Table of Contents for
Building PHP Applications with Symfony™, CakePHP, and Zend® Framework
 Building PHP Applications with Symfony™, CakePHP, and Zend® Framework
Published by
Wrox, 2011
Building PHP Applications with Symfony™, CakePHP, and Zend® Framework
Published by
Wrox, 2011
- Copyright
- Credits
- ABOUT THE AUTHORS
- ACKNOWLEDGMENTS
- Introduction
- 1. Introducing Symfony, CakePHP, and Zend Framework
- 2. Getting Started
- 3. Working with Databases
- 4. Your First Application in the Three Frameworks
- 5. Forms
- 6. Mailing
- 7. Searching
- 8. Security
- 9. Templates
- 10. AJAX
- 11. Making Plug-ins
- 12. Web Services
- 13. Back End
- 14. Internationalization
- 15. Testing
- 16. User Management
- 17. Performance
- 18. Summary
- A. Web Resources
- B. CodeIgniter, Lithium, and Agavi with Code Examples
- GLOSSARY OF ACRONYMS AND TECHNICAL TERMS
WHAT'S IN THIS CHAPTER?
Content management systems (CMSs) are now so popular that they are a well-known standard. It is not really a problem to build a CMS from scratch, but why should you reinvent the wheel? Developing just another CMS when you need one is a waste of time because there are so many really good solutions, and you will certainly find one to suit your needs. The CMSs described in this chapter use proven design patterns and promote best programming practices, which makes using them both straightforward and educative.
But what is really good about these solutions is that they are based on the three frameworks covered in this book and they inherit the Model-View-Controller (MVC) architecture. Another benefit is that they follow their parent framework's structure and conventions, so you don't need to learn how to use a new piece of software, but instead you will feel yourself at home. It's also definitely much easier to add or change some functionalities of a CMS based on your favorite framework.
Symfony has an extensive plug-in repository, including CMS plug-ins that can be installed directly from the command line. Another way of installing a CMS is to download a prepared package, complete with Symfony and CMS inside. In addition, you can use one more solution that is delivered with Symfony itself: the admin feature of the Doctrine object-relational mapper (ORM). For more on Doctrine and ORMs, refer to Chapter 3.

The two ready-to-use CMS plug-ins described in this section are Apostrophe and Diem (their logos are shown in Figure 13-1). Both solutions should attract your attention because they are arguably the richest of the CMSs covered in this chapter. There are also some other solutions, such as Lfcms or Sympal, but they are not as refined.
Symfony delivers a lot of command-line tools as described in earlier chapters. There are two commonly used tasks to generate create, read, update, and delete (CRUD) modules:
doctrine
    :generate-admin
    :generate-module
In Chapter 4, the generate-module task was described in detail. The generate-admin task generates administration controllers and views, which implement the CRUD operations. This simplifies the work when you want to build a back-end application. Let's build a simple CRUD back-end application, which will allow you to manipulate e-mail data. Assume that you have an e-mail model containing such fields as email, forename, and surname. You can create the application with the following command:
$ symfony generate:app backend
To generate an admin module, you need to use this command:
$ symfony doctrine:generate-admin frontend Mails
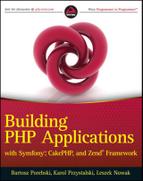
Now, when you go to http://localhost/backend_dev.php/mails, you should see something similar to the left side of Figure 13-2. The right side of Figure 13-2 shows filters for searching for records based on concrete fields. It's useful when you want to constrain your results to a few fixed fields.
Note that the URL includes localhost because we assume that you are working on your local computer. If you go to /apps/backend/modules/mails, you notice that almost all the directories are empty, and no class definitions contain any defined methods; they are only inherited from other classes that reside in cache. These cache classes are generated from the libraries. So such exemplary action.class.php files found in this folder can be as simple as follows:
<?php
require_once dirname(__FILE__).'/../lib/mailsGeneratorConfiguration.class.php';
require_once dirname(__FILE__).'/../lib/mailsGeneratorHelper.class.php';
class mailsActions extends autoMailsActions {
}
All files are generated and placed in the /cache directory. The directory structure should be as follows:
cache/backend/dev/
    config/
    i18n/
    modules/
    template/
Inside the cache in a proper directory, you can find the autoMailsActions class definition.
You can change how files are generated by changing the generator.yml configuration file, as shown in the following code. The generator.yml configuration file is located in the /modules/config directory.
generator:
  class: sfDoctrineGenerator
  param:
    model_class: Mails
    theme: admin
    non_verbose_templates: true
    with_show: false
    singular: ~
    plural: ~
    route_prefix: mails
    with_doctrine_route: true
    actions_base_class: sfActions

  config:
    actions: ~
    fields: ~
    list: ~
    filter: ~
    form: ~
    edit: ~
    new: ~
code snippet /symfony/app/frontend/modules/adminexample/config/generator.yml
To summarize, you need to execute just one command to get a CRUD module. You don't need to add any more lines of code. Propel also has this kind of functionality that you can use through Symfony's command-line tools. Note that generating CRUD modules is a functionality of Doctrine, so you can use this feature in any other web framework where Doctrine integration is possible. You can download Doctrine from www.doctrine-project.org.
Apostrophe is a CMS in which the word management means something different than in most other CMSs. Instead of creating two different levels (management and presentation), it blurs the boundary between the back end and the front end. You can get Apostrophe from www.apostrophenow.com.
If you have already created a project, you can install Apostrophe as a plug-in with the following command:
$ symfony plugin:install apostrophePlugin
Note that installing only the previous plug-in will not give you all functionalities that come with Apostrophe. You should also install the following plug-ins:
apostropheBlogPlugin
apostrophePlugin
sfDoctrineActAsTaggablePlugin
sfDoctrineGuardPlugin
sfFeed2Plugin
sfJqueryReloadedPlugin
sfSyncContentPlugin
sfTaskExtraPlugin
sfWebBrowserPlugin
These plug-ins are available out of the box in the sandbox version. After unpacking, you should change the configuration filenames by deleting .sample at the end. You need to edit database.yml and fill it with proper database information. If your database doesn't exist, you need to create it before going on to the next steps (this was described in Chapters 2 and 3). Next, you need to execute the following combination of commands:
$ symfony cc
$ symfony plugin:publish-assets
$ symfony doctrine:build --all
$ symfony doctrine:data-load
The first command is executed only to make sure that there are no previously generated files within /cache. The second command publishes Apostrophe's web assets. After that, you need to build models, forms, and database tables, as designed in Apostrophe's schema.yml files. Finally you load some data to see it on the Web.
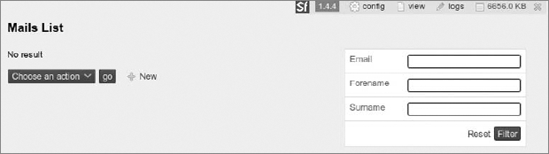
When you go to http://localhost/, you should be able to see something similar to what is presented in Figure 13-3.
If you cannot see the Apostrophe main page (refer to Figure 13-3) and you are sure that you configured the web server properly, you should check permissions by executing the following command:
$ symfony project:permissions
That command will fix directories permissions if they are set wrong.
In the right corner of the main page, you can see a Login button. This allows you to enter the administration mode. To get there, you need to fill out the login form with admin for the login and demo for the password. Now you can add, edit, or delete the contents of each page. A dialog for creating a page is shown in Figure 13-4.
As shown in the following code, Apostrophe also provides a lot of new tasks available within Symfony's command-line interface (CLI):
apostrophe-blog:fix-untitled-posts :migrate-page-slugsapostrophe:after-deploy :demo-fixtures :deploy :fix-remote-permissions :generate-slot-type :import-files :migrate :migrate-data-from-pkcontextcms :migrate-from-pkcontextcms :optimize-search-index
:rebuild-search-index
    :refresh
    :repair-tree
    :ssh
    :update-search-index
Apostrophe's approach gives you the capability to use CMS in a way other than how it is commonly used, where a project is divided into two parts: the front end and the back end. With Apostrophe the pages are nearly What You See Is What You Get (WYSIWYG), so the page you make changes to looks nearly the same as the page the user will see.
Diem is more than a simple CMS. It's a content management framework (CMF). It has huge capabilities because you can build your pages with blocks. It has a lot of widgets that can be placed within your website. To start using Diem, you need to download the package from http://diem-project.org/. Next, unpack it to a convenient directory like C:\diem\. The next step, shown in the following code, is to create a directory where your Diem project will be finally placed:
$ cd C:\xampp\htdocs\
$ mkdir diemproject
Now you can proceed with the installation by going to the directory you created and executing the Diem PHP install script:
$ cd C:\xampp\htdocs\diemproject\
$ php C:\diem\install
This script will create a lot of files. When it ends, you need to configure Diem by executing the following command in your Diem project directory:
$ symfony dm:setup
That command will ask you some simple questions and will do the rest of the configuration by itself. After your Diem project is configured, you will be able to execute some Diem tasks using Symfony's command-line interface, as shown in the following code:
dm
    :clear-cache
    :data
    :loremize
    :permissions
    :publish-assets
    :search-update
    :server-check
    :setup
    :sitemap-update
    :sync-pages
:upgradedmAdmin:generate :generate-moduledmFront:generate :page-indexable-contentdmUser:change-password :promote
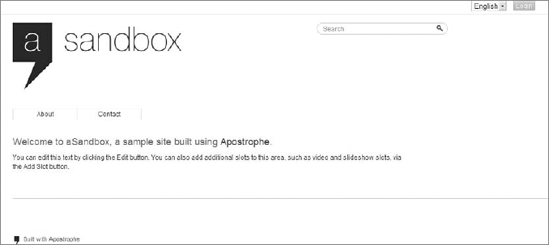
You can access the Diem admin page by typing http://localhost/admin_dev.php/ in your browser, and you can access the front end with http://localhost/. The front end won't look good when you first open it because you have not built a page yet, so it's almost blank. If you go to the admin site and sign in with admin as both the login and the password, you will be able to change the website's details. You might notice a link at the bottom of the page to switch to the back end. After clicking it, you will have access to the Diem tool for building websites, as shown in Figure 13-5. You should see two panels: the one to the left is called Pages, and the one to the right is called Media. You need to choose a page on the left and add widgets with drag and drop. After you are done making changes to the front end, you can log out and try it out.
CakePHP framework has only two CMSs worth describing: Croogo and Wildflower (their logos are shown in Figure 13-6). There are also some other CMS or e-commerce solutions (such as BakeSale) that are based on CakePHP, but only these two are now in active development. CakePHP doesn't support generating default CRUD modules as Symfony does. That can be done by integrating Doctrine with CakePHP, but it needs additional effort.
Croogo is a simple CMS that you just need to unpack to the /app directory. Croogo needs to be installed within an existing CakePHP instance as its application. You need to download it first from www.croogo.org. Unpack the content of Croogo's main directory to the /app directory. Your directory structure should look as follows:
app/
    config/
    controllers/
    libs/
    locale/
    models/
    plugins/
         acl/
         empty/
         example/
         extensions/
            install/
         tinymce/
         translate/
    tests/
    tmp/
    vendors/
    views/
    webroot/
    app_controller.php
    app_error.php
    app_helper.php
    app_model.php
    .htaccess
    index.php
    LICENSE.txt
    README.mdown
    VERSION.txt
cake/
plugins/
vendors/
.htaccess
index.php
README
This listing doesn't show everything; only files and directories that we selected are shown here, and the most important directories are bold. The main /app folder contains the Croogo application downloaded in the earlier step. After this preparation, Croogo is ready to be installed. The Croogo web installer will guide you through the next configuration steps. Just type http://localhost/ into your browser, provided you have installed the CMS on your local workstation. After the installation process ends, you need to delete the /install directory, shown in bold in the preceding code. Now you can run the Croogo CMS. Under http://localhost/ you can find your front-end application, and the back end is under http://localhost/admin. The default login is admin, and the password is password. A front-end example page is shown in Figure 13-7.
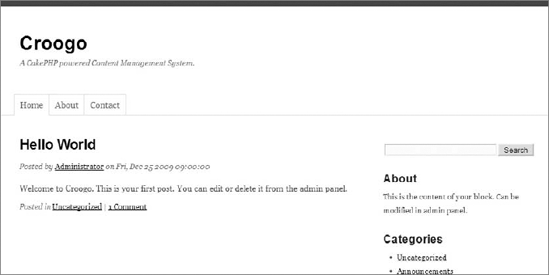
Croogo is a decent CMS without unusual features, so don't expect any rocket science, but at least this CMS has all the basic features everyone expects.
Wildflower is also a CMS based on CakePHP. It's even simpler than Croogo. Installation of Wildflower is not as easy as it is with Croogo because it hasn't got an installer. Before starting manual installation, you need to download Wildflower from http://wf.klevo.sk/. The downloaded package is a whole CakePHP application with CakePHP's libraries. You only need to unpack it to a proper directory.
When you're done with that, you can start working with Wildflower by changing database connection properties in app/config/database.php. Database connection entries should be changed as is usually done in a CakePHP application. Then you can create proper database tables and insert some example data in them. Wildflower delivers a SQL file for import with your favorite database tool. If you don't have a favorite database tool, you can import these entries from the command line as follows:
$ mysql -u root -D wildflower < app/config/sql/wildflower.sql
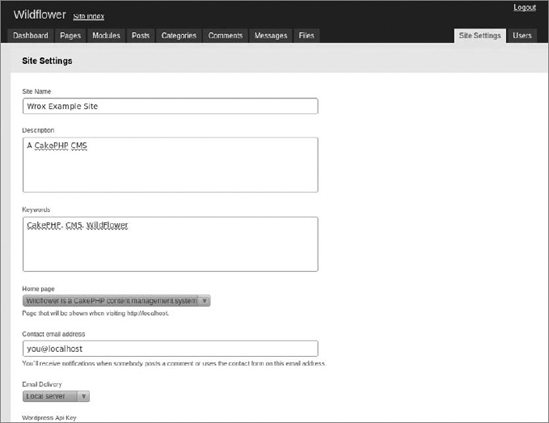
Note that this works if you are currently in the project directory. Otherwise, you should give the whole path to wildflower.sql. Now you have Wildflower installed and you can access the front end (http://localhost/) and back end (http://localhost/admin) of the application. Wildflower's back end is shown in Figure 13-8. The default password for the admin account is admin321. Wildflower is a very simple CMS, but you can develop a bigger application based on it.
Zend Framework doesn't support generating CRUD controllers by default (except when using Doctrine as the default ORM). This is a big drawback, but you can live without that because in most cases developers spend a lot of time customizing those automatically generated controllers and views, and thus the time savings are not as great as one would expect.
A guide to building a CRUD module for Zend Framework is the same as in Chapter 4: You need to create all CRUD actions yourself manually. You can also use one of the open source CMSs and customize it to your needs. This section presents three of the best known open source CMSs based on Zend Framework: TomatoCMS, Pimcore, and Digitalus CMS. Their respective logos are shown in Figure 13-9.

TomatoCMS comes with a handy web installer. After downloading it from www.tomatocms.com and unpacking to your web root directory, you can access the installer just by typing http://localhost/ into your web browser. You should see something similar to what is presented in Figure 13-10.
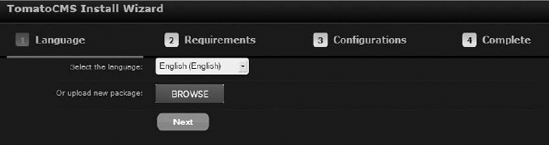
The installer will guide you step by step. In Step 3, you should check Import sample data if you are using TomatoCMS for the first time. The back-end application is available at http://localhost/admin. The password for the admin account is generated randomly, and you should be able to see it in the last step of the installation wizard. TomatoCMS is nicely integrated with Google applications and also with Flickr and Twitter. The rest of the features are as usual in all common CMS solutions.
Pimcore is one of the biggest CMSs presented in this chapter. You can download it from its homepage: www.pimcore.org. You can install Pimcore in two ways: through a web installer or manually. We will show you the manual approach because it gives deeper insight into the CMS. When you unpack Pimcore, you will notice that the directory structure is a little bit different from that of Zend Framework. Pimcore developers made their libraries based on ZF, and although they're not the same as in ZF, they're quite close. If you know ZF, you should have no problems with Pimcore.
After unpacking, you need to set information on the database connection in the pimcore/website/var/config/system.xml configuration file. Lines to be edited are shown in bold:
<?xml version="1.0"?>
<zend-config xmlns:zf="http://framework.zend.com/xml/zend-config-xml/1.0/">
  <general>
    <timezone>Europe/Berlin</timezone>
    <domain></domain>
<language>en</language>
<validLanguages>en</validLanguages>
<debug>1</debug>
<theme>/pimcore/static/js/lib/ext/resources/css/xtheme-blue.css</theme>
<welcomescreen>1</welcomescreen>
</general>
<database>
<adapter>Pdo_Mysql</adapter>
<params>
<host>localhost</host>
<username>root</username>
<password></password>
<dbname>pimcore_example</dbname>
</params>
</database>
<documents>
<versions>
<days></days>
<steps>20</steps>
</versions>
<default_module>website</default_module>
<default_controller>default</default_controller>
<default_action>default</default_action>
<error_page>/</error_page>
</documents>
<objects>
<versions>
<days></days>
<steps>20</steps>
</versions>
</objects>
<assets>
<webdav>
<hostname></hostname>
</webdav>
<versions>
<days></days>
<steps>20</steps>
</versions>
</assets>
<services>
<scribd>
<apikey></apikey>
<secret></secret>
</scribd>
code snippet /pimcore/website/var/config/system.xmlAs in almost all previous cases, you need to additionally create a proper database. After that, you should load some example data if you are using it for the first time:
$ mysql -u wroxuser -D pimcore_example <
    /home/wrox/public_html/pimcore/pimcore_example.sql
Now you can access the back-end application through http://localhost/admin with admin as both login and password. It has a lot of features and nice tools that make your life easier. Pimcore's theme looks a little bit like Microsoft Outlook (see Figure 13-11).
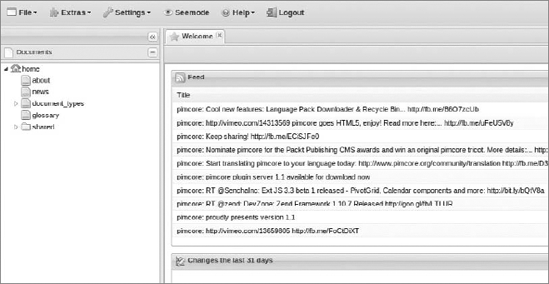
You can now edit pages from the back end with a WYSIWYG editor that shows you the result of the whole web page, not only the content of it, as it is presented in most of the other CMSs.
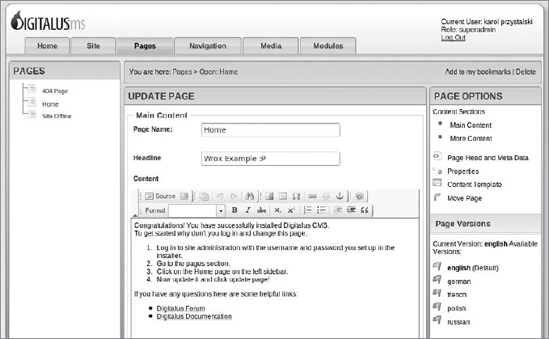
You can grab this CMS from http://digitaluscms.com/. Digitalus CMS comes with a nice installer, which checks all prerequirements and creates all needed tables. You will be asked for a user ID and password for your super-user account.
After the installation is finished, you should be able to see something similar to Figure 13-12. Digitalus comes with a rich internationalization feature. The rest of it is very similar to the other commonly used CMS solutions.
We have prepared a short summary of the unique features of individual CMSs (see page 369). This table should be helpful for comparing them and choosing the right one for your needs.
CMS | INSTALLATION SIMPLICITY | GOOGLE ANALYTICS/ACCOUNT INTEGRATION | PLUG-INS | LICENSE | MANAGEMENT APPROACH |
|---|---|---|---|---|---|
Out of the box in Symfony | No | Yes | GPLv2 | Typical back-end approach | |
Apostrophe | As plug-in or sandbox | No | Yes | MIT | Front-end approach |
As plug-in or sandbox | Yes | Yes | MIT | Back-end and front-end approach, widget-driven | |
Web installer | No | Yes | MIT | Back-end approach | |
No installer, need to change files manually | Yes | No | MIT | Back-end approach | |
Web installer | Yes | Yes | GPLv2 | Back-end approach | |
Simple change in database connection configuration file, also a web installer | Yes | Available | BSD | From back end, but as WYSIWYG | |
Digitalus | Web installer | Yes | As modules | BSD | Back-end approach |
CMS | ADDITIONAL FEATURES | MAINTENANCE | SEARCH ENGINE | DOCUMENTATION\COMMUNITY |
|---|---|---|---|---|
Doctrine | Filters, admin generator configurable via generator.yml | Manual | As all plug-ins for Symfony; this can be added separately | Very good |
Building website from content blocks | Can be automated; CLI command available | Lucene | Good | |
Diem | Widgets | Can be automated; scripts available | Lucene | Good |
Croogo | Integrated reCaptcha | Manual; scripts not provided | Not available | Good |
Wildflower | Integrated Wordpress | Manual; scripts not provided | Not available | Poor |
TomatoCMS | Pools, integrated with Flickr and Twitter | Manual; scripts not provided | Not available | Good |
Pimcore | History of changes, simple image editor, PDF/doc documents preview | Can be automated | Available as a plug-in | Good |
Digitalus | Internationalization | Manual; scripts not provided | Lucene | Good |