Table of Contents for
Building PHP Applications with Symfony™, CakePHP, and Zend® Framework
 Building PHP Applications with Symfony™, CakePHP, and Zend® Framework
Published by
Wrox, 2011
Building PHP Applications with Symfony™, CakePHP, and Zend® Framework
Published by
Wrox, 2011
- Copyright
- Credits
- ABOUT THE AUTHORS
- ACKNOWLEDGMENTS
- Introduction
- 1. Introducing Symfony, CakePHP, and Zend Framework
- 2. Getting Started
- 3. Working with Databases
- 4. Your First Application in the Three Frameworks
- 5. Forms
- 6. Mailing
- 7. Searching
- 8. Security
- 9. Templates
- 10. AJAX
- 11. Making Plug-ins
- 12. Web Services
- 13. Back End
- 14. Internationalization
- 15. Testing
- 16. User Management
- 17. Performance
- 18. Summary
- A. Web Resources
- B. CodeIgniter, Lithium, and Agavi with Code Examples
- GLOSSARY OF ACRONYMS AND TECHNICAL TERMS
WHAT'S IN THIS CHAPTER?
Setting up the hosting environment.
Installing and configuring frameworks.
Creating a Hello World application.
Using integrated development environments (IDEs).
Before you start developing applications with the frameworks, you need to follow a few simple steps. Web applications cannot operate alone; they need to be placed in a special hosting environment. This chapter will show you how to install and configure all software required to get your frameworks going and let you produce working web apps.
Web applications and web frameworks are system-independent, but must be configured properly for the hosting environment they're in. We will show you how to set up workspaces for Windows 7 64-bit, Ubuntu Desktop 10.04.1 64-bit and Mac OS 10.6 Snow Leopard. Of course, these instructions should work for most related operating systems such as Windows Vista or other flavors of Linux.
In order to successfully build web applications with web frameworks you need the following server software:
To run the application on the client side, you just need a web browser. Examples presented in this book were tested on Mozilla Firefox 3.6.10 and Google Chrome 6.0.472.63 browsers, although they should work well on any modern browser.
The server software requirements presented in the preceding list are common for most web applications. Therefore, the open source community has begun to create packages of the best solutions to satisfy these needs. Combining the Linux operating system, Apache web server, MySQL database, and PHP interpreter, the popular LAMP bundle emerged in the same way WAMP did for Apache, MySQL and PHP for Windows, and MAMP for Mac OS.
XAMPP stands for X = cross platform, Apache, MySQL, PHP, and Perl. It is a wonderful server package that saves hours (okay, maybe just minutes, but minutes are precious, too) of work needed to install all these components independently and make them work together. It is available for all major operating systems. In addition to its main components it also provides some other useful free software, including the following:
PEAR package manager — Discussed later in this chapter.
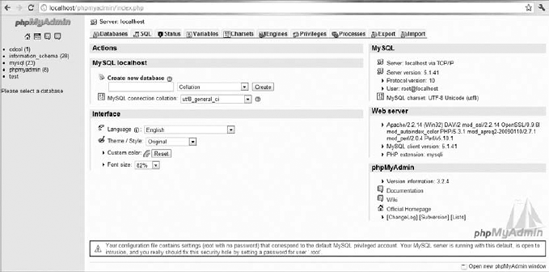
phpMyAdmin — An immensely clever PHP application that allows MySQL database administration from the level of your browser. It allows modifying whole databases, tables, and individual fields, executing raw SQL statements, and importing and exporting data into various formats, among other tasks. You can see the main page in Figure 2-1.
OpenSSL — A cryptographic library implementing SSL and TLS protocols, used for secure connections.
SQLite — Embedded database system (also discussed later in this chapter).
After installing XAMPP, you may notice a security warning on the phpMyAdmin main page: http://localhost/phpmyadmin (see Figure 2-1). That's because phpMyAdmin notices that your database's root user has no password, which is indeed an open door for intrusion. XAMPP is configured this way for your convenience — in a development environment it's much easier to have privileged access to the database without needing to type in any passwords.
However, before moving to any production environment you must make XAMPP secure. You can use the http://localhost/security/ page to monitor your security settings and also fix most basic security issues. Making a web server fully secure is enough material for another thick book, so we will not even begin to discuss it here.
Just go to the XAMPP website (www.apachefriends.org/en/xampp.html), download the Windows version, and run the installer. After the files are extracted, a command window will open and ask you a few questions. The default installation is advised. After the successful installation, you should be able to run the XAMPP Control Panel Application, as shown in Figure 2-2. Try to run Apache and MySQL.
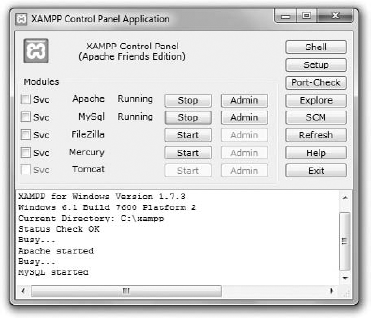
If any of these modules doesn't start, first check your firewall settings. Apache uses ports: 80 (HTTP), 81 (WebDAV), and 443 (HTTPS). MySQL uses port 3306. For Apache and MySQL to start properly, these ports must not be blocked by a firewall nor used by any other program. You can use the Port-Check button in the XAMPP Control Panel to find out if any other program uses these ports. A common conflict-maker here is Skype. You need to close such conflicting programs first or change their settings not to block these ports.
On Windows Vista, a problem was reported with the User Account Control (UAC). To deactivate it, type msconfig in the start menu; then go to Tools and disable User Access Control.
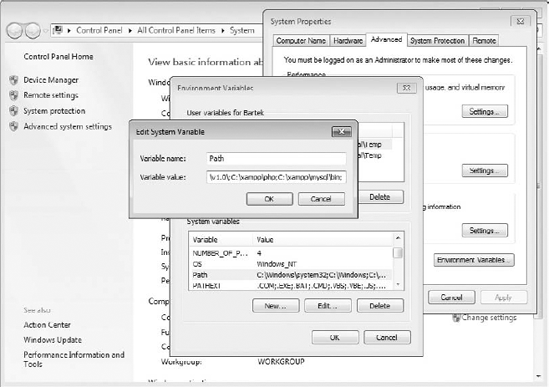
Another thing you need to do is set the PATH environment variable. Right-click Computer and select Properties from the context menu. In the window that opens, click Advanced system settings to open the System Properties dialog. Select the Advanced tab and click the Environment Variables button. In the Environment Variables dialog you will see a list of all environment variables. In the System variables pane in the lower part of the dialog, find Path and edit it to add the following path:
;C:\xampp\php;C:\xampp\mysql\bin
Note that all entries must be separated by a semicolon and no spaces. All steps of this process are shown in Figure 2-3.
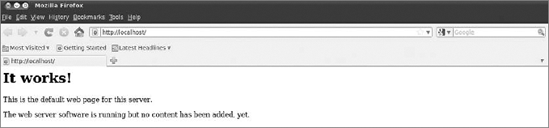
You will know that your XAMPP is working fine when you type http://localhost in your browser and you see a welcome screen.
Although there are also downloadable installation files of XAMPP for Linux, most Linux users prefer to install all components separately using package managers because it is even faster and simpler than downloading a compressed folder from the Internet. This will be covered in the next few pages. It is also consistent with Linux methodology that recommends using package managers for installation whenever possible because it allows easy management and automated updating of your software. As one somewhat radical friend commented, "No true Tuxhead would ever use that!"
Download the Mac OS package from the XAMPP website (www.apachefriends.org/en/xampp.html). A window will open (see Figure 2-4).
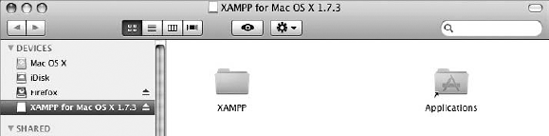
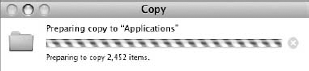
It is a .dmg installer, so just drag and drop it into the /Applications folder. You will see a progress bar like the one shown in Figure 2-5.
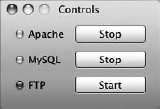
Finally, go to /Applications/XAMPP and run the XAMPP controls. You will see a nice little Control Panel (see Figure 2-6).
Now add /Applications/XAMPP/xamppfile/bin to your environment variables. You can do it in a few ways, including using the following command:
$ export PATH=${PATH}:/Applications/XAMPP/xamppfile/bin/Apache, the most popular HTTP web server, is used to host the majority of websites around the world. It is an open source project, maintained and developed by the Apache Software Foundation.
Apache is installed as a part of XAMPP, so you don't have to install it separately.
You can get Apache for all flavors of Linux. The following command installs it for Ubuntu:
# sudo aptitude install apache2
When you go to http://localhost/ in your browser, you should see a welcome message from the server (see Figure 2-7).
Your installation is not done yet. You need to install the PHP5 engine and PHP5 module for the server:
# sudo aptitude install php5 libapache2-mod-php5
Then restart Apache with following command:
# sudo /etc/init.d/apache2 restart
All web applications need persistent data storage. The most widely used mechanisms are relational database management systems (RDBMSs). They are not really perfectly matched for object-oriented web applications (this is further discussed in Chapter 3), but they are standard technologies used by most companies and by the frameworks.
Now let's focus on installing a database solution.
MySQL is one of the leading open source databases. First it was developed by a Swedish company, MySQL AB; then the company was bought by Sun Microsystems, which in turn was bought by Oracle Corporation in 2010. MySQL is equipped with innovative features such as triggers, views, replication, and stored procedures. It is written in C/C++, is multithreaded, and is among the fastest RDBMSs with client-server architecture.
XAMPP includes MySQL, so you don't have to install it anymore on Windows and Mac OS. To install MySQL and PHP5 support under Ubuntu, type the following into the console:
# sudo aptitude install mysql-server mysql-client php5-mysql
The package manager will ask you if you want to set up a root password. Although such a password is strongly recommended for production environments, it is easier to develop our applications without this password. If you need to set it (for example, if phpMyAdmin wants it), you can do it any time with following command:
# sudo mysqladmin -u root password NEW_PASSWORD
Most databases are built on client-server architecture, in which the database is a standalone process of the operating system, and all applications need to establish connections with it. SQLite is completely different. It works as a statically or dynamically linked programming library that is embedded into applications, allowing communication with the database by function calls (which is much more efficient). This approach also removes the necessities of installation and administration. The whole database is stored in a single file with a mechanism of locking it for read and write operations. SQLite is light, but fast and capable. It is generally ACID-compliant (atomicity, consistency, isolation, durability), but the programmer must manually impose integrity constraints on data types; otherwise, it is possible to insert incorrect data types. SQLite lacks some features of heavier databases, such as views or triggers.
XAMPP also includes SQLite. To install both SQLite and PHP5 support under Ubuntu, just type the following:
# sudo aptitude install sqlite php5-sqlite
If you envy XAMPP users the phpMyAdmin application, you can install it now with following command:
# sudo aptitude install phpmyadmin
It will automatically configure your Apache and MySQL database. You only need to include into /etc/apache2/apache2.conf the following line:
Include /etc/phpmyadmin/apache.conf
You can access phpMyAdmin at http://localhost/phpMyAdmin.
PEAR stands for PHP Extension and Application Repository. It is a distribution system, sometimes also called a framework, and can be very helpful in PHP development. PEAR provides modules of PHP code, called packages, and a package manager for easy installation of these. The full list of packages can be found at http://pear.php.net/packages.php.
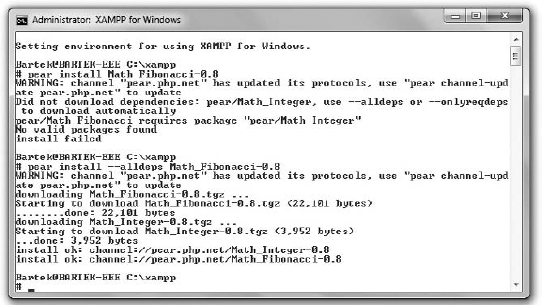
To install some packages, go to the command line. To call a Windows command line with PEAR support, go to the XAMPP Control Panel and click the Shell button. Find on the package list at the PEAR website the name of the package you want to install; for example, let it be a tool for Fibonacci series computation: Math_Fibonacci-0.8. You can install it using following command:
# pear install Math_Fibonacci-0.8
As you can see in Figure 2-8, this package is dependent on another package: Math_Integer. You can install it automatically with following switch:
# pear install --alldeps Math_Fibonacci-0.8
Now you have the package installed and you can include its classes into your applications.
PEAR also provides an upgrade tool for easy updating of packages. A special example is upgrading the PEAR itself with following command, (which is a recommended action, by the way):
# pear upgrade pear
PEAR is included into some Linux distributions. If it's not, you can easily install it with package managers:
# apt-get install php-pear
Subversion is a revision control system founded in 2000 by CollabNet Inc. Its popular name, SVN, is derived from its shell command svn. It is not required for installation of web frameworks, nor for further development with them, so this installation is optional.
This tool is essential in most community projects, so even if you do not use it to install the frameworks, you will surely run across it one way or another. If you have never used this tool, you should become familiar with it.
The features of Subversion include the following:
You can learn more about SVN and get download instructions at http://subversion.apache.org/.
At this point you have all your required software downloaded and set up. Generally there is more than one way to install the frameworks. Installation with PEAR is generally the easiest way. You can also download sandbox applications that need just extraction to a chosen folder. Package managers provide a Linux way of fast managed installation, but some distributions use very obsolete versions (see the following table for consideration of Ubuntu packages). Finally, there is the possibility of SVN checkout for advanced users to get fresh, updated code.
The following table compares availability of the installation methods.
This section covers the installation of Symfony, CakePHP, and Zend Framework for Windows 7 64-bit, Ubuntu 10.04.1 Desktop Edition 64-bit, and Mac OS 10.6 Snow Leopard. Of course, this should work with little or no modifications for other versions of these operating systems. We assume that you have all your required software installed and properly configured. Installation of frameworks varies little between different operating systems. Generally we will provide one installation guide, and minor differences will be put into square braces: [ ].
Although there are many ways to install Symfony, we will show only the simplest approaches in this section. The sandbox is a fast preview — you don't have to follow this installation, but we believe it might be useful if you have never installed any frameworks before. PEAR is our default installation for Windows and for Linux as well. Advanced developers will probably want to check out from SVN (and they will need no guidance), but this involves setting up an SVN environment, which is not necessary and might be an effort for beginners. Package managers provide (for Ubuntu) the obsolete 1.0 version, so they will be disregarded here.
Installation instructions are for Symfony 1.4.8. By the time you read this book, Symfony 2.0 should be available to download with PEAR. At the time of writing, the 2.0 beta is available for preview as a sandbox application and that's how we installed it to describe Symfony 2.0 features.
Sandbox is the absolutely fastest way to start playing with Symfony because all you need to do is download a package from http://www.symfony-project.org/installation and unzip the /sf_sandbox folder into the web root directory:
Windows —
C:\xampp\htdocsLinux —
/var/wwwMac OS —
/Applications/XAMPP/htdocs/
Then you can type http://localhost/sf_sandbox/web/ into your browser to see your sample project.
Well, even if the sample project is working, it probably lacks CSS and images. If that's the case, you will see this message:
This project uses the symfony libraries. If you see no image in this page, you may need to configure your web server so that it gains access to the symfony_data/web/sf/ directory.
This page with no CSS is shown later in this chapter in Figure 2-11, where it is the output of the default project generator. When you look at the web page source, you see that the image links point to nonexistent folders. This may lead to lots of confusion because you might expect that a sandbox application would really run out of the box, just like the Symfony developers promised!
You do not really need these images because you will shortly transform this example into your first application, but it's educative to do it anyway. The simplest way to enjoy these images is to add an alias to your Apache server, redirecting the nonexistent directory to the proper path. To do that, go to C:\xampp\apache\conf in Windows, /etc/apache2/ in Linux, or /Applications/XAMPP/etc/ in Mac OS and then add the following line at the end of the httpd.conf file:
Windows:
Alias /sf_sandbox/web/sf "C:\xampp\htdocs\sf_sandbox\lib\vendor\symfony\data\web\sf"
Linux:
Alias /sf_sandbox/web/sf var/www/sf_sandbox/lib/vendor/symfony/data/web/sf
Mac OS:
Alias /sf_sandbox/web/sf /Applications/XAMPP/xamppfiles/lib/php/pear/data/symfony/web/sf/
Restart the Apache server. The resulting webpage will look like Figure 2-9.
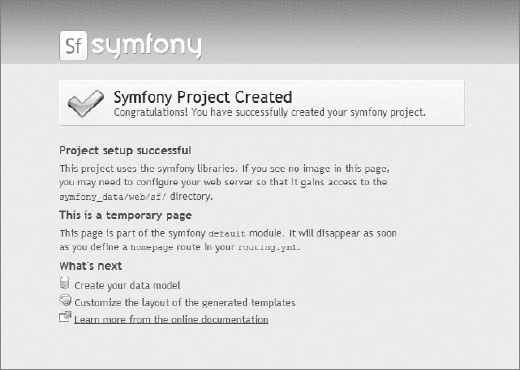
It is perfectly okay to use the sandbox version of Symfony stored in the web root folder for learning and development because it is a complete installation of Symfony. However, for production environments you have to separate the configuration files from the web presentation files for security reasons. Otherwise, vulnerable files such as /config/databases.yml will be accessible to the public.
To uninstall the sandbox, simply delete the /sf_sandbox folder and undo the modification in httpd.conf.
This method is also fast and simple. Just open your command line and type (sudo for Linux) the following:
# pear channel-discover pear.symfony-project.com
# pear install symfony/symfony
The most up-to-date version of Symfony will be installed. This book was written using Symfony 1.4.8, so if you want to install this specific version, type this instead:
# pear channel-discover pear.symfony-project.com
# pear install symfony/symfony-1.4.8
A great advantage of this approach is that the symfony command has been integrated with the console. You can check it with this:
# symfony
You will get a list of available tasks.
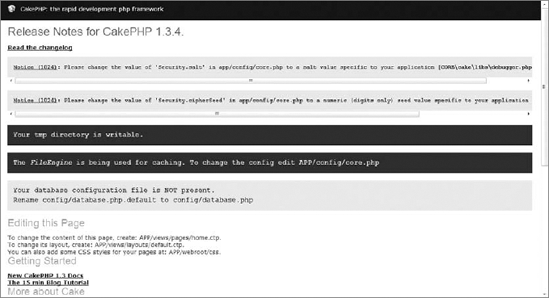
CakePHP installation is extremely straightforward because in contrast with Symfony, everything works out of the box. You just need to go to the CakePHP website (http://cakephp.org) and download the package. Then create in your web root directory a /cakephp folder and unpack the package contents into it. At the time of writing this book, the most recent CakePHP version was 1.3.4, and we have used it for most code samples. If you experience problems with a newer version, you can download 1.3.4 from the CakePHP website. When the package is unpacked, you should see a welcome screen like that shown in Figure 2-10 after typing http://localhost/cakephp in your browser.
Linux users probably will not see a page like this because of default Linux settings. If images are missing and you get warnings that some files are not writeable, you need to do a few things more. First, recursively change the web root directory to be writeable:
$ sudo chmod -R 777 /var/www
The second thing is to make sure that mod_rewrite is activated. To do it, invoke the following command:
$ sudo a2enmod rewrite
And finally edit /etc/apache2/sites-enabled/000-default. Locate the following block:
<Directory /var/www/>
   Options Indexes FollowSymLinks MultiViews
   AllowOverride None
   Order allow,deny
   allow from all
</Directory>
Change AllowOverride None to AllowOverride All. Restart your Apache. It should now work as shown in Figure 2-10.
Apart from this sandbox application, you can also install development versions of CakePHP using the Git online revision control tool, but stable versions are highly recommended.
Zend Framework has a wide choice of install options. Our recommended approach is to use the PEAR channel. This is an unofficial PEAR channel, yet it is regularly updated and works just fine. However, just in case it is ever broken or discontinued, we also present the installation from archive. The version that was used to write this book is 1.10.8, so you may look for it if you experience compatibility issues with the latest version.
You can also install Zend Framework bundled with Zend Server Community Edition (CE), which is a nice and easy way to start development with Zend Server. However, in this book we will not follow this approach in favor of approaches that are easier to compare between frameworks.
There are also almost up to date Ubuntu packages of Zend Framework. Perhaps there is not a regular update schedule, but if you feel adventurous, you can try installing ZF with package managers. Of course, SVN checkout is possible as well.
The PEAR channel provides the fastest and simplest installation method. Just go to your console and type the following:
# pear channel-discover pear.zfcampus.org
# pear install zfcampus/zf
Zend Framework libraries will be installed and the command-line tool will be integrated with your shell.
First download a Full package of Zend Framework from its website, http://framework.zend.com/download/latest. There is also a Minimal package, but it lacks several modules you will need later. ZF doesn't provide any sandbox application, so installing from archive means just extracting its contents to a directory of your choice.
There are some minor tasks that need to be done before you can create your sample projects. The solutions presented here are absolutely the simplest methods to make things work and sometimes are not elegant. If you are experienced in operating systems and web development, you can add several upgrades such as separating your development environment from the web root and creating a personalized /public_html folder, but it's not needed for a quick start. Also we will not configure frameworks to connect to the databases. The next chapter is focused on everything associated with databases and data models, and they will be explained in detail there.
There is not much configuration for Symfony here. Some configuration will be done during the Hello World example, but there is nothing to prepare before getting to that point. However, don't be lulled into a sense of complacency by this fact, as you will configure many things in Symfony later on.
Remember the welcome page of CakePHP (Figure 2-10) at http://localhost/cakephp? It displayed some notices to attract your attention, and now we will deal with them.
First, change the Security.salt and Security.cipherSeed values in /app/config/core.php, as shown in the following code. They are needed for security purposes — you need to provide random values generated by yourself. Security issues are further described in Chapter 8.
/**
 * A random string used in security hashing methods.
 */
Configure::write('Security.salt', 'nrhG93b0qyJfIxfs3guVoUubWwvniR2G0dgaC9mi');
/**
 * A random numeric string (digits only) used to encrypt/decrypt strings.
 */
Configure::write('Security.cipherSeed', '46859309657453543496741683645');
The two top yellow (light grey in Figure 2-10) blocks should be gone now. While you are in the /app/config directory, make a copy of the database.php.default file and change the name of the copy to database.php.
When all other configuration steps are done, the last thing is to add the cake command to the command-line interface:
Windows — Add to the PATH environment variable (the process was shown during XAMPP installation) following path:
;C:\xampp\htdocs\cakephp\cake\console
Linux — The following command is a smart way to add the path to the environment of the current user. The
/home/username/.profilefile is modified as the result:echo 'export PATH=/var/www/cakephp/cake/console:$PATH' >> ~/.profile
Mac OS — You can export the path with the following command:
$ export PATH=${PATH}:/Applications/XAMPP/htdocs/cakephp/cake/console
Once you have your framework installed, you need to do two things. The first one is to make sure that the ZF's command-line tool is added into the PATH environment variable. This tool is found here:
Windows —
/path_to_zf/bin/zf.batLinux —
/path_to_zf/bin/zf.shMac OS —
/Applications/XAMPP/xamppfiles/bin/zf
The good thing about PEAR is that this will be already done during the installation.
The second thing is to add the Zend /library to the PHP include_path. To do it, you need to find a corresponding line in php.ini and add the path to /path_to_zf/library. This file can be found here:
Windows —
C:\xampp\phpLinux —
/etc/php5/apache2Mac OS —
/Applications/XAMPP/xamppfiles/etc
Also check register_globals and magic_quotes_gpc and make sure they are both Off.
It is finally the time to create and run your first framework application. If you have used a sandbox, most of the work has been already done. That's why we recommend the PEAR installs wherever possible — they are the easiest to configure and you can still learn how to use the command-line interface to create your projects.
Go to your web root and create a new directory there, for example /symfony. Then open the console, navigate to this new folder, and turn it into a Symfony project:
$ symfony generate:project symfony
Inside this project, create an application. Let it be named frontend because it will produce the output for the user:
$ symfony generate:app frontend
Still inside the main project folder, execute the following statement to create a hello module of the frontend application:
$ symfony generate:module frontend hello
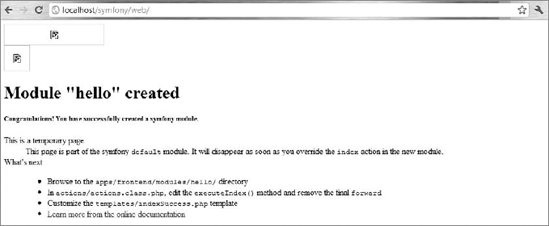
You can now go with your browser to http://localhost/symfony/hello and admire the web page of your default generated project, shown in Figure 2-11. If you played with the sandbox installation, notice that it's the same image-less page.
We want to change this default view to a view of our new module. Locate the file /symfony/apps/frontend/config/routing.yml and change the homepage parameter from the default module to the hello module. After editing, these lines should look as follows:
homepage:
  url: /
  param: { module: hello, action: index }
code snippet /symfony/apps/frontend/config/routing.yml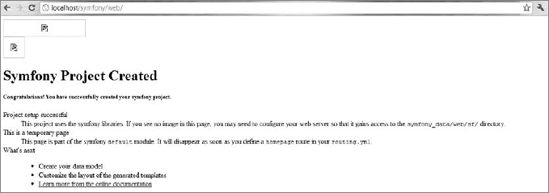
This code redirected the main page of this application to our module. You can check this in your browser, but you need to clear the cache from the command line:
# symfony cc
Now when you go to http://localhost/symfony/hello, you should see Figure 2-12.
It is just a bit better, but you are still in the default module. To be able to display your own module, go to /symfony/apps/frontend/modules/hello/actions/actions.class.php and comment out the forwarding function, just like this:
<?php
class helloActions extends sfActions {
  public function executeIndex(sfWebRequest $request) {
    //$this->forward('default', 'module');
  }
}
code snippet /symfony/apps/frontend/modules/hello/actions/actions.class.php
Now the browser will display a blank page because the index view for the hello module is empty. To change that, go to /symfony/apps/frontend/modules/hello/templates/indexSuccess.php and put the following there:
<h1>Hello World!</h1>
code snippet /symfony/apps/frontend/modules/hello/templates/indexSuccess.php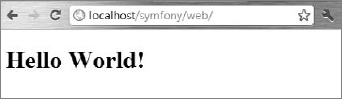
Now check http://localhost/symfony/hello again. You should see a big black Hello World! message, as shown in Figure 2-13. Well done!
It's time to create the first application in CakePHP. You will need a controller, a model, and a view. First, let's make the controller. Create a new file in /app/controllers and name it hello_controller.php. Names are important in CakePHP because they indicate the default file for the hello controller. You need to add into this controller the following code:
<?php
class HelloController extends AppController{
    function index(){
         $this->set( 'test', "Hello World!");
    }
}
?>
code snippet /cakephp/app/controllers/hello_controller.php
It is possible to create a controller that uses no model, but we want to include a dummy model instead into our example. When you set the $useTable property to false, it makes a model that does not use a database. Your database is not connected yet, so that's exactly what you need now.
<?php
class Hello extends AppModel{
    var $useTable = false;
}
?>
code snippet /cakephp/app/models/hello.php
Create the view that will present the data to the user. In the controller, you have set a test variable that can be displayed in the associated view. You need to create an additional /hello folder inside /app/views. Note also that this view needs a peculiar CakePHP template file .ctp extension.
<html>
<body><h1><?php echo $test ?></h1>
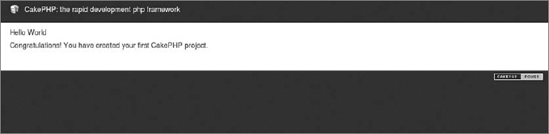
<p>Congratulations! You have created your first CakePHP project.
</body>
</html>
code snippet /cakephp/app/views/hello/index.ctp
Go to the file /app/config/routes.php and comment out the two default routing schemes. Write a rule that redirects connections from the web root to the hello controller and sets index() as the default action.
// Router::connect('/', array('controller' => 'pages', 'action' =>
 'display', 'home'));
// Router::connect('/pages/*', array('controller' => 'pages', 'action' =>
 'display'));

Router::connect('/', array('controller' => 'hello', 'action' => 'index'));
The result is presented in Figure 2-14. Notice that the CakePHP default stylesheet was used.
Navigate with your command line to the place where you want to set up your Hello World application. In this case, it will be the web root folder. Then use ZF's command-line tool to create a project template:
$ zf create project zfhello
Now you can go to your browser and type in this link: http://localhost/zfhello/public. You will hopefully see a blue image (its grayscale version is presented in Figure 2-15).
The default controller and view were already created by the zf create project command, so there is not much work to be done. But take a look at them anyway. First the controller:
<?php
class IndexController extends Zend_Controller_Action
{
    public function init()
    {
        /* Initialize action controller here */
    }
    public function indexAction()
    {
// action body
}
}
code snippet /zfhello/application/controllers/IndexController.php
As you can see, it has only stubs of actions. You will fill them later and write new ones as well.
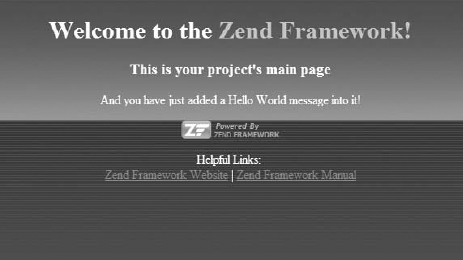
Second, take a look at the view. It is located at /zfhello/application/views/scripts/index/index.phtml. Notice the .phtml extension. It is a pre-HTML template that is preprocessed before being served as an HTML page. It may also have PHP scripts embedded. You can type a paragraph or two into it. For example, in the following code you add a Hello World message under the <h3> title:
<style>
    // various style definitions
</style>
<div id="welcome">
    <h1>Welcome to the <span id="zf-name">Zend Framework!</span></h1>
    <h3>This is your project's main page</h3>
    <div id="more-information">
        <p><img src="http://framework.zend.com/images
          /PoweredBy_ZF_4LightBG.png" /></p>
        <p>
            Helpful Links: <br />
            <a href="http://framework.zend.com/">Zend Framework Website</a> |
            <a href="http://framework.zend.com/manual/en
              /">Zend Framework Manual</a>
        </p>
    </div>
</div>
code snippet /zfhello/application/views/scripts/index/index.phtml
We couldn't leave without showing a Hello World example, so we have edited this file a little and you can see the effect in Figure 2-16.
That's it! You've managed to install all frameworks, configure them, and create your sample Hello World applications.
This section will take a look at the structure of folders and the most important files after the default installation and creation of a project. The default installation method is PEAR for Symfony and Zend Framework, and the sandbox application for CakePHP.
Symfony framework core installation — that is, all files installed by PEAR will be called the global files, while the place where your application is developed with all files generated by Symfony will be referred to as local files. In the sandbox installation, global and local files are placed together, so if you decided to use it, you will have to make the appropriate adjustments to follow the information in this section.
The global files are divided into two folders. The first folder, /data/symfony, is located in the user space of your operating system. Under Linux, it is in the standard directory, C:\xampp\php\PEAR\data\symfony, but under Windows. you must look for it at C:\Users\Username\pear\data\symfony\web. This folder contains Symfony's command-line tool and media files for web templates — check /data/symfony/web/sf/sf_default if you want styles for your default Symfony website. The hierarchy for this folder is the following:
/data/symfony
    bin
    web
The second global folder contains Symfony libraries, as shown in the following list. If you have installed XAMPP, it will be located at /xampp/php/PEAR/symfony. Under Linux it will be /usr/share/php5/symfony/.
/symfony
    action
addon
autoload
cache
command
config
controller
database
debug
escaper
event_dispatcher
exception
filter
form
generator
helper
i18n
log
mailer
plugin
plugins
request
response
routing
storage
task
test
user
util
validator
vendor
view
widget
yamlThe local folder is created by you in the web root or in any other location you prefer. It consists of the following folders:
/symfony
    apps
    cache
    config
    data
    lib
    log
    plugins
    test
    web
The important thing about Symfony is that it generates three levels of applications. The root local symfony folder is the project folder. In /apps there may be multiple applications. And each of these applications has a /modules folder where you create individual modules folders, resulting in organized, yet needlessly long, paths to individual files.
After installation, CakePHP has the following folder structure:
/cakephp
    app
    cake
    vendors
    plugins
    .gitignore
    .htaccess
    index.php
READMEapp— The folder of your application. It contains a template folder structure and some default files.cake— Contains core components of CakePHP. You should never edit it.vendors— Placeholder for third-party libraries.plugins— Here you can install CakePHP plug-ins..
htaccess— Server access rule that redirects you to/app/webroot, where the welcome message and a script verifying your installation are located.index.php— PHP redirection in casemod_rewritewas not enabled.
The /app folder is especially interesting and you will use it often:
/app
    config
    controllers
    libs
    locale
    models
    plugins
    tests
    tmp
    vendors
    views
    webroot
    .htaccess
    index.php
The names are mostly self-explanatory, but please note the following folders:
config— CakePHP follows a convention over configuration approach. There are only a few necessary configuration files and they are stored there.controllers, modelsandviews— The MVC pattern in action.plugins&vendors— There are also folders with these names in the main/cakephpfolder. These additional folders allow better customization of multiple applications.tmp— Stores temporary data-like logs or session information. It must be writeable.webroot— The document root of your application for production environments. Contains CSS, images, JavaScripts, and other deployable files.
The full downloadable package after installation includes these directories:
/ZendFramework-1.10.8
    bin
    demos
    externals
    extras
    incubator
    library
    resources
    src
    tests
    INSTALL.txt
    LICENSE.txt
    README.txt
Of these, the most important is the /library folder that holds the majority of the framework itself. That's why ZF is sometimes called "more a library than a framework." You can unpack this whole structure to any directory, as long as it is a fixed place. If installed with PEAR, only libraries and binaries are installed. The command-line binaries are exported into the shell then. You will find the libraries in the following folders:
Under Windows:
C:\xampp\php\PEAR\Zend
Under Linux (usually):
/usr/share/php/Zend/
And under Mac OS:
/Applications/XAMPP/xamppfiles/lib/php/pear/Zend/
When you create a project using command-line tools, it looks like this:
/zfhello
    application
        Bootstrap.php
        configs
            application.ini
        controllers
            ErrorController.php
            IndexController.php
        models
        views
            helpers
scripts
error
error.phtml
index
index.phtml
library
public
htaccess
index.php
tests
application
bootstrap.php
library
bootstrap.php
phpunit.xmlAn important file here is /zfhello/application/Bootstrap.php. It allows mapping URLs to controller actions. It also defines which components and resources should be initialized.
In this book, we will show you how to build web applications using pure frameworks and their plug-ins with as little third-party support software as possible. That's the best way to understand the nature of each framework and grasp its unique qualities. However, once you get familiar with them, you might want to use an integrated development environment (IDE) to further speed up and organize your development process. There are a few IDE solutions that you can integrate with your frameworks; the most notable are NetBeans, Eclipse, and Zend Studio.
These IDE integrations are purely optional and not required for further chapters of this book. Moreover, you can integrate an IDE while in any part of this book, so you can skip it now. As a rule of thumb, you should use an IDE only if you exactly know how you will benefit from it.
NetBeans is written entirely in Java, so it is commonly called "a Java tool." Many developers do not know that it is also a great IDE for PHP development. It provides built-in support for Symfony and Zend Framework. It offers a few development enhancements like:
Autocompletion for both application and framework classes
Running framework commands by keyboard shortcuts or convenient menus with searching and documentation
Automated creation of frontend and backend apps
Support for YAML syntax
Error messages printed with red font — simple yet useful
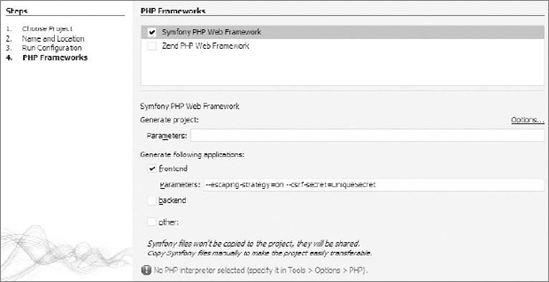
You can download NetBeans from http://netbeans.org/downloads/index.html. Then you need to include the framework's library in NetBeans preferences and set some framework-specific options. If you did it well, you should be able to create a new Framework project with the New PHP Project wizard, as shown in Figure 2-17.
Despite efforts of the community, NetBeans still doesn't have built-in support for CakePHP. That situation is about to change in the upcoming 7.0 version, but for now you can, with some effort, use only some of the most basic IDE functions. Fortunately, you can also integrate CakePHP with Eclipse, which seems the best IDE solution for CakePHP now.
Eclipse is a generic IDE, but it provides several tools for PHP development, for instance the intuitively named PHP Development Tools (PDT) project. You can download it from http://www.eclipse.org/pdt/. While Eclipse has no direct support for any of the frameworks, it can be configured with little effort for each one to provide several basic enhancements such as autocompletion. The preferred solution for both Symfony and Zend Framework is NetBeans, so we will show you how to integrate Eclipse with CakePHP.
First, download both CakePHP and Eclipse with the PDT pack. There are no installers, so just unpack them to separate folders on your hard drive. Run eclipse.exe from the Eclipse main folder. Set a convenient workspace — a good idea is a web server's applications folder such as C:\xampp\htdocs. Then copy CakePHP's /app folder into this workspace and rename it as you wish (in this example, it is named cake_example). In Eclipse's File menu create a new PHP project and name it just like the folder you have previously renamed. You should see the folder name in the source list, and when you click Finish, there will be a tree of all subfolders that were once inside the original /app folder.
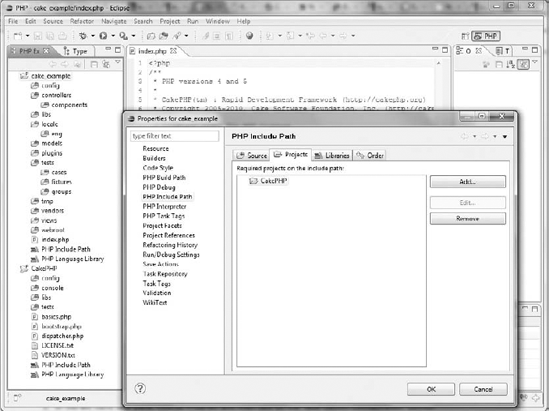
Once you have your application imported, you can make several development upgrades; the two most important are linking the project with the CakePHP core and the integration of Cake's bake script with Eclipse's Run External Tool command. The first thing can be done by creating a separate PHP project for CakePHP and pointing to the core files as existing sources. Then right-click the cake_example project in the source list and select Configure Include Path. Then include the CakePHP project as shown in Figure 2-18. Then you should have autocompletion for all core CakePHP classes.
The integration of Symfony and Zend Framework is almost the same. You can also use Eclipse to provide an IDE for other less-known frameworks.
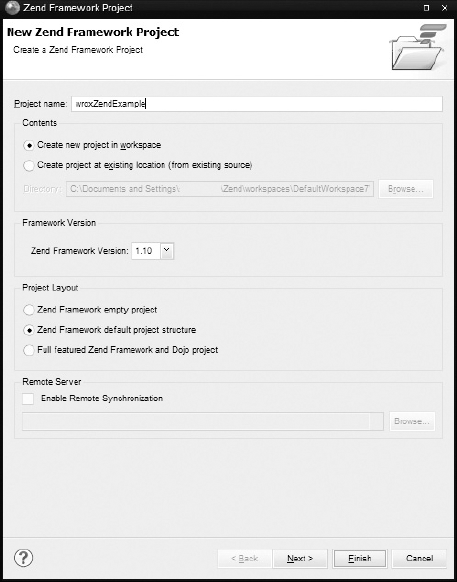
Zend Studio offers great functionalities for extending the Zend Framework, including code generation, an integrated debugger, and integration with Zend Server. However it is proprietary software. In this book we focus on open source solutions for individual developers and small companies, so we will not use this IDE in further chapters. However, you are encouraged to download a 30-day trial version at http://www.zend.com/en/products/studio/. Figure 2-19 shows creating a new ZF project with Zend Studio.