Table of Contents for
Building PHP Applications with Symfony™, CakePHP, and Zend® Framework
 Building PHP Applications with Symfony™, CakePHP, and Zend® Framework
Published by
Wrox, 2011
Building PHP Applications with Symfony™, CakePHP, and Zend® Framework
Published by
Wrox, 2011
- Copyright
- Credits
- ABOUT THE AUTHORS
- ACKNOWLEDGMENTS
- Introduction
- 1. Introducing Symfony, CakePHP, and Zend Framework
- 2. Getting Started
- 3. Working with Databases
- 4. Your First Application in the Three Frameworks
- 5. Forms
- 6. Mailing
- 7. Searching
- 8. Security
- 9. Templates
- 10. AJAX
- 11. Making Plug-ins
- 12. Web Services
- 13. Back End
- 14. Internationalization
- 15. Testing
- 16. User Management
- 17. Performance
- 18. Summary
- A. Web Resources
- B. CodeIgniter, Lithium, and Agavi with Code Examples
- GLOSSARY OF ACRONYMS AND TECHNICAL TERMS
Poets' starving children bleed
Nothing he's got he really needs
Twenty first century schizoid man.
WHAT'S IN THIS CHAPTER?
Frameworks offer great enhancements in web development by themselves, but with plug-ins you can achieve even more! There are various ready-to-use plug-ins that greatly extend the core functionalities of the frameworks. In this chapter, we show you how to build a plug-in in all three frameworks. In Symfony and CakePHP, you will see how to create a plug-in that prepares PDF files. Plug-ins in Zend Framework are of a somewhat different nature and are dedicated to purposes different from plug-ins of other frameworks.
Plug-ins are great for two reasons. First, they help with separating code that provides certain additional functionalities from the framework's core. This way, the framework can remain lighter and achieve better performance, while the optional add-ons are installed on demand. And that's the second advantage of this approach: it is beneficial for core developers who are freed to focus on development of the framework, for the open-source community that can easily prepare and maintain plug-ins dedicated for certain solutions, for companies that may develop sophisticated commercial plug-ins, and finally for all users who can choose from the wide range of ready-to-use solutions.
This section describes how to write a plug-in for generating PDF files. Actually, making PDF files can be done easily in Symfony by installing sfTCPDFPlugin using the following command:
$ symfony plugin:install sfTCPDFPlugin
However, if you have read this book up to this part, you should know how to install existing plug-ins, and using this one is not the objective of this section. We've shown this just to let you know that this ready-made plug-in exists, but in this section you will learn how to create your own plug-in for Symfony.
Let's start with Symfony's plug-in structure. In general, it consists of folders and files as follows:
sfPlugin/
  config/
    sfPluginConfiguration.class.php
    routing.yml
    doctrine/
     schema.yml
  lib/
    sfPlugin.class.php
    helper/
    filter/
    form/
    model/
    task/
  modules/
    pluginModule/
      actions/
      config/
      templates/
  web/
You can see that there is a strong similarity between this file structure and Symfony's application file structure. You don't need to create every directory, only those that you will need when making this plug-in. The /config directory contains all configuration files, such as routing.yml, that can be used for adding a module for routing. Schema and plug-in dependencies go to this folder, too. The /lib folder holds tasks, helpers, forms, models, and the main plug-in class. Inside /modules, all ready-to-use modules are kept; inside /web are all images, stylesheets, and JavaScripts.
As you want to develop your own plug-in, you will avoid the TCPDF plug-in mentioned in the introduction to this section and use an alternative: the Free PDF PHP (FPDF) general-purpose library.
For simple PDF creation, you don't have to code much; all you need is one simple helper with one exemplary function that will generate a PDF with text. You must have the FPDF library installed before creating this helper. You can download it from www.fpdf.org and copy it into the PHP libraries. Under Linux, you can also install it as a package. This helper file could look like this:
<?php
require('fpdf/fpdf.php');
function generatePDF() {
    $pdf=new FPDF();
    $pdf->AddPage();
    $pdf->SetFont('Times','B',12);
    $pdf->Cell(40,10,'Symfony FPDF Plugin');
    $pdf->Output();
}
?>
code snippet /symfony/plugins/sfFPDFPlugin-1.0.0/lib/helper/sfFPDFHelper.php
Plug-in development requires a few basic facts about the plug-in. This information is stored in the package.xml file in the root folder of the plug-in. An example is presented here:
<?xml version="1.0" encoding="UTF-8"?>
  <package xmlns="http://pear.php.net/dtd/package-2.0"
    xmlns:tasks="http://pear.php.net/dtd/tasks-1.0"
    xmlns:xsi="http://www.w3.org/2001/XMLSchema-instance" packagerversion="1.8.0"
    version="2.0" xsi:schemaLocation="http://pear.php.net/dtd/tasks-1.0
    http://pear.php.net/dtd/tasks-1.0.xsd http://pear.php.net/dtd/package-2.0
    http://pear.php.net/dtd/package-2.0.xsd">
  <name>sfFPDFPlugin</name>
  <channel>pear.symfony-project.com</channel>
  <summary>Exemplary FPDF Plugin</summary>
  <description>Very short example</description>
  <lead>
    <name>Wrox</name>
    <user>Wrox</user>
    <email>foo_bar@wrox.com</email>
    <active>yes</active>
  </lead>
  <date>2011-02-27</date>
  <time>00:00:00</time>
  <version>
    <release>1.0.0</release>
    <api>1.0.0</api>
  </version>
  <stability>
    <release>stable</release>
    <api>stable</api>
  </stability>
  <license uri="http://www.symfony-project.com/license">MIT license</license>
  <notes>
    Exemplary notes
  </notes>
  <contents>
    <dir name="/">
      <file md5sum="2779dd4abdee0683069bc5ecb9721cde"
name="lib/helper/sfFPDFHelper.php" role="data"/>
</dir>
</contents>
<dependencies>
<required>
<php>
<min>5.3.0</min>
</php>
<pearinstaller>
<min>1.4.1</min>
</pearinstaller>
</required>
</dependencies>
<phprelease/>
</package>
code snippet /symfony/plugins/sfFPDFPlugin-1.0.0/package.xmlNote that you can set the minimal version of PEAR and PHP as well as the plug-in's version and its stability. You need to supply the MD5 sum as well. This is a minimal security measure to counteract unauthorized file replacement and also helps with discovering corrupt file download.
The file structure of your plug-in should be as follows now:
sfFPDFPlugin-1.0.0\
    lib\
        helper\
            sfFPDFHelper.php
package.xmlTo test your plug-in, all you have to do is to pack it into an archive and install it:
$ symfony plugin:install /home/wrox/public_html/sfFPDFPlugin-1.0.0.tar.gz
Although the directory path may differ on your machine, the output will be the same:
>> plugin installing plugin "/home/wrox/public_html/sfFPDFPlugin-1.0.0.tar.gz"
>> sfSymfonyPluginManager Installation successful for plugin
    "/home/wrox/public_html/sfFPDFPlugin-1.0.0.tar.gz"
Your helper can be now added into the configuration file of your applications. An example is presented here:
all:
    .settings:
       standard_helpers:    [Partial, Cache, sfFPDF]
code snippet /symfony/apps/frontend/config/settings.yml
And here is an example action that utilizes this helper:
public function executeIndex(sfWebRequest $request)
  {
    $response = $this->getResponse();
    $response->setContentType('application/pdf');
  }
code snippet /symfony/apps/frontend/modules/pdfexample/actions/actions.class.php
The preceding code sets the output type as PDF. You need to execute the helper in a view as follows:
<?php echo generatePDF(); ?>
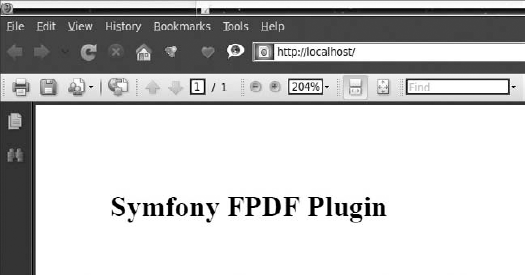
code snippet /symfony/apps/frontend/modules/pdfexample/templates/indexSuccess.phpWhen the routing is set to call this action, you should see a PDF file like the one in Figure 11-1.
Plug-ins in CakePHP are basically mini-applications that can be deployed in different CakePHP projects and used therein. In this section, you will have the opportunity to learn how to prepare a plug-in that will be responsible for generating PDF reports. The content of this report will be a list of persons held in an addresses database table — the same one that was introduced in Chapter 4. To generate this report, the Free PDF PHP (FPDF) class is used.
To use FPDF in your application, you should download FPDF from the http://fpdf.org/ website and place all its content into the /app/vendors/fpdf/ directory. Later it will be called from the controller file of your plug-in.
When a copy of fpdf.php is in your /app/vendors/fpdf/ directory, you can proceed with the process of creating a CakePHP plug-in. Plug-ins in CakePHP are usually self-contained applications on their own, so the file structure for such a plug-in is nearly identical to those of a normal CakePHP application.
First you need to name your plug-in. For this example, pdfreport should be a good name. The basic plug-in file structure used for the pdfreport example plug-in looks as follows:
/pdfreport
    /app
    /plugins
    /pdfreport
    /controllers
    /models
    /views
    /pdfreport_app_controller.php
    /pdfreport_app_model.php
In the main plug-in folder, there are two important files: the pdfreport_app_controller.php file that is the plug-in's AppController and the pdfreport_app_model.php file that is the plug-in's AppModel. These files are named after plug-in's name.
To start building your plug-in, you need to create the file structure shown in the preceding section. The content of the AppController file of the plug-in in this example is a simple class extending the AppControler of your main application. The listing of this file is as follows:
<?php
    class PdfreportAppController extends AppController {
    }
?>
code snippet /cakephp/app/plugins/pdfreport/pdfreport_app_controller.php
The situation is similar with the AppModel of the plug-in. The code for this example is as follows:
<?php
    class PdfreportAppModel extends AppModel {
    }
?>
code snippet /cakephp/app/plugins/pdfreport/models/pdfreport_app_model.php
Now you have the basis of your plug-in, and it is time to create a controller that will handle all the capabilities of your plug-in. Since you want to generate PDF reports from your application, you need to create GeneratePdfController inside the /controllers folder of your plug-in. In this example, the controller file will prepare a user list that is stored in the addresses database table. To do this, you need to use the $uses variable to point out that this controller uses the Address model to read all the data. The controller file used in this example goes as follows:
<?php
class GeneratePdfController extends PdfreportAppController {
var $name = 'GeneratePdf';
var $uses = array('Address');
function index() {
$this->layout = 'pdf';
$this->set('address_list', $this->Address->find('all'));
}
}
?>
code snippet /cakephp/app/plugins/pdfreport/controllers/pdfreport_app_controller.phpThis controller file has an index() action that does two things: specify the layout file that was used to render the view file and read all data from the Address model and pass it to the view file as the address_list variable.
The layout file pdf.ctp, specified in the index action, needs to be created inside the /views/layouts folder. It will be used to render the index.ctp view file as PDF content instead of HTML content. The content of the layout file should be as follows:
<?php
    header("Content-type: application/pdf");
    echo $content_for_layout;
?>
code snippet /cakephp/app/plugins/pdfreport/views/layouts/pdf.ctp
You should create the model file and set the $useTable variable to false because this model does not use any database tables. Code for this file can go like this:
<?php
class GeneratePdf extends PdfreportAppModel {
    var $name = 'GeneratePdf';
    var $useTable = false;
}
?>
code snippet /cakephp/app/plugins/pdfreport/models/generate_pdf.php
Finally, the view file, index.ctp, needs to be created in the /app/plugins/pdfreport/views/generate_pdf folder. Here you will place all the PDF building commands, but first you need to import the FPDF library by using the App::import() command. The code used to illustrate how the PDF file is generated is listed next:
<?php
    App::import('Vendor', 'fpdf/fpdf');
    $pdf = new FPDF();
    $pdf->AddPage();
    $pdf->SetFont('Times', '', 16);
    $pdf->Write(5, 'Persons list');
    $pdf->Ln();
    $pdf->SetFontSize(10);
$pdf->Write(5, 'Report of users held in database.');
$pdf->Ln();
$pdf->Ln(5);
$pdf->SetFont('Arial', 'i', 10);
$pdf->Cell(10 ,7, 'Nr.', 1);
$pdf->Cell(20 ,7, 'Name', 1);
$pdf->Cell(50 ,7, 'Email', 1);
$pdf->Cell(20 ,7, 'Phone', 1);
$pdf->Ln();
$pdf->SetFont('Helvetica', '', 10);
foreach ( $address_list as $line ) {
$address = $line['Address'];
$pdf->Cell(10 ,7, $address['id'], 1);
$pdf->Cell(20, 7, $address['first_name'].' '.$address['last_name'], 1);
$pdf->Cell(50, 7, $address['email'], 1);
$pdf->Cell(20, 7, $address['phone'], 1);
$pdf->Ln();
}
$pdf->Output();
?>
code snippet /cakephp/app/views/addresses/index.ctpIf you wish to learn more on how PDF files are created, please visit http://fpdf.org/ because this example introduces only basic functions.
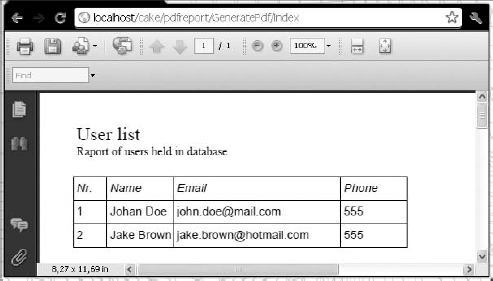
This concludes writing your CakePHP plug-in, and now you probably wonder how you can use it. Well, this is quite simple. Because this plug-in was designed to generate PDFs containing a user list, it would be nice to add this option to an application that has a user list already. For this example, the application from Chapter 4 will be used, but you need to add one code line at the end of the index.ctp file that is responsible for displaying the address list. It will create the Get pdf report link illustrated in Figure 11-2. The report is presented in Figure 11-3. The code line that needs to be added is as follows:
<?php echo $html->link('Get pdf report', array('plugin' => 'pdfreport',
    'controller' => 'GeneratePdf', 'action' => 'index')); ?>
code snippet /app/views/addresses/index.ctp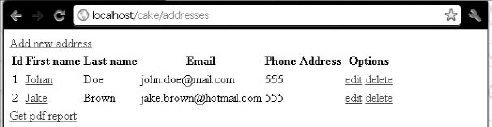
In the Symfony and CakePHP sections of this chapter, you learned how to create plug-ins that allow you to generate PDF files on the fly. In this section, no such plug-in will be created. This is because of the specificity of plug-ins in Zend Framework, which is discussed in this section.
As for generating PDF files, Zend Framework is supplied with the Zend_Pdf component that allows you to do that. The Zend_Pdf component offers a number of features that allow you to load, create,modify, and save PDF documents. If you wish to learn more about generating PDF files in Zend Framework, please refer to the Zend_Pdf component documentation at: http://framework.zend.com/manual/en/zend.pdf.html or consider using the Free PDF PHP library introduced in the Symfony and CakePHP sections of this chapter.
If you think of plug-ins in general, you imagine something that you connect to an application, and that you can use as a part of a bigger whole. As a hardware example, consider a USB web camera or a game controller that you can connect to any computer, and is ready to use after the installation process. The concept is similar with plug-ins for Symfony or CakePHP, in which a plug-in can have nearly unlimited functionality and can be used in any application.
In Zend Framework, plug-ins are completely different and are designed to be used in a different manner than in Symfony or CakePHP. In Zend Framework, a plug-in is a class that contains a number of preset methods that are called every time an application page is loaded. Because of this, when you wish to create a Zend Framework plug-in, you need to keep in mind that its code will be executed every time the page is loaded. This limits your plug-ins to a small set of specific tasks that can be performed this way. It differentiates Zend Framework plug-ins from typical plug-ins, where you create a controller class that can give you access to additional helpers.
So what are Zend Framework plug-ins used for? A Zend Framework plug-in is a set of listeners that is called when certain events occur in the front controller. These events correspond to the routing and dispatch actions. So typically, Zend Framework plug-ins can be applied to application initialization, caching, routing modification, user authentication, and so on.
Creating your own plug-in is a simple task because you need only one file to make it work. You may have noticed that in Symfony and CakePHP, there is a certain folder named plug-ins that gives you a general idea of where your plug-ins should be. But in Zend Framework, you don't have such a folder. So where should you place your plug-in? Usually you should create a /My folder inside the /Library folder of your application.
Now let's create an example plug-in called Pluginexample.php, which you'll create in the /appName/library/My/Controller directory. Note that the path name influences how the class is named inside Pluginexample.php, and for appName/library/My/Controller the plug-in class name will be My_Controller_Pluginexample. The following code is a listing of a basic plug-in with a set of functions. These functions will be executed one by one when any page is loaded in the application that uses this plug-in:
<?php
class My_Controller_Pluginexample extends Zend_Controller_Plugin_Abstract {
    public function routeStartup(Zend_Controller_Request_Abstract $request){
      echo '<p>1. Router startup executed.</p>';
    }
    public function routeShutdown(Zend_Controller_Request_Abstract $request){
      echo '<p>2. Router shutdown executed.</p>';
    }
    public function dispatchLoopStartup(Zend_Controller_Request_Abstract $request){
      echo '<p>3. Dispatch loop startup.</p>';
    }
    public function preDispatch(Zend_Controller_Request_Abstract $request){
      echo '<p>4. Pre dispatch executed.</p>';
    }
    public function postDispatch(Zend_Controller_Request_Abstract $request){
      echo '<p>5. Post dispatch executed.</p>';
    }
    public function dispatchLoopShutdown(){
      echo '<p>6. Dispatch loop shutdown.</p>';
    }
}
?>
code snippet /zf/library/My/Controller/Pluginexample.php
In this file, you can place the desired functions for your application instead of the example functions we used; for example, for processing session variables or influencing routing.
To use this plug-in, you need to make sure that your application's Bootstrap.php contains the following line. This will register name space for your plug-in folder; in this case, its name is /My.
$autoloader->registerNamespace('My_');
code snippet /zf/application/Bootstrap.php
Finally, to enable a specific plug-in, you need to add the following line inside the application.ini file:
resources.frontController.plugins.param = "My_Controller_Pluginexample"
code snippet /zf/application/configs/application.ini
Now when you run your application, all messages contained in My_Controller_Pluginexample will be displayed before any content of your application is rendered. These messages will look as follows:
1. Router startup executed.
2. Router shutdown executed.
3. Dispatch loop startup.
4. Pre dispatch executed.
5. Post dispatch executed.
6. Dispatch loop shutdown.