Table of Contents for
Building PHP Applications with Symfony™, CakePHP, and Zend® Framework
 Building PHP Applications with Symfony™, CakePHP, and Zend® Framework
Published by
Wrox, 2011
Building PHP Applications with Symfony™, CakePHP, and Zend® Framework
Published by
Wrox, 2011
- Copyright
- Credits
- ABOUT THE AUTHORS
- ACKNOWLEDGMENTS
- Introduction
- 1. Introducing Symfony, CakePHP, and Zend Framework
- 2. Getting Started
- 3. Working with Databases
- 4. Your First Application in the Three Frameworks
- 5. Forms
- 6. Mailing
- 7. Searching
- 8. Security
- 9. Templates
- 10. AJAX
- 11. Making Plug-ins
- 12. Web Services
- 13. Back End
- 14. Internationalization
- 15. Testing
- 16. User Management
- 17. Performance
- 18. Summary
- A. Web Resources
- B. CodeIgniter, Lithium, and Agavi with Code Examples
- GLOSSARY OF ACRONYMS AND TECHNICAL TERMS
The PHP world does not begin, nor end, with Symfony, CakePHP, and Zend Framework. There is a multitude of other frameworks and some of them are useful, brilliant, and (most important) increasingly popular. In this appendix we will take a closer look at three of them: CodeIgniter (CI), Lithium, and Agavi.
The sample applications presented here will cover the first two of the create, read, update, and delete (CRUD) functionalities: creating and reading entries. We call them news publishing applications, but with a little modification they can be used for blogging, commenting, or as a guest book. That should give you enough sense of what each framework is up to.
We will use the two of the hosting environments presented in Chapter 2: Windows 7 64-bit with XAMPP 1.7.3; and Ubuntu Linux Desktop 10.04.1 64-bit with the standard Linux, Apache, MySQL, and PHP (LAMP) environment. If you need help with setting them up, Chapter 2 covers that in detail.
CodeIgniter had an explosion of popularity recently and if the trend continues, it will become the leading framework in 2011. So, what's so unique about it? It's incredibly nimble:
Lightweight — Less than 2MB.
Fast — No performance tweaks needed.
Easy — Single configuration file, great documentation, no need to learn a templating language.
Flexible — Loosely coupled architecture that does not need much hacking to extend. Model layer is optional.
Adaptable — No command-line tools. Not cool, but facilitates deployment on hosts without a command line. Runs on PHP 4 (also not cool, but makes it even more adaptable).
Many people do not need the advanced features of heavy-duty frameworks. CI has all the important things that are sufficient for most projects. It is also popular because it works in shared hosting environments, where using a minimal framework without command-line tools is often the only choice you have. Finally, CI is both simple to learn and very well documented, which gets it the approval of the community and often makes it the first choice for beginners in PHP development. Let's check it out now.
The installation couldn't be easier. The CodeIgniter version used here is 1.7.2 but we encourage you to install the newest version from this website:
http://codeigniter.com/downloads/
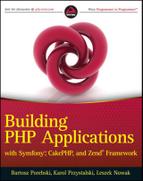
Uncompress the package to your web root folder. Optionally, change the name to something short for your convenience. In this example, it was changed from /CodeIgniter_1.7.2 to /ci. Go with your browser to http://localhost/ci and you should see the welcome page shown in Figure B-1.
The welcome page is clean and informative. The paths to the default view and controller are displayed there. You can start experimenting with CodeIgniter just by editing those files. There is also a link to the included User Guide. It is both good introduction material and a full documentation of CI classes. This documentation is a big advantage of this framework. Hint: if it's late at night and you have a hard time looking for the table of contents, there is a dark tab at the top of the User Guide to help you locate it.
In this example, you need to create the news database and entries table for the application. The single table will hold an autoincremented id, short title of the news, full description of it, and (optionally) the date when it was added. You can do it conveniently with phpMyAdmin, or just by invoking the following commands from the command line:
CREATE DATABASE news;
CREATE TABLE `news`.`entries` (
`id` INT NOT NULL AUTO_INCREMENT PRIMARY KEY ,
`title` VARCHAR( 50 ) NOT NULL ,
`description` VARCHAR( 1000 ) NULL DEFAULT NULL ,
`date` DATE NULL DEFAULT NULL
) ENGINE = MYISAM ;
Then configure the CodeIgniter to make it establish a connection to this database:
$db['default']['hostname'] = "localhost";
$db['default']['username'] = "root";
$db['default']['password'] = "your password";
$db['default']['database'] = "news";
$db['default']['dbdriver'] = "mysql";
code snippet /ci/system/application/config/database.php
Go to the autoload.php configuration file. Find the line responsible for autoloading libraries. Insert into the array the 'database' string to enable automatic loading and instantiation of the database on each page load:
$autoload['libraries'] = array('database');
code snippet /ci/system/application/config/autoload.php
Unfortunately, no database connection check is made in the default module, but soon you will be able to access this database with your application.
If you do not want to develop your app in the web root folder, but in the home folder or anywhere else on the system, you need to reconfigure Apache. This is optional because you can store the folder in the web root and still access the application with http://localhost/ci, but many developers prefer it that way. Just supply the CI's main folder path, and the rest is done with .htaccess files, which is quite convenient:
Alias /ci /home/username/public_html/ci
<Directory /home/username/public_html/ci>
    Options Indexes FollowSymLinks MultiViews
    AllowOverride All
    Order allow,deny
allow from all
</Directory>
code snippet /apache/httpd.confChange the base URL in your CI configuration file to point to the root of your application. Don't forget the trailing slash.
$config['base_url'] ="http://localhost/ci/";$config['index_page'] = "index.php";code snippet /ci/system/application/config/config.php
Set the routing. Find the default welcome controller:
$route['default_controller'] = "welcome";
code snippet /ci/system/application/config/routes.php
And change it to the name of the controller you are about to create:
$route['default_controller'] = "news";
code snippet /ci/system/application/config/routes.phpNow you can finally create the News controller. It extends the standard Controller class and uses its constructor. News provides one index() action that loads the single model, gets a list of the freshest news, and passes them to the view as the $data variable. At this point the database is empty, so it's not anything spectacular.
<?php
class News extends Controller {
    function News() {
        parent::Controller();
    }

    function index() {
        $this->load->model('Newsmodel');
        $data['list'] = $this->Newsmodel->getList();
        $this->load->view('newsview', $data);
    }
}
code snippet/ci/system/application/controllers/news.php
Please note one very important thing: the database query result must be passed as a value of the 'list' key in the $data array. Then this array is passed to the view. It may seem tempting to pass just the variable like this:
$list = $this->Newsmodel->getList();
$this->load->view('newsview', $list);
But don't try it; the $list variable will not be visible to the view and it won't work.
Now create the model. It is not obligatory to create models in CI, but we recommend it as a good practice. Another point is that it is almost always very useful. The solution used here is a modified Active Record pattern, which means that database tables and properties are wrapped by a database object $db inside the model. We are using the database helper here. The get() method is a shortcut for selecting all rows from the entries table:
<?php
class Newsmodel extends Model {
    var $title = '';
    var $description = '';
    var $date = '';
    function Newsmodel() {
        parent::Model();
    }

    function getList() {
        $query = $this->db->get('entries');
        return $query;
    }
}
code snippet /ci/system/application/models/newsmodel.php
The view presented here is already fully functional and does not need to be modified later.
<html>
<head>
<title>The news application</title>
</head>
<body>
<h1>The latest news!</h1>
<?php
foreach ($list->result() as $row):
    echo "<h3>". $row->title ."</h3>";
    echo "<p>". $row->description;
    echo "<p><small>Added on: ". $row->date ."</small>";
endforeach;
?>
<h1>Adding news:</h1>
<?php
$this->load->helper('form');
echo form_open('news/add');
    echo form_label('Title')."<br>";
echo form_input('title')."<br>";
echo form_label('The Contents')."<br>";
$params = array(
'name' => 'description',
'id' => 'description',
'value' => '',
'maxlength' => '1000',
'rows' => '5',
'style' => 'width:50%',
);
echo form_textarea($params)."<br>";
echo form_submit('submit', 'Add News');
echo form_close('');
?>
</body>
</html>
code snippet /ci/system/application/views/newsview.phpThere are a few important things here. In the foreach loop, individual rows are extracted with the $list->result() method. Then the title and description fields are accessed to print out the content.
The forms are created with CodeIgniter's form helper, which is loaded manually in this example, unlike the database utility class that was included for autoloading. You can also autoload the form.
The input form is opened with the following function:
echo form_open('news/add');It is shorthand for this line:
<form method="post" action="http://localhost/ci/index.php/news/add" />
Actually, it is a little more than shorthand because the full link is constructed using the base_url configured earlier. This adds to the portability of the application when you have multiple forms.
Also, the form_input() and form_textarea() methods are the helper's shorthand for well-known form creation tags. The first method is created using only a name string for simplicity, and the textarea is configured using an array of parameters. All form creation methods accept arrays, though. There are many other kinds of forms this helper can create, such as form_hidden(), form_checkbox() or form_password().
Finally, the form_submit() method creates a submit button that sends the form to the add action of the News controller. That's what the argument of form_open('news/add') was for. There is no add() function in the controller yet, but it will be created in the next section.
To add some entries into the database, you must go back to the Newsmodel and add a function that would insert the data into the database. The following function reads the submitted form, sets the corresponding variables (defined earlier in the model), gets the current time in ISO format, and finally inserts the complete entry into the database:
function addNews() {
$this->title = $_POST['title'];
$this->description = $_POST['description'];
$this->date = date('c');
$this->db->insert('entries', $this);
}
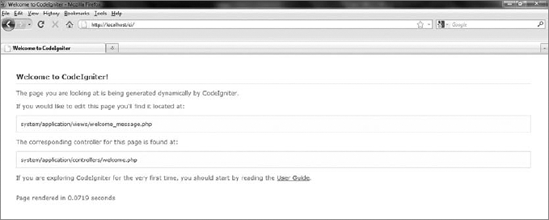
code snippet /ci/system/application/models/newsmodel.phpWith this tool you can create the action to handle the form submission. It must load the model first; then it checks to be sure the form is not empty. If it's not, it adds the news item into the database. Finally, this action redirects to the index action to display the new content. You can see a sample of the outcome in Figure B-2.
Note that the url helper is loaded just before that. Helpers need to be included just once and then they are globally available, but we have loaded it in the add action just before the redirect() method where it is needed.
function add() {
    $this->load->model('Newsmodel');
    if($this->input->post('submit')){
      if($_POST['title'] != NULL && $_POST['description'] != NULL)
        $this->Newsmodel->addNews();
    }
$this->load->helper('url');
redirect('news/index','refresh');
}
code snippet /ci/system/application/controllers/news.phpCongratulations! You have created your first half-CRUD application in CodeIgniter.
Lithium is a young framework that has already caused much excitement among the PHP crowd. A quick look at Lithium's website, http://lithify.me/, shows that they really want to be unique. Both an unusual visual style and a large concentration of daring catchwords build up quite a lot of tension and raise expectations for the upcoming stable version. The Lithium version used here is 0.9.5. By the time you read this book, the 1.x release will probably be available. Will it meet all the expectations? The current version may be a good forecast of that. We will create the same simple app as in the CodeIgniter section to compare them.
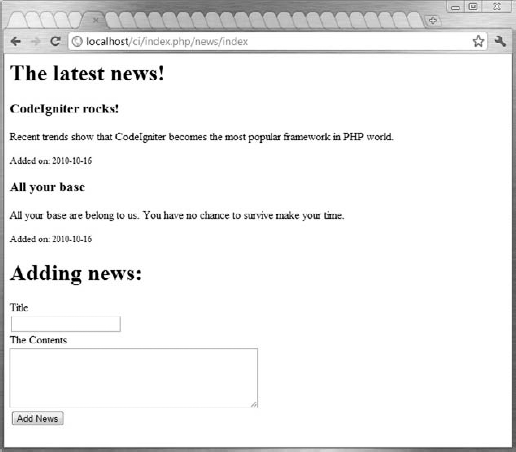
To install Lithium, go to its website and click the download() link. That opens a page where you can grab the latest release. Alternatively, you can use Git version control system (available from http://git-scm.com/). Unpack the folder to your web root. We have renamed it /lith, so do the same or adjust paths from our examples. At http://localhost/lith, you will see Lithium's welcome page (see Figure B-3):
Smells like Cake, doesn't it? Well, Lithium was started by the people who previously developed CakePHP. They were not happy with it, mainly because of its conformance with PHP 4, so they first made a PHP 5.3 fork called Cake3, and then turned that into a separate framework called Lithium. Even if Lithium's core is completely rewritten, when you look at the welcome page's graphic style, the relation to CakePHP is evident.
To get direct access to the /lith/libraries/lithium/console/li3 (or li3.bat for Windows) application, which is the all-in-one command-line tool of Lithium, you must add its path to the PATH environment variable. The process for adding this path was described in Chapter 2. For UNIX-like systems, use this:
$ export PATH=${PATH}:/path_to_lithium/lith/libraries/lithium/console/When the path is set, you can type the following command in the console:
$ li3
You will see the following output:
COMMANDS
    Create
    The 'create' command allows you to rapidly develop your models, views,
    controllers, and tests by generating the minimum code necessary to test
    and run your application.

    G11n
    The 'G11n' set of commands deals with the extraction and merging of message
    templates.

    Help
    Get information about a particular class including methods, properties, and
    descriptions.

    Library
    The Library command is used to archive and extract Phar::GZ archives. Requires
    zlib extension. In addition, communicate with the a given server to add plugins
    and extensions to the current application. Push archived plugins to the server.

    Test
    Runs a given set of tests and outputs the results.

See 'li3 help COMMAND' for more information on a specific command.
Notice that i18n has been renamed to G11n, meaning globalization. The name is different, yet it works like all other localization tools.
Going back to our example, the application you are working on here will be very similar to the news application for CodeIgniter shown earlier in this chapter. They can share the news database. If you have not created the database for the CI example, you can do it with the following command:
CREATE DATABASE news;
Now create the table for the Lithium application. Note that this table is called news, while the CI table was called entries. This is the only difference, as Lithium needs the tables to be named like the models (or rather models like tables).
CREATE TABLE 'news'.'news' (
'id' INT NOT NULL AUTO_INCREMENT PRIMARY KEY ,
'title' VARCHAR( 50 ) NOT NULL ,
'description' VARCHAR( 1000 ) NULL DEFAULT NULL ,
'date' DATE NULL DEFAULT NULL
) ENGINE = MYISAM ;
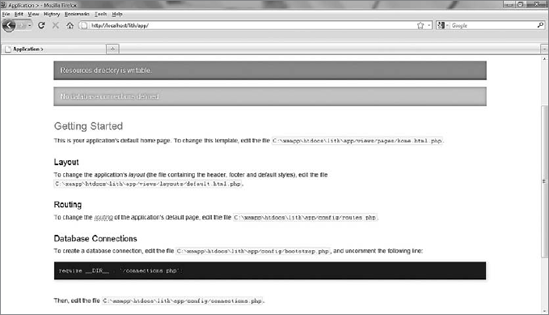
Then you need to establish a connection to your database. Just as the welcome page suggests, go to the bootstrap.php file and uncomment the following line:
/**
    * Include this file if your application uses a database connection.
    */
require __DIR__ . '/connections.php';
code snippet /lith/app/config/bootstrap.php
Uncommenting this line allows loading of the connections.php file when the application is executed.
Edit this file now. The 'default' in the following code means that models will use this connection by default. In the current version, you have to uncomment all database lines first.
use \lithium\data\Connections;
  Connections::add('default', array(
    'type' => 'database',
    'adapter' => 'MySql',
    'host' => 'localhost',
    'login' => 'root',
    'password' => '',
    'database' => 'news'
 ));
code snippet /lith/app/config/connections.phpYou need to set the routing to the news controller you are about to create, instead of the default one. Also set the default action to the index action.
/**
    * Here, we are connecting '/' (base path) to the controller called 'Pages',
    * its action called 'view', and we pass a param to select the view file
    * to use (in this case, /app/views/pages/home.html.php)...
    */
Router::connect('/', array('controller' => 'news', 'action' => 'index'));
code snippet /lith/app/config/routes.php
You may also reconfigure Apache to use a folder other than the web root. This was shown in the CodeIgniter configuration and is the same here with obvious path changes.
So you probably want to see how rapid the development with Lithium can be. Create a model as shown here:
<?php
namespace app\models;
use \lithium\data\Connections;
class News extends \lithium\data\Model {
}
?>
code snippet /lith/app/models/News.php
That's it. Nothing more is needed to make a working model; you can just call it in your controller and then load or save data into it. This file will not be modified in this example app any more.
Prepare the stub of the NewsController with two empty actions: index and add. Make it use the News model created earlier in this chapter. Add the line use app\models\News; just after the namespace declaration.
<?php
namespace app\controllers;
use app\models\News;
class NewsController extends \lithium\action\Controller {
public function index() {
}
public function add() {
}
}
?>
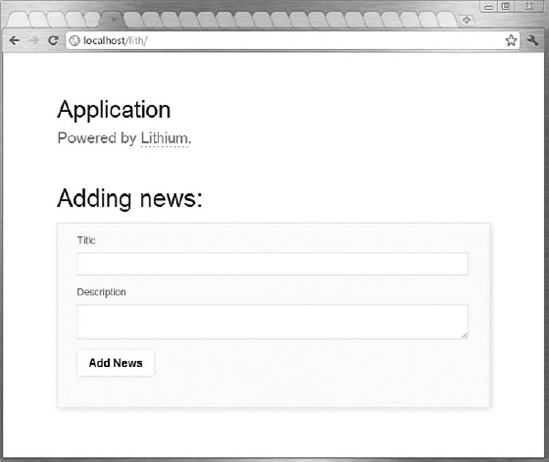
code snippet /lith/app/controllers/NewsController.phpIt's time to make a basic view. Look how easy it is in Lithium to create forms: just open the form with the create() method, add some fields with the field() method, use submit() for the submit button, and close the form with the end() method. All these methods belong to the Form helper class. The create() method can be bound to a data object to analyze column types, fill in input form fields, and throw error messages. In this example, it is not used, so the first parameter is null. The second parameter is an array of options, of which the most important is the action that can be used to direct the form to a chosen action of the controller. If it is not set, the form is directed by default to the action associated with this view.
<html>
<head>
<title>The news application</title>
</head>
<body>
<h1>Adding news:</h1>
  <?=$this->form->create(NULL,array('action' => 'add')); ?>
    <?=$this->form->field('title');?>
    <?=$this->form->field('description', array('type' => 'textarea'));?>
    <?=$this->form->submit('Add News'); ?>
  <?=$this->form->end(); ?>
</body>
</html>
code snippet /lith/app/views/news/index.html.php
When you enter the link to this application in your browser, you should see the following output (shown in Figure B-4). It is nicely styled with Lithium's default layout.
You may have noticed that Lithium has adopted a few conventions:
Uses auto-loading feature and namespaces introduced in PHP 5.3.
A full path with backslashes (
\) is required when extending base framework classes.There are strict naming conventions. Models must be named the same as the corresponding database tables, and the controllers' class names must have a suffix of
Controller. Both must be capitalized and stored in files named exactly the same as the class names.Views must be named the same as the actions they are linked to and must have
.html.phpextensions. They also must be stored in additional folders named after their controllers. For example, for theindexaction of theNewsControllercontroller, the full path to the index view is/lith/app/views/news/index.html.php.
When you've got such a nice form, it would be a waste not to use it. Locate the add() method of your controller and fill it with following code:
public function add() {
  if ($this->request->data) {
    if($this->request->data['title'] != NULL &&
    $this->request->data['description'] != NULL){
        $news = News::create($this->request->data);
        $news->date = date('c');
        $news->save();
    }
  }
  $this->redirect(array('action' => 'index'));
}
code snippet /lith/app/controllers/NewsController.php
The form input data is accessed by $this->request->data. It is an array, so the array operator is used to retrieve the values. If the post passes all checks and is considered non-empty, a $news model object is created. The current date is added to the object. All you have to do then is to invoke the save() method of the object. Finally, the control flow is redirected to the index method to show the news list.
Showing the news list is also very simple, as presented in the following code. Prepare a $data[] array and write under the list key some entries associated with the News model. Use the find('all') method of this model class to get all entries from the database table. If you pass an integer instead of the 'all' string, only this amount will be returned.
public function index() {
    $data['list'] = News::find('all');
    return $data;
}
code snippet /lith/app/controllers/NewsController.php
Finally, add into your view a loop that goes through all rows of the table and writes out their contents. The full file is presented here:
<html>
<head>
<title>The news application</title>
</head>
<body>
<h1>The latest news!</h1>
  <?php foreach($list as $row):
    echo "<h3>". $row->title ."</h3>";
    echo "<p>". $row->description;
    echo "<p><small>Added on: ". $row->date ."</small>";
  endforeach; ?>
<h1>Adding news:</h1>
  <?=$this->form->create(NULL,array('action' => 'add')); ?>
    <?=$this->form->field('title');?>
    <?=$this->form->field('description', array('type' => 'textarea'));?>
    <?=$this->form->submit('Add News'); ?>
  <?=$this->form->end(); ?>
</body>
</html>
code snippet /lith/app/views/news/index.html.php
Well, that's it! You've got your first app in Lithium. There is just one small thing to do.
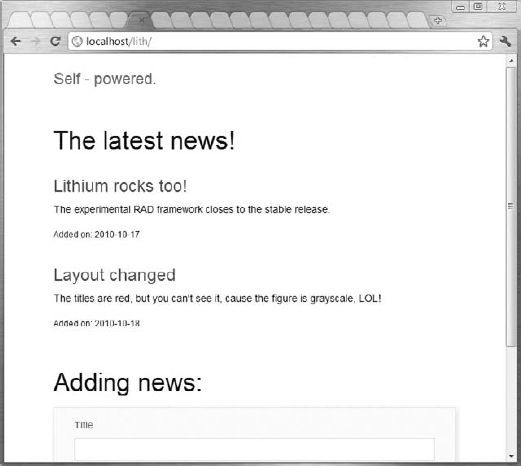
The default template provided by Lithium is nice, but you probably do not want the big Application header in your new application. Go to the default layout, find the header div, and shorten it to something modest:
<div id="header">
  <h2>
    Self - powered.
  </h2>
</div>
code snippet /lith/app/views/layouts/default.html.php
You may also want to modify the default cascading style sheet (CSS). It is stored in /lith/app/webroot/css/lithium.css. First, decrease the vertical padding in the container div from 60px to something like 10px:
#container {
    position: relative;
    padding: 10px 10%;
}
code snippet /lith/app/webroot/css/lithium.css
And change some colors of your headers; for example, make <h3> red:
h3, h6 { font-size: 1.7em; color: #ff0000; }
code snippet /lith/app/webroot/css/lithium.css
Time to see the result. The header should change to Self-powered, your news titles should be blood-red, and vertical distances greatly decreased, just as shown in Figure B-5.
As you have seen, Lithium allows very rapid development indeed, and this little application is just the tip of the iceberg. Now it seems a little bit overloaded with conventions and authors' personal attitude, but these should mitigate as it gains maturity. Also, the documentation is missing now, as there are only two tutorials on the Web, so it is more a curious experiment than a maintainable solution. However, the hype is high and it seems that the authors will stand up to the task, so soon you will have a rapid, powerful, extensible, and strictly PHP 5.3 framework to use.
The creators of Agavi want you to think about it as a "serious framework for serious development" and not a "website building kit." This basically means two things: first, it could be viewed as an excuse for quite scarce documentation, compared with Symfony or CodeIgniter. The authors admit that and suggest that many developers feel comfortable just reading Agavi source code. By the way, it is very well commented; that's a plus. On the other hand, without a big base of working examples and friendly tutorials, this framework will not reach as many developers as it might have. And that's the second thing: the authors explicitly address this framework to advanced programmers who will be able to use and appreciate its unique traits.
So what is so unique about Agavi? Well, most frameworks strive for completeness — they provide as many features as they can, and there's no way to avoid coupling of these components. This means they enable really rapid development, but at the cost of flexibility. Agavi's uniqueness lies in the extendibility and quality of its code. This allows using it for applications that will evolve for a long time and are meant to be completely scalable from the very beginning. Agavi prides itself on not restricting developers' freedom to achieve any goal without hacking the framework itself. So if you are a gifted mastermind who wants to dominate the world, that's the tool for you!
Agavi provides a PHP Extension and Application Repository (PEAR) channel that is the recommended way of installing it. (PEAR is discussed in Chapter 2.) First, find this channel:
# pear channel-discover pear.agavi.org
And then install Agavi using this command:
# pear install -a agavi/agavi
There is a prerequirement: the Phing. What is Phing, then? PHing Is Not Gnu make, yet it shares some similarities with GNU make because it is a tool for PHP project building. You can install it with PEAR as well:
# pear channel-discover pear.phing.info
# pear install phing/phing
Retry installing Agavi if it didn't succeed before installing Phing.
You will need the following PHP modules, too (they are enabled by default, so if you don't have them, you'll probably know why):
libxml
dom
SPL
Reflection
pcre
xsl
tokenizer
session
xmlrpc
soap
iconv
gettext
If you can't (or don't want to) use PEAR, you can use direct download from the Agavi website:
http://www.agavi.org/download
When PEAR is done with installing Agavi, you should check if the installation is successful. Type the following in your console:
$ agavi
You will see output similar to this:
Buildfile: /usr/share/php/agavi/build/build.xml

Agavi > status:

    [echo] PHP:
    [echo] Version: 5.3.2-1ubuntu4.5
    [echo] Include path: .:/usr/share/php:/usr/share/pear
    [echo]
    [echo] Phing:
    [echo] Version: Phing 2.4.2.1
    [echo]
    [echo] Agavi:
    [echo] Installation directory: /usr/share/php/agavi
    [echo] Version: 1.0.3
    [echo] URL: http://www.agavi.org
    [echo]
    [echo] Project:
    [echo] (not found)
    [echo]
    [echo] For a list of possible build targets, call this script with the -l
           argument.

BUILD FINISHED

Total time: 0.0032 seconds
The buildfile on Windows is located at C:\xampp\php\PEAR\agavi\build\build.xml by default. This file is responsible for the project build process described in the next steps.
You can get the list of all available targets with this command:
$ agavi -l
To build a project, you need to create an /agavi folder in your web root directory, or somewhere else, and make an Apache alias as shown in the "Configuration" section of the "CodeIgniter" section earlier in this chapter. Go to this folder with your command line and execute this:
$ agavi project-wizard
Then you will be asked for the project base directory, as shown in the following code snippet. Here the directory is the default web root directory for Windows with XAMPP, so we leave it this way. Then provide the project name and project prefix. In this example, both will be News. All other options can be left at the defaults.
Agavi > project-wizard: Agavi > project-create: Project base directory [C:\xampp\htdocs\agavi]: [property] Loading C:\xampp\htdocs\agavi\build.properties [property] Unable to find property file: C:\xampp\htdocs\agavi\build.properties... skipped Project name [New Agavi Project]:NewsProject prefix (used, for example, in the project base action) [News]: Default template extension [php]: [property] Loading C:\xampp\htdocs\agavi\build.properties [copy] Copying 1 file to C:\xampp\htdocs\agavi ...
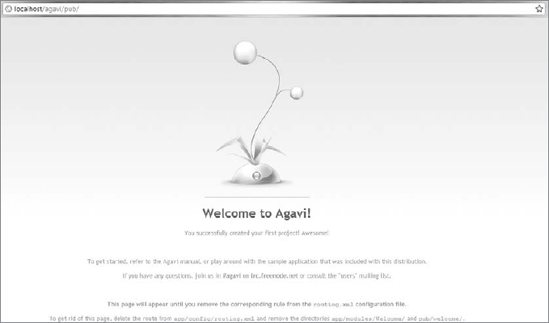
The amount of configurable options is simply tremendous! Go through all messages of the project wizard; when it's done, you may skip to your browser and type http://localhost/agavi/pub. If everything went well, you will see a welcome page like the one shown in Figure B-6.
The first thing you need to set is the routing scheme. Agavi provides a sophisticated routing mechanism that even includes regular expression matching. You will not need that here, so your pattern will be terminated by ^ at the left side and $ at the right side, meaning that an exact match is needed. Go to routing.xml, remove the default routing, and write these two lines instead:
<!-- default action for "/" -->
<route name="index" pattern="^/$" module="News" action="Index" />
<route name="add" pattern="^/add$" module="News" action="Add" />
code snippet /agavi/app/config/routing.xml
This includes setting the root directory for the index action of the News module and the /add directory for the add action of the same module.
Next you need to enable the database support. Find settings.xml in application's configuration directory and set use_database to true:
<settings> <setting name="app_name">News</setting> <setting name="available">true</setting> <setting name="debug">false</setting><setting name="use_database">true</setting><setting name="use_logging">false</setting> <setting name="use_security">true</setting> <setting name="use_translation">false</setting> </settings>code snippet /agavi/app/config/settings.xml
Now configure the database. The file is databases.xml in the same directory. Have you noticed that all Agavi configuration files are elegant XML files? You need to specify the details needed to connect to the database server as well as the database name:
<ae:configuration>
  <databases default="pdo_mysql_main">
    <database name="pdo_mysql_main" class="AgaviPdoDatabase">
        <ae:parameter name="dsn">mysql:host=localhost;dbname=news</ae:parameter>
        <ae:parameter name="username">root</ae:parameter>
        <ae:parameter name="password"></ae:parameter>
    </database>
  </databases>
</ae:configuration>
code snippet /agavi/app/config/databases.xml
In this example, we'll use the same news database that was used in previous examples and the entries table created for CodeIgniter. If you have not created that application, go to the "Setting Up the Database" section of the "CodeIgniter" section and run the SQL queries listed there.
There was a problem with the Propel database configured by default in this file. We assumed in the previous listing that this part is deleted. The exact lines are as follows (don't hesitate to delete them if they cause errors):
<database name="propelom" class="AgaviPropelDatabase">
     <ae:parameter name="config">%core.app_dir%/config/project-conf.php</ae:parameter>
</database>The following code snippets provide complete listings of all files needed to get the sample app running. It is much easier to comprehend Agavi's principles this way, without wandering off into its intricacies. If you want a complete step-by-step tutorial, please refer to the official Agavi documentation. It is extremely detailed and will keep you amused for many hours.
Start by creating a module for your application and the two basic actions with the command-line tool. Run the following command in your console:
$ agavi module-wizard
When the command-line wizard asks for the module name, type News. In the next step, type Index Add (separated only by a space) to create these two actions. Then the wizard will ask you to provide names of views for the Index action. The default Success view is all you need, so agree by pressing Enter. Then do the same for the Add action.
The first file discussed is IndexAction.class.php. It holds the Index action of the News module. Why does News appear twice in the name of the NewsNewsBaseAction class? The first News comes from the project name, and the second comes from the module's name. The executeRead() method is invoked when this action is called by the routing system. It first calls the data model and then sets the data to be used by the view. When the method returns a 'Success' string, it means that the IndexSuccessView is called.
Now fill this file with the following code:
<?php
class News_IndexAction extends NewsNewsBaseAction {
    public function getDefaultViewName() {
        return 'Success';
    }
public function executeRead(AgaviRequestDataHolder $rd) {
        $model = $this->getContext()->getModel('Entries', 'News');
        $this->setAttribute('posts', $model->load());
        return 'Success';
    }
}
?>
code snippet /agavi/app/modules/News/actions/IndexAction.class.php
The view, presented here, doesn't do anything important. It sets up the HTML document, sets the title (visible as <h1> header), and calls the template file:
<?php
class News_IndexSuccessView extends NewsNewsBaseView {
public function executeHtml(AgaviRequestDataHolder $rd) {
$this->setupHtml($rd);
$this->setAttribute('_title', 'Latest News!');
}
}
?>
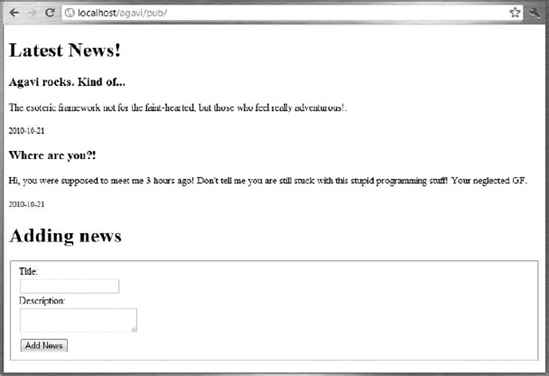
code snippet /agavi/app/modules/News/views/IndexSuccessView.class.phpIn Agavi, each view must have its template file. The IndexSuccess.php template consists of two parts. The first part uses the $posts data set to display the table contents. Note the htmlspecialchars() function that escapes the output in a smart way. The second part is a standard form for user input. See that the form action is set as "index.php/add". When you press the Add News button, two values are sent: title and description.
<?php foreach ($t['posts'] as $post): ?>
    <h3><?php echo htmlspecialchars($post['title']); ?></h3>
    <p> <?php echo htmlspecialchars($post['description']); ?> </p>
    <small><p> <?php echo htmlspecialchars($post['date']); ?> </small></p>
<?php endforeach; ?>
<h1>Adding news</h1>
<form action="index.php/add" method="post">
  <fieldset>
    <div class="form_row">
      <label for="title">Title:</label>
</div>
<div class="form_row">
      <input type="text" name="title" id="title" />
    </div>
    <div class="form_row">
      <label for="description">Description:</label>
</div>
<div class="form_row">
      <textarea name="description" id="description"></textarea>
    </div>
    <div class="form_row form_row_submit">
      <button type="submit" class="submit">Add News</button>
    </div>
  </fieldset>
</form>
code snippet /agavi/app/modules/News/templates/IndexSuccess.phpCreating a form is obviously not enough; you need to have the Add action and data model as well. The source code for the Add action is presented as follows. The executeRead() method is used when somebody calls the Add action through routing. He is then directed to the Success view of the Add action immediately. The executeWrite() method is much more important here. It first calls for the data model, sets the model object's fields to corresponding form values, and finally calls the save() method of the model. It also invokes the AddSuccessView then.
<?php
class News_AddAction extends NewsNewsBaseAction {
    public function getDefaultViewName() {
        return 'Success';
    }
    public function executeRead(AgaviRequestDataHolder $rd) {
        return 'Success';
    }
    public function executeWrite(AgaviRequestDataHolder $rd) {
$model = $this->getContext()->getModel('Entries', 'News');
$model->title = $rd->getParameter('title');
$model->description = $rd->getParameter('description');
$model->save();
return 'Success';
}
}
?>
code snippet /agavi/app/modules/News/actions/AddAction.class.phpThe Success view of the Add method differs little from the Success view of the Index method. The only difference is redirection to the root of the application. The redirection uses a direct URL here. Agavi offers methods for redirecting to specific actions as well.
<?php
class News_AddSuccessView extends NewsNewsBaseView {
    public function executeHtml(AgaviRequestDataHolder $rd) {
        $this->setupHtml($rd);
        $this->setAttribute('_title', 'Add');
        $this->getContainer()->getResponse()->setRedirect('/agavi/pub');
        return;
    }
}
?>
code snippet /agavi/app/modules/News/views/AddSuccessView.class.php
There are two very important things to say here:
The only places where redirections work are views. You cannot just redirect from one action to another.
Each view needs its own template. Go to
/agavi/app/modules/News/templatesand create an empty file calledAddSuccess.php.
After all actions and views are done, you can build the model. You will probably be surprised that Agavi provides no object-relational mapping (ORM) tool. Of course, you can quite easily integrate Doctrine with it, but we want to make this example as simple as possible, so SQL statements will be used here.
The full News_EntriesModel class is presented in the following listing. The load() method executes a pretty simple SQL query and returns all contents of the Entries table as the result. This method is invoked by the Index action to list all the news. The save() method inserts the form input into the table. Unlike the previous frameworks' examples, here the MySQL's NOW() function is used to determine the current time instead of the PHP equivalent. The SQL query has two question marks instead of values. They are placeholders for values and they are filled by the bindValue() method. After the statement has been prepared, it is executed to store the values into the database.
Copy the contents of the following listing into EntriesModel.class.php file in the /agavi/app/modules/News/models directory:
<?php
class News_EntriesModel extends NewsNewsBaseModel {
    var $title;
    var $description;
    function load() {
        $sql = 'SELECT * FROM entries ORDER BY date';
        $stmt = $this->getContext()->getDatabaseManager()->getDatabase()->
          getConnection()->prepare($sql);
        $stmt->execute();
        return $result = $stmt->fetchAll();
    }
    function save() {
        $sql = 'INSERT INTO entries (title, description, date) VALUES(?, ?, NOW())';
        $stmt = $this->getContext()->getDatabaseManager()->getDatabase()->
          getConnection()->prepare($sql);
        $stmt->bindValue(1, $this->title, PDO::PARAM_STR);
        $stmt->bindValue(2, $this->description, PDO::PARAM_STR);
        $stmt->execute();
    }
}
?>
code snippet /agavi/app/modules/News/models/EntriesModel.class.phpBut instead, you have to stay here and finish this sample app. Guess what? Agavi discards all input that is not validated. It doesn't matter that you made a nice form and politely wanted to use the values sent by POST. Agavi drops them without warning. Disgusting, isn't it?
When the CLI tool created the actions for you, it also created validation files. That's where you need to validate the two form input fields. Go to /agavi/app/modules/News/validate and edit the Add.xml file to make it look like this:
<?xml version="1.0" encoding="UTF-8"?>
<ae:configurations
xmlns="http://agavi.org/agavi/config/parts/validators/1.0"
xmlns:ae="http://agavi.org/agavi/config/global/envelope/1.0"
parent="%core.module_dir%/News/config/validators.xml">
  <ae:configuration>
    <validators method="write">
       <validator class="string">
          <arguments>
               <argument>title</argument>
               <argument>description</argument>
          </arguments>
          <errors>
<error for="required">ERROR: Name is missing</error>
</errors>
<ae:parameters>
<ae:parameter name="required">true</ae:parameter>
</ae:parameters>
</validator>
</validators>
</ae:configuration>
</ae:configurations>
code snippet /agavi/app/modules/News/validate/Add.xmlThe good thing is that you don't need to manually check whether the values are not null, as you did in previous examples.
You think that's all? No. You must have a special view for error handling. Open up your command line and execute the following command in the project root:
$ agavi view-create
When you are asked for the module, answer News; for action, answer Add; and call the new view Error. Go to this new file and add redirection to the main page as shown here:
<?php
class News_AddErrorView extends NewsNewsBaseView {
    public function executeHtml(AgaviRequestDataHolder $rd) {
        $this->setupHtml($rd);
        $this->setAttribute('_title', 'Add');
        $this->getContainer()->getResponse()->setRedirect('/agavi/pub');
    }
}
?>
code snippet /agavi/app/modules/News/views/AddErrorView.class.php
No, you are not finished yet because every view needs its template. It doesn't matter that this template will be an empty 0-kB file; it must be created anyway. Go to /agavi/app/modules/News/templates and create an empty file called AddError.php. The sample app should work now, finally. The output is shown in Figure B-7.
Agavi is certainly not a framework for everyone. The development pace is sluggish, and the learning curve is incredibly steep. The sample application at the Agavi website, the only official guide to this framework, takes a few hours to follow and a few days to understand (and only slightly at best). If you do not really know exactly how you will benefit from using Agavi, we recommend trying CodeIgniter or Lithium instead.
On the other hand, if you are able to harness Agavi's strength, you will get a strictly elegant, inherently extensible, and architecturally powerful application. The routing system is the best one among all major frameworks and the filter chain mechanism can do wonders as well. The news application presented here doesn't even come close to showing the full capabilities of this product. A dish for connoisseurs, indeed.