Table of Contents for
Building PHP Applications with Symfony™, CakePHP, and Zend® Framework
 Building PHP Applications with Symfony™, CakePHP, and Zend® Framework
Published by
Wrox, 2011
Building PHP Applications with Symfony™, CakePHP, and Zend® Framework
Published by
Wrox, 2011
- Copyright
- Credits
- ABOUT THE AUTHORS
- ACKNOWLEDGMENTS
- Introduction
- 1. Introducing Symfony, CakePHP, and Zend Framework
- 2. Getting Started
- 3. Working with Databases
- 4. Your First Application in the Three Frameworks
- 5. Forms
- 6. Mailing
- 7. Searching
- 8. Security
- 9. Templates
- 10. AJAX
- 11. Making Plug-ins
- 12. Web Services
- 13. Back End
- 14. Internationalization
- 15. Testing
- 16. User Management
- 17. Performance
- 18. Summary
- A. Web Resources
- B. CodeIgniter, Lithium, and Agavi with Code Examples
- GLOSSARY OF ACRONYMS AND TECHNICAL TERMS
Beware the Jabberwock, my son!
The jaws that bite, the claws that catch!
Beware the Jubjub bird, and shun
The frumious Bandersnatch!
WHAT'S IN THIS CHAPTER?
Creating an image gallery using Lightbox
Integrating chosen template engines with frameworks
Pros and cons of using template engines
Overview of popular template engines
Previous chapters discussed frameworks' innards; this chapter focuses on the presentation layer instead. So what are these template engines, and why are they so important? In web development, PHP code processes all data, so it's responsible for the business logic. The view layer represented by template engines is the presentation part of your site. A template engine allows you to develop websites with various different layouts or themes for the same core functionality.
Template engines are very popular tools among PHP projects that do not use any frameworks. Despite their popularity however, they are not often used along with web frameworks. In this chapter, we will explain why it is so and show a few tricks to make them get along with each other.
The following script renders an index page. It uses some PHP functions to generate the page content intertwined with HTML blocks. (This is a programming style from the year 2000, when PHP was a new thing altogether.)
<?php
$head_title = 'Title';
$block_name ='News block';
display_content();
function_1();
function_2();
?>

<html>
   <head>
      <title>
         <?php echo $head_title; ?>
      </title>
</head>
<body>
   <tag>
      <tag>
         <?php echo $block_name; ?>
      </tag>
   </tag>
   <tag>
      <?php echo display_content(); ?>
   </tag>
</body>
</html>
Today, more advanced template engines are used to separate the view layer from PHP code, which is used for the business logic. This allows developers to work on the code of the system without interfering with the designers who create different layouts for it. This is a good programming practice just like the Model-View-Controller (MVC) architecture offered by the frameworks.
A second commonly known good practice that can be used here is Don't Repeat Yourself (DRY). You can use just one template file for a few functionalities if the template code is the same in all of them. This is possible because of separating business logic from the view. The following pseudo-code example demonstrates how PHP scripts should be separated from an HTML template:
<?php
$variable1;
$variable2;
$variable3;

function_1();
function_2();
function_3();
function_4();
render_template (template.tpl);
?>
This code presents a quasi-controller that renders the following template file:
<html>
<head>
    <title></title>
</head>
<body>
    <tag>
        <tag></tag>
    </tag>
    <tag></tag>
    <tag></tag>
</body>
</html>
The template fragment can still contain PHP scripts, but usually it requires a template language to indicate segments that are to be filled with content by a script. These languages vary from one template engine to another, but usually cover the same functions.
Before you move to the template engines, we will discuss a nice and easy topic concerning the presentation layer as well. We'll show you how to create an image gallery in your frameworks by using the frameworks' helper classes and the Lightbox JavaScript application.
Helpers are classes that encapsulate certain frequently used functionalities and allow developers to use these complex functions easily without the need for much coding. Usually helpers are designed for the view part of the MVC pattern because most repeated code lines are located in the view files. You can use helpers to format and prepare output data easily using a single function/method.
The three frameworks that you work with in this book have a number of useful helpers. In previous chapters, helpers were used many times in a very natural manner, without the necessity to learn their usage or even to explain it too much. Well, look at the following example:
<?php echo $html->text('UserName') ?>This line from a view file can create the standard HTML text input tag with the name attribute set to UserName, but it also may encapsulate this input field in <p></p> tags or <div></div> tags just like this:
<div class="form-Input">
    <input type="text" name="UserName" />
</div>
It all depends on how this HTML helper is designed. Now, knowing only this example and the common HTML form tags, you can assume that when you write the following line:
<?php echo $html->password('UserPass') ?>it should render a password input field with name attribute set to UserPass, just like this:
<div class="form-Input">
    <input type="password" name="UserPass" />
</div>
The preceding code snippets illustrate how intuitive helpers can be. Similar helpers are available for formatting data, field validation, time-date operations, and so on. Custom helpers can also be added to facilitate other aspects of web development.
Now we will focus on the main topic of this section: for every web developer there comes a time when he needs to have an image gallery in the project that he is working on, be it his own portfolio or a different random project. The most basic image gallery can be created using only an HTML page with multiple thumbnails or plain links connected to large images that can be opened in a new page or different frame. This solution is rather outdated because the user can spend more time navigating the gallery than viewing it.
Today, in most cases, image galleries are built using JavaScript. JavaScript requires more work for the developer and makes it more difficult to modify an existing gallery, but most JavaScript libraries provide a few additional features — for example, opening images with some basic navigation, such as next and previous buttons.
Now if you wonder whether you can learn how to create your own image gallery from this book, the answer is no. We would love to show it, but the book would grow another 50 pages or so and it would not really be framework-related code. Instead you will learn how to implement one of the most common, lightweight, and dynamic ready-to-use image galleries: the Lightbox.
Lightbox is a JavaScript application, written by Lokesh Dhakar, used to display image galleries utilizing a popup window. This script has gained wide popularity, mostly due to easy implementation and great presentation style that fits any website. You can read more about Lightbox at its author's website: www.huddletogether.com/projects/lightbox2. Now you will learn how to include Lightbox 2 in your application, developed for all three frameworks.
There are several solutions that allow you to create web image galleries simply by adding one of the available Symfony plug-ins. First you will learn how to implement one of these solutions that enables you to display image galleries in your application using the popular Lightbox script. Later you will find a short description of two selected alternative solutions.
If you've read this book chapter by chapter, you probably already know the routine and will not be surprised by anything written in this section. sfJQueryLightBoxPlugin allows you to use the sfJQueryLightbox helper that transforms image links into a Lightbox image gallery. You can find details about this plug-in at www.symfony-project.org/plugins/sfJQueryLightboxPlugin. First of all, the sfJQueryLightBoxPlugin requires you to have sfJqueryReloadedPlugin already installed. To install it, simply execute the following command in your project command line:
$ symfony plugin:install sfJqueryReloadedPlugin
For details on this plug-in, please refer to its website: www.symfony-project.org/plugins/sfJqueryReloadedPlugin. If you already have sfJqueryReloadedPlugin, you can proceed to sfJQueryLightboxPlugin installation.
To install sfJQueryLightboxPlugin, you need to simply type the following command into the console at your project directory:
$ symfony plugin:install sfJQueryLightBoxPlugin
Next, you can clear the cache data by typing the following command into your console:
$ symfony cache:clear
Assuming that you created a project and a sample frontend application, at this point you should be ready to start editing the files of your project. Let's create a sample module:
$ symfony generate:module frontend lightexample
You need only one method for this example. What is more, this method should be empty because all the gallery presentation is done in the view layer:
public function executeIndex() {
}code snippet
In order to use features that were installed by sfJQueryLightBoxPlugin, you need to modify the module's view file located in /apps/frontend/modules/lightexample/templates. It is necessary to indicate there that you want to use the jQuery helper required by the sfJQueryLightbox helper to make it work. To do so, just add the following line in your indexSuccess.php file:
<?php use_helper("jQuery") ?>
code snippet /gallery/symfony/apps/frontend/modules/lightexample/templates/indexSuccess.php
Once it is done, you can now do the same for the JQueryLightbox helper. Just add another line:
<?php use_helper("sfJQueryLightbox") ?>
code snippet /gallery/symfony/apps/frontend/modules/lightexample/templates/indexSuccess.php
Now in the same template file, you can use the light_image() function for the image that you want to have the Lightbox effect. It is done like this:
<?php echo light_image(
          $thumbnail_url,
          $full_image_url,
          array('title' => $image_title ),
          $thumb_options
          );
?>
code snippet /gallery/symfony/apps/frontend/modules/lightexample/templates/indexSuccess.php
The example of a simple gallery can look as follows:
<?php use_helper( 'jQuery', 'sfJQueryLightbox') ?>
<h1>Lightbox Logos Gallery</h1>
<?php echo light_image(
'http://www.symfony-project.org/images/symfony_logo.gif',
'http://www.symfony-project.org/images/symfony_logo.gif',
array('title' => 'Symfony Logo'),
array('border' => 0)); ?>
<br />
<?php echo light_image(
'http://cakephp.org/img/cake-logo.png',
'http://cakephp.org/img/cake-logo.png',
array('title' => 'CakePHP Logo' ),
array('border' => 0)); ?>
<br />
<?php echo light_image(
'http://framework.zend.com/images/logo.gif',
'http://framework.zend.com/images/logo.gif',
array('title' => 'Zend Framework Logo' ),
array('border' => 0)); ?>
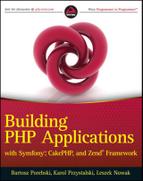
code snippet /gallery/symfony/apps/frontend/modules/lightexample/templates/indexSuccess.phpNote that in this example, the same image is used for the thumbnail as well as for the normal-size image. The preceding example should be rendered by the browser the same way as it is illustrated by Figure 9-1.
If your image gallery misses some graphics, such as the next or close buttons, it may be due to having a different web root than the one assumed by the plug-in. The default directory for Lightbox graphics is /sfJQueryLightboxPlugin/images/.
It is possible to change paths for every image used by Lightbox. To do this, you need to add a few code lines into the app.yml file. For this example, the first slash character had to be removed from the image paths, in order to make Lightbox display all elements correctly. This is shown in the following code:
all:
  sf_jquery_lightbox:
    css_dir: '/sfJQueryLightboxPlugin/css/'
    js_dir: '/sfJQueryLightboxPlugin/js/'
    imageLoading: 'sfJQueryLightboxPlugin/images/lightbox-ico-loading.gif'
    imageBtnClose: 'sfJQueryLightboxPlugin/images/lightbox-btn-close.gif'
    imageBtnPrev: 'sfJQueryLightboxPlugin/images/lightbox-btn-prev.gif'
    imageBtnNext: 'sfJQueryLightboxPlugin/images/lightbox-btn-next.gif'
    imageBlank: 'sfJQueryLightboxPlugin/images/lightbox-blank.gif'
    txtImage: 'Image'
    txtOf: 'of'
code snippet /gallery/symfony/apps/frontend/config/app.yml
sfLightboxPlugin is an alternative to sfJQueryLightBoxPlugin introduced earlier. After installation, sfLightboxPlugin provides you with LightboxHelper that allows you to create image galleries and slideshows very easily.
It may be a little less popular among users of the Symfony framework, but on the other hand it is compatible with older versions of Symfony. Installation files and examples for this plug-in can be found at www.symfony-project.org/plugins/sfLightboxPlugin.
sfMediaBrowser is a plug-in that works directly on the file structure to allow users to manage file uploads. It comes with a complete user interface for managing files as well as folders that are contained in a specific directory. What is unusual about sfMediaBrowser is that it does not use any database.
This plug-in comes with a widget and a validator that can be used in any form to replace the standard HTML file upload input field. You can get installation files from the following website: www.symfony-project.org/plugins/sfMediaBrowserPlugin.
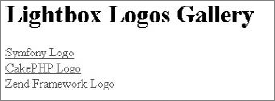
Using Lightbox in Cake is nearly as straightforward as in any static website. To demonstrate this example of Lightbox 2, you need to download the package from the author's website: www.huddletogether.com/projects/lightbox2. The example gallery will consist of three links to framework logos, as illustrated in Figure 9-2.
When you have the Lightbox2 package, it is time to put all the files into your CakePHP application directory. Lightbox uses the Prototype and Scriptaculous libraries to render some effects while displaying images. Assuming that you follow the standard CakePHP installation, you need to put the following JavaScript libraries inside the CakePHP /app/webroot/js/ directory:
builder.js
effects.js
lightbox.js
prototype.js
scriptaculous.js
The same thing goes for the Lightbox CSS file (lightbox.css) that you need to place into the /app/webroot/css/ directory.
The Lightbox styles use the ../images/ path to display images, so you also need to make sure that any paths to images in the CSS are correct. If you placed the lightbox.css file as instructed, all images used by Lightbox should be located in the /app/webroot/images/ directory. That is all you need to do in terms of Lightbox installation.
Next there are a few things that need to be done to use the installed Lightbox in your application. Add the following lines of code to your site's layout that is located in the /app/views/layouts/ directory and you're good to go. In this example, the default.ctp layout file is used. CakePHP allows you to easily link CSS and JavaScript files into your site's head section of layout. The layout used for this example looks as follows:
<html>
  <head>
    <?php
       echo $html->css ( "lightbox", "stylesheet");
         if ( isset ( $javascript ) ):
            echo $javascript->link ("/app/webroot/js/prototype.js" );
            echo $javascript->link(
                         "/app/webroot/js/scriptaculous.js?load=effects,builder");
            echo $javascript->link ("/app/webroot/js/lightbox.js" );
         endif;
      ?>
    </head>
    <body>
      <?php echo $content_for_layout ?>
    </body>
</html>
code snippet /gallery/cakephp/app/views/layouts/default.ctp
The routing file should contain the following line:
Router::connect('/lightbox', array(
    'controller' => 'lightbox','action' => 'index'));
code snippet /gallery/cakephp/app/config/routes.php
Now you can use the http://localhost/lightbox URL to test your project.
You need to prepare the controller for this example. To use Lightbox in your view files, the controller needs to have the $helpers value specified and set to use Javascript. This will define which helper is used in this example. If you have already specified $helpers within your controller, you can just append another value at the end of your helper array, and set it to "Javascript". The controller file used in this example looks like this:
<?php
  class LightboxController extends AppController {
    var $name = 'lightbox';
    var $helpers = array ( "Javascript" );
    function index() {
    }
  }
?>
code snippet /gallery/cakephp/app/controllers/lightbox_controller.php
In the model file, you need to indicate that this small project does not use any database table by setting the $useTable variable to false. If you don't, a missing table error message will be displayed.
<?php
class Lightbox extends AppModel {
    var $useTable = false;
}
code snippet /gallery/cakephp/app/models/lightbox.php
The last thing to do is to create your view file that will contain the image gallery and will use Lightbox to display images. At this point, you only need to add the rel="lightbox" parameter to a link in order to use Lightbox. The rel parameter used for this example looks different because it is possible to group image sets using brackets, just like in the following view file:
<h1>Lightbox Logos Gallery</h1>
<a href="http://www.symfony-project.org/images/symfony_logo.gif"
rel="lightbox[logos]"
title="Symfony Logo">Symfony Logo</a>
<br />
<a href="http://cakephp.org/img/cake-logo.png"
rel="lightbox[logos]"
title="CakePHP Logo">CakePHP Logo</a>
<br />
<a href="http://framework.zend.com/images/logo.gif"
rel="lightbox[logos]"
title="Zend Framework Logo">Zend Framework Logo</a>
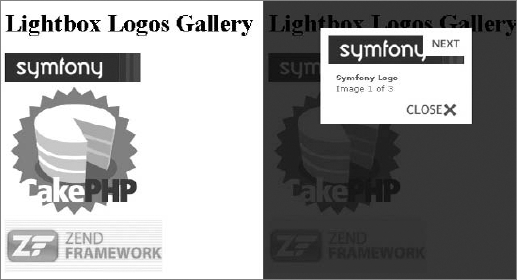
code snippet /gallery/cakephp/app/views/lightbox/index.ctpFinally, you should be able to run Lightbox through the http://localhost/lightbox page, and by clicking any of the image links, an image like the one illustrated in Figure 9-3 will be displayed as the result. Note that text links can be replaced with image thumbnails simply by adding an <img> tag between the <a> and </a> tags.
Now you have Lightbox up and running, and if you wish to use any other external JavaScript file, this example should give you a general idea how to do it.
Using Lightbox2 in Zend Framework is not a complicated task; the installation is very similar to the one done in CakePHP. To begin, you need to download the Lightbox2 package from www.huddletogether.com/projects/lightbox2. After downloading and unpacking the libraries, you need to copy the JavaScript files into your application's /public/lightbox/js/ directory. Then the stylesheet lightbox.css goes to: /public/css/, and finally images used by Lightbox go to: /public/images/. If any of these directories does not exist, create it.
At this point, the /appDirectory/public/ directory should contain the following:
js/
  lightbox/
    builder.js
    effects.js
    lightbox.js
    prototype.js
    scriptaculous.js
css/
  lightbox.css
images/
    closelabel.gif
    ...
If you have this directory structure, you can create the controller file. To use Lightbox inside an existing project, you probably need to add another action to your controller, as in the following code:
<?php
class IndexController extends Zend_Controller_Action {
    public function init() {
    }
    public function lightboxAction() {
    }
}
code snippet /gallery/zf/application/controllers/IndexController.php
The controller file does not require any additional code lines added in order to use Lightbox because it is all done in the layout file.
The following is the listing of the layout.phtml file that uses helpers to append Lightbox libraries into the application:
<html>
  <head>
    <title>Lightbox Logos Gallery</title>
    <?php
       echo $this->headLink()->appendStylesheet(
         $this->baseUrl('/css/lightbox.css') );
       echo $this->headScript()->appendFile(
         $this->baseUrl('/js/lightbox/prototype.js') );
       echo $this->headScript()->appendFile(
         $this->baseUrl('/js/lightbox/scriptaculous.js?load=effects,builder'));
       echo $this->headScript()->appendFile(
         $this->baseUrl('/js/lightbox/lightbox.js') );
     ?>
    </head>
    <body>
      <?php echo $this->layout()->content; ?>
    </body>
</html>
code snippet /gallery/zf/application/layouts/layout.phtml
As you can see, $this->headLink()->appendStylesheet() is used to append the CSS file, and the $this->headScript()->appendFile() lines append the JavaScript files.
Now you have all files in their places and you can use the standard HTML syntax to turn any image link into a Lightbox effect gallery using rel="lightbox". You can also group a number of images using the rel="lightbox[groupname]" syntax.
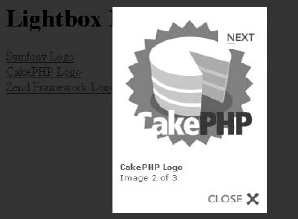
The following code is an example view file that renders an image like the one shown in Figure 9-4 when you type http://localhost/appName/public/index/lightbox into your browser:
<h1>Lightbox Logos Gallery</h1>
<a href="http://www.symfony-project.org/images/symfony_logo.gif"
    rel="lightbox[logos]"
    title="Symfony Logo">Symfony Logo</a>
<br />
<a href="http://cakephp.org/img/cake-logo.png"
    rel="lightbox[logos]"
    title="CakePHP Logo">CakePHP Logo</a>
<br />
<a href="http://framework.zend.com/images/logo.gif"
    rel="lightbox[logos]"
    title="Zend Framework Logo">Zend Framework Logo</a>
code snippet /gallery/zf/application/views/scripts/index/index.phtml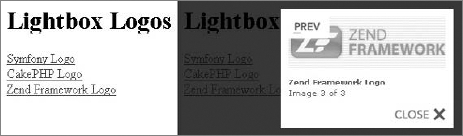
If your Lightbox window happens to be missing the loading image or close button image, you can fix it by modifying the corresponding paths in the lightbox.js file at lines 49 and 50. In this example, the paths look as follows:
LightboxOptions = Object.extend({
    fileLoadingImage: '../images/loading.gif',
    fileBottomNavCloseImage: '../images/closelabel.gif',
code snippet /gallery/zf/public/js/lightbox/lightbox.jsSo far we have described only the advantages of the framework template engines. However, to be honest with you, opinions on their usefulness are varied. They are often praised by teams where PHP programmers deal with business logic only and leave the presentation layer for the designers. However, individual developers tend to judge template engines as nearly useless.
PHP is an interpreted programming language that can act as a template engine. This means that the template engines are not necessary, and when you use them, they must be interpreted separately by PHP. Template engines provide an interpreted language inside the PHP-interpreted language, and that requires the templates to be parsed two times. This looks like an additional overhead that degrades performance of web apps, but in fact most of today's templating engines have caching features that make parsing necessary only once per template. The performance is no longer a big issue while using templates.
The following code illustrates how plain PHP can be a natural substitute for the Smarty template engine, which is described more fully in the following section. Smarty code first:
{if $user eq 'Martin'}
    Martin has logged in.
{elseif $ user eq 'Susie'}
    Susie has logged in.
{else}
    Anonymous has logged in.
{/if}
And the regular PHP equivalent:
<?php
if ($user == 'Martin'} {
echo ' Martin has logged in.';
} elseif ($user == 'Susie') {
echo 'Susie has logged in.';
} else {
echo 'Anonymous has logged in.';
}
?>Another reason for negative opinions about template engines is that there is a learning curve tied to any template system because most PHP templates have their own set of tags or even their own language. However, don't be prejudiced against template engines before you try them out. Many developers value them as an elegant way of view representation, and even if you won't like them, perhaps your fellow web designers will, so it's valuable to get to know this technology anyway.

Over the years, Smarty has gained lots of popularity and became probably the best known web template system written in PHP. Its logo is presented in Figure 9-5. Many newly created template engines were created based on Smarty because it has been for a long time a popular tool for separating system logic from HTML templates. Version 3 of Smarty is coming in big steps and will address shortcomings of its predecessor as well as add new features. This new version of Smarty is object-oriented, written from scratch, and written entirely in PHP 5.0. Moreover, tests indicate that it will offer much better performance than the current version.
You can install Smarty in various ways. The most basic is downloading the most recent release from the Smarty website: www.smarty.net. Then unpack it to your PHP library folder.
There is also a PEAR channel provided by a GoogleCode project. You can use it with the following console commands:
# pear channel-discover pear-smarty.googlecode.com/svn
# pear install smarty/smarty
UNIX/Linux has packages for various package managers, so you can install Smarty with the following command:
# apt-get install smarty3
Web content generated by Smarty relies on Smarty tags placed within documents (templates), later to be processed and substituted with PHP code. This is done by the template engine, allowing people working on application development to keep their work more organized and less reliant on the progress of others.
Smarty tags can be functions, loops, variables, or logical statements. These directives are enclosed in template delimiters and are used by Smarty's parser while the template is processed later. It is possible for PHP programmers to define custom functions that can be invoked using Smarty tags. The following code is an example implementation of Smarty. First is the PHP file that acts as the controller:
<?php
require 'libs/Smarty.class.php';
$smarty = new Smarty;
$smarty->template_dir = 'templates/';
$smarty->compile_dir = 'templates/compile/';
$smarty->cache_dir = 'templates/cache/';
$smarty->assign('title', 'Smarty example');
$smarty->assign("frameworks", array( 'Symfony', 'CakePHP', 'Zend Framework'));
$smarty->display('index.tpl');
?>
code snippet /templates/smarty/index.php
On top of the standard inclusion of a template engine class and the creation of its object, you usually need to set three paths for Smarty. The template directory is where Smarty looks for template files. Next the compile and cache files, which need to be writable, are placed where the processed templates will be compiled and cached. The variable assignment is done through the $smarty->assign() function that takes two parameters. The first parameter is the name of the variable, through which it will be visible in the template file, and the second parameter is the value to be passed to the template.
The template file used by this PHP script may look like this:
<!DOCTYPE html PUBLIC "-//W3C//DTD XHTML 1.1//EN"
    "http://www.w3.org/TR/xhtml11/DTD/xhtml11.dtd">
<html>
  <head>
    <title> {$title} </title>
    <meta http-equiv="content-type" content="text/html; charset=utf-8" />
  </head>
  <body>
    <h1>List of covered frameworks</h1>
    {* Smarty comment *}
    <div>
      {section name=row loop=$frameworks}
        {strip}
          {$smarty.section.row.index}) {$frameworks[row]} <br />
        {/strip}
      {/section}
    </div>
  {include file="footer.tpl"}
  </body>
</html>
code snippet /templates/smarty/templates/index.tpl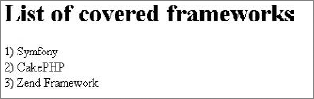
To print the passed variables into the template file the {$variable} syntax is used. The syntax for commenting looks like this: {* comment *}. {section}. It is used to encapsulate fragments of Smarty code; in this case, it is Smarty's equivalent of the foreach loop. And at the end, {include} is used to include other templates. In the preceding code, the template file is footer.tpl. It is not introduced here, so just create another empty template. The resulting image for this example is shown in Figure 9-6.
As you can see in the preceding example, the mechanics offered by Smarty allow web page functionality to be modified separately from the presentation part. This allows developers to simplify and enhance workflow as well as the software maintenance process.
You read at the beginning of this section that template engines receive some criticism. This is no different with Smarty because it replicates features offered natively by PHP, causing additional processing overhead. Actually, this general opinion could have originated from Smarty; at the early development stage of Smarty, server resources were not as cheap as they are today, to say the least. Today Smarty3 offers caching that greatly mitigates this problem; however, it was one of the first template engines and its early versions have influenced the general opinion. Additionally, any developers who wish to use Smarty need to learn the Smarty new pseudo-language.
PHP frameworks' view components usually provide most of the benefits offered by Smarty without sacrificing performance and adding the unnecessary complexity of learning a new language. This makes integration of such template engines with frameworks rather questionable. To make things worse, without well-maintained plug-ins or at least strong documentation, the template engines can be really hard to integrate with any framework.
The integration of Smarty with Zend Framework is a good example of how loosely coupled framework architecture results in its extensibility. Combined with good documentation on both sides, the process is fairly simple.
First you need to build a Smarty handling library. And of course, you must have Smarty installed prior to this. This library just replaces Zend View calls by Smarty methods. It extends the Zend_View class by an interface that has all the Zend_View methods; that's why this integration is so easy.
Create the SmartyView.class.php file in the /library folder of ZF. At the beginning of this file, import Smarty. (The path shown in the following code in bold is relevant for standard Linux installations; you need to provide the valid path for your environment.)
Create the constructor for your Zend_View_Smarty adapter class. It will take at least two arguments: the path to your template files folder, the path to the compilation results folder, and an optional array of extra parameters. Most of this class consists of getters and setters that translate Zend View arguments into Smarty fields. The last method passes a rendering of the view to the Smarty template. Now fill the SmartyView.class.php file with following code:
<?php
require_once("/usr/share/php/smarty/Smarty.class.php");
class Zend_View_Smarty implements Zend_View_Interface {
    public $_smarty;
    public function __construct($tmplPath = null, $cmplPath = null,
                      $extraParams = array()) {
        $this->_smarty = new Smarty;
        if (null !== $tmplPath) {
           $this->setScriptPath($tmplPath);
           $this->setCompilePath($cmplPath);
        }
        foreach ($extraParams as $key => $value) {
           $this->_smarty->$key = $value;
        }
    }
    public function getEngine() {
        return $this->_smarty;
    }
    public function setScriptPath($path) {
           if (is_readable($path)) {
               $this->_smarty->template_dir = $path;
               return;
           }
           throw new Exception('Invalid path provided');
    }
    public function getScriptPaths() {
           return array($this->_smarty->template_dir);
    }
    public function setCompilePath($path) {
           if (is_readable($path)) {
        $this->_smarty->compile_dir = $path;
               return;
           }
           throw new Exception('Invalid path provided');
    }
    public function getCompilePaths() {
           return array($this->_smarty->compile_dir);
    }
    public function setBasePath($path, $prefix = 'Zend_View') {
           return $this->setScriptPath($path);
    }
    public function addBasePath($path, $prefix = 'Zend_View') {
           return $this->setScriptPath($path);
    }
    public function __set($key, $val) {
           $this->_smarty->assign($key, $val);
    }
    public function __isset($key) {
           return (null !== $this->_smarty->get_template_vars($key));
    }
    public function __unset($key) {
$this->_smarty->clear_assign($key);
}
public function assign($spec, $value = null) {
if (is_array($spec)) {
$this->_smarty->assign($spec);
return;
}
$this->_smarty->assign($spec, $value);
}
public function clearVars() {
$this->_smarty->clear_all_assign();
}
public function render($name) {
return $this->_smarty->fetch($name);
}
}
code snippet /templates/zf/library/SmartyView.class.phpCreate the controller and load your adapter library, shown in bold in the next snippet. Now ZF's init() method comes in handy because you can easily replace the view of this controller before any other methods are called. This single line (segmented to fit the page) is shown in bold as well. Again you need to supply the proper paths for your environment.
The next few lines demonstrate the power of Zend Framework libraries. They allow you to get the ViewRenderer helper and then configure paths and the file suffix to work neatly with the adapter view. Create the IndexController.php file and fill it with following code:
<?phprequire_once("../library/SmartyView.class.php");class IndexController extends Zend_Controller_Action { public function init() {$this->view =new Zend_View_Smarty("/home/wrox/public_html/application/views/templates/","/home/wrox/public_html/application/views/compile/");$viewRenderer = Zend_Controller_Action_HelperBroker::getStaticHelper('ViewRenderer'); $viewRenderer->setView($this->view) ->setViewBasePathSpec($this->view->_smarty->template_dir) ->setViewScriptPathSpec(':controller/:action.:suffix') ->setViewScriptPathNoControllerSpec(':action.:suffix') ->setViewSuffix('tpl'); } public function indexAction() { $this->view->name = "Wrox"; } }code snippet /templates/zf/application/controller/IndexController.php
This controller handles all its methods, but you can go even further and include the init() part into the bootstrap. You will then have all the controllers use the adapter view by default.
Finally, create a simple index view file like the following:
Smarty works! {$name}
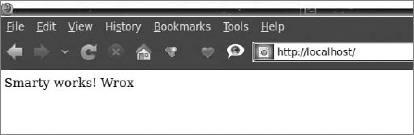
code snippet /templates/zf/application/views/templates/index/index.tplNote that the path of this view is created with a pattern very similar to the Zend View views: /templates/controller/action. The {$name} Smarty tag produces the $this->view->name variable set in the indexAction() method of the controller. The output is presented in Figure 9-7.
Integrating Smarty with Symfony and CakePHP, even when using ready-to-use plug-ins, can be a real pain in the neck and the profits still are marginal. The Symfony plug-in installation doesn't work. You can install Smarty manually instead, but you have to put in a lot of work to get this solution working with Symfony's command-line interface (CLI) code-generating tools.
Smarty can be integrated with CakePHP using SmartyView; it was recently updated to work with CakePHP 1.3 only, and it appears to have problems working without conflict with various versions of the Smarty engine. So you can waste a lot of time to figure out a working set among CakePHP, SmartyView, and Smarty. In the best-case scenario, you end up with a non-upgradable application using old versions of both the framework and the template engine.
You should not try these solutions unless you are a really experienced developer who has some spare time.

The Dwoo template engine (the logo is shown in Figure 9-8) is quite similar to Smarty, but is written entirely in PHP 5.0. In many aspects, Dwoo is compatible with Smarty's templates and plug-ins because Dwoo's authors based it on the general ideas that Smarty has introduced to the world of web development. Dwoo takes advantage of the new features offered by PHP 5.0, so it is a well-written, object-oriented template engine that allows easier and faster development compared with Smarty, and still it is compatible enough to allow developers using Smarty to make a smooth transition to Dwoo — and vice versa. What's more, Dwoo offers adapters that help developers integrate it into web frameworks such as CakePHP, Zend Framework, Code Igniter, Agavi, or Yii. Utilizing this feature, you will learn how to integrate Dwoo into CakePHP.
The Dwoo template engine is released under a modified BSD license. (The Dwoo website is http://dwoo.org/.)
To make your application use Dwoo, first you need to get the package from http://dwoo.org/ and extract the library to the /vendor directory of your application (for example, /app/vendors/dwoo). You can use a different directory if you wish, but it requires an additional adjustment of line 3 in the dwoo.php file. By default, it looks like this:
App::import('vendor', 'dwoo', array("file" => 'dwooAutoload.php'));The second step is to place the /Dwoo/Adapters/CakePHP/dwoo.php file from the package into the /app/views directory of your application. In the last step, you need to create the /app/tmp/dwoo/cache and the /app/tmp/dwoo/compile directories. Those directories should have write privileges.
It is possible to use a different template file extension than the default .tpl. To do so, you need to modify the dwoo.php file. Line 44 has the following line, which gives you the option to change the template file extension that Dwoo will use:
$this->ext = '.tpl';
code snippet /templates/cakephp/app/views/dwoo.php
Let's move on with the example. As usual, you must set the routing for this project by adding the following line in the routes.php file:
Router::connect('/dwoo', array('controller' => 'dwooexample', 'action' => 'index'));
code snippet /templates/cakephp/app/config/routes.php
Next you need to create a model file and configure it not to use the database:
<?php
class Dwooexample extends AppModel {
    var $useTable = false;
}
code snippet /templates/cakephp/app/models/dwooexample.php
Then there is the controller file, in which you need to import dwooAutoload.php and set the beforeFilter() function with autoRender set to false. It is marked with bold in the following code. Doing so disables the standard CakePHP template files. The rest of Dwoo-related code is located in the index() function. Three objects are created: one is the main Dwoo object, the second object loads the template file, and the last one creates the object for storing data:
<?php
    App::import('Vendor', 'dwoo', array('file' => 'dwooAutoload.php'));
    class DwooexampleController extends AppController {
       function beforeFilter() {
           $this->autoRender = false;
       }
       function index() {
         $dwoo = new Dwoo();
         $tpl = new Dwoo_Template_File('../views/dwooexample/index.tpl');
         $data = new Dwoo_Data();
         $frameworks = array( 'sf' => 'Symfony',
                             'ck' => 'CakePHP',
                             'zf' => 'Zend Framework');
         $data->assign('frameworks', $frameworks);
         $dwoo->output($tpl, $data);
        }
    }
?>
code snippet /templates/cakephp/app/controller/dwooexample_controller.php
At the end, the data is assigned to be displayed by the template file, and finally the template file is rendered.
Now you can use Dwoo template files to display data, as shown in the following code:
<h1>List of covered frameworks</h1>
<p>{$frameworks[sf]}</p>
<p>{$frameworks[ck]}</p>
<p>{$frameworks[zf]}</p>
code snippet /templates/cakephp/app/views/dwooexample/index.tpl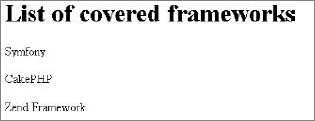
The resulting image is shown in Figure 9-9.
Unfortunately, this solution is not really what you want to get. It allows you to use only Dwoo templates, while CakePHP templates are not rendered, including the main layout file. This is similar to using Dwoo as a stand-alone application with a library that provides you with CakePHP controller functions.
This section has demonstrated just a crude example of how to get things done. To make Dwoo global for the whole project you would have to write a component that would map Dwoo to the CakePHP view, but this is beyond the scope of this book. Frankly speaking, this is a job that should be done by Dwoo developers if they really want it integrated with CakePHP.
You could try to integrate Dwoo with Symfony, but it would be hard because Symfony's file–generation CLI tools do not work with it, and there is no Dwoo plug-in for Symfony. You can also try to develop a new plug-in that would support Dwoo. For today, however, Symfony doesn't support Dwoo.
You can use Dwoo in Zend Framework by integrating its libraries with a ZF project. This is not an easy task, mainly because of Dwoo's disastrous documentation, some sections of which are now written in three different languages at random, so we don't recommend using ZF with Dwoo. In fact, it is hard to recommend using Dwoo with any framework, even if it is a worthy template engine for stand-alone projects.
Twig is one of the most full-featured modern PHP template engines and also one of the fastest. Twig compiles the templates down to plain optimized PHP code, so the overhead is minimal. It features native template inheritance in which templates are compiled as classes, automatic auto-escaping is done during compilation, and it has a secure sandbox mode. All these features give Twig great extensibility. A flexible lexer and parser allow the developer to define his own custom tags, filters, and much more.
Website: http://www.twig-project.org
License: MIT
Twig (the logo is shown in Figure 9-10) was developed by Sensio Labs and is an integral part of Symfony 2.0. We can't show you how to integrate Twig with Symfony because it is compatible only with old Symfony versions, so we will show you how to use Twig with Symfony 2.0 beta. Note that many things may change between now and the stable release of this framework.

Twig is packaged together with Symfony 2.0 by default. If you downloaded the Symfony 2.0 sandbox app (the default approach used in this example), you can find the Twig libraries in following directory: /src/vendor/twig/lib/. You can also install Symfony 2.0 by PEAR. In both cases, you don't have to install Twig separately. However, if you want to install just the Twig alone, you can do it by PEAR using following console command:
$ pear channel-discover pear.twig-project.org
$ pear install twig/Twig
Some configuration needs to be done. Find the config.yml file and add the bold lines shown in the following listing:
kernel.config:
    charset: UTF-8
    error_handler: null
web.config:
    csrf_secret: fsnbfw7e5y593hrt4057541y01h410t80
    router: { resource: "%kernel.root_dir%/config/routing.yml" }
validation: { enabled: true, annotations: true }
web.templating:
escaping: htmlspecialchars
twig.config:
auto_reload: true
code snippet /templates/symfony2/app/config/config.ymlYou can set the environment-related options in the config_prod.yml and config_test.yml files, although it is optional. YAML is the default format, but you can switch to XML or simply PHP if you like.
Create a controller like the one shown in the following code. The only difference from a standard Symfony 2.0 controller is highlighted with bold font. It sets the Twig template to be used by this action:
<?php
namespace Application\WroxBundle\Controller;
use Symfony\Bundle\FrameworkBundle\Controller\Controller;
class WroxController extends Controller
{
public function indexAction($name)
{
return $this->render('WroxBundle:Hello:index:twig', array('name' => $name));
}
}
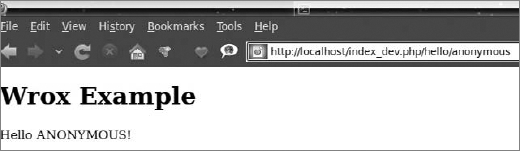
code snippet /templates/symfony2/src/Application/Bundle/WroxBundle/Controller/WroxController.phpThe final page will be rendered using two files. First change the main layout into something like this:
{% extends "::layout" %}
{% block body %}
    <h1>Wrox Example</h1>
    {% block content %}{% endblock %}
{% endblock %}
code snippet /templates/symfony2/src/Application/Bundle/WroxBundle/Resources/views/layout.twig
It will print the "Wrox Example" title for every view.
And finally, make a view to fill the {% block content %}{% endblock %} tags. The view uses the $name variable from the controller. The |upper switch makes it uppercase:
{% extends "WroxBundle::layout" %}
{% block content %}
    Hello {{ name|upper }}!
{% endblock %}
code snippet /templates/symfony2/src/Application/Bundle/WroxBundle/Resources/views/Wrox/index.twig
The output is shown in Figure 9-11.
Twig is dedicated for Symfony 2.0, but you can try to include it as a library for any other framework with the following code:
<?php
require_once 'lib/Twig/Autoloader.php';
Twig_Autoloader::register();
$loader = new Twig_Loader_String();
$twig = new Twig_Environment($loader);
$template = $twig->loadTemplate('Wrox {{ test }}!');
$template->display(array('test' => 'example'));
The first two lines can go to a bootstrap file or initializing method and the next four lines allow you to use Twig within a controller.
There is a large variety of PHP template engines available for use. From more than 50 known PHP template engines, implementation of only 3 was shown in the previous section. This section presents a handful of other valuable template engines. The code snippets presented here are just plain PHP files and templates to make you familiar with the templating languages. Integration with web frameworks, if possible, should be similar to those shown in the previous section.
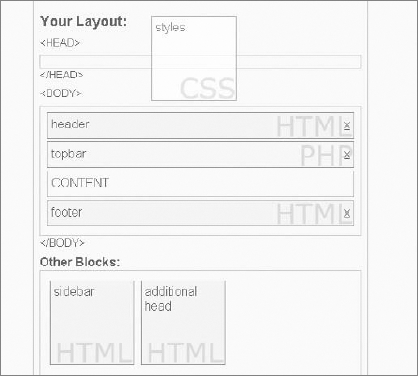
Template Blocks is a visual template engine, which means that it uses an AJAX interface to let the developer handle everything through online forms in the browser. There is no need to write everything by yourself because a significant part of site building is done simply by dragging blocks, as you can see in Figure 9-12.
Website: http://www.templateblocks.com
License: GPL
One of the few template engines written natively in PHP 5.0, the Open Power Template (OPT) is a powerful and rapidly developing tool. Its logo is shown in Figure 9-13. It uses a domain-specific XML template language for creating templates. Its API is object-oriented by design, which helps in integration with frameworks. It is well documented as part of a bigger set of tools: the Open Power Library. We recommend that you check this one out!
Website: http://www.invenzzia.org/en/projects/open-power-librariesopen-power-template
License:
Open Power Template 2.0: BSD-new
Open Power Template 1.1: GNU LGPL

The following code shows an example implementation. First the controlling PHP file needs some additional configuration. The path to OPT is set, template directories are defined, the OPT object is created, and finally the setup() method is called:
<?php
require('../lib/Opl/Base.php');
Opl_Loader::setDirectory('../lib/');
Opl_Loader::register();
$tpl = new Opt_Class;
$tpl->sourceDir = 'templates/';
$tpl->compileDir = 'templates_c/';
$tpl->setup();
$view = new Opt_View('index.tpl'); // Load template
$view->pageTitle = 'List of covered frameworks';
$view->list = array( 'Sf' => 'Symfony',
    'Cake' => 'CakePHP',
'ZF' => 'Zend Framework' );
$view->setFormat('list', 'Array');
$output = new Opt_Output_Http;
$output->render($view);
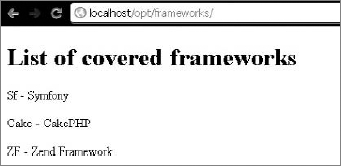
code snippet /templates/opt/index.phpCompared with other template engines, setting up OPT gives more configuration options. In OPT, templates are loaded before the variables are assigned. And as you can see in the following code, OPT gives developers some additional tags that generate common fragments of web pages or cover common tasks such as the foreach loop made using the <opt:foreach> tag. Displaying variables is exactly the same as in Smarty: by using {$variable}:
<?xml version="1.0" ?>
<opt:root>
<!-- generate an XML prolog for the browser -->
<opt:prolog version="1.0" />
<!-- generate the DTD for the browser from a template -->
<opt:dtd template="xhtml10transitional" />
<html>
  <head>
    <title>{$pageTitle}</title>
  </head>
  <body>
    <h1>List of covered frameworks</h1>
    <opt:foreach array="$list" index="short" value="value">
      <p>{@short} - {@value}</p>
    </opt:foreach>
  </body>
</html>
</opt:root>
code snippet /templates/opt/index.tpl
You can see the output of these two files in Figure 9-14.
What can be said about this template engine is that it is indeed tiny, which means one file and one PHP class! It has a few distinguishing features. It can natively work with MySQL, SQLite, and PostgreSQL. And it is not restricted to working with HTML files: it can work with XML, RTF, and WML files; and also with document files of OpenOffice and Microsoft Office.
Website: http://www.tinybutstrong.com
License: GNU LGPL
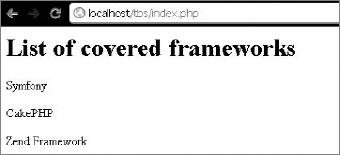
The following code shows an example implementation. It begins with the controlling PHP file, which is quite elegant. Then there is the standard class inclusion and template engine object creation at the beginning. Loading the template is done using the aptly named LoadTemplate() function. Variables are assigned as in a standard PHP file. An array variable is assigned by using the MergeBlock() function. Finally, the template is rendered using the Show() method:
<?php
include_once('tbs_class_php5.php');
$TBS = new clsTinyButStrong;
$TBS->LoadTemplate('index.htm');
$title = 'List of covered list';
$list = array( 'Symfony', 'CakePHP','Zend Framework' );
$TBS->MergeBlock('list', $list);
$TBS->Show();
code snippet /templates/tiny/index.php
Next, the following code shows the template file that uses minimalistic syntax to display variables. If the $list variable was set, the [list.val;block=p] block can be used to render blocks of <p></p> tags filled with the items from the $list variable:
<html>
  <head>
    <title>[onshow.title]</title>
  </head>
  <body>
    <h1>List of covered frameworks</h1>
    <p>[list.val;block=p]</p>

  </body>
</html>
code snippet /templates/tiny/index.htm
You can see the output of these two files in Figure 9-15.
This template engine is a part of the Rain framework, but it can be used stand-alone as well. It is quite small (only two files) and comes in a package with a simple example that can help you get familiar with it.
Website: http://www.raintpl.com
License: GNU GPL
An example implementation is illustrated by the two following files. Again the controller goes first:
<?php
    //include the RainTPL class
    include "inc/rain.tpl.class.php";
    //initialize a Rain TPL object
    $tpl = new RainTPL( 'tpl' );
    //assign title variable
    $tpl->assign( "title", 'List of covered frameworks' );
    // assign array variable
    $frameworks = array( 1 => 'Symfony',
               2 => 'CakePHP',
               3 => 'Zend Framework' );
    $tpl->assign( "frameworks", $frameworks );
    //draw the template
    echo $tpl->draw( 'index' );
?>
code snippet /templates/rain/index.php
The PHP file, in this case called index.php, begins with the RainTPL class, and then a new Rain TPL object is created. Data preparation is done as in standard PHP code, but variables that are to be passed to the template file are assigned using the assign() method of the Rain TPL object. Finally, index.html, shown following, is rendered using prepared data:
<!DOCTYPE HTML PUBLIC "-//W3C//DTD HTML 4.01 Transitional//EN" >
<html>
  <head>
    <meta http-equiv="Content-Type" content="text/html; charset=utf-8" >
    <title>{$title}</title>
  </head>
  <body>
    <h1>List of covered frameworks</h1>
    {loop name="frameworks"}
    <p>
       {$key }) {$value}
    </p>
    {/loop}
  </body>
</html>
code snippet /templates/rain/index.html
The page title is printed using {$title} syntax. In the page body, three paragraphs are generated using the {loop}{/loop} statement. The variables $key and $value are generated automatically using {loop} on the frameworks array. The resulting page looks like the one illustrated in Figure 9-16.
Savant (the logo is shown in Figure 9-17) is a somewhat unique template engine because of the language it uses. In most cases, developers need to learn a new markup language when they start using a new template engine. In Savant this is not the case because its templates use PHP.
Website: http://phpsavant.com
License: GNU LGPL

Most of Savant's syntax is identical to PHP, so in the following code the first Savant3.php file is included into the index.php file and then the Savant3 object is created. Variables are assigned as if they were variables of the Savant3 object called $tpl in this example. The template to be displayed is selected by the $tpl->display() method:
<?php
// Load the Savant3 class file and create an instance.
require_once 'Savant3.php';
$tpl = new Savant3();
// Set title
$title = "List of covered frameworks";
// Prepare data
$frameworks = array(
  array(
    'nr' => '1',
    'short' => 'Sf',
    'name' => 'Symfony'
  ),
  array(
    'nr' => '2',
    'short' => 'Cake',
    'name' => 'CakePHP'
  ),
  array(
    'nr' => '3',
    'short' => 'ZF',
    'name' => 'Zend Framework'
  )
);
// Assign values to the Savant instance.
$tpl->title = $title;
$tpl->frameworks = $frameworks;
// Display a template
$tpl->display('index.tpl.php');
?>
code snippet /templates/savant/index.phpThe template file uses the .tpl.php extension; in this case, the file is the index.tpl.php file. Variables are displayed using the $this object and the eprint() method:
<!DOCTYPE HTML PUBLIC "-//W3C//DTD HTML 4.01 Transitional//EN" >
<html>
  <head>
    <meta http-equiv="Content-Type" content="text/html; charset=utf-8" >
    <title><?php echo $this->eprint($this->title); ?></title>
  </head>
  <body>
    <h1>List of covered frameworks</h1>
    <table>
      <tr>
        <th>Nr.</th>
        <th>Short</th>
        <th>Framework name</th>
      </tr>
      <?php foreach ($this->frameworks as $key => $val): ?>
      <tr>
        <td><?php echo $this->eprint($val['nr']); ?></td>
        <td><?php echo $this->eprint($val['short']); ?></td>
        <td><?php echo $this->eprint($val['name']); ?></td>
      </tr>
      <?php endforeach; ?>
    </table>
  </body>
</html>
code snippet /templates/savant/index.tpl.php
Standard echo() and print() functions can be used to display variables, but the $this->eprint() method automatically escapes the output. This helps to protect your page against XSS scripting attacks. The result of this example is illustrated in Figure 9-18.

Because the templates in Savant are regular PHP files, it can be said that Savant is not an interpreted template system (that means they are interpreted a second time inside PHP). This feature makes Savant one of the fastest template engines available. It is also very well commented and easy to extend. Developers can use their own interpreters inside Savant to use any template markup system.