Table of Contents for
Ubuntu: Up and Running
 Ubuntu: Up and Running
Published by
O'Reilly Media, Inc., 2010
Ubuntu: Up and Running
Published by
O'Reilly Media, Inc., 2010
- Cover
- Ubuntu: Up and Running
- Ubuntu: Up and Running
- Dedication
- Foreword
- Preface
- 1. About Ubuntu
- 2. Installing and Upgrading Ubuntu
- 3. Configuring
- 4. The Desktop: Accessing Applications and Features
- 5. The Filesystem, File Attributes, and Permissions
- 6. The Nautilus File Browser
- 7. The Command Line
- 8. Installing and Removing Software
- 9. System Maintenance and Security
- 10. Networking Ubuntu
- 11. The Internet
- 12. Using OpenOffice.org
- 13. Playing Games
- 14. Pictures, Sound, and Video
- 15. Other Ubuntu Distributions
- 16. Using Wine
- Index
- About the Author
- Colophon
- Copyright
Chapter 15. Other Ubuntu Distributions
One of the great things about Linux, when compared with proprietary operating systems such as OS X and Windows, is that the licenses under which it is released allow developers to modify it and create new versions suited to their particular needs. Because of this, there are hundreds of varieties of Linux available, most of them tuned to very specific and niche requirements, while a small subset of distributions (or distros) have become very popular.
Of course, the most successful of these is Ubuntu, which itself is based upon another well-liked distro called Debian. But some developers have now taken Ubuntu and created derivatives of it for their own needs. For example, there’s Ubuntu Studio for creating media, Edubuntu for use in education, Mythbuntu for using as a personal video recorder, and so on.
In this chapter, we’ll look at a range of alternate Ubuntu distros and how to install and use them. Some are included on the DVD supplied with this book, so you won’t even have to download them.
Installation
You have a few options when it comes to installing Ubuntu distributions, as described in Chapter 2, ranging from installing one as your main operating system to adding it alongside another operating system or even within a virtual machine. But whichever method you choose, you’ll need the original ISO file.
For your convenience, the most popular Ubuntu derivative ISO files are included in the distros folder of the DVD supplied with this book, and their filenames are listed in Table 15-1.
Distribution | Filename |
Kubuntu 9.10 | kubuntu-9.10-desktop-i386.iso |
Mythbuntu 9.10 | mythbuntu-9.10-desktop-i386.iso |
Ubuntu 9.10 | ubuntu-9.10-desktop-i386.iso |
Ubuntu Netbook Remix 9.10 | ubuntu-9.10-netbook-remix-i386.iso |
Xubuntu 9.10 | xubuntu-9.10-desktop-i386.iso |
The original Ubuntu ISO is also there so that it can be used in conjunction with the wubi.exe program (in the same folder) to create an installation of Ubuntu within Windows (see Chapter 2). It can also be used to burn a CD-ROM for use on older computers that cannot read DVDs.
If you need the installer for any other distro, visit the following URL to choose the edition you need and download its ISO file:
| http://ubuntu.com/products/whatisubuntu/derivatives |
To install a distro, you will need to burn its ISO to a blank disc, either using the Ubuntu Brasero program by right-clicking the file or using any similar program available for other operating systems. If you are using Windows, the distros folder also contains the Active ISO Burner program, which you can install and use to burn ISO files.
Once you have burned an ISO file to disc, you can insert the disc into your target computer and reboot it to perform an installation. Although the different editions vary slightly, they will mostly follow the same process outlined in Chapter 2.
Installing Distributions Alongside Ubuntu
If you have already installed one of the Ubuntu editions and have a reasonably fast Internet connection, there’s an easy way to add other distros to your operating system, in such a way that you can choose which desktop environment to use each time you log in.
One of the benefits of this approach is that the core parts of Ubuntu don’t have to be downloaded again. Instead, just the packages relevant to the edition you are adding are fetched, saving on your bandwidth and the amount of time it takes to install.
And there’s nothing preventing you from creating your own “Megabuntu” edition by adding all the extra distros, giving yourself the maximum amount of flexibility and the greatest number of applications to use.
The only edition I don’t show you how to add is the Netbook Remix (known as Netbook Edition from version 10.04 onward), because it’s vastly different from all other editions in terms of design, usability, and layout, and would change your desktop in a number of ways you might not like.
Note
Installing additional editions may have the unwanted effect of changing the logos and colors used for the splash and login screens. The easiest way to ensure you have the look and feel you want is to add the distro whose graphics you like the most last, and those settings will then be your defaults.
Adding Kubuntu
To add the Kubuntu desktop to your computer, open up a Terminal window and enter the following command, followed by your password when asked:
sudo apt-get install kubuntu-desktopYou will then be prompted for input a few times by the installer, but you can press Enter each time to accept the default inputs offered (as shown in Figure 15-1).
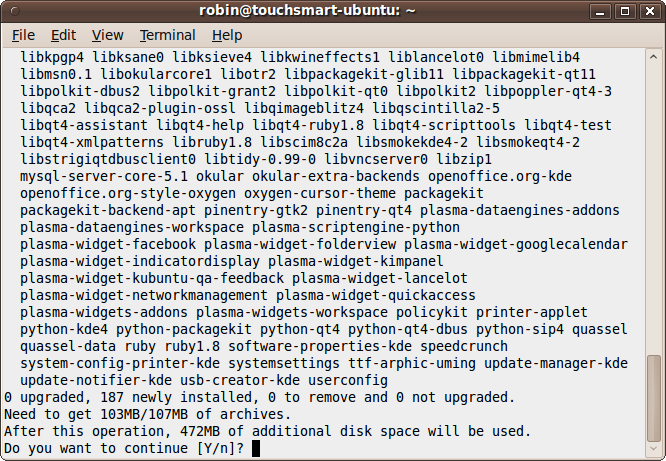
As a rough guide, at around 100 MB, on a 2 Mb broadband connection, the download process should take under five minutes. Once done, the screen in Figure 15-2 will appear. This is the start of the KDM configuration section, so press Enter to continue.
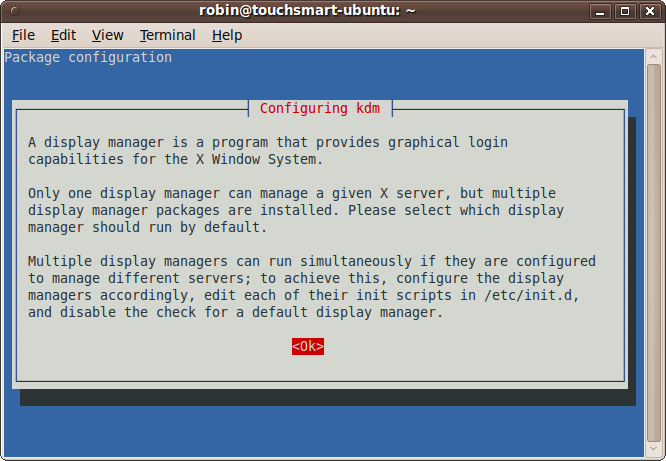
Next, you will need to decide which display manager you would
like to be your default (see Figure 15-3). If you want
GNOME to be the default, select gdm, or if you want KDE, select kdm. Don’t worry about making the wrong
choice, because you can easily change the default whenever you log in.
After making the decision, press Enter to continue with the
installation.
The installer will then proceed to unpack and set up all the packages it just downloaded, which will take a few more minutes. When it has finished, the installer will return control to the command line, and you’ll be ready to try out Kubuntu by first logging out of your current session.
When you log back in again, select your username. Then, in the Sessions input at the bottom of the screen, you can now choose between GNOME and KDE for your desktop. Finally, enter your password and you’ll be taken to the default KDE desktop.
Adding Xubuntu
You can add the Xubuntu desktop to your computer in almost the same way as Kubuntu, by opening a Terminal window and entering this command, followed by your password:
sudo apt-get install xubuntu-desktopA similar download process to that shown in Figure 15-1 will then take place. This installation, however, will not pause to ask you which display manager to use as your default.
When the installation has finished and returned to the command prompt, you can log out and then back in again by selecting either GNOME or Xfce (or KDE if you installed Kubuntu) from the Sessions field at the bottom of the login screen.
Adding Mythbuntu
The procedure for adding the Mythbuntu software to your computer is similar to the previous ones. Simply enter this command in a Terminal window, followed by your password when asked:
sudo apt-get install mythbuntu-desktopYou will be prompted for input a few times during installation; if in doubt, accept the defaults offered. Once installation has finished, all the various Mythbuntu applications will be added to your desktop. You can then log out and in again, but first select Mythbuntu from the Sessions field at the bottom of the login screen.
Adding Edubuntu
The procedure for adding the Edubuntu software to your computer is similar to the ones already shown. Simply enter this command in a Terminal window, followed by your password when prompted:
sudo apt-get install edubuntu-desktopThis is a larger distribution, and as a rule of thumb, may take about 10 minutes to download on a 2 Mb connection. It will also take another 10 minutes or so to unpack and install the packages. Once installation has finished, you will be able to use the Edubuntu programs right away, without having to log out and in again first.
Adding Ubuntu Studio
The procedure for adding the Ubuntu Studio software to your computer is also similar. Just enter this command in a Terminal window, followed by your password when prompted:
sudo apt-get install ubuntustudio-desktopAfter installation is complete, which will proceed without any questions being asked, you can use the newly installed programs immediately. There’s no need to log out and back in again, although if you do, you’ll get to see your desktop using the Ubuntu Studio theme.
Adding Ubuntu
To add the standard Ubuntu desktop to a computer that doesn’t have it (but that does have another edition installed), type the following command into a Terminal window, and enter your password when prompted:
sudo apt-get install ubuntu-desktopYou should accept any defaults if prompted. When the installation has finished, log out and back in again to use the Ubuntu desktop. Select GNOME from the Sessions field at the bottom of the login screen.
Kubuntu
This distribution is officially supported by Canonical, which means that it is thoroughly tested and support is available throughout the life of a release. Some other distributions are officially recognized but are not tested or supported by Canonical, and there are still other derivatives that are neither recognized nor supported.
The main thing about Kubuntu is that it uses KDE, the K Desktop Environment, instead of the GNOME environment of Ubuntu. But there’s more to it than just that, because it also comes with a whole host of other programs, and some of the default applications are different from those in GNOME. With its Kickoff Application Launcher at the bottom left of the desktop, it’s also reminiscent of the Windows Start menu (see Figure 15-4).
To access most things using KDE, click the K menu at the bottom left of the desktop (see Figure 15-5), from which you can select your favorites (files you have accessed a lot recently), the various available applications, the filesystem, and recently used files.
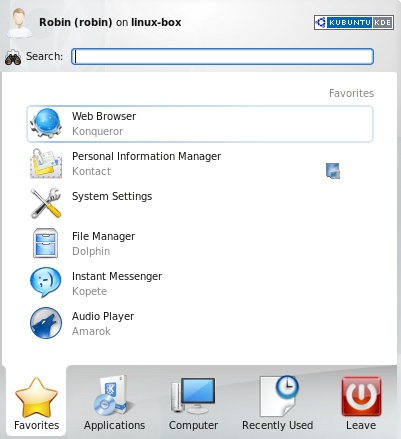
You can also call up the Quit menu for logging out, suspending the computer, and so on. If you can’t find the program you need, you can always enter its name into the search field at the top of the launcher, and all matching applications will be shown.
The rest of the desktop is pretty self explanatory, seeing as by default there is only one toolbar at the bottom, which contains items such as the workspace switcher, volume control, network connectivity, and so on.
For further information on using Kubuntu, you should visit http://kubuntuguide.org, which features a comprehensive guide with a handy search facility.
Xubuntu
Xubuntu is not a supported edition of Ubuntu, but it is a recognized derivative, which means that Canonical evaluates and assists with its development but doesn’t provide support for it. Luckily, you probably won’t need much support, as it’s just as easy to use as the other editions, if not more so due to the simplicity of its design.
Figure 15-6 shows a typical Xubuntu desktop, which is similar to GNOME (having the Applications and Places menus at the top left), but is actually based on the Xfce desktop manager.
Did you notice that there is no System menu shown in the screen grab? This is deliberate, because the developers of Xubuntu have decided to make this edition as fast and easy to use as possible, and also difficult for users to modify settings accidentally. This makes it ideal for installing on the computer of a novice user or on older computers with less powerful hardware.
Now that you know how to use Ubuntu from reading previous chapters, you’ll find that you also already know Xubuntu. But if you need any further information on this edition, you can visit the home page at http://xubuntu.org.
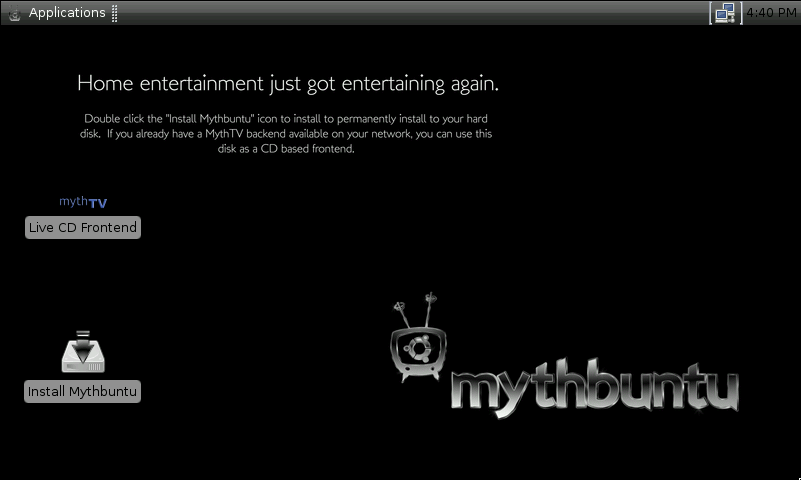
Mythbuntu
Mythbuntu is an officially recognized derivative of Ubuntu, but it is not supported by Canonical. Its main focus is on setting up a standalone personal video recorder (PVR), but you can simply add it to any other edition of Ubuntu to benefit from its TV integration features.
I covered setting up the MythTV program in detail in Chapter 3, so there’s no need to repeat that information here, other than to mention that the full Mythbuntu installation uses the Xfce desktop (see Figure 15-7) and doesn’t come with applications such as OpenOffice.org. If you need further information, you can get it from the website at http://mythbuntu.org.
Edubuntu
Edubuntu is an officially supported edition of Ubuntu created to fulfill the needs of children, students, parents, teachers, and schools. The full ISO is so large (at over 3 GB) that you have to burn it onto a DVD (or a high-capacity USB thumb drive, as long as you make it bootable) instead of a CD.
However, using the process outlined at the start of this chapter, in the section Adding Edubuntu, you can opt to just install the main programs from the distribution, which are only an extra 200 MB or so to download.
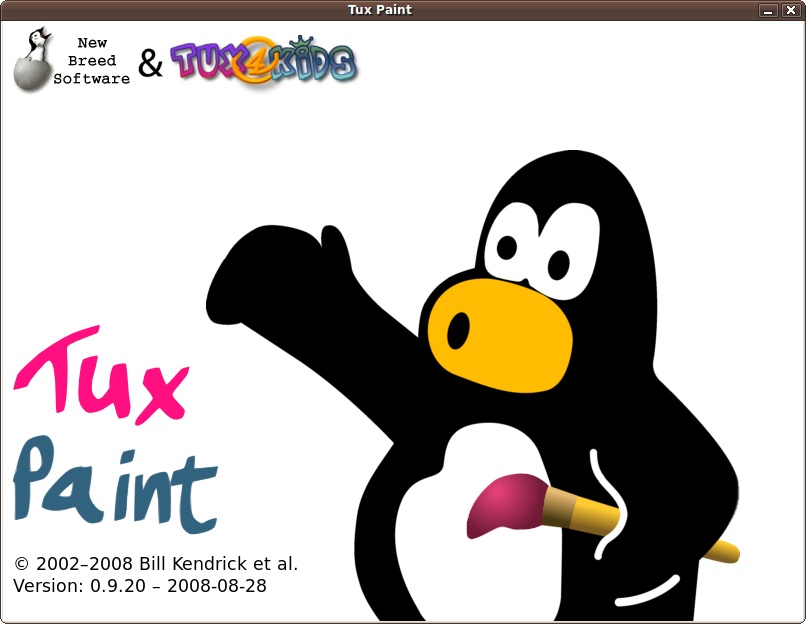
The distribution comes with over a dozen educational programs, such as Tux Paint (see Figure 15-8), which you can access from the Applications → Education menu.
The full edition supports the Linux Terminal Server Project (LTSP), for networking students’ computers with a teacher’s in a classroom environment. Explaining how to use it is beyond this book’s scope, but full details are available at http://edubuntu.org.
If you have young children, I definitely recommend installing the Edubuntu programs.
Ubuntu Netbook Edition
This edition of Ubuntu (known as Netbook Remix in versions of Ubuntu prior to 10.04) is a different kettle of fish altogether, because it’s been totally redesigned specifically for use on Netbook PCs (see Figure 15-9), which generally have less processing power and smaller screens. If you have such a device and find your current operating system to be slow and somewhat unresponsive, the Netbook Edition may be just what you need.
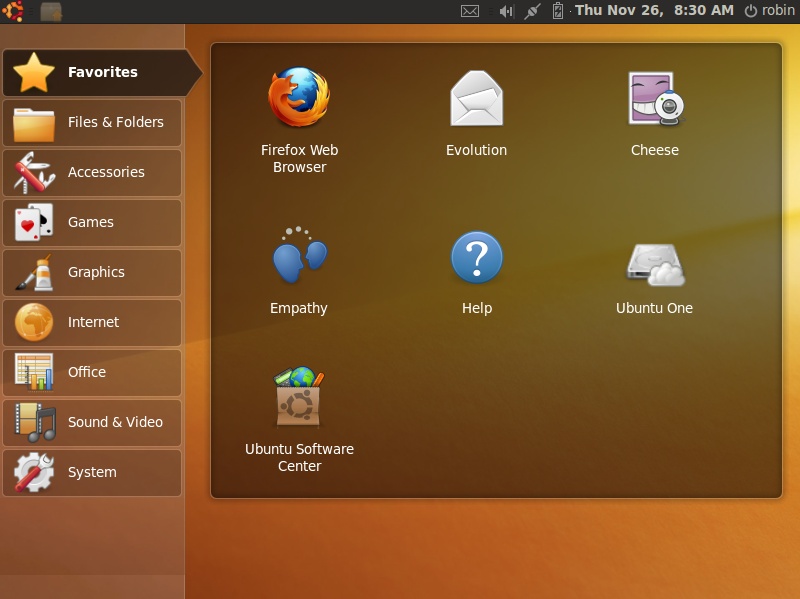
As you can see, the icons and menus of the Netbook Edition have been enlarged to take account of the small screens on Netbooks, with the main applications you are likely to use already placed on the desktop in the Favorites menu.
Using the Netbook Edition is similar to Ubuntu, except the menus from the top left of the desktop are no longer there. Instead, each item you select from the lefthand menu displays its contents on the desktop to the right, making for a very easy interface.
To install the Netbook Edition, you will need to burn the ISO image in the distros directory of the DVD supplied with this book to a blank disc, or to a bootable USB drive if your Netbook doesn’t have an optical drive. Installation is quite easy because you just follow the prompts to tell it about your location and keyboard, and the installer then gets on with the rest.
I think that if you try it, you’ll find this edition of Ubuntu to be an excellent alternative to your original operating system.
Warning
If you choose to replace your current operating system, rather than setting the Netbook Edition up alongside it as part of a dual boot setup, I recommend that you make sure you have backed up the hard disk using a disk imaging application such as the free Macrium Reflect program, which is available at http://macrium.com/reflectfree.asp. This is just a precaution in case you experience problems and need to restore your computer to its original state. Remember that if you don’t want to install Ubuntu Netbook Edition on your Netbook without testing it out first, you can always install it in a virtual machine using a program such as Sun’s VirtualBox. Details on how to do this are in Chapter 2.
What’s New in 10.04
Starting with Ubuntu 10.04, Ubuntu Netbook Edition is the new name for Ubuntu Netbook Remix. The name change is in recognition of the distribution now being much more than a simple remix. However, since the ISO file on the DVD supplied with this book is for version 9.10, it is called by its old name, Netbook Remix.
Ubuntu Server Edition
The Server edition of Ubuntu is officially supported by Canonical for 18 months with non-Long Term Support (LTS) releases, and a full five years for an LTS release, such as 10.04.
This edition comes with a range of rugged and reliable programs for fast and secure serving of web pages and applications. These include the Apache and Tomcat web servers, the MySQL and PostgreSQL database management systems, the PHP, Perl, Python, GCC, and Ruby programming languages, and much more.
Setting up and running a production web server is by no means an easy task, even when you have the support of a powerful operating system like Ubuntu Server. Therefore, I recommend you visit the following URL for further details:
| http://www.ubuntu.com/products/whatisubuntu/serveredition |
Note
By default, no graphical user interface is installed with the Server Edition, as it is unlikely to be required, although you can easily add one if desired using the information supplied in the section Installing Distributions Alongside Ubuntu.
Ubuntu Studio
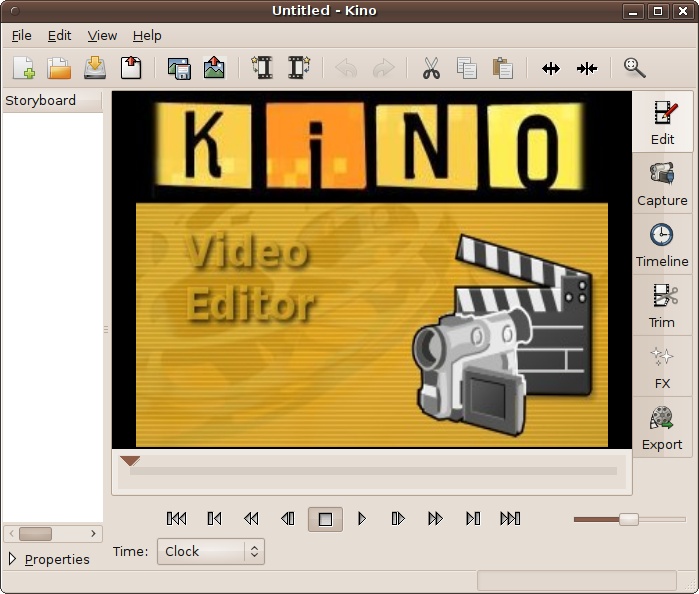
The Ubuntu Studio edition is officially recognized by Canonical, but the company doesn’t support it. The operating system consists of regular Ubuntu with the addition of audio, graphics, and video editing capabilities, such as the Kino video editor shown in Figure 15-10.
This distribution also features a different version of the Linux kernel that has been optimized for real-time processing of audio, the PulseAudio sound server, and the JACK sound system. This makes it an amazingly powerful tool for editing sound and creating real-time audio and visual effects. But these features come only with the full install, not with the quick install I outlined at the start of this chapter, which simply adds programs used by the distro.
The ISO file for this distribution is over 1.4 GB in size, so you’ll need to burn it to a DVD or a bootable USB thumb drive rather than a CD, or just perform the quick installation described at the start of this chapter if you want only the programs.
Visit http://ubuntustudio.org for full details on this edition of Ubuntu, including the hardware needed to run it at its best, and for comprehensive documentation.
Eeebuntu
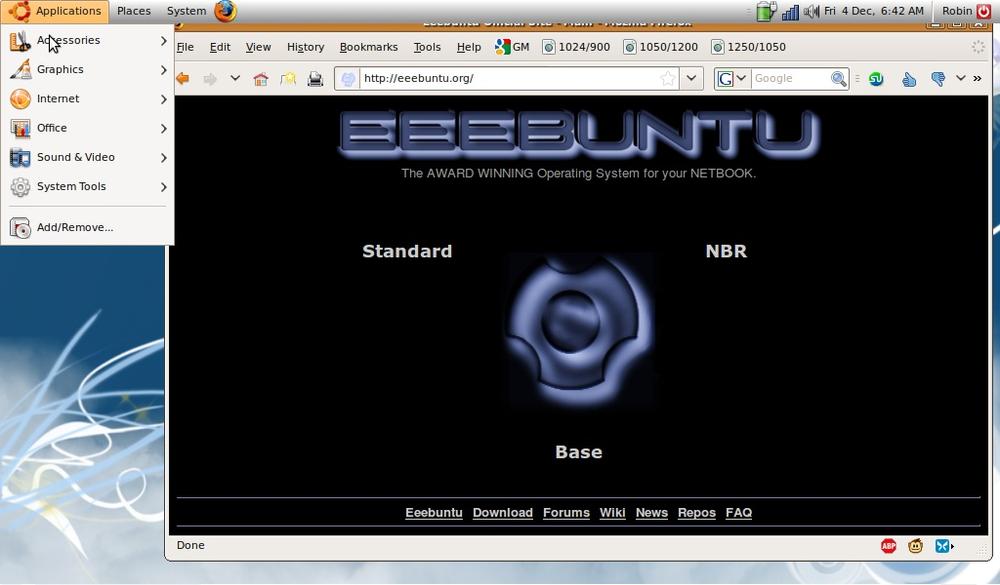
If you are dissatisfied with either the Windows XP or Xandros Linux installation on your Asus Eee PC, you’ll be pleased to learn that there’s an edition of Ubuntu just for you, called Eeebuntu. Although not officially supported (or recognized) by Canonical, I have found that it runs better than regular Ubuntu “out of the box” on an Eee PC, with no tweaking required (see Figure 15-11). It comes in three flavors:
- Standard (about 860 MB)
This edition includes a full suite of Internet applications, including Firefox for browsing, Pidgin for IM chat, Thunderbird for mail, OpenOffice.org for office documents, and a selection of multimedia applications, including VLC for watching movies and Banshee for listening to music.
- NBR (about 860 MB)
This is the Netbook Remix version of Eeebuntu, which is similar to the Standard version except that it uses the Netbook Launcher, specially customized for the small screen of Eee PCs. Also, instead of the usual desktop, the main launcher provides a tabbed environment with easy to access icons for all your applications and documents. It also comes with a complete set of applications.
- Base (about 560 MB)
This is the smallest and most stripped down of the versions. Basically it consists of Firefox and some configuration applications, and not much else. But this makes it ultra sleek and fast for people who mainly use their Eee PC for web browsing. You can, of course, install any additional Ubuntu programs you need via Synaptic.
You can download the ISO image file of your choice from the distribution’s website at http://eeebuntu.org. To create a bootable USB thumb drive for installing the operating system on your Eee PC, use a regular Ubuntu installation and select System → Administration → USB Startup Disk Creator.
Warning
Because development of Eeebuntu lags behind Ubuntu by a version or so, you should only ever use the Install Updates button in Update Manager, and not the Upgrade button if it’s offered. If you are informed that a new version of Ubuntu is available, don’t be tempted to try and upgrade to it, or you may find your wireless and other features stop working correctly. Instead, wait until a new Eeebuntu (as opposed to Ubuntu) release is available, to which you can then safely upgrade. Note that Eeebuntu version numbers are much lower than Ubuntu ones by about a value of 6 (for example, Eeebuntu 3.0 is based on Ubuntu 9.04), so you can easily tell them apart.
Even More Distributions
Believe it or not, although I’ve outlined the main Ubuntu editions in this chapter, they comprise only a fraction of the complete set of distros; last time I counted, there were over 50, including versions for kids, security and bioinformatics workers, certain localized versions for the visually impaired, and more.
So, if you still haven’t found the edition you want in the language of your choice and with the features you need, then I recommend the following URL, which lists every edition and derivative of Ubuntu there is and how to get it:
| http://wiki.ubuntu.com/DerivativeTeam/Derivatives |
Summary
In this chapter, you learned how to install the full versions of (or just extract the programs from) various releases and editions of Ubuntu. But no matter which you settle on in the end, if you have migrated from Windows, there may still be applications or utilities you miss or need access to for compatibility with your data. So, in the final chapter, we’ll look at installing and using the Wine program, which you can use to run almost all Windows programs directly from Ubuntu.