Table of Contents for
Ubuntu: Up and Running
 Ubuntu: Up and Running
Published by
O'Reilly Media, Inc., 2010
Ubuntu: Up and Running
Published by
O'Reilly Media, Inc., 2010
- Cover
- Ubuntu: Up and Running
- Ubuntu: Up and Running
- Dedication
- Foreword
- Preface
- 1. About Ubuntu
- 2. Installing and Upgrading Ubuntu
- 3. Configuring
- 4. The Desktop: Accessing Applications and Features
- 5. The Filesystem, File Attributes, and Permissions
- 6. The Nautilus File Browser
- 7. The Command Line
- 8. Installing and Removing Software
- 9. System Maintenance and Security
- 10. Networking Ubuntu
- 11. The Internet
- 12. Using OpenOffice.org
- 13. Playing Games
- 14. Pictures, Sound, and Video
- 15. Other Ubuntu Distributions
- 16. Using Wine
- Index
- About the Author
- Colophon
- Copyright
Chapter 12. Using OpenOffice.org
One of the great things about Ubuntu is that it comes with a wide range of ready-to-use software. And one of the best of these is the OpenOffice.org productivity suite, which comprises all the major applications you find in other office suites, such as Microsoft Office.
Not only do you get a word processor, spreadsheet, and presentation maker, OpenOffice.org also includes a drawing application, a database program, and a utility for creating mathematical formulas.
What’s more, OpenOffice.org can read and write files in many formats, including Microsoft’s familiar .xls, .doc, and .ppt, and it can even export PDF files. This means you can share and collaborate on documents with users of other operating systems and office suites. And like Ubuntu, OpenOffice.org is a free program with no purchase, upgrade, or license fees to pay, eliminating both up-front and ongoing costs.
Preparing the Example Files
You will recall from earlier chapters that your home folder contains an Examples folder with several example documents. Actually, Examples is a shortcut that points to the folder /usr/share/example-content, and all the files in it were created by the user root. This means that they can be read but not edited or saved. You’ll be able to tell this when you open a file because the title bar at the top will say “(read-only)” next to the name of the document, and you won’t be able to add or change anything.
So if you want to try out the various OpenOffice.org programs and modify the examples, you will need to make the files writable by opening the Terminal and copying the folder of examples to your desktop with the following command:
cp -r /usr/share/example-content ~/DesktopThis will create a new folder on your desktop called example-content, in which all the example files can be read from and written to. It also means the original example files will remain untouched, should you wish to refer back to them.
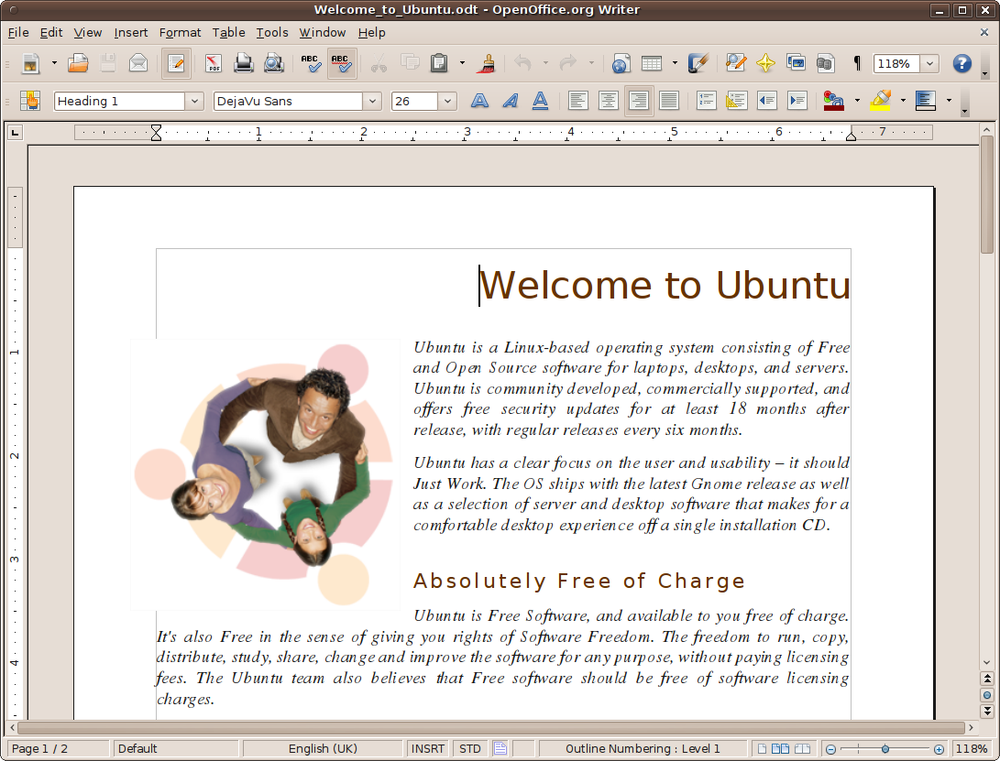
Writer
The OpenOffice.org word processor is a fast and easy-to-use application called Writer, and it’s packed with every conceivable feature you could need. To run it, you can select Applications → Office → OpenOffice.org Word Processor or double-click any file that’s associated with it, such as those with the extension .odt (the standard format used by OpenOffice.org and other free programs) or .doc. For example, Figure 12-1 shows the result of opening the file Welcome_to_Ubuntu.odt from within the example-content folder you just copied to your desktop.
Warning
Although Writer can handle Microsoft Word files (like all parts of the OpenOffice.org suite), files with some complicated formatting elements do strange things if you move between Writer and Word. These problems are unpredictable and can range from strange page layouts to missing text. That said, different versions of OpenOffice.org are much more compatible than different versions of Word, which often have difficulty with files from Word running on other systems.
If you have used any popular word processing package, you should find that Writer is very easy to learn, as it follows a lot of standard conventions. For example, the menus at the top are logical, and just browsing through them you’ll be able to find many of the features you need.
And, of course, there’s always the Help menu, which contains complete descriptions of all the features, along with a comprehensive index of topics.
This book doesn’t have room for a tutorial on using the word processor, but to get you started I’ll show you a few things, such as the Standard and Formatting toolbars, which are directly underneath the menus.
The Standard Toolbar
Figure 12-2 shows the left half of the Standard toolbar, which contains buttons for main features such as loading, saving, and printing files, and so on.

The first small icon, made up of three horizontal lines, is the drag handle, which you can use to drag and drop the bar elsewhere within the program’s window. If you drag it to any of the four window edges, it will align with that edge, and if you drop it elsewhere it will be released from the main window so that you can move it to anywhere you like on your desktop.
The next icon, which looks like a printed page, is for creating new documents. By default, a new word processor document will be started, or you can click the downward-pointing triangle next to it to select from the many other types of documents supported by OpenOffice.org.
After that comes the Open button (which looks like a document in a folder), the Save button (which looks like a 3.5” disk and is highlighted only when there are changes to be saved), and the E-mail button (for sending the current document as an email attachment using the default email client).
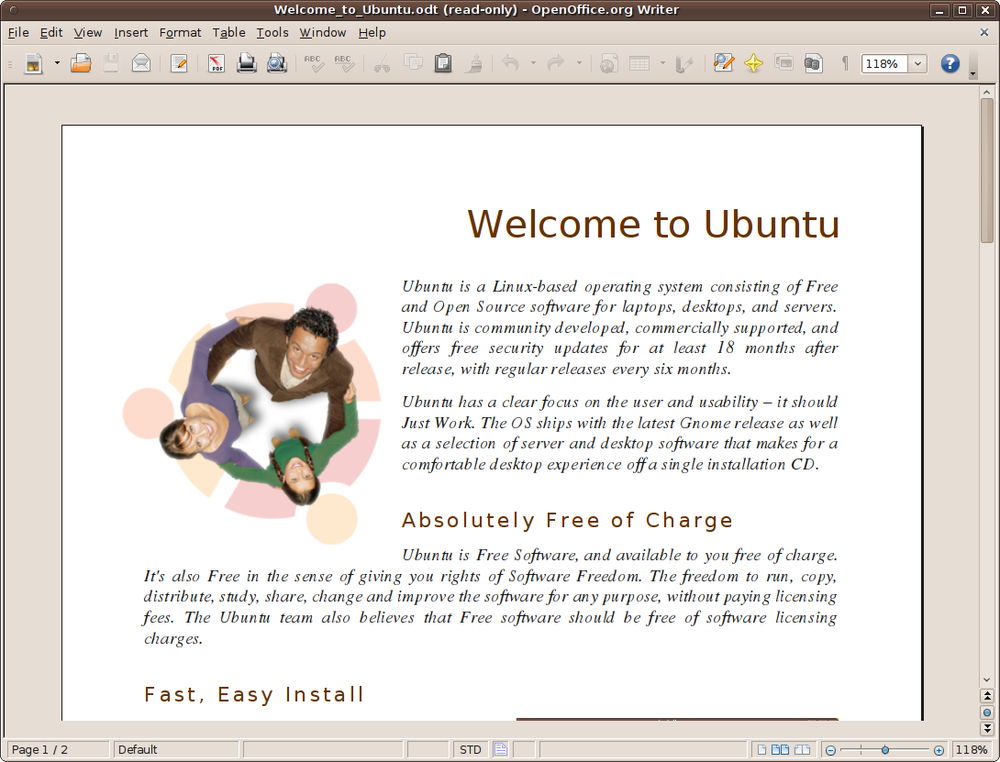
Next, standing off on its own between two separators, is the Edit file button, which toggles between edit and read-only modes. When you open a read-only document and click this button, you can then edit the document if you have sufficient privileges or will be offered the option of editing a copy of the document. Or if you click the button while editing a document, you can place it into a read-only (or preview) mode (see Figure 12-3). In this mode the document becomes read-only, and items you cannot use, such as the Formatting toolbar, are hidden.
The next three buttons are for outputting a document as a Portable Document Format (PDF) file, to a printer, or in Print Preview mode, which will show more than one page at a time if there’s enough space.
The two following buttons let you spellcheck a document interactively and enable automatic spellchecking as you type, respectively. If the latter is enabled, any unrecognized words will be underlined with a wavy line.
The next three buttons are for cutting, copying, and pasting, and are grayed out when they can’t be used (for example, if there is no highlighted text to cut or copy, or there is nothing in the clipboard for pasting). The final button, which looks like a paintbrush, allows you to paint a formatting style in the document by dragging the mouse over the portion to transform.
The right half of the Standard toolbar is shown in Figure 12-4, and starts with two curved arrows that provide undo and redo functionality. In lower resolutions or in a nonmaximized window, you may not see all these icons at once, but you can call up any hidden ones by clicking the >> icon that will appear on the far right of the toolbar.
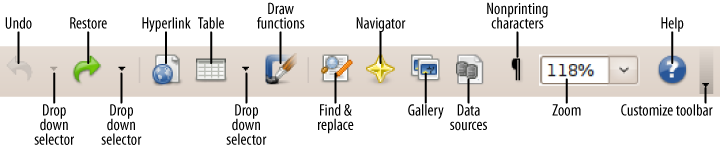
The next two icons, in turn looking like the world on a document and a spreadsheet, let you insert hyperlinks and tables. The next icon, which looks like a paintbrush drawing a rounded corner, calls up the drawing functions toolbar.
After these, the button that looks like a magnifying glass calls up a search (and optional replace) dialog, the four-pointed star brings up a handy navigator for moving throughout a document, and the button that looks like two photographs brings up a toolbar of graphic images.
The button following the photographs is for managing your data sources, and the one with a ¶ symbol toggles the display of nonprinting characters. The final two main buttons let you change the zoom level of the document and call up the help pages, respectively.
At the far right of the toolbar there’s a downward-pointing triangle you can use to customize the toolbar by adding and removing buttons or locking it in place.
The Formatting Toolbar
The other main toolbar you’ll use in Writer is the Formatting toolbar, the left half of which is shown in Figure 12-5.

This part of the Formatting toolbar starts with another drag handle for moving the toolbar about. It works in exactly the same way as the Standard toolbar. After this, a button that looks like a finger pointing to a cell in a table brings up the Styles and formatting menu.
The rest of this part of the toolbar deals with the style, font name, and font size of text, and the three letter A buttons at the end are for toggling the use of bold, italic, and underlined text.
Figure 12-6 shows the other half of the toolbar.
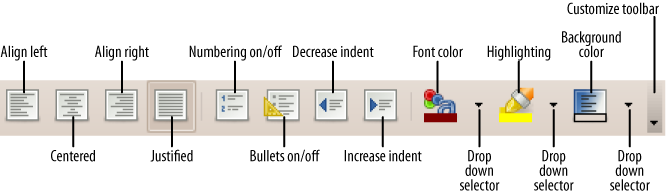
The first four buttons in this half of the toolbar let you select left, centered, right, and full justification. The next two buttons turn numbering and bullets on and off, and the ones after those, with left- and right-pointing triangles, are for decreasing and increasing indents.
The multicolored button with several letters on it changes the color of a font. Clicking the button directly changes selected text to the currently selected color, which you can further change to another color by clicking the downward-pointing triangle to the button’s right. The next button, which looks like a highlighter pen, works in the same way but alters the highlighting, and the final main button also works in the same way but controls the background color.
Again, at the end there’s a button with a downward-pointing triangle with which you can customize the toolbar.
Using Styles
Although you can create your document’s various styles as you go along by pushing buttons for indentation, bullets, and so on, you may find it much easier to apply styles instead, which will change the look of a feature (such as a bulleted list) throughout an entire document.
To create or edit a style, select an area of text, and then click the Styles and Formatting button in the Formatting toolbar. A menu will appear in which you can select the type of style (out of character, paragraph, frame, page, and list).
You can then right-click a style to modify it, or click the “New style from selection” button (at the top right) to create a new one. Or you can simply double-click a style of your choice to apply it to the selection. Your most recently used styles are displayed in a drop-down menu next to the Styles and Formatting button so you can easily apply them.
About Word Completion
There’s a clever feature in Writer that can help you auto-complete words you frequently use. Enabled by default, it’s called Word Completion, and it can help experienced users be more productive. However, many people find this feature intrusive and annoying, particularly when learning the ins and outs of Writer.
If you feel the same way, you can disable Word Completion by selecting Tools → AutoCorrect Options, and then click the Word Completion tab. Finally, uncheck “Enable word completion,” and the feature will be turned off. Or if you prefer, you can set Word Completion to accept the Tab key instead of Enter (matching the Nick Completion setting of the Pidgin program). To do this, click the “Accept with” drop-down menu in the AutoCorrect settings window, and then select Tab.
Calc
The OpenOffice.org spreadsheet program is called Calc, and you’ll find it works in much the same way as other major spreadsheets, such as Microsoft Excel. As with Writer, there’s not enough room in this book to teach you how to use the program, but I at least can get you up and running by pointing out where the main options are.
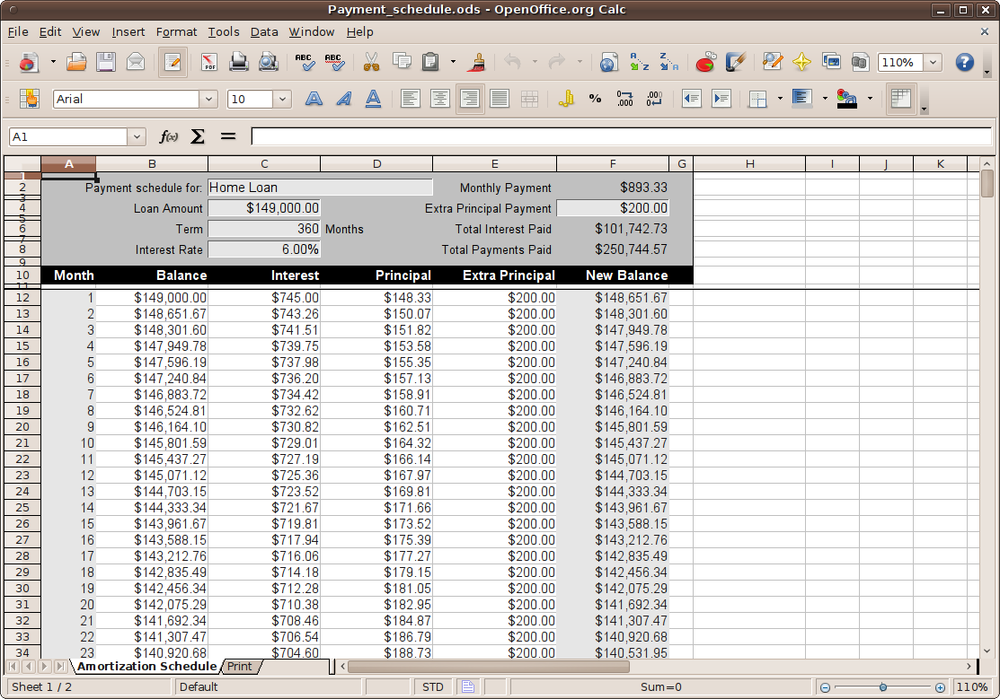
To try out the Calc program, you can double-click the spreadsheet file Payment_schedule.ods in the example-content folder of your desktop, as shown in Figure 12-7.
The Standard Toolbar
The first thing you should notice is that the Standard and Formatting toolbars are quite similar to those in Writer, so I don’t need to explain them to you again in detail. This is the great thing about the integrated suite; the look and feel and functionality transfer between the various parts. Once you’ve learned one of the programs, you already know most of the other parts, too.
However, a few of the buttons do work slightly differently from their effects in text documents, and there are a couple of additional or replacement buttons as well, as shown in Figure 12-8.
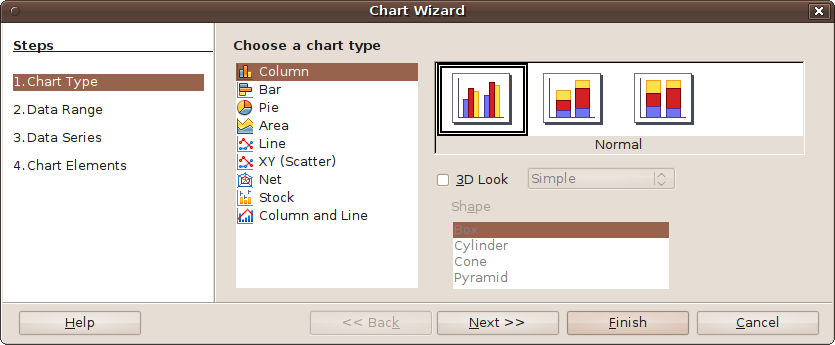
So, for example, in the Standard toolbar the Table button in Writer is now replaced with two buttons in Calc that feature the letters A and Z, which are for sorting in either ascending or descending order, respectively. There is also a new button that looks like a pie chart and calls up the Chart Wizard (see Figure 12-9), and the nonprinting characters button is removed, as it’s not applicable to spreadsheets.

The Formatting Toolbar
In the left half of the Formatting toolbar, the style field has been removed, but styles can still be selected by clicking the very first button, which calls up the Style and Formatting menu, so there’s not a lot of change there.
However, there are a few differences in the right half, as shown in Figure 12-10.
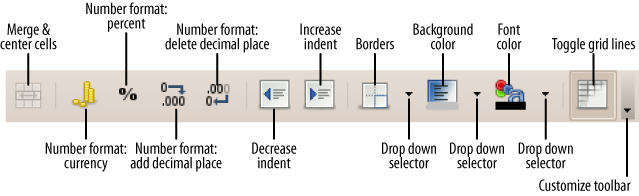
The first icon in the right half of the Formatting toolbar is for merging and centering cells. The next four buttons, starting with a pile of coins, select the number format, with the choices being currency, percent, adding a decimal place, and deleting a decimal place (which automatically rounds a fraction to the nearest whole number).
After the decrease and increase indent buttons, which are the same as in Writer, there’s a new button for placing borders around cells. The very last main button toggles the display of grid lines.
Viewing and setting data types
As well as using the Formatting toolbar buttons to change the data type of a cell or selection, when a highlighted section of a spreadsheet contains the same type of data, that information will be highlighted in the Formatting toolbar. For example, if a cell contains currency data and you click within it, the currency button will be highlighted. The same goes for a selected group of cells containing currency data, or even whole (or multiple) columns.
And if the highlighted cells contain percent data, that will be highlighted, and so on. By right-clicking the toolbar and selecting Visible Buttons, you can also add more Number Format buttons, since there are seven types available.
Impress
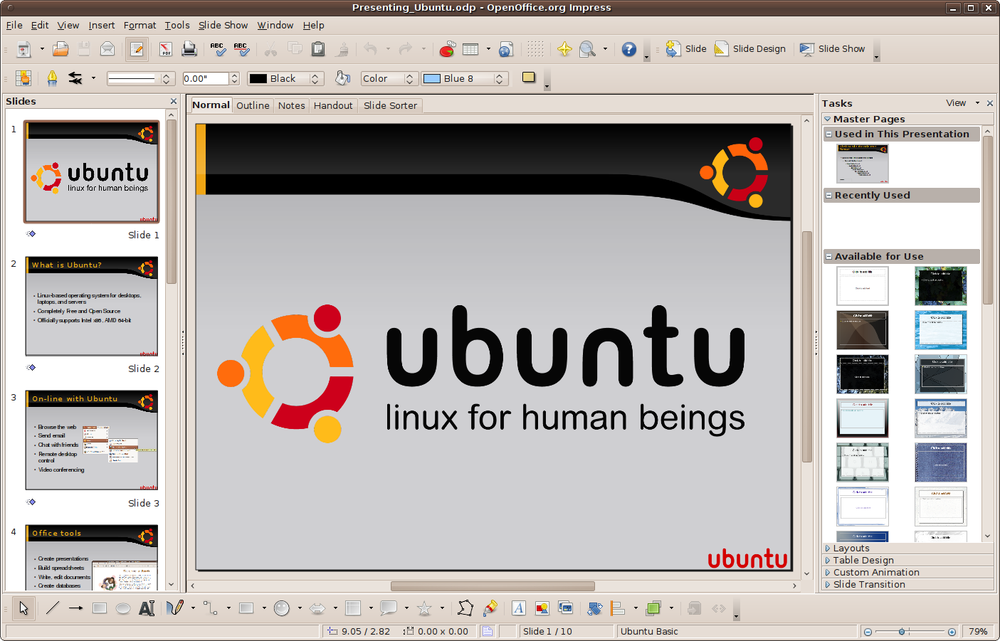
OpenOffice.org is also great for creating presentations. The program to use is Impress, which you can open by selecting Applications → Office → OpenOffice.org Presentation. Or you can call up a presentation file such as Presenting_Ubuntu.odp from the example-content folder of your desktop (see Figure 12-11).
The Standard Toolbar
The functions in the Standard toolbar are mostly the same as the rest of the suite, but a new Presentation toolbar is available to its right, as shown in Figure 12-12.
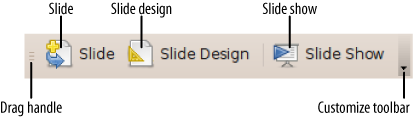
There are three buttons in the toolbar, the first of which inserts a new slide in the current location with the currently selected slide design. The second calls up the Slide design window for selecting other designs, and the third button starts a presentation slide show.
The Line and Filling Toolbar
Instead of placing the Formatting toolbar underneath the Standard toolbar, Impress gives you the Line and Filling toolbar, which looks like Figure 12-13.
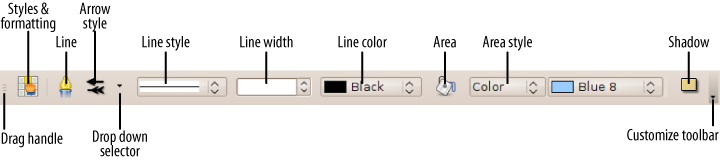
After the grab handle, the next button is the familiar Style and Formatting button, followed by the Line button, which calls up a window with which to select a line style. Following that is the Arrow style button, which is a drop-down menu. After that come the Line style, Line width, and Line color drop-down fields.
The next button, which looks like a can of paint, is the Area button for handling a wide range of area fills, followed by the area Color and Styling fields. Finally, the button with a shadowed rectangle represents toggling shadows on or off. Like all the other toolbars, you can customize this one by clicking the downward-pointing triangle at the far right.
A mini toolbar, called the Slide Sorter, is placed to the right. Its two buttons either select objects or start a slide show. Underneath the toolbars, the Impress program is divided into three main frames: Slides, Workspace, and Tasks.
The Slides Frame
This frame contains a scrollable view of all the slides in a presentation. You can use the scroll bar or middle mouse wheel to move backward and forward through the stack of slides and click one to display it in the center frame.
The Workspace Frame
This is where you do all of your slide designing and editing. Every object in a slide is smart so that clicking on it will call up the correct toolbars for editing it above the frame, including some toolbars I haven’t detailed.
Right-clicking an object element will also bring up a context-sensitive menu with additional options.
The Tasks Frame
This frame features a variety of tasks, such as Layouts, Table Design, and so on. Click one of the headings to expand its contents, which are then selectable. Just as with toolbars, you can drag and drop this and other frames into the main window, after which you can then leave it floating over your content or move it out and onto your main Ubuntu desktop.
The Drawing Toolbar
Underneath these frames is the Drawing toolbar, which provides a range of shapes, lines, fonts, and many other tools with which you can fully customize your presentations to their best effect.
The Master Slide
One way to develop slides is to lay out the first one exactly the way you want it, including font, size, layout of elements, and so on, and just duplicate it over and over, changing what you want on each slide.
However, every presentation has a master slide that can be used as the default for slides in the presentation. You view the master by selecting View → Master → Slide Master, which opens up the master view, in which only that slide is edited. Now you can edit the header, footer, background, and any other constant features to use throughout a presentation.
Every new slide you make will then have these attributes. When you have finished editing the master, click Close Master View in the Master View toolbar.
Draw
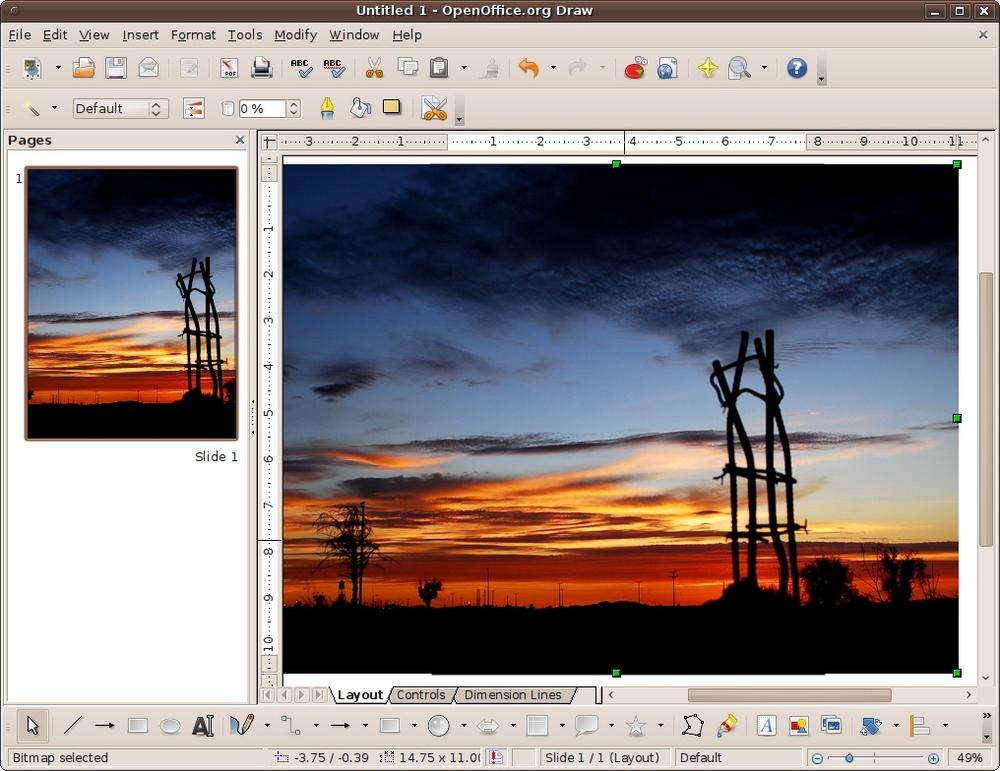
OpenOffice.org comes with a powerful drawing program called Draw, which you can open by selecting Applications → Graphics → OpenOffice.org Drawing. Figure 12-14 shows the program editing a photo from the example-content folder.
Describing the features available in the different OpenOffice.org modules becomes easier with each one. For example, Draw has many of the same toolbars as Impress, and its drawing features work in the same way.
The program has powerful style and formatting features, 2D and 3D object rotation, photorealistic rendering, smart connectors for creating charts, and much more. The best way to find out what it can do for you is to play with it.
Note
The Draw program will save only file types that can be read by OpenOffice.org programs, so it’s not suitable for creating images for use in other programs. But there’s always the GIMP image editor (the Ubuntu equivalent of Photoshop), the F-Spot photo manager, and the XSane image scanner (or the more user friendly Simple Scan if you are using Ubuntu 10.04), all of which are available from the Applications → Graphics menu in Ubuntu 9.10. So, if OpenOffice.org’s Draw doesn’t have exactly the features you want, one or more of the other programs probably will.
Base
The Base database program started off as added functionality for the other OpenOffice.org applications, but eventually evolved into a powerful database application in its own right.
Ubuntu doesn’t install the program by default, but you can easily install it yourself by going to the Ubuntu Software Center and entering “openoffice” in the search field, as shown in Figure 12-15.

You will see that the other parts of the suite have a checkmark on their icons, indicating that they are installed, but the sixth entry doesn’t. This is the one you want, so double-click it, and then click the Install button on the following screen. After entering your password, the program will be downloaded and installed. When finished, it will be accessible from the Applications → Office menu.
When you run Base you’ll be prompted to either create a new database or open an existing one (or you can connect to an existing database connection). Once you have chosen what to do, you’ll be taken to the main screen, as shown in Figure 12-16.
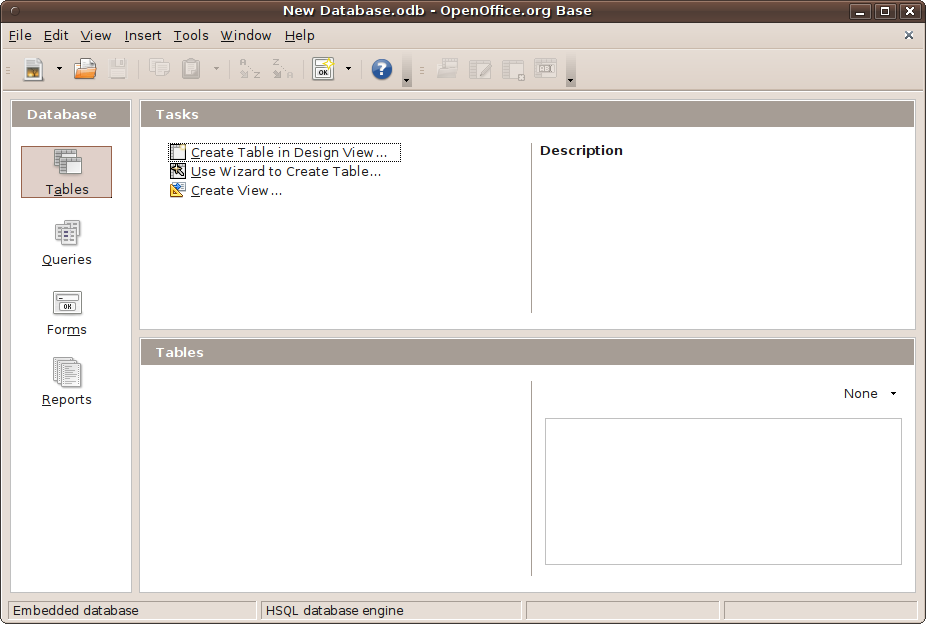
In Base you can use a variety of tools for inserting or editing data, ranging from handy wizards for creating tables, queries, forms, and reports, to a powerful design view interface for entering data.
Whether you simply want to catalogue your CD collection or need to produce monthly departmental sales reports, Base has the features you need. It’s also extremely fast, even with large databases.
Math
The OpenOffice.org Math program helps you to create advanced mathematical formulas, using the right symbols properly aligned in the correct places. It comes preinstalled with Ubuntu, but for some reason its menu option has been set to hidden.
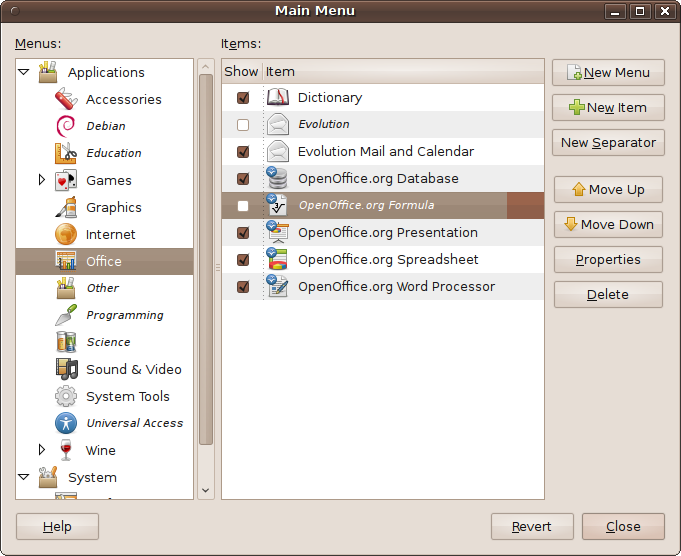
You can access it either by opening any other OpenOffice.org application and then selecting File → New → Formula or by right-clicking on the top-left Ubuntu menus and selecting Edit Menus to bring up the menu editor, as shown in Figure 12-17. In the menu editor, select Office in the lefthand pane to open the Office menu in the righthand one. Then, after you check the box next to OpenOffice.org Formula and click Close, the program will become available from the Applications → Office menu.
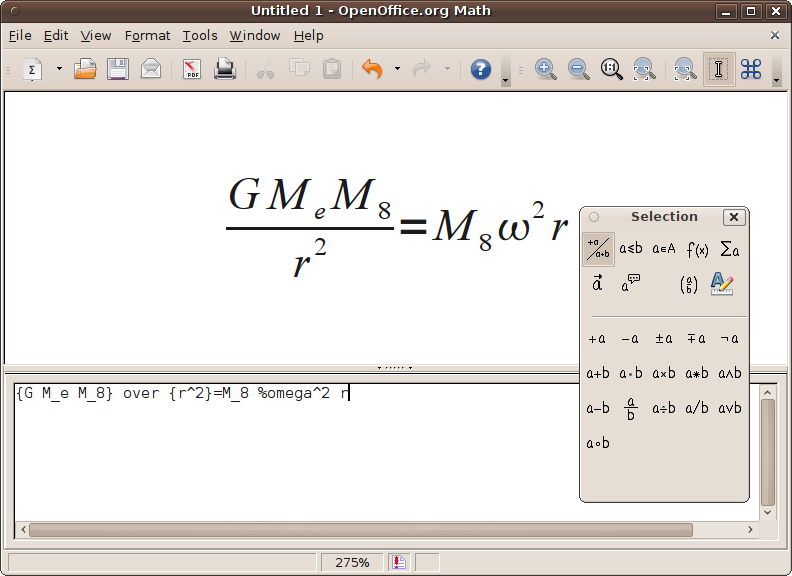
Using Math, there are three main ways of entering a formula. You can type markup directly into the equation editor, right-click on the equation editor and select the symbol from the context menu, or select a symbol from the Selection toolbox.
Figure 12-18 shows an equation that has been entered as text into the equation editor, with its corresponding formula displayed in the top pane.
Built-in Help
If you can’t figure out what an OpenOffice.org button does, select Help → What’s This from the program’s menus, and then hover your mouse over it to be shown a brief description of its function.
Evolution Calendar
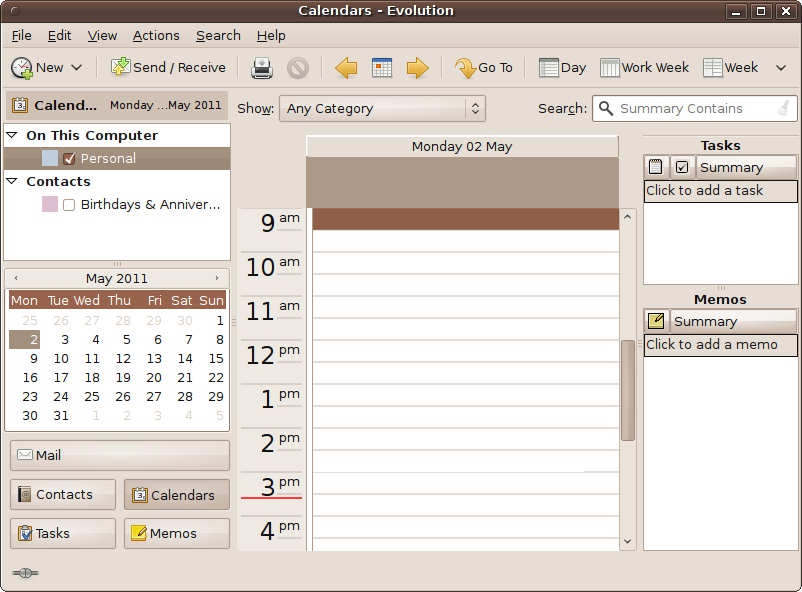
Although not a part of the OpenOffice.org suite, don’t forget that you can always click the date at the right of the top desktop status bar to pull up a calendar. From here, you can then double-click any date to enter the Evolution Calendars program, which features appointments, reminders, contacts, memos, and more (including subscribing to other calendars and publishing your schedule), as shown in Figure 12-19.
What’s New in 10.04?
As Ubuntu has grown in size, due to new features being constantly added, not everything the developers would like can fit on a 700 MB CD-ROM. Therefore, for each release decisions have to be made about what to include. As you’ve already discovered in this chapter, a couple of releases ago the Base program was dropped from the CD, and for 10.04 it’s the GIMP program’s turn.
Both applications remain in the Ubuntu repositories, are easy to install with the Ubuntu Software Center, and remain under development. But they are not used as much as the other bundled programs, so they have made way for other features that will be used by more users to be installed by default.
Therefore, seeing as this book went to press before the final release of 10.04, it is possible that other parts of OpenOffice.org may have been moved off the installation ISO file. If this is the case, remember that you can always install them from Synaptic or the Ubuntu Software Center.
Summary
The OpenOffice.org suite is a powerful match for any other commercial suite. Because it’s open source, and therefore under continuous development by a wide range of programmers, bugs are fixed, features are added, and updates are released much more frequently than the every three years or so of other suites. In fact, since 2006 there have been at least four updates to the suite each year. Because of this, it has the solid support of millions of users all over the world, and you can be sure that your time spent learning OpenOffice.org will be well invested.
Now that you have the office applications under your belt, in the next chapter, we’ll take things a little easier and look at the world of Ubuntu gaming.