Table of Contents for
Ubuntu: Up and Running
 Ubuntu: Up and Running
Published by
O'Reilly Media, Inc., 2010
Ubuntu: Up and Running
Published by
O'Reilly Media, Inc., 2010
- Cover
- Ubuntu: Up and Running
- Ubuntu: Up and Running
- Dedication
- Foreword
- Preface
- 1. About Ubuntu
- 2. Installing and Upgrading Ubuntu
- 3. Configuring
- 4. The Desktop: Accessing Applications and Features
- 5. The Filesystem, File Attributes, and Permissions
- 6. The Nautilus File Browser
- 7. The Command Line
- 8. Installing and Removing Software
- 9. System Maintenance and Security
- 10. Networking Ubuntu
- 11. The Internet
- 12. Using OpenOffice.org
- 13. Playing Games
- 14. Pictures, Sound, and Video
- 15. Other Ubuntu Distributions
- 16. Using Wine
- Index
- About the Author
- Colophon
- Copyright
Chapter 10. Networking Ubuntu
In this chapter, we’ll look at how to connect your Ubuntu computer with others, whether they run Linux, Windows, or OS X. We’ll cover file and folder sharing, using one keyboard and mouse to operate multiple computers, and logging into remote computers.
In the past, many of these operations took a lot of wrestling with highly technical configuration options. Getting the networking right could be a fiddly and time-consuming task. But nowadays advanced networking is nothing to be frightened of, because it’s generally just a matter of using your mouse to click a few options, maybe entering the name of a computer to which you wish to connect, and clicking a Connect button.
This chapter assumes you can reach the local network that connects the computers in your home or office. Make sure you are connected to your local hub and the Internet, using the instructions in Chapter 3 as needed in your environment. To show you how easy it is, let’s jump right in and start accessing one computer’s desktop remotely via another one.
Remote Desktop
Ubuntu comes installed with a Virtual Network Computing (VNC) program with which you can echo another computer’s desktop onto yours, either in a window or taking up the whole screen, as though you were at that machine. You can also operate that computer through VNC if you have been given that privilege.
You may wish to do this to provide assistance to other people remotely, or so you can work on different computers in different locations all from the one computer. If you don’t have access to two computers, you may want to jump ahead to the section Using Shared Folders.
Enabling the VNC Server
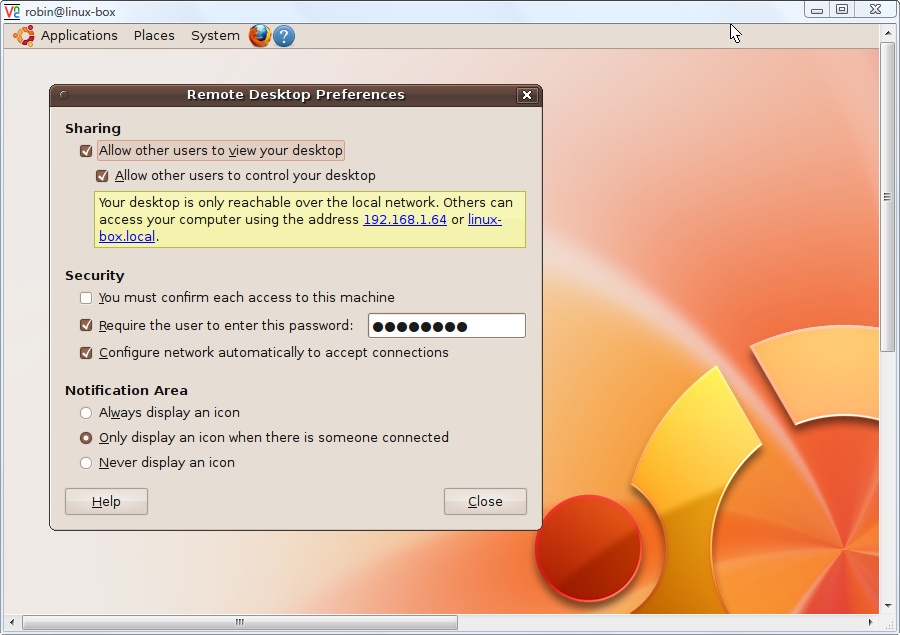
To use this facility, you will need two computers, one of which should be running a VNC server and the other a VNC client. So, let’s get an Ubuntu computer up and running as a server by selecting System → Preferences → Remote Desktop to bring up the window in Figure 10-1.
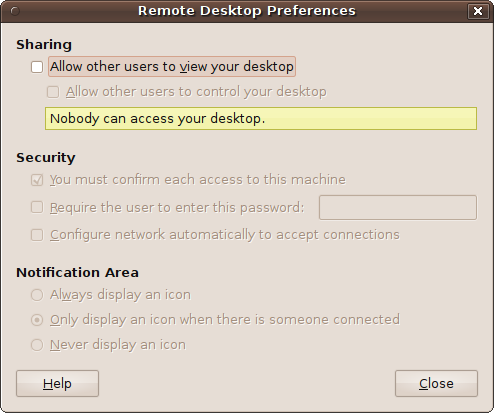
This is the default state in which, as the program says, “Nobody can access your desktop.” But remember that as soon as you start using it, VNC may open up security risks, depending on what you do.
To enable the VNC client, click the checkbox next to “Allow other users to view your desktop” and wait a few seconds until the connectivity check completes. Then check the box “Allow other users to control your desktop,” followed by “Configure network automatically to accept connections,” and you’ll be set to go.
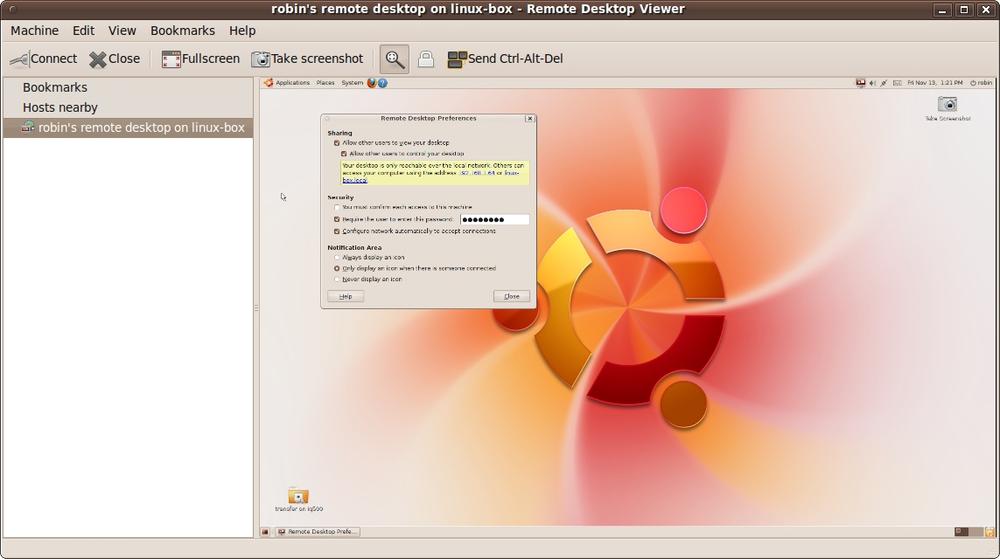
However, it will be possible for anyone else to log into your computer at this point, so also check “Require the user to enter this password” and enter a password in the input field, and then you’ll be set to go and secure. The program’s window should now look something like the one shown in Figure 10-2.
Warning
Make sure to read the section Passwords to help you choose a secure password. Usually the activities in this chapter open your system only to other systems on the local network in your home or office. Even so, every program you open to allow access to your computer creates an attack channel for malicious users, and thousands of programs roam the network daily looking for bugs that permit entry. So, good passwords are highly recommended.
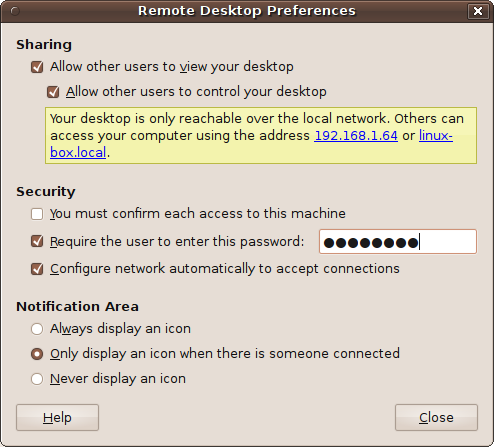
As you can see in the figure, the local IP address the router has given this computer is 192.168.1.64, and it can be accessed using the local name linux-box.local. I have also created an eight-character password.
The remaining options
You should note that checking the third option under the Security section causes the first one to become unchecked, since they are mutually exclusive. When the first is checked, you will need to be at the server computer whenever a request to start a VNC connection comes through, because you must then accept or deny the request.
However, seeing as you may be using VNC to connect computers in different rooms, I have set this VNC server up to allow all incoming requests, as long as the correct password is supplied. You may wish to change this back if you intend to allow only VNC connections under your immediate physical control.
I also left the Notification Area setting at the default. The way it is by default, an icon will appear on the status bar only when there is an active VNC connection. But you can choose to have the icon always displayed when the VNC server is running, or to never have it displayed.
Connecting to the VNC Server
I’ll now show you three ways of connecting to the VNC server you’ve enabled: for Ubuntu, Windows, and OS X.
Using Ubuntu
To connect one Ubuntu computer to another one with an enabled VNC server, you need to select Applications → Internet → Remote Desktop Viewer on the computer that looks at or controls the other’s desktop. This option calls up the Vinagre VNC program shown in Figure 10-3, which has been grabbed from another Ubuntu installation on the same local network.
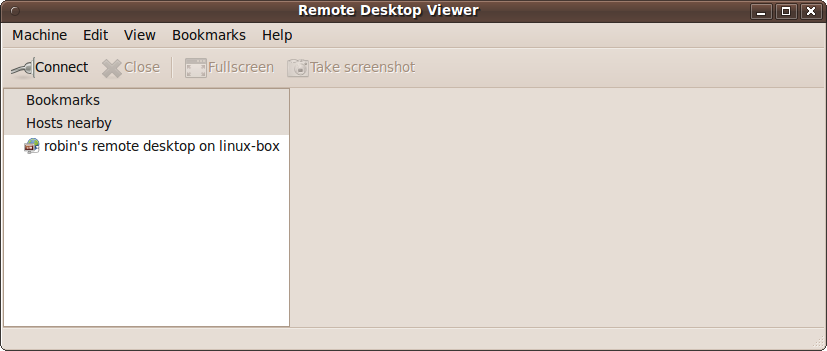
You can now double-click any VNC servers shown in the lefthand pane to connect to them. In this case only one has been found, which is the machine on which I just enabled VNC in the previous section. Double-clicking it brings up the password prompt shown in Figure 10-4.
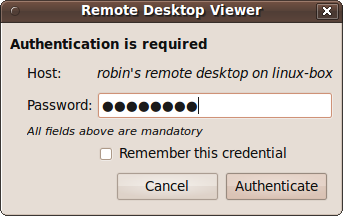
When entering the password, you can check the “Remember this credential” checkbox to remember the password in future (which you can do if you’re in an environment you trust and don’t have to worry about casual visitors playing with the computer). When ready, click the Authenticate button to establish the connection, which will make the Remote Desktop Viewer’s righthand pane display the contents of the VNC Server’s desktop, as shown in Figure 10-5. Here, I have also clicked the magnifying glass icon to resize the desktop to fit exactly into the pane.
This resized view is great for seeing what’s on the desktop. When you need to see more detail, click the magnifying glass icon again to return the display to normal size, but you’ll have to use the scroll bars to move the contents around within the pane. You may also want to resize the lefthand pane and/or the whole window to get the best fit.
The View menu
Using the View menu, you can toggle the display of the top toolbar, the status bar, or the side panel, and can alternate between full screen and windowed view, as well as scale the display and control whether to just view the remote desktop without being able to modify it.
Fullscreen mode
By clicking the Fullscreen button or pressing the F11 key, you can also toggle between full screen and windowed mode, as shown by Figure 10-6. In full screen mode, you would never know that the desktop shown is that of another computer, except that the responsiveness will not be as fast as the local desktop.

Using Windows
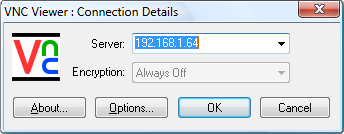
With Windows, you will need to download and install a VNC client program such as RealVNC (available from http://www.realvnc.com/products/download.html). You can then run it in the usual way. Depending on the program you use, you will normally get a window such as Figure 10-7, in which the VNC server name or IP address is being requested.
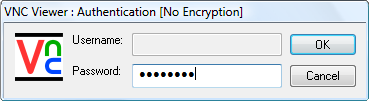
Enter the IP address of your Ubuntu computer (which, in my case, is 192.168.1.64), select any options (which generally provide customization for the colors used and rate limiting of mouse movement events), and click OK. This should bring up a password prompt such as the one in Figure 10-8.
Once the password has been authenticated, the VNC connection is established and Windows will open up a view of the VNC server’s desktop, which will be similar to Figure 10-9.
Depending on the features available with your VNC client, you should be able to move the view of the desktop around with the scroll bars and maximize the window to view the Ubuntu desktop in as much detail as possible.
Using Mac OS X
On a Mac computer, you can use a program such as Jollys Fast VNC (available from http://www.jinx.de/JollysFastVNC.html) as your VNC client. Simply download and install the program, and then run it to bring up a screen similar to Figure 10-10.
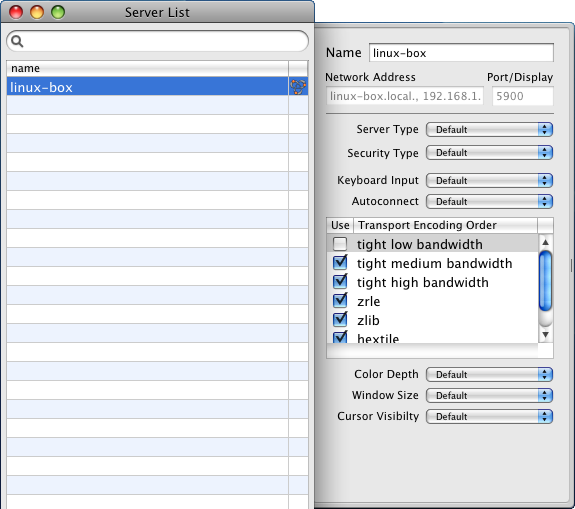
As you’d expect, the VNC client will normally detect servers to which it is capable of connecting, and it has done so here. Now all you need to do is double-click the server to which you wish to connect, bringing up the password prompt shown in Figure 10-11.
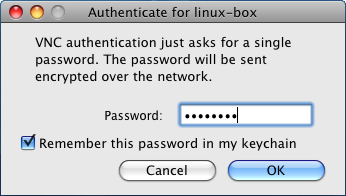
Once the password has been verified, the VNC client starts communicating with the server and opens up a window similar to the one shown in Figure 10-12.
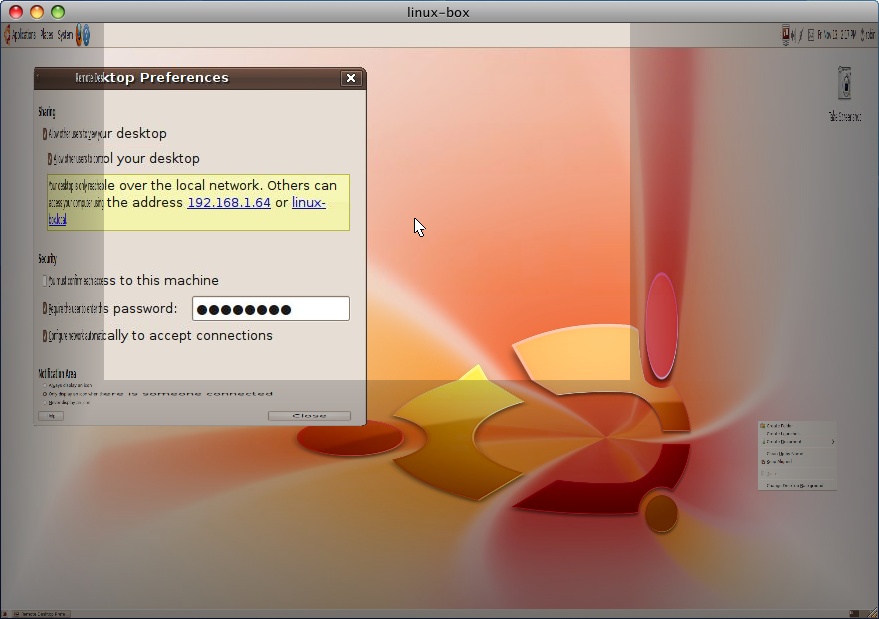
Interestingly, when the remote desktop is larger than the local window, this particular VNC client displays the area immediately surrounding the mouse pointer in full detail, and then shrinks areas of the desktop farther away, so you can still view the desktop in its entirety.
VNC Desktop Resolutions
When running a VNC server, it is helpful for other users (or yourself) who will be connecting to it if you choose a lower resolution. This substantially reduces the amount of data transferred across the network, and allows a client to show the remote desktop in a smaller window. I generally think a size of 1024 × 768 pixels is more than necessary, and 800 × 600 is probably optimal for both speed and productivity. You can change the desktop resolution using System → Preferences → Display. If you need a larger desktop, you could instead try changing your monitor’s color depth to a small value such as 256, or even 16.
Using VNC over the Internet
Another use for VNC is to connect computers remotely over the Internet—for example, to access your work computer from home. But there are several security issues to consider, and doing so is not as easy as over a local network. Therefore, I suggest you refer to the official Ubuntu documentation at https://help.ubuntu.com/community/VNC, which explains in detail the procedures to follow.
Controlling Multiple Local Computers
Nowadays, with technology being so much cheaper, it’s not uncommon to have two or even more computers on your desk. The only downside is that they all require their own keyboard and mouse to operate them, which leaves little room for much else on your desk.
Luckily, there’s a very useful program called Synergy with which you can share a single keyboard and mouse across multiple computers. And, unlike using VNC, it’s a remarkably responsive system because only the mouse and keyboard data is sent across the network, rather than large amounts of graphical data.
On Ubuntu you can download and install Synergy by selecting System → Administration → Synaptic Package Manager, and entering Synergy in the “Quick search” field. This highlights two packages, synergy and quicksynergy. Mark both for installation, and then click Apply to perform the installation.
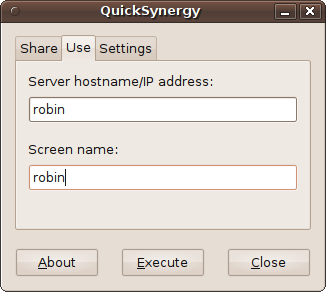
Now you must choose which computer will be your master, i.e., the one whose keyboard and mouse will control the others, and make a note of its name. For example, mine is simply called robin. Then, on each Ubuntu computer you wish to control, you should select Applications → Accessories → QuickSynergy and then click the Use tab, shown in Figure 10-13. Here, you should enter the controlling computer’s name in both fields. (The screen name just determines what name appears in the Synergy program.)
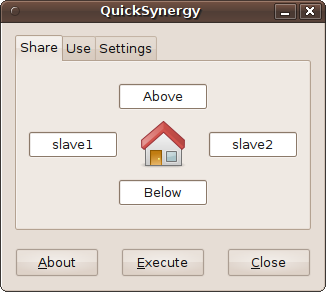
Once all your slave computers have been set up, you need to configure your master. To do this, download and install both synergy and quicksynergy on that machine in the previous manner using Synaptic. But then, when you call up the program (by selecting Applications → Accessories → QuickSynergy), use the Share tab to decide where each of your remote computers (slaves) should appear, relative to your main computer’s screen. You can control up to four slaves.
So, for example, if you have two slaves, called slave1 and slave2, I would recommend placing one monitor on the left and the other to the right of your main one. Then, in the fields showing Left and Right, enter the names of the two slave computers, as shown in Figure 10-14.
You are now ready to click the Execute button on each of your computers, and you’ll find that your main computer will allow your mouse pointer to travel all the way from the far left of the lefthand monitor, past your main monitor, and all the way through to the far edge of the righthand one. With each monitor it enters, your main computer’s mouse and keyboard will take over control of that computer.
Once you have verified that it’s all working, you can tuck the spare keyboards and mice away behind the monitors. Don’t move them too far, though, as you may need them for logging in again after a reboot, or if the master machine plays up.
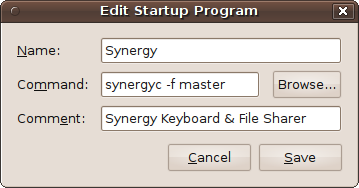
If you decide you like this setup and want the convenience of having your slave computers start up automatically with each reboot, you can select System → Preferences → Startup Applications, and then enter the details shown in Figure 10-15, replacing the word master with the name of your master computer. After the next reboot you won’t need to run QuickSynergy again, although you’ll still need the keyboard and mouse to log in, unless you have chosen automatic logins. On my setup, I’ve chosen automatic logins because the slave machines are on my desk in a secure environment.
Synergy is also available for Windows and Mac OS X, but its configuration can be convoluted compared to the ease of QuickSynergy on Linux. If you would like to network Ubuntu with these types of computers, the details you need are on the program’s home page at http://synergy2.sourceforge.net. For example, using the information there, I have been able to connect a Mac, a Windows Vista and 7 computers, and some Ubuntu machines all together.
Because these are all different computers (and not several monitors connected to a single computer), you cannot drag windows or files between them, but Synergy does retain the clipboard buffer, so you can copy and paste between computers. For transferring entire files and directories between a group of computers, I usually open up a server connection, as described in the following section.
Using Shared Folders
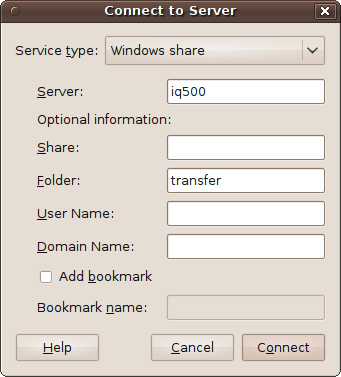
When you wish to access a folder that has been previously shared by another computer in your network, you can manually choose Places → Connect to Server and enter that folder’s details, as shown in Figure 10-16. Here, the folder transfer is being opened up on the computer iq500.
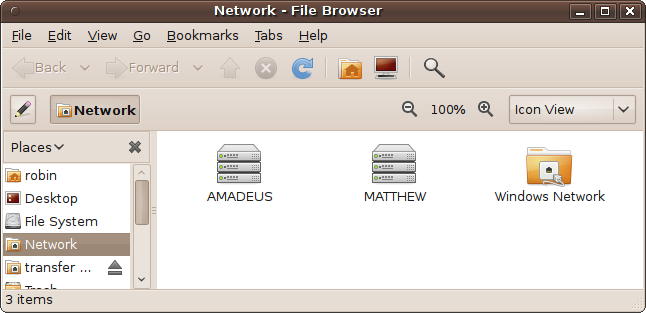
If prompted, enter any password that has been set, and the folder will open up on your desktop, along with an icon representing it. If you don’t know which resources are where on your network, you can also select Places → Network and then browse through the computers and folders shown in the righthand pane. Figure 10-17 shows what it will look like.
Note
Unlike other operating systems, Ubuntu doesn’t remember network
shares between reboots. However, it is possible to create a launcher to
reconnect to them. To do this, right-click the desktop and choose Create
Launcher. When the window pops up, provide a name for the launcher, and
then enter the following in the Command field, where
computer and
folder are the names of the computer and
folder to which you wish to connect:
nautilus smb://computer/folder
Then click OK, and you can instantly re-establish a connection by double-clicking the new icon on your desktop. This works by calling up the Nautilus file browser and passing it the details for creating a Samba networking protocol connection. So, in the previous example case, you would enter the command:
nautilus smb://iq500/transfer
Sharing Your Folders
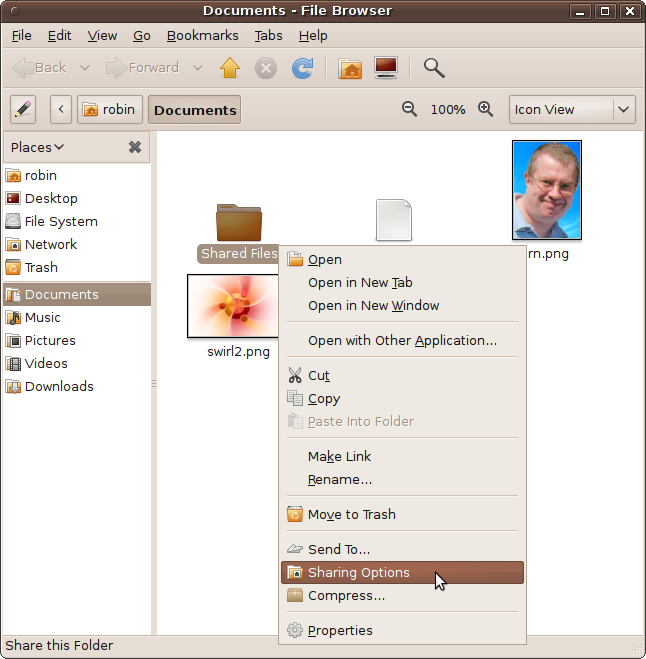
To share files on your Ubuntu Computer with other systems, you first need to turn on the Sharing service, which is disabled by default. The easiest way to do this is wait until you have something to share, and then right-click its folder and select Sharing Options, as shown in Figure 10-18.
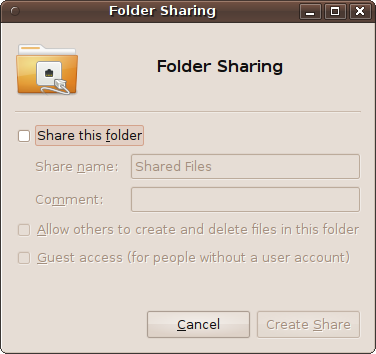
A new window will then pop up with the sharing options available, shown in Figure 10-19.
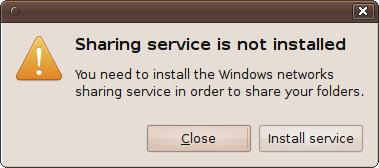
The first time you click the “Share this folder” checkbox, another window will pop up (see Figure 10-20) informing you that the Sharing service is not yet enabled, and giving you the option to close the window or install the service. So click “Install service,” and enter your password when prompted.
Some package files will then be downloaded and installed, which may take a couple of minutes. When the process is complete, you will be prompted to click “Restart session” to continue. So make sure your work is saved, and then click the button. You won’t have to repeat this procedure again.
The Folder Sharing window will now change and offer you its options, which you can use to confer creation and deletion capabilities (on top of having read access), and whether guests can access the folder. Once you have decided what to allow, click Create Share.
The first thing you should notice now is that the icon of the folder you have shared has a small emblem at its top right that shows two arrows facing in different directions. This indicates that the folder has been shared and can now be accessed from other computers.
Sharing folders on other operating systems
Most operating systems, including Windows and OS X, use either the Windows domain protocol or the Samba protocol (which is fully Windows compatible). Therefore, you should be able to refer to your operating system’s user documentation to see how to share folders, which generally involves the same steps, regardless of the operating system used by the remote computer.
Using Keyrings
When working with Ubuntu and network shares, WiFi connections, and so on, you will sometimes be asked for your keyring password. Don’t be confused by this. Simply enter your main Ubuntu password.
There’s a lot more to the Keyring, though. Ubuntu can remember all your passwords and prompt you just once, the first time you need one of those passwords, to enter your keyring password. The idea is clever in that you can have several passwords for different things, and yet only have to remember one master password. But it’s not always clear to new users what is going on. It can also be annoying when you don’t actually want to use the keyring feature.
So here’s how it works. If you don’t want to use the keyring, whenever you are prompted by a keyring request, just press Enter. As long as you haven’t already set a keyring password for the particular type of access you want, you shouldn’t be prompted again for that item.
Otherwise, if you do want to use the keyring system, think up one password you would like as a master password, and enter that whenever asked for your keyring password. You can then supply the actual passwords just the once for each item. They will then be remembered by Ubuntu, which will prompt only for the keyring password in future, and only once per session.
Managing Your Keyring
You can manage your keyring by selecting Applications → Accessories → Passwords and Encryption Keys. This will bring up a window similar to the one shown in Figure 10-21.
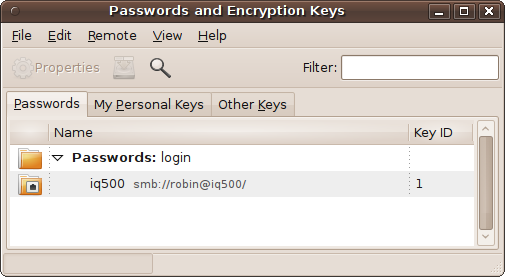
Here, you can see there is currently only a single password in use, which is one I created for accessing another computer with the name iq500. Instead of having to remember the correct password for the iq500 computer, I now only have to enter the keyring password.
Should you decide you don’t want to use a particular keyring password anymore, you can right-click it and select Delete. You will then have to confirm any prompts you are given, and the key will be removed. If you still have problems, delete the keyring itself (it will normally be called Passwords: default or Passwords: login). You can then choose an empty password next time you are requested to, and you won’t be prompted again.
Summary
This marks the last of the “How to use Ubuntu” chapters. Congratulations—you are now an experienced Ubuntu user! In the remaining chapters, I’ll take you through some of the things you can do with your new operating system, such as playing games, running Windows programs, working with OpenOffice.org, or, as in the next chapter, using the Internet.