Table of Contents for
Ubuntu: Up and Running
 Ubuntu: Up and Running
Published by
O'Reilly Media, Inc., 2010
Ubuntu: Up and Running
Published by
O'Reilly Media, Inc., 2010
- Cover
- Ubuntu: Up and Running
- Ubuntu: Up and Running
- Dedication
- Foreword
- Preface
- 1. About Ubuntu
- 2. Installing and Upgrading Ubuntu
- 3. Configuring
- 4. The Desktop: Accessing Applications and Features
- 5. The Filesystem, File Attributes, and Permissions
- 6. The Nautilus File Browser
- 7. The Command Line
- 8. Installing and Removing Software
- 9. System Maintenance and Security
- 10. Networking Ubuntu
- 11. The Internet
- 12. Using OpenOffice.org
- 13. Playing Games
- 14. Pictures, Sound, and Video
- 15. Other Ubuntu Distributions
- 16. Using Wine
- Index
- About the Author
- Colophon
- Copyright
Chapter 14. Pictures, Sound, and Video
When it comes to multimedia, Ubuntu is definitely no slacker. In fact, the Ubuntu Studio edition is absolutely brimming with programs for handling all types of multimedia. But you don’t need to install Ubuntu Studio to be able to retouch and print photographs, edit home movies, or play your MP3s, because the standard Ubuntu edition comes with programs for these tasks, either preinstalled or available for download and installation with a few mouse clicks.
Even better, because Ubuntu is extremely efficient and can run quickly using a lot less processor power and system memory than other operating systems, you should find that manipulating media using Ubuntu is quicker and easier than ever.
Whether you just want to listen to your MP3s or watch videos, or you need to create or edit your own media, this chapter introduces a range of professional and fully featured programs that are as good as, or better than, those you’ll find on other platforms. What’s more, they won’t cost you a cent to install and use.
Movie Player
The Movie Player program is supplied with Ubuntu as the default application for playing movies and audio files. You can open it from the Applications → Sound & Video menu, or by default, it will be called up when you double-click a movie or audio file. Figure 14-1 shows the program displaying the file water-and-wind.ogv, one of the samples in the folder /usr/share/example-content (which you may also have copied to your desktop if you followed the examples in Chapter 12).
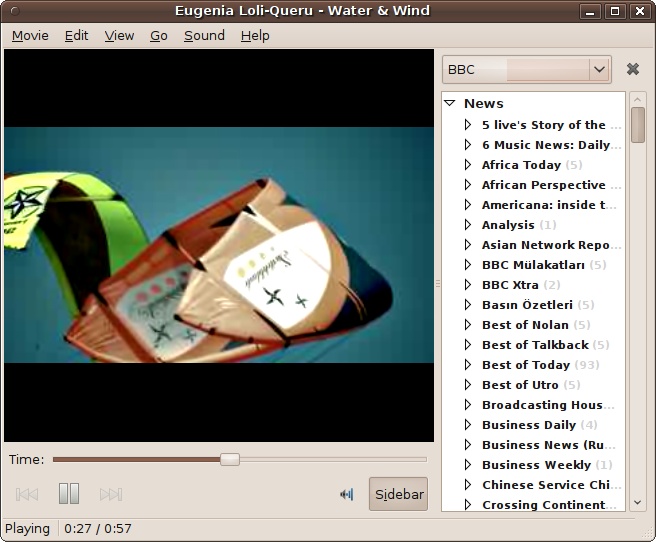
To view a movie in full-screen mode, you can double-click the player window; double-click it again to return to normal view. You can also use the slider, as well as the backward and forward buttons, to move about within a movie.
To the right of the window is the sidebar, which displays the properties of the current video, the playlist, a selection of BBC audio podcasts, or a YouTube video search application—all selectable from the drop-down menu above it. The Sidebar button underneath the video can be used to toggle the sidebar on and off.
Note
At the time of this writing, the BBC audio podcasts were working, but as this book went to press, they were not, and an error of “Could not connect to server” was returned. Hopefully, they will be up and running again by the time you read this.
Adding Plug-ins
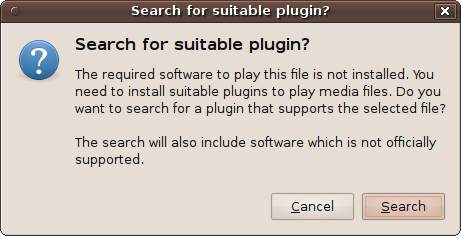
In order to play the wide range of audio and video formats in which artists release their work (MP3, WAV, and QuickTime, just to mention a few), programs such as Movie Player depend on related programs called codecs, available as plug-ins. Whenever you play a video for which your system lacks the required codec, the window shown in Figure 14-2 will pop up, and you will need to click the Search button.
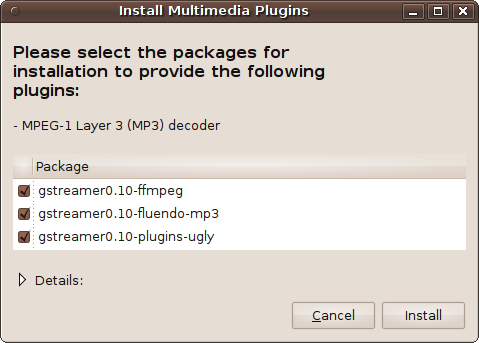
The window will then be replaced with the Install Multimedia Plugins window, which will spend a few seconds searching for the plug-ins and then display those it finds. To install them, click the Install button (see Figure 14-3), and then click Confirm in response to the following prompt. Finally, enter your password when asked to initiate the installation process.
The plug-ins are then downloaded and installed, and you will then return to the Movie Player window, which you should restart in order to take advantage of the new plug-ins. You may have to go through this process the first few times you try to play different types of content. But once a plug-in has been installed, you won’t be prompted for it again, and that includes any other programs that might use the same plug-ins.
Note
The United States and some other countries have responded to the complaints of copyright holders by passing laws that make it illegal to download some plug-ins. I won’t launch into a legal discussion here, but the practical effect of such laws is to discriminate against Linux and other free software users. I will leave it up to your discretion about whether to install the plug-ins. Life would certainly be easier for users of all systems if artists moved to formats unaffected by these laws.
VLC Media Player
The Ubuntu Movie Player is great for a basic program, but if you want bells and whistles you may wish to try the VLC Media Player, which you can download and install in the usual way by entering “vlc” in the search field of the Ubuntu Software Center. Once installed, it becomes available in the Applications → Sound & Video menu.
Figure 14-4 shows the minimal window that appears when you run it. But don’t be fooled by its modest appearance, because VLC is packed with powerful features for playing just about any kind of media, including DVDs and network streams. It can even convert and save files in different formats.
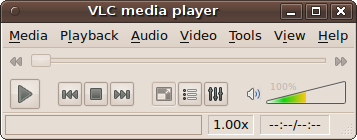
It’s well worth your time to browse through the various menus to discover the features that VLC offers, which also include a graphic equalizer and spatializer, as well as image transformation effects such as sharpening, rotation, cropping, and more.
Rhythmbox Music Player
You can open Rhythmbox by selecting it from the Applications → Sound & Video menu. It may not immediately open a window, though; instead, a new icon (looking like a loudspeaker cabinet with one large and either one or two small speakers depending on the version) will be placed on the top status bar, as shown in Figure 14-5.
To open the program, click the icon, and a window like the one in Figure 14-6 will appear, although if you haven’t imported any music yet, there will be nothing displayed in the various panes.

Importing Tracks
To import music into Rhythmbox, select Music → Import Folder from its menus and locate the root folder of your music collection. You can also drag and drop files and folders from the File Manager into Rhythmbox.
Imported tracks will then appear in the three righthand panes, sorted by artist, album, and track names. In Figure 14-6, Radio, the fourth track of the album Motivation Radio, is currently playing. You can also see that, where available, album covers are also shown.
Playing Music
To play a track, double-click it, or double-click an album to play all the tracks in the album. When a track is playing, the speaker cabinet icon in the top status bar will either display a circle around it, or simply become darker and bolder, depending on the version.
You can control playing and pausing as well as track skipping, looping, randomizing, and the master volume from the top toolbar. The Library pane lets you create a play queue and play podcasts and live radio. It also informs you of any errors encountered while importing your music collection.
Using the Search field, you can quickly find any track. Or you can browse your collection by artist, album, or title by clicking the relevant button above the Album pane. The bottom pane lists the tracks matching your selection, which you can further sort by clicking any heading
Unlike some other Linux audio players, Rhythmbox plays a wide variety of formats, including .wma (Windows Media Audio) and .m4a (Apple’s iTunes format), so you shouldn’t need to convert your music collection.
Note
When you click the Rhythmbox player’s close icon, the program doesn’t actually close; it just makes the window go away so that you can play your music without cluttering the desktop. You can click the Rhythmbox icon in the top status bar at any time to bring back or hide the display of the main program window.
Last.fm
If you are a member of the popular online music streaming service Last.fm, you can access it from Rhythmbox by clicking Last.fm in the lefthand pane and then clicking the Account Settings button to enter your username and password.
What’s New in 10.04
At the time of this writing, a music store called the Ubuntu One Music Store was slated for inclusion within the Rhythmbox program in Ubuntu 10.04. So, if you have upgraded Rhythmbox to the latest version, and if everything has gone as planned, by now you may be able to access this store from the Stores section, in a similar manner to the free and listen-before-you-buy stores Jamendo and Magnatune. Presumably, you will have to create an account with a designated credit card in order to purchase tracks, and hopefully they will be free of Digital Rights Management (DRM).
There was also talk of adding an audio equalizer to Ubuntu in order to make your music sound as good as possible by tailoring it to the acoustics of the room your computer is in. If it has made it into the final release, you will most likely be able to access the graphic equalizer by clicking (or right-clicking) the sound icon in the desktop’s top panel.
Another major new feature in 10.04 is the ability of Rhythmbox to access your iPhone or iPod media. Simply connect it to your computer by USB and it should be immediately recognized and mounted on the desktop, and also listed as a device in Rhythmbox. You can then play media directly from the device, or copy it back and forth between your player and computer. I have confirmed this using a 32 Gb unjailbroken iPhone 3GS with version 1.3.1 firmware. However, it is always possible that future firmware upgrades from Apple could change this, requiring an update to Rhythmbox to restore interoperability.
The GIMP Image Editor
The GIMP image editor, available from the Applications → Graphics menu (but see the section What’s New in 10.04?), is an incredibly well-featured and powerful image editor, championed by many people as the Linux equivalent of Adobe Photoshop. It does take a little getting used to, not least because it divides its components up into separate windows on your desktop (see Figure 14-7).
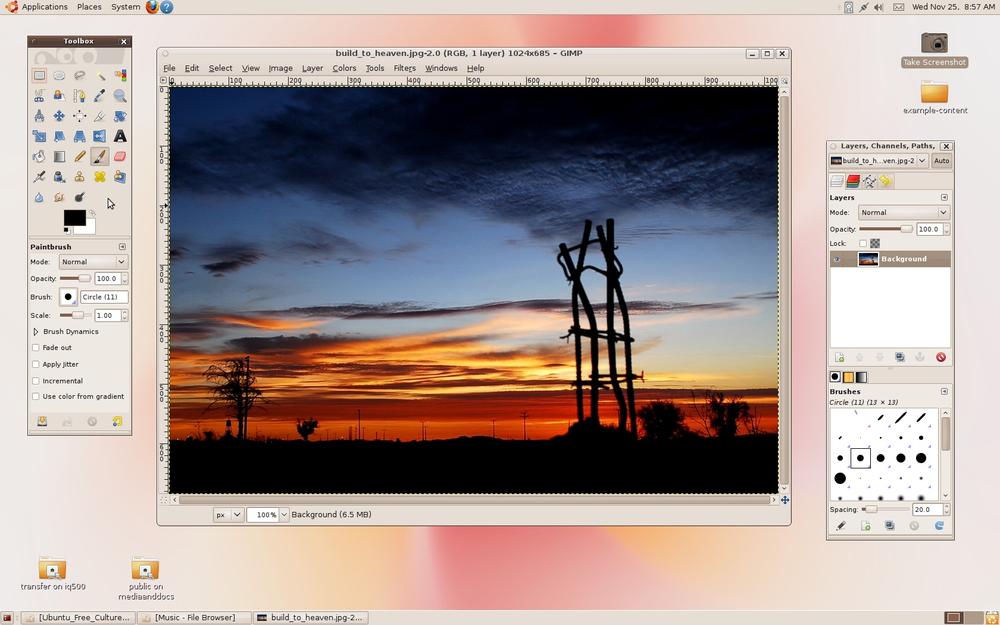
But if you are used to an environment in which your graphic editor takes up the entire desktop, and prefer not to be distracted by any other open windows, you may wish to click the bottom-left icon of your desktop to hide all open windows, and then click the tab in the bottom status bar representing the GIMP. This will ensure only GIMP windows are visible.
Learning How to Use It
Teaching you how to use an image editor as powerful as the GIMP is beyond the scope of this book, so you’ll need to browse through the various menus and try out options to acquaint yourself with the program’s full capabilities.
Having said that, though, the Help menu brings up a comprehensive tutorial that takes you through every aspect of the program (see Figure 14-8). Because the GIMP shares the desktop with other windows and doesn’t hog the whole monitor to itself, you can open up the help next to the GIMP editor and try out features as you read.
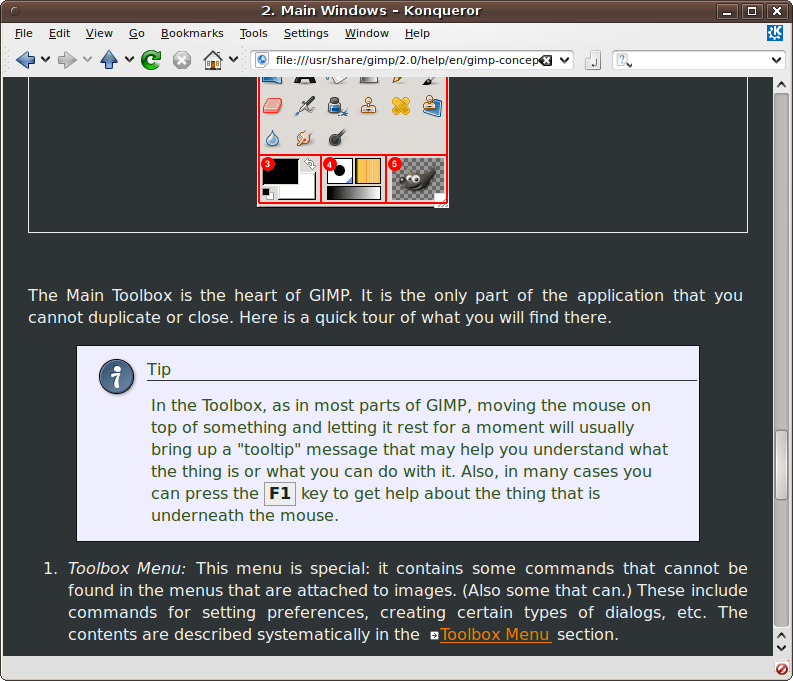
There’s also a very popular GIMP community at http://gimptalk.com, which is dedicated to helping new and seasoned users alike, and where they share tips, techniques, and images created using the program. The GIMP program is also easily extensible using plug-ins available from http://registry.gimp.org, and there are some handy tutorials at http://gimp.org/tutorials.
What’s New in 10.04?
Starting with Ubuntu version 10.04, the decision was taken to remove the GIMP from the standard Ubuntu installation in order to return space to other new features that are deemed to be useful to a greater number of users. As the distribution expands, this is the kind of difficult decision that the team will keep having to make.
But by no means has the program been dropped, nor is it considered old or obsolete—far from it. The GIMP remains one of the jewels in the Linux crown, is still in the Ubuntu repository, and is easily installed by typing “gimp” into the Ubuntu Software Center search field, and may also be available in a planned new section of the Ubuntu Software Center called Staff Picks.
Note
As you might imagine, there was a lot of discussion about this on the Ubuntu bulletin boards as this book was going to press, and therefore I believe that there is a slight possibility that the decision to drop the GIMP from the ISO could be reversed (although this would likely be at the expense of something else being dropped), in which case, disregard this section. Also, if you installed Ubuntu 9.10 from the DVD supplied with this book and then upgraded to version 10.04 or higher, GIMP will be grandfathered in on your computer, and will not have been removed.
F-Spot Photo Manager
The F-Spot photo manager, available from the Applications → Graphics menu, is a handy editor designed for touching up your photographs (see Figure 14-9).
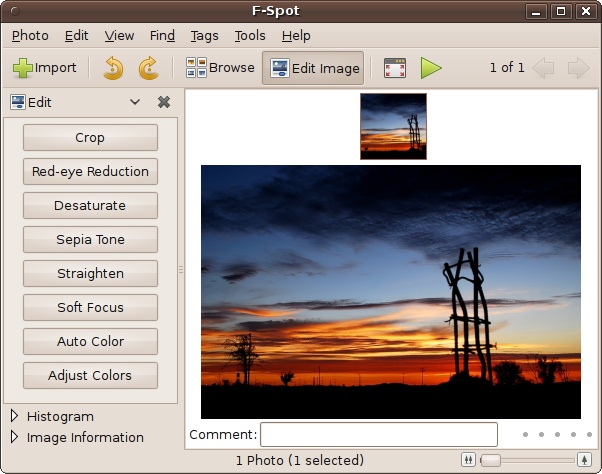
With F-Stop, you can crop images to size, reduce or remove the red from people’s eyes, modify the color balance and saturation of an image, and a whole lot more. Select these features by clicking buttons in the lefthand pane, and then use them in the righthand main pane.
The top toolbar lets you import photos, rotate them left or right, browse multiple images, view photos full screen, and display them in a slide show. At the bottom left, you can get details such as an image’s histogram, the date a photo was taken, its size, and the exposure setting used. The slider at the bottom right lets you easily zoom in and out of a picture you are working on.
For more details on using the program, click the Help menu to bring up a comprehensive manual.
Audacity Audio Editor
Audacity is a multitrack digital audio editing application. It’s not bundled with Ubuntu, but you can easily install it by entering “audacity” in the search field of the Ubuntu Software Center. Once installed, it will be available in the Applications → Sound & Video menu. You can also open it by right-clicking an audio file and selecting Open With → Audacity, which is exactly what has been done in Figure 14-10 using the file InTheCircle.oga, one of the supplied example media files.
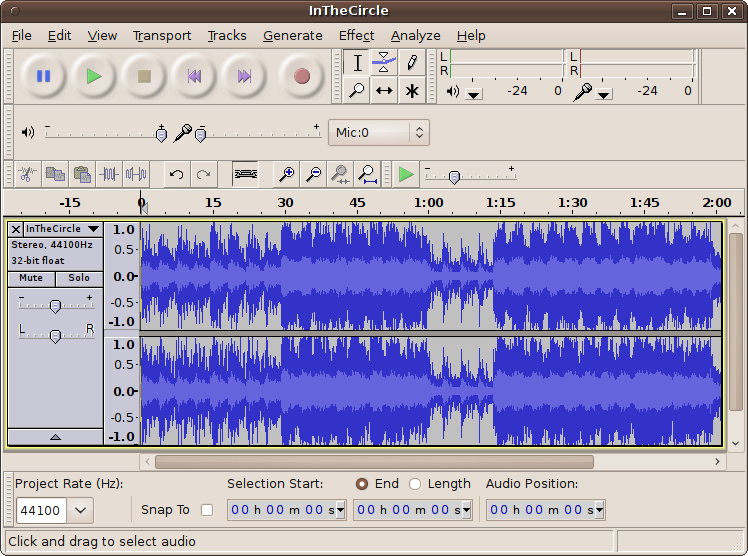
As you can see, the file being edited is in stereo because the left and right parts are both shown. Mono files have only a single track.
To edit sounds using the program, think of them like the tape of an old fashioned reel-to-reel recorder. Using the mouse, you can highlight segments of the “tape” and then perform actions on them, such as copy, delete, and paste, or any one of the huge range of effects, such as echo, fade, reverse, pitch, and so on, all available from the Effect menu.
You can even add more tracks to the editor by dragging and dropping them into the program, or by using the File → Import function. You can then edit them individually or as a group, from which you can create a final stereo mix. Resampling, overdubbing, and many other options are also available, as well as over a 100 specialist plug-ins, including comb filter, valve rectifier, harmonic generator, and more.
The Help menu provides links to both a quick reference and the complete online manual for the program.
Rosegarden
If you want to use MIDI to create and edit music, Rosegarden is one of the best programs available for Linux. It’s a complete sequencer, along with a multitrack editor, and supports both piano-roll and score notation. Figure 14-11 shows the program editing aveverum.rg, one of the sample files that comes with it.
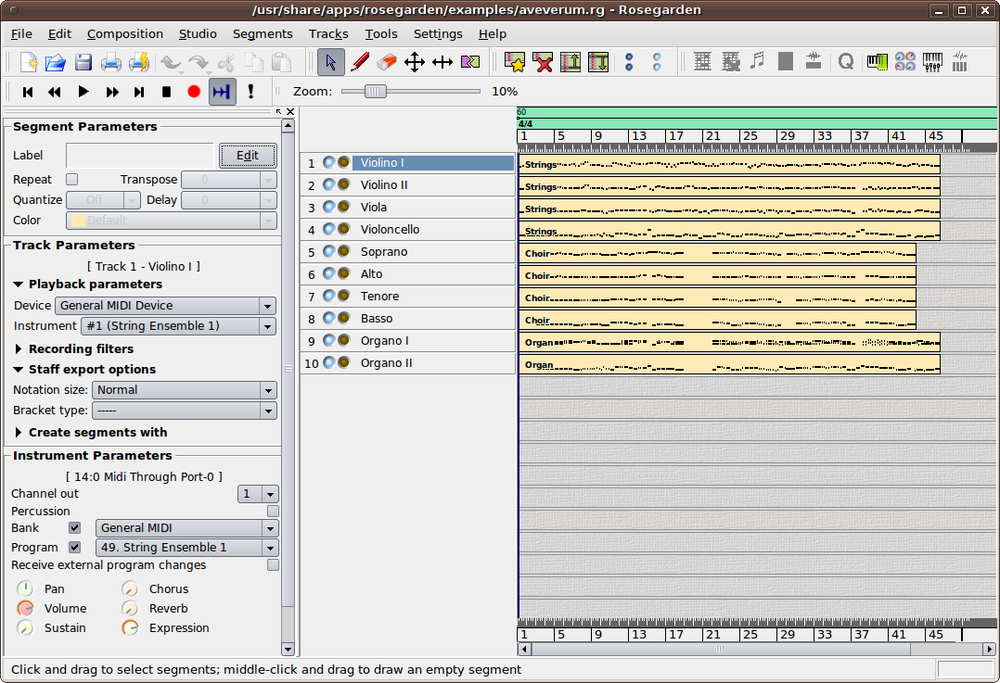
On the left of the window are three panes for controlling one or more of the current track segment’s parameters, the parameters of the whole track, or the instruments used. In the center, the instruments used are shown, with round checkboxes next to them for selecting muting or recording.
The righthand pane shows a piano roll representing the entire track. Using the slider above it, you can zoom in and out of the track to see more or less detail. The buttons in the top toolbar offer many powerful extra options, such as calling up the MIDI Mixer shown in Figure 14-12.

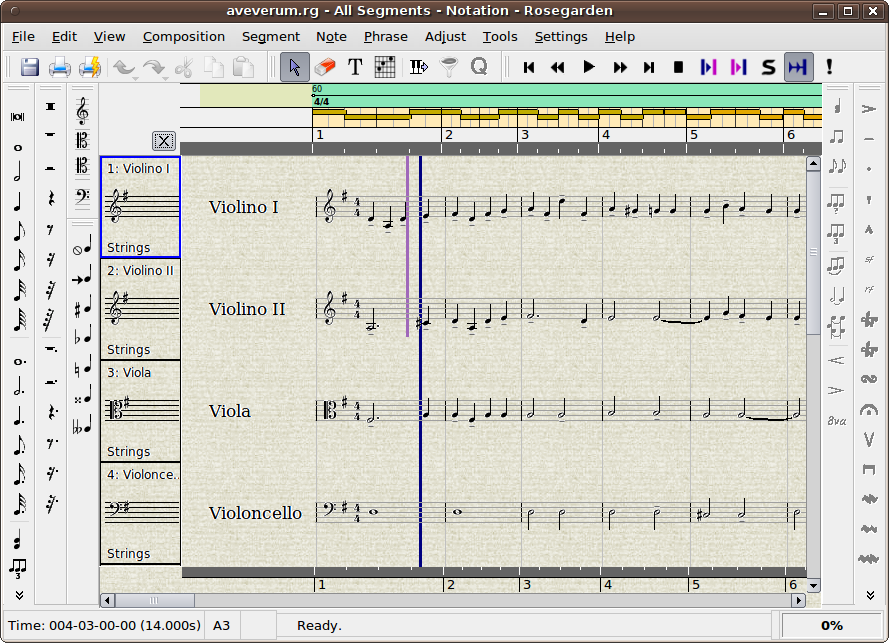
Other features include a percussion matrix editor, an audio mixer, and a musical notation editor, as shown in Figure 14-13, with which you can make beautiful-looking scores. Because of all these powerful features, the application takes a little while to learn, but the rewards are well worth the time spent doing so.
In addition to playing around with the features to see what they do, use the Help menu to bring up a link to a complete online manual, which has all the information you need to master Rosegarden and make music like a professional.
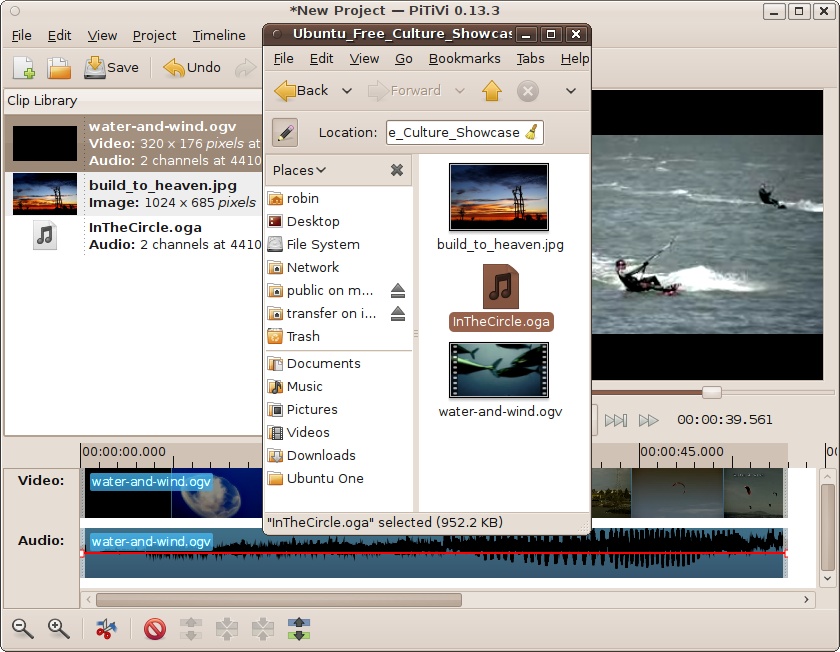
PiTiVi Video Editor
When it comes to video editing, Ubuntu also comes up with the goods, and one of the best applications is the PiTiVi program, which is not installed by default (but see the section What’s New in 10.04?). However, you can easily install it by entering “pitivi” into the search field of the Ubuntu Software Center.
I have found that the best way to use the program is to drag and drop all the source files (which can be movies, audio, and still images) into the lefthand frame. From there you can drag and drop them into the compositing pane at the bottom, where you can insert scenes, images, and audio exactly where you need them (see Figure 14-14).
You can also place extra tracks underneath each other, which can be of any media type. So, for example, you can overlay sound effects and music, as well as add captions. Using the controller buttons under the movie pane, you can then play your movie or step through it to see how it’s progressing.
The top toolbar lets you save the movie project, import clips, view the movie on the whole screen, and render the project to a new movie file. Depending on the complexity of a project, rendering can take some time, but you can leave it to run in the background.
Again, unfortunately, there’s no room to teach you how to make movies, but all the help you could want, including a complete manual, is available at http://pitivi.org.
What’s New in 10.04?
Starting with version 10.04 of Ubuntu, PiTiVi is now installed by default, and so you will not need to install it from the Software Center. This is a good decision because video editing is becoming ever more popular, and PiTiVi is one of the easiest and fastest programs of its type out there.
The Take Screenshot Program
Ubuntu comes with a handy utility for grabbing all or part of a screen, aptly called Take Screenshot. It’s the program I used for the majority of the screen grabs in this book, and is available from the Applications menu. When run, it opens the window shown in Figure 14-15.
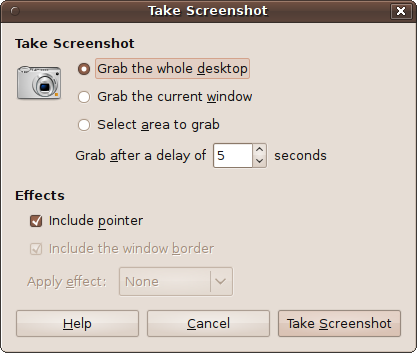
The main choices it offers include grabbing the whole desktop, the currently selected window, or an area of the screen. The first and second choices occur after the delay shown, which can be between 0 and 99 seconds. The delay gives you a chance to set up any options or menus to grab and then move the mouse pointer out of the way of the area you want to focus on.
When the current window choice is selected, only its contents will be grabbed, unless you select “Include the window border,” in which case, it will also include the title bar. The available effects for grabbing a window are drop shadow and border.
The third choice lets you select an area to grab, which you do by dragging a rectangle around the part of the screen that you want. When you release the mouse button, that area is then grabbed.
In all cases, a window then pops up, offering to save the grabbed image as Screenshot.png (followed by Screenshot-1.png, and so on, for subsequent grabs). You can change the filename offered if you wish, as well as the destination folder. When you are ready, click Save to save the grabbed image.
Summary
Never let anyone tell you that Ubuntu doesn’t have the multimedia tools that are available for Windows and Mac computers, because you’ve now seen just some of the amazing programs that either are provided by default or are available with just a few mouse clicks. And there are many more quality programs; there simply wasn’t room to include them all in this chapter. I recommend you spend a little time browsing the Software Center to find other programs. However, be prepared to try out a few in each category before you settle on one you like.
Anyway, this chapter marks the end of everything strictly Ubuntu in this book. In the remaining two chapters, we’ll look at some other flavors of the operating system, such as Kubuntu and Xubuntu, as well as the Wine program for running Windows software under Linux.