Table of Contents for
Ubuntu: Up and Running
 Ubuntu: Up and Running
Published by
O'Reilly Media, Inc., 2010
Ubuntu: Up and Running
Published by
O'Reilly Media, Inc., 2010
- Cover
- Ubuntu: Up and Running
- Ubuntu: Up and Running
- Dedication
- Foreword
- Preface
- 1. About Ubuntu
- 2. Installing and Upgrading Ubuntu
- 3. Configuring
- 4. The Desktop: Accessing Applications and Features
- 5. The Filesystem, File Attributes, and Permissions
- 6. The Nautilus File Browser
- 7. The Command Line
- 8. Installing and Removing Software
- 9. System Maintenance and Security
- 10. Networking Ubuntu
- 11. The Internet
- 12. Using OpenOffice.org
- 13. Playing Games
- 14. Pictures, Sound, and Video
- 15. Other Ubuntu Distributions
- 16. Using Wine
- Index
- About the Author
- Colophon
- Copyright
Chapter 11. The Internet
One of the computer’s biggest functions these days is Internet connectivity, whether for browsing websites, exchanging emails, sending family photos to relatives, making use of free Internet phone calls, using cloud servers for offline storage, or any number of other things.
And Ubuntu is no shirker when it comes to the horsepower needed for some of these tasks. It is light on system resources, leaving plenty of memory and processor power for use by programs such as browsers and instant messengers, and it’s fast, so your use of the Internet will be as streamlined as possible.
What’s more, Ubuntu comes with all the software you could want to get you up and running, and there’s plenty more you can easily install using the Ubuntu Software Center or Synaptic Package Manager. In this chapter, I’ll take you through some of the main installed programs, and detail others you might want to add.
Web Browsing
We all use browsers nowadays as if they were extensions of ourselves. Whenever we need the facts about something, we turn to our computers and Google it. Some developers have even written browser operating systems, with which you hardly ever need to leave your browser. And productivity suites such as Google Apps bring cloud computing ever closer.
By default, the browser installed with Ubuntu is Mozilla Firefox (see Figure 11-1). Like most of the other applications in this chapter, you will find the launcher for Firefox in the Applications → Internet menu. It’s such an important program that there’s also an icon for it on the top status bar.
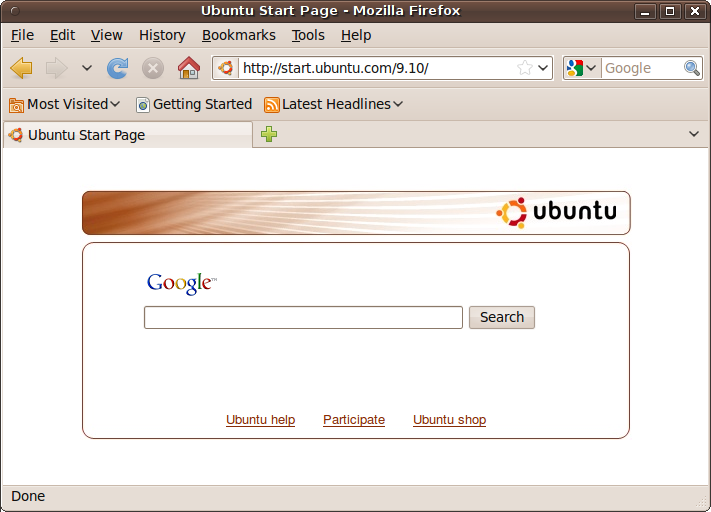
If you’ve never used Firefox before (for example, if your previous browser was Microsoft Internet Explorer, which is not available for Linux), then you may find it takes a little getting used to. So here’s a brief introduction.
The Menus
Most of the menus are very similar to those in other browsers, so I won’t go into them in detail. However, a couple of features are in different places, such as the Options menu, which is under Tools → Internet options in Internet Explorer or Tools → Options in other versions of Firefox. But in Ubuntu, you’ll find it under Edit → Preferences.
Also, the Check for Updates option in the Help menu of other versions of Firefox is not included on Ubuntu. Instead, you will be informed about new versions either by Firefox itself or by the Update manager.
The Bookmarks Toolbar
In Ubuntu, this toolbar is enabled by default and features three items:
- Most Visited
A drop-down menu of the pages you frequent the most
- Getting Started
Takes you to the “Getting started with Firefox” web page
- Latest Headlines
A drop-down menu of the latest news from the BBC World News website
Tabs and Windows
Firefox supports tabbed windows, which you can open up either by clicking the New Tab button (the + symbol to the right of the existing tabs), by holding down the Ctrl key when clicking on a link to open it in a new tab, or by pressing Ctrl-T. Sometimes the middle scroll button on a mouse will also do this if there is one.
If more tabs are open than can be displayed, the right side of the New Tab button will feature a drop-down list, with which you can jump to any tab.
You can also right-click on the tab bar for additional options, and to open or close tabs. If your mouse has a middle button, you can middle-click on a tab to close it.
You can open new windows by selecting New Window from the File menu or by holding down the Shift key when you click a link. These should be closed by clicking the X button, as with any other window, or by pressing Alt-F4.
Searching
The Google search on the Firefox home page is a great place to start Internet browsing, but if you are already viewing a page and need to look something up, the best thing to do is click on the New Tab icon to open a new window, and then either click the Home button or simply type your search query into the top-right search box. You can also change your search provider by clicking the drop-down menu next to this input field.
Other Browsers
A number of other browsers are available for Ubuntu, of which my favorite alternative is Opera (see Figure 11-2). The Google Chrome browser (available at http://google.com/chrome/) also looks very promising and should be out of beta test sometime in 2010.
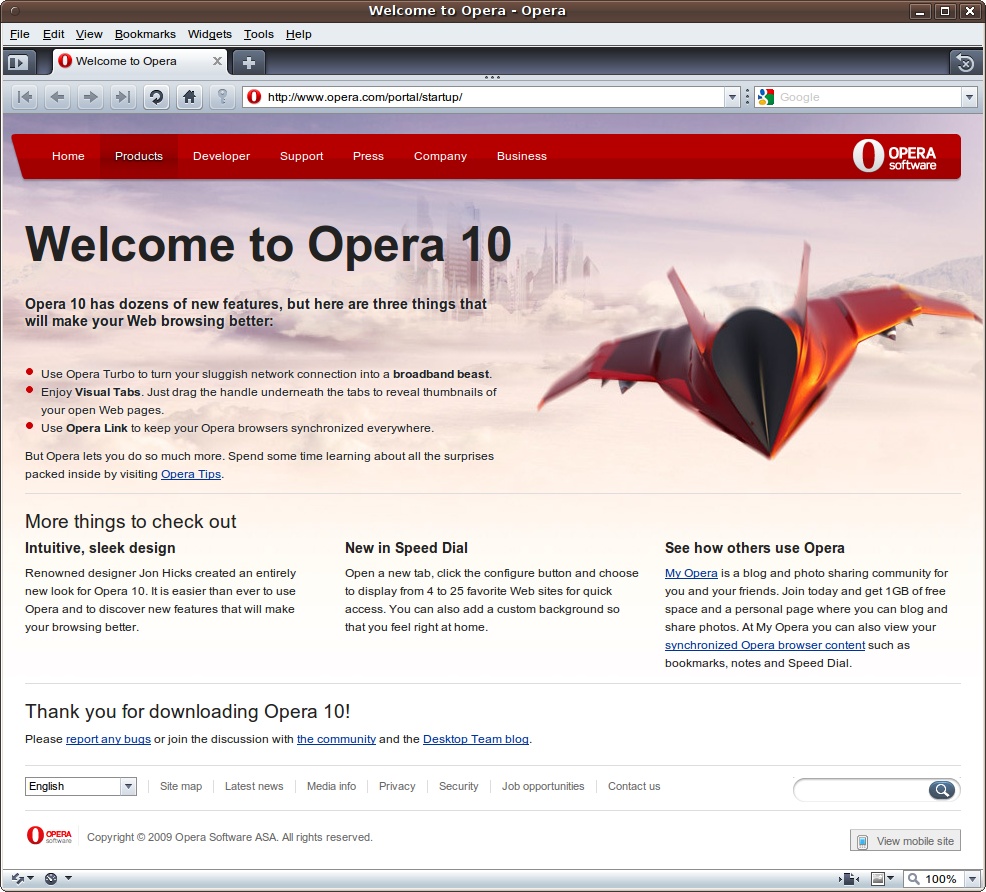
To install Opera using Firefox, visit the following page, check the version required, and click Download Opera:
| http://www.opera.com/download/index.dml?platform=linux |
Note
This type of installation is a special case. Normally you use the official repositories to install programs. However, Opera is not among the repository entries, and rather than going to the trouble of adding the Opera repository and then using Synaptic, it is sometimes much easier to simply provide the location of a downloadable .deb package where available, as in this case.
When Firefox asks you what to do with the file, select “Open with GDebi Package Installer” and click OK. After the download is complete, click the Install Package button, enter your password, and wait for the installation to finish. Opera will now show up as an entry in the Applications → Internet menu.
The default Ubuntu email program is Evolution Mail (see Figure 11-3), which you can access from the Applications → Internet menu or by clicking the envelope icon in the top status bar.
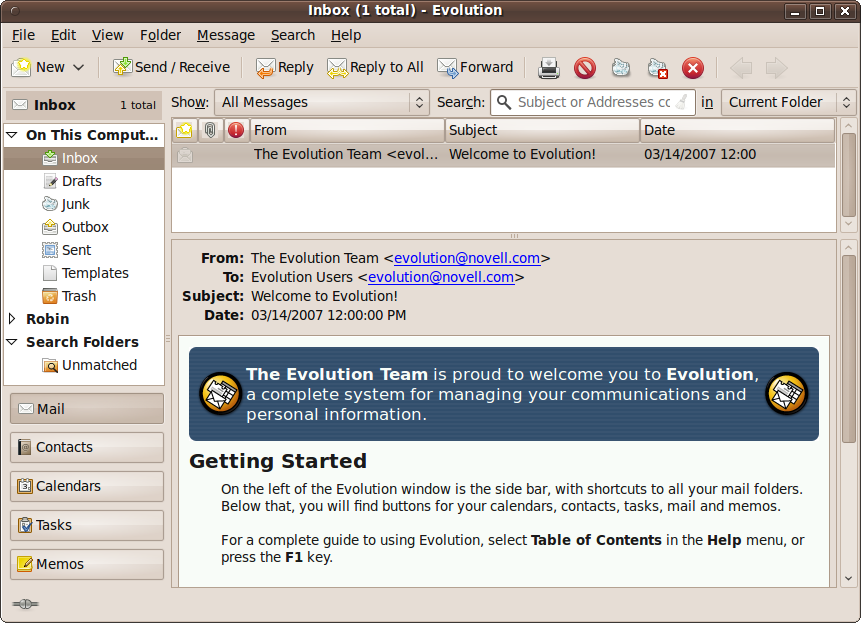
The first time you use Evolution you’ll need to set up one or more email accounts. So after you’ve read the Welcome screen, click the Forward button to get to the Restore screen.
So far you won’t have made a backup, so there is nothing to restore. But once you start using Evolution, it’s a good idea to make backups from time to time, and if you do, this is where you can restore them. You can, at this point, restore a backup made on another computer if you wish. Otherwise, click the Forward button.
On the next screen, you should enter your full name and email address on the top two lines, and (optionally) your reply-to email address and organization name (see Figure 11-4).
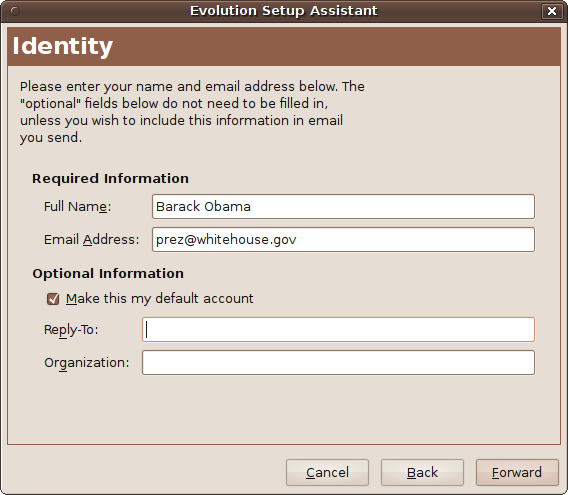
You can also uncheck the box “Make this my default account” if you don’t want it to be the default. Click Forward when you are ready to go to the screen for setting up the collection of email, shown in Figure 11-5.
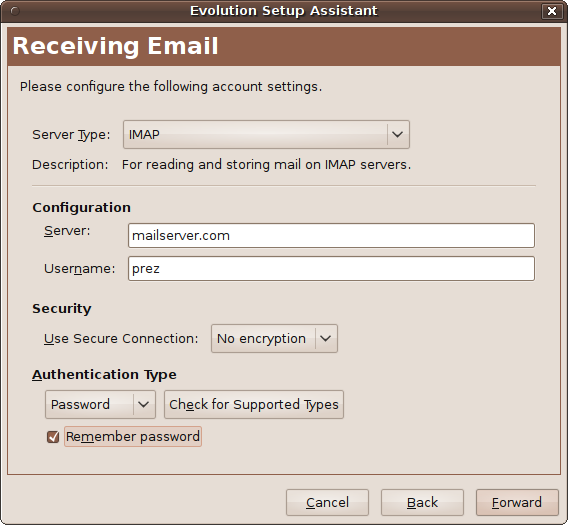
If in doubt on what to select for this screen, try the default IMAP option for Server Type. Other options you can select by clicking the pull-down list include Microsoft Exchange, Novell GroupWise, POP, Usenet News, Local Delivery, and more.
You need to then enter the domain name of your email server and the username you are known by on that server. Normally, the username will be the same as the first half of your email address, the part before the @ character.
You can also enable a secure connection at this point, choose authentication types, and configure Evolution to remember your password. If you do the latter, you will be prompted for your password only the first time it is needed. When you are finished, click Forward to call up the Receiving Options screen (see Figure 11-6).
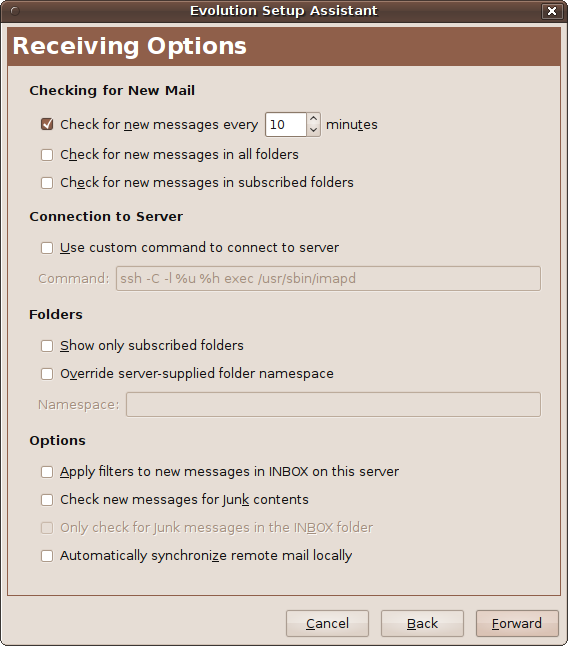
This screen lets you choose whether and how often to check for new messages. If you don’t check any of the options on this screen, you will have to click a button whenever you want to see if you have any new messages.
Using this screen, you can also enter custom commands the mail server may require, designate mail folders to view or check for messages, and choose whether and how to apply filters, such as checking for junk messages. When you are ready, click Forward to go to the Sending Email screen (see Figure 11-7).
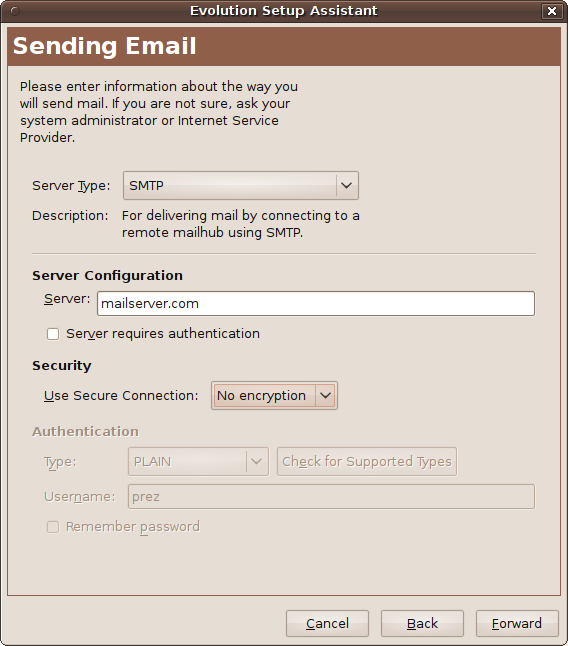
On this screen you can choose between SMTP and Sendmail for Server Type, and set a different server for sending email if necessary. If the same server does both sending and receiving, leave the default name as is.
If the server requires authentication, click the box, and then tell Evolution whether to use a secure connection. When you are ready, click Forward to enter the Account Management screen, shown in Figure 11-8.
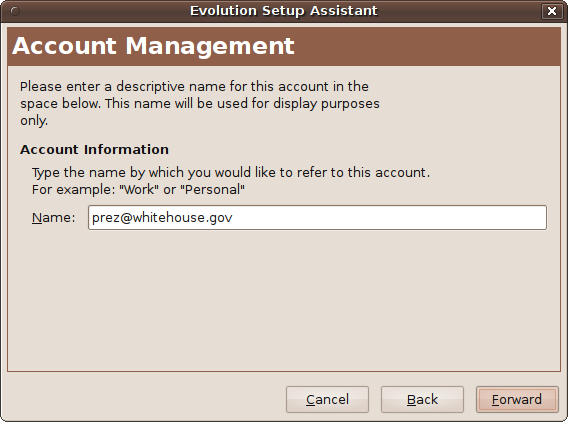
On this screen you can choose the default name supplied, which will be your email address. But if you would like to name the account differently, you are free to do so. When done, click the Forward button to go to the congratulations message, and then click Apply to finish. Evolution will then open up, with a welcome message waiting for you in the inbox that you can click to view.
The menus and icons used by the program are pretty self-explanatory, but to get you going, just click the Send/Receive button to make your first email collection, and any emails waiting for you on the server will then be fetched. To write a new message, click the New button, to reply to a message click Reply, and so on. For further details on using the program, select Help → Contents from Evolution’s menus.
Instant Messaging
Since version 9.10 (named Karmic Koala), Ubuntu’s default instant messaging (IM) client is Empathy, but I have found it to be rather buggy. For example, it doesn’t check whether a new account has been created properly or whether an existing one has been entered successfully, error reporting is minimal, and there appears to be no means of removing accounts once they are created. There’s also a lot more besides that just doesn’t work right or seems incomplete, but if you’re curious, try it for yourself—some people really rave about it.
Until these issues are resolved I recommend you use Pidgin, the previous default IM program that used to be included with Ubuntu but was unceremoniously dropped—and not even installed alongside Empathy to allow for continuity.
Therefore, you’ll need to install the program by visiting the Ubuntu Software Center and entering “pidgin” in the search field. Then, double-click Pidgin Internet Messenger, click the Install button, and enter your password when prompted to do so, and the program will be downloaded and installed.
While using the Software Center, if you wish you can also remove Empathy from your PC to save resources by clicking Installed Software in the lefthand pane and entering “empathy” in the search field to bring up the Uninstall button.
Note
If you upgraded from a version of Ubuntu earlier than 9.10 and already had Pidgin installed, you shouldn’t need to install it again, because it will have been left in place. However, you still might want to uninstall Empathy if you don’t plan on using it.
Using Pidgin
Once installed, you can run Pidgin by selecting Applications → Internet → Pidgin Instant Messenger, or click the envelope icon on the top status bar. The first time you use it, a welcome screen will be displayed, in which you should click the Add button to bring up the Add Account window shown in Figure 11-9.
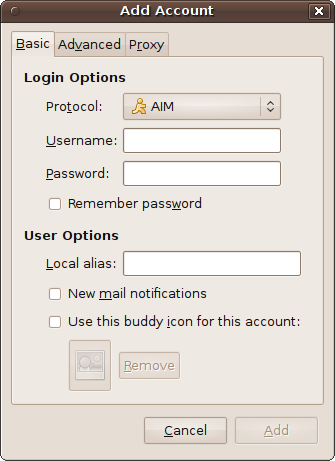
Here, you can click the Protocol drop-down list to select any of 17 different IM services, so your favorites are sure to be supported. Then enter your username and password for that service, check “Remember password” if you’d like it saved, and configure any of the User Options that you’d like. The “Local alias” is just a name you’ll see for yourself in Pidgin; it isn’t displayed to the people you communicate with. If you need them, various advanced and proxy settings can also be managed via the tabs at the top of the window.
When you’ve finished entering your IM account details, you can add other accounts by clicking the Add button, or click Close to finish.
Adding buddies
You’re now ready to start adding your buddies to your Buddy List, which may be minimized to the bottom status bar. Once you’ve called it up, the window will look like Figure 11-10, in which I have already added one buddy.
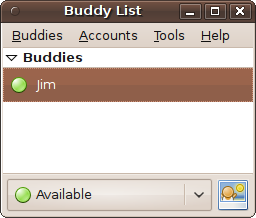
Using Pidgin is simplicity itself, and if you’ve used any other IM program, you’ll be right at home with it. To add a buddy, click Buddies followed by Add Buddy; to join a chat, click Buddies followed by Join a Chat; and so on. And, once you have buddies listed, you can also right-click them to call up an extensive menu of options.
Internet Telephony
Ekiga Softphone used to be Ubuntu’s default Voice Over Internet Protocol (VOIP) application, but it is no longer included by default. However, you can still install it from the Ubuntu Software Center if you’d like to try it out. Instead, the Empathy program is intended to be the replacement VOIP program, but for reasons previously stated, I would not recommend it.
Therefore, I suggest going with the most popular program in place of Empathy, and that means Skype, although you won’t find it in either the Software Center or the Synaptic Package Manager because it is proprietary software. Instead, you need to visit http://skype.com/download in your browser and then click the version you would like to download, either 32-bit or 64-bit.
The latest version may be a couple behind the current version of Ubuntu, but it will still run just fine. After downloading, open your Downloads folder and double-click the downloaded file to call up the Package Installer (unless you set the download facility to automatically do so). When it opens, click Install Package, and after entering your password, the program will be installed. When installation finishes, click the Close button and exit the Package Installer.
You will now be able to run Skype from the Applications → Internet menu, and the first time you do so you must select your language and accept the license agreement. You will then be ready to enter your Skype name and password (see Figure 11-11).
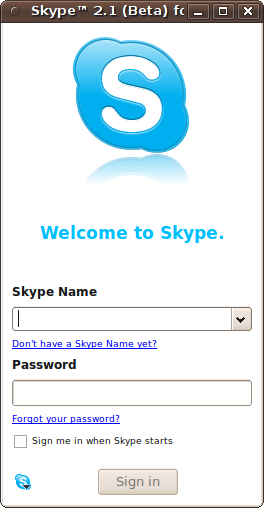
If you don’t have a Skype name, click “Don’t have a Skype Name yet?” and you’ll be taken through the free signup process. Otherwise, using the program is the same as on any other platform, and that includes video support, so you’ll be right at home.
Peer-to-Peer File Sharing
In case you haven’t come across them yet, peer-to-peer (P2P) programs are ones that allow computers all over the world to connect with each other and exchange files.
With P2P you can add a data file to your local file-sharing client (known as seeding), and its details will then be passed to the tracker servers that you choose. Using these servers, other users can then discover the file and start to download it from you.
If more than one user wants the file, they will all fetch different parts of it from your computer and then exchange the various pieces they get with each other, which means you don’t have to serve up the entire file for every downloader—keeping your bandwidth usage to the minimum.
Note
When large files such as the Ubuntu operating system ISO images are released, rather than consuming all of the available bandwidth at http://ubuntu.com, they are also listed on file-sharing trackers so that the images can be downloaded using P2P clients that share the required bandwidth between all downloaders (because they are also all uploaders, too).
Probably one of the best-known P2P file-sharing programs is BitTorrent, which you can access by selecting Applications → Internet → Transmission BitTorrent Client. But the most common way to call it up is by clicking a link to a torrent file.
The easiest way to find torrents is to use a search engine with a query that includes the word “torrent.” When you have located one that you want, click it and your browser should prompt you to open the torrent using the Transmission BitTorrent Client. Click OK to accept, and the Torrent Options window, shown in Figure 11-12, will open up.
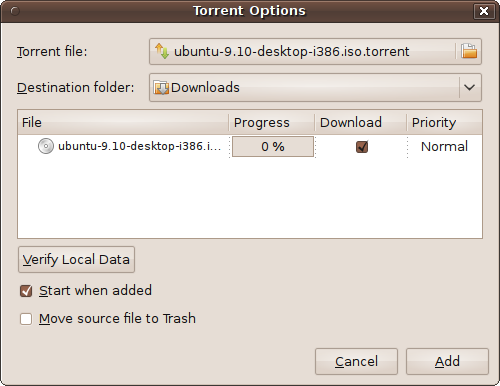
Using this window, you can check that you have selected the right file, choose the download folder, and if the torrent is made up of separate files, opt out of downloading any files you don’t need. When you are ready, click Add to start the process.
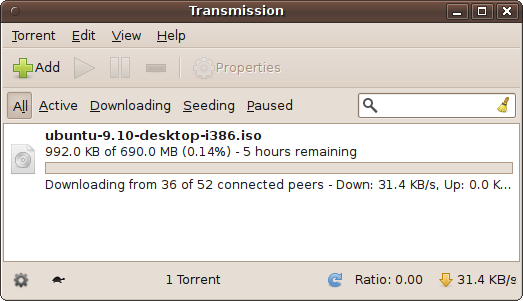
The program’s main window will then be displayed, showing the torrents you have in your folder and their status. For example, you may have some torrents you previously downloaded but are leaving in place to seed for other users to download. This is a great way of paying back the community for all the bandwidth you benefited from during the download. You will also see the most recent torrent you selected, as shown in Figure 11-13, in which an Ubuntu ISO is being downloaded from 36 out of a possible 52 different locations.
Note
Some broadband providers throttle torrent bandwidth at certain times of day, which is the case in Figure 11-13, where it is running at only 31.4 KB/s. This is because I started the download during a peak usage period. If that happens to you, you may find that times before 6 p.m. and after midnight are better for downloading large files.
Telnet and SSH
Sometimes you need to log directly into a command-line shell on a remote computer, and the best way to do this is via Telnet or SSH (Secure Shell). SSH is far preferable because it’s secure, whereas Telnet isn’t, although on a local network behind a suitable firewall Telnet is perfectly OK.
The best program I have seen for performing these functions is the PuTTY application, which you can install from the Ubuntu Software Center by entering “putty” in the search field and then double-clicking Putty SSH Client, followed by clicking Install on the following screen. After entering your password, the program will be downloaded and installed, and will become available under the Applications → Internet menu. When you first run PuTTY, it will look like Figure 11-14.
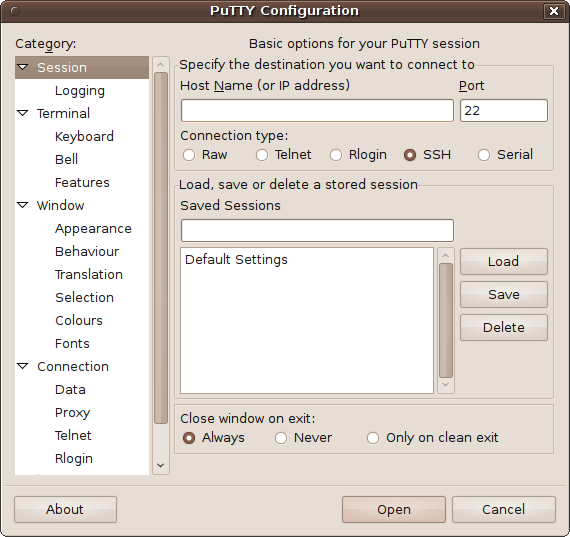
To connect to a remote computer, enter its IP address or domain name in the Host Name field, and choose the kind of connection from the radio buttons underneath—by default this will be SSH. You can, if you wish, enter a session name in the Saved Sessions field and click the Save button to store those details for future use. After choosing the window behavior on exit (from the “Close window on exit” section), click the Open button to establish a connection.
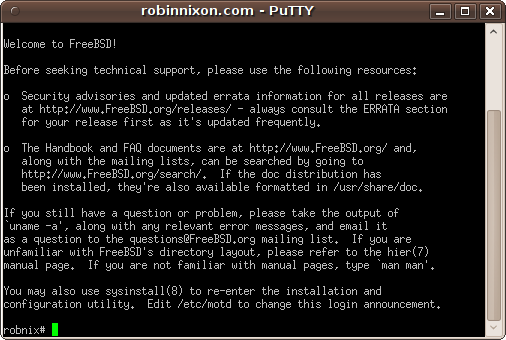
Once connected, a new window will open like the one shown in Figure 11-15, in which I have logged into a web server on which I keep my websites.
Ubuntu One
Ubuntu One is a new service from Canonical, the publishers of Ubuntu, that provides you with 2 GB of free offline, or cloud, storage for backing up and transferring your files. If this free storage isn’t enough for you, you can also upgrade to a much larger 50 GB of space for a monthly fee.
Joining and Logging In
To get started with Ubuntu One, select Applications → Internet → Ubuntu One. The first time you do so, you’ll be taken to the Launchpad Login Service page shown in Figure 11-16.
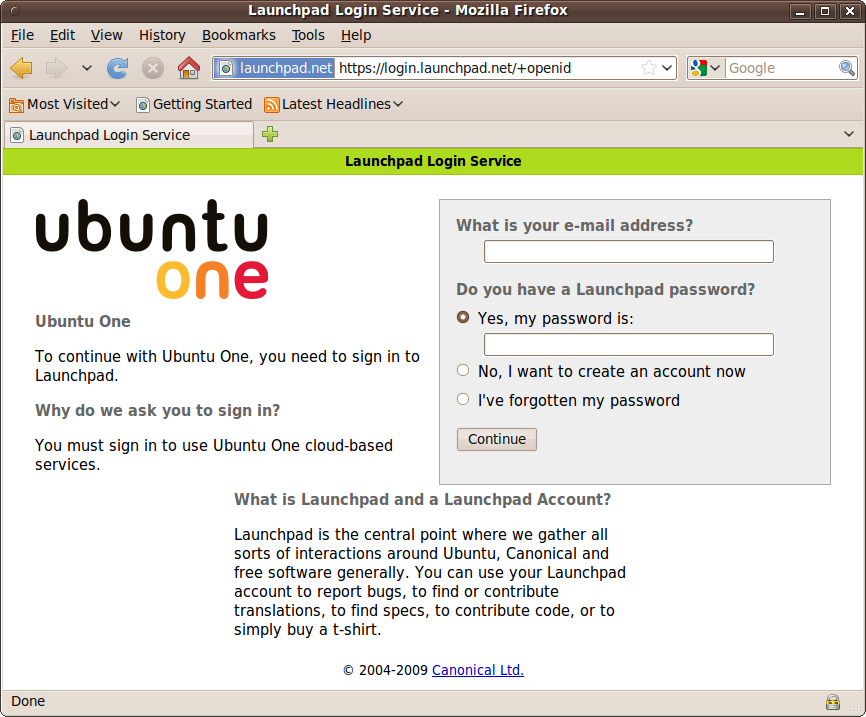
Here, you can use a previous Launchpad login (if you have one) or create a new account. Either way, enter a valid email address first, and then click Continue.
If you are creating an account, a confirmation email will be sent to the address you gave, giving you a link you should follow. You will then be taken to a web page where you can choose your Display Name and decide whether to hide your email address. Then enter a password twice and click the Continue button.
Once you have created an account, you can simply enter your email address and password at the Login Service screen and click Continue. If a computer is new to Ubuntu One, you will be asked whether to add the computer you are using to your Ubuntu One account, so click Subscribe and then Add This Computer.
Using Ubuntu One
Once you have created an account, you will see a new icon in the top status bar that looks like a cloud, depicting Ubuntu One as what is known as a cloud service. You can connect to the service by clicking the icon and selecting Connect.
If you wish to view your Ubuntu One account’s folders and files, you can right-click the cloud icon and select “Go to Web,” which will open up a screen similar to Figure 11-17 in your browser.

You can also copy files into and out of your Ubuntu One folder, which is under your home folder and is also available by selecting Places → Ubuntu One. Any files that you copy into the folder will be uploaded to the remote cloud storage (up to your allowance limit). And any files you copy from that folder will be downloaded from the cloud storage.
You can learn about a number of other Ubuntu One features, such as sharing files with friends and colleagues, via the following link:
| https://wiki.ubuntu.com/UbuntuOne/Tutorials |
Summary
This chapter covered a number of things that you can do over the Internet using Ubuntu. For most users, this will be enough. But if there’s a program or feature you want that I haven’t mentioned, you will almost certainly be able to find it (or another program that provides a reasonable approximation of the feature) by searching either the Synaptic Package Manger or the Ubuntu Software Center.
One of the best examples of the power and capability of open source software is the OpenOffice.org productivity suite of programs, which we’ll take a look at in the next chapter.