Table of Contents for
Raspberry Pi Cookbook, 2nd Edition
 Raspberry Pi Cookbook, 2nd Edition
Published by
O'Reilly Media, Inc., 2016
Raspberry Pi Cookbook, 2nd Edition
Published by
O'Reilly Media, Inc., 2016
- nav
- Cover
- Raspberry Pi Cookbook
- Raspberry Pi Cookbook
- Preface to the Second Edition
- Setup and Management
- Networking
- Operating System
- Software
- Python Basics
- Python Lists and Dictionaries
- Advanced Python
- Computer Vision
- Hardware Basics
- Controlling Hardware
- Motors
- Digital Inputs
- Sensors
- Displays
- The Internet of Things
- Arduino and Raspberry Pi
- Parts and Suppliers
- Raspberry Pi Pinouts
- Index
- About the Author
- Colophon
Chapter 7. Advanced Python
7.0 Introduction
In this chapter, you will explore some of the more advanced concepts in the Python language—in particular, object-oriented Python, reading and writing files, handling exceptions, using modules, and Internet programming.
7.1 Formatting Numbers
Solution
Apply a format string to the number. For example:
>>>x=1.2345678>>>"x={:.2f}".format(x)'x=1.23'>>>
Discussion
The formatting string can contain a mixture of regular text and markers delimited by { and }. The parameters to the format function (there can be as many as you like) will be substituted in place of the marker, according to the format specifier.
In the preceding example, the format specifier is :.2f, which means that the number will be specified with two digits after the decimal place and is a float f.
If you wanted the number to be formatted so that the total length of the number is always seven digits (or padding spaces), then you would add another number before the decimal place like this:
>>>"x={:7.2f}".format(x)'x= 1.23'>>>
In this case, since the number is only three digits long, there are four spaces of padding before the 1. If you wanted the padding to take the form of leading zeros, you would use:
>>> "x={:07.2f}".format(x)
'x=0001.23'
>>>
A more complicated example might be to display the temperature in both degrees Celsius and degrees Fahrenheit, as shown here:
>>>c=20.5>>>"Temperature {:5.2f} deg C, {:5.2f} deg F.".format(c,c*9/5+32)'Temperature 20.50 deg C, 68.90 deg F.'>>>
7.2 Formatting Dates and Times
Solution
Apply format string to the date object.
For example:
>>>fromdatetimeimportdatetime>>>d=datetime.now()>>>"{:%Y-%m-%d%H:%M:%S}".format(d)'2015-12-09 16:00:45'>>>
Discussion
The Python formatting language includes some special symbols for formatting date. %Y, %m, and %d correspond to year, month, and day numbers, respectively.
Other symbols useful for formatting the date are %B, which supplies the full name of the month and %Y, which gives the year in four digit format, as shown here:
>>> "{:%d %B %Y}".format(d)
'09 December 2015'
See Also
See Recipe 7.1 for formatting of numbers.
Formatting in Python actually involves a whole formatting language. You will find full details of this at http://strftime.org/.
7.3 Returning More Than One Value
Solution
Return a Python tuple and use the multiple variable assignment syntax. A tuple is a Python data structure that’s a little like a list, except that tuples are enclosed in parentheses rather than brackets. They are also of fixed size.
For example, you could have a function that converts a temperature in Kelvin into both Fahrenheit and Celsius. You can arrange for this function to return the temperature in both these units by separating the multiple return values by commas:
>>>defcalculate_temperatures(kelvin):...celsius=kelvin-273...fahrenheit=celsius*9/5+32...returncelsius,fahrenheit...>>>c,f=calculate_temperatures(340)>>>>>>(c)67>>>(f)152.6
When you call the function, you just provide the same number of variables before the = and each of the return values will be assigned to the variables in the same position.
Discussion
Sometimes when you just have one or two values to return, this is the right way to return multiple values. However, if the data is complex, you might find that the solution is neater if you use Python’s object-oriented features and define a class that contains the data. That way, you can return an instance of the class rather than a tuple.
See Also
See Recipe 7.4 for information on defining classes.
7.4 Defining a Class
Solution
Define a class and provide it with the member variables you need.
The following example defines a class to represent an address book entry:
classPerson:'''This class represents a person object'''def__init__(self,name,tel):self.name=nameself.tel=tel
The first line inside the class definition uses the triple quotes to denote a documentation string. This should explain the purpose of the class. Although entirely optional, adding a documentation string to a class allows others to see what the class does. This is particularly useful if the class is made available for others to use.
Doc strings are not like normal comments because, although they are not active lines of code, they do get associated with the class, so, at any time, you can read the doc string for a class by using the following command:
Person.__doc__
Inside the class definition is the constructor method, which will be called automatically whenever you create a new instance of the class. A class is like a template, so in defining a class called Person, we do not create any actual Person objects until later:
def__init__(self,name,tel):self.name=nameself.tel=tel
The constructor method must be named as shown with double underscores on either side of the word init.
Discussion
One way in which Python differs from most object-oriented languages is that you have to include the special variable self as a parameter to all the methods that you define within the class. This is a reference to, in this case, the newly created instance. The variable self is the same concept as the special variable this that you find in Java and some other languages.
The code in this method transfers parameters that were supplied to it into member variables. The member variables do not need to be declared in advance, but do need to be prefixed by self..
So the following line:
self.name=name
creates a variable called name that’s accessible to every member of the class Person and initializes it with the value passed into the call to create an instance, which looks like this:
p=Person("Simon","1234567")
We can then check that our new Person object, p, has a name of "Simon" by typing the following:
>>>p.nameSimon
In a complex program, it is good practice to put each class in its own file with a filename that matches the class name. This also makes it easy to convert the class into a module (see Recipe 7.11).
See Also
See Recipe 7.5 for information on defining methods.
7.5 Defining a Method
Solution
The following example shows how you can include a method within a class definition:
classPerson:'''This class represents a person object'''def__init__(self,first_name,surname,tel):self.first_name=first_nameself.surname=surnameself.tel=teldeffull_name(self):returnself.first_name+" "+self.surname
The full_name method concatenates the first name and surname attributes of the person, with a space in between.
Discussion
You can think of methods as just functions that are tied to a specific class and may or may not use member variables of that class in their processing. So, as with a function, you can write whatever code you like in a method and also have one method call another.
If one method calls another within the same class, the call to the method has to be prefixed with self.
See Also
See Recipe 7.4 for information on defining a class.
7.6 Inheritance
Solution
Use inheritance to create a subclass of an existing class and add new member variables and methods.
By default, all new classes that you create are subclasses of object. You can change this by specifying the class you want to use as a superclass in parentheses after the class name in a class definition. The following example defines a class (Employee) as a subclass of Person and adds a new member variable (salary) and an extra method (give_raise):
classEmployee(Person):def__init__(self,first_name,surname,tel,salary):super().__init__(first_name,surname,tel)self.salary=salarydefgive_raise(self,amount):self.salary=self.salary+amount
Note that the preceding example is for Python 3. For Python 2, you can’t use super the same way. Instead, you must write:
classEmployee(Person):def__init__(self,first_name,surname,tel,salary):Person.__init__(self,first_name,surname,tel)self.salary=salarydefgive_raise(self,amount):self.salary=self.salary+amount
See Also
See Recipe 7.4 for information on defining a class.
The Python inheritance mechanism is actually very powerful and supports multiple inheritance, where a subclass inherits from more than one superclass. For more on multiple inheritance, see the official documentation for Python.
7.7 Writing to a File
Discussion
Once you have opened the file, you can make as many writes to it as you like before you close the file. Note that it is important to use close because although each write should update the file immediately, it may be buffered in memory and data could be lost. It could also leave the file locked so that other programs can’t open it.
The open method takes two parameters. The first is the path to the file to be written. This can be relative to the current working directory, or if it starts with a /, an absolute path.
The second parameter is the mode in which the file should be opened. To overwrite an existing file or create the file with the name specified if it doesn’t exist, just use w. Table 7-1 shows the full list of file mode characters. You can combine these using +. So to open a file in read and binary mode, you would use:
>>>f=open('test.txt','r+b')
| Mode | Description |
|---|---|
|
r |
Read |
|
w |
Write |
|
a |
Append - to the end of an existing file rather than overwriting |
|
b |
Binary mode |
|
t |
Text mode (default) |
|
+ |
A shortcut for r+w |
Binary mode allows you to read or write binary streams of data, such as images, rather than text.
See Also
To read the contents of a file, see Recipe 7.8. For more information on handling exceptions, see Recipe 7.10.
7.8 Reading from a File
Discussion
You can also read text files one line at a time using the method readline.
The preceding example will throw an exception if the file does not exist or is not readable for some other reason. You can handle this by enclosing the code in a try/except construction like this:
try:f=open('test.txt')s=f.read()f.close()exceptIOError:("Cannot open the file")
See Also
To write things to a file and for a list of file open modes, see Recipe 7.7.
For more information on handling exceptions, see Recipe 7.10.
7.9 Pickling
Solution
Use the Python pickling feature to dump the data structure to file in a format that can be automatically read back into memory as an equivalent data structure later on.
The following example saves a complex list structure to file:
>>>importpickle>>>mylist=['some text',123,[4,5,True]]>>>f=open('mylist.pickle','w')>>>pickle.dump(mylist,f)>>>f.close()
To unpickle the contents of the file into a new list, use the following:
>>>f=open('mylist.pickle')>>>other_array=pickle.load(f)>>>f.close()>>>other_array['some text',123,[4,5,True]]
Discussion
Pickling will work on pretty much any data structure you can throw at it. It does not need to be a list.
The file is saved in a text format that is sort of human-readable, but you will not normally need to look at or edit the text file.
See Also
To write things to a file and for a list of file open modes, see Recipe 7.7.
7.10 Handling Exceptions
Solution
Use Python’s try/except construct.
The following example, taken from Recipe 7.8, catches any problems in opening a file:
try:f=open('test.txt')s=f.read()f.close()exceptIOError:("Cannot open the file")
Because you wrapped the potentially error-prone commands to open the file in a try/except construction, any error that occurs will be captured before it displays any error message allowing you to handle it in your own way. In this case, that means displaying the friendly message "Cannot open the file".
Discussion
A common situation where runtime exceptions can occur, in addition to during file access, is when you are accessing a list and the index you are using is outside the bounds of the list. For example, this happens if you try to access the fifth (index 4) element of a three-element list:
>>>list=[1,2,3]>>>list[4]Traceback(mostrecentcalllast):File"<stdin>",line1,in<module>IndexError:listindexoutofrange
Errors and exceptions are arranged in a hierarchy, and you can be as specific or general as you like when catching the exceptions.
Exception is pretty near the top of that tree and will catch almost any exception. You can also have separate except sections for catching different types of exception and handling, each in a different way. If you do not specify any exception class, all exceptions will be caught.
Python also allows you to have else and finally clauses in your error handling:
list=[1,2,3]try:list[8]except:("out of range")else:("in range")finally:("always do this")
The else clause will be run if there is no exception, and the finally clause will be run whether there is an exception or not.
Whenever an exception occurs, you can get more information about it by using the exception object, which is available only if you use the as keyword, as shown in the following example:
>>>list=[1,2,3]>>>try:...list[8]...exceptExceptionase:...("out of range")...(e)...outofrangelistindexoutofrange>>>
This allows you to handle the error in your own way, but also keep hold of the original error message.
See Also
Python documentation for Python exception class hierarchy.
7.11 Using Modules
Solution
Use the import command:
importrandom
Discussion
There is a very large number of modules (sometimes called libraries) available for Python. Many are included with Python as part of the standard library and others can be downloaded and installed into Python.
Standard Python libraries include modules for random numbers, database access, various Internet protocols, object serialization, and many more.
One consequence of having so many modules is that there is the potential for conflict—for example, if two modules have a function of the same name. To avoid such conflicts, when importing a module, you can specify how much of the module is accessible.
For example, if you just use a command like this:
importrandom
there is no possibility of any conflicts because you will only be able to access any functions or variables in the module by prefixing them with random.. (Incidentally, you’ll be meeting the random package in the next recipe.)
If, on the other hand, you use the following command, everything in the module will be accessible without your having to put anything in front of it. Unless you know what all the functions are in all the modules you are using, there is a much greater chance of conflict.
fromrandomimport*
In between these two extremes, you can explicitly specify the components of a module that you need within a program so that they can be conveniently used without any prefix.
For example:
>>>fromrandomimportrandint>>>(randint(1,6))2>>>
A third option is to use the as keyword to provide a more convenient or meaningful name for the module when referencing it.
>>>importrandomasR>>>R.randint(1,6)
See Also
For a definitive list of the modules included with Python, see http://docs.python.org/2/library/.
7.12 Random Numbers
Solution
Use the random library:
>>>importrandom>>>random.randint(1,6)2>>>random.randint(1,6)6>>>random.randint(1,6)5
The number generated will be between the two arguments (inclusive)—in this case, simulating a gaming dice.
Discussion
The numbers generated are not truly random, but are what is known as a pseudorandom number sequence; that is, they are a long sequence of numbers that, when taken in a large enough quantity, show what statisticians call a random distribution. For games, this is perfectly good enough, but if you were generating lottery numbers, you would need to look at special randomizing hardware. Computers are just plain bad at being random; it’s not really in their nature.
A common use of random numbers is to select something at random from a list. You can do this by generating an index position and using that, but there is also a command in the random module specifically for this. Try the following example:
>>>importrandom>>>random.choice(['a','b','c'])'a'>>>random.choice(['a','b','c'])'b'>>>random.choice(['a','b','c'])'a'
See Also
See the official reference for the random package for more information on this.
7.13 Making Web Requests from Python
Discussion
If you are using Python 3 rather than Python 2, then you will need to change your example to:
importurllib.requestresponse=urllib.request.urlopen('http://python.org/')contents=response.read()(contents)
Having read the HTML, you are then likely to want to search it and extract the parts of the text that you really want. For this, you will need to use the string manipulation functions (see Recipes 5.14 and 5.15).
See Also
For more Internet-related examples using Python, see Chapter 15.
7.14 Command-Line Arguments in Python
Solution
Import sys and use its argv property, as shown in the following example. This returns an array, the first element of which is the name of the program. The other elements are any parameters (separated by spaces) that were typed on the command line after the program name.
importsysfor(i,value)inenumerate(sys.argv):("arg:%d%s"%(i,value))
Running the program from the command line, with some parameters after it, results in the following output:
$ python cmd_line.py a b c
arg: 0 cmd_line.py
arg: 1 a
arg: 2 b
arg: 3 c
Discussion
Being able to specify command-line arguments can be useful for automating the running of Python programs, either at startup (Recipe 3.21) or on a timed basis (Recipe 3.23).
See Also
For basic information on running Python from the command line, see Recipe 5.4.
In printing out argv, we used list enumerations (Recipe 6.8).
7.15 Running Linux Commands from Python
Solution
Use the system command.
For example, to delete a file called myfile.txt in the directory from which you started Python, you could do the following:
importosos.system("rm myfile.txt")
Discussion
Sometimes rather than just execute a command blindly as in the example above, you need to capture the response of the command. Let’s say you wanted to use the 'hostname' command to find the IP address (see Recipe 2.2) of the Raspberry Pi. In this case, you can use the check_output function in the subprocess library.
importsubprocessip=subprocess.check_output(['hostname','-I'])
In this case, the variable ip will contain the IP address of the Raspberry Pi. Unlike system, check_output requires the command itself and any parameters to be supplied as separate elements of an array.
See Also
For documentation on the OS library, see http://www.pythonforbeginners.com/os/pythons-os-module.
For more information on the subprocess library, see https://docs.python.org/3/library/subprocess.html.
In Recipe 14.4, you will find an example using subprocess to display the IP address, hostname, and time of your Raspberry Pi on an LCD screen.
7.16 Sending Email from Python
Solution
Python has a library for the Simple Mail Transfer Protocol (SMTP) that you can use to send emails:
importsmtplibGMAIL_USER='your_name@gmail.com'GMAIL_PASS='your_password'SMTP_SERVER='smtp.gmail.com'SMTP_PORT=587defsend_email(recipient,subject,text):smtpserver=smtplib.SMTP(SMTP_SERVER,SMTP_PORT)smtpserver.ehlo()smtpserver.starttls()smtpserver.ehlosmtpserver.login(GMAIL_USER,GMAIL_PASS)header='To:'+recipient+'\n'+'From: '+GMAIL_USERheader=header+'\n'+'Subject:'+subject+'\n'msg=header+'\n'+text+'\n\n'smtpserver.sendmail(GMAIL_USER,recipient,msg)smtpserver.close()send_email('destination_email_address','sub','this is text')
To use this example to send an email to an address of your choice, first change the variables GMAIL_USER and GMAIL_PASS to match your email credentials. If you are not using Gmail, then you will also need to change the values of the SMTP_SERVER and possibly SMTP_PORT.
You also need to change the destination email address in the last line.
Discussion
The send_email message simplifies the use of the smtplib library into a single function that you can reuse in your projects.
Being able to send emails from Python opens up all sorts of project opportunities. For example, you could use a sensor such as the PIR sensor to send an email when movement is detected.
See Also
For a similar example that uses the IFTTT web service to send emails, see Recipe 15.3.
For performing HTTP requests from the Raspberry Pi, see Recipe 7.13.
For more information on the smtplib, see http://docs.python.org/2/library/smtplib.html.
For a whole load of Internet-related recipes, see Chapter 15.
7.17 Writing a Simple Web Server in Python
Solution
Use the bottle Python library to run a pure Python web server that will respond to HTTP requests.
To install bottle, use the following command:
sudo apt-get install python-bottle
The following Python program (called bottle_test in the book resources) simply serves up a message displaying what time the Pi thinks it is. Figure 7-1 shows the page you see if you connect to the Raspberry Pi from a browser anywhere on your network:
frombottleimportroute,run,templatefromdatetimeimportdatetime@route('/')defindex(name='time'):dt=datetime.now()time="{:%Y-%m-%d%H:%M:%S}".format(dt)returntemplate('<b>Pi thinks the date/time is: {{t}}</b>',t=time)run(host='0.0.0.0',port=80)
To start the program, you need to run it with superuser privileges:
$ sudo python bottle_test.py
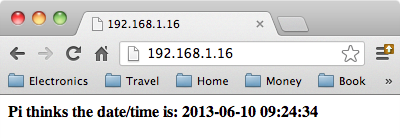
Figure 7-1. Browsing to a Python bottle web server
This example requires a little explanation.
After the import commands, the @route command links the URL path / with the handler function that follows it.
That handler function formats the date and time and then returns a string of the HTML to be rendered by the browser. In this case, it uses a template into which values can be substituted.
The final run line actually starts the web serving process. Port 80 is the default port for web serving, so if you wish to use a different port, then you need to add the port number with a : after the server address.
Discussion
You can define as many routes and handlers as you like within the program.
bottle is perfect for small, simple web server projects, and because it’s written in Python, it’s very easy to write a handler function to control hardware in response to the user interacting with the page in a browser. You will find other examples using bottle in Chapter 15.
See Also
For more information, see the bottle project documentation.
For more on formatting dates and times in Python, see Recipe 7.2.
For a whole load of Internet-related recipes, see Chapter 15.
7.18 Doing More Than One Thing at a Time
Solution
Use the Python thread library.
The following example, which you can download from the Downloads section of the Raspberry Pi Cookbook website, sets a thread running that will interrupt the counting of the main thread.
importthread,time,randomdefannoy(message):whileTrue:time.sleep(random.randint(1,3))(message)thread.start_new_thread(annoy,('BOO !!',))x=0whileTrue:(x)x+=1time.sleep(1)
The output on the console will look something like this:
$ python thread_test.py
0
1
BOO !!
2
BOO !!
3
4
5
BOO !!
6
7
8
When you start a new thread of execution using the Python thread library, you must specify a function that is to be run as that thread. In this example, the function is called annoy and it contains a loop that will continue indefinitely printing out a message after a random interval of between 1 and 3 seconds.
To start the thread, the start_new_thread function in the thread module is called. This function expects two parameters: the first is the name of the function to run (in this case annoy) and the second is a tuple that contains any parameters that are to be passed to the function (in this case 'BOO !!').
You can see that the main thread that is just happily counting will be interrupted every few seconds by the thread running in the annoy function.
Discussion
Threads like these are also sometimes called lightweight processes because they are similar in effect to having more than one program or process running at the same time. They do, however, have the advantage that threads running in the same program have access to the same variables, and when the main thread of the program exits, so do any threads that are started in it.
See Also
For a good introduction to threading in Python, see http://www.tutorialspoint.com/python/python_multithreading.htm.
7.19 Doing Nothing in Python
Solution
Use the sleep function in the time library as illustrated in the following code example that you can find with the downloads for the book called sleep_test.py.
importtimex=0whileTrue:(x)time.sleep(1)x+=1
The main loop of the program will delay for a second before printing the next number.
Discussion
The function time.sleep takes a number of seconds as its parameter. But if you want shorter delays, you can specify decimals. For example, to delay for a millisecond, you would use time.sleep(0.001).
Its a good idea to put a short delay in any loop that continues indefinitely, or even just continues for more than a fraction of a second, because when sleep is being called, the processor is freed up to allow other processes to do some work.
See Also
For an interesting discussion of how time.sleep can reduce the CPU load of your Python program, see http://raspberrypi.stackexchange.com/questions/8077/how-can-i-lower-the-usage-of-cpu-for-this-python-program.
7.20 Using Python with Minecraft Pi Edition
Solution
Use the Python interface that comes with Minecraft Pi edition to interact with Minecraft Pi while it is running.
Although you can switch back and forth between an LXTerminal session and the Minecraft game, the game will pause each time the window loses focus, so it is a lot easier to connect to the Raspberry Pi by using SSH on a second computer (Recipe 2.7). This has the added benefit that you get to see the Python script in action, live in the game.
The following example, which you can download from the Downloads section of the Raspberry Pi Cookbook website, builds a staircase at your current location (Figure 7-2):
frommcpiimportminecraft,blockmc=minecraft.Minecraft.create()mc.postToChat("Lets Build a Staircase!")x,y,z=mc.player.getPos()forxyinrange(1,50):mc.setBlock(x+xy,y+xy,z,block.STONE)
The Python library comes pre-installed in Raspbian, so if it’s not there, you should probably update your system (Recipe 1.5).
After the library imports, the variable mc is assigned to a new instance of the Minecraft class.
The postToChat method sends a message to the player’s screen telling him or her that the staircase is about to be built.
The variables x, y, and z are bound to the player’s position and then the for loop increments both the x and y (y is height) repeatedly to build the staircase using the setBlock method (Figure 7-2).

Figure 7-2. Building a staircase in Minecraft Pi with Python
Discussion
The mcpi library does not just allow you to post to chat, find the player’s location, and place a block, it also provides a whole load of other methods that allow you to:
- Find the ID of the block at the coordinates specified
- Find out who’s playing and teleport them perhaps?
- Set the position of a player
- Get the direction a player is facing
There is no definitive documentation for the class other than this useful blog post.
See Also
For more information on the Minecraft Pi Edition, see Recipe 4.7.
To learn about running a Minecraft server on a Raspberry Pi, see Recipe 4.8.