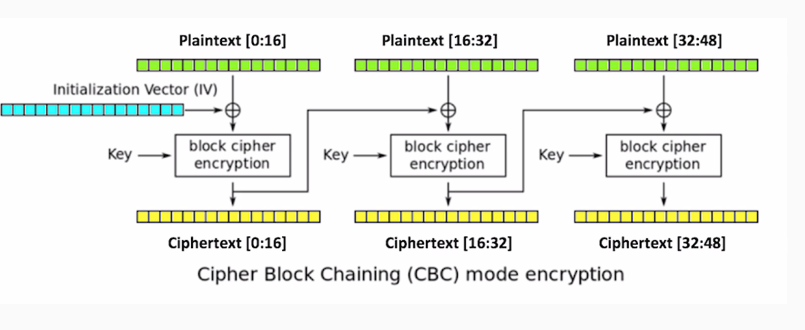
In addition to the key, you add an initialization vector, which is XOR'd with the plaintext before encryption. Then for the next block, you take the ciphertext produced by encryption and use it as the initialization vector for the second block. The output of that is used as the initialization vector for the third block. Thus, even if the inputting plaintext is the same in every block, the ciphertext will be different in each block:
This results in far more obfuscation:
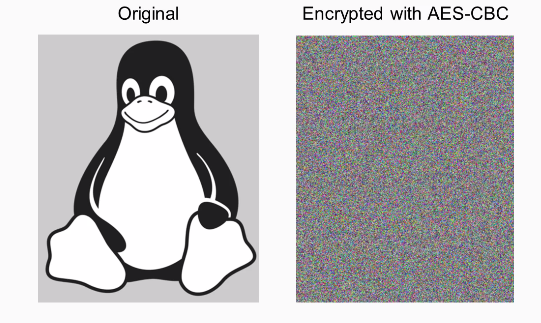
You can see that the penguin is now completely invisible and all the bytes are just random, so this is preferred from almost every purpose.
To do it in Python, here's how we did the previous AES, which was the EBC mode. By default, you don't specify the mode.
If you want to use CBC mode, you put the following command:
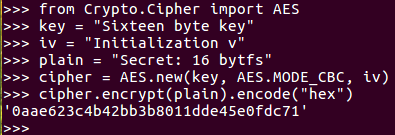
AES mode CBC when you create the cipher object. You also have to provide an initialization vector, which can be 16 bytes, just like the key. If you encrypt one block of 16 bytes of text, there's no obvious difference in the result because of the initialization vector, but it's just a block of hexadecimal. To see the effect of this, you need to make the plaintext longer. When you encrypt it, you get a blob of hexadecimal. That's the ECB mode, which does not remove all the patterns in the data. Here's the CBC mode with the same repeating input. As you can see, the output has no pattern, and does not repeat however far you go. So, it much more effectively conceals the data.
Let's take a look at that. We start Python in the Terminal, and then add this code:
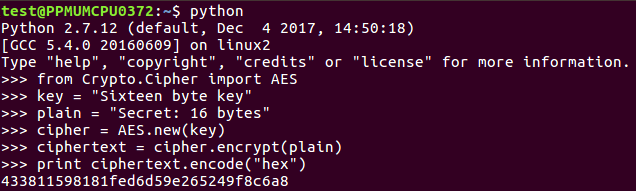
So, you can see the 16-byte key and the 16-byte plaintext AES in ECB mode. We encrypt it and print the answer.
If we want to make it longer, we add this:

You can multiply a string object in Python and if you just print it out, you'll see it's just the same thing three times.
Now we can encrypt that plain3:

When we print that out, it'll have that repeating pattern for 33. Now, if we change the mode, we'll need an iv:

We just need 16 bytes, so we'll just 16 bytes to iv. Next, we create a new AES object. In the iv now, we encryp plain3 again, and we print out the result again.
You see it has 61f, and you can see that there's no longer any repetition. So, this is a much more effective way to encrypt things if you really want to obscure the input.