In this section, we will take a look at the Advanced Encryption Standard (AES), private key encryption, key and block size, how to influence AES, and Python and confusion and diffusion.
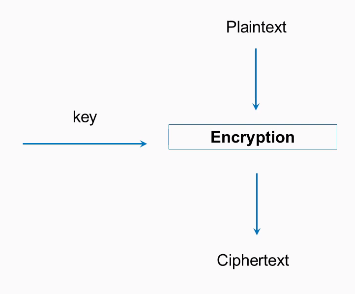
AES is the encryption standard approved by the United States National Institute of Standards and is considered very secure. It's approved even for the storage of secret military information. It is private key cryptography, which is the kind of cryptography that has been used for thousands of years in which both the sender and the receiver use the same key. It's a block cipher, so the input data has to be put in blocks that are 128-bits long, and a block of plaintext is encrypted with a key, producing a block of ciphertext:
There are three key sizes: 128, 192, and 256-bits. The most common type of AES is the 128-bit key size, and that's what we'll use in this example. In Python, it's quite easy to use.
Firstly, you need to import the AES module from crypto cipher, then you need a 16-byte key and plaintext, which is some integral multiple of 16 bytes. You will then create a new AES object with the key and then calculate it with cipher encrypt. This gives you a 16-byte string, which may be unprintable, so it's best to encode it as hex to print it out; and, of course, if you decrypt it, you get back to your original plaintext. This has many desirable cryptographic properties, and one of them is confusion. If you change a bit of the key, it changes the entire ciphertext.
So, if we change the key to kex, you will see that all of the ciphertext changes. This is what you want. Two very similar keys produce completely different results, so you cannot find any pattern in the results that you could use to deduce information about the key.
Similarly, diffusion is a desirable property, where if you encrypt something twice with the same key but you change even one bit of the plaintext, again, the entire ciphertext changes. See the following example:

Here we have bytes and we get the same 433 ending in 6a8. If we change the last letter to t, you can see that it starts with 90c and ends with 5d2; that is, it completely changes.
Let's take a look at that in Python:
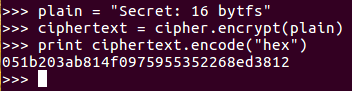
- Open the Terminal window and start python. We will enter the following command, as shown in the sceenshot:
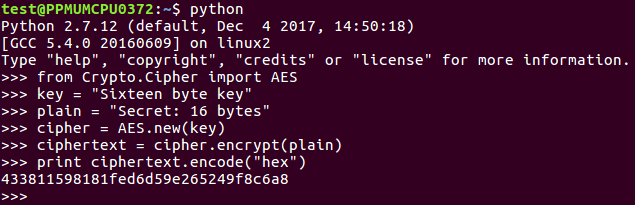
- We import the AES module, where we have a 16-byte key and a 16-byte plaintext. We have created an AES object, encrypted it, and then we have printed out the hex value over here:

- Now, we change the key:
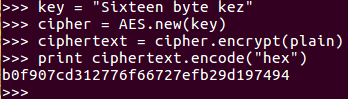
Here we go up to the key line and change that to say z, and then do it again, creating a new AES object with that key. Performing the encryption and printing out the results again, you see everything is different.
It now starts with b, ends with 4, and has completely changed.
- Now, we'll leave the key where it is and change the plaintext. Let's change t to F. Now if we encrypt that and print out the result in hexadecimal, once again, everything has changed; even though this is the same key as the one above it:
So, this shows both confusion and diffusion, which are desirable properties. In the next section, we'll discuss ECB and CBC modes.