Table of Contents for
Professional WordPress® Plugin Development
 Professional WordPress® Plugin Development
Published by
Wrox, 2011
Professional WordPress® Plugin Development
Published by
Wrox, 2011
- Copyright
- CREDITS
- ABOUT THE AUTHORS
- ACKNOWLEDGMENTS
- FOREWORD
- INTRODUCTION
- 1. An Introduction to Plugins
- 2. Plugin Foundation
- 3. Hooks
- 4. Integrating in WordPress
- 5. Internationalization
- 6. Plugin Security
- 7. Plugin Settings
- 8. Users
- 9. HTTP API
- 10. The Shortcode API
- 11. Extending Posts: Metadata, Custom Post Types, and Taxonomies
- 12. JavaScript and Ajax in WordPress
- 13. Cron
- 14. The Rewrite API
- 15. Multisite
- 16. Debugging and Optimizing
- 17. Marketing Your Plugin
- 18. The Developer Toolbox
WHAT'S IN THIS CHAPTER?
In the modern web, dubbed "2.0," Internet-based services communicate with each other: web-based readers gather data from blog feeds and Twitter accounts; personal web sites display Facebook badges or YouTube videos.
Your site should be no exception to this interoperability: In this chapter you learn how to make WordPress exchange information with remote services API and open it to a whole new level of perspective.
This opening section explains what exactly an HTTP request is, what it can be used for, and why you will once again thank WordPress for lending a convenient hand and doing the cumbersome parts for you.
Hyper Text Transfer Protocol (HTTP) is the networking protocol that is no less than the foundation of data communication for the World Wide Web.
Even if you cannot name or explain the following concepts yet, you have already experienced them in your everyday life online, using a web browser: HTTP is a request/response protocol in the client/server computing model.
Client/server — An application (the client) talks to another application (the server) that itself can respond to many clients at the same time. In the HTTP model, a client is, for example, a web browser, such as Firefox running on your computer, and the server is a web server powered, for instance, by Apache, PHP, and MySQL and running WordPress. A client can also be a web indexing spider robot or a PHP script that fetches and parses a web page to retrieve information. You do this later in this chapter.
Request/response protocol — The client submits an HTTP request (basically "Hello, I'm Firefox, please send me file example.html") and the server sends back a response ("Hello, I'm the Apache running PHP; here is the file, it is 4kb in size," followed by the file itself). Both requests contain potentially interesting information you learn to decipher and use.
An HTTP transaction is a simple and clear text communication between the client and the server.
The client request typically consists of a few lines sent in clear text to the server. Using Firefox as a web browser and trying to load http://example.com/file.html from a Google result page would translate into the following query:
GET /file.html HTTP/1.1
Host: www.example.com
User-Agent: Mozilla/5.0 (Windows; U; Windows NT 5.0) Firefox/3.6
Referer: http://www.google.com/search?q=example.com
Cookie: lastvisit=235456684
The first line starts with GET: A GET session is how you tell the server you want to retrieve a document, here file.html from host example.com. Other main requests methods you can use are HEAD (to just receive the server response headers) and POST (to submit data to a form).
Notice also how information such as the referrer URL or the user agent string is also sent by the client. In Chapter 6, "Plugin Security," you read that these data should not be trusted: Indeed, in an example later, you learn how to forge these values to anything.
The server response consists of three parts: the headers, with information about the response, a blank line, and then the response body.
The headers are a few lines of information and can be something like this:
HTTP/1.1 200 OK
Date: Mon, 23 May 2012 22:38:34 GMT
Server: Apache/1.3.3.7 (Unix)  (Red-Hat/Linux)
Last-Modified: Wed, 08 Jan 2003 23:11:55 GMT
Set-Cookie: lastvisit=235456951
Content-Length: 438
Content-Type: text/html; charset=UTF-8
The first interesting information is the status code, here 200. Each server response should have a status code giving details on how the transaction was handled by the server: 200 means OK, 404 means not found. Table 9-1 lists the main HTTP status codes you can use.
Table 9.1. Main HTTP Status Codes
STATUS CODE | SIGNIFICATION |
|---|---|
Source: | |
200 | OK |
301 | Moved Permanently |
302 | Moved Temporarily |
403 | Forbidden |
404 | Not Found |
500 | Internal Server Error |
503 | Service Unavailable |
Of course, you don't have to memorize all these status codes, but with some experience you can quickly remember the main classes, as detailed in Table 9-2.
Table 9.2. HTTP Status Code Classes
STATUS CODE | SIGNIFICATION |
|---|---|
2xx | Request was successful. |
3xx | Request was redirected to another resource (like in the case of a URL shortener). |
4xx | Request failed because of a client error (for instance, a wrong username/password combination). |
5xx | Request failed because of a server error (like a bad configuration or a broken script). |
The server response also generally discloses information about the software running on the server, the content-type of the document it serves, and its length.
The first obvious use of HTTP requests is to retrieve a remote document or particular information within a remote document: a Twitter user's last message, the current value of share stock, or JSON encoded data from a remote API service.
You can also send information to a remote document, such as a form or an HTTP API, and modify data from a client script.
These requests would be done using either GET or POST methods, sometimes with credentials (a login and password or another authentication mechanism) or other parameters. You can make such requests later in this chapter.
Another interesting application, using HEAD requests, is to check the state of a remote document without bothering downloading its content. For instance, a broken link checker plugin could make sure your bookmarks in WordPress don't return a 404 header.
In basic PHP, without WordPress that is, there are several common ways to send HTTP requests. It is interesting to know the basics because you sometimes need to code a portion of code in a non-WordPress environment.
The following examples all do the same thing: send a GET request to http://wordpress.org/ and display the content received (that is, their index page).
You can use the HTTP extension to send a GET request to http://wordpress.org/ and display the content received.
<?php

$r= new HttpRequest( 'http://wordpress.org/', HttpRequest::METH_GET );
$r->send () ;
echo $r->getResponseBody();
?>
You can use fopen() streams to send a GET request to http://wordpress.org/ and display the content received.
<?php

if( $stream = fopen( 'http://wordpress.org/', 'r' ) ) {
    echo stream_get_contents( $stream );
    fclose($stream);
}
?>You can use a standard fopen() to send a GET request to http://wordpress.org/ and display the content received.
<?php

$handle = fopen( "http://wordpress.org/", "rb" );
$contents = '';
while( !feof( $handle ) ) {
    $contents .= fread( $handle, 8192 );
}
fclose( $handle );
echo $contents;
?>You can use fsockopen() to send a GET request to http://wordpress.org/ and display the content received.
<?php

$fp = fsockopen( "wordpress.org", 80, $errno, $errstr, 30 );
if (!$fp) {
    echo "$errstr ($errno)<br />\n";
} else {
    $out = "GET / HTTP/1.1\r\n";
    $out .= "Host: wordpress.org\r\n";
    $out .= "Connection: Close\r\n\r\n";
    fwrite($fp, $out);
    while (!feof($fp)) {
        echo fgets($fp, 128);
    }
    fclose($fp);
}
?>You can use the CURL extension to send a GET request to http://wordpress.org/ and display the content received.
<?php

$ch = curl_init();

curl_setopt( $ch, CURLOPT_URL, "http://wordpress.org/" );
curl_setopt( $ch, CURLOPT_HEADER, 0 );
curl_exec($ch);
curl_close($ch);
?>
Code snippet http_request_tests.php
Each way has drawbacks and advantages over others: Some are simple and quicker to write, and some allow more parameters for finer control, support different request methods, or are faster to execute. Notice for instance how burdensome it is to use fsockopen(), which needs the complete request headers, compared to using streams or the HTTP extension.
The problem is this: Depending on the server setup and configuration, PHP version, or security settings, some methods won't be allowed or even available. When working for a specific client, you could adapt to its specific server architecture and use a method you know will work, but this is simply impossible when authoring a plugin you intend to release for broad use.
What you have to do, simply put, boils down to this alternative: Either test each method prior to using one, or rely on WordPress' HTTP API.
WordPress implements a smart and powerful class, named WP_Http and found in wp-includes/class-http.php, which can test each previously described method and automatically select the best one available on the current machine.
The HTTP API supports all the methods you need to use (GET, POST and HEAD) and enables fine-tuning several parameters such as proxy tunneling.
Note
Don't use PHP native methods to perform HTTP requests: Remember, they may be not installed or have restrictive configurations on many web hosts. Always use the WordPress HTTP API and its functions described next.
You can execute an HTTP request within WordPress mostly using three functions: wp_remote_get(), wp_remote_post(), and wp_remote_head(), obviously for GET, POST, and HEAD requests.
These functions all operate the same way:
The HTTP request is performed using the eponymous method.
They accept two parameters, one required and one optional.
They return an array or an object.
The syntax of these three functions follows:
<?php

$get_result  = wp_remote_get( $url, $args );
$post_result = wp_remote_post( $url, $args );
$head_result = wp_remote_head( $url, $args );

?>
These three functions can actually be considered as simple shortcuts to the more generic wp_remote_request(). Indeed, the three preceding lines are equivalent to the three following ones:
<?php

$get_result  = wp_remote_request( $url, array( 'method' => 'GET' ) );
$post_result = wp_remote_request( $url, array( 'method' => 'POST' ) );
$head_result = wp_remote_request( $url, array( 'method' => 'HEAD' ) );

?>
The function wp_remote_request() works the same way as the other wp_remote_* functions, so everything that follows applies to any wp_remote_ function.
You now learn what parameters they need, what data they return, and then play with them.
The first parameter $url these functions need is a string representing a valid site URL to which the HTTP request will be sent. Supported protocols are HTTP and HTTPS; some transports might work with other protocols such as FTP but don't assume this.
The second parameter $args is an optional array of parameters to override the defaults. The default parameters are the following array:
<?php

$defaults = array (
    'method' => 'GET',
    'timeout' => 5,
    'redirection' => 5,
    'httpversion' => '1.0',
    'user-agent' => 'WordPress/3.1; http://example.com/',
    'blocking' => true,
    'headers' => array (),
    'cookies' => array (),
    'body' => NULL,
    'compress' => false,
    'decompress' => true,
    'sslverify' => true,
)

?>
This array contains the default values when omitted. For instance, instead of identifying your blog in the user-agent string and if you want to disguise your HTTP request as one made by a generic browser, you would write the following:
<?php

$args = array(
    'user-agent' => 'Mozilla/5.0 (Windows NT 5.1; en-US) Firefox/3.6.8',
);

$result = wp_remote_get( $url, $args );

?>
In Chapter 6, you learned that despite its trustful name, the PHP generated array $_SERVER should not be trusted. As you can see, it takes a single PHP line to forge and fake the content of, for example, $_SERVER['HTTP_USER_AGENT'].
Table 9-3 contains a comprehensive description of the most important default values. You can consider the others either partially implemented, not always functional depending on the transport used, or simply of minor interest.
Table 9.3. Default Settings of wp_remote_ Functions Optional Parameters
PARAMETER | SIGNIFICATION |
|---|---|
| Either |
| A number of seconds: how long the connection should stay open before failing when no response. |
| The user-agent used to identify "who" is performing the request. Defaults to |
| An array of additional headers. |
| An array of cookie values passed to the server. |
| The body of the request, either a string or an array, which is data submitted to the URL. |
All wp_remote_* functions return an array if the request has completed, or an error object if it was unsuccessful.
In case of a malformed HTTP request, or if the request cannot be performed for any other reason (site not responding, temporary connection problem, etc.), the result will be an object instance of WordPress' class WP_Error, containing an error code and an error message, as illustrated in the following code snippet:
<?php

var_dump( wp_remote_get( 'malformed-url' ) );

?>
The result of this ill-fated GET request follows:
object(WP_Error)#259 (2) {
  ["errors"]=>
  array(1) {
    ["http_request_failed"]=>
    array(1) {
      [0]=>
      string(29) "A valid URL was not provided."
    }
  }
  ["error_data"]=>
  array(0) {
  }
}
Error objects returned by HTTP requests will contain the error code "http_request_failed" and a meaningful detailed diagnosis. Consider the following attempts:
<?php

$bad_urls = array(
   'malformed',
   'http://0.0.0.0/',
   'irc://example.com/',
   'http://inexistant',
);

foreach( $bad_urls as $bad_url ) {
    $response = wp_remote_head( $bad_url, array('timeout'=>1) );
    if( is_wp_error( $response ) ) {
        $error = $response->get_error_message();
        echo "<p>$bad_url returned: <br/> $error </p>";
    }
}

?>
Code snippet wp_remote_errors.php
Notice a couple of things in this snippet:
To speed up things because it's obvious these requests will fail, and you don't want to wait for 5 seconds each, an additional timeout parameter is set, to 1 second.
Because HTTP requests return a
WP_Errorobject on failure, you can test the response using functionis_wp_error(). You learn more about dealing with errors and theWP_Errorclass in Chapter 16, "Debugging and Optimizing."
Finally, look at the actual result of this code snippet:
Trying malformed returned:
A valid URL was not provided.

Trying http://0.0.0.0/ returned:
couldn't connect to host

Trying irc://example.com/ returned:
Unsupported protocol: irc

Trying http://inexistant returned:
Could not resolve host: inexistant; No data record of requested type
As you can see, the HTTP request functions can diagnose most scenarios, so you know you can rely on them if you need to troubleshoot unexpected behavior within your code.
When the HTTP request has completed, wp_remote_ functions return a multidimensional array of four elements, containing the raw server response in four parts: 'headers', 'body', 'response', and 'cookies'.
Consider the following request:
<?php

var_dump( wp_remote_get( 'http://example.com/asdfgh' ) );

?>
The output of this request will be akin to the following:
array(4) {

  ["headers"] => array(5) {
     ["date"] => string(29) "Wed, 01 Sep 2010 14:39:21 GMT"
     ["server"] => string(85) "Apache/2.2.8 mod_ssl/2.2.8 PHP/5.2.5"
     ["content-length"] => string(3) "461"
     ["connection"] => string(5) "close"
     ["content-type"] => string(25) "text/html; charset=utf-8"
  }

  ["body"]=> string(461) "<html><head>
<title>404 Not Found</title>
</head><body>
(... snip ...)
</body></html>
"
["response"] => array(2) {
["code"] => int(404)
["message"] => string(9) "Not Found"
}
["cookies"] => array(0) {}
}The first thing you should note here is that despite sending an HTTP request to a nonexistent page, the request is still considered successful: Whenever the web server replies to the client request, no matter its reply, the HTTP transaction is complete.
The four elements of the response array consist of the following:
'headers'— The raw list of the server response as detailed in the first section of this chapter, minus the HTTP response code.'body'— The body of the server response, which is typically the page HTML content itself but can be JSON or XML encoded data when polling a remote API for instance.'response'— The server response code and its signification, as detailed in Table 9-1 and Table 9-2. This particular information is especially valuable: Despite the HTTP transaction being successful, its result may be totally different from what you expect. You should always check that you obtain 200 as a response code.'cookies'— If the server wants the client to store cookie information, they will be included here. In case you need this info for any subsequent HTTP request, include them as additional optional parameter in the nextwp_remote_function call.
The array returned by wp_remote_ functions enclose exhaustive information, and as such may contain too much data if you need just a part of it.
Along with functions performing HTTP requests, you can use "companion" functions that enable quick access to a part of the returned array. These functions follow:
wp_remote_retrieve_response_code()— Returns just the response code (for example, 200) of an HTTP responsewp_remote_retrieve_response_message()— Returns just the response message (for example, "OK")wp_remote_retrieve_body()— Returns the body of the responsewp_remote_retrieve_headers()— Returns all the headers of a server responsewp_remote_retrieve_header()— Returns just one particular header from a server response
For example, to check if a link exists and does not return a 404 Not Found error, you can use the following code:
<?php

$url = 'http://www.example.com/bleh';

// Send GET request
$response = wp_remote_get( $url );

// Check for server response
if( is_wp_error( $response ) ) {

    $code = $response->get_error_message();
    wp_die( 'Requests could not execute. Error was: ' . $code );

}

// Check that the server sent a "404 Not Found" HTTP status code
if( wp_remote_retrieve_response_code( $response ) == 404 ) {

    wp_die( 'Link not found' );

}

// So far, so good
echo 'Link found';

?>
Code snippet wp_remote_check_404.php
You can use these simple companion functions more in the next examples and plugins.
Thanks to these wp_remote_ functions, you are now able to perform most tasks involving HTTP requests in a standard WordPress environment. But not all environments are customary, and not all tasks are basic. Fortunately, the HTTP API is extensible and versatile.
For instance, it is frequent that networks in corporate environments are isolated behind a firewall or a proxy. You will now read how to bypass this, and maybe treat HTTP responses differently.
In the following sections, you will also learn how to fine-tune the behavior of the HTTP API, utilizing its hooks and filters, for example to log requests for troubleshooting.
In computer networks, a proxy server is a server that acts as an intermediary between the client and the requested server.
A great aspect of the HTTP API, and another reason why it is superior to PHP native functions as detailed in the first section, is that it supports connections through proxy without additional complex configuration.
To enable proxy support, you simply need to have the user define the following constants:
<?php

define( 'WP_PROXY_HOST', 'firewall.corp.example.com' );
define( 'WP_PROXY_PORT', '3128' );
define( 'WP_PROXY_USERNAME', 'mylogin' );
define( 'WP_PROXY_PASSWORD', 'mypassword' );

?>
This is especially important for users in a corporate environment where proxies are common and can block all WordPress' outgoing requests if not, or incorrectly, configured.
On a corporate network, where a firewall architecture can characteristically handle different connections toward the Internet and those staying on the intranet, another constant can be used to specify domains that should not go through the proxy, in a comma-separated list:
<?php

// these hosts will not go through the proxy
define( 'WP_PROXY_BYPASS_HOSTS', 'sales.example.com, hr.example.com' );
?>
The blog domain and localhost are automatically added to this list, so you don't have to include them.
Also, when working with clients on a firewalled corporate intranet, a concern of your client's IT department may be to limit outgoing connections to a restricted white list of web sites. If so, use constants WP_HTTP_BLOCK_EXTERNAL and WP_ACCESSIBLE_HOSTS like so:
<?php

// block all requests through the HTTP API
define( 'WP_HTTP_BLOCK_EXTERNAL', true );

// except for these hosts
define( 'WP_ACCESSIBLE_HOSTS',
    'api.wordpress.org, sales.example.com, partner.web' );
?>
Including api.wordpress.org in the list of accessible hosts can ensure that the built-in upgrading for core, plugins, and themes still work.
As any other piece of WordPress code poetry, the HTTP API makes considerable use of hooks, and reading the source file of the WP_Http class you can find several filters and actions triggered.
For instance, if you want all your plugins to show off your WordPress skills in server logs whenever they perform queries, add the following filter and function:
<?php

// Hook into the filter that sets user agent for HTTP requests
add_filter( 'http_headers_useragent', 'boj_myplugin_user_agent' );

// Set your own user agent
function boj_myplugin_user_agent() {
    global $wp_version;

    return "WordPress version $wp_version ; ".
           "Need a WordPress specialist? Contact us! ".
           "BOJ Studio www.example.com";
}

?>
This filter can set the new default value for the user agent string, which means that on a per-request basis you can still override it, as in the previous example where you disguised as a generic Internet browser.
Hooks that can come handy when debugging requests and server responses are the 'http_request_args' and 'http_response' filters, used to allow modification of the request's parameters right before it is executed or just before the server responses are returned.
In the WP_Http class source (located in wp-includes/class-http.php), you can see that each request applied these two filters:
<?php

// before the request is sent, you will find:
$r = apply_filters( 'http_request_args', $r, $url );

// once the response is processed, you will read:
return apply_filters( 'http_response', $response, $r, $url );

?>
You are now going to code a plugin that logs each HTTP request and its parameters, and each server response into a flat text file. You can use boj_loghttp as a prefix throughout this plugin.
<?php
/*
Plugin Name: Log HTTP requests
Plugin URI: http://example.com/
Description: Log each HTTP requests into a flat text file for further analysis
Author: WROX
Author URI: http://wrox.com
*/

// Hook into filters
add_filter( 'http_request_args', 'boj_loghttp_log_request', 10, 2 );
add_filter( 'http_response', 'boj_loghttp_log_response', 10, 3 );

// Log requests.
// Parameters passed: request parameters and URL
function boj_loghttp_log_request( $r, $url ) {

    // Get request parameters formatted for display
    $params = print_r( $r, true );

    // Get date with format 2010-11-25 @ 13:37:00
    $date = date( 'Y-m-d @ H:i:s' );

    // Message to log:
    $log = <<<LOG
    $date: request sent to $url
    Parameters: $params
    --------------

LOG;

    // Log message into flat file
    error_log( $log, 3, dirname( __FILE__ ).'/http.log' );
// Don't forget to return the requests arguments!
return $r;
}
// Log responses
// Parameters passed: server response, requests parameters and URL
function boj_loghttp_log_response( $response, $r, $url ) {
// Get server response formatted for display
$resp = print_r( $response, true );
// Get date with format 2010-11-25 @ 13:37:00
$date = date( 'Y-m-d @ H:i:s' );
// Message to log:
$log = <<<LOG
$date: response received from $url
Response: $resp
--------------
LOG;
// Log message into flat file
error_log( $log, 3, dirname( __FILE__ ).'/http.log' );
// Don't forget to return the response!
return $response;
}
?>Code snippet plugin_boj_loghttp.php
The two logging functions are similar: They receive from the filters a number of parameters that are then printed into a flat text file using PHP function error_log(); then they eventually return the unmodified filtered value.
Notice the particular syntax used here to delimit strings, called the heredoc syntax. The opening string delimiter is an identifier after <<<, and the closing delimiter is the identifier, not indented.
After you activate this plugin, it starts appending entries to the file http.log in the plugin's directory. This is an interesting plugin that demonstrates the inner working of WordPress' core, because it will, for instance, log all transactions with api.wordpress.org when checking the latest version of plugins, themes, and core, or when fetching the feeds displayed in your dashboard.
Note
Remember that logging events is for debugging only and is not suitable for production environments, as it could leak sensitive information or even fill up disk space with log data.
Filters and actions in the WP_Http class enable specific customization of how WordPress handles HTTP requests.
Imagine working for a client who wants a plugin that can monitor the content of an FTP directory. As a seasoned plugin author, you know that the HTTP API supports only the HTTP and HTTPS protocols, but as an experienced PHP hacker you also remember that the CURL extension can perform FTP requests.
You could obviously code something using CURL directly instead of the HTTP API functions, but that would not be best practice because you would lose access to the hooks of this API.
When you are confident the client server will have CURL support, you can code a specific plugin to leverage CURL's capability to work with the FTP protocol.
You can now write the part of such a plugin to do the following:
Disable all transports except CURL.
Add custom parameters to the CURL session.
Fetch and display the content of an FTP directory (for example, ftp://ftp.gnu.org, a public repository).
<?php

// Disable all transports but curl
function boj_onlycurl_force_curl() {
    add_filter( 'use_fsockopen_transport', '__return_false' );
    add_filter( 'use_fopen_transport', '__return_false' );
    add_filter( 'use_streams_transport', '__return_false' );
    add_filter( 'use_http_extension_transport', '__return_false' );
}

// Add a custom parameter to the CURL requests:
// display only file names of FTP directories (no attributes, size etc...)
function boj_onlycurl_hack_curl_handle( $handle ) {
    curl_setopt( $handle, CURLOPT_FTPLISTONLY, true );
    return $handle;
}

// Hook CURL requests to the above function
add_action( 'http_api_curl', 'boj_onlycurl_hack_curl_handle' );

// Now do the job
boj_onlycurl_force_curl();

var_dump( wp_remote_get( 'ftp://ftp.gnu.org' ) );

?>
Code snippet plugin_boj_onlycurl.php
By using the HTTP API, even if reducing it to use the CURL extension, your code still interacts easily with WordPress, for instance with your previously defined filter that modifies the user agent string.
Notice a convenient function you used here: __return_false(). A few shortcut functions in WordPress can be used to return always the same value: __return_true(), __return_false(), __return_zero() and __return_empty_array().
These shortcut functions are designed to be used in a filter context for simpler code. The three following examples are equivalent:
<?php

// 1. The old way
// You need to create an extra function that may be used only once
add_filter( 'somefilter', 'boj_always_return_false' );
function boj_always_return_false() {
    return false;
}

// 2. The convoluted short way
add_filter( 'somefilter', create_function('$a', 'return false;') );
// 3. The elegant and simple way add_filter( 'somefilter', '__return_false' ); ?>
Using anonymous (or lambda) functions in PHP with create_function() has several drawbacks for which it is wise to avoid:
The argument list and body are strings, so you have to pay extra attention to escaping and quotes.
Your favorite editor or IDE cannot highlight properly the code within the string body, making it more difficult to code more complex operations.
Opcode caches such as APC or PHP Accelerator cannot cache these dynamic functions.
When you want to programmatically check the existence and validity of a link with an HTTP request, you can break your analysis down into two steps: If the request is successful and the response code is 404, you know the link does not exist. Otherwise, you may have to check things more carefully, depending on the context:
If the request is an
is_wp_error(), it can be because the URL to check is malformed but also because there is a temporary glitch preventing your web server from accessing the URL (connection problem, DNS timeout, and so on).If the response code is in the 5xx family (a server error, remember Table 9-2) this is probably a temporary server error, so you need to check again later.
Some web servers are configured to handle "Not Found" errors differently than expected. For instance,
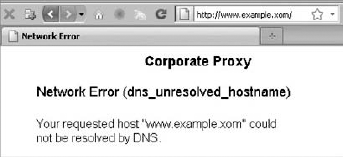
http://example.com/iconswill return a 404 when you would have expected the server to redirect tohttp://example.com/icons/, which actually exists.Some proxies or DNS servers, especially in corporate environments, are configured to handle all requests successfully, even though they should have returned an error: The following result is the actual return of
wp_remote_head( 'http://example.xom' ) (notice the typo in the top-level domain) behind such a proxy, treating a nonexistent domain as a regular 404 error. (See Figure 9-1 for the human readable result in a browser when trying to access this URL.)
array(4) {
  ["headers"]=>
  array(6) {
    ["cache-control"]=>
    string(8) "no-cache"
    ["pragma"]=>
    string(8) "no-cache"
    ["content-type"]=>
    string(24) "text/html; charset=utf-8"
    ["proxy-connection"]=>
    string(10) "Keep-Alive"
["connection"]=>
string(10) "Keep-Alive"
["content-length"]=>
string(3) "762"
}
["body"]=>
string(0) ""
["response"]=>
array(2) {
["code"]=>
int(404)
["message"]=>
string(9) "Not Found"
}
["cookies"]=>
array(0) {
}
}
Now that you know mostly everything about the HTTP API, it's time to put your knowledge into practice.
Twitter is an interesting practical playground because its API is developer-friendly, has extensive documentation (see http://dev.twitter.com/doc/), and can output results in various formats such as JSON, XML, or RSS.
Note
When working with remote APIs, always check the current documentation for recent changes. More often than not, third-party services introduce new methods and deprecate some, possibly breaking previously functional code.
In this section you create a plugin that can fetch the number of followers of a given Twitter username and the latest status update. You also learn how to get and parse JSON data, a format you often deal with when playing with remote APIs.
The API URL you will poll is http://api.twitter.com/1/users/show.json?screen_name=$username, with a simple GET request. This returns data presented in JSON format, which looks like this, when formatted and indented for human eyes:
{
  "followers_count" : 1731,
  "friends_count" : 108,
  "name" : "Ozh RICHARD",
  "description" : "WordPress & PHP hacker.",
  "screen_name" : "ozh",
  "status" : {
      "created_at" : "Sun Sep 05 09:01:56 +0000 2010",
      "id" : 23045381793,
      "retweet_count" : 1337,
      "text" : "I'm writing a book about WordPress plugins!",
    },
  "statuses_count" : 1730,
  "time_zone" : "Paris",
  "url" : "http://ozh.org/",
}
JSON (JavaScript Object Notation) is a popular data text format with a "name":"value" pair structure, which resembles a PHP multidimensional array. A reason for its popularity is that it is easy to programmatically parse and generate it, using functions json_encode() and json_decode().
Note
For your information, functions json_encode() and json_decode() are built in PHP as of version 5.2 and newer. Fortunately, WordPress versions with looser requirements include emulations of these functions for older platforms, to be found in wp-includes/compat.php.
After you have your JSON data collected into string $json, the function json_decode() converts it to an object or an array, as follows:
<?php

// Convert JSON string to an object
$json_object = json_decode( $json );
$followers   = $json_object->followers_count;
$last_tweet  = $json_object->status->text;

// Convert JSON string to an array: pass bool true as second parameter
$json_array = json_decode( $json, true );
$followers   = $json_array['followers_count'];
$last_tweet  = $json_array['status']['text'];

?>
Your complete plugin, named "Twitter Info" and using boj_ti_ as a prefix, follows:
<?php
/*
Plugin Name: Twitter Info
Plugin URI: http://example.com/
Description: Get number of followers and last tweet of a Twitter user
Author: WROX
Author URI: http://wrox.com
*/

// Define the Twitter username. Edit this.
define( 'BOJ_TI_USERNAME', 'ozh' );

// Name of the transient key to cache values
define( 'BOJ_TI_KEY', 'boj_ti_key' );

// Poll Twitter API
// Return array of (follower count, last tweet), or false on error
function boj_ti_ask_twitter() {

    // Send GET request to Twitter API
    $api_url = 'http://api.twitter.com/1/users/show.json?screen_name=';
    $api_response = wp_remote_get( $api_url . urlencode( BOJ_TI_USERNAME ) );

    // Get the JSON object
    $json = wp_remote_retrieve_body( $api_response );

    // Make sure the request was successful or return false
    if( empty( $json ) )
        return false;

    // Decode the JSON object
    // Return an array with follower count and last tweet
    $json = json_decode( $json );

    return array(
        'followers'  => $json->followers_count,
        'last_tweet' => $json->status->text
    );
}

// Return array of followers and last tweet, either from cache or fresh
function boj_ti_get_infos( $info = 'followers' ) {
// first, look for a cached result
if ( false !== $cache = get_transient( BOJ_TI_KEY ) )
return $cache[$info];
// no cache? Then get fresh value
$fresh = boj_ti_ask_twitter();
// Default cache life span is 1 hour (3600 seconds)
$cache = 3600;
// If Twitter query unsuccessful, store dummy values for 5 minutes
if( $fresh === false ) {
$fresh = array(
'followers' => 0,
'last_tweet' => '',
);
$cache = 60*5;
}
// Store transient
set_transient( BOJ_TI_KEY, $fresh, 60*5 );
// Return fresh asked info
return $fresh[$info];
}
// Echo number of followers
function boj_ti_followers() {
$num = boj_ti_get_infos( 'followers' );
echo "<p>I have $num followers on Twitter!</p>";
}
// Echo last tweet
function boj_ti_last_tweet() {
$tweet = boj_ti_get_infos( 'last_tweet' );
echo "<p>My last tweet: $tweet</p>";
}
// Register custom actions
add_action( 'boj_ti_followers', 'boj_ti_followers' );
add_action( 'boj_ti_last_tweet', 'boj_ti_last_tweet' );
?>Code snippet plugin_boj_twitter_info.php
In this plugin, the function boj_ti_ask_twitter() sends a GET request against Twitter's API, makes sure the result is JSON, decodes it, and returns an array of follower count and last tweet.
The function boj_ti_get_infos() makes good use of the Transient API as covered in Chapter 7, "Plugin Settings," to avoid hammering Twitter for constantly fresh results. Notice how it also caches dummy results for a shorter time when the API returns an error: It is good practice to cover all possible results when dealing with third-party providers you have no control over.
Because the main function boj_ti_get_infos() returns an array with the follower count and last tweet, for more convenience you've added two simple shortcut functions to easily access one data set, boj_ti_followers() and boj_ti_last_tweet().
To use your plugin, you would traditionally use the following snippet:
<?php

if( function_exists( 'boj_ti_followers' ) )
    boj_ti_followers()

?>
This way, if for some reason your plugin is deactivated, you won't break your blog by calling an undefined function.
But have a closer look at the end of the plugin: You have defined two custom actions. This good practice now enables you to simply use this one-liner:
<?php
do_action( 'boj_ti_followers' );
?>
Using this method is simpler for end users (less code to add) and safer. (If the plugin is deactivated, the action simply does not exist and nothing is triggered.)
You can now practice with POST requests.
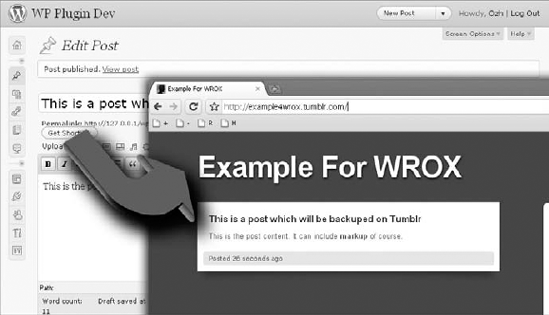
Code a simple plugin that can automatically back up your blog posts to Tumblr, a popular free blogging platform located at http://www.tumblr.com/ and with a simple API, documented at http://www.tumblr.com/docs/api.
First, you need to create an account there and write down the email used for login and your password.
Sending POST requests is like submitting a form in a web browser; the information you would write into form fields are instead collected in an array that is sent as the body of the request.
When you publish a new post, your plugin can get its title and content into $post_title and $post_content. You can now send a POST request to the Tumblr write API:
<?php

// URL of the Tumblr API
$api = 'http://www.tumblr.com/api/write';

// Data for the POST request
$data = array(
'email' => 'email@example.com',
    'password' => '123456',
    'type' => 'regular',
    'title' => $post_title,
    'body' => $post_body
);

// Do the POST
$response = wp_remote_post( $api,
    array(
        'body' => $data,
        'timeout' => 20
    )
);
?>
The data of the POST request is passed as the body item of the request parameter array, along with any other parameter as, for instance here, a longer timeout.
Your complete plugin, named Simple Tumblr Backup and using boj_stb as a prefix, follows:
<?php
/*
Plugin Name: Simple Tumblr Backup
Plugin URI: http://example.com/
Description: Backup posts to a Tumblr account as you publish them
Author: WROX
Version: 1.00
Author URI: http://wrox.com/
*/

// Edit this:
define( 'BOJ_STB_TUMBLR_EMAIL', 'email@example.com' );
define( 'BOJ_STB_TUMBLR_PASSW', '132456' );

// Actions when new post is published
add_action( 'draft_to_publish',   'boj_stb_newpost' );
add_action( 'pending_to_publish', 'boj_stb_newpost' );
add_action( 'future_to_publish',  'boj_stb_newpost' );

// Function called when new post. Expecting post object.
function boj_stb_newpost( $post ) {

    // Get post information
    $post_title   = $post->post_title;
    $post_content = $post->post_content;

    // URL of the Tumblr API
    $api = 'http://www.tumblr.com/api/write';

    // Data for the POST request
    $data = array(
           'email' => BOJ_STB_TUMBLR_EMAIL,
'password' => BOJ_STB_TUMBLR_PASSW,
'type' => 'regular',
'title' => $post_title,
'body' => $post_content
);
// Do the POST request
$response = wp_remote_post( $api,
array(
'body' => $data,
'timeout' => 20
)
);
// All done!
}
?>The simple trick here is to hook your function that sends to Tumblr into each action triggered when a new post is published, which is one of these scenarios:
Draft post that you eventually publish (action:
'draft_to_publish')A post pending review and now published (action:
'pending_to_publish')A post previously written but set with a future date (action:
'future_to_publish')
After you activate your plugin, each post you publish on your WordPress blog is automatically backed up on your Tumblr account, as shown in Figure 9-2.
You cannot always poll a remote API with neat results presented in formatted JSON or XML. Sometimes, you need to fetch arbitrary content, such as a plain HTML page, and extract the information out of it.
In Chapter 7, the practical example for using the Transients API included a hypothetical function to fetch the current song title from an online radio. The code used follows:
<?php

// Fetches from an online radio a song title currently on air
function boj_myplugin_fetch_song_title_from_radio() {
    // ... code to fetch data from the remote website
    return $title;
}
?>
Now it's time you make this function less imaginary and code it to retrieve the song currently on air on, say, radio KNAC located at http://www.knac.com/.
This web site does not offer a convenient API, but after some poking you'll find that its system generates a text file located at http://knac.com/text1.txt and formatted as follow:
text1=<b>NOW PLAYING</b>: EL DORADO<br><b>BY:</b> IRON MAIDEN

<current_song> EL DORADO
<current_artist> IRON MAIDEN
<current_album> THE FINAL FRONTIER

<last_5_songs_played> 10:32:37 - SLAYER, WAR ENSEMBLE<br> (... snip ...)
There is a slight resemblance to XML but it's not, and you'll be on your own to parse this file. You use regular expressions to extract the requested information from this text.
The working function will now be the following:
<?php

function boj_myplugin_fetch_song_title_from_radio() {
    $url = 'http://knac.com/text1.txt';

    $text = wp_remote_retrieve_body( wp_remote_get( $url ) );

    preg_match( '/\<current_song\>(.*)/', $text, $matches );
    $song = trim( $matches[1] );

    preg_match( '/\<current_artist\>(.*)/', $text, $matches );
    $artist = trim( $matches[1] );
return "$song by $artist"; } ?>
Code snippet plugin_boj_current_title.php
The regular expression used here to capture the song title, for instance, is '/\<current_song\>(.*)/', which translates to: string <current_song> followed by any character (the dot) repeated zero or more times (the *) until the end of the line.
Regular expressions are a key skill when it comes to parsing arbitrary content. If you are not familiar with them, they are introduced in Chapter 6, and then you can learn more at http://php.net/pcre.
A great trait of WordPress is that when plugins are hosted on http://wordpress.org/extend/plugins, users see right from their blog administration interface if there is a new version of a particular plugin, and they can update it without leaving their blog. WordPress' central repository is a key feature of plugin marketing, as you see in detail in Chapter 17, "Marketing Your Plugins."
This said, not all plugins you create end up available for public use on WordPress' repository: Clients often require that plugins created for their use remain private, or you may want to code plugins and sell them through your own repository.
Even if you host your plugin yourself, you can still have your users benefit from WordPress' built-in upgrade feature.
Twice daily, WordPress sends a request to api.wordpress.org with the list of plugins currently installed. The API server replies with a list of new versions when available and information about these new versions.
For instance, if you have on your blog only one plugin installed and active, the request sent as POST to http://api.wordpress.org/plugins/update-check/1.0/ would be something like this:
<?php

// Sample request sent to api.wordpress.org to check for new plugins

$request = array(
    'plugins' => array (
        'boj_myplugin/plugin.php' => array (
            'Name' => 'My BOJ Plugin',
            'PluginURI' => 'http://example.com/',
            'Version' => '',
            'Description' => 'This plugin does incredible stuff',
'Author' => 'Ozh',
'AuthorURI' => 'http://wrox.com/',
'TextDomain' => '',
'DomainPath' => '',
'Network' => false,
'Title' => 'My BOJ Plugin',
),
),
'active' => array (
0 => 'boj_myplugin/plugin.php',
),
)
?>If your plugin is hosted on wordpress.org, and there is a new version available, the API server will reply with the following information array:
<?php

// Sample response from api.wordpress.org with new plugin versions, if any

$response = array(
    'boj_myplugin/plugin.php' => array(
        'id' => 10256,
        'slug' => 'boj_myplugin',
        'new_version' => '2.0',
        'url' => 'http://wordpress.org/extend/plugins/boj_myplugin/',
        'package' => 'http://downloads.wordpress.org/plugin/boj_myplugin.zip'
    )
);

?>
So every 12 hours, your blog checks for new plugin versions and stores the request sent and the response received in a site transient named 'update_plugins', containing the following information:
'last_checked': the last time it checked'checked': the list of plugins and their version currently installed'response': the response from the API server with new version information
The function responsible for this behavior is wp_update_plugins(), found in file wp-includes/update.php.
You can now code a plugin that also checks an alternative API for a new version about a particular plugin not hosted on WordPress.
Just before your blog stores the site transient, the filter 'pre_set_site_transient_update_plugins' is applied to the transient value. At this point, your plugin sends a request to your alternative API and appends its response to the transient value. This response contains information about a new value if applicable, along with a package URL that won't be hosted on wordpress.org.
<?php
/*
Plugin Name: BOJ Alternate Plugin API
Plugin URI: http://example.com/
Description: Checks for a new version of itself against a self hosted API
Version: 1.0
Author: Ozh
Author URI: http://wrox.com/
*/

define( 'BOJ_ALT_API', 'http://example.com/plugin-api/' );
This constant defines your alternative API that sends information about a new version of this plugin. You can code the server script for this API later.
Now, the function that checks the API at the moment the transient is about to be stored follows:
// Hook into the plugin update check
add_filter('pre_set_site_transient_update_plugins', 'boj_altapi_check');

// Check alternative API before transient is saved
function boj_altapi_check( $transient ) {

    // Check if the transient contains the 'checked' information
    // If no, just return its value without hacking it
    if( empty( $transient->checked ) )
        return $transient;

    // The transient contains the 'checked' information
    // Now append to it information form your own API

    $plugin_slug = plugin_basename( __FILE__ );

    // POST data to send to your API
    $args = array(
        'action' => 'update-check',
        'plugin_name' => $plugin_slug,
        'version' => $transient->checked[$plugin_slug],
    );

    // Send request checking for an update
    $response = boj_altapi_request( $args );

    // If response is false, don't alter the transient
    if( false !== $response ) {
$transient->response[$plugin_slug] = $response;
}
return $transient;
}
// Send a request to the alternative API, return an object or false
function boj_altapi_request( $args ) {
// Send request
$request = wp_remote_post( BOJ_ALT_API, array( 'body' => $args ) );
// Make sure the request was successful
if( is_wp_error( $request )
or
wp_remote_retrieve_response_code( $request ) != 200
) {
// Request failed
return false;
}
// Read server response, which should be an object
$response = unserialize( wp_remote_retrieve_body( $request ) );
if( is_object( $response ) ) {
return $response;
} else {
// Unexpected response
return false;
}
}The purpose of the function boj_altapi_check() is to insert into the transient information about your plugin coming from another place than WordPress' repository, and in particular the URL of the new download package.
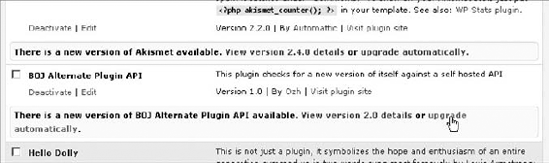
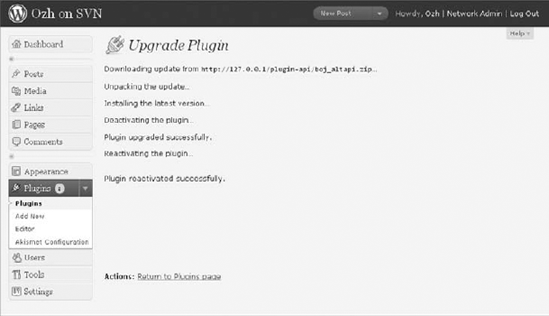
At this point, if the alternative API replies that a new version for this plugin is available, you see an upgrade link (see Figure 9-3) and can run the built-in upgrader with your own package URL (see Figure 9-4).
But things are not perfect yet: You need to also take care of the View Version Details link which, at this point, would still fetch detailed information from api.wordpress.org and thus display a blank screen.
The internal function you need to take over is plugins_api() (found in wp-admin/includes/plugin-install.php) and that uses the filter 'plugins_api':
// Hook into the plugin details screen
add_filter('plugins_api', 'boj_altapi_information', 10, 3);

function boj_altapi_information( $false, $action, $args ) {

    $plugin_slug = plugin_basename( __FILE__ );

    // Check if this plugins API is about this plugin
    if( $args->slug != $plugin_slug ) {
        return false;
    }

    // POST data to send to your API
    $args = array(
        'action' => 'plugin_information',
        'plugin_name' => $plugin_slug,
        'version' => $transient->checked[$plugin_slug],
    );

    // Send request for detailed information
    $response = boj_altapi_request( $args );
// Send request checking for information
$request = wp_remote_post( BOJ_ALT_API, array( 'body' => $args ) );
return $response;
}
?>Code snippet boj_altapi.php
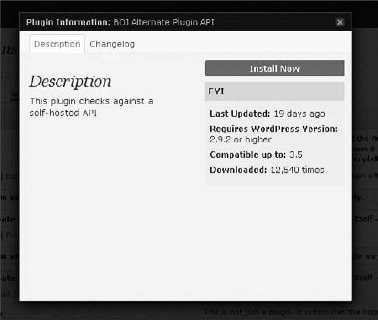
Now if you click the detailed information link, your plugin can pull information from your own API, as shown on Figure 9-5.
Of course, your plugin is completely dependent on the alternative API that must reply with information about the plugin. Fortunately, such an API is fairly easy to implement.
On a remote server, defined as 'http://example.com/plugin-api/' in the plugin, a single script can handle the two types of requests your plugin can issue:
Check for a new version (action parameter:
'update-check') that needs a reply with a newer version number and a package URL where to download the newer plugin.Check for detailed information about an updated plugin (action parameter:
'plugin_information')
<?php

$action = $_REQUEST['action'];
$slug = $_REQUEST['plugin_name'];

// Create new object
$response = new stdClass;

switch( $action ) {

    // API is asked for the existence of a new version of the plugin
    case 'update-check':
        $response->slug = $slug;
        $response->new_version = '2.0';
        $response->url = 'http://example.com/boj-altapi/';
        $response->package = 'http://example.com/plugin-api/boj_altapi.zip';
break;
// Request for detailed information
case 'plugin_information':
$response->slug = 'boj_altapi.php';
$response->plugin_name = 'boj_altapi.php';
$response->new_version = '2.0';
$response->requires = '2.9.2';
$response->tested = '3.5';
$response->downloaded = 12540;
$response->last_updated = "2010-08-23";
$response->sections = array(
'description' => 'This plugin checks against a self-hosted API',
'changelog' => 'New features added!'
);
$response->download_link = 'http://example.com/plugin-api/boj_altapi.zip';
break;
}
echo serialize( $response );
?>Code snippet plugin-api/index.php
This single script generates a response object, which needs to be serialized (that is, transformed into a string), for printing purpose. The key variable in its response is the URL of a zip package that is not hosted on wordpress.org.
The flexibility of WordPress' plugin API enables all sorts of customization, including not being tied to wordpress.org if needed.
This being said, you should consider hosting your plugins on wordpress.org if you intend to release them publicly. You learn in Chapter 17 how doing so can play a great role in your promotion strategy.
The HTTP API functions can fetch any type of remote content, such as HTML, images, zip archives, or JSON data. To fetch remote RSS feeds though, there is a better alternative: WordPress ships with SimplePie, a third-party popular and efficient RSS and Atom feed parser.
The function you use is fetch_feed(), which needs a single argument (the feed URL such as http://example.com/feed/) and returns either a WP_Error object on failure or a SimplePie object on success.
To illustrate how to use fetch_feed() and its return, you can now get the five latest articles from a web site and display their title, publication date, and link.
<?php


// Get a SimplePie object from a feed source.
$rss = fetch_feed('http://example.com/feed/');

// Make sure the SimplePie object is created correctly
if( is_wp_error( $rss ) )
    wp_die( 'Could not fetch feed' );

echo 'Feed found, contains '. $rss->get_item_quantity() . ' articles.';

// Build an array of 5 elements, starting from item #0
$rss_items = $rss->get_items( 0, 5 );

// Start ordered list
echo '<ol>';

// Loop through each item and display its link, title and date
foreach( $rss_items as $item ) {
    $title = $item->get_title();
    $date  = $item->get_date('Y/m/d @ g:i a');
    $link  = $item->get_permalink();

    echo "<li><a href='$link'>$title</a> ($date)</li>\n";
}

// Close ordered list
echo '</ol>';
?>
When polled using fetch_feed(), web site feeds are cached for 12 hours by default and stored in a transient.
The SimplePie class has numerous methods that you can become acquainted with at this address: http://simplepie.org/wiki/reference/start.
The HTTP API functions are a bridge between your blog and a whole world of interaction with remote services. Practically all modern web services offer an API for developers to use, and this widens even more the scope of possibilities for WordPress plugins.
The one thing you should retain from this chapter is that you should forget what you have done in a pre-WordPress life, when you probably got used to coding HTTP requests using CURL. As you have learned here, relying on the WordPress API enables much more flexibility (leveraging the internal hooks of the API) and security because you can be confident WordPress will pick the best functions available to perform requests.