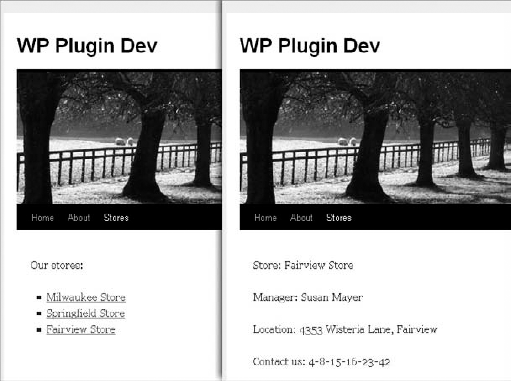
WordPress Multisite, formerly WordPress MU or Multiuser, is a powerful feature included in WordPress. Multisite enables you to create multiple sites with a single install of WordPress. This makes it easy for anyone running WordPress to create and administer a network of sites. This network can enable open user and site registration, or be a closed network where only administrators can create new sites and users.
Each site in your Multisite network can also run separate plugins, offer different themes, store unique content, and have a completely separate user base. It doesn't take much to realize how powerful Multisite is in WordPress. Because of this, as a plugin developer you need to understand what features are available when working with Multisite in WordPress.
When Multisite is enabled an entire new set of features and functions become available for plugin developers to take advantage of. Understanding what functions are available can help you include Multisite-specific functionality in the plugins you create. It can also help to understand how you can make your plugins Multisite-compatible from the start.
Each site in your WordPress Multisite network has a unique ID, or blog ID. This blog ID will be used in just about every Multisite-specific function you use. This is how WordPress determines what site you want to work with. The blog ID is also used in the prefix of the database tables for your site.
For example, if you enable Multisite and create a second site in your network, WordPress creates several database tables prefixed like wp_2_posts where wp_ is the table prefix you defined when installing WordPress, and 2_ is the blog ID of the new site. As you create additional sites, WordPress creates additional database tables in the same manner.
The blog ID is stored in the global variable $blog_id as shown here:
<?php
global $blog_id;
echo 'Current blog ID: ' .$blog_id;
?>
The $blog_ID global variable does exist in standard WordPress but will always be 1. In Multisite mode the blog ID will be the ID of the blog the current user is viewing.
When working with WordPress Multisite you can take advantage of some common functions. The first function is called is_multisite() and determines whether Multisite support is enabled. Look at an example:
<?php
if ( is_multisite() ) {
echo 'Multisite is enabled';
}
?>As you can see this function doesn't accept any parameters. It simply checks if Multisite is enabled in WordPress and if so returns True. Anytime you plan on using Multisite-specific functions in WordPress, it's imperative that you use this function to verify Multisite is running. If Multisite is not running, the default Multisite functions will not be available for use in WordPress, and you will get errors in your plugin.
Another useful function for retrieving network site posts is get_blog_post(). This function retrieves a post from any site in the network.
<?php get_blog_post( $blog_id, $post_id ); ?>
The function accepts two parameters: $blog_id and $post_id. Look at an example:
<?php
//set blog and post ID
$multisite_blog_id = 3;
$multisite_post_id = 4;
//load the post data
$post_details = get_blog_post(
$multisite_blog_id, $multisite_post_id );
//display the post title and contentecho 'Post Title: ' .$post_details->post_title .'<br />';
echo 'Post Content: ' .$post_details->post_content .'<br />';
?>
This example assumes you have a site with an ID of 3 and you want to retrieve post ID 4. This is a quick-and-easy way to retrieve a post from any site in your network.
It can also be useful to retrieve specific information about a site you are working with. To retrieve site information you can use the get_blog_details() function.
<?php get_blog_details( $fields, $getall ); ?>
The function accepts two parameters:
$fields — Blog ID, a blog name, or an array of fields to query against
$getall — Whether to retrieve all details
This function returns an object containing all public variables stored in the wp_blogs table. You can also retrieve a single, specific variable.
<?php
$blog_details = get_blog_details( 1 );
print_r( $blog_details );
?>
Running the preceding code would produce the following object output:
stdClass Object
(
[blog_id] => 1
[site_id] => 1
[domain] => example.com
[path] => /
[registered] => 2010-10-31 19:14:59
[last_updated] => 2010-11-11 14:19:34
[public] => 1
[archived] => 0
[mature] => 0
[spam] => 0
[deleted] => 0
[lang_id] => 0
[blogname] => Example Website
[siteurl] => http://example.com
[post_count] => 420
)As you can see there is a lot of valuable data returned about the site specified. You can also retrieve a single option value by stating the name to return:
<?php
echo 'Total post count: ' .get_blog_details( 1 )->post_count;
?>
Switching and Restoring Sites
One major advantage to using WordPress Multisite is how easy it is to aggregate content, and other data, between different sites in your network.
You can use two primary functions to pull data from sites in your network. The first of these functions is switch_to_blog(). This function enables you to switch to any site in your network.
<?php switch_to_blog( $blog_id, $validate ); ?>
The function accepts two parameters:
The second function is restore_current_blog(). This function restores the user back to the current site. You should always execute this function after calling switch_to_blog(). If not, everything that processes after the switch will pull from the site you switched to, and not the current site. This can mess up your widgets, site settings, and more.
Now look at an example. In this example, you create a custom settings page and display posts from the blog ID 3.
<?php
add_action( 'admin_menu', 'boj_multisite_switch_menu' );
function boj_multisite_switch_menu() {
//create custom top-level menu
add_menu_page( 'Multisite Switch', 'Multisite Switch',
'manage_options', 'boj-network-switch', 'boj_multisite_switch_page' );
}
?>First create a custom top-level menu. This will point to the boj_multisite_switch_page() function, which will be the display page for the posts from site 3.
<?php
function boj_multisite_switch_page() {
if ( is_multisite() ) {
//switch to blog ID 3
switch_to_blog( 3 );
//create a custom Loop
$recentPosts = new WP_Query();
$recentPosts->query( 'posts_per_page=5' );
//start the custom Loop
while ( $recentPosts->have_posts() ) :$recentPosts->the_post();
//store the recent posts in a variable
echo '<p><a href="' .get_permalink(). '">' .
get_the_title() .'</a></p>';
endwhile;
//restore the current site
restore_current_blog();
}
}
?>As always you need to verify Multisite is enabled using the is_multisite() function check. If Multisite is not enabled, the switch_to_blog() and restore_current_blog() functions will not be available to use in your plugin. Next, use the switch_to_blog() function to switch to blog ID 3. In this case you hardcoded the blog ID, but this could always be a dynamic variable set by a user. Now that you've switched to the site you want to pull content from, you need to create a custom Loop to retrieve the content.
To create the custom Loop, you define a variable named $recentPosts and instantiate an instance of WP_Query. Next set the query parameters; in this case you set posts_per_page to 5. This returns the five latest posts found. Now that WP_Query has been defined, it's time to execute the Loop and retrieve the results. You do this with the have_posts() and the_post() functions. The custom loop will then echo out the posts found from the query.
The final step is to execute restore_current_blog(). If you did not run this function, WordPress would stay on the site you switched to. If you execute additional loops below this, they would all pull from blog ID 3, and not from the current site you are viewing.
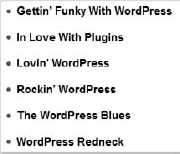
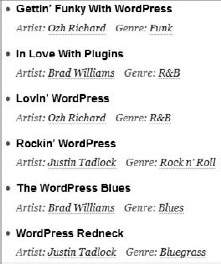
Now when you visit the plugin settings page the latest five posts from blog ID 3 display. Review the entire plugin:
<?php
/*
Plugin Name: Multisite Switch Example Plugin
Plugin URI: http://example.com/wordpress-plugins/my-plugin
Description: A plugin to demonstrate Multisite site switching
Version: 1.0
Author: Brad Williams
Author URI: http://wrox.com
License: GPLv2
*/
add_action( 'admin_menu', 'boj_multisite_switch_menu' );
function boj_multisite_switch_menu() {
//create custom top-level menuadd_menu_page( 'Multisite Switch', 'Multisite Switch',
'manage_options',
'boj-network-switch', 'boj_multisite_switch_page' );
}
function boj_multisite_switch_page() {
if ( is_multisite() ) {
//switch to blog ID 3
switch_to_blog( 3 );
//create a custom Loop
$recentPosts = new WP_Query();
$recentPosts->query( 'posts_per_page=5' );
//start the custom Loop
while ( $recentPosts->have_posts() ) :
$recentPosts->the_post();
//store the recent posts in a variable
echo '<p><a href="' .get_permalink(). '">' .
get_the_title() .'</a></p>';
endwhile;
//restore the current site
restore_current_blog();
}
}
?>Code snippet boj-multisite-switch.php
This is a basic example that demonstrates the power of the switch_to_blog() functionality in Multisite.
The switch_to_blog() function is not just limited to site content. You can also retrieve other WordPress data including widgets, sidebars, menus, and more. Basically any data stored in the content database tables (wp_ID_tablename) is available when using the switch_to_blog() function. Now look at a few examples. In the following example, you can assume you have a site with an ID of 3 and you want to retrieve a navigation menu from the site.
<?php
//switch to blog ID 3
switch_to_blog( 3 );
//display the nav menu Main Menu
wp_nav_menu( 'Main Menu' );
//restore the current site
restore_current_blog();
?>
First run switch_to_blog() to switch to blog ID 3. Next use the wp_nav_menu() function to display a menu named Main Menu from the site. Finally run the restore_current_blog() function to reset back to the blog you are viewing. The end result displays the nav menu Main Menu created on site 3 anywhere you run this code in your network.
As another example you can also easily load a sites sidebar using the same method.
<?php
//switch to blog ID 34
switch_to_blog( 34 );
//load the primary sidebar
get_sidebar();
//restore the current site
restore_current_blog();
?>
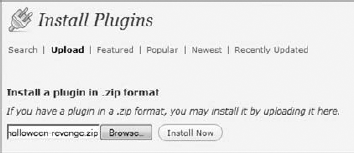
It's important to note that switch_to_blog() is database-only. This means a site's plugins are not included in a switch. So if site 2 has the Halloween Revenge plugin running, and you switch to site 2, Halloween Revenge will not be available for use unless it is also activated on the site performing the switch.
Network Content Shortcode Examples
Now take the switch example and integrate shortcode support. This plugin enables you to add a shortcode to a post, define what blog ID you want posts from, and display on your post or page.
First create a new shortcode using the add_shortcode() function, introduced in Chapter 10, "The Shortcode API."
<?php
add_shortcode( 'network_posts', 'boj_multisite_network_posts' );
?>
The new shortcode will be [network_posts]. Next create the function to generate the network posts to display when the shortcode is used in a post or page.
<?php
function boj_multisite_network_posts( $attr ) {
extract( shortcode_atts( array(
"blogid" => '1',
"num" => '5'), $attr ) );
if ( is_multisite() ) {
$return_posts = '';
//switch to site set in the shortcode
switch_to_blog( absint( $blogid ) );
//create a custom Loop
$recentPosts = new WP_Query();
$recentPosts->query( 'posts_per_page=' .absint( $num ) );
//start the custom Loop
while ( $recentPosts->have_posts() ) :
$recentPosts->the_post();
//store the recent posts in a variable
$return_posts .= '<p><a href="' .get_permalink() '">' .get_the_title() .'</a></p>';
endwhile;
//restore the current site
restore_current_blog();
//return the results to display
return $return_posts;
}
}
?>The shortcode can accept two parameters: blogid and num. This enables the user to set which site in the network to pull the posts from and how many to display. As always check to verify Multisite is enabled on the site before proceeding.
$return_posts is the variable that stores all the posts to return to the shortcode for display, so start by setting that variable to nothing to flush it out. Next use the switch_to_blog() function to switch to the site specified in the shortcode. If the user did not set a specific blog ID, it will default to 1.
Now it's time to create a custom loop to retrieve the posts to display. You can see the posts_per_page parameter is set to $num, which is set in the shortcode. If the user does not set the number of posts to display, it defaults to 5. Next loop through the posts loaded and store them in $return_posts.
After the custom loop finishes running, you need to execute restore_current_blog(). This resets the site back to the site you are viewing, and not the site you switched to earlier. The final step is to return $return_posts. This replaces the shortcode in a post or page with the custom loop results.
Now you can easily retrieve posts from any site in your network using the shortcode such as [network_posts blogid="3" num="10"]. Review the full plugin:
<?php
/*
Plugin Name: Multisite Switch Shortcode Plugin
Plugin URI: http://example.com/wordpress-plugins/my-plugin
Description: A plugin to aggregating content using a shortcode
Version: 1.0
Author: Brad Williams
Author URI: http://wrox.com
License: GPLv2
*/
add_shortcode( 'network_posts', 'boj_multisite_network_posts' );
function boj_multisite_network_posts( $attr ) {
extract( shortcode_atts( array(
"blogid" => '1',
"num" => '5'
), $attr ) );
if ( is_multisite() ) {
$return_posts = '';
//switch to site set in the shortcode
switch_to_blog( absint( $blogid ) );
//create a custom Loop
$recentPosts = new WP_Query();
$recentPosts->query( 'posts_per_page=' .absint( $num ) );
//start the custom Loop
while ( $recentPosts->have_posts() ) :
$recentPosts->the_post();
//store the recent posts in a variable
$return_posts .= '<p><a href="' .get_permalink().
'">' .get_the_title() .'</a></p>';
endwhile;
//restore the current site
restore_current_blog();
//return the results to display
return $return_posts;
}
}
?>Code snippet boj-multisite-shortcode.php
Now take the switch shortcode example to the next level and retrieve posts from multiple sites in the network and display based on the latest post date. As in the previous example, use the add_shortcode() function to register the shortcode in your plugin:
<?php
add_shortcode( 'latest_network_posts',
'boj_multisite_latest_network_posts' );
?>Next create your custom boj_multisite_latest_network_posts() function:
<?php
function boj_multisite_latest_network_posts() {
if ( is_multisite() ) {
$return_posts = '';As always check to verify Multisite is enabled using the is_multisite() function. You can also set $return_posts to nothing to flush it out. Now it's time to retrieve the posts:
//get posts from current site
$local_posts = get_posts( 'numberposts=5' );
//switch to blog ID 3
switch_to_blog( 3 );
//get posts from another site
$network_posts = get_posts( 'numberposts=5' );
//restore the current site
restore_current_blog();
Use the get_posts() function to retrieve the latest five posts from the current site. Next switch to blog ID 3 and run the same get_posts() function to retrieve the five latest posts from that site. Notice you are storing the returned array values in separate variables: $local_posts and $network_posts. Finally call restore_current_blog() to reset back to the current site you are on.
Now that you have five posts from each site stored in separate arrays, you need to merge them into a single array.
//merge the two arrays
$posts = array_merge( $local_posts, $network_posts );
Now that you have a single array of posts, you need to sort the posts based on post date so that they are in proper reverse chronological order with the latest post first. Use the PHP usort() function to sort the array based on a custom comparison function you will create later on.
//sort the post results by date
usort( $posts, 'boj_multisite_sort_posts_array' );
Now that the posts are in the proper order in the array, you need to loop through the results and assign them to the $return_posts variable.
foreach ( $posts as $post ) {
//store latest posts in a variable
$return_posts .= $post->post_title .' - posted on '
.$post->post_date .'<br />';
}Use a standard foreach PHP loop to loop through the results. Finally return the results for display by the shortcode.
//return the results to display
return $return_posts;
}
}The final step is to create the custom function boj_multisite_sort_posts_array() to sort the post array by the date that was called earlier from the usort function.
//sort the array by date
function boj_multisite_sort_posts_array( $a, $b ) {
//if dates are the same return 0
if ($a->post_date == $b->post_date)
return 0;
//ternary operator to determine which date is newer
return $a->post_date < $b->post_date ? 1 : −1;
}This function simply compares two values and returns either a 1 or −1 based on which is greater. The usort() function sorts based on the number assigned.
Review the entire plugin code:
<?php
/*
Plugin Name: Multisite Latest Network Posts Plugin
Plugin URI: http://example.com/wordpress-plugins/my-plugin
Description: Displays the latest posts from multiple sites
Version: 1.0
Author: Brad Williams
Author URI: http://wrox.com
License: GPLv2
*/
add_shortcode( 'latest_network_posts',
'boj_multisite_latest_network_posts' );
function boj_multisite_latest_network_posts() {
if ( is_multisite() ) {
$return_posts = '';
//get posts from current site
$local_posts = get_posts( 'numberposts=5' );
//switch to blog ID 3
switch_to_blog( 3 );
//get posts from another site
$network_posts = get_posts( 'numberposts=5' );
//restore the current site
restore_current_blog();
//merge the two arrays
$posts = array_merge( $local_posts, $network_posts );
//sort the post results by date
usort( $posts, 'boj_multisite_sort_posts_array' );
foreach ( $posts as $post ) {
//store latest posts in a variable
$return_posts .= $post->post_title .' - posted on '
.$post->post_date .'<br />';
}
//return the results to display
return $return_posts;
}
}
//sort the array by date
function boj_multisite_sort_posts_array( $a, $b ) {
//if dates are the same return 0
if ($a->post_date == $b->post_date)
return 0;
//ternary operator to determine which date is newer
return $a->post_date < $b->post_date ? 1 : −1;
}
?>Code snippet boj-multisite-latest-network-posts.php
One thing to consider when using switch_to_blog() is performance. This function can cause a heavy performance hit on your server depending on the size of your network. Whenever you use this function, it's always best to cache the results, if possible, rather than retrieve in real-time. This can greatly reduce the server load when retrieving content and other data across sites in your network. Caching is covered in detail in Chapter 16, "Debugging and Optimizing."
A Network Content Widget Example
Another common task when working in a Multisite environment is a widget to display recent posts from sites in the network. You can create a plugin with a widget to display the recent posts from any site in the network.
<?php
//widgets_init action hook to execute custom function
add_action( 'widgets_init', 'boj_multisite_register_widget' );
//register our widget
function boj_multisite_register_widget() {
register_widget( 'boj_multisite_widget' );
}
?>First use the widgets_init action hook to run the custom function to register your new widget. In this example the new widget will be registered as boj_multisite_widget. Next create a new class using the registered widget name and extending the WP_Widget.
<?php
//boj_multisite_widget class
class boj_multisite_widget extends WP_Widget {
//process our new widget
function boj_multisite_widget() {
$widget_ops = array( 'classname' => 'boj_multisite_widget',
'description' => 'Display recent posts
from a network site.' );
$this->WP_Widget( 'boj_multisite_widget_posts',
'Multisite Recent Posts',
$widget_ops );
}You also define the widget settings. You set the widget name to Multisite Recent Posts, the description of what the widget does, and the custom class name that will be used when displaying the widget.
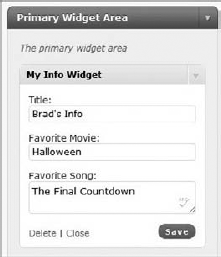
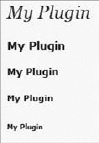
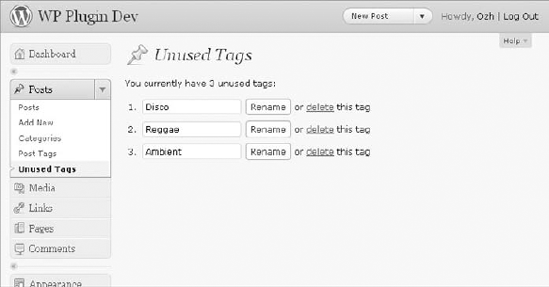
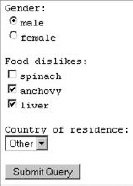
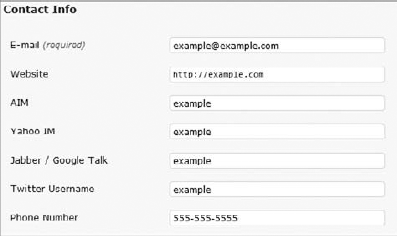
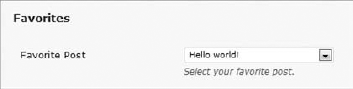
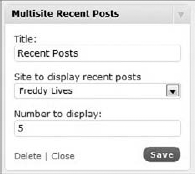
Now it's time to create the widget settings form. This widget contains three settings: Title, the site to load recent posts from, and the number of posts to display.
//build our widget settings form
function form( $instance ) {global $wpdb;
$defaults = array( 'title' => 'Recent Posts',
'disp_number' => '5' );
$instance = wp_parse_args( (array) $instance, $defaults );
$title = $instance['title'];
$siteid = $instance['siteid'];
$disp_number = $instance['disp_number'];You will be making a custom database query to retrieve the network blog IDs, so you need to define $wpdb as a global variable. The widget defaults are set in the $defaults variable; in this case you set the default title to Recent Posts and the default number of posts to display to 5. Next the instance values are loaded, which are your widget setting values.
Now that you have loaded the widget values, you need to add the form field settings for the widget. The first field is a text field to store the widget title that will be displayed:
//title textfield widget option
echo '<p>Title: <input class="widefat" name="'
.$this->get_field_name( 'title' )
.'" type="text" value="'
.esc_attr( $title ). '" /></p>';As always you want to use the proper escaping function when displaying data entered in by a user, in this case esc_attr() to display the $title value.
The next field to add is a select form to set which site in the network to display recent posts from. To create this form field, you need to retrieve a list of all public blog IDs in your network. Create a custom query to retrieve the IDs.
//get a list of all public blog IDs
$sql = "SELECT blog_id FROM $wpdb->blogs
WHERE public = '1' AND archived = '0' AND mature = '0'
AND spam = '0' AND deleted = '0' ";
$blogs = $wpdb->get_col( $wpdb->prepare( $sql ) );The query retrieves all public blog IDs in your Multisite network and returns them in an array stored in the $blogs variable. Now that you have the blog IDs, you need to loop through the results to build the select list.
if ( is_array( $blogs ) ) {
echo '<p>';
echo 'Site to display recent posts';
echo '<select name="' .$this->get_field_name('siteid')
.'" class="widefat" >';
//loop through the blog IDs
foreach ($blogs as $blog) {
//display each site as an optionecho '<option value="' .$blog. '" '
.selected( $blog, $siteid )
.'>' .get_blog_details( $blog )->blogname
.'</option>';
}
echo '</select>';
echo '</p>';
}Before working with an array, it's a good practice to verify it is actually an array. You can do so using the PHP function is_array(). After you confirm that $blogs is an array, you can display the option text and select field. To display each site as an option, loop through the array values. Use the get_blog_details() function to display the site name in the option field. The $blog variable, which stores the blog ID, is set to the value of the option field.
The final form field to display is the number of posts option.
//number to display textfield widget option
echo '<p>Number to display: <input class="widefat" name="'
.$this->get_field_name( 'disp_number' ). '" type="text"
value="' .esc_attr( $disp_number ). '" /></p>';
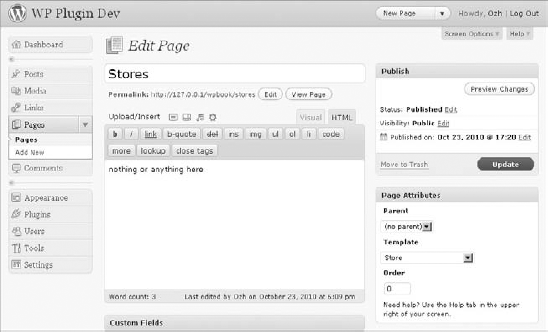
}Just as the title option before, this is a standard text form field to store the number of posts to display. That's the final widget form field, so be sure to close out the function with }. Now your widget settings form has been created and looks like Figure 15-2.
Next you need to save your widget settings using the update widget class function.
//save the widget settings
function update( $new_instance, $old_instance ) {
$instance = $old_instance;
$instance['title'] = strip_tags( $new_instance['title'] );
$instance['siteid'] = absint( $new_instance['siteid'] );
$instance['disp_number'] =
absint( $new_instance['disp_number'] );
return $instance;
}The widget class will handle saving the options for you. Be sure to sanitize the widget settings. Both siteid and disp_number should always be a number, so use the absint() function to verify the setting is a positive integer.
The final step is to display the widget.
//display the widget
function widget( $args, $instance ) {
extract( $args );
echo $before_widget;
//load the widget options
$title = apply_filters( 'widget_title', $instance['title'] );
$siteid = empty( $instance['siteid'] ) ? 1 :
$instance['siteid'];
$disp_number = empty( $instance['disp_number'] ) ? 5 :
$instance['disp_number'];
//display the widget title
if ( !empty( $title ) ) { echo $before_title . $title .
$after_title; };
echo '<ul>';First, extract the $args variable to gain access to the global theme values like $before_widget and $after_widget. Next load the widget settings. The $siteid and $disp_number variables are both using a ternary operator to set their values. This means if the option value is empty it will be set to a default value. $siteid would default to 1, and $disp_number would default to 5.
Now display the $title, surrounded by the $before_title and $after_title global theme values. Now it's time to display the recent posts from the site saved in the widget.
//switch to site saved
switch_to_blog( absint( $siteid ) );
//create a custom loop
$recentPosts = new WP_Query();
$recentPosts->query( 'posts_per_page='
.absint( $disp_number ) );
//start the custom Loop
while ( $recentPosts->have_posts() ) :
$recentPosts->the_post();
//display the recent post title with link
echo '<li><a href="' .get_permalink(). '">'
.get_the_title() .'</a></li>';
endwhile;
//restore the current site
restore_current_blog();
echo '</ul>';
echo $after_widget;
}
}Using the switch_to_blog() function, the widget switches to the site saved in the widget settings. After the site has been loaded, create a custom loop using the WP_Query class. The posts_per_page query parameter is defined by the $disp_number widget setting. The recent posts display in an unordered list using a while loop. After the loop completes, you need to restore the current site using restore_current_blog().
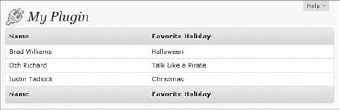
You now have a Multisite widget to easily display posts from any site in your network! This simple example shows the power of aggregating content throughout a Multisite network in WordPress and how easy it is to accomplish that.
<?php
/*
Plugin Name: Multisite Recent Posts Widget
Plugin URI: http://example.com
Description: Retrieves the most recent posts in a Multisite network
Author: Brad Williams
Version: 1.0
Author URI: http://wrox.com
*/
//widgets_init action hook to execute custom function
add_action( 'widgets_init', 'boj_multisite_register_widget' );
//register our widget
function boj_multisite_register_widget() {
register_widget( 'boj_multisite_widget' );
}
//boj_multisite_widget class
class boj_multisite_widget extends WP_Widget {
//process our new widget
function boj_multisite_widget() {
$widget_ops = array( 'classname' => 'boj_multisite_widget',
'description' =>
'Display recent posts from a network site.' );
$this->WP_Widget( 'boj_multisite_widget_posts',
'Multisite Recent Posts', $widget_ops );
}
//build our widget settings form
function form( $instance ) {
global $wpdb;
$defaults = array( 'title' => 'Recent Posts',
'disp_number' => '5' );
$instance = wp_parse_args( (array) $instance, $defaults );
$title = $instance['title'];
$siteid = $instance['siteid'];
$disp_number = $instance['disp_number'];
//title textfield widget optionecho '<p>Title: <input class="widefat" name="'
.$this->get_field_name( 'title' )
. '" type="text" value="' .esc_attr( $title )
. '" /></p>';
//get a list of all public blog IDs
$sql = "SELECT blog_id FROM $wpdb->blogs
WHERE public = '1' AND archived = '0' AND mature = '0'
AND spam = '0' AND deleted = '0' ";
$blogs = $wpdb->get_col( $wpdb->prepare( $sql ) );
if ( is_array( $blogs ) ) {
echo '<p>';
echo 'Site to display recent posts';
echo '<select name="' .$this->get_field_name('siteid')
.'" class="widefat" >';
//loop through the blog IDs
foreach ($blogs as $blog) {
//display each site as an option
echo '<option value="' .$blog. '" '
.selected( $blog, $siteid )
. '>' .get_blog_details( $blog )->blogname
. '</option>';
}
echo '</select>';
echo '</p>';
}
//number to display textfield widget option
echo '<p>Number to display: <input class="widefat" name="'
.$this->get_field_name( 'disp_number' ). '" type="text"
value="' .esc_attr( $disp_number ). '" /></p>';
}
//save the widget settings
function update( $new_instance, $old_instance ) {
$instance = $old_instance;
$instance['title'] = strip_tags( $new_instance['title'] );
$instance['siteid'] = absint( $new_instance['siteid'] );
$instance['disp_number'] =
absint( $new_instance['disp_number'] );
return $instance;
}
//display the widget
function widget( $args, $instance ) {extract( $args );
echo $before_widget;
//load the widget options
$title = apply_filters( 'widget_title', $instance['title'] );
$siteid = empty( $instance['siteid'] ) ? 1 :
$instance['siteid'];
$disp_number = empty( $instance['disp_number'] ) ? 5 :
$instance['disp_number'];
//display the widget title
if ( !empty( $title ) ) { echo $before_title . $title
. $after_title; };
echo '<ul>';
//switch to site saved
switch_to_blog( absint( $siteid ) );
//create a custom loop
$recentPosts = new WP_Query();
$recentPosts->query( 'posts_per_page='
.absint( $disp_number ) );
//start the custom Loop
while ( $recentPosts->have_posts() ) :
$recentPosts->the_post();
//display the recent post title with link
echo '<li><a href="' .get_permalink(). '">'
.get_the_title() .'</a></li>';
endwhile;
//restore the current site
restore_current_blog();
echo '</ul>';
echo $after_widget;
}
}
?>Code snippet boj-multisite-widget.php
You can easily create new sites in your Multisite network in the admin dashboard of WordPress. But what if you want to create a new site in your plugin? As always there's a function for that, and it's called wpmu_create_blog().
<?php wpmu_create_blog( $domain, $path, $title,
$user_id, $meta, $blog_id ); ?>This function accepts six parameters:
$domain — The domain of the new site.
$path — The path of the new site. This is the subdirectory or subdomain name depending on which setup you use.
$title — The title of the new site.
$user_id — The user ID of the user account who will be the site admin.
$meta — Additional meta information.
$blog_id — The blog ID of the site to be created.
The only required parameters are the first four; the last two are optional. If the new site is created successfully, the function returns the newly created blog ID.
As you noticed, the function begins with wpmu_. Many of the Multisite functions were once a part of WordPress MU, prior to the merging of the two code bases. These function names can contain wpmu, or blog, to support backward compatibility.
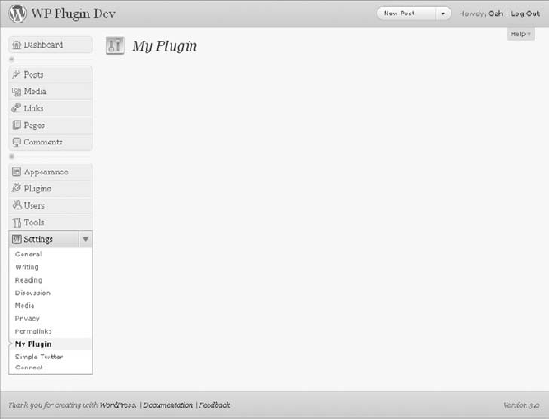
As an example create a plugin that enables users to create sites in WordPress Multisite. First, create a custom top-level menu for the plugin page.
<?php
add_action( 'admin_menu', 'boj_multisite_create_menu' );
function boj_multisite_create_menu() {
//create custom top-level menu
add_menu_page( 'Multisite Create Site Page',
'Multisite Create Site',
'manage_options', 'boj-network-create',
'boj_multisite_create_sites_page' );
}
?>Now create the function to display a form for creating a new site.
<?php
function boj_multisite_create_sites_page() {
//check if multisite is enabled
if ( is_multisite() ) {As always you need to verify Multisite is enabled before using any Multisite-specific functions. Next add the code to retrieve the form fields submitted and create a new site in the network with the values:
<?php
//if the form was submitted lets process it
if ( isset( $_POST['create_site'] ) ) {
//populate the variables based on form values
$domain = esc_html( $_POST['domain'] );
$path = esc_html( $_POST['path'] );
$title = esc_html( $_POST['title'] );
$user_id = absint( $_POST['user_id'] );
//verify the required values are set
if ( $domain && $path && $title && $user_id ) {
//create the new site in WordPress
$new_site = wpmu_create_blog( $domain, $path,
$title, $user_id );
//if successfully display a message
if ( $new_site ) {
echo '<div class="updated">New site '
.$new_site. ' created successfully!</div>';
}
//if required values are not set display an error
} else {
echo '<div class="error">
New site could not be created.
Required fields are missing</div>';
}
}
?>First check if $_POST['create_site'] is set. This will be set only if the form has been submitted. Next populate the variables based on the form entries. Notice you'll be using the proper escaping functions to verify the data submitted from the form is escaped properly.
Next verify that $domain, $path, $title, and $user_id all have values because they are the required fields when creating sites using wpmu_create_blog(). If the values are not filled out, an error message displays. After you verify all values exist, it's time to execute the wpmu_create_blog() function to create the new site. If the site is created successfully, the variable $new_site will contain the ID of the newly created site and a success message will be displayed.
The final piece is to create the form for the new site fields.
<div class="wrap">
<h2>Create New Site</h2>
<form method="post">
<table class="form-table">
<tr> valign=*top*><th scope="row">
<label for="fname">Domain</label>
</th>
<td><input maxlength="45" size="25" name="domain"
value="<?php echo DOMAIN_CURRENT_SITE; ?>" />
</td>
</tr>
<tr>
<th scope="row"><label for="fname">Path</label></th>
<td>
<input maxlength="45" size="10" name="path" />
</td>
</tr>
<tr>
<th scope="row">
<label for="fname">Title</label>
</th>
<td>
<input maxlength="45" size="25" name="title" />
</td>
</tr>
<tr>
<th scope="row">
<label for="fname">User ID</label>
</th>
<td>
<input maxlength="45" size="3" name="user_id" />
</td>
</tr>
<tr>
<td>
<input type="submit" name="create_site"
value="Create Site" class="button-primary" />
<input type="submit" name="reset"
value="Reset" class="button-secondary" />
</td>
</tr>
</table>
</form>
</div>This is a fairly basic form that accepts the parameters required to create a new site.
Now review the entire plugin code:
<?php
/*
Plugin Name: Multisite Create Site Example Plugin
Plugin URI: http://example.com/wordpress-plugins/my-plugin
Description: A plugin to demonstrate creating sites in Multisite
Version: 1.0
Author: Brad Williams
Author URI: http://wrox.com
License: GPLv2
*/
add_action( 'admin_menu', 'boj_multisite_create_menu' );
function boj_multisite_create_menu() {
//create custom top-level menu
add_menu_page( 'Multisite Create Site Page',
'Multisite Create Site',
'manage_options', 'boj-network-create',
'boj_multisite_create_site_settings' );
}
function boj_multisite_create_site_settings() {
//check if multisite is enabled
if ( is_multisite() ) {
//if the form was submitted lets process it
if ( isset( $_POST['create_site'] ) ) {
//populate the variables based on form values
$domain = esc_html( $_POST['domain'] );
$path = esc_html( $_POST['path'] );
$title = esc_html( $_POST['title'] );
$user_id = absint( $_POST['user_id'] );
//verify the required values are set
if ( $domain && $path && $title && $user_id ) {
//create the new site in WordPress
$new_site = wpmu_create_blog( $domain, $path,
$title, $user_id );
//if successfully display a message
if ( $new_site ) {
echo '<div class="updated">New site '
.$new_site. ' created successfully!</div>';
}
//if required values are not set display an error
} else {
echo '<div class="error">
New site could not be created.
Required fields are missing</div>';
}
}?>
<div class="wrap">
<h2>Create New Site</h2>
<form method="post">
<table class="form-table">
<tr>
<th scope="row">
<label for="fname">Domain</label>
</th>
<td><input maxlength="45" size="25" name="domain"
value="<?php echo DOMAIN_CURRENT_SITE; ?>" />
</td>
</tr>
<tr>
<th scope="row"><label for="fname">Path</label></th>
<td>
<input maxlength="45" size="10" name="path" />
</td>
</tr>
<tr>
<th scope="row"><label for="fname">Title</label></th>
<td>
<input maxlength="45" size="25" name="title" />
</td>
</tr>
<tr>
<th scope="row">
<label for="fname">User ID</label>
</th>
<td>
<input maxlength="45" size="3" name="user_id" />
</td>
</tr>
<tr>
<td>
<input type="submit" name="create_site"
value="Create Site" class="button-primary" />
<input type="submit" name="reset" value="Reset"
class="button-secondary" />
</td>
</tr>
</table>
</form>
</div>
<?php
} else {
echo '<p>Multisite is not enabled</p>';
}
}
?>Code snippet boj-multisite-create-site.php
There is also an easy method to update a site's status. This is useful if you want to dynamically archive a site, or flag a site as spam. To do so use the update_blog_status() function.
<?php update_blog_status( $blog_id, $pref, $value, $refresh ); ?>
The function accepts four parameters:
$blog_id — The blog ID of the site to update
$pref — The status type to update
$value — The new value of the status
$refresh — Whether to refresh the site details cache
The first three parameters are required. The $pref parameter is the status to update, which accepts site_id, domain, path, registered, last_updated, public, archived, mature, spam, deleted, and lang_id. In this example you update a site in your network to be archived.
<?php
update_blog_status( $blog_id, 'archived', 1 );
?>
Options in Multisite are stored similar to standard WordPress but use a different set of functions:
add_blog_option() — Creates a new option
update_blog_option() — Updates an option and creates it if it doesn't exist
get_blog_option() — Loads a site option that already exists
delete_blog_option() — Deletes a site option
The major difference between this set of functions and the standard option functions is you have to pass a blog ID parameter to each function. The function will then switch to the site specified, handle the option task, and then switch back to the current site.
<?php add_blog_option( $blog_id, $key, $value ); ?>
The $blog_id is the ID of the site you want to add an option to. The $key is the name of the option to add, and the $value is the value of the new option.
Loading site options is just as easy. Using the get_blog_option() function, you can load any site-specific option required.
<?php
$blog_id = 3;
echo '<p>Site ID: '.$blog_id .'</p>';
echo '<p>Site Name: ' .get_blog_option( $blog_id, 'blogname' )
.'</p>';
echo '<p>Site URL: ' .get_blog_option( $blog_id, 'siteurl' ) .'</p>';
?>Users in a Multisite network work slightly different than in standard WordPress. If Allow New Registrations is enabled under Network Settings, visitors to your site can register new accounts in WordPress. The major difference is each site in your network can feature a different set of users. Users can also have different roles on different sites throughout the network. Users are not automatically members of every site in your network, but rather the main (first) site in your network. For example if your network features two sites, a Halo Blog and a Tekken Blog, any user who registers would be a member of the Halo Blog but not the Tekken Blog.
Before executing any code that is site-specific, you should verify the user logged in is a member of that site. Multisite features multiple functions for working with users. To verify a user is a member of the site, use the is_blog_user() function:
<?php is_blog_user( $blog_id ) ?>
The function accepts one parameter, $blog_id, which is optional. If the parameter isn't specified, it defaults to the current blog you are on.
<?php
if ( is_blog_user() ) {
//user is a member of this site
}
?>You can also specify a blog ID if you want to verify the user is a member of a different site in the network:
<?php
if ( is_blog_user( 3 ) ) {
//user is a member of blog ID 3
}
?>Now that you understand how to check if a user is a member of a site, look at adding members to a site. In Multisite you use the add_user_to_blog() function to add any user in WordPress to a specific site in your network.
<?php add_user_to_blog( $blog_id, $user_id, $role ); ?>
This function accepts three parameters:
$blog_id — The ID of the site you want to add the user to
$user_id — The ID of the user to add
$role — The user role the user will have on the site
Look at a working example:
<?php
$blog_id = 18;
$user_id = 4;
$role = 'editor';
add_user_to_blog( $blog_id, $user_id, $role );
?>
Now build a real-world example plugin. This plugin auto-adds logged-in users to any site they visit in your network. This is useful if you want users to become members on every site in your network without manually adding them to each one.
Start off by using the init action hook to execute your custom function to add users to a site:
<?php
add_action( 'init', 'boj_multisite_add_user_to_site' );
?>
Next create the boj_multisite_add_user_to_site() function to add the users.
<?php
function boj_multisite_add_user_to_site() {
//verify user is logged in before proceeding
if( !is_user_logged_in() )
return false;
//load current blog ID and user data
global $current_user, $blog_id;
//verify user is not a member of this site
if( !is_blog_user() ) {
//add user to this site as a subscriber
add_user_to_blog( $blog_id, $current_user->ID, 'subscriber' );
}
}
?>The first step is to verify the users are logged in, and if not return false and exit the function. After you have verified the users are logged in, call the global $current_user and $blog_id variables. These variables store the data of the current logged-in users and the blog ID the users are currently viewing. Next confirm if the users are already members of the site they are viewing. If the users are already members, there is no reason to add them again.
The final step is to add the users to the site using the add_user_to_blog() function. You'll pass in the blog ID, current user ID, and the role the users are assigned on the site, in this case subscriber. That's it! For this plugin to work across your entire network you'll either need to upload to the /mu-plugins directory or Network Activate the plugin in the Network Admin
Review the entire plugin:
<?php
/*
Plugin Name: Multisite Auto-Add User to Site
Plugin URI: http://example.com/wordpress-plugins/my-plugin
Description: Plugin automatically adds the user to any site they visit
Version: 1.0
Author: Brad Williams
Author URI: http://wrox.com
License: GPLv2
*/
add_action( 'init', 'boj_multisite_add_user_to_site' );
function boj_multisite_add_user_to_site() {
//verify user is logged in before proceeding
if( !is_user_logged_in() )
return false;
//load current blog ID and user data
global $current_user,$blog_id;
//verify user is not a member of this site
if( !is_blog_user() ) {
//add user to this site as a subscriber
add_user_to_blog( $blog_id, $current_user->ID, 'subscriber' );
}
}
?>Code snippet boj-multisite-add-users.php
As easily as you can add users, you can also remove users from a site using the remove_user_from_blog() function.
<?php remove_user_from_blog( $user_id, $blog_id, $reassign ); ?>
This function accepts three parameters:
$user_id — The user ID you want to remove
$blog_id — The blog ID to remove the user from
$reassign — The user ID to reassign posts to
Look at a working example:
<?php
$user_id = 4;
$blog_id = 18;
$reassign = 1;
remove_user_from_blog( $user_id, $blog_id, $reassign );
?>
Note
Remember adding and removing users from a site in Multisite is not actually creating or deleting the user in WordPress, but instead adding or removing them as a member of that site.
Another useful function when working with Multisite users is get_blogs_of_user(). This function retrieves site info for all sites the specified users are a member of.
<?php
$user_id = 1;
$user_sites = get_blogs_of_user( $user_id );
print_r( $user_sites );
?>
Running this code example would result in an object array being returned:
Array
(
[1] => stdClass Object
(
[userblog_id] => 1
[blogname] => Main Site
[domain] => example.com
[path] => /
[site_id] => 1
[siteurl] => http://example.com
)
[2] => stdClass Object
(
[userblog_id] => 2
[blogname] => Halloween Revenge
[domain] => example.com
[path] => /myers/
[site_id] => 1
[siteurl] => http://example.com/myers
)
[8] => stdClass Object
([userblog_id] => 8
[blogname] => Freddy Lives
[domain] => example.com
[path] => /kruger/
[site_id] => 1
[siteurl] => http://example.com/kruger
)
)You can also do a foreach loop to display specific data from the array:
<?php
$user_id = 1;
$user_sites = get_blogs_of_user( $user_id );
foreach ( $user_sites AS $user_site ) {
echo '<p>'.$user_site->siteurl .'</p>';
}
?>Multisite also introduces a new user role: Super admin. Super admin users have access to the Network Admin section of WordPress. This is where all network settings, themes, plugins, and so on are managed. Super admins also have full control over every site in the network, whereas a normal admin can administer only their specific sites.
In Multisite you can easily assign an existing user to the super admin role by using the grant_super_admin() function. This function accepts only one parameter, which is the user ID to which you want to grant super admin privileges.
<?php
$user_id = 4;
grant_super_admin( $user_id );
?>
As quickly as you can grant super admin privileges, you can just as easily revoke them using the revoke_super_admin() function. This function also accepts only one parameter, which is the user ID to revoke as super admin.
<?php
$user_id = 4;
revoke_super_admin( $user_id );
?>
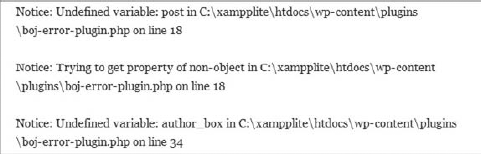
Both of these functions are located in wp-admin/includes/ms.php. This means these functions by default are not available on the public side of your site and can be used only on the admin side.
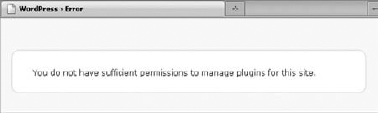
For example, if you tried calling either of these functions with a shortcode, you would get a Call to Undefined Function PHP error.
To list all super admins in Multisite, use the get_super_admins() function. This function returns an array of all super admin usernames in your network.
<?php
$all_admins = get_super_admins();
print_r( $all_admins );
?>
This would return the following array of super admins:
Array
(
[0] => admin
[1] => brad
)You can also easily check specific users' IDs to determine if they are a super admin in your network. To do so use the is_super_admin() function.
<?php
$user_id = 1;
if ( is_super_admin( $user_id ) ) {
echo 'User is Super admin';
}
?>Every site in your Multisite network has a site owner. This owner is defined by the admin email address stored in the site options and is set when a new site is created in your network. If you allow open site registration, the user who created the site will be set as the site owner. If you created the site in the dashboard, you can set the owner's email at time of creation.
In some cases you may want to retrieve a site owner and corresponding user data. Following is an example of how you can so.
<?php
$blog_id = 3;
$admin_email = get_blog_option( $blog_id, 'admin_email' );
$user_info = get_user_by( 'email', $admin_email );
print_r( $user_info );
?>
First, use the get_blog_option() function to retrieve the admin_email value for blog ID 3. Next use the get_user_by() function to retrieve the user data based off the admin email. This function enables you to retrieve user data by either user ID, slug, email, or login. In this case use the admin email to load the user data. The results are shown here:
stdClass Object
(
[ID] => 3
[user_login] => freddy
[user_pass] => $P$B0VRNh0UbN/4YqMFB8fl3OZM2FGKfg1
[user_nicename] => Freddy Krueger
[user_email] => freddy@example.com
[user_url] =>
[user_registered] => 2011-10-31 19:00:00
[user_activation_key] =>
[user_status] => 0
[display_name] => Freddy
[spam] => 0
[deleted] => 0
[first_name] => Freddy
[last_name] => Krueger
[nickname] => fredster
[description] =>
[rich_editing] => true
[comment_shortcuts] => false
[admin_color] => fresh
[use_ssl] => 0
[aim] =>
[yim] =>
[jabber] =>
[source_domain] => example.com
[primary_blog] => 3
[wp_3_capabilities] => Array
(
[administrator] => 1
)
[wp_3_user_level] => 10
[user_firstname] => Freddy
[user_lastname] => Krueger
[user_description] =>
)As you can see a lot of useful user information is returned for the site admin account.
Multisite features a few functions to generate stats about your network. The get_user_count() function returns the total number of users registered in WordPress. The get_blog_count() function returns the total number of sites in your network. You can also use the get_sitestats() function to retrieve both values at once in an array.
<?php
$user_count = get_user_count();
echo '<p>Total users: ' .$user_count .'</p>';
$blog_count = get_blog_count();
echo '<p>Total sites: ' .$blog_count .'</p>';
$network_stats = get_sitestats();
print_r( $network_stats );
?>