Table of Contents for
Professional WordPress® Plugin Development
 Professional WordPress® Plugin Development
Published by
Wrox, 2011
Professional WordPress® Plugin Development
Published by
Wrox, 2011
- Copyright
- CREDITS
- ABOUT THE AUTHORS
- ACKNOWLEDGMENTS
- FOREWORD
- INTRODUCTION
- 1. An Introduction to Plugins
- 2. Plugin Foundation
- 3. Hooks
- 4. Integrating in WordPress
- 5. Internationalization
- 6. Plugin Security
- 7. Plugin Settings
- 8. Users
- 9. HTTP API
- 10. The Shortcode API
- 11. Extending Posts: Metadata, Custom Post Types, and Taxonomies
- 12. JavaScript and Ajax in WordPress
- 13. Cron
- 14. The Rewrite API
- 15. Multisite
- 16. Debugging and Optimizing
- 17. Marketing Your Plugin
- 18. The Developer Toolbox
WHAT'S IN THIS CHAPTER?
Integrating your plugin in WordPress is a critical step in building a professional plugin. WordPress features many different ways to integrate your plugin including adding top-level and submenu items, creating widgets and dashboard widgets, and adding meta boxes to your content screens.
In this chapter you learn how to properly integrate your plugin into the various areas of WordPress. You also learn the proper design and styles available that your plugins can take advantage of to provide your users with a consistent user-interface experience.
Many plugins you create need some type of menu item, which generally links to your plugin's settings page where the user can configure your plugin options. WordPress features two methods for adding a plugin menu: a top-level menu or a submenu item.
The first menu method for your plugin to explore in WordPress is a new top-level menu, which is added to the admin dashboard menu list. For example, Settings is a top-level menu. A top-level menu is common practice for any plugin that needs multiple option pages. To register a top-level menu, you use the add_menu_page() function.
<?php add_menu_page( page_title, menu_title, capability, menu_slug, function,
        icon_url, position ); ?>
The add_menu_page() function accepts the following parameters:
page_title— The title of the page as shown in the<title>tagsmenu_title— The name of your menu displayed on the dashboardcapability— Minimum capability required to view the menumenu_slug— Slug name to refer to the menu; should be a unique namefunction: Function to be called to display the page content for the itemicon_url— URL to a custom image to use as the Menu iconposition— Location in the menu order where it should appear
Now create a new menu for your plugin to see the menu process in action. Use the admin_menu action hook to trigger your menu code. This is the appropriate hook to use whenever you create menus and submenus in your plugins.
<?php
add_action( 'admin_menu', 'boj_menuexample_create_menu' );
function boj_menuexample_create_menu() {
//create custom top-level menu
add_menu_page( 'My Plugin Settings Page', 'Menu Example Settings',
'manage_options', __FILE__, 'boj_menuexample_settings_page',
plugins_url( '/images/wp-icon.png', __FILE__ ) );
}
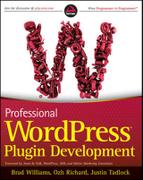
?>As you can see, the admin_menu action hook calls your custom boj_menuexample_create_menu() function. Next you need to call the add_menu_page() function to register the custom menu in WordPress. Set the name of your menu to Menu Example Settings, which requires that the user has manage_options capabilities (that is, is an administrator), and even set a custom icon located in the /images folder of your plugin, as shown in Figure 4-1.

Note
Menus are a common feature in WordPress plugins and are generally expected by the user. It's a good idea to mention where your plugin settings can be found in the plugin description and documentation.
Now that you have a new top-level menu created, create some submenus for it, which are menu items listed below your top-level menu. For example, Settings is a top-level menu whereas General, listed below Settings, is a submenu of the Settings menu. To register a submenu, use the add_submenu_page() function.
<?php add_submenu_page( parent_slug, page_title, menu_title, capability,
        menu_slug, function ); ?>
The add_submenu_page() function accepts the following parameters:
parent_slug: Slug name for the parent menu (menu_slugpreviously defined)page_title: The title of the page as shown in the<title>tagsmenu_title: The name of your submenu displayed on the dashboardcapability: Minimum capability required to view the submenumenu_slug: Slug name to refer to the submenu; should be a unique namefunction: Function to be called to display the page content for the item
Now that you know how submenus are defined, you can add one to your custom top-level menu:
<?php
add_action( 'admin_menu', 'boj_menuexample_create_menu' );

function boj_menuexample_create_menu() {

    //create custom top-level menu
    add_menu_page( 'My Plugin Settings Page', 'Menu Example Settings',
        'manage_options', __FILE__, 'boj_menuexample_settings_page',
        plugins_url( '/images/wp-icon.png', __FILE__ ) );

    //create submenu items
    add_submenu_page( __FILE__, 'About My Plugin', 'About', 'manage_options',
        __FILE__.'_about', boj_menuexample_about_page );
    add_submenu_page( __FILE__, 'Help with My Plugin', 'Help', 'manage_options',
        __FILE__.'_help', boj_menuexample_help_page );
    add_submenu_page( __FILE__, 'Uninstall My Plugin', 'Uninstall', 'manage_options',
        __FILE__.'_uninstall', boj_menuexample_uninstall_page );

}
?>
Code snippet boj-custom-menu-plugin.php
The preceding code creates three submenus for your custom top-level menu: About, Help, and Uninstall, as shown in Figure 4-2. Each of these submenu items link to a different custom function that can contain any code you want to use for that submenu page.
If your plugin requires only a single options page, you do not need to create a custom top-level menu. Instead you can simply add a submenu to an existing menu, such as the Settings menu.
WordPress features many different functions to add submenus to the existing default menus in WordPress. One of these functions is the add_options_page() function. Now explore how the add_options_page() function works to add a submenu item to the Settings menu.
<?php add_options_page( page_title, menu_title, capability, menu_slug, function);?>
The add_options_page() function accepts the following parameters:
page_title— The title of the page as shown in the<title>tagsmenu_title— The name of your submenu displayed on the dashboardcapability— Minimum capability required to view the submenumenu_slug— Slug name to refer to the submenu; should be a unique namefunction— Function to be called to display the page content for the item
Now add a submenu item to the Settings menu:
<?php
add_action( 'admin_menu', 'boj_menuexample_create_menu' );

function boj_menuexample_create_menu() {

    //create a submenu under Settings
    add_options_page( 'My Plugin Settings Page', 'Menu Example Settings',
        'manage_options', __FILE__, 'boj_menuexample_settings_page' );

}
?>
Code snippet boj-options-page-plugin.php
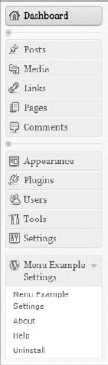
The preceding code adds a submenu labeled Menu Example Settings under the Settings menu, as shown in Figure 4-3. Set the page title to My Plugin Settings Page, set the capability to manage_options so that only administrators can view it, and set the function boj_menuexample_settings_page() to be called when the submenu is clicked.
Following is a list of all available submenu functions in WordPress.
add_dashboard_page— Adds a submenu to the Dashboard menuadd_posts_page— Adds a submenu to the Posts menuadd_media_page— Adds a submenu to the Media menuadd_links_page— Adds a submenu to the Links menuadd_pages_page— Adds a submenu to the Pages menuadd_comments_page— Adds a submenu to the Comments pageadd_theme_page— Adds a submenu to the Appearance menuadd_plugins_page— Adds a submenu to the Plugins menuadd_users_page— Adds a submenu to the Users menuadd_management_page— Adds a submenu to the Tools menuadd_options_page— Adds a submenu to the Settings menu
To use any of these functions, simply swap out the function name in the code shown earlier.
Note
If your plugin requires only a single options page, it's best to add it as a submenu to an existing menu. If you require more than one, create a custom top-level menu.
Widgets are a great way to give the users of your plugin an easy method to display your plugin information or data. WordPress features a Widgets API for creating and interacting with widgets. In this section you explore how to create widgets, add and save widget options, and display plugin information in the widget.
You create all widgets in WordPress using the WP_Widget class. To understand how the widget class works, it's helpful to look at an overview of the class:
<?php
class My_Widget extends WP_Widget {

    function My_Widget() {
        // processes the widget
    }

    function form($instance) {
// displays the widget form in the admin dashboard
}
function update($new_instance, $old_instance) {
// process widget options to save
}
function widget($args, $instance) {
// displays the widget
}
}
?>As you can see, the WP_Widget class features multiple functions for your widget, each with a specific purpose.
Now it's time to create a widget for your plugin. For this first widget, you create a simple text-based widget to save and display your favorite movie and song. It is a simple example that demonstrates how to save text data in a WordPress widget.
To start you use the widgets_init action hook. This hook is triggered after the default widgets have been registered in WordPress.
<?php
// use widgets_init action hook to execute custom function
add_action( 'widgets_init', 'boj_widgetexample_register_widgets' );

 //register our widget
function boj_widgetexample_register_widgets() {
    register_widget( 'boj_widgetexample_widget_my_info' );
}
?>
The widgets_init hook triggers the custom function to register your widget, in this case boj_widgetexample_register_widgets(). Next you use the register_widget() function to register your new widget; in this example you register the class name as boj_widgetexample_widget_my_info(). This function accepts one parameter, and that is the class name that will extend WP_Widget. The widget class name can be anything, but it must be unique and should always be descriptive of your widget. You can also register as many widgets as needed using this function.
Now that you've registered your widget, it's time to set up the widget class.
<?php
//boj_widgetexample_widget_my_info class
class boj_widgetexample_widget_my_info extends WP_Widget {
?>
You need to extend the WP_Widget class by creating a new class with the unique name you defined when you registered your widget. Now that you've defined the class, it's time to start building the widget.
<?php
    //process the new widget
    function boj_widgetexample_widget_my_info() {
        $widget_ops = array(
            'classname' => 'boj_widgetexample_widget_class',
            'description' => 'Display a user\'s favorite movie and song.'
        );
        $this->WP_Widget( 'boj_widgetexample_widget_my_info', 'My Info Widget',
            $widget_ops );
    }
?>
First, make a new array to store your widget options called $widget_ops. This array can hold the classname and description options. The classname option is the class name added to the <li> element of the widget. Sidebars, by default, display all widgets in an unordered list. Each individual widget is a list item in that list, so by adding a custom classname and ID, you can easily create custom styles and designs for your widget. The description displays under the widget on the Appearance

After building your options array, you then pass those values to WP_Widget. The first value you pass is the ID for the list item of your widget, in this case boj_widgetexample_widget_my_info(). The second value to pass is the widget name displayed in the Widgets screen. The widget name should be a short and sweet name describing your widget. The final value to pass is your array of options you set earlier.
Next you need to create your widgets settings form. This widget accepts three values: Title, Favorite movie, and Favorite song.
<?php
    //build the widget settings form
    function form($instance) {
        $defaults = array( 'title' => 'My Info', 'movie' => '', 'song' => '' );
        $instance = wp_parse_args( (array) $instance, $defaults );
        $title = $instance['title'];
        $movie = $instance['movie'];
        $song = $instance['song'];
        ?>
        <p>Title: <input class="widefat" name="
            <?php echo $this->get_field_name( 'title' ); ?>"  type="text"
            value="<?php echo esc_attr( $title ); ?>" /></p>
        <p>Favorite Movie: <input class="widefat" name="
            <?php echo $this->get_field_name( 'movie' ); ?>"  type="text"
            value="<?php echo esc_attr( $movie ); ?>" /></p>
        <p>Favorite Song: <textarea class="widefat" name="
            <?php echo $this->get_field_name( 'song' ); ?>" / >
            <?php echo esc_attr( $song ); ?></textarea></p>
        <?php
    }
?>
First, you create a $defaults variable to set the default values of each option. In this example, you set only the default title to My Info. Next pull in the instance values; that is, the widget settings that have been saved. If this is a new widget and was just added to a sidebar, there won't be any settings saved, so this value will be empty.
The final part to your widget settings is to display the form elements for entering the widget information. Use a standard HTML input text field for all three of your fields: title, movie, and song. You'll notice you don't need to include the <form> tags or submit button; the widget class handles that for you. Also notice you use the esc_attr() function to escape the saved value prior to displaying it in the field.
Now it's time to save your widget settings using the update function of the widget class.
<?php
    //save the widget settings
    function update($new_instance, $old_instance) {
        $instance = $old_instance;
        $instance['title'] = strip_tags( $new_instance['title'] );
        $instance['movie'] = strip_tags( $new_instance['movie'] );
        $instance['song'] = strip_tags( $new_instance['song'] );

        return $instance;
    }
?>
As you can see, the widget class handles all the saving for you. You simply pass in the $new_instance values for each of your widget settings. Always be sure to sanitize any user-entered data, in this case using the strip_tags() PHP function.
The final piece to the widget puzzle is displaying your widget in the sidebar. To do this you use the widget function of the widget class.
<?php
//display the widget
function widget($args, $instance) {
extract($args);
echo $before_widget;
$title = apply_filters( 'widget_title', $instance['title'] );
$movie = empty( $instance['movie'] ) ? ' ' : $instance['movie'];
$song = empty( $instance['song'] ) ? ' ' : $instance['song'];
if ( !empty( $title ) ) { echo $before_title . $title . $after_title; };
echo '<p>Fav Movie: ' . $movie . '</p>';
echo '<p>Fav Song: ' . $song . '</p>';
echo $after_widget;
}
?>The first step is to extract the $args parameter. This variable holds global theme values such as $before_widget and $after_widget. These values can be defined when a sidebar is registered and can be used to customize the code that wraps your widget, such as adding a custom <div> tag.
Next you set the $title variable for the title of your widget. You need to apply the widget_title filter hook to the title. This enables other developers to modify the display of the widget title if needed. To set the $movie and $song variables, use a PHP ternary operator. In plain English this line breaks down as follows: If $movie is empty, set it to ' ', if it's not empty set it to $instance['movie'].
Now that you've defined all your widget setting variables and populated their values, it's time to display them. First, display the $title variable. It's always important to wrap this value with the $before_title and $after_title variables. These global variables can also be set by developers when registering a sidebar. After displaying the $title value, display the favorite movie and song values. Finally, remember to end your widget display with the $after_widget global value.
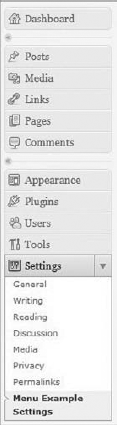
Congratulations! You just created a WordPress widget! Now you can add your newly created widget and fill in the widget settings, as shown in Figure 4-4.
Your new widget then displays in your sidebar, as shown in Figure 4-5.

Now review the full widget code that's put together:
<?php
/*
Plugin Name: Widget Example Plugin
Plugin URI: http://example.com/wordpress-plugins/my-plugin
Description: A plugin to create widgets in WordPress
Version: 1.0
Author: Brad Williams
Author URI: http://wrox.com
License: GPLv2
*/

// use widgets_init action hook to execute custom function
add_action( 'widgets_init', 'boj_widgetexample_register_widgets' );

 //register our widget
function boj_widgetexample_register_widgets() {
    register_widget( 'boj_widgetexample_widget_my_info' );
}

//boj_widget_my_info class
class boj_widgetexample_widget_my_info extends WP_Widget {

    //process the new widget
    function boj_widgetexample_widget_my_info() {
        $widget_ops = array(
            'classname' => 'boj_widgetexample_widget_class',
            'description' => 'Display a user\'s favorite movie and song.'
            );
        $this->WP_Widget( 'boj_widgetexample_widget_my_info', 'My Info Widget',
            $widget_ops );
    }

     //build the widget settings form
function form($instance) {
$defaults = array( 'title' => 'My Info', 'movie' => '', 'song' => '' );
$instance = wp_parse_args( (array) $instance, $defaults );
$title = $instance['title'];
$movie = $instance['movie'];
$song = $instance['song'];
?>
<p>Title: <input class="widefat" name="
<?php echo $this->get_field_name( 'title' ); ?>"
type="text" value="<?php echo esc_attr( $title ); ?>" /></p>
<p>Favorite Movie: <input class="widefat" name="
<?php echo $this->get_field_name( 'movie' ); ?>"
type="text" value="<?php echo esc_attr( $movie ); ?>" /></p>
<p>Favorite Song: <textarea class="widefat" name="
<?php echo $this->get_field_name( 'song' ); ?>" / >
<?php echo esc_attr( $song ); ?></textarea></p>
<?php
}
//save the widget settings
function update($new_instance, $old_instance) {
$instance = $old_instance;
$instance['title'] = strip_tags( $new_instance['title'] );
$instance['movie'] = strip_tags( $new_instance['movie'] );
$instance['song'] = strip_tags( $new_instance['song'] );
return $instance;
}
//display the widget
function widget($args, $instance) {
extract($args);
echo $before_widget;
$title = apply_filters( 'widget_title', $instance['title'] );
$movie = empty( $instance['movie'] ) ? ' ' : $instance['movie'];
$song = empty( $instance['song'] ) ? ' ' : $instance['song'];
if ( !empty( $title ) ) { echo $before_title . $title . $after_title; };
echo '<p>Fav Movie: ' . $movie . '</p>';
echo '<p>Fav Song: ' . $song . '</p>';
echo $after_widget;
}
}
?>Code snippet boj-widget-plugin.php
Now that you have a solid understanding of how widgets work, you can create a more advanced widget. In this example, you create a widget that retrieves an RSS feed and displays its results. You also use different types of form elements for your widget options. First, you need to register your new widget.
<?php
// use widgets_init action hook to execute custom function
add_action( 'widgets_init', 'boj_awe_register_widgets' );

//register our widget
function boj_awe_register_widgets() {
    register_widget( 'boj_awe_widget' );
}
?>
Register your new widget as boj_awe_widget. Now that your widget is registered, it's time to extend the WP_Widget class for your new widget.
<?php
//boj_widget_my_info class
class boj_awe_widget extends WP_Widget {

    //process the new widget
    function boj_awe_widget() {

        $widget_ops = array(
        'classname' => 'boj_awe_widget_class',
        'description' => 'Display an RSS feed with options.'
    );

        $this->WP_Widget( 'boj_awe_widget', 'Advanced RSS Widget', $widget_ops );
    }
?>
As before, you set the class name and description of your new widget. In this example, the new widget title is set to Advanced RSS Widget. Next create the widget options.
<?php
     //build the widget settings form
    function form($instance) {
        $defaults = array(
            'title' => 'RSS Feed',
            'rss_feed' => 'http://strangework.com/feed',
            'rss_items' => '2'
        );
        $instance = wp_parse_args( (array) $instance, $defaults );
        $title = $instance['title'];
        $rss_feed = $instance['rss_feed'];
        $rss_items = $instance['rss_items'];
        $rss_date = $instance['rss_date'];
        $rss_summary = $instance['rss_summary'];
        ?>
            <p>Title: <input class="widefat" name="
                <?php echo $this->get_field_name( 'title' ); ?>"
type="text" value="<?php echo esc_attr( $title ); ?>" /></p>
<p>RSS Feed: <input class="widefat" name="
<?php echo $this->get_field_name( 'rss_feed' ); ?>"
type="text" value="<?php echo esc_attr( $rss_feed ); ?>" /></p>
<p>Items to Display:
<select name="<?php echo $this->get_field_name( 'rss_items' ); ?>">
<option value="1" <?php selected( $rss_items, 1 ); ?>>1</option>
< option value="2" <?php selected( $rss_items, 2 ); ?>>2</option>
< option value="3" <?php selected( $rss_items, 3 ); ?>>3</option>
< option value="4" <?php selected( $rss_items, 4 ); ?>>4</option>
< option value="5" <?php selected( $rss_items, 5 ); ?>>5</option>
</select>
</p>
<p>Show Date?: <input name="
<?php echo $this->get_field_name( 'rss_date' ); ?>"
type="checkbox" <?php checked( $rss_date, 'on' ); ?> /></p>
<p>Show Summary?: <input name="
<?php echo $this->get_field_name( 'rss_summary' ); ?>"
type="checkbox" <?php checked( $rss_summary, 'on' ); ?> /></p>
<?php
}
?>This widget features five options enabling the user to set the title, RSS feed, items to display, and whether a date and summary of each post will be displayed. The title and RSS feed options are standard text fields.
The items to display option is an HTML select list. Notice the use of the selected() function, which is an extremely useful tool for comparing two values in a select field to determine if that option is selected. If the option value compared is the option that is saved, WordPress adds selected='selected' value to the option field, which makes it the selected option.
The show date and show summary options are both check box form fields. Here you use the checked() WordPress function. This function works just like the selected() function in that it compares two values and determines if they are identical, but the difference is the checked() function outputs checked='checked', which makes the option checked.
Now that your widget form is set up, it's time to save your widget options.
<?php
    //save the widget settings
    function update($new_instance, $old_instance) {
        $instance = $old_instance;
        $instance['title'] = strip_tags( $new_instance['title'] );
        $instance['rss_feed'] = strip_tags( $new_instance['rss_feed'] );
        $instance['rss_items'] = strip_tags( $new_instance['rss_items'] );
        $instance['rss_date'] = strip_tags( $new_instance['rss_date'] );
        $instance['rss_summary'] = strip_tags( $new_instance['rss_summary'] );

        return $instance;
    }
?>
As always make sure you sanitize the widget option values using the proper sanitizing function, in this case strip_tags(). Now that the widget options are saved, it's time to display the widget based on the set options.
<?php
    //display the widget
    function widget($args, $instance) {
        extract($args);

        echo $before_widget;

        //load the widget settings
        $title = apply_filters( 'widget_title', $instance['title'] );
        $rss_feed = empty( $instance['rss_feed'] ) ? '' : $instance['rss_feed'];
        $rss_items = empty( $instance['rss_items'] ) ? 2 : $instance['rss_items'];
        $rss_date = empty( $instance['rss_date'] ) ? 0 : 1;
        $rss_summary = empty( $instance['rss_summary'] ) ? 0 : 1;

        if ( !empty( $title ) ) { echo $before_title . $title . $after_title; };

            if ( $rss_feed ) {
                //display the RSS feed
                wp_widget_rss_output( array(
                    'url' => $rss_feed,
                    'title' => $title,
                    'items' => $rss_items,
                    'show_summary' => $rss_summary,
                    'show_author' => 0,
                    'show_date' => $rss_date
                ) );
            }

        echo $after_widget;
    }
?>
First, you need to load all the widget options to determine how the RSS feed should display. The defaults for each option are set using a ternary operator. For example, if the RSS date option is checked by the user, the $rss_date variable will be set to 1; if not it will be set to 0.
You have just created an advanced RSS widget in WordPress! This widget is a great example of how to create and set different types of options and use them appropriately in your widget's display. Now look at the full source code for the widget.
<?php
/*
Plugin Name: Advanced Widget Example Plugin
Plugin URI: http://example.com/wordpress-plugins/my-plugin
Description: A plugin to create widgets in WordPress
Version: 1.0
Author: Brad Williams
Author URI: http://wrox.com
License: GPLv2
*/

// use widgets_init action hook to execute custom function
add_action( 'widgets_init', 'boj_awe_register_widgets' );

//register our widget
function boj_awe_register_widgets() {
    register_widget( 'boj_awe_widget' );
}

//boj_widget_my_info class
class boj_awe_widget extends WP_Widget {

    //process the new widget
    function boj_awe_widget() {

        $widget_ops = array(
            'classname' => 'boj_awe_widget_class',
            'description' => 'Display an RSS feed with options.'
            );

        $this->WP_Widget( 'boj_awe_widget', 'Advanced RSS Widget', $widget_ops );
    }

     //build the widget settings form
    function form($instance) {
        $defaults = array(
            'title' => 'RSS Feed',
            'rss_feed' => 'http://strangework.com/feed',
            'rss_items' => '2'
        );
        $instance = wp_parse_args( (array) $instance, $defaults );
        $title = $instance['title'];
        $rss_feed = $instance['rss_feed'];
        $rss_items = $instance['rss_items'];
        $rss_date = $instance['rss_date'];
        $rss_summary = $instance['rss_summary'];
        ?>
            <p>Title: <input class="widefat" name="
                <?php echo $this->get_field_name( 'title' ); ?>"
                type="text" value="<?php echo esc_attr( $title ); ?>" /></p>
            <p>RSS Feed: <input class="widefat" name="
                <?php echo $this->get_field_name( 'rss_feed' ); ?>"
                type="text" value="<?php echo esc_attr( $rss_feed ); ?>" /></p>
            <p>Items to Display:
                <select name="<?php echo $this->get_field_name( 'rss_items' ); ?>">
                    <option value="1" <?php selected( $rss_items, 1 ); ?>>1</option>
                    <option value="2" <?php selected( $rss_items, 2 ); ?>>2</option>
                    <option value="3" <?php selected( $rss_items, 3 ); ?>>3</option>
                    <option value="4" <?php selected( $rss_items, 4 ); ?>>4</option>
                    <option value="5" <?php selected( $rss_items, 5 ); ?>>5</option>
                </select>
            </p>
            <p>Show Date?: <input name="
<?php echo $this->get_field_name( 'rss_date' ); ?>"
type="checkbox" <?php checked( $rss_date, 'on' ); ?> /></p>
<p>Show Summary?: <input name="
<?php echo $this->get_field_name( 'rss_summary' ); ?>"
type="checkbox" <?php checked( $rss_summary, 'on' ); ?> /></p>
<?php
}
//save the widget settings
function update($new_instance, $old_instance) {
$instance = $old_instance;
$instance['title'] = strip_tags( $new_instance['title'] );
$instance['rss_feed'] = strip_tags( $new_instance['rss_feed'] );
$instance['rss_items'] = strip_tags( $new_instance['rss_items'] );
$instance['rss_date'] = strip_tags( $new_instance['rss_date'] );
$instance['rss_summary'] = strip_tags( $new_instance['rss_summary'] );
return $instance;
}
//display the widget
function widget($args, $instance) {
extract($args);
echo $before_widget;
//load the widget settings
$title = apply_filters( 'widget_title', $instance['title'] );
$rss_feed = empty( $instance['rss_feed'] ) ? '' : $instance['rss_feed'];
$rss_items = empty( $instance['rss_items'] ) ? 2 : $instance['rss_items'];
$rss_date = empty( $instance['rss_date'] ) ? 0 : 1;
$rss_summary = empty( $instance['rss_summary'] ) ? 0 : 1;
if ( !empty( $title ) ) { echo $before_title . $title . $after_title; };
if ( $rss_feed ) {
//display the RSS feed
wp_widget_rss_output( array(
'url' => $rss_feed,
'title' => $title,
'items' => $rss_items,
'show_summary' => $rss_summary,
'show_author' => 0,
'show_date' => $rss_date
) );
}
echo $after_widget;
}
}
?>Code snippet boj-advanced-rss-widget.php
WordPress also features a dashboard widget API. You can use this API to create custom widgets on the WordPress dashboard screen.
To create your dashboard widget, you use the wp_add_dashboard_widget() function. Here's how to use this function to create a dashboard widget:
<?php wp_add_dashboard_widget( widget_id, widget_name, callback,
        control_callback ); ?>
The wp_add_dashboard_widget() function accepts the following parameters:
widget_id— The CSS ID added to the widget DIV elementwidget_name— The name of your widget displayed in its headingcallback— Function to be called to display your widgetcontrol_callback— Function to be called to handle for elements and submission
Following are some different examples. First, you create a simple dashboard widget that displays a piece of content to the user.
To create a dashboard widget, use the wp_dashboard_setup action hook. This hook is executed directly after the default dashboard widgets have been initialized, but prior to them being displayed.
<?php
add_action( 'wp_dashboard_setup', 'boj_dashboard_example_widgets' );
function boj_dashboard_example_widgets() {
//create a custom dashboard widget
wp_add_dashboard_widget( 'dashboard_custom_feed',
'My Plugin Information', 'boj_dashboard_example_display' );
}
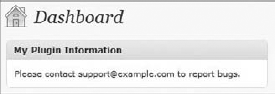
?>The wp_dashboard_setup hook can call your custom boj_dashboard_example_widgets() function. Next use the wp_add_dashboard_widget() function to register your new dashboard widget. Set the widget title to My Plugin Information, and call the custom function boj_dashboard_example_display(). Now that your dashboard widget is registered, you need to set up the custom function to display a message to your users.
<?php
function boj_dashboard_example_display()
{
    echo '<p>Please contact support@example.com to report bugs.</p>';
}
?>
You now have a custom dashboard widget with a simple message displayed to your users, as shown in Figure 4-6. The Dashboard Widget API automatically makes your widget draggable, collapsible, and even adds your widget to the Screen Options tab so that users can easily hide it if they choose.
Now review the widget code in its entirety:
<?php
/*
Plugin Name: Dashboard Widget Example Plugin
Plugin URI: http://example.com/wordpress-plugins/my-plugin
Description: A plugin to create dashboard widgets in WordPress
Version: 1.0
Author: Brad Williams
Author URI: http://wrox.com
License: GPLv2
*/

add_action( 'wp_dashboard_setup', 'boj_dashboard_example_widgets' );

function boj_dashboard_example_widgets() {

    //create a custom dashboard widget
    wp_add_dashboard_widget( 'dashboard_custom_feed',
        'My Plugin Information', 'boj_dashboard_example_display' );

}

function boj_dashboard_example_display()
{
    echo '<p>Please contact support@example.com to report bugs.</p>';
}
?>
Code snippet boj-dashboard-widget.php
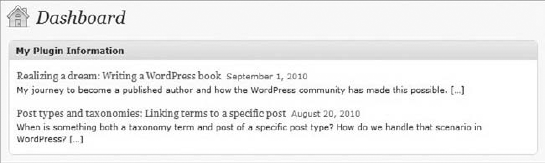
Now that you understand dashboard widgets, you can create a more advanced widget that stores an option value. Dashboard widgets can store options, making them easily customizable by the user. If a dashboard widget has any options, you see a Configure link display when you hover over the widget title.
The dashboard widget in this example enables you to set a custom RSS feed URL and display the contents of that feed.
<?php
add_action( 'wp_dashboard_setup', 'boj_dashboard_example_widgets' );

function boj_dashboard_example_widgets() {
//create a custom dashboard widget
wp_add_dashboard_widget( 'dashboard_custom_feed',
'My Plugin Information', 'boj_dashboard_example_display',
'boj_dashboard_example_setup' );
}
?>Notice the wp_add_dashboard_widget() function has the fourth parameter set, in this example boj_dashboard_example_setup(), which is the control callback. This is the function that displays your widget setting field and saves the data entered as an option for your widget. Next you need to create the boj_dashboard_example_display() function to display the custom RSS feed in your widget.
<?php
function boj_dashboard_example_display()
{
    //load our widget option
    $boj_option = get_option( 'boj_dashboard_widget_rss ');

    //if option is empty set a default
    $boj_rss_feed = ( $boj_option ) ? $boj_option : 'http://wordpress.org/news/feed/';

    //retrieve the RSS feed and display it
    echo '<div class="rss-widget">';

    wp_widget_rss_output( array(
        'url' => $boj_rss_feed,
        'title' => 'RSS Feed News',
        'items' => 2,
        'show_summary' => 1,
        'show_author' => 0,
        'show_date' => 1
    ) );

    echo '</div>';
}
?>
The first two lines load the RSS feed saved as an option in the widget. Chapter 7, "Plugin Settings," covers plugin settings and options in more detail. Next the widget uses the wp_widget_rss_output() function to retrieve the RSS feed and display it. This handy little function is great for retrieving and displaying RSS feeds in WordPress. The widget defines the RSS URL, sets the title to RSS Feed News, sets the number of posts to show to 2, and includes a few other options.
Now that you have the widget display, you need to create the control callback function boj_dashboard_example_setup(). This function adds the form field to your widget and can also save the value entered by the user.
<?php
function boj_dashboard_example_setup() {

    //check if option is set before saving
    if ( isset( $_POST['boj_rss_feed'] ) ) {
        //retrieve the option value from the form
        $boj_rss_feed = esc_url_raw( $_POST['boj_rss_feed'] );

        //save the value as an option
        update_option( 'boj_dashboard_widget_rss', $boj_rss_feed );
    }

    //load the saved feed if it exists
    $boj_rss_feed = get_option( 'boj_dashboard_widget_rss ');

    ?>
    <label for="feed">
        RSS Feed URL: <input type="text" name="boj_rss_feed" id="boj_rss_feed"
            value="<?php echo esc_url( $boj_rss_feed ); ?>" size="50" />
    </label>
    <?php
}
?>
The first task the function handles is saving the widget option. You should always check to verify the POST value exists prior to saving it using the isset() PHP function. Next you set the value of $_POST['boj_rss_feed'] to the $boj_rss_feed variable. Notice how the POST value is escaped using esc_url_raw(). This verifies the value is a properly formatted URL and free from any illegal characters prior to saving the data. Finally, the widget option is saved using update_option().
Now that the widget option is saved, you need to display the widget form field so that your users can enter in the RSS feed URL they want displayed. First, retrieve the widget option from the database if it exists, so you can display it in the form field. Next create a simple text input named boj_rss_feed. Notice the value is set to $boj_rss_feed, which is storing the RSS feed URL value entered by the user.
You now have a custom dashboard widget that stores a custom RSS feed URL and displays the latest two posts to the user, as shown in Figure 4-7!
Now look at the full source for the custom RSS feed dashboard widget:
<?php
/*
Plugin Name: RSS Dashboard Widget Example Plugin
Plugin URI: http://example.com/wordpress-plugins/my-plugin
Description: A plugin to create dashboard widgets in WordPress
Version: 1.0
Author: Brad Williams
Author URI: http://wrox.com
License: GPLv2
*/

add_action( 'wp_dashboard_setup', 'boj_dashboard_example_widgets' );

function boj_dashboard_example_widgets() {

    //create a custom dashboard widget
    wp_add_dashboard_widget( 'dashboard_custom_feed', 'My Plugin Information',
                'boj_dashboard_example_display', 'boj_dashboard_example_setup' );

}

function boj_dashboard_example_setup() {

    //check if option is set before saving
    if ( isset( $_POST['boj_rss_feed'] ) ) {
        //retrieve the option value from the form
        $boj_rss_feed = esc_url_raw( $_POST['boj_rss_feed'] );

        //save the value as an option
        update_option( 'boj_dashboard_widget_rss', $boj_rss_feed );
    }

     //load the saved feed if it exists
    $boj_rss_feed = get_option( 'boj_dashboard_widget_rss ');

    ?>
    <label for="feed">
        RSS Feed URL: <input type="text" name="boj_rss_feed" id="boj_rss_feed"
            value="<?php echo esc_url( $boj_rss_feed ); ?>" size="50" />
    </label>
    <?php
}

function boj_dashboard_example_display()
{
    //load our widget option
    $boj_option = get_option( 'boj_dashboard_widget_rss ');

    //if option is empty set a default
    $boj_rss_feed = ( $boj_option ) ? $boj_option : 'http://wordpress.org/news/feed/';

    //retrieve the RSS feed and display it
echo '<div class="rss-widget">';
wp_widget_rss_output( array(
'url' => $boj_rss_feed,
'title' => 'RSS Feed News',
'items' => 2,
'show_summary' => 1,
'show_author' => 0,
'show_date' => 1
) );
echo '</div>';
}
?>Code snippet boj-rss-dashboard-widget.php
Note
Dashboard widgets are a great way to get important information in front of your users. The majority of WordPress users log directly into the admin dashboard, so what better way to feature important information about your plugin?
WordPress features multiple sections, or meta boxes, on the post, page, and link manager screens. These meta boxes enable you to easily add additional data to your content. For example, the Post Tags meta box enables you set tags for your post.
To create a custom meta box in WordPress, you use the add_meta_box() function. This function enables you to define all aspects of your meta box. Following is how this function is used:
<?php add_meta_box( id, title, callback, page, context, priority,
            callback_args ); ?>
The add_meta_box() function accepts the following parameters:
id— The CSS ID added to the DIV element that wraps your meta boxtitle— The name of your meta box displayed in its headingcallback— Function to be called to display your meta boxpage— The screen where your meta box should showcontext— The part of the page where the meta box should be shownpriority— The priority in which your meta box should be showncallback_args— Arguments to pass into your callback function
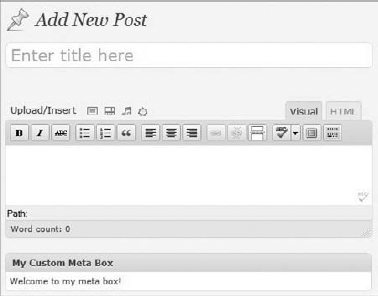
Now you can build a custom meta box for the post screen.
<?php
add_action( 'add_meta_boxes', 'boj_mbe_create' );

function boj_mbe_create() {

    add_meta_box( 'boj-meta', 'My Custom Meta Box', 'boj_mbe_function', 'post',
        'normal', 'high' );

}

function boj_mbe_function() {

    echo 'Welcome to my meta box!';

}
?>
In this example, you create a meta box on the post screen. You use the add_meta_boxes action hook to trigger your boj_mbe_create() function to add a new meta box. The meta box title is set to My Custom Meta Box; it calls the boj_mbe_function() for display. Also notice you set the context parameter to normal and the priority to high. This displays your meta box directly below the visual editor on your post screen, as shown in Figure 4-8.
Note
You can add a custom meta box to any custom post type in WordPress by simply setting the page parameter to the name of your custom post type.
The real power of meta boxes is saving data to a post, page, or any type of content in WordPress. Any data saved against your content is called metadata. In the WordPress edit screens, the meta box for custom fields exists by default. Custom fields are just a quick way to save metadata against your content. Chapter 11, "Extending Posts," covers metadata in more detail, but you need understand the concept to save data in your meta box.
In this example, you create a meta box on the post screen to save two fields of data against your post.
<?php
add_action( 'add_meta_boxes', 'boj_mbe_create' );

function boj_mbe_create() {

    //create a custom meta box
    add_meta_box( 'boj-meta', 'My Custom Meta Box', 'boj_mbe_function', 'post',
        'normal', 'high' );


}
?>
You need to initialize and create your meta box just as you did before. Now create the function to display the form fields.
<?php
function boj_mbe_function( $post ) {

    //retrieve the metadata values if they exist
    $boj_mbe_name = get_post_meta( $post->ID, '_boj_mbe_name', true );
    $boj_mbe_costume = get_post_meta( $post->ID, '_boj_mbe_costume', true );

    echo 'Please fill out the information below';
    ?>
    <p>Name: <input type="text" name="boj_mbe_name" value="
        <?php echo esc_attr( $boj_mbe_name ); ?>" /></p>
    <p>Costume:
    <select name="boj_mbe_costume">
        <option value="vampire" <?php selected( $boj_mbe_costume, 'vampire' ); ?>>
            Vampire
        </option>
        <option value="zombie" <?php selected( $boj_mbe_costume, 'zombie' ); ?>>
            Zombie
        </option>
        <option value="smurf" <?php selected( $boj_mbe_costume, 'smurf' ); ?>>
            Smurf
        </option>
    </select>
    </p>
    <?php

}
?>
The first thing you should notice is the $post object passed as a parameter to your custom function. This gives you access to all the post data available in the object, in this case the post ID, to use in your meta box.
Now you need to retrieve the two metadata values from WordPress if they exist. To do this use the get_post_meta() function. This function accepts three parameters.
post_id— The ID of the post you want to load metadata fromkey— The unique name of the metadata field you want to loadsingle— Whether to return the string as an array (false) or a single string (true)
If you create a new post, the two metadata values would not exist because they haven't been created yet. Next in the code, the two form fields display. The first is a text field for a name. Notice the value of the text field is set to $boj_mbe_name, the variable that stores the metadata value you retrieve, and is escaped using the esc_attr() function for security.
The second field in the form is an HTML <select> form field. This field has three options to choose as your costume: Vampire, Zombie, or Smurf. In the example, you use the selected() function to determine if the item is selected. The meta box form is now complete, and as you can see there is no need to add a Submit button or form tags. Using use the save_post action hook, the values are passed to your boj_mbe_save_meta() function as shown here.
<?php

//hook to save the meta box data
add_action( 'save_post', 'boj_mbe_save_meta' );

function boj_mbe_save_meta( $post_id ) {

    //verify the metadata is set
    if ( isset( $_POST['boj_mbe_name'] ) ) {

        //save the metadata
        update_post_meta( $post_id, '_boj_mbe_name',
            strip_tags( $_POST['boj_mbe_name'] ) );
        update_post_meta( $post_id, '_boj_mbe_costume',
            strip_tags( $_POST['boj_mbe_costume'] ) );

    }

}
?>
First use the add_action() function to trigger the save_post action hook, which will call your boj_mbe_save_meta() function when a post is saved. This function saves the data entered by the user in your meta box. Notice you pass the $post_id variable to your function as a parameter. The post ID is used when saving your metadata. It's always a good idea to verify the form field you want to work with is set prior to doing so, as shown using the isset() PHP function. Finally, the update_post_meta() function adds or updates the post meta entered in your meta box. This function accepts four parameters.
post_id— The ID of the post you want to save metadata tometa_key— The unique name of the metadata field you want to savemeta_value— The value of the metadata field to saveprev_value— The old value of the metadata field, which differentiates between multiple fields with the same name
In this example you use only the first three parameters because the fourth is optional. You set the post ID, name of the metadata field, and the value entered in your custom meta box. The form values are sanitized using the strip_tags() function.
Note
If your metadata name starts with an underscore, it does not display in the default custom fields meta box in WordPress. This can help eliminate confusion by the user when entering metadata.
You have just successfully created a custom meta box that stores data in WordPress! Now review the full code for your plugin.
<?php
/*
Plugin Name: Meta Box Example Plugin
Plugin URI: http://example.com/wordpress-plugins/my-plugin
Description: A plugin to create meta boxes in WordPress
Version: 1.0
Author: Brad Williams
Author URI: http://wrox.com
License: GPLv2
*/

add_action( 'add_meta_box', 'boj_mbe_create' );

function boj_mbe_create() {

    //create a custom meta box
    add_meta_box( 'boj-meta', 'My Custom Meta Box', 'boj_mbe_function',
                'post', 'normal', 'high' );


}

function boj_mbe_function( $post ) {

    //retrieve the metadata values if they exist
    $boj_mbe_name = get_post_meta( $post->ID, '_boj_mbe_name', true );
    $boj_mbe_costume = get_post_meta( $post->ID, '_boj_mbe_costume', true );

    echo 'Please fill out the information below';
    ?>
    <p>Name: <input type="text" name="boj_mbe_name" value="
            <?php echo esc_attr( $boj_mbe_name ); ?>" /></p>
    <p>Costume:
    <select name="boj_mbe_costume">
        <option value="vampire" <?php selected( $boj_mbe_costume, 'vampire' ); ?>>
            Vampire
        </ option>
        <option value="zombie" <?php selected( $boj_mbe_costume, 'zombie' ); ?>>
            Zombie
</option>
<option value="smurf" <?php selected( $boj_mbe_costume, 'smurf' ); ?>>
Smurf
</option>
</ select>
</p>
<?php
}
//hook to save the meta box data
add_action( 'save_post', 'boj_mbe_save_meta' );
function boj_mbe_save_meta( $post_id ) {
//verify the metadata is set
if ( isset( $_POST['boj_mbe_name'] ) ) {
//save the metadata
update_post_meta( $post_id, '_boj_mbe_name',
strip_tags( $_POST['boj_mbe_name'] ) );
update_post_meta( $post_id, '_boj_mbe_costume',
strip_tags( $_POST['boj_mbe_costume'] ) );
}
}
?>Code snippet boj-meta-box.php
Now that you understand how meta boxes work, you can build a more complex one. In this example, you create a custom meta box that enables the user to select an image from the WordPress Media Library and save the URL in the meta box.
First, you use the add_meta_boxes action hook as before to execute the custom function to create your meta box.
<?php
add_action( 'add_meta_boxes', 'boj_mbe_image_create' );

function boj_mbe_image_create() {

    //create a custom meta box
    add_meta_box( 'boj-image-meta', 'Set Image', 'boj_mbe_image_function',
        'post', 'normal', 'high' );


}
?>
Using the add_meta_box() function, you can define the settings for your custom meta box. In this case the meta box is named Set Image and calls the custom boj_mbe_image_function() function.
Now that the meta box has been created, you need to create the function to display meta box content.
<?php
function boj_mbe_image_function( $post ) {

    //retrieve the metadata value if it exists
    $boj_mbe_image = get_post_meta( $post->ID, '_boj_mbe_image', true );
    ?>
    Image <input id="boj_mbe_image" type="text" size="75"
        name="boj_mbe_image" value="<?php echo esc_url( $boj_mbe_image ); ?>" />
    <input id="upload_image_button" type="button"
        value="Media Library Image" class="button-secondary"  />
    <br /> Enter an image URL or use an image from the Media Library
    <?php

}
?>
The first step is to load the metadata value if it exists to the $boj_mbe_image variable. If this meta value has not been saved, it will be empty. Next display the text form field to enter and display the image URL. You also create a button that enables the user to select an image from the Media Library, as shown in Figure 4-9.

Now call the save_post action hook to execute your custom boj_mbe_image_save_meta() function to save the meta box data.
<?php

//hook to save the meta box data
add_action( 'save_post', 'boj_mbe_image_save_meta' );

function boj_mbe_image_save_meta( $post_id ) {

    //verify the metadata is set
    if ( isset( $_POST['boj_mbe_image'] ) ) {

        //save the metadata
        update_post_meta( $post_id, '_boj_mbe_image',
            esc_url_raw( $_POST['boj_mbe_image'] ) );

    }

}
?>
It's a good practice to verify the form field is set prior to retrieving the form field value. If the field is set, your function can use the update_post_meta() function to save the metadata to the post. Notice you're using the esc_url_raw() function to sanitize the URL. This can eliminate invalid characters, remove dangerous characters, and verify the URL has a proper protocol set (http, https, ftp, and so on).
Up to this point this is a fairly standard meta box plugin. Now is where the fun begins! To prompt for the Media Library overlay, you need to use some JavaScript. Create a new file named boj-meta-image.js. This file can contain the JavaScript code that inserts the image URL into your meta box text field when selected from the Media Library. Now review the code.
jQuery(document).ready(function($) {

    var formfield = null;

    $('#upload_image_button').click(function() {
        $('html').addClass('Image');
        formfield = $('#boj_mbe_image').attr('name');
        tb_show('', 'media-upload.php?type=image&TB_iframe=true');
        return false;
    });


    // user inserts file into post.
    //only run custom if user started process using the above process
    // window.send_to_editor(html) is how wp normally handle the received data

    window.original_send_to_editor = window.send_to_editor;
    window.send_to_editor = function(html){
        var fileurl;

        if (formfield != null) {
            fileurl = $('img',html).attr('src');

            $('#boj_mbe_image').val(fileurl);

            tb_remove();

            $('html').removeClass('Image');
            formfield = null;
        } else {
            window.original_send_to_editor(html);
        }
    };

});
Remember this is JavaScript code and cannot be surrounded by <?php ?> tags. First, the code opens the Media overlay when the upload_image_button is clicked, which is the name of the Submit button in your meta box. The second part of the code takes the image URL and inserts it into the image URL text field in your form, named boj_mbe_image.
Now that the JavaScript file is in place, you need to call this file from your plugin.
<?php
//script actions with page detection
add_action('admin_print_scripts-post.php', 'boj_mbe_image_admin_scripts');
add_action('admin_print_scripts-post-new.php', 'boj_mbe_image_admin_scripts');

function boj_mbe_image_admin_scripts() {

    wp_enqueue_script( 'boj-image-upload',
        plugins_url( '/boj-meta-box/boj-meta-image.js' ),
        array( 'jquery','media-upload','thickbox' )
    );

}
?>
Use the admin_print_scripts action hook to execute the custom function for including your JavaScript file. Notice how the action hook has -post.php and -post-new.php appended to the hook name. This is called page detection, so the hook calls only the custom boj_mbe_image_admin_scripts() function when the user is on the post.php or post-new.php pages in WordPress.
To insert your JavaScript fill to the header of the page, use the wp_enqueue_script() function. This is the proper way to include JavaScript files in the header of WordPress, which Chapter 12, "JavaScript and Ajax," covers in more detail.
The final step is to add the thickbox style using the wp_enqueue_styles() function.
<?php

//style actions with page detection
add_action('admin_print_styles-post.php', 'boj_mbe_image_admin_styles');
add_action('admin_print_styles-post-new.php', 'boj_mbe_image_admin_styles');

function boj_mbe_image_admin_styles() {
    wp_enqueue_style( 'thickbox' );
}
?>
This includes the thickbox style in the header of the page.
To set an image in your meta box, just click the Media Library Image button. Next select an image from the Media Library, and click the Insert into Post button. This inserts the image URL into your meta box form field. This happens only if the user clicks the Media Library Image button in your meta box.
Now review the full plugin code.
BOJ-META-BOX-IMAGE.PHP
<?php
/*
Plugin Name: Meta Box Media Library Image Example
Plugin URI: http://example.com/wordpress-plugins/my-plugin
Description: Adds the ability to select an image from the media library
Version: 1.0
Author: Brad Williams
Author URI: http://wrox.com
License: GPLv2
*/

add_action( 'admin_init', 'boj_mbe_image_create' );

function boj_mbe_image_create() {

    //create a custom meta box
    add_meta_box( 'boj-image-meta', 'Set Image', 'boj_mbe_image_function', 'post',
        'normal', 'high' );

}

function boj_mbe_image_function( $post ) {

    //retrieve the metadata value if it exists
    $boj_mbe_image = get_post_meta( $post->ID, '_boj_mbe_image', true );
    ?>
    Image <input id="boj_mbe_image" type="text" size="75" name="boj_mbe_image"
        value="<?php echo esc_url( $boj_mbe_image ); ?>" />
           <input id="upload_image_button" type="button"
               value="Media Library Image" class="button-secondary"  />
     <p>Enter an image URL or use an image from the Media Library</p>
     <?php
}

//script actions with page detection
add_action('admin_print_scripts-post.php', 'boj_mbe_image_admin_scripts');
add_action('admin_print_scripts-post-new.php', 'boj_mbe_image_admin_scripts');

function boj_mbe_image_admin_scripts() {
    wp_enqueue_script( 'boj-image-upload',
        plugins_url( '/boj-meta-box/boj-meta-image.js' ),
        array( 'jquery','media-upload','thickbox' ) );
}

//style actions with page detection
add_action('admin_print_styles-post.php', 'boj_mbe_image_admin_styles');
add_action('admin_print_styles-post-new.php', 'boj_mbe_image_admin_styles');

function boj_mbe_image_admin_styles() {
    wp_enqueue_style( 'thickbox' );
}


//hook to save the meta box data
add_action( 'save_post', 'boj_mbe_image_save_meta' );


function boj_mbe_image_save_meta( $post_id ) {

    //verify the metadata is set
if ( isset( $_POST['boj_mbe_image'] ) ) {
//save the metadata
update_post_meta( $post_id, '_boj_mbe_image',
esc_url( $_POST['boj_mbe_image'] ) );
}
}
?>Code snippet boj-meta-box-image.zip
BOJ-META-IMAGE.JS
jQuery(document).ready(function($) {

    var formfield = null;

    $('#upload_image_button').click(function() {
        $('html').addClass('Image');
        formfield = $('#boj_mbe_image').attr('name');
        tb_show('', 'media-upload.php?type=image&TB_iframe=true');
        return false;
    });


    // user inserts file into post.
    // only run custom if user started process using the above process
    // window.send_to_editor(html) is how wp normally handle the received data

    window.original_send_to_editor = window.send_to_editor;
    window.send_to_editor = function(html){
        var fileurl;

        if (formfield != null) {
            fileurl = $('img',html).attr('src');

            $('#boj_mbe_image').val(fileurl);

            tb_remove();

            $('html').removeClass('Image');
            formfield = null;
        } else {
            window.original_send_to_editor(html);
        }
    };

});
Code snippet boj-meta-box-image.zip
They say consistency is one of the principles of good UI design. Creating a plugin for WordPress is no different, and it's a best practice to make your plugin match the WordPress user interface as closely as possible. This helps keep the interface consistent for end users and can make your plugin more professional by providing a solid user experience from the start.
WordPress features many different styles that you can easily use in your plugin. In this section you learn how to use the styling available in WordPress for your plugins. To demonstrate, create a simple plugin with a settings page:
<?php
add_action( 'admin_menu', 'boj_styling_create_menu' );

function boj_styling_create_menu() {

    //create custom top-level menu
    add_menu_page( 'My Plugin Settings', 'Plugin Styling',
        'manage_options', __FILE__, 'boj_styling_settings' );

}
?>
Throughout this section you modify the boj_styling_settings() function.
The most important part of using the WordPress styles is to wrap your plugin in the class wrap div.
<div class="wrap">
    Plugin Page
</div>
This class sets the stage for all admin styling.
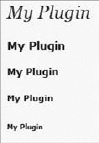
WordPress has custom styles available for all heading tags. Now look at how those heading tags display:
<?php
function boj_styling_settings() {
    ?>
    <div class="wrap">
        <h2>My Plugin</h2>
        <h3>My Plugin</h3>
        <h4>My Plugin</h4>
        <h5>My Plugin</h5>
        <h6>My Plugin</h6>
    </div>
    <?php
}
?>
Each heading is slightly smaller than the previous, as shown in Figure 4-10. Notice there is no <h1> tag defined. The <h1> tag is reserved for the name of your website displayed at the top of the admin dashboard. Because of this you should always use the <h2> tag for your primary heading.
WordPress features many different icons for each section head. These icons are also available for use in your plugins. For example, the dashboard header icon is a house icon.
<div id="icon-index" class="icon32"></div>
<div id="icon-edit" class="icon32"></div>
<div id="icon-upload" class="icon32"></div>
<div id="icon-link-manager" class="icon32"></div>
<div id="icon-edit-pages" class="icon32"></div>
<div id="icon-edit-comments" class="icon32"></div>
<div id="icon-themes" class="icon32"></div>
<div id="icon-plugins" class="icon32"></div>
<div id="icon-users" class="icon32"></div>
<div id="icon-tools" class="icon32"></div>
<div id="icon-options-general" class="icon32"></div>
These divs generate the icons shown in Figure 4-11.
Rather than hardcoding these values, WordPress features a function to generate the icon divs called screen_icon(). This function accepts one parameter, and that is the screen icon you want to load.
Now modify your boj_styling_settings() function to display an icon and header.
<?php
function boj_styling_settings() {
    ?>
    <div class="wrap">
        <?php screen_icon( 'plugins' ); ?>
        <h2>My Plugin</h2>
    </div>
    <?php
}
?>
x
Now your plugin has a clean header and uses the Plug icon.
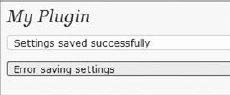
When an action occurs in your plugin, such as saving settings, it's important to display a message to the user verifying whether the update was successful. WordPress features some different styles for displaying these messages.
<?php
function boj_styling_settings() {
    ?>
    <div class="wrap">
        <h2>My Plugin</h2>
        <div id="message" class="updated">Settings saved successfully</div>
        <div id="message" class="error">Error saving settings</div>
    </div>
    <?php
}
?>
These styles will generate the messages shown in Figure 4-12.
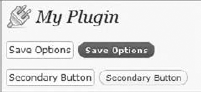
When adding buttons to your form, you can take advantage of multiple classes. The first two you use are the button-primary and button-secondary classes. These classes style your buttons to match the WordPress UI.
<p>
<input type="submit" name="Save" value="Save Options" />
<input type="submit" name="Save" value="Save Options" class="button-primary" />
</p><p>
<input type="submit" name="Secondary" value="Secondary Button" />
<input type="submit" name="Secondary" value="Secondary Button"
    class="button-secondary" />
</p>
This example demonstrates a standard unstyled button as compared to the WordPress styled button. As you can tell, the WordPress-styled button looks familiar and uses the proper styling, as shown in Figure 4-13.
You can also use the button-highlighted class to put an emphasis on a particular button.
<input type="submit" name="secondary" value="Secondary Button"
    class="button-secondary" />
<input type="submit" name="highlighted" value="Button Highlighted"
    class="button-highlighted" />
The button is now bold and stands out more than a normal Secondary button, as shown in Figure 4-14. This is useful if you want to focus the users' attention on a button.
Links can also take the form of a button by using the appropriate class.

<a href="#">Search</a>
<a href='#' class='button-secondary'>Search</a>
<a href='#' class='button-highlighted'>Search</a>
<a href='#' class='button-primary'>Search</a>
This example shows how a standard <a href> link can be styled to look like a button, as shown in Figure 4-15. To normal users they would never know these are regular text links because they look just like a button.

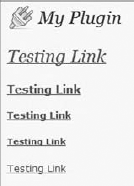
Links inside the wrap class automatically assume the standard WordPress admin link style. However, you can modify the default styling in different ways.
<div class="wrap">
    <?php screen_icon( 'plugins' ); ?>     <h2>My Plugin</h2>
    <h2><a href="#">Testing Link</a></h2>
    <h3><a href="#">Testing Link</a></h3>
    <h4><a href="#">Testing Link</a></h4>
    <h5><a href="#">Testing Link</a></h5>
    <a href="#">Testing Link</a>
</div>
Wrapping any link in a heading tag enables you to adjust the size of the link, as shown in Figure 4-16.
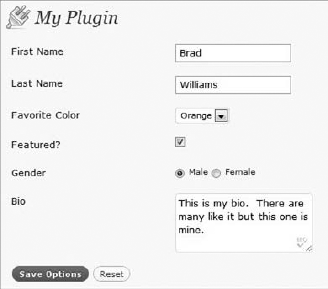
WordPress has a special table class just for forms called form-table. This class is used on all WordPress admin dashboard forms, including every Settings page. This is a useful class when creating any type of options in your plugin.
<div class="wrap">
        <?php screen_icon( 'plugins' ); ?>
        <h2>My Plugin</h2>
        <form method="POST" action="">
        <table class="form-table">
        <tr valign="top">
            <th scope="row"><label for="fname">First Name</label></th>
            <td><input maxlength="45" size="25" name="fname" /></td>
        </tr>
        <tr valign="top">
            <th scope="row"><label for="lname">Last Name</label></th>
            <td><input id="lname" maxlength="45" size="25" name="lname" /></td>
        </tr>
        <tr valign="top">
            <th scope="row"><label for="color">Favorite Color</label></th>
            <td>
                <select name="color">
                    <option value="orange">Orange</option>
                    <option value="black">Black</option>
                </ select>
            </td>
        </tr>
<tr valign="top">
<th scope="row"><label for="featured">Featured?</label></th>
<td><input type="checkbox" name="favorite" /></td>
</tr>
<tr valign="top">
<th scope="row"><label for="gender">Gender</label></th>
<td>
<input type="radio" name="gender" value="male" /> Male
<input type="radio" name="gender" value="female" /> Female
</td>
</tr>
<tr valign="top">
<th scope="row"><label for="bio">Bio</label></th>
<td><textarea name="bio"></textarea></td>
</tr>
<tr valign="top">
<td>
<input type="submit" name="save" value="Save Options"
class="button-primary" />
<input type="submit" name="reset" value="Reset"
class="button-secondary" />
</td>
</tr>
</table>
</form>
</div>Using the form-table can give your options a familiar look to your plugin users. This makes for a better user experience, as shown in Figure 4-17.
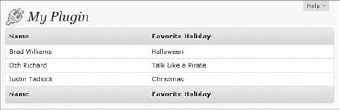
HTML tables are a great way to display rows and columns of data in an easy-to-read layout. Tables can easily be styled in WordPress using the widefat class.
<table class="widefat">
<thead>
    <tr>
        <th>Name</th>
        <th>Favorite Holiday</th>
    </tr>
</thead>
<tfoot>
    <tr>
        <th>Name</th>
        <th>Favorite Holiday</th>
    </tr>
</tfoot>
<tbody>
    <tr>
<td>Brad Williams</td>
<td>Halloween</td>
</tr>
<tr>
<td>Ozh Richard</td>
<td>Talk Like a Pirate</td>
</tr>
<tr>
<td>Justin Tadlock</td>
<td>Christmas</td>
</tr>
</tbody>
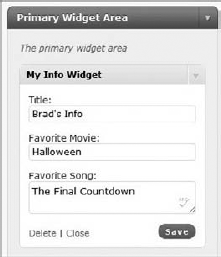
</table>The widefat class has specific styles set for the thead and tfoot HTML tags. This styles the header and footer of your table to match all other tables on the admin dashboard. The class can also style all table data, as shown in Figure 4-18.
If your plugin contains a list of records, you may have a need for pagination, which is the method to break lists of data into multiple pages and have links to load each individual page. This helps reduce the load times and makes it a much cleaner user experience to navigate through the data. Would you rather view 500 records on a page or 10 pages with 50 records on each page?
WordPress has a few different classes to style your pagination. Following is an example.
<div class="tablenav">
<div class="tablenav-pages">
<span class="displaying-num">Displaying 1-20 of 69</span>
<span class="page-numbers current">1</span>
<a href="#" class="page-numbers">2</a>
<a href="#" class="page-numbers">3</a>
<a href="#" class="page-numbers">4</a>
<a href="#" class="next page-numbers">»</a>
</div>
</div>First, you need to wrap your pagination links in the tablenav and tablenav-pages div classes. The displaying-num class styles the records you view. The page-numbers class styles the page links in the familiar WordPress format. Adding current or next to the link class can add some unique styles to those elements, as shown in Figure 4-19.
Keeping your plugin design consistent with the WordPress user interface can reduce your plugins' learning curve because users will feel comfortable with the design and styles used. This can also make your plugins' design future-proof. If the WordPress core styles change down the road, your plugins' design will also change to match the new user interface, and you won't need to edit a single line of code!