Table of Contents for
Professional WordPress® Plugin Development
 Professional WordPress® Plugin Development
Published by
Wrox, 2011
Professional WordPress® Plugin Development
Published by
Wrox, 2011
- Copyright
- CREDITS
- ABOUT THE AUTHORS
- ACKNOWLEDGMENTS
- FOREWORD
- INTRODUCTION
- 1. An Introduction to Plugins
- 2. Plugin Foundation
- 3. Hooks
- 4. Integrating in WordPress
- 5. Internationalization
- 6. Plugin Security
- 7. Plugin Settings
- 8. Users
- 9. HTTP API
- 10. The Shortcode API
- 11. Extending Posts: Metadata, Custom Post Types, and Taxonomies
- 12. JavaScript and Ajax in WordPress
- 13. Cron
- 14. The Rewrite API
- 15. Multisite
- 16. Debugging and Optimizing
- 17. Marketing Your Plugin
- 18. The Developer Toolbox
WHAT'S IN THIS CHAPTER?
Using a WordPress database to save and get data
Leveraging the API functions to write compact and future proof code
Saving global options, or per-user options
Saving special option types: expiring options
Creating a custom database table, when and how to do it
WordPress enables easy access to the database to store and retrieve data, such as options end users can modify and save in settings pages or internal information plugins you need to know. You learn how to save and fetch this data using internal WordPress functions and API.
The Options API is a set of functions that enable easy access to the database where WordPress, plugins, and themes save and fetch needed information.
Options are stored in a database table named, by default, wp_options and can be text, integers, arrays, or objects. For example, WordPress keeps in this table the title of your blog, the list of active plugins, the news articles displayed on the Dashboard, or the time when to check if a new version is available.
You'll now learn how to use the functions to access, update, and save options: add_option(), update_option(), get_option(), and delete_option().
You start by saving your first plugin option, which will be named boj_myplugin_color and have a value of red. The function call to do so is the following:
<?php
add_option( 'boj_myplugin_color', 'red' );
?>
The first parameter is your option name. It is crucial that you make it unique and self-explanatory.
Unique: It shall never conflict with internal existing or future WordPress options, nor with settings that might be created by another plugin.
Self-explanatory: Name it so that it's obvious it's a plugin setting and not something created by WP.
Note
Using the same prefix, for example, boj_myplugin, for function names, options, and variables is highly recommended for code consistency and preventing conflict with other plugins. The golden rule "Prefix Everything," first introduced in Chapter 2, applies here.
The second parameter is the option value that can be practically anything a variable can hold: string, integer, float number, Boolean, object, or array.
Updating an option value is a similar function call:
<?php
update_option( 'boj_myplugin_color', 'blue' );
?>
The difference between add_option() and update_option() is that the first function does nothing if the option name already exists, whereas update_option() checks if the option already exists before updating its value and creates it if needed.
Every option saved adds a new record in WordPress' option table. You can simply store several options at once, in one array: This avoids cluttering the database and updates the values in one single MySQL query for greater efficiency and speed.
<?php
$options = array(
    'color'    => 'red',
    'fontsize' => '120%',
'border' => '2px solid red' ); update_option( 'boj_myplugin_options', $options ); ?>
Saving your plugin options in one array rather than individual records can have a huge impact on WordPress' loading time, especially if you save or update many options. Most of the time, PHP code executes fast, but SQL queries usually hinder performance, so save them whenever possible.
To fetch an option value from the database, use the function get_option():
<?php
$myplugin_color = get_option( 'boj_myplugin_color' );
?>
The first thing to know about get_option() is that if the option does not exist, it will return false. The second thing is that if you store Booleans, you might get integers in return.
As an illustration of this behavior, consider the following code block that creates a couple of new options with various variable types:
<?php
update_option( 'test_bool_true',  true );
update_option( 'test_bool_false', false );
?>
You can now retrieve these options, along with another one that does not exist, and see what variable types are returned, shown as an inline comment below each get_option() call:
<?php
var_dump( get_option( 'nonexistent_option' ) );
// bool(false)

var_dump( get_option( 'test_bool_true' ) );
// string(1) "1"

var_dump( get_option( 'test_bool_false' ) );
// bool(false)
?>
To avoid an error when checking option values, you should store true and false as 1 and 0. This means also that you need to strictly compare the return of get_option() with Boolean false to check if the option exists:
<?php
if( get_option( 'boj_myplugin_someoption' ) === false ) {
    // option has not been defined yet
    // ...
} else {
// option exists
// ...
}
?>You can also specify what value you want to be returned if the option is not found in the database, with a second option parameter to get_option(), like in the following example:
<?php
$option = get_option( 'boj_myplugin_option', 'option not found' );
?>
You have seen that saving multiple options in a single array is best practice. A complete example of saving and then getting values from one array would be as follows:
<?php
// To store all of them in a single function call:
$myplugin_options = array(
    'color'    => 'red',
    'fontsize' => '120%',
    'border'   => '2px solid red'
);
update_option( 'boj_myplugin_options', $myplugin_options ) ;

// Now to fetch individual values from one single call:
$options  = get_option( 'boj_myplugin_options' );
$color    = $options[ 'color' ];
$fontsize = $options[ 'fontsize' ];
$border   = $options[ 'border' ];
?>
Saving and retrieving options enclosed in an array has another advantage: Variable Boolean types within the array are preserved. Consider the following example:
<?php
add_option( 'test_bool', array(
    'booltrue'  => true,
    'boolfalse' => false
    )
);
?>
Now get the option value from the database with var_dump( get_option( 'test_bool' ) ). See how Boolean types are retained, contrary to the previous example:
// output result of var_dump(get_option('test_bool'))
array(2) {
  ["booltrue"] => bool(true)
  ["boolfalse"]=> bool(false)
}
Deleting an option needs a self-explanatory function call:
<?php
delete_option( 'boj_myplugin_options' );
?>
This function call returns false if the option to delete cannot be found and returns true otherwise. You will mostly delete options when writing uninstall functions or files (see Chapter 2).
By default, all the options stored in the database are fetched by a single SQL query when WordPress initializes and then caches. This applies to internal WordPress core settings and options created and stored by plugins.
This is efficient behavior: No matter how many get_option() calls you issue in your plugins, they won't generate extra SQL queries and slow down the whole site. Still, the potential drawback of this autoload technique is that rarely used options are always loaded in memory, even when not needed. For instance, there is no point in fetching backend options when a reader accesses a blog post.
To address this issue when saving an option for the first time, you can specify its autoload behavior, as in the following example:
<?php
add_option( 'boj_myplugin_option', $value, '', $autoload );
?>
Note the empty third parameter: This is a parameter that was deprecated several WordPress versions ago and is not needed any more. Any value passed to it will do; just be sure not to omit it.
The fourth parameter is what matters here. If $autoload is anything but 'no' (or simply not specified), option boj_myplugin_option will be read when WordPress starts, and subsequent get_option() function calls will not issue any supplemental SQL query. Setting $autoload to 'no' can invert this: This option will not be fetched during startup of WordPress, saving memory and execution time, but it will trigger an extra SQL query the first time your code fetches its value.
Note
If you want to specify the autoload parameter, you need to use add_option() instead of update_option() when creating an option the first time. If you don't need this parameter, always using update_option() to both create and update will make your code more simple and consistent.
Of course, specifying the autoload parameter upon creation of an option does not change the way you fetch, update, or delete its value.
A function to initiate your plugin options, run on plugin activation as covered in Chapter 2, could then look like the following:
<?php
function boj_myplugin_create_options() {
    // front-end options: autoloaded
    add_option( 'boj_myplugin_options', array(
        'color'    => 'red',
        'fontsize' => '120%',
        'border'   => '2px solid red'
    );

    // back-end options: loaded only if explicitly needed
    add_option( 'boj_myplugin_admin_options', array(
        'version'    => '1.0',
        'donate_url' => 'http://x.y/z/',
        'advanced_options' => '1'
    ), '', 'no' );
}
?>
Again, don't forget the empty third parameter before the autoload value. This might seem a bit convoluted, and actually it is for so few options set. This professional technique makes sense if your plugin features dozens of options, or options containing long text strings.
Note
As a rule of thumb, if your options are needed by the public part of the blog, save them with autoload. If they are only needed in the admin area, save them without autoload.
The autoload parameter is set when an option is created with add_option() and is not supposed to change afterward. With this said, if you believe that it would improve your plugin's efficiency to modify the autoload behavior, it is possible and easy: simply delete and then re-create the option with an explicit autoload parameter:
<?php
function boj_myplugin_recreate_options() {
    // get old value
    $old = get_option( 'boj_myplugin_admin_options' );

    // delete then recreate without autoload
    delete_option( 'boj_myplugin_admin_options' );
    add_option( 'boj_myplugin_admin_options', $old, '', 'no' );
}
?>Options can be internally created and updated by your plugin (for instance, storing the timestamp of the next iteration of a procedure). But they are also frequently used to store settings the end user will modify through your plugin administration page.
When creating or updating user-defined options for a plugin, relying on the Settings API can make your code both simpler and more efficient.
Dealing with user inputs introduces new constraints in the option process: You need to design a user interface, monitor form submissions, handle security checks, and validate user inputs. To easily manage these common tasks, WordPress wraps the option functions into a comprehensive Settings API.
The Settings API enables you to handle the simple tasks:
Tell WordPress that you are going to use some new options and how you want them displayed.
Specify a function that will sanitize user inputs.
... and let WordPress transparently manage for you the cumbersome and repetitive parts:
Draw most of the option page itself.
Monitor form submission and handle
$_POSTdata.Create and update options if needed.
Wield all the required security measures and hidden fields for nonces, as covered in Chapter 6.
Now dissect the Settings API: you learn to use it through a step-by-step example.
The Settings API functions consist of three steps:
First tell WordPress the new settings you want it to manage for you. Doing so adds your settings into a list of authorized options (also known as whitelisting).
Next define the settings (text areas, input boxes, and any HTML form element) and how they will be visually grouped together in sections.
Tell WordPress to display your settings in an actual form.
But first, you create a setting management page for your plugin.
The plugin page will be located at /wp-admin/options-general.php?page=boj_myplugin:
<?php
// Add the admin options page
add_action('admin_menu', 'boj_myplugin_add_page');
function boj_myplugin_add_page() {
add_options_page( 'My Plugin', 'My Plugin', 'manage_options',
'boj_myplugin', 'boj_myplugin_options_page' );
}
// Draw the options page
function boj_myplugin_options_page() {
?>
<div class="wrap">
<?php screen_icon(); ?>
<h2>My plugin</h2>
<form action="options.php" method="post">
</form></div>
<?php
}
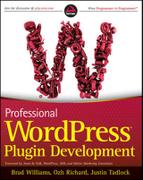
?>This page is empty for now (see Figure 7-1). You will add form inputs later.
Creating pages for plugins is covered in detail in Chapter 4, "Integrating in WordPress," so refer to it for more explanation about this code.
The function you need here is register_setting() and three parameters, used as follows:
<?php
register_setting(
    'boj_myplugin_options',
    'boj_myplugin_options',
    'boj_myplugin_validate_options'
);
?>
The first parameter is the setting group name, and the second parameter is the option name as you would use it in a get_option() call. The group name can be anything actually, but it's just simpler to name it the same as the option that will get stored in the database.
The third parameter is an optional function callback: It's a string that references a function, here named boj_myplugin_validate_options(), that will be passed all the settings saved in your form. You define this function later.
Now define what the settings will be more precisely by using the function add_settings_field() and how they will be visually grouped with the function add_settings_section():
<?php
add_settings_section(
    'boj_myplugin_main',
    'My Plugin Settings',
    'boj_myplugin_section_text',
    'boj_myplugin'
);

add_settings_field(
    'boj_myplugin_text_string',
    'Enter text here',
    'boj_myplugin_setting_input',
    'boj_myplugin',
    'boj_myplugin_main'
);
?>
The first function call, add_settings_section(), defines how the section on the page will show. The four required parameters it uses follow:
An HTML ID tag for the section
The section title text that will show within an
<H3>tagThe name of the callback function that will echo some explanations about that section
The settings page on which to show the section (that is, the
?page=boj_mypluginpart of the page URL)
The second function call, add_settings_field(), describes how to add the form input. Its five required parameters follow:
An HTML ID tag for the section
The text printed next to the field
The name of the callback function that will echo the form field
The settings page on which to show the section
The section of the settings page in which to show the field, as defined previously by the
add_settings_section()function call
You now need to define two simple callback functions: One to display a few explanations about the section and one to output and fill the form field.
<?php
// Explanations about this section
function boj_myplugin_section_text() {
    echo '<p>Enter your settings here.</p>';
}

// Display and fill the form field
function boj_myplugin_setting_input() {
    // get option 'text_string' value from the database
    $options = get_option( 'boj_myplugin_options' );
    $text_string = $options['text_string'];
    // echo the field
    echo "<input id='text_string' name='boj_myplugin_options[text_string]'
        type='text' value='{$options['text_string']}' />";
}
?>
This second function call fetches the option value 'text_string' that is stored in an array.
When outputting the HTML input field, note its name. This is how you tell the browser to pass this value back into an array with the same name as the option you'll save, as defined earlier in the register_setting() function call. Any field that has not been previously registered and whitelisted will be ignored by WordPress.
There is still one callback function to define: boj_myplugin_validate_options(), as mentioned at the beginning when registering the settings.
In this example, users are asked to enter text, so your validation function simply makes sure that the input contains only letters:
<?php
function boj_myplugin_validate_options( $input ) {
    $valid = array();
    $valid['text_string'] = preg_replace(
        '/[^a-zA-Z]/',
        '',
        $input['text_string'] );
    return $valid;
}?>
To validate the user input as letters only, a simple pattern matching (also known as regular expression) that strips all other characters is used here.
This function is passed the $_POST data as a parameter. For enhanced security, start creating a new empty array named $valid and collect in this array only the values you are expecting. This way, if for some reason an unanticipated field is submitted in the form, your function not only validates the information you want but also blocks everything else. Refer to Chapter 6 for more tips and functions about data validation.
Now that you have defined these function calls, it's time to use them. At the beginning of this step-by-step example, you created an empty page: Go back to that and add the form fields and a Submit button:
<?php
// Draw the options page
function boj_myplugin_options_page() {
    ?>

    <div class="wrap">
    <?php screen_icon(); ?>
    <h2>My plugin</h2>
    <form action="options.php" method="post">

    <?php
    settings_fields('boj_myplugin_options');
    do_settings_sections('boj_myplugin');
    ?>

    <input name="Submit" type="submit" value="Save Changes" />
    </form></div>

    <?php
}?>
The settings_fields() function call references the whitelisted option you have declared with register_setting(). It takes care of the hidden fields, security checks, and form redirection after it has been submitted.
The second function call, do_settings_sections(), outputs all the sections and form fields you have previously defined.
Notice how little HTML you have laid down, and yet the plugin page is now complete and functional. This is a major reason this Settings API is rock solid: You focus on features and let WordPress create all the HTML with relevant tags and classes, handle the data submission, and escape strings before inserting them to the database.
Note
Designing plugin pages using the Settings API is future-proof: Imagine that you are creating a plugin for a client on a particular version of WordPress. Later, when the administration interface of WordPress changes (different layout, colors, HTML classes), your plugin will still seamlessly integrate because you did not hardcode any HTML in it.
Some of the function calls used here need to be hooked into WordPress actions such as 'admin_init'. Now recapitulate all the steps covered bit by bit into a full-fledged plugin.
<?php
/*
Plugin Name: Settings API example
Plugin URI: http://example.com/
Description: A complete and practical example of use of the Settings API
Author: WROX
Author URI: http://wrox.com
*/

// Add a menu for our option page
add_action('admin_menu', 'boj_myplugin_add_page');
function boj_myplugin_add_page() {
    add_options_page( 'My Plugin', 'My Plugin', 'manage_options',
        'boj_myplugin', 'boj_myplugin_option_page'
    );
}

// Draw the option page
function boj_myplugin_option_page() {
    ?>
    <div class="wrap">
    <?php screen_icon(); ?>
    <h2>My plugin</h2>
<form action="options.php" method="post">
<?php settings_fields('boj_myplugin_options'); ?>
<?php do_settings_sections('boj_myplugin'); ?>
<input name="Submit" type="submit" value="Save Changes" />
</form></div>
<?php
}
// Register and define the settings
add_action('admin_init', 'boj_myplugin_admin_init');
function boj_myplugin_admin_init(){
register_setting( 'boj_myplugin_options', 'boj_myplugin_options',
'boj_myplugin_validate_options' );
add_settings_section( 'boj_myplugin_main', 'My Plugin Settings',
'boj_myplugin_section_text', 'boj_myplugin' );
add_settings_field( 'boj_myplugin_text_string', 'Enter text here',
'boj_myplugin_setting_input', 'boj_myplugin', 'boj_myplugin_main' );
}
// Draw the section header
function boj_myplugin_section_text() {
echo '<p>Enter your settings here.</p>';
}
// Display and fill the form field
function boj_myplugin_setting_input() {
// get option 'text_string' value from the database
$options = get_option( 'boj_myplugin_options' );
$text_string = $options['text_string'];
// echo the field
echo "<input id='text_string' name='boj_myplugin_options[text_string]'
type='text' value='$text_string' />";
}
// Validate user input (we want text only)
function boj_myplugin_validate_options( $input ) {
$valid = array();
$valid['text_string'] = preg_replace(
'/[^a-zA-Z]/',
'',
$input['text_string'] );
return $valid;
}?>Code snippet plugin1-standalone-page.php
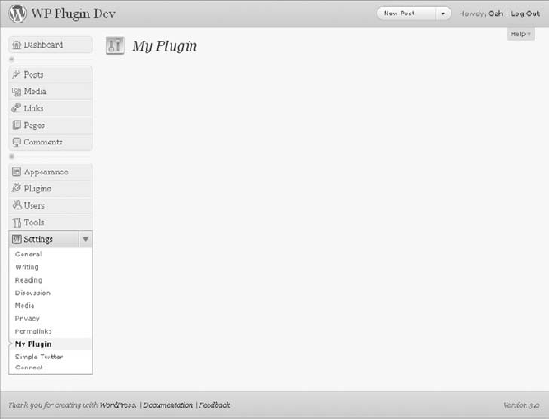
Activate this plugin and head to /wp-admin/options-general.php?page=boj_myplugin. You see a similar interface to the one shown in Figure 7-2.
The validation function you've previously defined could be slightly improved by letting the users know they have entered an unexpected value and that it has been modified so that they can pay attention to it and maybe amend their input.
The relatively unknown function add_settings_error() of the Settings API can handle this case. Here's how it is used:
<?php
add_settings_error(
   'boj_myplugin_text_string',
   'boj_myplugin_texterror',
   'Incorrect value entered!',
   'error'
);
?>
This function call registers an error message that displays to the user. The first parameter is the title of the setting to which this error applies. The second parameter is an HTML ID tag. Then comes the error message itself, which WordPress encloses in appropriate <div> and <p> tags. The last parameter is the HTML class and can be either 'error' or 'update'.
You can improve the validating function with a user notice if applicable:
<?php
function boj_myplugin_validate_options( $input ) {
    $valid['text_string'] = preg_replace(
'/[^a-zA-Z]/',
'',
$input['text_string'] );
if( $valid['text_string'] != $input['text_string'] ) {
add_settings_error(
'boj_myplugin_text_string',
'boj_myplugin_texterror',
'Incorrect value entered!',
'error'
);
}
return $valid;
}
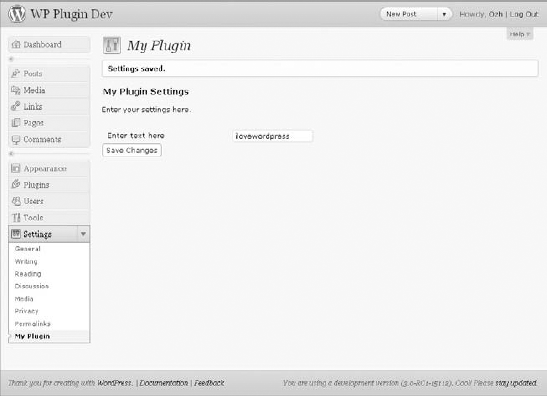
?>The function now compares the validated data with the original input and displays an error message if they differ (see Figure 7-3).
You have seen how to create a complete settings page for a plugin and its associated entry in the administration menus. Doing so makes sense if your plugin features a lot of settings and its administration page shows a lot of content.
Sometimes though, it is not worth adding a new menu entry for just one or a few plugin options. Here again the Settings API will prove to be useful, allowing plugin setting fields to easily be added to the existing WordPress setting pages.
Two internal functions, do_settings_sections() and do_settings_fields(), are triggered to draw sections and fields that have been previously registered, like you did in the example plugin.
Each core setting page calls these two functions, so you can hook into them if you know their slug name.
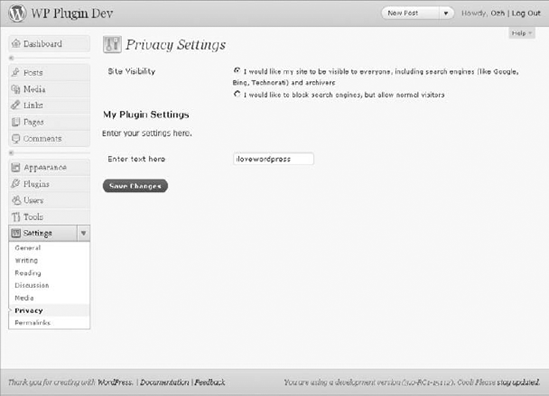
Your previous plugin was adding a whole new section and its input field on a standalone page: You now modify it to insert this content into WordPress' Privacy Settings page.
<?php
function boj_myplugin_admin_init(){
    register_setting(
        'privacy',
        'boj_myplugin_options',
'boj_myplugin_validate_options'
);
add_settings_section(
'boj_myplugin_options',
'My Plugin Settings',
'boj_myplugin_section_text',
'privacy'
);
add_settings_field(
'boj_myplugin_text_string',
'Enter text here',
'boj_myplugin_setting_input',
'privacy',
'boj_myplugin_options'
);
}?>This function now adds your custom section into the 'privacy' section, which is located within the Privacy Settings page, as shown in Figure 7-4. Replace all 'privacy' instances with 'media', and your section will be appended at the end of the Media Settings page.
You still need to whitelist this setting, with register_setting(). Omitting this step would make WordPress ignore the setting when submitting the form.
Of course, it can even make sense to add just one field and no section header to an existing page. Now modify the function in the previous example:
<?php
function boj_myplugin_admin_init(){
    register_setting(
        'privacy',
        'boj_myplugin_options',
        'boj_myplugin_validate_options'
    );

    add_settings_field(
        'boj_myplugin_text_string',
        'Enter text here',
        'boj_myplugin_setting_input',
        'privacy',
        'default'
    );
}?>
Code snippet plugin2-add-to-page.php
Your singular field will be added to the 'default' field set of the 'privacy' section, as seen in Figure 7-5.

To add a section to an existing page or a field to an existing section, all you need to know is the slug name of the page. Table 7-1 includes every section and field set names found in WordPress 3.0's Settings pages.
Table 7.1. List of Core Sections and Fields
WORDPRESS' SETTINGS PAGES | SECTION NAMES | FIELD SET NAMES |
|---|---|---|
General Settings( |
|
|
Writing Settings( |
|
|
Reading Settings( |
|
|
Discussion Settings( |
|
|
Media Settings( |
|
|
Privacy Settings( |
|
|
Permalink Settings( |
|
|
Electing to add your plugin settings to a separate page or to a core WordPress page is often a matter of choosing the right user interface for the right end user.
When working on a site for a client, you may focus on delivering a key-in-hand CMS solution and not on explaining what is WordPress and what is a plugin extending its features. Adding your plugin settings to a core Settings page can enhance its integration into WordPress' backend because it won't appear different from other core settings. From the client's point of view, your plugin is a core element just as any other built-in feature.
On the contrary, if you intend to make your plugin available for download, you can target people who probably understand the concept of adding new features to a core set. These people will naturally search for a custom menu where they can manage your plugin. If you opt for adding fields to an existing page, be sure to explicitly tell users about it, for instance in the plugin documentation.
You sometimes need to store volatile values in the database. For instance, picture a plugin that would retrieve the name of the song currently on air from an online radio site. In essence, such data has a short life span because it usually changes every three or four minutes.
To be efficient and avoid polling the online radio too often, your plugin could then fetch the song title and keep it for at least three minutes before checking for a fresher value.
The Transients API offers a simple way to temporarily store cached data in the database. It is similar to the Options API, with the added attribute of an expiration time after which the option will be considered expired and deleted.
The Transients API uses three functions: set_transient(), get_transient(), and delete_transient(). In the following sections you learn how to use them.
Imagine that your plugin has determined the current song on the online radio to be "I Heart WordPress" by the famous fictional band WROX Hackers. You are going to save this information, stating that it will be valid for 3 minutes:
<?php
set_transient( 'boj_myplugin_song', 'I Heart WordPress', 180 );
?>
As you can see, the analogy with add_option() is obvious: first a transient name and then its value. The novelty here is a number of seconds as a third parameter, which indicates the duration of the transient validity.
On every page request, your plugin would now get this transient value:
<?php
$song = get_transient( 'boj_myplugin_song' );
?>
The behavior of function get_transient() is as follows:
If the transient exists and is still valid, return its value.
If the transient has expired or has never been set before, return Boolean
false.
To manually delete a transient, use function delete_transient():
<?php
delete_transient( 'boj_myplugin_song' );
?>
This function returns true if successful, false otherwise, for the instance when the transient cannot be found in the database.
Using transients does not clutter the database because expired ones are automatically deleted when you attempt to get their value. Typically, you will not have to use this function, except during an uninstall procedure.
Now see what your plugin would look like.
<?php

// Fetches from an online radio a song title currently on air
function boj_myplugin_fetch_song_title_from_radio() {
    // ... code to fetch data from the remote website
    return $title;
}

// Get song title from database, using a 3 minute transient, and return it
function boj_myplugin_get_song_title() {
    // Get transient value
    $title = get_transient( 'boj_myplugin_song' );

    // If the transient does not exists or has expired, refresh it
    if( false === $title ) {
        $title = boj_myplugin_fetch_song_title_from_radio();
        set_transient( 'boj_myplugin_song', $title, 180 );
    }

    return $title;
}?>
Code snippet plugin3-transients.php
The boj_myplugin_fetch_song_title_from_radio() function would do the following:
Fetch data from the remote radio website
Parse this data to extract the current song title
Return this song title
Such tasks are beyond the scope of this chapter, but you learn how to do them in Chapter 9, which deals with HTTP requests.
Function boj_myplugin_get_song_title() is a complete example of how to use transient functions: Get a transient, and if it's false then refresh its value and restore it.
Due to their volatile nature, transients benefit from caching plugins, where normal options don't. For example, on server setups using memcached (a memory caching system) and a memcached plugin, WordPress stores transient values in fast memory instead of in the database. For this reason, never assume transients live in the database because they may not be stored there at all.
Any time you want to store data with a short time to live, you should probably use the transients. Following are a few examples of tasks or plugin features that would be a perfect application of the Transient API:
A corporate blog where the clients want to display the current value of their share price
Current number of Facebook friends
Last tweet from a Twitter account
Latest article fetched from an RSS feed
The plugins give WordPress users more control over their site with more options. Usually, a plugin adds a page under the Settings menu where you can modify the options and tweak how WordPress works.
There are situations in which such a feature implementation (that is, affecting the way an entire WordPress setup operate) is not ideal. In a single site with multiple users for instance, you might want to allow per-user settings instead of global options.
Imagine your newest client being a corporation with both English and Spanish employees. Your job, while working on its corporate intranet CMS (based on WordPress, of course), is to allow employees to select the language in which the interface of WordPress' backend will display.
As per your naming conventions, you can name this plugin BOJ's Admin Lang and use boj_adminlang as a prefix. While learning how to use functions needed to save and get per-user settings, you can build this plugin.
Data about users are kept in two places in WordPress' database:
Core information primarily used by the login process (name, email address, date of registration, and password) is stored in table
wp_users.Meta information, that is, the other data about the user (bio, contact info, Visual Editor preference and so on) resides in table
wp_usermeta.
The user metadata table has been designed to store anything related to a user and to be easily extensible. To do so, a set of functions enables easy access to these records: add_user_meta(), update_user_meta(), get_user_meta(), and delete_user_meta().
These four functions are similar to the ones from the Options API, with an interesting twist: They enable duplicate data.
The function call to save user metadata has the following syntax:
<?php
add_user_meta( $user_id, $meta_key, $meta_value, $unique );
?>
Its parameters follow:
$user_id— In user tables, users are identified by an integer, their user ID. You'll see later how to get a user's ID.$meta_keyand$meta_value— The pair of metadata name and value, like in previous functions covered such asadd_option().$unique— Optional, a Boolean. Iftrue, you cannot add a given user several metadata with the same name. Its default value isfalse, meaning that if you don't specify it, you implicitly allow duplicate meta keys. For code clarity, it's recommended that you don't omit this parameter.
The various option types previously covered have to be unique, but several metadata for a given user can have the same key. This can make sense to store, for instance, multiple book titles a user would own:
<?php
add_user_meta( 3, 'books', 'Professional WordPress', false);
add_user_meta( 3, 'books', 'I Love WP', false);
?>
Depending on the context, it also can make sense to state that a particular metadata key needs to be unique. Back to BOJ's Admin Lang: Storing a user's choice for an interface language is an example of a setting that cannot have multiple values:
<?php
add_user_meta( 3, 'boj_adminlang_lang', 'es_ES', true );
?>
This says that user #3 will want the interface to be translated using locale es_ES (see Chapter 5, "Internationalization," for more details on locales).
The syntax of function update_user_meta() follows:
<?php
update_user_meta( $user_id, $meta_key, $meta_value, $prev_value );
?>
The first three parameters are obvious by now. The fourth parameter, if specified, states which metadata key should be updated. If omitted, all the user's metadata with this $meta_key will be updated.
In a previous example, you have saved two book titles for user #3. Now update the second title to replace WP with WordPress:
<?php
update_user_meta( 3, 'books', 'I Love WordPress', 'I Love WP' );
?>
Omitting the fourth parameter would have updated all the book titles. Back to your polyglot plugin: Because this metadata key is unique, you don't need to pass a fourth parameter. Now set user #3's interface language to empty:
<?php
update_user_meta( 3, 'boj_adminlang_lang', '' );
?>
Prior to displaying WordPress' backend interface when a user loads it, your bilingual plugin can check if that particular user has a metadata stating a locale preference. Now see what user #3 prefers:
<?php
$lang = get_user_meta( 3, 'boj_adminlang_lang', true );
?>
The first and second parameters are the user ID and the metadata key. The third parameter is a bit less obvious: It's a Boolean stating whether you want the return value to be a single value (true) or an array (false).
Your dashboard language plugin stores unique metadata with the name boj_adminlang_lang, so you want that unique value as a string. To fetch the list of books from the previous example, set this third parameter to false to get the following array. (The results are shown as a comment below the function call.)
<?php
$book = get_user_meta( 3, 'books', false );
// array( 'Professional WordPress', 'I Love WordPress' );
?>
The last function you will learn to use is delete_user_meta(), which returns true if successful and false otherwise (for instance, when the metadata key could not be found in the database). Its syntax follows:
<?php
delete_user_meta( $user_id, $meta_key, $meta_value )
?>
You can match records based on key only, or on key and value, to deal with duplicate metadata keys. When you know the metadata key is unique, you can omit the third parameter:
<?php
delete_user_meta( 3, 'boj_adminlang_lang' );
?>
If the metadata key is not unique, as in the example with the book title, you can specify which record to delete or simply delete all records with that key:
<?php
// Delete one record:
delete_user_meta( 3, 'books', 'I Love WordPress' );

// Delete all records:
delete_user_meta( 3, 'books' );
?>
You have been reading about user IDs and have been using 3 in previous examples, but how do you get the current user ID?
Some actions and filters in WordPress pass the current user ID as an argument, as you see when you build your bilingual plugin from the ground up. If the current user ID is not known, use the following code:
<?php
$user = wp_get_current_user();
$userid = $user->ID;
?>
In this code, $user becomes an object containing all known data about the current user: login name, email, privileges in the admin area, Visual Editor preference, metadata, and so on. One of the properties of this object is ID, which is the integer you are looking for.
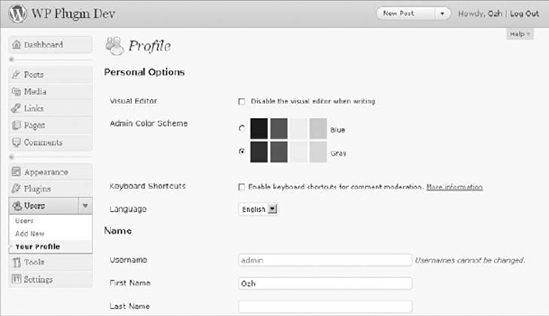
Because you are going to store per-user settings, it would not make sense to make a global plugin option page. Instead, you can add an input field to every user's Profile page. Profile pages trigger several actions to which you can hook if you want to add content to the page:
'personal_options'— Add content at the end of the "Personal Options" section.'profile_personal_options'— Append content after the "Personal Options" section.'show_user_profile'— Add content before the "Update Profile" button.
Now you can add a simple drop-down list from which to choose between English or Español in the "Personal Options" section:
<?php
// Add and fill an extra input field to user's profile
function boj_adminlang_display_field( $user ) {
    $userid = $user->ID;
    $lang = get_user_meta( $userid, 'boj_adminlang_lang', true );
    ?>

    <tr>
        <th scope="row">Language</th>
        <td>
        <select name="boj_adminlang_lang">
        <option value=""
            <?php selected( '', $lang); ?> >English</option>
        <option value="es_ES"
            <?php selected( 'es_ES', $lang); ?> >Spanish</option>
        </select>
        </td>
    </tr>

    <?php
}
// Trigger this function on 'personal_options' action
add_action( 'personal_options', 'boj_adminlang_display_field' );
?>
The action 'personal_options' passes to your custom function boj_adminlang_display_field() the user object. Your function gets the user ID, the language preference from the user's metadata, and then outputs the HTML that adds the select input field, as shown in Figure 7-6.
The input field uses WordPress' function selected() to automatically select the appropriate option, as per user choice if previously saved.
On profile pages, you need to monitor form submissions and verify if the user entered any custom metadata. To do so, you can rely on action 'personal_options_update' and check the $_POST data:
<?php
// Monitor form submits and update user's setting if applicable
function boj_adminlang_update_field( $userid ) {
    if( isset( $_POST['boj_adminlang_lang'] ) ) {
        $lang = $_POST['boj_adminlang_lang'] == 'es_ES' ? 'es_ES' : '';
        update_user_meta( $userid, 'boj_adminlang_lang', $lang );
    }
}
add_action( 'personal_options_update', 'boj_adminlang_update_field' );
?>
The plugin is now finished in its visible part: A custom field on every user's Profile page asks for and saves a preference setting.
Notice how you used a ternary operator for shorter code. The following single line:
<?php
$lang = $_POST['boj_adminlang_lang'] == 'es_ES' ? 'es_ES' : '';
?>
is equivalent to the longer structure:
<?php
if( $_POST['boj_adminlang_lang'] == 'es_ES' ) {
    $lang = 'es_ES';
} else {
    $lang = '';
}?>Now you just need to make sure the admin area is actually translated as the user wants. Whenever WordPress needs to know what language to use, its internal function get_locale() returns the locale, after applying a filter. From WordPress' source, file wp-includes/l10n.php:
<?php
return apply_filters( 'locale', $locale );
?>
What you need to do is hook into this filter and return the locale as stored in the user's metadata. The entire plugin, complete with this function and its header, will look like this:
<?php
/*
Plugin Name: Per User Setting example
Plugin URI: http://example.com/
Description: Allow choosing either English or Spanish in the admin area
Author: WROX
Author URI: http://wrox.com
*/

// Return user's locale
function boj_adminlang_set_user_locale() {
    $user = wp_get_current_user();
    $userid = $user->ID;
    $locale = get_user_meta( $userid, 'boj_adminlang_lang', true );
    return $locale;
}
// Trigger this function every time WP checks the locale value
add_filter( 'locale', 'boj_adminlang_set_user_locale' );

// Add and fill an extra input field to user's profile
function boj_adminlang_display_field( $user ) {
    $userid = $user->ID;
    $lang = get_user_meta( $userid, 'boj_adminlang_lang', true );
    ?>

    <tr>
    <th scope="row">Language</th>
        <td>
        <select name="boj_adminlang_lang">
        <option value=""
            <?php selected( '', $lang); ?> >English</option>
        <option value="es_ES"
            <?php selected( 'es_ES', $lang); ?> >Spanish</option>
        </select>
        </td>
    </tr>

    <?php
}
add_action( 'personal_options', 'boj_adminlang_display_field' );
// Monitor form submits and update user's setting if applicable
function boj_adminlang_update_field( $userid ) {
    if( isset( $_POST['boj_adminlang_lang'] ) ) {
        $lang = $_POST['boj_adminlang_lang'] == 'es_ES' ? 'es_ES' : '';
        update_user_meta( $userid, 'boj_adminlang_lang', $lang );
    }
}
add_action( 'personal_options_update', 'boj_adminlang_update_field' );
?>
Code snippet plugin4-per-user-option.php
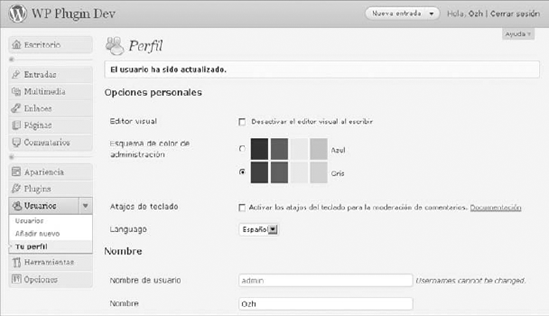
Now activate the plugin, pick the Spanish option and... ¡ole!, your blog now speaks Spanish, as shown in Figure 7-7.
Note
For this plugin to work, the WordPress installation needs to include the Spanish translation files you can get from http://es.wordpress.org/. Put the es_ES files in the directory wp-content/languages (which you might need to create first).
If you want a plugin to store per-user settings, make sure it includes the following attributes:
Visually well integrated into WordPress
Wisely implemented
Visual integration — Because you add content to Profile pages, such content must match the look and feel of the original WordPress interface. Use proper HTML and classes, as in the plugin example. More than ever your plugin settings will look like core settings because you won't create an extra administration page, so make it integrate impeccably.
Wise implementation — Sometimes it makes more sense to have a standalone plugin option page, or to add a few options to the WordPress Settings page, with global settings instead of per-user settings. Most WordPress blogs are single-user blogs, where people may not head to their Profile to check for new settings.
So far in this chapter, you have learned how to store and manage standard options, expiring options, and user metadata. WordPress comes with a number of database tables, and in most cases anything you want to store can fit perfectly in these tables. Still, there might be cases in which you need to create custom tables to save and get data from.
Following are two types of records you can store:
Setup information
Collected data
Setup information is typically plugin options: Users configure and save some settings the first time they install a plugin; they might modify these settings in the future, but the number of records won't grow. This is typically what needs to be stored in the Options table.
Collected data is information added as the users continue to use their blog. This data might be related to posts, comments, or any WordPress component. Data expanding over time might be appropriate candidates for a custom table.
WordPress installs 11 tables, and specifically tables that are more likely to store a lot of custom data; default names are as follows:
wp_posts— The site's contentwp_postmeta— Metadata about postswp_commentmeta— Comments metadatawp_usermeta— Metadata for userswp_options— Options
Not only can these tables store practically everything you need to store, but they all also have convenient API functions to save and get data. Try to make a connection between information you want to store and a metadata table.
Sometimes you need to think outside of the box to realize that a particular table will be just fine for your data. Consider for instance the wp_post table with stored custom menus, which at first you probably wouldn't have considered a particular post type.
This cannot be emphasized enough: In 99% of the cases, these tables will suffice, and most of the time you will store data in the options table.
Imagine a statistics plugin that can store the IP address and timestamp of every visitor on your blog. This plugin would need a custom table with three fields, as shown in Table 7-2.
Table 7.2. Data Set Structure and Type
HIT_ID | HIT_IP | HIT_DATE |
|---|---|---|
int(11) NOT NULL AUTO_INCREMENT | varchar(100) NOT NULL | datetime |
The SQL statement to create such a table structure follows:
CREATE TABLE 'wp_hits' (
    'hit_id' INT( 11 ) NOT NULL AUTO_INCREMENT,
    'chitin' VARCHAR( 100 ) NOT NULL ,
    'hit_date' DATETIME
);
You now can use a powerful built-in WordPress tool: function dbDelta(). This function is not loaded by default, so you need to manually include it in your plugin. Now create your custom table:
<?php
$tablename = $wpdb->prefix . "hits";

$sql = "CREATE TABLE '$tablename' (
    'hit_id' INT( 11 ) NOT NULL AUTO_INCREMENT,
    'hit_ip' VARCHAR( 100 ) NOT NULL ,
    'hit_date' DATETIME
);";

require_once(ABSPATH . 'wp-admin/includes/upgrade.php');

dbDelta($sql);
?>
What you have just done follows:
Got the database table prefix and used it to name your custom table.
Defined a SQL statement, one field per line.
Included the file that defines function
dbDelta().Ran this function.
Note
In wp-config.php a WordPress site owner can define a custom database table prefix, which is by default wp_. When you create a custom table, don't hardcode its full name, and always use the $wpdb->prefix.
Before creating a table, you might want to check its existence first. To do so, compare the result of SQL command SHOW TABLE with your actual table name:
<?php
$tablename = $wpdb->prefix . "hits";

if( $wpdb->get_var("SHOW TABLES LIKE '$tablename'") != $tablename ) {
    // table does not exist!
}
?>
The function dbDelta() includes a check for the table existence before attempting to create or update it. Doing this by yourself can make sense, for instance to determine if your plugin needs to include an otherwise unneeded file containing upgrade functions.
The power of function dbDelta() resides in its capability to update a table with the same syntax used to create it: It examines the current table structure if found, compares it to the desired table structure, and either adds or modifies the table as required.
This can make your code much easier to maintain: The install and the upgrade functions actually share this one function call.
Back to your statistics plugin: You can now add a fourth field to hold the WordPress post ID that has been visited. You can also improve the table structure with a primary key on first field hit_id.
Following is a complete create and upgrade function:
<?php
// Create / Update the custom table
function boj_hits_create_table() {
    global $wpdb;


    $tablename = $wpdb->prefix . "hits";

    $sql = "CREATE TABLE '$tablename' (
          'hit_id' int(11) NOT NULL AUTO_INCREMENT,
          'hit_ip' varchar(100) NOT NULL,
          'hit_date' datetime,
          'post_id' int(11) NOT NULL,
          PRIMARY KEY ('hit_id')
        );";

    require_once(ABSPATH . 'wp-admin/includes/upgrade.php');

    dbDelta($sql);
}?>
Note
Don't forget to bring in your function the $wpdb object from the global scope.
Function dbDelta() can be tricky to use. MySQL's tolerance for syntax errors or approximations is limited, and so is dbDelta(), which is basically a wrapper function. It takes a single space (missing or extra) to fail the function call and sometimes to fail silently.
dbDelta() is touchy and needs the SQL statement to be formatted with care:
Put each field on its own line in your SQL statement.
Use the key word KEY rather than its synonym INDEX.
Don't use extra spaces between MySQL keywords.
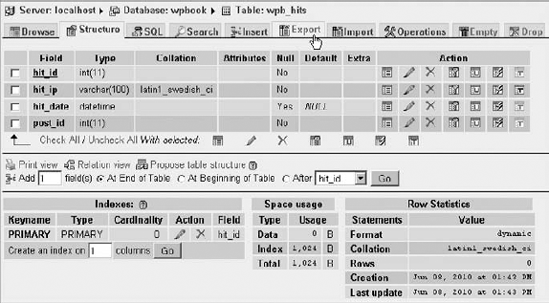
The simplest way to make sure your SQL statement is cleanly formatted is to design your table in a tool such as phpMyAdmin (see Chapter 18, "The Developer Toolbox") and then export your table structure, as shown in Figure 7-8. The SQL generated will generally be formatted and indented in a suitable way for dbDelta().
dbDelta() does not output any message in case of success or error, but it does return some valuable information about what it did.
You cannot make your plugin install function display debug information because that can trigger a fatal error and prevent your plugin from activating. Instead, it is easy to make a simple sandbox in which you can test your function and inspect dbDelta()'s results with print_r().
In the WordPress root directory of your test install, create an empty file named testsql.php and paste the following code:
<?php
require('./wp-load.php');
?>
<pre>
<?php
$wpdb->show_errors();

$tablename = $wpdb->prefix . "hits";

$sql = "CREATE TABLE '$tablename' (
    'hit_id' int(11) NOT NULL AUTO_INCREMENT,
    'hit_ip' varchar(100) NOT NULL,
    'hit_date' datetime,
    'post_id' int(11) NOT NULL,
    PRIMARY KEY ('hit_id')
);";
require_once(ABSPATH . 'wp-admin/includes/upgrade.php');

var_dump( dbDelta($sql) );

$wpdb->print_error();
?>
</pre>
This file loads the WordPress environment and then runs your install code. Point your browser to this file (its location would be, for instance, http://example.com/testsql.php) and you can see a result like the following:
Array
(
    ['wpb_hits'] => Created table 'wpb_hits'
)
If your SQL statement is incorrect, the resulting array would be empty. Note that you also explicitly turned error echoing on at the top of the file and printed the last SQL error, if any.
Function dbDelta() accepts two parameters: a mandatory SQL statement and an optional Boolean that can prevent the statement from actually executing if set to false:
<?php
// Execute statement and print execution result
var_dump( dbDelta( $sql ) );

// Test-run statement without executing it, and print result
var_dump( dbDelta( $sql, false ) );
?>
You will probably never use this optional parameter in a production situation (on a client's site or within a released plugin) but this can be an insightful debugging option in a sandbox as just shown.
Now that your custom table is created, you can access it using the global $wpdb object. The following code snippet shows standard SQL queries:
<?php

$tablename = $wpdb->prefix . "hits";

// Insert a record
$newdata = array(
    'hit_ip' => '127.0.0.1',
    'hit_date' => current_time( 'mysql' ),
    'post_id' => '123'
);
$wpdb->insert(
    $tablename,
    $newdata
);

// Update a record
$newdata = array( 'post_id' => '456' );
$where   = array( 'post_id' => '123', 'hit_id' => 1 );
$wpdb->update( $tablename, $newdata, $where );


?>
Refer to Chapter 6 to learn how to use the wpdb class in detail.
Saving data is a key part of writing plugins: It enables your plugin to be customized and personally set by your users, who will appreciate the ability to fine-tune new features. Using the functions described here, you can integrate your plugins seamlessly into WordPress with efficient, compact, and future-proof code.