First, we will use the Windows platform and download and install Visual Studio Community 2017 (https://www.visualstudio.com/downloads/). At the time of writing, this version is freely available with a 30-day trial period. The steps which we will follow are also nicely explained in this video: https://www.youtube.com/watch?v=_lKxJjV8r3Y.
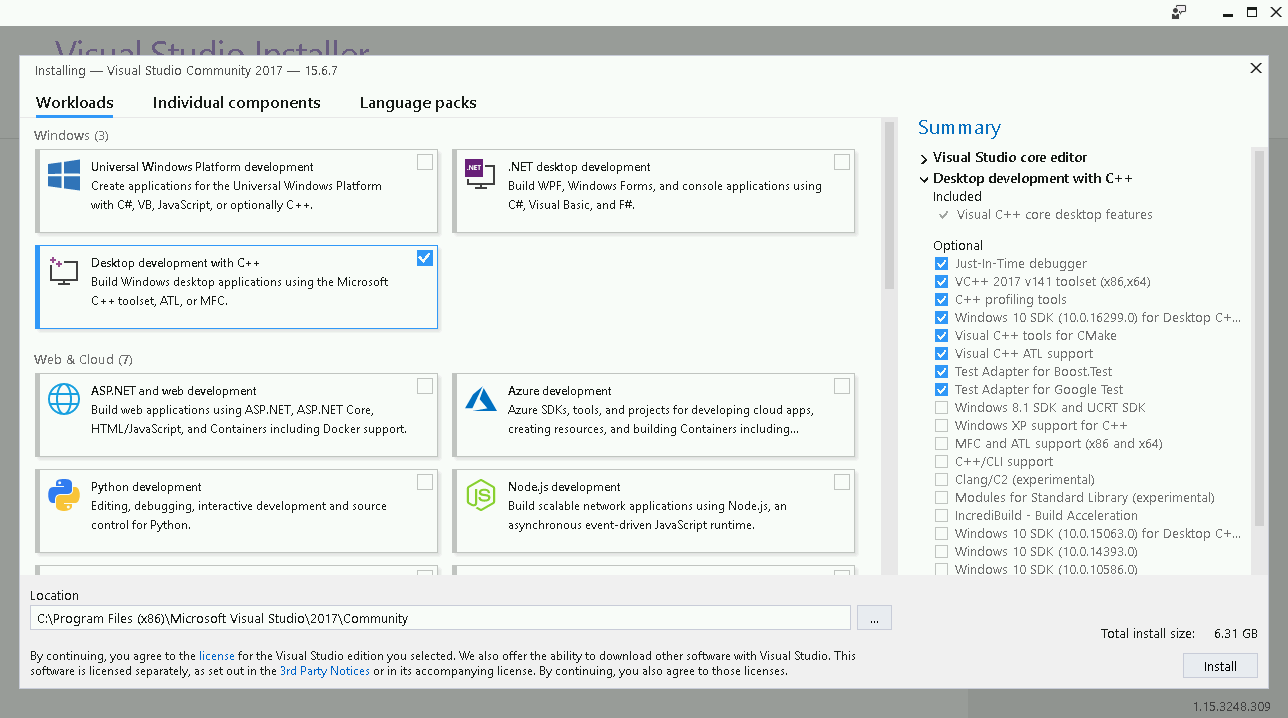
When running the installer, make sure to select Desktop development with C++ on the left panel and also verify that Visual C++ tools for CMake is checked on the Summary panel to the right:
In Visual Studio 2017 15.4, you can also build code for the Linux platform. For this, select Linux development with C++ under Other Toolsets:

With this option enabled, you can target both Windows and Linux machines from within Visual Studio provided you have configured access to a Linux server. However, we will not demonstrate this approach in this chapter.
In this recipe, we will build a Windows binary on Windows, and our goal will be to configure and build the following example code (hello-world.cpp):
#include <cstdlib>
#include <iostream>
#include <string>

const std::string cmake_system_name = SYSTEM_NAME;

int main() {
  std::cout << "Hello from " << cmake_system_name << std::endl;

  return EXIT_SUCCESS;
}