
It should now be clear that integrating all kinds of channels with built-in bot service support is feasible. The Bot Builder SDK designers were aware that not every single feature of every channel can be handled by the bot service and kept the SDK flexible to support extensibility.
The bot service supports quite a few channels, but what if our bot needs to support a channel like the Twitter Direct Messages API? What if we need to integrate with a live chat platform that integrates directly with Facebook Messenger and we cannot utilize the Bot Framework Facebook channel connector? The bot service includes support for SMS via Twilio, but what if we want to extend it to Twilio’s Voice APIs so we can literally talk to our bot?
All of this is possible via a facility offered by Microsoft called the Direct Line API. In this chapter, we will walk through what this is, how to build a custom web chat interface that communicates with our bot, and finally how to hook our bot into Twilio’s Voice APIs. By the end of the chapter, we will be calling a phone number, speaking to our bot, and listening to it respond to us!
The Direct Line API
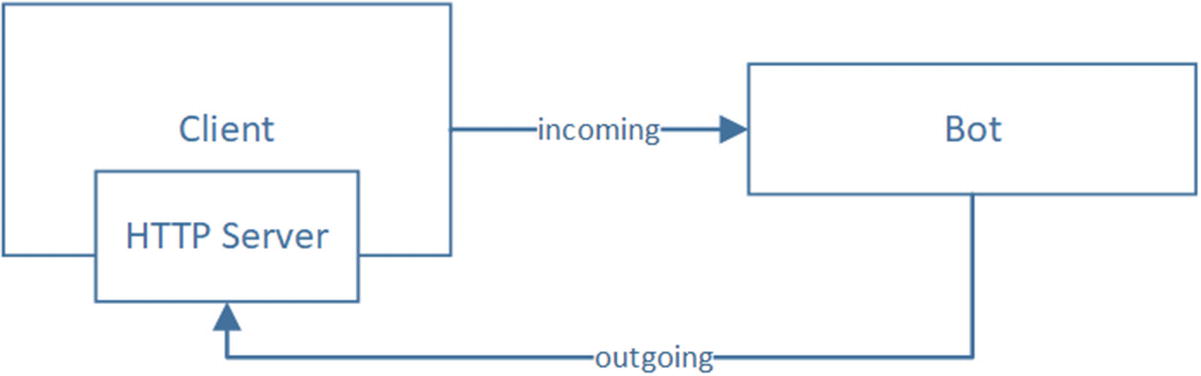
Interaction between a client application and an Bot Framework bot
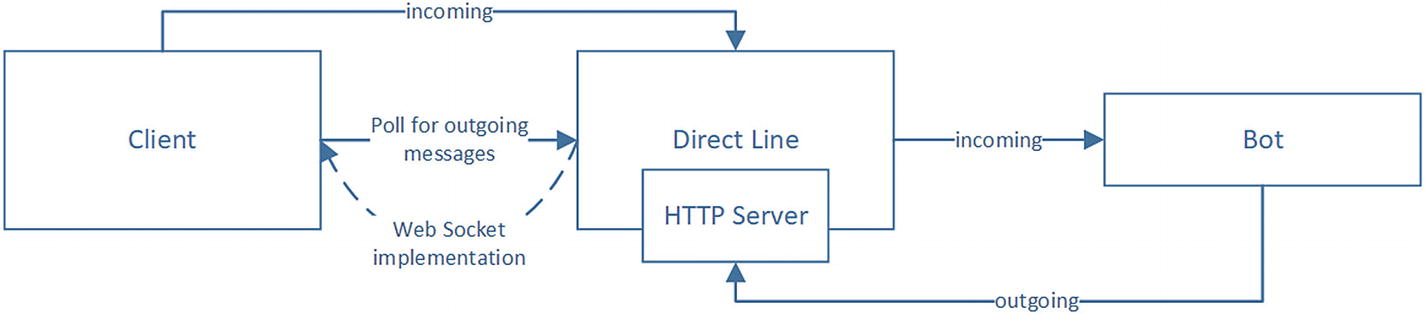
Direct Line obviating the need for the client to host an HTTP server
The Direct Line channel is also convenient because it handles bot authentication for us. We only need to pass a Direct Line key as the Bearer token into the Direct Line channel.
StartConversation: Begins a new conversation with the bot. The bot will receive the necessary messages to indicate that a new conversation is starting.
GetConversation: Gets details around an existing conversation including a streamUrl that the client can use to connect via WebSocket.
GetActivities: Gets all the activities exchanged between the bot and the user. This provides an optional ability to pass a watermark to only get activities after the watermark.
PostActivity: Sends a new activity from the user to the bot.
UploadFile: Uploads a file from the user to the bot.
The API also contains two authentication methods.
Generate token: POST /v3/directline/tokens/generate
Refresh token: POST /v3/directline/tokens/refresh
The Generate endpoint generates a token to be used for one and only one conversation. The response also includes an expires_in field. If there is a need to extend the timeline, the API provides the Refresh endpoint to refresh the token for another expires_in value at a time. At the time of this writing, the value of expires_in is 30 minutes.
Start Conversation: POST /v3/conversations
Get Conversation: GET /v3/conversations/{conversationId}?watermark={watermark}
GetActivities: GET /v3/conversations/{conversationId}/activities?watermark={watermark}
PostActivity: POST /v3/conversations/{conversationId}/activities
UploadFile: POST /v3/conversations/{conversationId}?userId={userId}
You can find more details about the Direct Line API in the online documentation.2
Custom Web Chat Interface
There are many Direct Line samples online; one in the context of a console node app can be found here: https://github.com/Microsoft/BotBuilder-Samples/tree/master/Node/core-DirectLine/DirectLineClient .
We’ll take this code as a template and create a custom web chat interface to discuss connecting to a bot from a client application. Although the Bot Builder SDK already includes a componentized version of a web chat,3 building it ourselves will be great experience with Direct Line.

The Direct Line channel icon
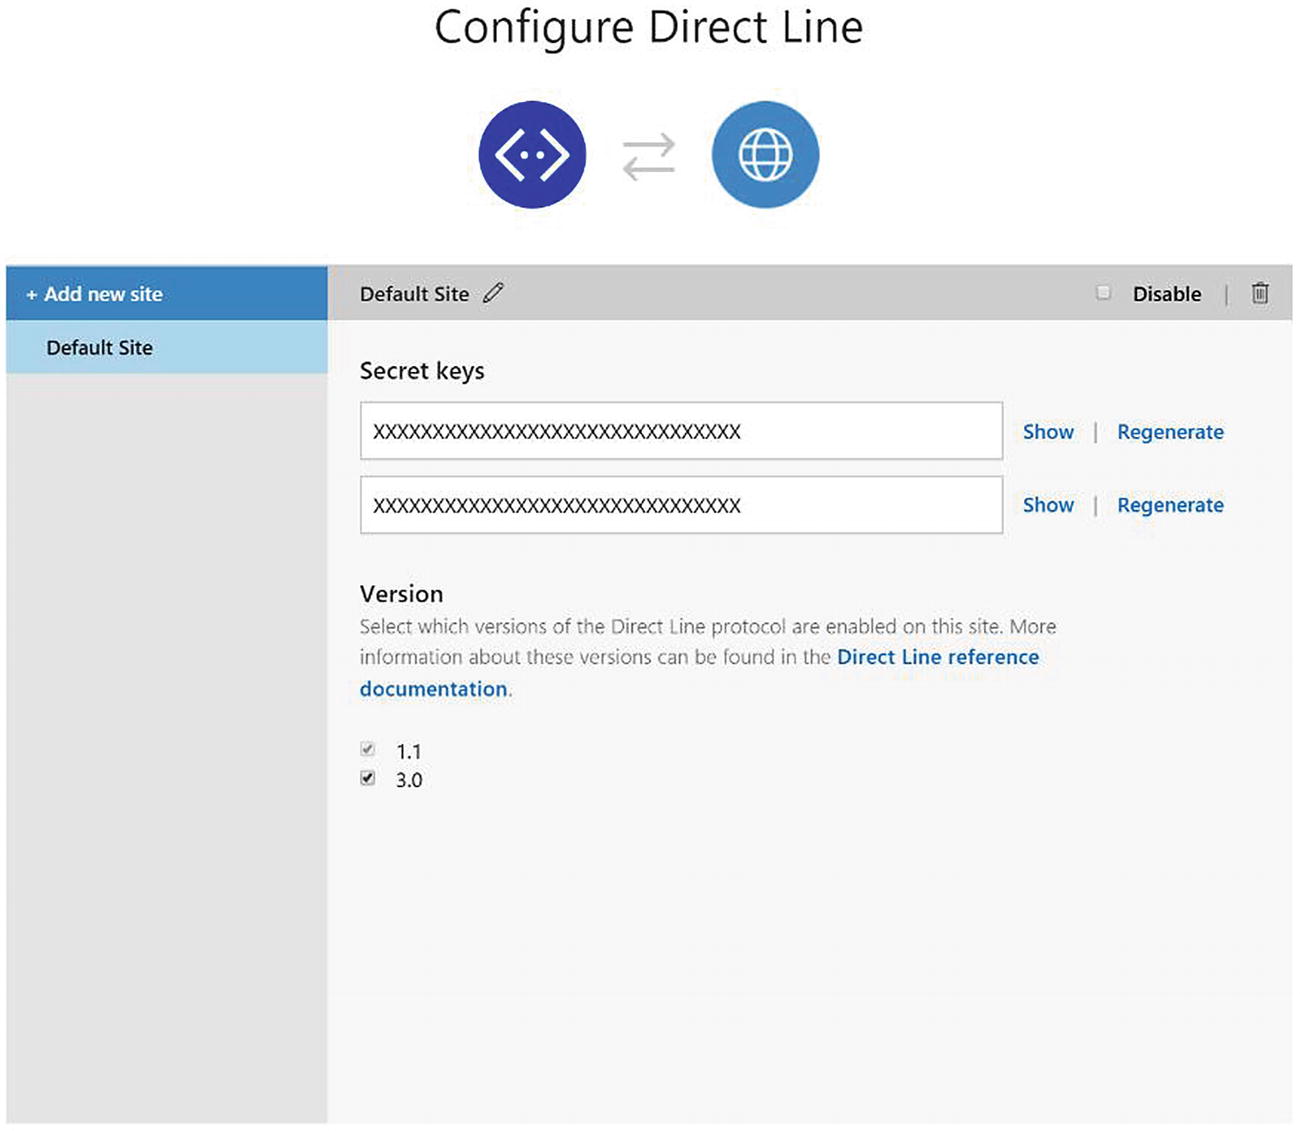
The Direct Line configuration interface
Now that we have the keys ready, we will create a node package that contains a bot and a simple jQuery-enabled web page to illustrate how to wire the bot together with a client app. The full code for the following work is included as part of our git repo.
We will create a basic bot that can respond to some simple input, so we will create an index.html page that hosts our web chat component. The bot’s .env file should include the MICROSOFT_APP_ID and MICROSOFT_APP_PASSWORD values as usual. We also add DL_KEY, which is the value of our shared Direct Line key from Figure 9-4. When the page opens, the code will fetch a token from the bot so that we do not expose the secret to the client. This requires implementing endpoints on our bot.
To get started, set up an empty bot with our typical dependencies. The basic conversation code is shown next. We support some silly things such as “hello,” “quit,” “meaning of life,” “where’s waldo,” and “apple.” If the input doesn’t match any of these, we default with the dismissive “oh, that’s cool.”
Second, we want to create a web chat page index.html page that includes jQuery and Bootstrap from a CDN.
Our index.html provides a simple user experience. We will have a chat client container with two elements: a chat history view that will render any messages between the user and the bot and a text entry box. We’ll assume that pressing the Return key sends the message. For the chat history, we will insert chat entry elements and use CSS and JavaScript to size and position the entry elements correctly. We will use the messaging paradigm of messages from the user being on the left and messages from the other party on the right.
The chat.css style sheet looks as follows:
Our client-side logic lives in chat.js. In this file, we declare a few functions to help us call the necessary Direct Line endpoints.
To support the getToken() and refreshToken() client-side functions, we expose two endpoints on the bot. /api/token generates a new token, and /api/token/refresh accepts a token as input and refreshes it, extending its lifetime.
When the page is loaded on the browser, we start a conversation, fetch a token for it, and listen for incoming messages.
Here is what sendMessagesFromInputBox looks like:
The code listens to a Return key press on the textbox. If the user input is not empty, it sends the message to the bot and adds the user’s message to the chat history. If the message to the bot fails for any reason, the user’s message is removed from the chat history. We also make sure that the chat history control scrolls to the bottom so the newest messages are visible. On the receiving end, we poll Direct Line for messages. Here is the supporting code:
Notice that Direct Line API returns all messages between the user and bot, so we must filter out anything sent by the user since we already appended those when the message was initially sent. Beyond that, we have custom logic to support image attachments.
We could extend that piece to support hero (we have a switch case for this in our code already, but we have not implemented a renderHeroCard function) or adaptive cards, audio attachments, or any other kind of custom rendering our application needs.
A quick note: since we are using the Direct Line API and a custom client application, we have the option of defining custom attachments. Thus, if our bot has a need of rendering some application user interface within the web chat, we could specify this rendering logic by using our own attachment. The code in buildBotEntry would simply know how to do so.
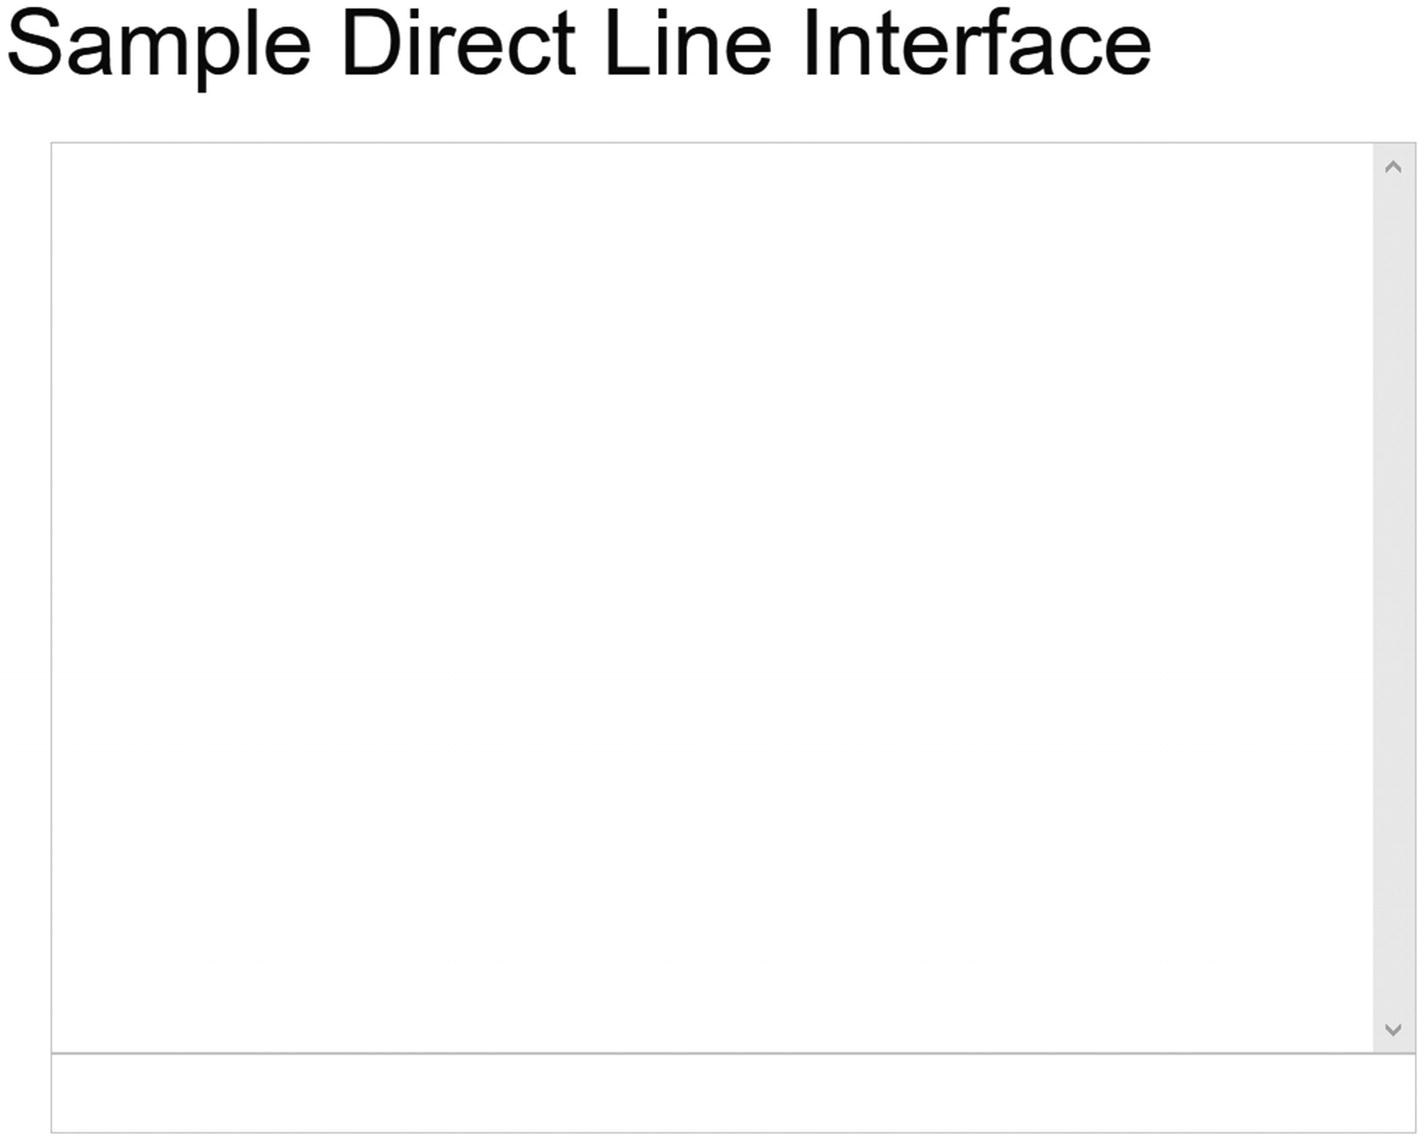
Plain empty chat interface
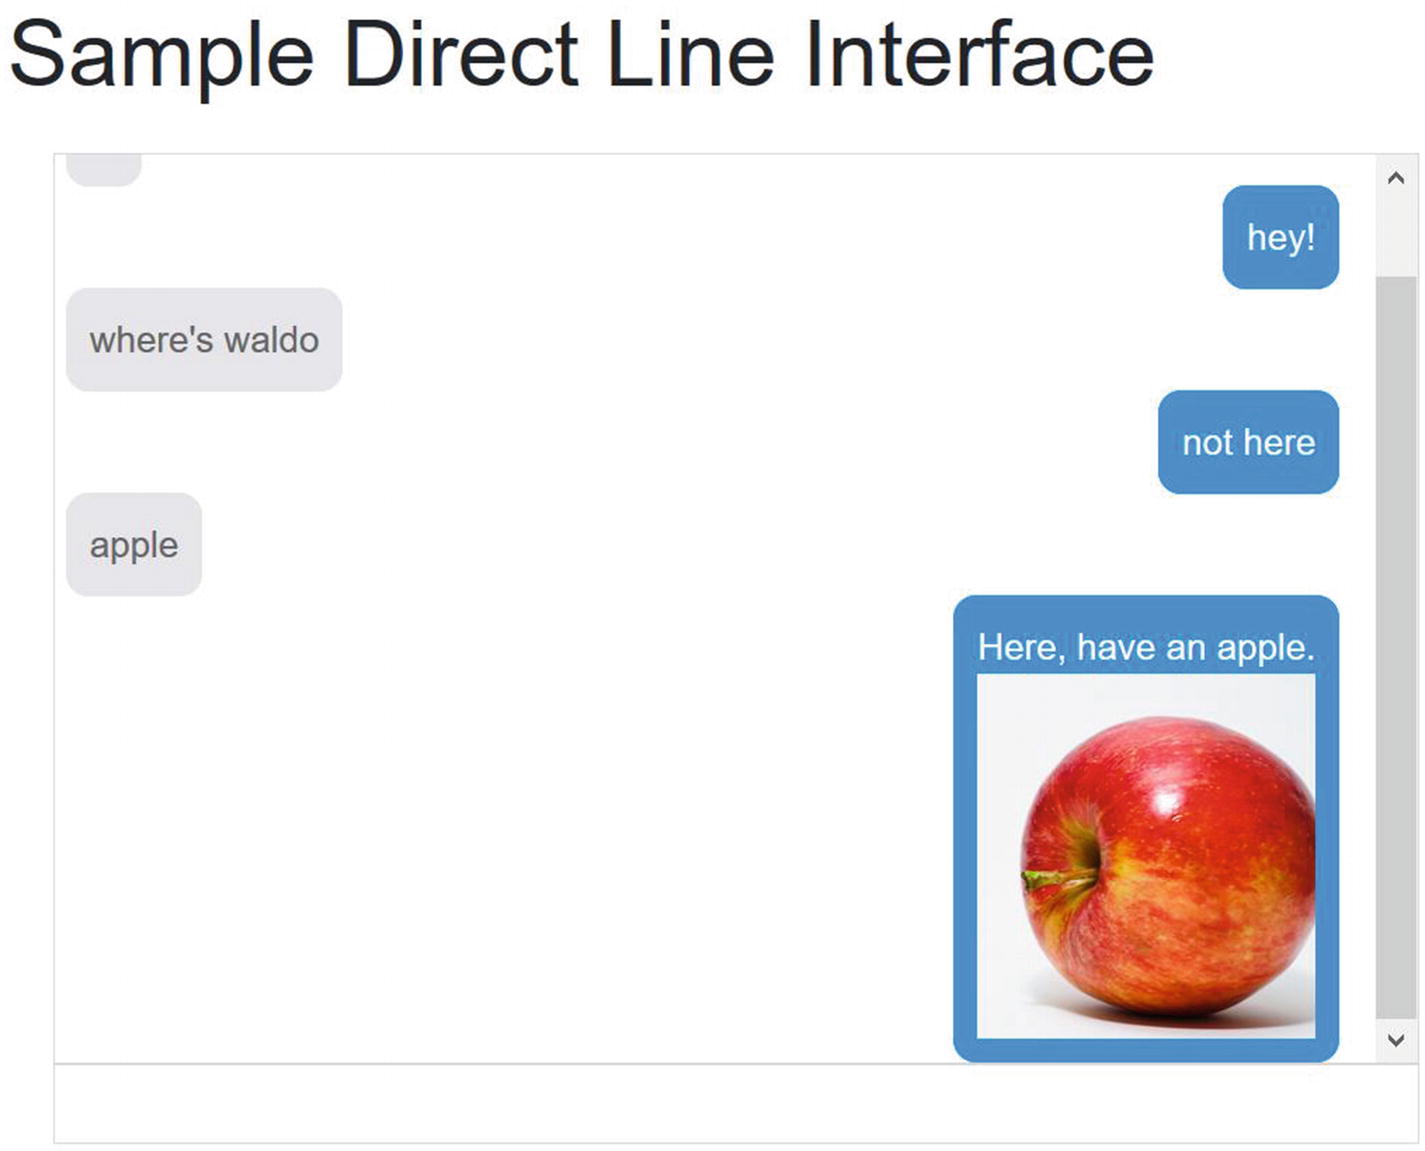
Oh, wait, there we go! That’s pretty cool
Exercise 9-1
Node Console Interface
- 1.
Create a simple bot that can respond to several user utterance options with text. Ensure the bot works as expected by using the emulator.
- 2.
Configure your bot to accept Direct Line input on the bot channel registration Channels blade.
- 3.
Write a node command-line app that listens to user's console input and sends the input to Direct Line when the user presses Return.
- 4.
For incoming messages, write the code to poll for messages and print them out on the screen. Poll every 1 to 2 seconds. Use the console app to send multiple messages to the bot and see how fast it responds.
- 5.
As a second exercise, write code that utilizes the streamUrl to initialize a new WebSocket connection. You can use the ws Node.js package, documented here: https://github.com/websockets/ws . Print incoming messages to the screen.
- 6.
How does the performance of the polling solution compare to the WebSocket option?
You are now well versed in integrating with the Direct Line API. If you are developing custom channel adapters, this is the place to start.
Voice Bots
OK, so we have a lot of flexibility with the Bot Framework. There is one more area around channels we planned to address, and that’s custom channel implementations. Say, for example, you are building a bot for a client, and everything is going well and on schedule. On a Friday afternoon, the client comes by and asks you, “Hey, Ms. Bot Developer, can a user call an 800 number to talk to our bot?”
Well, uh, sure I suppose anything is possible with enough time and money, but how do we get started? Something very similar happened to me once, and my initial reaction was “No way, this is crazy. There’s too many issues. Voice is not the same as chat.” Some of these reservations remain; reusing a bot between a messaging and voice channel is a tricky area that requires a lot of care because the two interfaces are quite different. Of course, that doesn’t mean we are not going to try!
As it turns out, Twilio is a solid and easy-to-use provider of voice calls and SMS APIs. Lucky for us, not too long ago, Twilio added speech recognition to its platform, and it can now translate a user’s voice into text. In the future, intent recognition will be integrated into the system. In the meantime, what is there now should be sufficient for our purposes. In fact, the Bot Framework is already integrated into SMS via Twilio; maybe one day we’ll have full voice support as well.
Twilio
Before we get jump into the bot code, let’s talk a bit about Twilio and how it works. One of Twilio’s products is called Programmable Voice. Any time a call comes into a registered phone number, a Twilio server will send a message to a developer-defined endpoint. The endpoint must respond informing Twilio the actions it should perform, for example, speak an utterance, dial another number into the call, gather data, pause, etc. Anytime an interaction occurs, such as Twilio gathering user input via speech recognition, Twilio calls into this endpoint to receive its instructions on what to do next. This is good for us. It means our code does not need to know anything about phone calls. It’s just APIs!
The way that we instruct Twilio what to do is via an XML markup language called TwiML.4 A sample is shown here:
Say: Speak text to the caller
Play: Play an audio file for the caller
Dial: Add another party to the call
Record: Record the caller’s voice
Gather: Collect digits the caller types on their keypad, or translate voice into text
SMS: Send an SMS message during a phone call
Hangup: Hang up the call
Enqueue: Add the caller to a queue of callers
Leave: Remove a caller from a queue of callers
Redirect: Redirect call flow to a different TwiML document
Pause: Wait before executing more instructions
Reject: Decline an incoming call without being billed
Message: Send an MMS or SMS message reply
Your TwiML response can have one or multiple verbs. Some verbs can be nested for specific behaviors on the system. If your TwiML document contains multiple verbs, Twilio will execute each verb one after another in sequential order. For example, we could create the following TwiML document:
This document will start by trying to gather user input. It will first prompt the user to enter their account number, followed by the pound sign. The nested behavior of Say within a Gather means that the user can speak their response before the Say speech content is done. This is a great feature for returning users. If the Gather verb results in no user input, Twilio proceeds to the next element, which is a Say element notifying the user that Twilio did not receive a response. At this point, since there are no more verbs, the phone call ends.
There are detailed documentation and samples for each verb, and as we would expect, a full-fledged TwiML application can get complex. As with all user interfaces, there are many details. For our purposes, we will create a basic integration so that we can talk to the same bot that we just created for our custom web chat.
Integrating Our Bot with Twilio
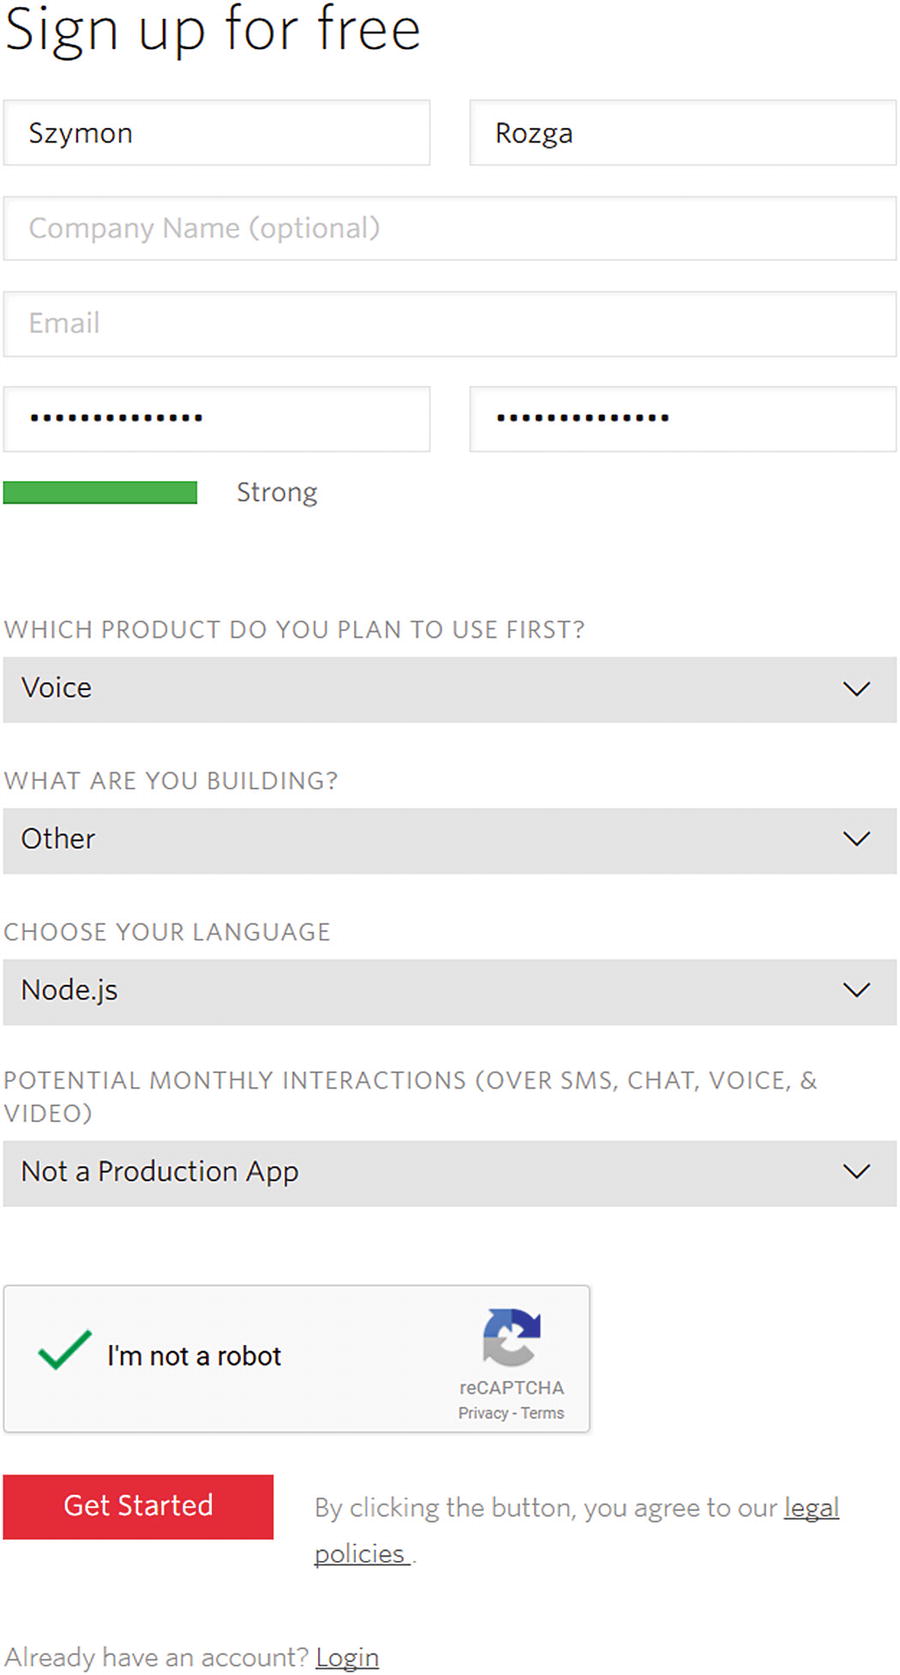
Signing up for a Twilio account
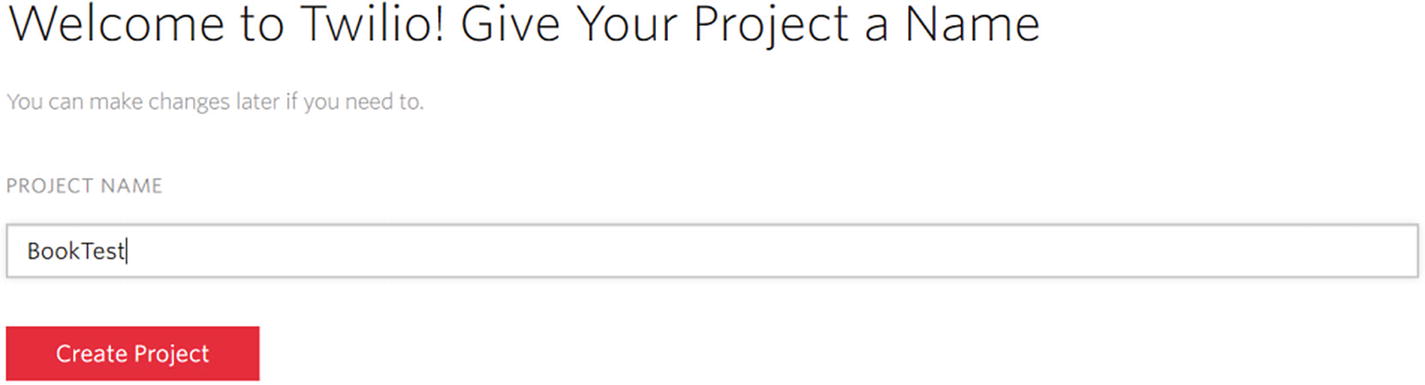
Creating a new Twilio project
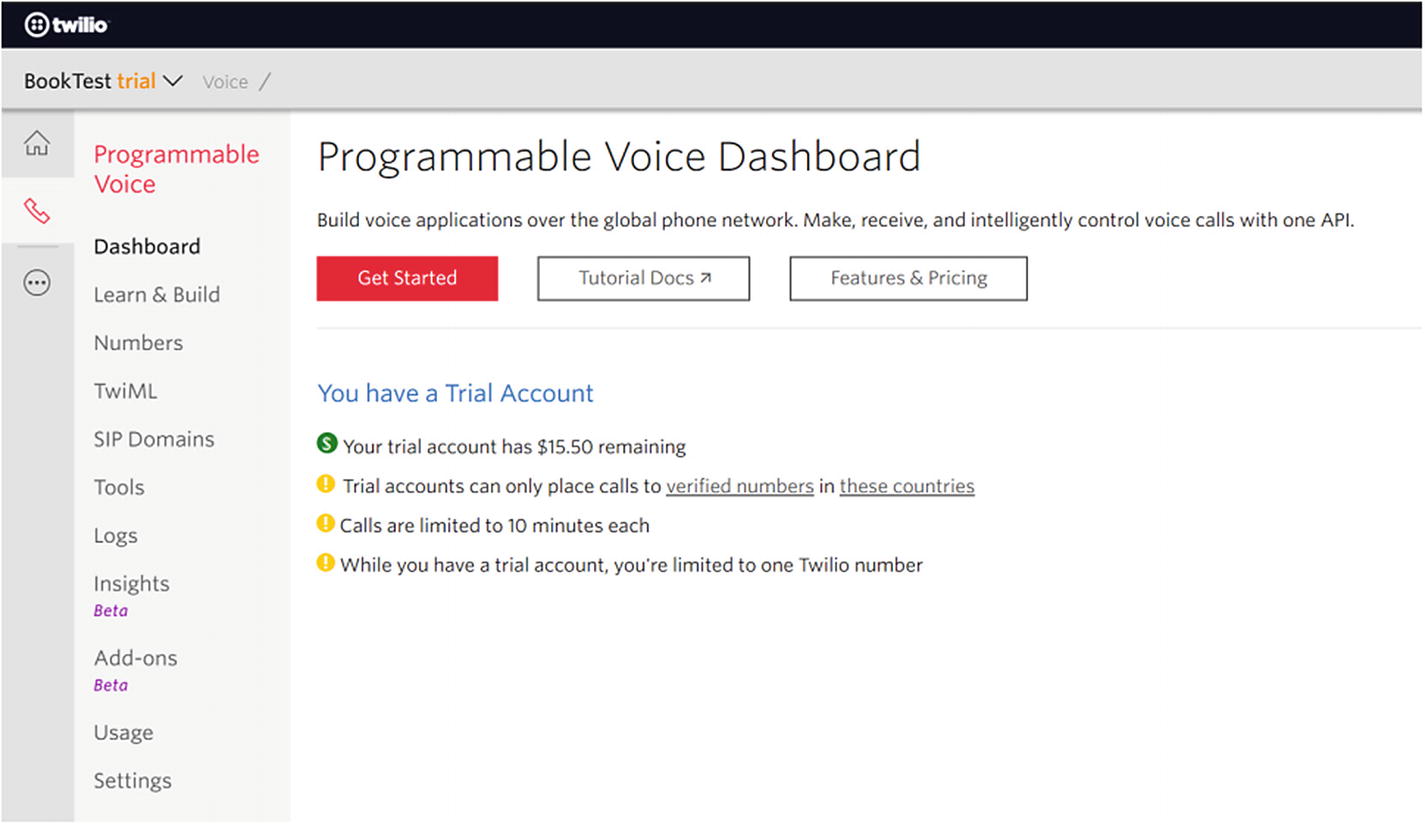
The Twilio project dashboard
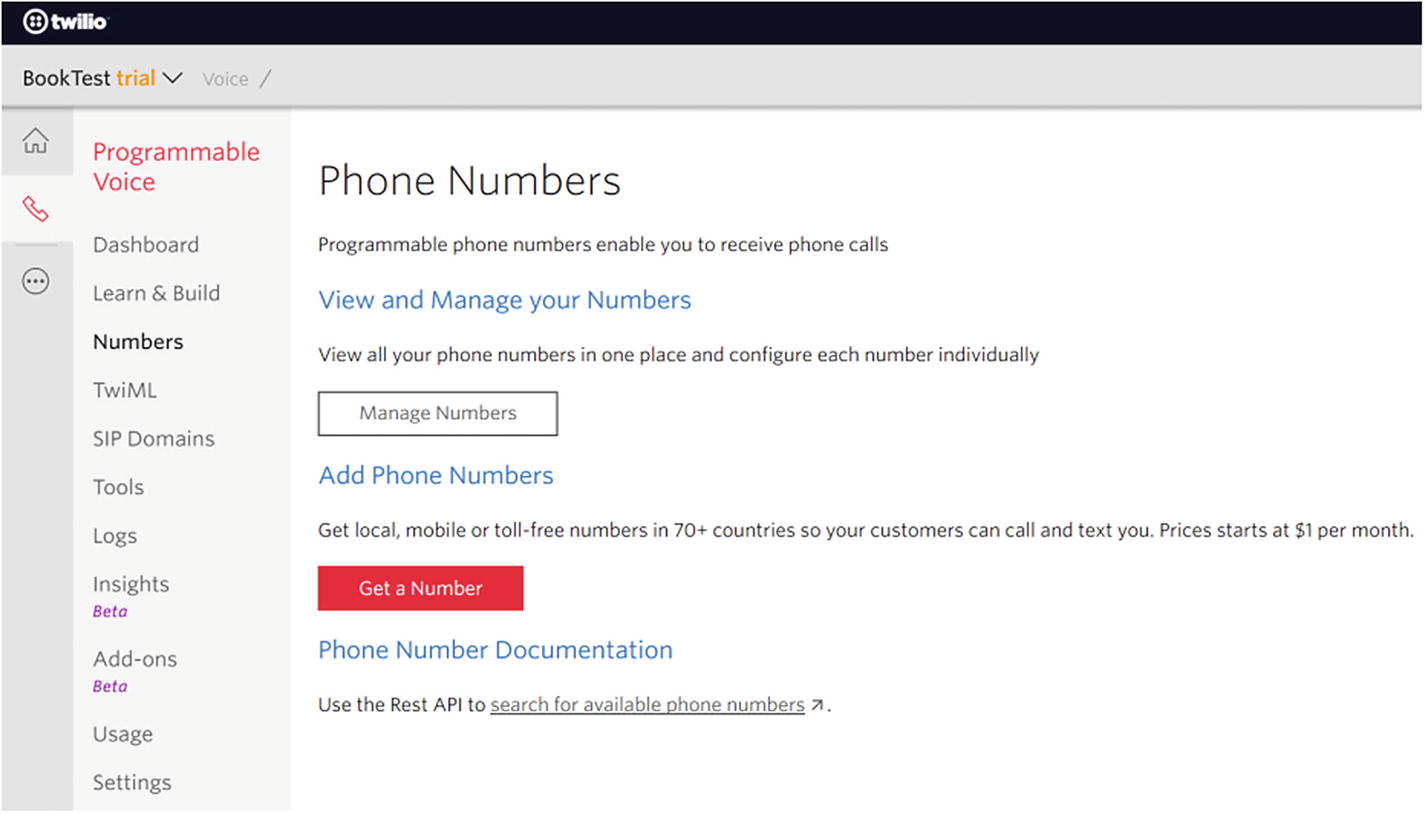
Let’s get a phone number for our project!

Configuring the endpoint Twilio will send a message to on an incoming call
Now, any time that anyone calls that number, our endpoint will receive an HTTP POST request with all the information relevant to the call. We will be able to accept this call and respond using TwiML documents like the ones we previously discussed.
OK, so what now? In our bot code, we can add the /api/voice endpoint to start accepting calls. For now, we simply added a log but return no response. Let’s see what kind of data we get from Twilio.
Twilio sends some interesting data. Since we get the caller number, we can easily use that as the user ID in interactions with our bot. Let’s create a response to the API call. Let’s first install the Twilio node API.
We can then import the relevant types into our node app.
VoiceResponse is a convenient type that helps generate the response XML. Here is a sample of how we can return a basic TwiML response:
Now, when we call the phone number provided by Twilio, after a disclaimer, we should see a request to our API endpoint, and a female voice should speak to us over the phone and then hang up. Congratulations! You’ve established connectivity!
It is not a great experience when our bot hangs up pretty much immediately, but we can improve on that. First, let’s gather some input from the user.
The Gather verb includes several different options, but we are mainly concerned with the fact that Gather can be used to accept either voice or dual-tone multi-frequency (DTMF) signals from the user’s phone. DTMF are just the signals sent when you press a key on your phone. That is how a phone system can reliably gather information such as a credit card number without the user speaking it. For the purposes of this example, we are solely concerned with collecting speech.
Here is a Gather sample, like what we will be using:
This snippet tells Twilio to gather speech from the user and for Twilio to send the recognized speech using a POST to /api/voice/gather. That’s it! Gather has many other options around timeouts and sending partial speech recognition results as well, but those are unnecessary for our purposes.6
Let’s establish an echo Twilio integration. We extend our code for /api/voice to include the Gather verb and then create the endpoint for /api/voice/gather that echoes back what the user said and gathers more information, establishing a virtually endless conversation loop.
Go ahead and run this code in your bot. Call the phone number. Talk to you bot. That’s cool, right? Great. It’s not useful, but we’ve establish a working conversation loop between a Twilio phone conversation and our bot.
Lastly, let’s integrate this into our bot by using Direct Line. Before we jump into the code, we write a few functions to help our bot invoke Direct Line.
We will extract the creation and sending of the TwiML response into its own function called buildAndSendTwimlResponse . We have added a bit more structure into the act of listening to input and, if none is received, to ask for input again before hanging up.
When a call first starts, we need to create a Direct Line conversation for our bot to use. We also need to cache the mapping of user ID (caller phone number) to conversation ID. We do so in a local JavaScript object (cachedConversations). If we were to scale this service out to multiple servers, this approach will break; we can get around this by utilizing a cache such as Redis.
The code for the Gather element should retrieve the conversation ID, get the user input, send the activity to the bot via the Direct Line API, and then wait for the response to come back before sending it back to Twilio as TwiML. Since we need to poll for the new messages, we need to use setInterval until we get a response from the bot. The code doesn’t include any kind of timeout, but we should certainly consider it in case something goes wrong with the bot. We also only support one response from the bot per message. Voice interactions are not a place to exercise a bot’s ability to send multiple responses asynchronously, although we could certainly try. One approach would be to include custom channel data communicating the number of messages expected to return or to wait a predefined number of seconds and then send all messages back.
If you run this, you should now be able to talk to the same bot that we exposed via our webchat via Twilio!
Exercise 9-2
Twilio Voice Integration
- 1.
Sign up for a trial Twilio account and get a testing phone number.
- 2.
Enter your bot voice endpoint for Twilio to use when your phone number receives a call.
- 3.
Integrate the voice endpoint with a Direct Line call into your bot. Return the first reply you receive from your bot.
- 4.
Explore Twilio’s voice dashboard. The dashboard provides information about each call and, more importantly, a functionality to view all errors and warnings. If your bot appears to be working correctly but the phone call to your bot fails, the “Errors & Warnings” section is a great place to start investigating what may have happened.
- 5.
Add the Gather verb into your response so the user can have a conversation with the bot. How long of a conversation can you have before the novelty of a dumb bot wears off and you want to implement something meaningful?
- 6.
Substitute the polling mechanism for a WebSocket, like you did in Exercise 9-1. Does it help with this solution?
- 7.
Play around a bit with Twilio’s speech recognition. How good is it? How good is it at recognizing your name? How easily can it be broken?
- 8.
Applying speech recognition to arbitrary voice data is challenging enough as it is, not to mention when applied to phone quality voice data. Twilio's Gather verb allows for hints7 to prime the speech recognition engine8 with a vocabulary of words or phrases. Typically, this improves the voice recognition performance. Go ahead and add some hints that contain words supported by your bot. Does the speech recognition behave any better?
You just created your own voice-enabled chat bot and experimented with some interesting Twilio features. You can use similar techniques to create connectors for just about any other channel.
Integrating with SSML
Recall that systems like Google Assistant and Amazon’s Alexa support voice output via Speech Synthesis Markup Language (SSML). Using this markup language, developers can specify tone, speed, emphasis, and pauses in the bot’s voice responses. Unfortunately, Twilio does not support SSML at the time of this writing. Lucky for us, Microsoft has some APIs that can convert text to speech using SSML.
One such APIs is Microsoft’s Bing Speech API.9 This service provides both speech-to-text and text-to-speech functionality. For the text-to-speech functionality, we provide an SSML document and receive an audio file in response. We have some control over the output format, though for our sample we will receive a wave file. Once we have the file, we can utilize the Play verb to play the audio to the phone call. Let’s see how this works.
We’ll first pull in the bing-speechclient-api Node.js package.
A sample Play TwiML document looks like this:
Twilio accepts a URI in the Play verb. As such, we will need to save the output from the Bing Speech API to a file on the file system and generate a URI that Twilio can use to retrieve the audio file. We are going to write all output audio files into a directory called audio. We will also set up a new restify route to retrieve those files.
First, let’s create our function to generate the audio file and store it in the right location. Given some text, we want to return a URI for the calling function to utilize. We will use an MD5 hash of the text as the identifier for the audio file.
This is what the code looks like to generate an audio file and save it locally. There are two prerequisites. First, we need to generate an API key to utilize Microsoft’s Bing Speech API. We can achieve this by creating a new Bing Speech API resource in the Azure Portal. There is a free plan version of this API. Once we have the key, we add it to the .env file and name it MICROSOFT_BING_SPEECH_KEY. Second, we add our base ngrok URI to the .env file as BASE_URI.
To test this, we create a test endpoint that creates an audio file and responds with the URI. We could then use the browser to point at the URI and download the resulting sound file. The following SSML is borrowed from Google’s SSML documentation, and I’ve added the current time using Date().getTime() so that we generate a unique MD5 each time.
If we invoke the URL from curl, we get the following result. The audio file referenced by the URI is clearly a speech synthesis of the SSML document.
Finally, we integrate this into our code. We change the buildAndSendTwimlResponse function to generate the audio files for any text we send. We also make a change in the generateAudio function to use any previously generated audio files based on the MD5 hash. That means we’ll have to generate only one audio file per input.
Final Touches
We are almost done. One thing we have not yet done is to have the bot respond with SSML, instead of using the text. We do not utilize all the speech features from the Bot Builder. As shown in Chapter 6, we could have each message populate the inputHint to assist in determining which TwiML verbs should be used and even to consolidate multiple response from the bot. We stick to simply populating the speak field in each message with the appropriate SSML. We must also modify our connector code to use the speak field, instead of the text field.
Note that we also added an extra metadata control field. The response to input quit includes a field called hangup, set to true. This is an indicator to our connector to include the Hangup verb. We create a function called buildAndSendHangup to generate that response.
We modify the /api/voice/gather handler to use the speak property and interpret the hangup field correctly.
Now we can call and have a great conversation with a witty bot that pauses before saying the meaning of life is 42 and places emphasis on the fact that Waldo is definitely not where the bot is!
Conclusion
Direct Line is a powerful feature and is the main interface for calling into our bot from a client app. Having the ability to consider other channels as sort of a client app is how we can create custom channel connectors. One of the more interesting tasks we accomplished in this chapter was adding SSML support to our bot integration. This kind of integration is just a taste of the intelligence that we can begin building into our bot experience. The Bing Speech API that we utilized is just one of numerous Microsoft APIs known as the Cognitive Services APIs. In the next chapter, we’ll look at applying other APIs in that family to tasks we may encounter in the bot space.