
We have spent a substantial amount of time so far discussing NLU systems, conversational experiences, and how we can develop bots in a generic manner using a common format via the Bot Builder SDK. The Bot Builder SDK lets us get up and running quickly. This is part of why it is such a powerful abstraction. But frankly, a lot of the innovation in the space is coming from the various messaging platforms. For example, Slack is leading the pack in terms of collaboration software. Slack’s ability to edit messages, allowing for interactive workflows, is very powerful.
In this chapter, we will explore the ability to invoke native functionality from within a Bot Framework bot. We will learn to invoke Slack’s feature to transform simple text-based workflows into rich button and menu-based experiences. Along the way, we will sign up for a Slack integration, connect our bot to our Slack workspace, and then use native Slack calls to create a compelling and straightforward workflow. Let's dive in.
Deeper Slack Integration
Slack is a rich platform that allows close collaboration among different members of internal and external teams. The interface is simple, yet the messaging framework is quite different from something like Facebook Messenger. For example, although there is a facility called attachments that results in a user interface similar to cards, it is not treated in the same way. There are no carousels, and there are no requirements around aspect ratios for images.
A message in Slack is simply a JSON object with a text property, where the text can have special sequences that reference users, channels, or teams. These references, called @mentions, are text strings like @channel, which notifies all users in a channel to pay attention to a message. Other examples are @here and @everyone. A message can include up to 20 attachments. An attachment is simply an object that provides additional context to the message. The JSON object looks as follows:
Like a HeroCard, we can include title, text, and images. In addition, there are various other parameters we can provide to Slack. We can include references to a message author, data fields or theme colors.
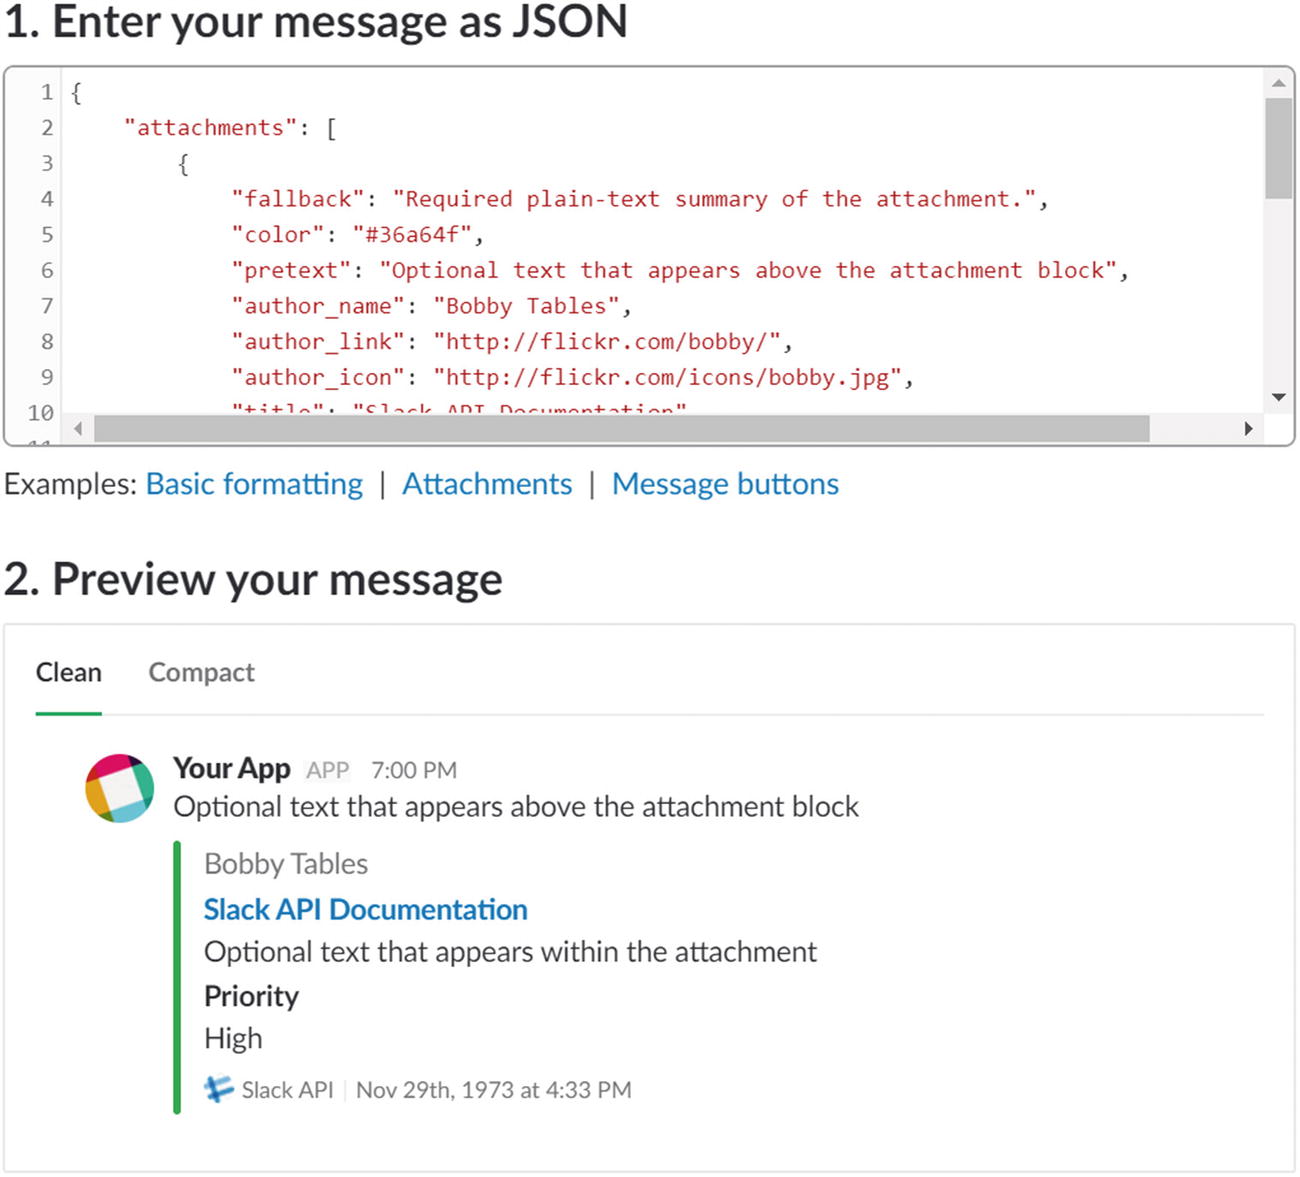
Slack Message Builder and preview
Good direction…
Except that the Slack guidelines are not fully respected by the Slack Bot channel connector
What a well-formed attached could look like
Naturally, this is the kind of detail the Bot Framework team will most likely support in the future. Until then, if there is a mismatch in terms of the type of interface we want to render and what the platform supports, we can drop into the native JSON to achieve our goals.
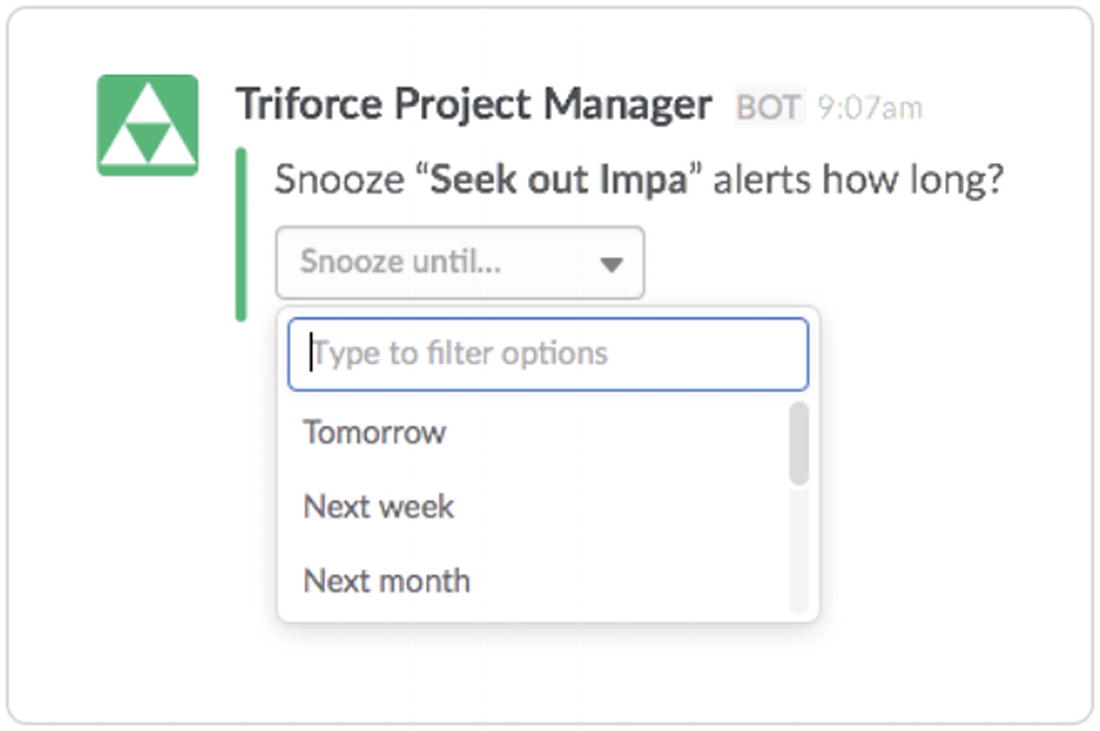
A Slack menu
In this section, we will explore how to achieve the interactive message effect by integrating closely via native messages.
First, we will integrate our bot with a Slack workspace. Second, we will create a one-step interactive message. Third, we’ll create a multistep interactive message that provides a rich, Slack-native data-gathering experience.
Before we continue, let’s go over a few ground rules. This chapter is not intended to give you a deep dive into Slack’s Messaging APIs and features. We encourage you to read about these on your own; Slack has very rich documentation on the subject. What we do want to show is how we can leverage the bot service to provide that deeper integration with Slack. You may ask, why not just develop a native Slackbot using Slack’s Node Developer Kit? You certainly can, but there are two big reasons for using the Bot Builder library. One, you get the dialog and conversation engine to help guide a user through a conversation, and two, if you are exposing an experience on multiple messaging channels, one codebase enables code reuse.
Connecting to Slack
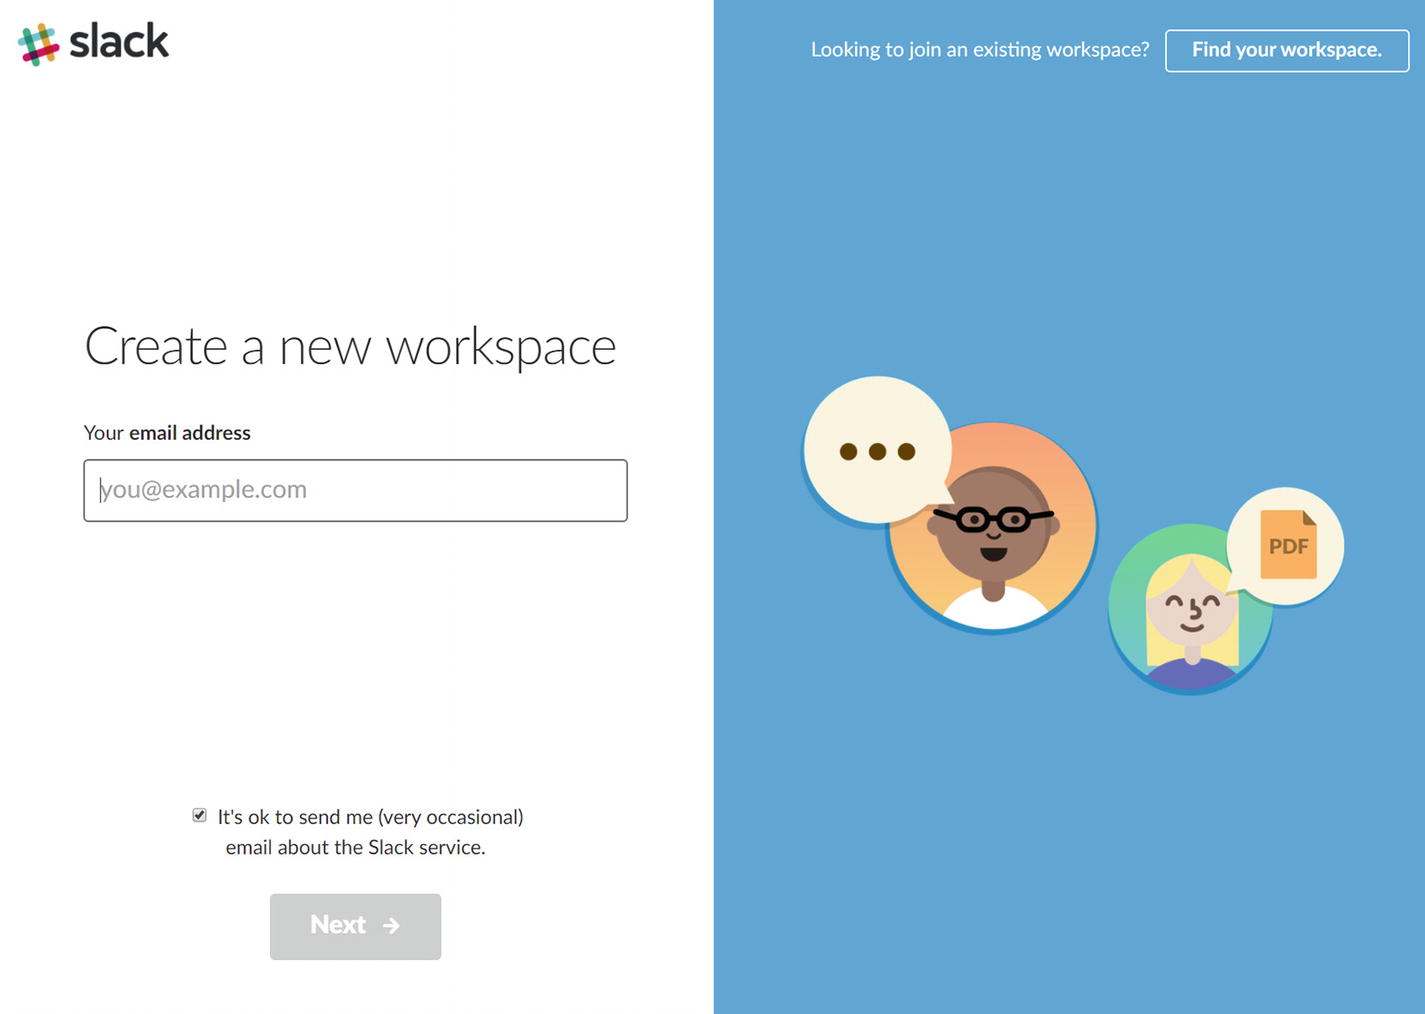
Creating a new Slack workspace
Once we enter the confirmation code, it will ask us for our name, password, (group) workspace name, target audience, and workspace URL. We can send invitations to the workspace, but we will skip this for now. We will not be redirected to the workspace. For the purposes of this demo, mine is https://srozgaslacksample.slack.com .
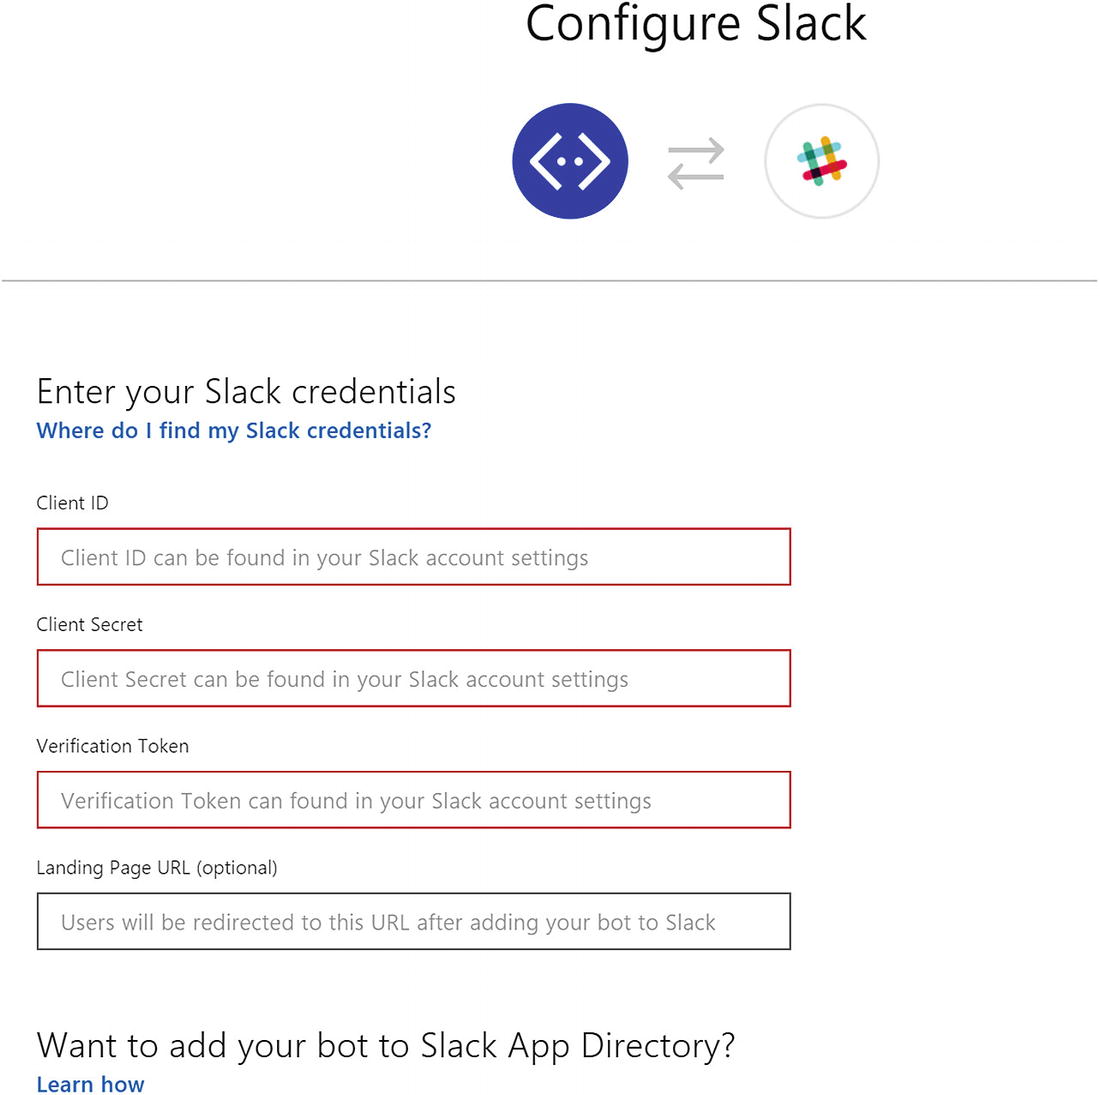
Configuring our bot’s Slack integration
The interface is like the Facebook Messenger channel configuration interface but asks for differrent data. We will need three pieces of information from Slack: the client ID, the client secret, and the verification token.
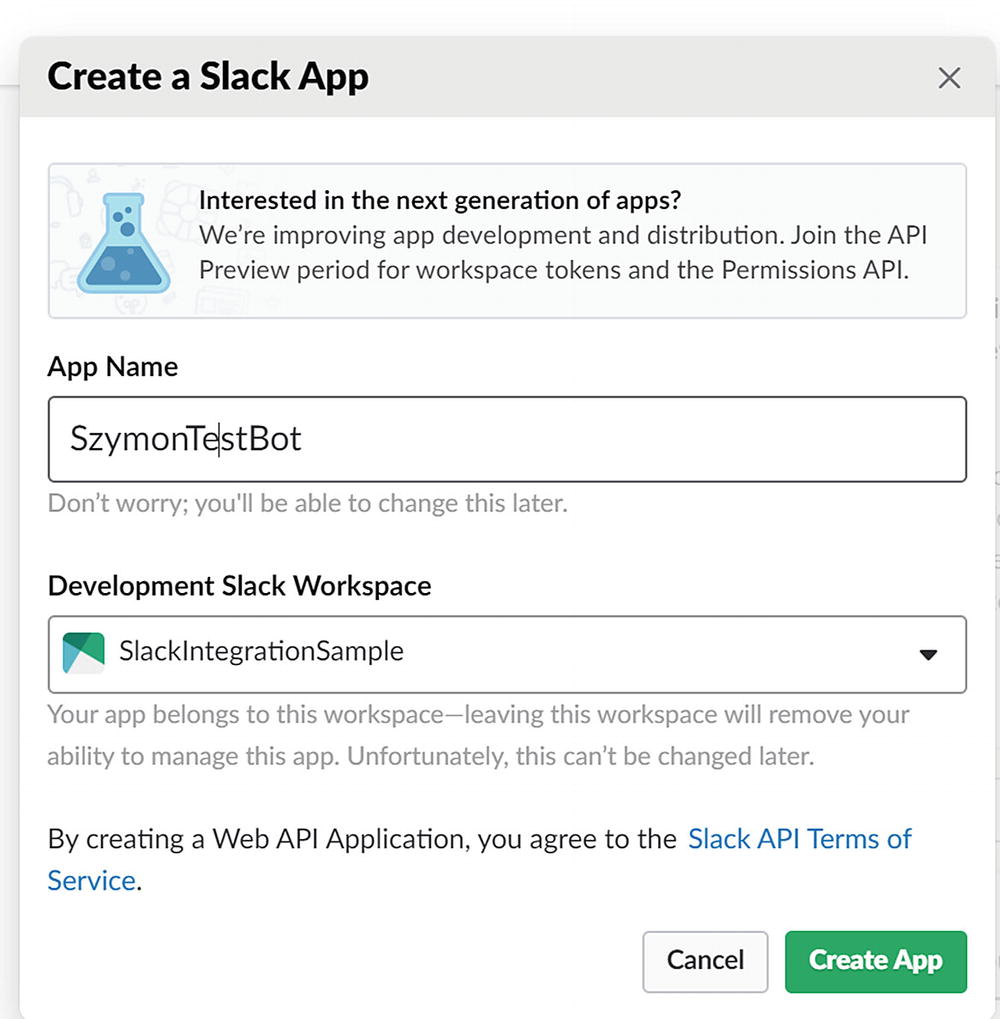
Creating a Slack app
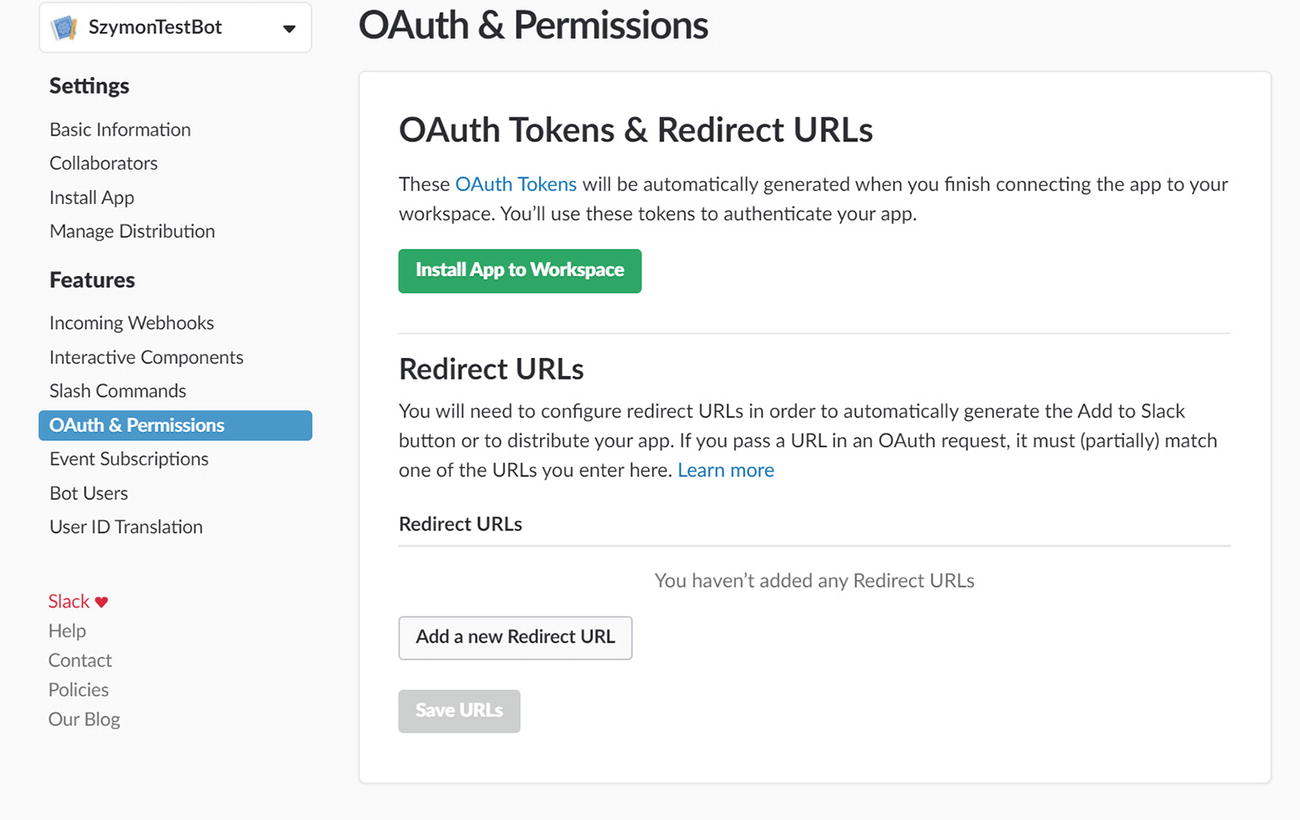
Setting up the bot service redirect URI
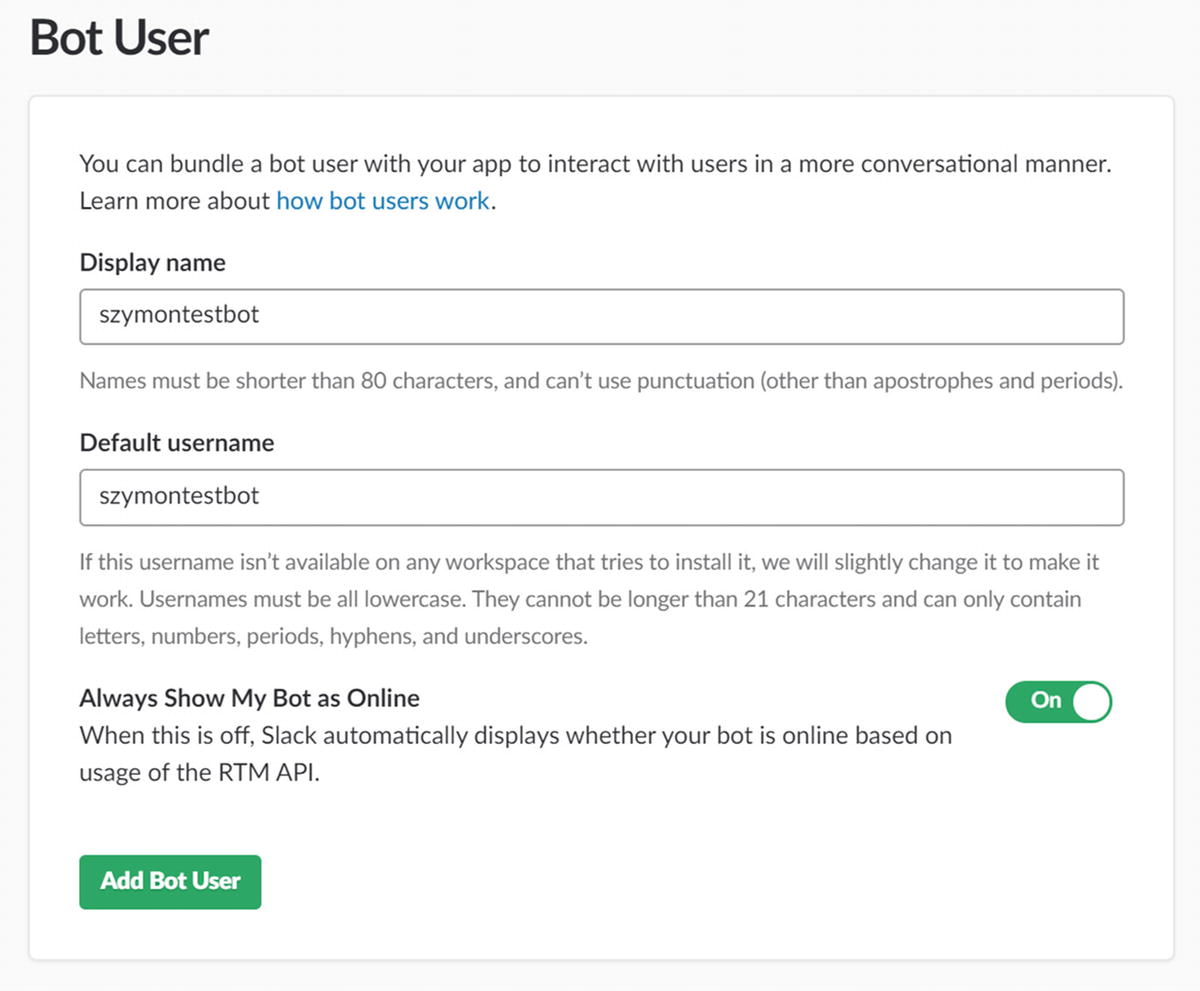
Creating a bot user that represents a bot in a channel
member_joined_channel
member_left_channel
message.channels
message.groups
message.im
message.mpim
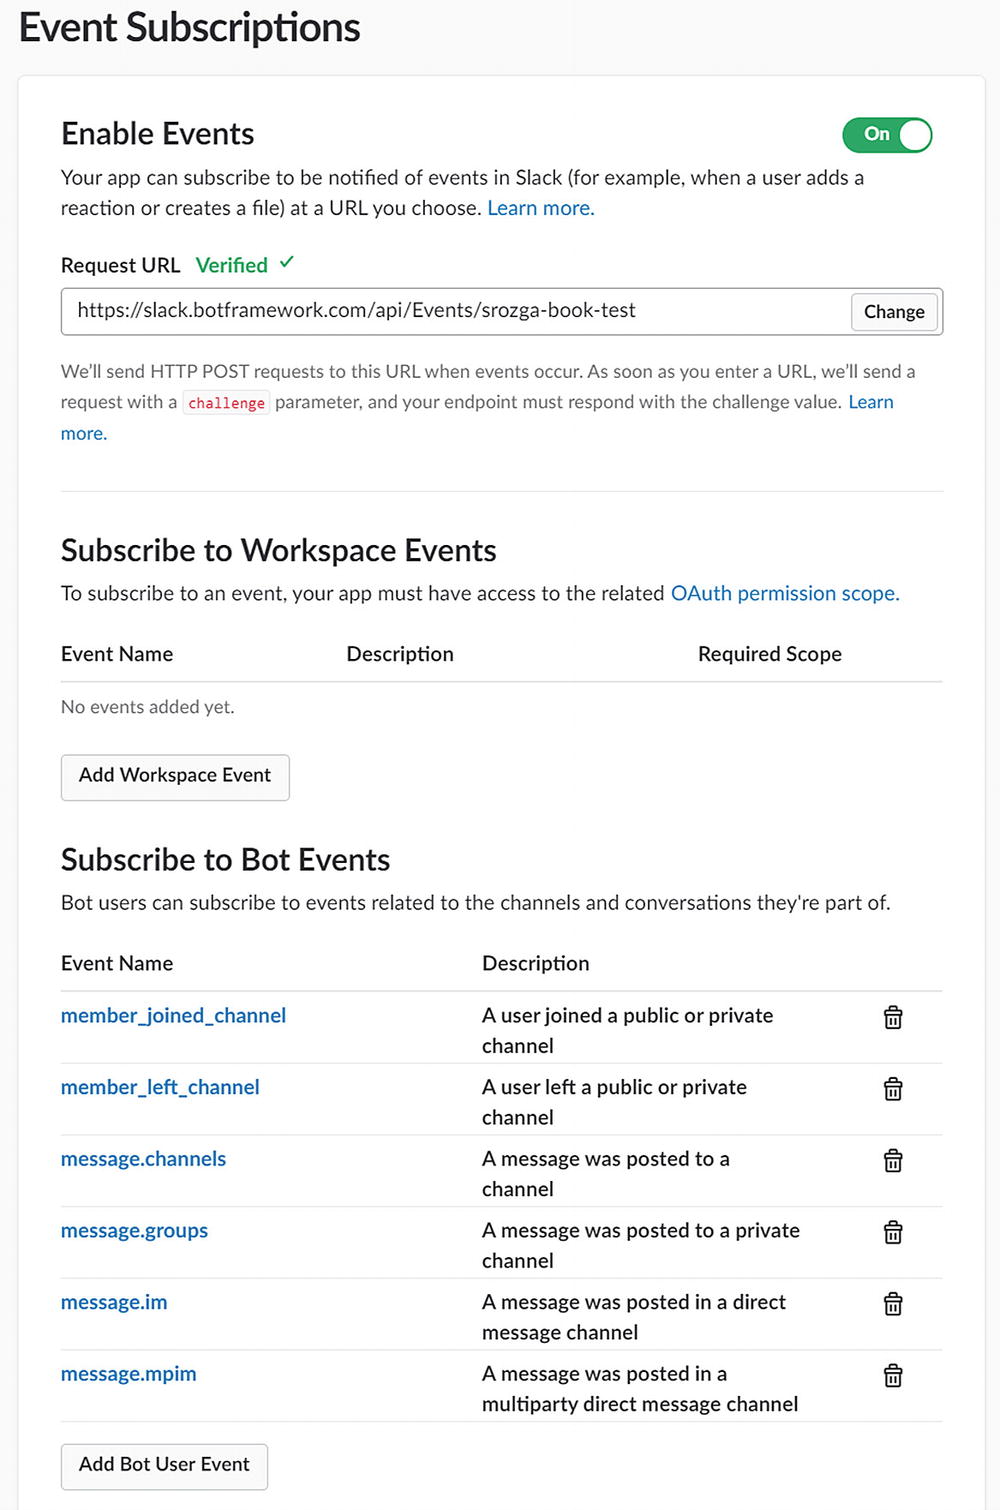
Subscribing our bot to Slack events
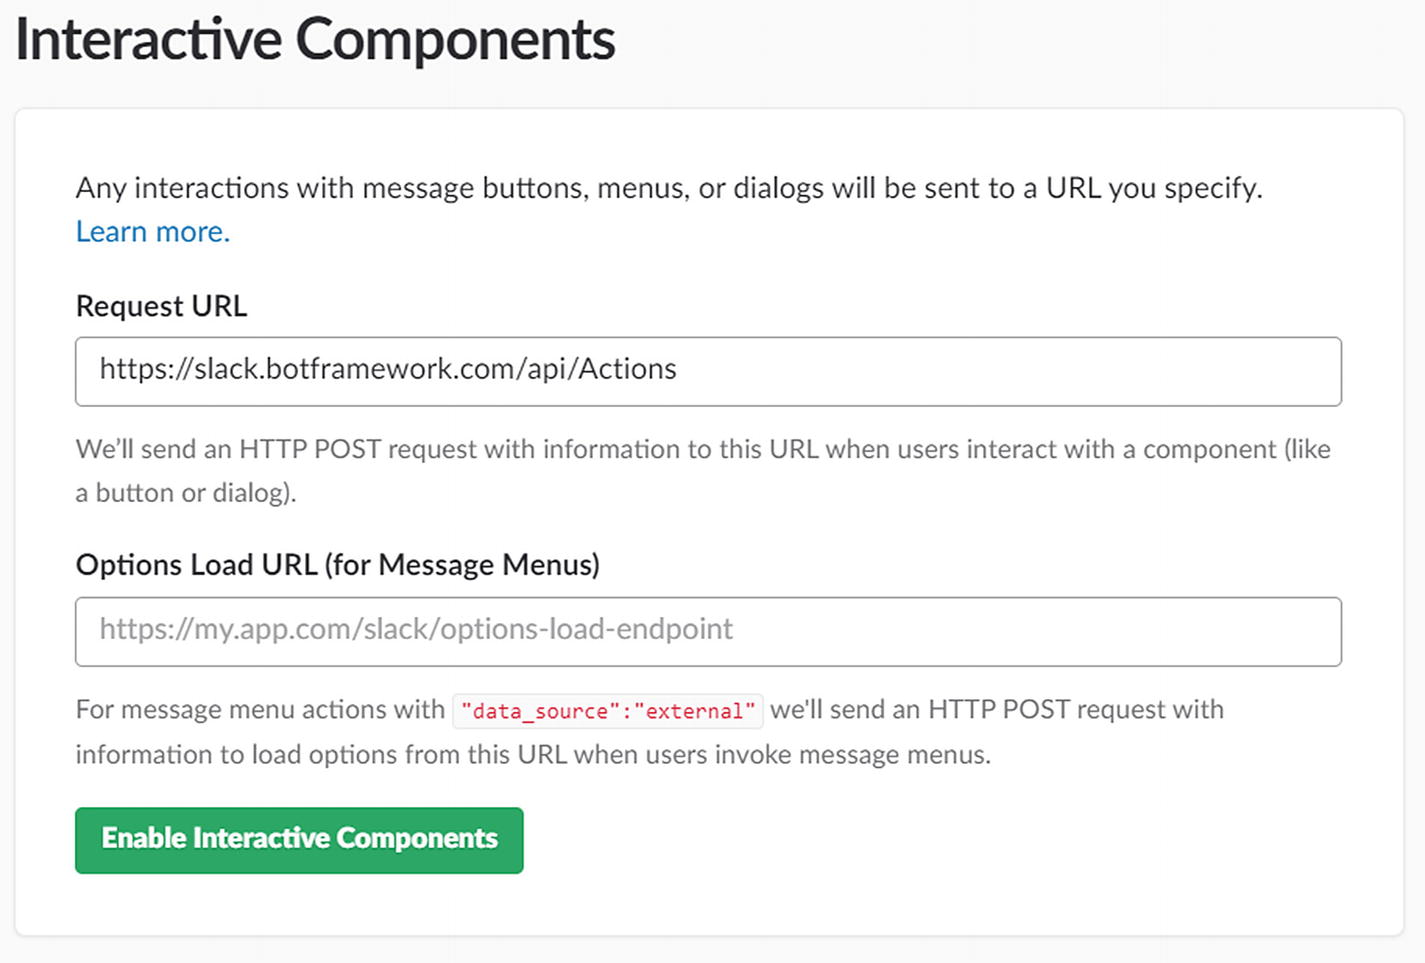
Enabling interactive components in our bot. That means buttons and menus!

We’ve connected to the Azure bot service
Remember to run ngrok! You can tell I forgot to run my ngrok in Figure 8-13.
Exercise 8-1
Basic Slack Integration and Message Rendering
- 1.
Create a test Slack workspace.
- 2.
Connect your Azure Bot service bot to the workspace by following the steps in the previous section.
- 3.
Confirm you can communicate with your bot via Slack.
- 4.
Test the bot and answer the following questions: How does the bot render the sign-in button? How does the bot render the primary card selection cards? How does the bot behave in a multi-user conversation (you may need to add a new test user to the workspace)?
Great work. You are now able to connect an existing bot to Slack, and you are learning about Slack, its message, and attachments.
Experimenting with the Slack APIs
Chat.postMessage: Posts a new message into a Slack channel
Chat.update: Updates an existing message in Slack
Chat.postEphemeral: Posts a new ephemeral message, one visible to only one user, into a Slack channel
Chat.delete: Deletes a Slack message
To invoke any of these, we need an access token. For example, assuming we have a token, we could use the following Node.js code to create a new message:
A natural question is how do we obtain the token? If we examine the message coming in from the bot service channel connector, we notice that we have all that information at our disposal. The full incoming message from Slack looks like this:
Note that the sourceEvent includes an ApiToken and a SlackMessage with all the details about which channel the bot is in and the user from which the original message originated. In this example, the channel is D85TN0231, and the user is U85M9EQJ2. Further, we can find the IDs for the team, the bot, the bot user, and the app. An incoming message doesn’t really have an ID in Slack; each message has a unique-per-channel timestamp referred to as ts.
So, once we have the first message from a user, we can easily respond either by using the Bot Builder’s session.send method or by using the chat.postMessage endpoint directly (Figure 8-14). Of course, session.send is doing all the token work for us underneath the covers by calling to the Slack channel connector, which then calls chat.postMessage.
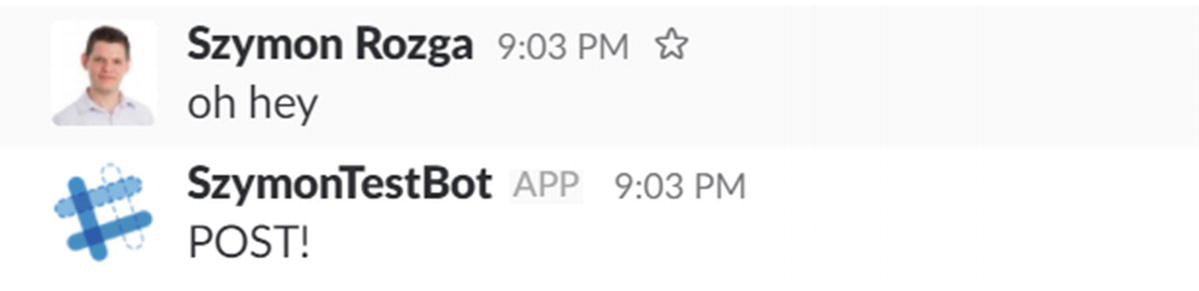
Responding using a native Slack call
postMessage does not really get us anything better than session.send, except that chat.postMessage returns the message’s native ts value, whereas session.send does not. Very cool. That means we can now update the message! We define an updateMessage method as follows:
Now we can write code to send a message and update it whenever any other response comes in (see Figure 8-15, Figure 8-16, and Figure 8-17).
So far so good…
Seems to be working…
Exactly as designed
Now this is a contrived example, but it illustrates our ability to call a postMessage followed by an update to modify the contents of a message. There are some rules around what exactly update can do, but we leave reading that documentation3 as an exercise to the developer.
Another example of what we can accomplish with the APIs is posting and removing ephemeral messages. An ephemeral message is visible only to the recipient of the message. The bot can, for example, give feedback to a user without displaying the result in the channel until all the necessary data has been gathered. Although a slightly different interaction model, the giphy4 Slash command is a great example of this model.
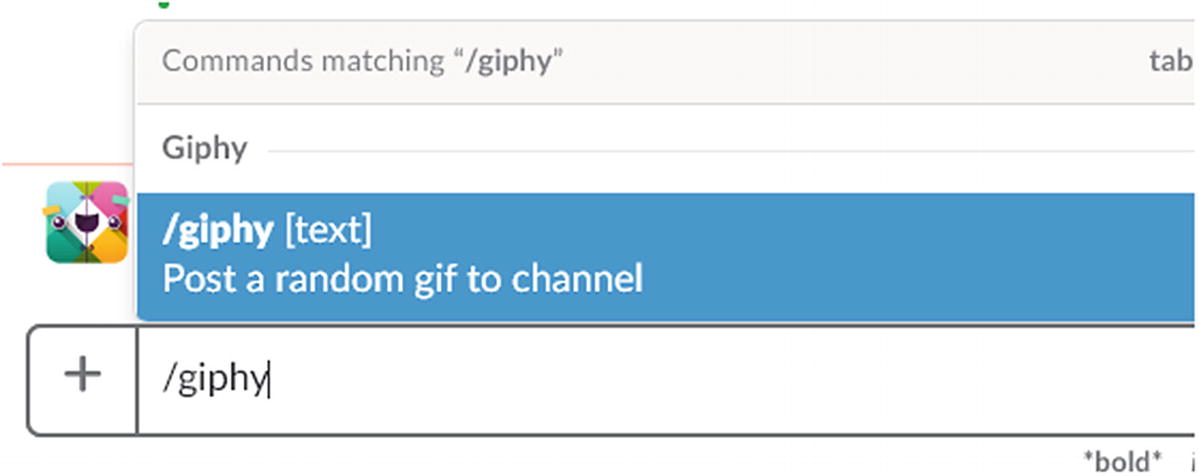
Invoking the /giphy Slash command
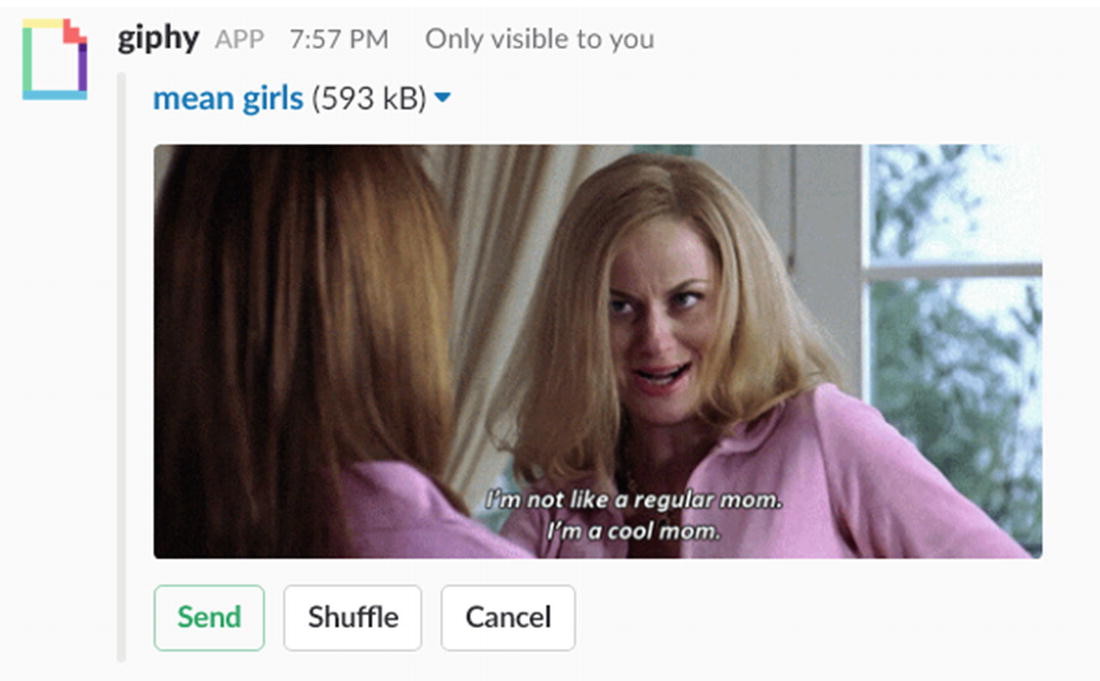
A preview of a cool mom mean girls GIF
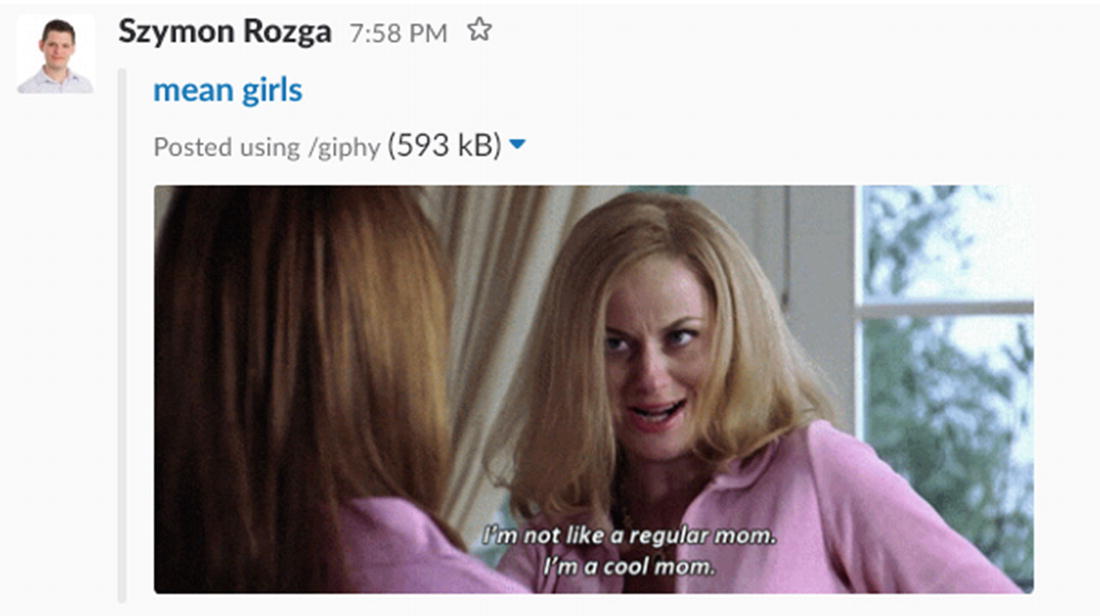
I’ve now immortalized in Slack conversation the 2004 cult classic Mean Girls by using /giphy mean girls
We could use the postEphemeral message to give feedback to only certain users. And, of course, delete gives us the ability to delete old messages from the bot. From a usability perspective, the delete feature is not interesting. It is a better experience to update a message with a correction or to notify the user that a message has been deleted, rather than to simply get rid of it without any explanation.
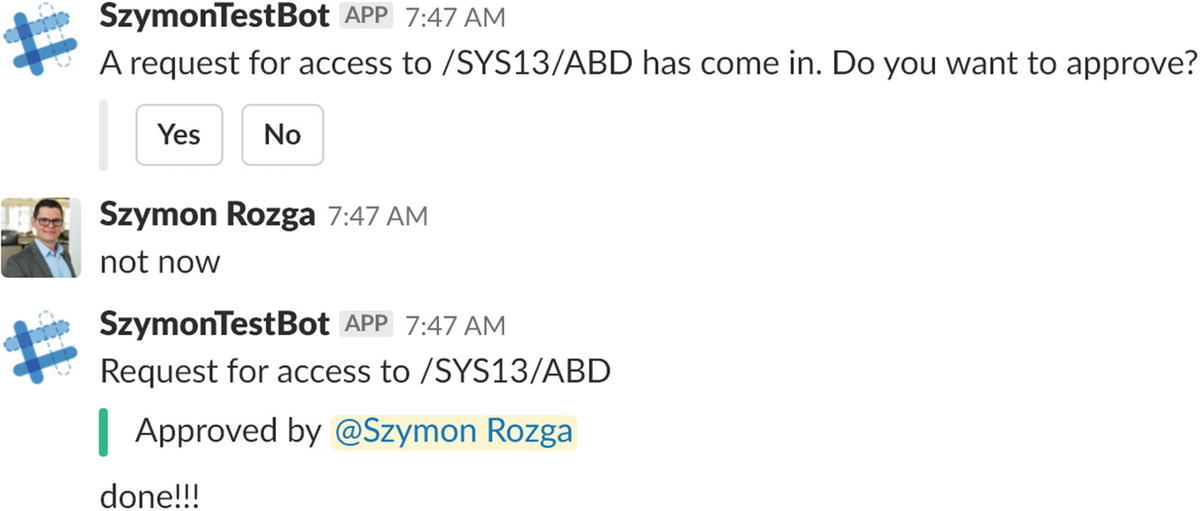
Simple Interactive Message
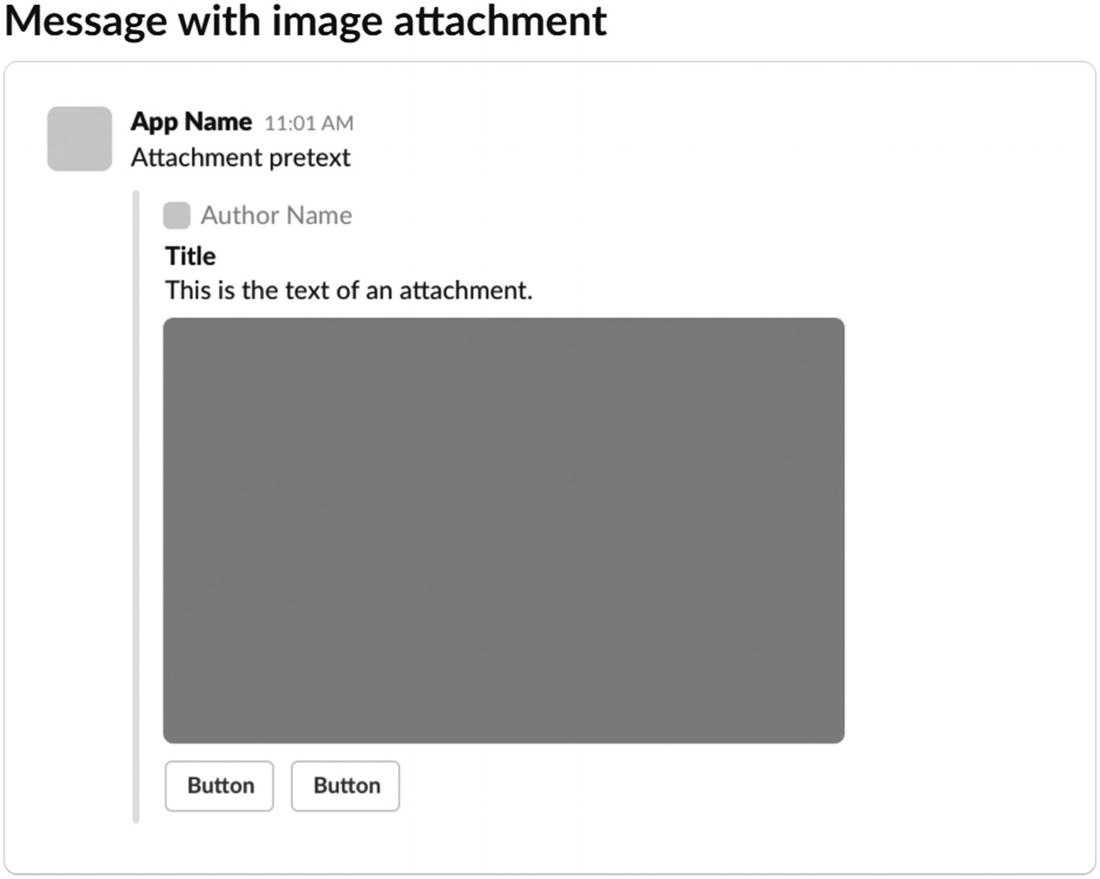
Slack allows us to instrument better conversational experiences using what are known as interactive messages.5 An interactive message is a message that includes the usual message data plus buttons and menus. In addition, as users interact with the user interface elements, the message can change to reflect that.

A simple interactive message
Request approved
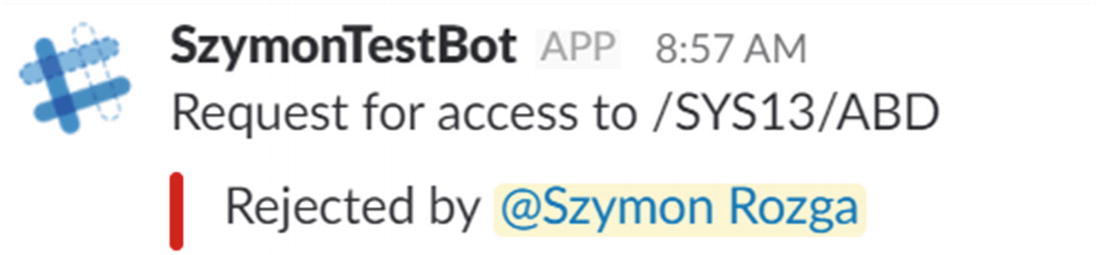
Request was not approved
Certainly, we can orchestrate this type of behavior using postMessage and updateMessage, but there’s an easier and more integrated way to do it. First, we define a dialog called simpleflow that uses a Choice Prompt to send a message with buttons.
Then we handle the response to the button click by making a POST request to a response_url.
A few things are happening here. First, we grab the response from Slack, which is resolved to the entity value. Second, we grab what’s known as the response_url from the Slack message. A response_url is a URL that allows us to modify the interactive message that a user just responded to or to create a new message in the channel. Next, we grab the token that authorizes us to send POST requests to the response_url. Lastly, we POST to the response_url with the updated message.
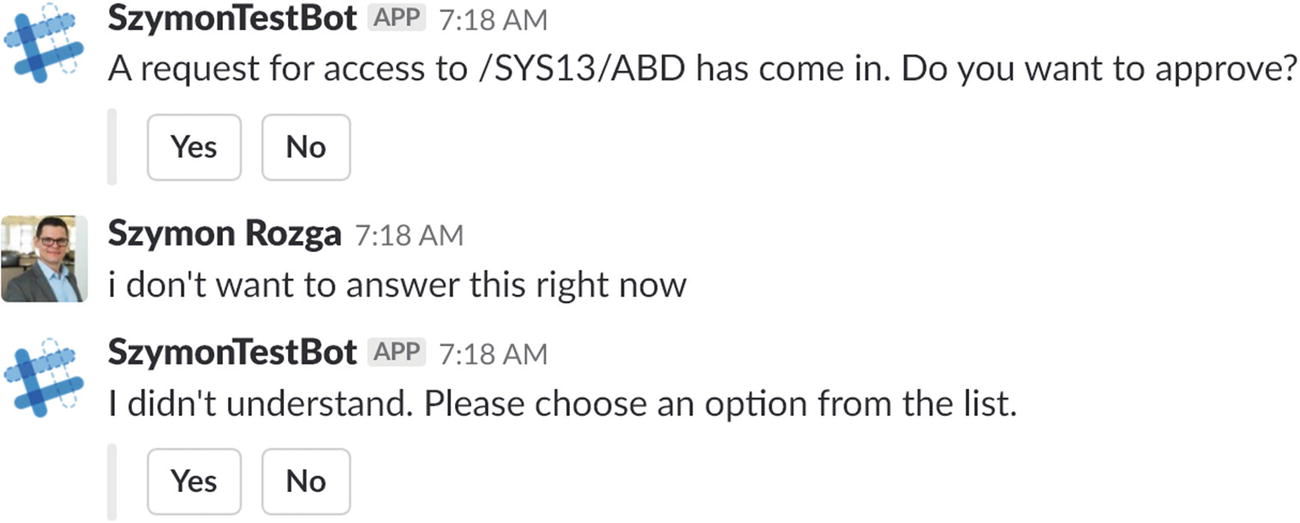
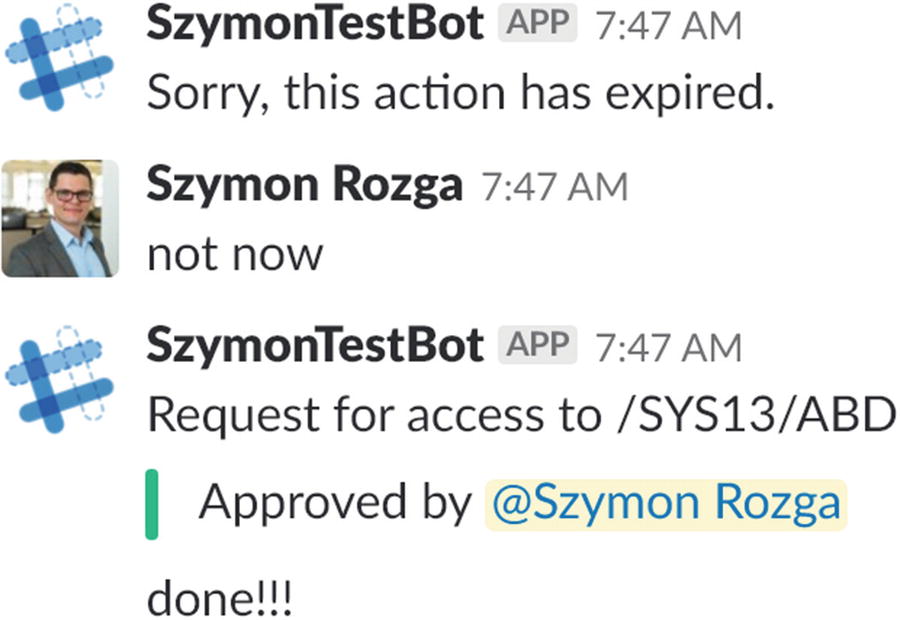
Hmm…seems I have two sets of buttons to answer the same question
Shouldn’t the first message update as well?
Oh, that makes no sense…
The experience can get complicated quickly. That’s the problem with rendering buttons on any platform: the buttons stay in the chat history and can be clicked any time. Our role as developers is to make sure the bot can handle the buttons and their payloads at any time.
Here is one approach to solve the previous problem. We leave the default behavior as is, but we create a custom recognizer that handles interactive message inputs and redirects the message to a dialog that tells the user that the action has expired, if these inputs are not expected. Let’s start with the dialog. It will read the response_url for the interactive message and simply post a “Sorry, this action has expired.” message to it. The dialog is invoked when the bot resolves the intent practicalbot.expire . A naming convention like that allows us to draw a distinction between LUIS intents and intents internal to the bot.
The custom recognizer would look like this:
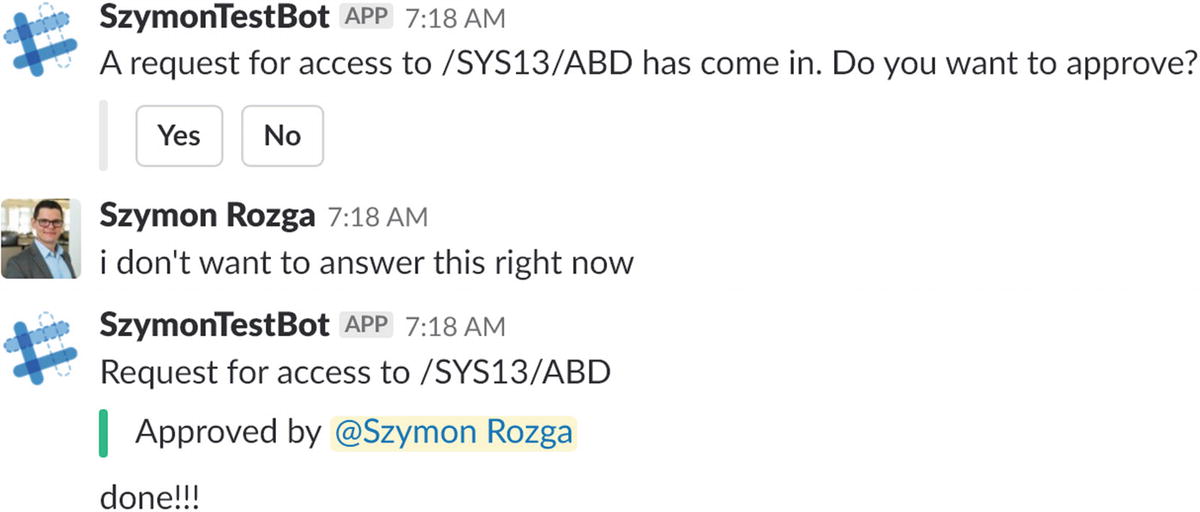
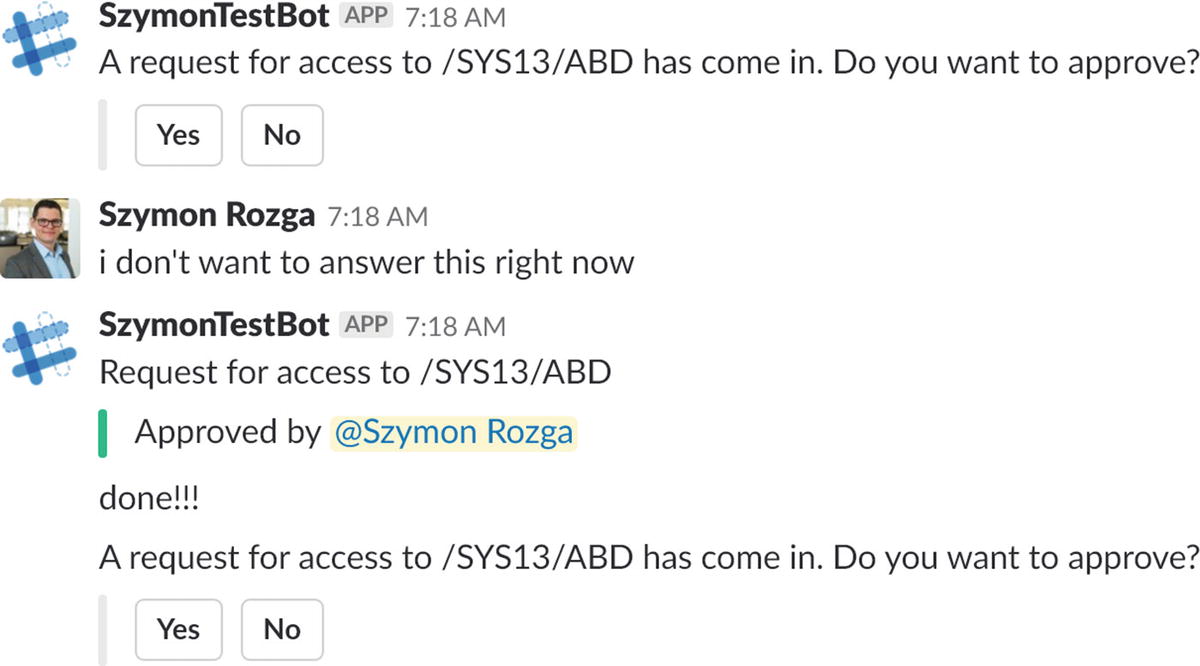
OK, back to this scenario
It works. We can now act of older interactive messages without creating UX chaos.
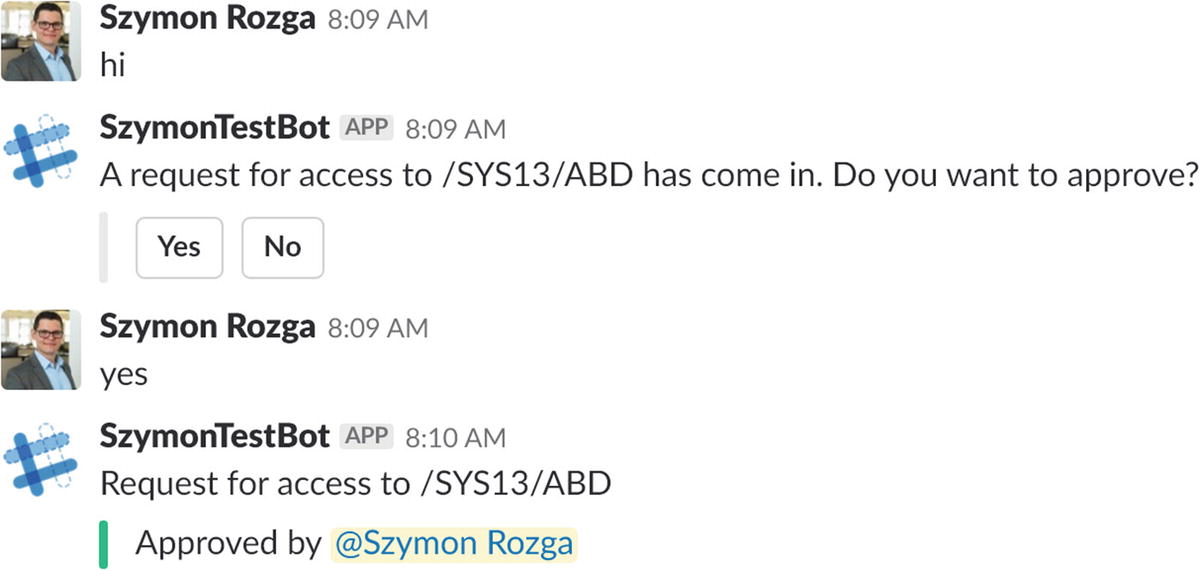
There are a couple of caveats we should mention. First, if you tried responding to the prompt using text instead of clicking a button, the code provided would fail. Why is this? Slack does not send a Payload object with details about the message interaction. It would just be considered text input, and we would not have a way to properly update the message to be approved or rejected. One way of dealing with this is to simply require button inputs instead of text input. Another way is to accept it but send the confirmation as a new message. Here is the code with that behavior with the resulting conversation after responding with a text message in Figure 8-29:
We can now handle text responses as well
The second caveat is that in the previous example we use the choice prompt that blocks the conversation until a yes or no response is sent by the user. We want to avoid this behavior so that the user can continue working with the bot without necessarily having to answer the prompt immediately. A better approach would be to install a global recognizer that is able to map interactive message responses to intents that, in turn, map to dialogs that fulfill certain actions. We will be looking at this in Exercise 8-2.
Exercise 8-2
Exploring Nonblocking Interactive Messages in Slack
- 1.
Create a universal bot that begins a dialog called sendExpenseApproval.
- 2.
Create a dialog called sendExpenseApproval. The dialog should create a random expense object with four fields: ID, user, type, amount. This object would represent the fact that user spent $amount on an item of type type. ID should just be a random unique identifier. For example, create an object representing the fact that Szymon spent $60 on a taxi ride or that Bob spent $20 on a case of flavored sparkling water. After generating the random expense, send a hero card to the user summarizing the expense and two buttons with the labels Approve and Reject. After sending the response using session.send, end the dialog.
- 3.
At this point, the bot doesn’t do anything. Modify the Approve and Reject buttons in the hero card so that the value sent to the bot is Approved request with id {ID} and Reject request with id {ID}.
- 4.
Create a custom recognizer to match these patterns and extract the ID. Your custom recognizer should return the intent ApproveRequestIntent or RejectRequestIntent based on the input. Make sure to include the ID in the resulting recognizer object.
- 5.
Create two dialogs, one called ApproveRequestDialog and one called RejectRequestDialog. Use triggerAction to connect the dialogs to the corresponding intents.
- 6.
Ensure the two dialogs send the correct approved or rejected response to the response_url so that the original hero card is updated.
The technique used in this exercise to handle all the interactive messages globally is powerful and extensible. You can easily add more message types, intents, and dialogs for any future behavior. In practice, you may end up with a mix of blocking and nonblocking messages. You are now equipped to handle both styles.
Multistep Experience
In the previous section, we created a single-step interactive message. We will continue our exploration of interactive messages on Slack with a more complex, multistep interaction. Let’s say we want to guide the user through a multistep process of selecting a type of pizza, some ingredients, and a size. We will build the experience using a multistep interactive message. The code for this section is included in the book’s git repos; we will share the most relevant bits in the following pages.
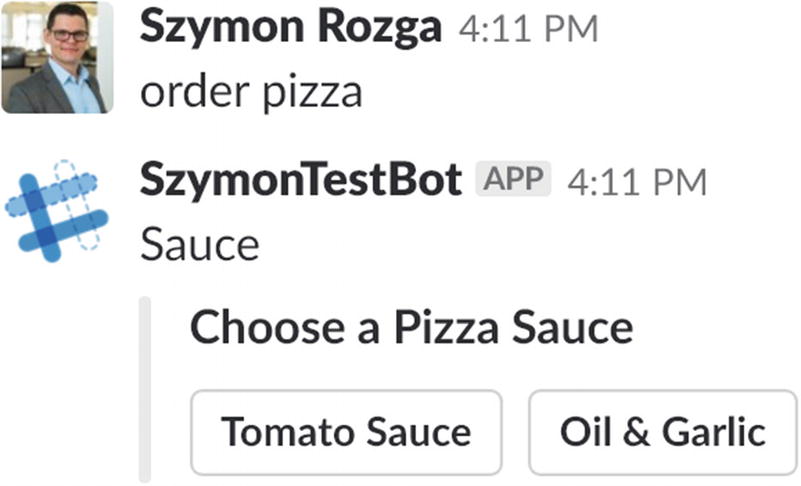
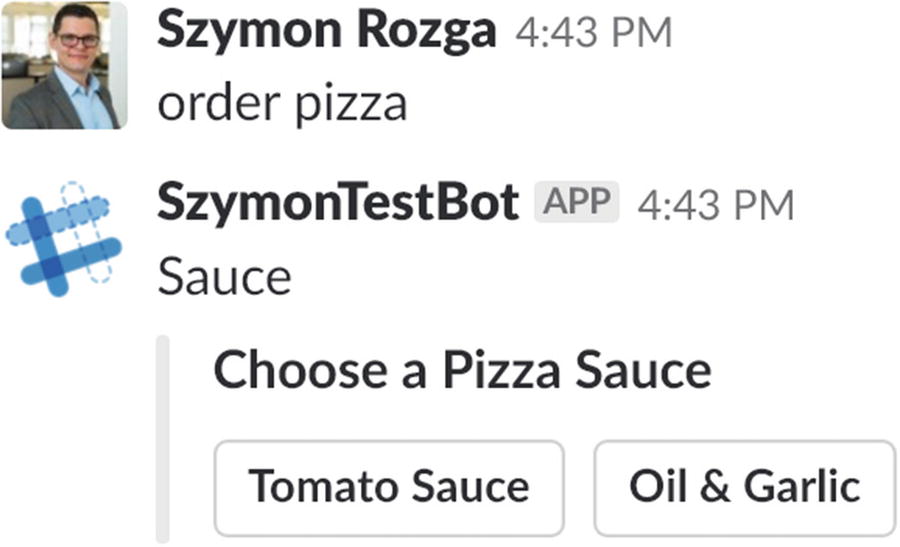
What pizza sauce would you like?
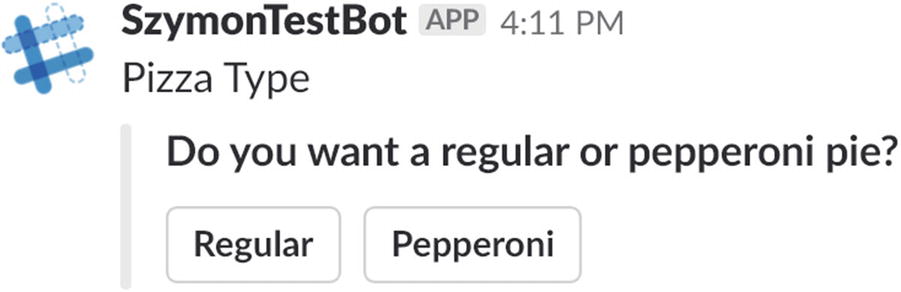
Pizza type options with tomato sauce
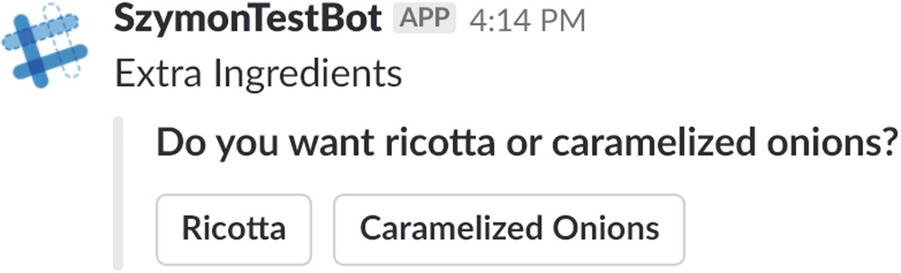
Extra ingredient options for an Oil & Garlic base pizza
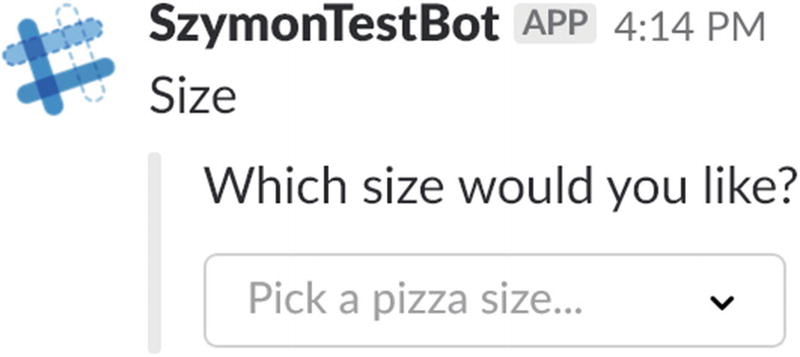
Which size would you like?

User order summary
As an exercise, we will utilize the native Slack APIs. The Bot Builder SDK needs a dialog step to explicitly use prompts to proceed from one step to the next. Since we will be using the Slack API directly, we will have a one-step waterfall dialog. This means the same function will be called over and over until a different global action is recognized or our dialog calls endDialog .
You’ll recall that in the previous example, we took advantage of Bot Builder’s prompts to send buttons back and collect the results back to logic in our bot. One of the things that the Bot Framework abstracts for us is that sending a prompt to a user actually sends a Slack message with an attachment that includes a set of actions where each button is a different action. When the user taps or clicks a button, a callback is made into our bot with a callback ID to identify the action.
For example, if we send this message to Slack, it will render a message that looks like Figure 8-31 .
When either button is clicked, our bot will receive a message with a callback ID of pizzatype and the selected value. Here is the relevant JSON fragment of the message we receive when we click Tomato Sauce:
So, the logic to figure out whether we are getting a callback of a type is easy. In fact, the code is similar to our recognizer code shown earlier. We create an isCallbackResponse function that can tell us whether a message is a callback and, optionally, whether it is a callback of a certain type.
We can then configure our recognizer to use this function instead.
The first message to select a pizza type
Based on the pizza type selected, one of two ingredient selections
A selection for the pizza size
A final confirmation message
Here is the JSON we use:
We then create a waterflow dialog with one step. If the message we receive from the user is not a callback, we send the first step using postMessage .
Otherwise, if the message is a callback, we determine the callback type, get the data passed in the message (which is slightly different depending on whether it is coming from a button press or a menu), save the response data appropriately, and respond with the next relevant message. We track that state using privateConversationData . One caveat is that we need to explicitly save the state.
Typically, the state would be saved as part of the session.send call. Since we don’t use this mechanism anymore because we are using the Slack API directly, we’ll call it explicitly at the end of our method. We detect if the user says “quit” to exit the flow. Here’s what the entire method looks like:
So far so good
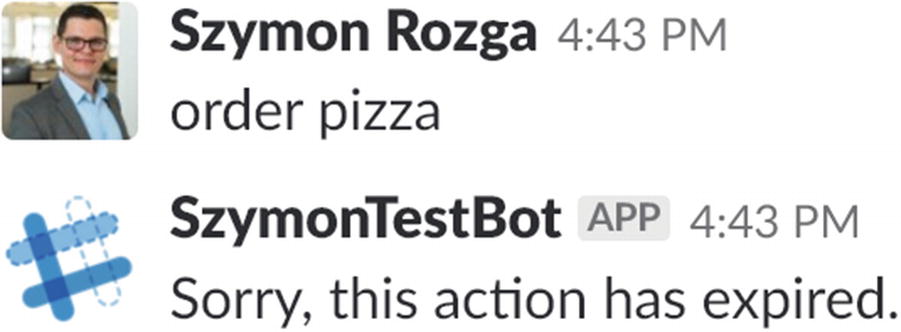
Yikes!
So, what happened? As it turns out, the recognizer we previously created to reject interactive message responses when they were not expected kicked in and told us the action is expired. It seems that the prompt code pre-empted the global recognizer, whereas if we use a waterfall dialog, there is no way for us to control the recognition process.
In Chapter 6, when we discussed custom dialogs, we briefly touched on a method called recognize. This method allows us to indicate to the Bot Builder SDK that we want our current dialog to be first in line in interpreting a user message. In this case, we have specific callbacks coming in from Slack. This is a great use case for the recognize feature. But how do we access it? Turns out, we can create a custom subclass of WaterfallDialog and define a custom recognize implementation.
In short, recognize is called any time a message comes in. We resolve the supported callbacks in the dialog from the this.callbackId object. We support a single callback value, an array of callback values, or a function that returns callback values. If the callback is of any of the supported callback IDs, we return a score of 1.0, which means that our dialog will handle the message. Otherwise, we pass a score of 0.0. This means these callbacks will go up to the global recognizers, as discussed in Chapter 6. Any other callback ID will be considered expired.
We can easily use this class as follows:
If we run the code now, we get the same resulting flow as in Figures 8-30 through 8-33.
Exercise 8-3
Interactive Messages
- 1.
Create a universal bot with two steps. The first step calls a dialog called filterClothing, and the second step prints the dialog’s result to the console and ends the conversation.
- 2.
Follow the structure of the latest section to create a multistep interactive message dialog called filterClothing. Collect three pieces of data to filter a hypothetical clothing collection: garment type, size, and color. Exclusively use menus.
- 3.
Make sure to utilize HTTP requests against response_url to update the interactive message.
You are now well-versed in exercising the Slack API for multistep interactive messages, one of the cooler Slack features.
Conclusion
The code demonstrated in this chapter is just scratching the surface of the integration possibilities between our Bot Builder bots and different channels. Although we have deliberately focused on Slack use cases, we hope it is clear there are plenty opportunities to reuse our bot code across a spectrum of different experiences both generic and platform-specific in nature.
The powerful abstractions of dialogs, state, and recognizers can be applied across all channels, even when using native mechanisms to invoke the dialogs. We have not yet explored creating a connector for a custom channel. We will examine this in the next chapter.