
Snort itself isn't too terribly difficult to set up. However, if you're doing everything manually, it can be a bit tedious by the time you've set up the control console, the sensors, and your choice of graphical frontends. So—and, imagine me peering at you over my dark glasses as I say this—what if I told you that you can get your Snort setup as part of a ready-to-go appliance? What if I told you that setting up such an appliance is an absolute breeze? I imagine that you'd probably say, So, show me already!
Since Snort is a Free Open Source Software (FOSS) project, it's perfectly legal for people to build it into their own FOSS applications. Also, if you think back to our discussion of firewalls in Chapter 3, Securing Your Server with a Firewall, I completely glossed over any discussion of creating the Network Address Translation (NAT) rules that you would need for setting up an edge or gateway type of firewall. That's because there are several Linux distros that have been created specifically for this purpose. What if I told you, that some of them also include a full implementation of Snort?
IPFire is completely free of charge, and it only takes a few minutes to set up. You install it on a machine with at least two network interface adapters and configure it to match your network configuration. It's a proxy-type of a firewall, which means that in addition to doing normal firewall-type packet inspection, it also includes caching, content-filtering, and NAT capabilities. You can set up IPFire in a number of different configurations:
- On a computer with two network interface adapters, you can have one connected to the internet, and the other connected to the internal LAN.
- With three network adapters, you can have one connection to the internet, one to the internal LAN, and one to the Demilitarized Zone (DMZ), where you have your internet-facing servers.
- With a fourth network adapter, you can have all the above, plus protection for a wireless network.
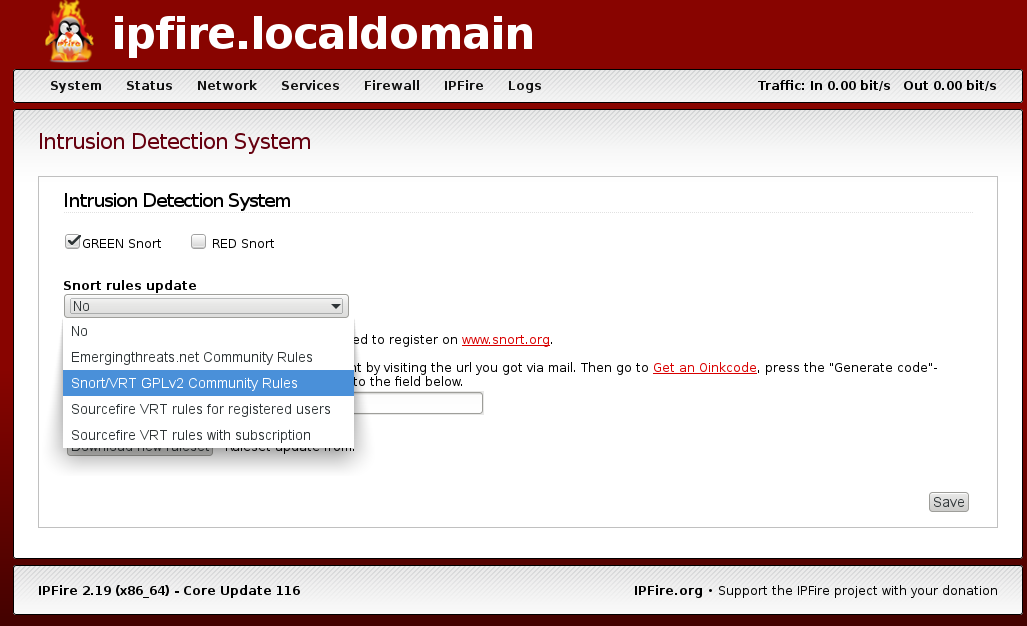
After you install IPFire, you'll need to use the web browser of your normal workstation to navigate to the IPFire dashboard. Under the Services menu, you'll see an entry for Intrusion Detection. Click on that to get to this screen, where you can download and enable the Snort detection rules:
There's really only one slight bit of manual tweaking that you might need to do from the command line. That is, you might want to go into the rules directory and make sure that the rules that you want to enable are enabled. On my demo machine, I installed the community rules and the emerging threat rules:
[root@ipfire rules]# ls -l
total 19336
-rw-r--r-- 1 nobody nobody    1656 Dec 19 06:01 BSD-License.txt
-rw-r--r-- 1 nobody nobody    2638 Dec 19 06:01 classification.config
-rw-r--r-- 1 nobody nobody 1478085 Dec 19 06:01 community.rules
-rw-r--r-- 1 nobody nobody   15700 Dec 19 06:01 compromised-ips.txt
-rw-r--r-- 1 nobody nobody  378690 Dec 19 06:01 emerging-activex.rules
-rw-r--r-- 1 nobody nobody   79832 Dec 19 06:01 emerging-attack_response.rules
-rw-r--r-- 1 nobody nobody   82862 Dec 19 06:01 emerging-botcc.portgrouped.rules
-rw-r--r-- 1 nobody nobody  249176 Dec 19 06:01 emerging-botcc.rules
-rw-r--r-- 1 nobody nobody   34658 Dec 19 06:01 emerging-chat.rules
. . .
. . .
-rw-r--r-- 1 nobody nobody    1375 Dec 19 06:01 reference.config
-rw-r--r-- 1 nobody nobody 3691529 Dec 19 06:01 sid-msg.map
-rw-r--r-- 1 nobody nobody       0 Dec 19 06:01 snort-2.9.0-enhanced-open.txt
-rw-r--r-- 1 nobody nobody   53709 Dec 19 06:01 unicode.map
-rw-r--r-- 1 nobody nobody   21078 Dec 19 04:46 VRT-License.txt
[root@ipfire rules]#
When you open one of these rules files, you'll see that a lot of them are disabled and relatively few are enabled. The disabled rules have a # sign in front of them, as do these two rules from the community.rules file:
#alert tcp $HOME_NET 2589 -> $EXTERNAL_NET any (msg:"MALWARE-BACKDOOR - Dagger_1.4.0"; flow:to_client,established; content:"2|00 00 00 06 00 00 00|Drives|24 00|"; depth:16; metadata:ruleset community; classtype:misc-activity; sid:105; rev:14;)
#alert tcp $EXTERNAL_NET any -> $HOME_NET 7597 (msg:"MALWARE-BACKDOOR QAZ Worm Client Login access"; flow:to_server,established; content:"qazwsx.hsq"; metadata:ruleset community; reference:mcafee,98775; classtype:misc-activity; sid:108; rev:11;)
You've probably also noted that each rule begins with the keyword, alert. You can use grep to do a quick check to see which rules in a file are enabled:
[root@ipfire rules]# grep ^alert community.rules | less
[root@ipfire rules]#
The ^ character means that I'm searching through the community.rules file for every line that begins with the word alert, without the preceding # sign. Piping the output into less is optional, but it can help you better see all of the output data. You can also search through all the files at once using a wildcard:
[root@ipfire rules]# grep ^alert *.rules | less
[root@ipfire rules]#
You'll want to look through the rules to see which you need and which you don't need. Enable the desired rule by removing the # sign from in front of it and disable an undesired rule by placing a # sign in front of it.
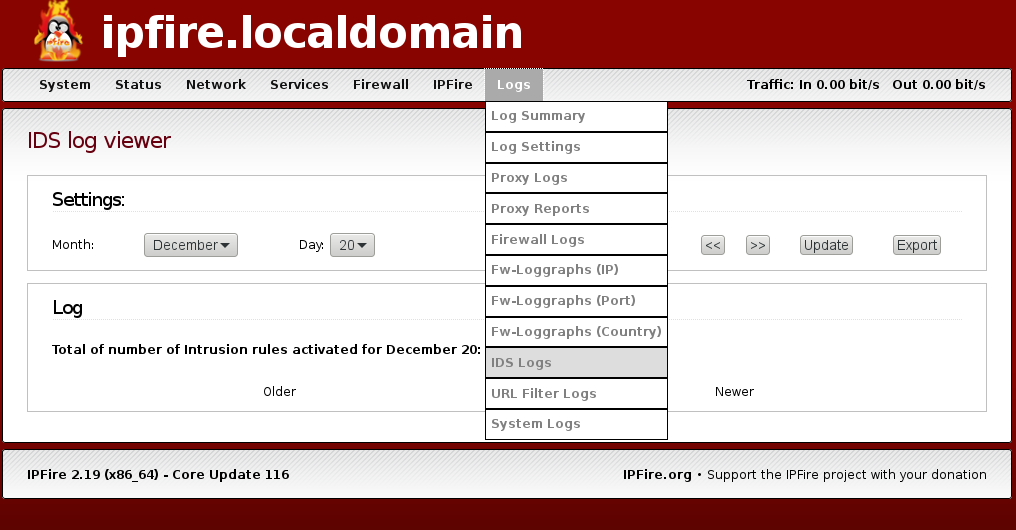
Unfortunately, IPFire doesn't include a graphical frontend for visualizing Snort data, but it does come with an IDS log viewer:
IPFire also has a lot of other cool features that I haven't yet mentioned. These include built-in Virtual Private Network (VPN) capabilities, a built-in DHCP server, a built-in dynamic DNS server, and Quality of Service controls. The best part is that it's totally free of charge unless you want to buy a subscription to always get the most up-to-date Snort rules.