Table of Contents for
Mastering Linux Security and Hardening

Version ebook / Retour

Cover image for bash Cookbook, 2nd Edition Mastering Linux Security and Hardening by Donald A. Tevault Published by Packt Publishing, 2018
  1. Mastering Linux Security and Hardening
  2. Title Page
  3. Copyright and Credits
  4. Mastering Linux Security and Hardening
  5. Packt Upsell
  6. Why subscribe?
  7. PacktPub.com
  8. Contributors
  9. About the author
  10. About the reviewer
  11. Packt is searching for authors like you
  12. Table of Contents
  13. Preface
  14. Who this book is for
  15. What this book covers
  16. To get the most out of this book
  17. Download the color images
  18. Conventions used
  19. Get in touch
  20. Reviews
  21. Running Linux in a Virtual Environment
  22. The threat landscape
  23. So, how does this happen?
  24. Keeping up with security news
  25. Introduction to VirtualBox and Cygwin
  26. Installing a virtual machine in VirtualBox
  27. The EPEL repository on the CentOS virtual machine
  28. Configuring a network for VirtualBox virtual machines
  29. Creating a virtual machine snapshot with VirtualBox
  30. Using Cygwin to connect to your virtual machines
  31. Installing Cygwin on your Windows host
  32. Summary
  33. Securing User Accounts
  34. The dangers of logging in as the root user
  35. The advantages of using sudo
  36. Setting up sudo privileges for full administrative users
  37. Method 1 – adding users to a predefined admin group
  38. Method 2 – creating an entry in the sudo policy file
  39. Setting up sudo for users with only certain delegated privileges
  40. Hands-on lab for assigning limited sudo privileges
  41. Advanced tips and tricks for using sudo
  42. The sudo timer
  43. Hands-on lab for disabling the sudo timer
  44. Preventing users from having root shell access
  45. Preventing users from using shell escapes
  46. Preventing users from using other dangerous programs
  47. Limiting the user's actions with commands
  48. Letting users run as other users
  49. Locking down users' home directories the Red Hat or CentOS way
  50. Locking down users' home directories the Debian/Ubuntu way
  51. useradd on Debian/Ubuntu
  52. adduser on Debian/Ubuntu
  53. Hands-on lab for configuring adduser
  54. Enforcing strong password criteria
  55. Installing and configuring pwquality
  56. Hands-on lab for setting password complexity criteria
  57. Setting and enforcing password and account expiration
  58. Configuring default expiry data for useradd – for Red Hat or CentOS only
  59. Setting expiry data on a per-account basis, with useradd and usermod
  60. Setting expiry data on a per-account basis, with chage
  61. Hands-on lab for setting account and password expiry data
  62. Preventing brute-force password attacks
  63. Configuring the pam_tally2 PAM module
  64. Hands-on lab for configuring pam_tally2
  65. Locking user accounts
  66. Using usermod to lock a user account
  67. Using passwd to lock user accounts
  68. Locking the root user account
  69. Setting up security banners
  70. Using the motd file
  71. Using the issue file
  72. Using the issue.net file
  73. Summary
  74. Securing Your Server with a Firewall
  75. An overview of iptables
  76. Basic usage of iptables
  77. Hands-on lab for basic iptables usage
  78. Uncomplicated Firewall for Ubuntu systems
  79. Basic usage of ufw
  80. Hands-on lab for basic ufw usage
  81. firewalld for Red Hat systems
  82. Verifying the status of firewalld
  83. firewalld zones
  84. firewalld services
  85. Adding ports to a firewalld zone
  86. firewalld rich language rules
  87. Hands-on lab for firewalld commands
  88. nftables – a more universal type of firewall system
  89. nftables tables and chains
  90. Getting started with nftables
  91. Using nft commands
  92. Hands-on lab for nftables on Ubuntu
  93. Summary
  94. Encrypting and SSH Hardening
  95. GNU Privacy Guard
  96. Creating your GPG keys
  97. Symmetrically encrypting your own files
  98. Hands-on lab – combining gpg and tar for encrypted backups
  99. Using private and public keys for asymmetric encryption and signing
  100. Signing a file without encryption
  101. Encrypting partitions with Linux Unified Key Setup – LUKS
  102. Disk encryption during operating system installation
  103. Adding an encrypted partition with LUKS
  104. Configuring the LUKS partition to mount automatically
  105. Encrypting directories with eCryptfs
  106. Home directory and disk encryption during Ubuntu installation
  107. Encrypting a home directory for a new user account
  108. Creating a private directory within an existing home directory
  109. Encrypting other directories with eCryptfs
  110. Encrypting the swap partition with eCryptfs
  111. Using VeraCrypt for cross-platform sharing of encrypted containers
  112. Getting and installing VeraCrypt
  113. Creating and mounting a VeraCrypt volume in console mode
  114. Using VeraCrypt in GUI mode
  115. Ensuring that SSH protocol 1 is disabled
  116. Creating and managing keys for password-less logins
  117. Creating a user's SSH key set
  118. Transferring the public key to the remote server
  119. Disabling root user login
  120. Disabling username/password logins
  121. Setting up a chroot environment for SFTP users
  122. Creating a group and configuring the sshd_config file
  123. Hands-on lab – setting up a chroot directory for sftpusers group
  124. Summary
  125. Mastering Discretionary Access Control
  126. Using chown to change ownership of files and directories
  127. Using chmod to set permissions values on files and directories
  128. Setting permissions with the symbolic method
  129. Setting permissions with the numerical method
  130. Using SUID and SGID on regular files
  131. The security implications of the SUID and SGID permissions
  132. Finding spurious SUID or SGID files
  133. Hands-on lab – searching for SUID and SGID files
  134. Preventing SUID and SGID usage on a partition
  135. Using extended file attributes to protect sensitive files
  136. Setting the a attribute
  137. Setting the i attribute
  138. Hands-on lab – setting security-related extended file attributes
  139. Summary
  140. Access Control Lists and Shared Directory Management
  141. Creating an access control list for either a user or a group
  142. Creating an inherited access control list for a directory
  143. Removing a specific permission by using an ACL mask
  144. Using the tar --acls option to prevent the loss of ACLs during a backup
  145. Creating a user group and adding members to it
  146. Adding members as we create their user accounts
  147. Using usermod to add an existing user to a group
  148. Adding users to a group by editing the /etc/group file
  149. Creating a shared directory
  150. Setting the SGID bit and the sticky bit on the shared directory
  151. Using ACLs to access files in the shared directory
  152. Setting the permissions and creating the ACL
  153. Charlie tries to access Vicky's file with an ACL set for Cleopatra
  154. Hands-on lab – creating a shared group directory
  155. Summary
  156. Implementing Mandatory Access Control with SELinux and AppArmor
  157. How SELinux can benefit a systems administrator
  158. Setting security contexts for files and directories
  159. Installing the SELinux tools
  160. Creating web content files with SELinux enabled
  161. Fixing an incorrect SELinux context
  162. Using chcon
  163. Using restorecon
  164. Using semanage
  165. Hands-on lab – SELinux type enforcement
  166. Troubleshooting with setroubleshoot
  167. Viewing setroubleshoot messages
  168. Using the graphical setroubleshoot utility
  169. Troubleshooting in permissive mode
  170. Working with SELinux policies
  171. Viewing the Booleans
  172. Configuring the Booleans
  173. Protecting your web server
  174. Protecting network ports
  175. Creating custom policy modules
  176. Hands-on lab – SELinux Booleans and ports
  177. How AppArmor can benefit a systems administrator
  178. Looking at AppArmor profiles
  179. Working with AppArmor command-line utilities
  180. Troubleshooting AppArmor problems
  181. Summary
  182. Scanning, Auditing, and Hardening
  183. Installing and updating ClamAV and maldet
  184. Installing ClamAV and maldet
  185. Configuring maldet
  186. Updating ClamAV and maldet
  187. Scanning with ClamAV and maldet
  188. SELinux considerations
  189. Scanning for rootkits with Rootkit Hunter
  190. Installing and updating Rootkit Hunter
  191. Scanning for rootkits
  192. Controlling the auditd daemon
  193. Creating audit rules
  194. Auditing a file for changes
  195. Auditing a directory
  196. Auditing system calls
  197. Using ausearch and aureport
  198. Searching for file change alerts
  199. Searching for directory access rule violations
  200. Searching for system call rule violations
  201. Generating authentication reports
  202. Using predefined rules sets
  203. Applying OpenSCAP policies with oscap
  204. Installing OpenSCAP
  205. Viewing the profile files
  206. Scanning the system
  207. Remediating the system
  208. Using SCAP Workbench
  209. More about OpenSCAP profiles
  210. Applying an OpenSCAP profile during system installation
  211. Summary
  212. Vulnerability Scanning and Intrusion Detection
  213. Looking at Snort and Security Onion
  214. Obtaining and installing Snort
  215. Graphical interfaces for Snort
  216. Getting Snort in prebuilt appliances
  217. Using Security Onion
  218. Scanning and hardening with Lynis
  219. Installing Lynis on Red Hat/CentOS
  220. Installing Lynis on Ubuntu
  221. Scanning with Lynis
  222. Finding vulnerabilities with OpenVAS
  223. Web server scanning with Nikto
  224. Nikto in Kali Linux
  225. Installing and updating Nikto on Linux
  226. Scanning a web server with Nikto
  227. Summary
  228. Security Tips and Tricks for the Busy Bee
  229. Auditing system services
  230. Auditing system services with systemctl
  231. Auditing network services with netstat
  232. Auditing network services with Nmap
  233. Port states
  234. Scan types
  235. Password-protecting the GRUB 2 bootloader
  236. Resetting the password for Red Hat/CentOS
  237. Resetting the password for Ubuntu
  238. Preventing kernel parameter edits on Red Hat/CentOS
  239. Preventing kernel parameter edits on Ubuntu
  240. Password-protecting boot options
  241. Disabling the submenu for Ubuntu
  242. Password-protecting boot option steps for both Ubuntu and Red Hat
  243. Securely configuring BIOS/UEFI
  244. Using a security checklist for system setup
  245. Summary
  246. Other Books You May Enjoy
  247. Leave a review – let other readers know what you think

Auditing network services with netstat

The following are two reasons why you would want to keep track of what network services are running on your system:

  • To ensure that no legitimate network services that you don't need are running
  • To ensure that you don't have any malware that's listening for network connections from its master

The netstat command is both handy and easy to use for these instances. First, let's say that you want to see a list of network services that are listening, waiting for someone to connect to them:

donnie@linux-0ro8:~> netstat -lp -A inet


(Not all processes could be identified, non-owned process info
will not be shown, you would have to be root to see it all.)
Active Internet connections (only servers)
Proto Recv-Q Send-Q Local Address Foreign Address State PID/Program name
tcp 0 0 *:ideafarm-door *:* LISTEN -
tcp 0 0 localhost:40432 *:* LISTEN 3296/SpiderOakONE
tcp 0 0 *:ssh *:* LISTEN -
tcp 0 0 localhost:ipp *:* LISTEN -
tcp 0 0 localhost:smtp *:* LISTEN -
tcp 0 0 *:db-lsp *:* LISTEN 3246/dropbox
tcp 0 0 *:37468 *:* LISTEN 3296/SpiderOakONE
tcp 0 0 localhost:17600 *:* LISTEN 3246/dropbox
tcp 0 0 localhost:17603 *:* LISTEN 3246/dropbox
udp 0 0 *:57228 *:* 3376/plugin-contain
udp 0 0 192.168.204.1:ntp *:* -
udp 0 0 172.16.249.1:ntp *:* -
udp 0 0 linux-0ro8:ntp *:* -
udp 0 0 localhost:ntp *:* -
udp 0 0 *:ntp *:* -
udp 0 0 *:58102 *:* 5598/chromium --pas
udp 0 0 *:db-lsp-disc *:* 3246/dropbox
udp 0 0 *:43782 *:* 5598/chromium --pas
udp 0 0 *:36764 *:* -
udp 0 0 *:21327 *:* 3296/SpiderOakONE
udp 0 0 *:mdns *:* 5598/chromium --pas
udp 0 0 *:mdns *:* -
raw 0 0 *:icmp *:* 7 -
donnie@linux-0ro8:~>

The breakdown is as follows:

  • -lp: The l means that we want to see which network ports are listening. In other words, we want to see which network ports are waiting for someone to connect to them. The p means that we want to see the name and process ID number of the program or service that is listening on each port.
  • -A inet: This means that we only want to see information about the network protocols that are members of the inet family. In other words, we want to see information about the raw, tcp, and udp network sockets, but we don't want to see anything about the Unix sockets that only deal with interprocess communications within the operating system.

Since this output is from the OpenSUSE workstation that I just happen to be using at the moment, you won't see any of the usual server-type services here. However, you do see a few things that you likely won't want to see on your servers. For example, let's look at the very first item:

Proto Recv-Q Send-Q Local Address      Foreign Address         State       PID/Program name
tcp 0 0 *:ideafarm-door *:* LISTEN -

The Local Address column specifies the local address and port of this listening socket. The asterisk means that this socket is on the local network, and ideafarm-door is the name of the network port that is listening. (By default, netstat will show you the names of ports whenever possible, by pulling the port information out of the /etc/services file.)

Now, because I didn't know what the ideafarm-door service is, I used my favorite search engine to find out. By plugging the term ideafarm-door into DuckDuckGo, I found the answer:

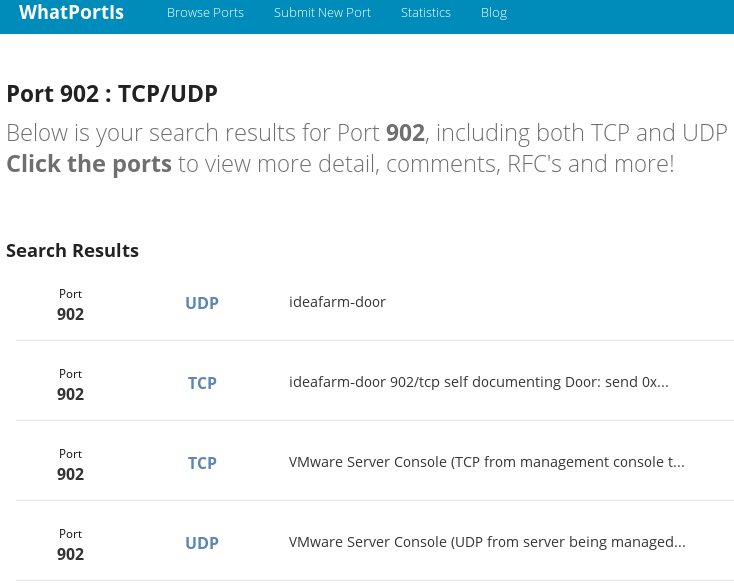
The top search result took me to a site named WhatPortIs. According to this, the ideafarm-door is in reality port 902, which belongs to the VMware Server Console. Okay, that makes sense because I do have VMware Player installed on this machine. So, that's all good.

You can check out the WhatPortIs site here: http://whatportis.com/.

Next on the list is:

tcp        0      0 localhost:40432    *:*       LISTEN      3296/SpiderOakONE

This item shows the local address as localhost and that the listening port is port 40432.  This time, the PID/Program Name column actually tells us what this is. SpiderOak ONE is a cloud-based backup service that you might or might not want to see running on your server. 

Now, let's look at a few more items:

tcp 0      0 *:db-lsp                   *:*      LISTEN      3246/dropbox
tcp 0 0 *:37468 *:* LISTEN 3296/SpiderOakONE
tcp 0 0 localhost:17600 *:* LISTEN 3246/dropbox
tcp 0 0 localhost:17603 *:* LISTEN 3246/dropbox

Here, we see that Dropbox and SpiderOak ONE are both listed with the asterisk for the local address. So, they're both using the local network address. The name of the port for Dropbox is db-lsp, which stands for Dropbox LAN Sync Protocol. The SpiderOak ONE port doesn't have an official name, so it's just listed as port 37468. The bottom two lines show that Dropbox also uses the local machine's address, on ports 17600 and 17603.

So far we've looked at nothing but TCP network sockets. Let's see how they differ from UDP sockets:

udp        0      0 192.168.204.1:ntp       *:*                                 -
udp 0 0 172.16.249.1:ntp *:* -
udp 0 0 linux-0ro8:ntp *:* -

The first thing to note is that there's nothing under the State column. That's because with UDP, there are no states. They actually are listening for data packets to come in, and they're ready to send data packets out. But since that's about all that UDP sockets can do, there was really no sense in defining different states for them.

In the first two lines, we see some strange local addresses. That's because I have both VMware Player and VirtualBox installed on this workstation. The local addresses of these two sockets are for the VMware and VirtualBox virtual network adapters. The last line shows the hostname of my OpenSUSE workstation as the local address. In all three cases, the port is the Network Time Protocol port, for time synchronization.

Let's now look at one last set of UDP items:

udp        0      0 *:58102         *:*                                 5598/chromium --pas
udp 0 0 *:db-lsp-disc *:* 3246/dropbox
udp 0 0 *:43782 *:* 5598/chromium --pas
udp 0 0 *:36764 *:* -
udp 0 0 *:21327 *:* 3296/SpiderOakONE
udp 0 0 *:mdns *:* 5598/chromium --pas

Here, we see that my Chromium web browser is ready to accept network packets on a few different ports. We also see that Dropbox uses UDP to accept discovery requests from other local machines that have Dropbox installed. I assume that port 21327 performs the same function for SpiderOak ONE.

Of course, since this machine is my workhorse workstation, Dropbox and SpiderOak ONE are almost indispensable to me. I installed them myself, so I've always know that they were there. However, if you see anything like this on a server, you'll want to investigate to see if the server admins know that these programs are installed, and then find out why they're installed. It could be that they're performing a legitimate function, and it could be that they're not.

A difference between Dropbox and SpiderOak ONE is that with Dropbox, your files don't get encrypted until they've been uploaded to the Dropbox servers. So, the Dropbox folk have the encryption keys to your files. On the other hand, SpiderOak ONE encrypts your files on your local machine, and the encryption keys never leave your possession. So, if you really do need a cloud-based backup service and you're dealing with sensitive files, something like SpiderOak ONE would definitely be better than Dropbox. (And no, the SpiderOak ONE folk aren't paying me to say that.)

If you want to see port numbers and IP addresses instead of network names, add the n option. We have the following code:

donnie@linux-0ro8:~> netstat -lpn -A inet

(Not all processes could be identified, non-owned process info
will not be shown, you would have to be root to see it all.)
Active Internet connections (only servers)
Proto Recv-Q Send-Q Local Address Foreign Address State PID/Program name
tcp 0 0 0.0.0.0:902 0.0.0.0:* LISTEN -
tcp 0 0 127.0.0.1:40432 0.0.0.0:* LISTEN 3296/SpiderOakONE
tcp 0 0 0.0.0.0:22 0.0.0.0:* LISTEN -
tcp 0 0 127.0.0.1:631 0.0.0.0:* LISTEN -
tcp 0 0 127.0.0.1:25 0.0.0.0:* LISTEN -
tcp 0 0 0.0.0.0:17500 0.0.0.0:* LISTEN 3246/dropbox
tcp 0 0 0.0.0.0:37468 0.0.0.0:* LISTEN 3296/SpiderOakONE
tcp 0 0 127.0.0.1:17600 0.0.0.0:* LISTEN 3246/dropbox
tcp 0 0 127.0.0.1:17603 0.0.0.0:* LISTEN 3246/dropbox
udp 0 0 192.168.204.1:123 0.0.0.0:* -
udp 0 0 172.16.249.1:123 0.0.0.0:* -
udp 0 0 192.168.0.222:123 0.0.0.0:* -
udp 0 0 127.0.0.1:123 0.0.0.0:* -
udp 0 0 0.0.0.0:123 0.0.0.0:* -
udp 0 0 0.0.0.0:17500 0.0.0.0:* 3246/dropbox
udp 0 0 0.0.0.0:50857 0.0.0.0:* 5598/chromium --pas
udp 0 0 0.0.0.0:43782 0.0.0.0:* 5598/chromium --pas
udp 0 0 0.0.0.0:44023 0.0.0.0:* 10212/plugin-contai
udp 0 0 0.0.0.0:36764 0.0.0.0:* -
udp 0 0 0.0.0.0:21327 0.0.0.0:* 3296/SpiderOakONE
udp 0 0 0.0.0.0:5353 0.0.0.0:* 5598/chromium --pas
udp 0 0 0.0.0.0:5353 0.0.0.0:* -
raw 0 0 0.0.0.0:1 0.0.0.0:* 7 -
donnie@linux-0ro8:~>

All you have to do to view the established TCP connections is to leave out the l option. On my workstation, this makes for a very long list, so I'll only show a few items:

donnie@linux-0ro8:~> netstat -p -A inet
(Not all processes could be identified, non-owned process info
will not be shown, you would have to be root to see it all.)
Active Internet connections (w/o servers)
Proto Recv-Q Send-Q Local Address Foreign Address State PID/Program name
tcp 1 0 linux-0ro8:41670 ec2-54-88-208-223:https CLOSE_WAIT 3246/dropbox
tcp 0 0 linux-0ro8:59810 74-126-144-106.wa:https ESTABLISHED 3296/SpiderOakONE
tcp 0 0 linux-0ro8:58712 74-126-144-105.wa:https ESTABLISHED 3296/SpiderOakONE
tcp 0 0 linux-0ro8:caerpc atl14s78-in-f2.1e:https ESTABLISHED 10098/firefox
. . .
. . .

The Foreign Address column shows the address and port number of the machine at the remote end of the connection. The first item shows that the connection with a Dropbox server is in a CLOSE_WAIT state. This means that the Dropbox server has closed the connection, and we're now waiting on the local machine to close the socket.

Because the names of those foreign addresses don't make much sense, let's add the n option to see IP addresses instead:

donnie@linux-0ro8:~> netstat -np -A inet
(Not all processes could be identified, non-owned process info
will not be shown, you would have to be root to see it all.)
Active Internet connections (w/o servers)
Proto Recv-Q Send-Q Local Address Foreign Address State PID/Program name
tcp 0 1 192.168.0.222:59594 37.187.24.170:443 SYN_SENT 10098/firefox
tcp 0 0 192.168.0.222:59810 74.126.144.106:443 ESTABLISHED 3296/SpiderOakONE
tcp 0 0 192.168.0.222:58712 74.126.144.105:443 ESTABLISHED 3296/SpiderOakONE
tcp 0 0 192.168.0.222:38606 34.240.121.144:443 ESTABLISHED 10098/firefox
. . .
. . .

This time we see something new. The first item shows a SYN_SENT state for the Firefox connection. This means that the local machine is trying to establish a connection to the foreign IP address. Also, under Local Address, we see the static IP address for my OpenSUSE workstation.

If I had space to display the entire netstat output here, you'd see nothing but tcp under the Proto column. That's because the UDP protocol doesn't establish connections in the same way that the TCP protocol does.

Something to keep in mind is that rootkits can replace legitimate Linux utilities with their own trojaned versions. For example, a rootkit could have its own trojaned version of netstat that would show all network processes except for those that are associated with the rootkit. That's why you want something like Rootkit Hunter in your toolbox.

If you need more information about netstat, see the netstat man page.