
First of all, let's see how we generate an object file. I am quite sure you have already understood how to produce different targets in general and for this example in particular. Let's begin with a 32-bit MSCOFF object file by setting the ACTIVE_TARGET variable to TARGET_W32_OBJ and compiling the main source file.
Create a C/C++ project in Visual Studio and copy the object file into the project directory as shown in the following screenshot (the screenshot shows object files for both 32-bit and 64-bit):
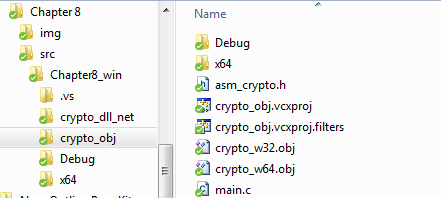
As you can see in the preceding screenshot, there is at least one more file we need, namely the header file. Since our crypto engine is fairly simple, we do not need any complicated header files. The one shown here would definitely suffice:

There is a small catch in the preceding code. Try figuring out what isn't correct before you read the next paragraph.
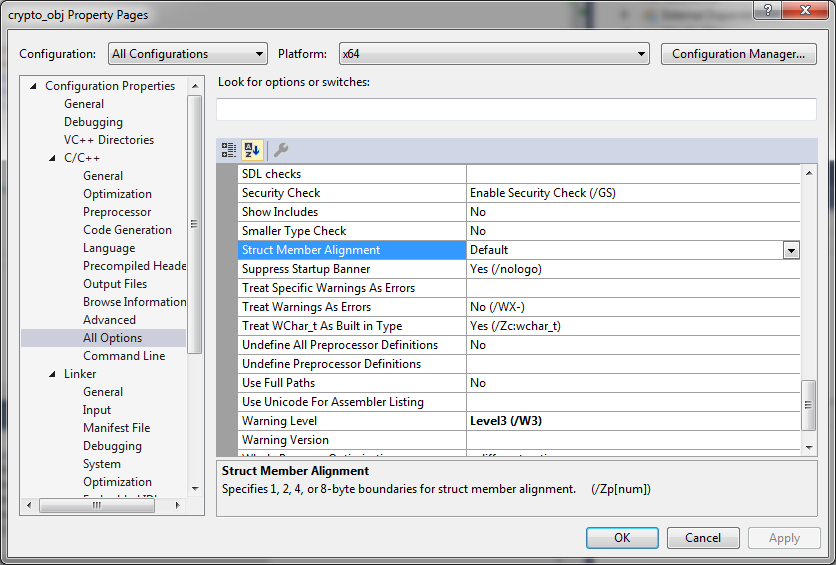
Technically, the code is correct. It would compile and run without a problem, but there is one very important aspect of linking modules written in Assembly to other languages, very important and not quite obvious at the first glance:structure member alignment. In this example, we only used one structure (where we store procedure pointers) and we took proper care of it so that the pointers would be properly aligned depending on the platform. While we aligned our data on a byte boundary (stored it sequentially), Visual Studio's default structure member alignment value is, well, Default, which does not really tell us a lot. Assumptions may be made (in this case, we can assume that Default means the first option, which is a 1-byte alignment), but there is no guarantee of that and we have to explicitly specify the alignment, as assumptions not only do not always work in the case of Assembly, but they also pose a serious threat. It is important to mention that, despite the fact that we have been mentioning Visual Studio in this paragraph, the same applies to any C compiler.
One way to specify structure member alignment would be through the project settings, as follows:
This is good enough for our example, but it may cause problems in the case of larger projects. It is highly recommended not to change the structure member alignment project-wide without any reasonable need for such a change. Instead, we may make a tiny modification to our header file, which would tell the compiler how to handle structure member alignment for this specific structure. Insert the following code right before the declaration of the crypto_functions_t structure:
#ifdef WIN32                   // For Windows platforms (MSVC)
#pragma pack(push, 1)          // set structure member alignment to 1
#define PACKED
#else                          // Do the same for Unix based platforms (GCC)
#define PACKED  __attribute__((packed, aligned(1)))
#endif
Insert the following right after the declaration:
#ifdef WIN32                   // For Windows platforms
#pragma pack(pop)              // Restore previous alignment settings
#endif
Now, consider the following line:
}crypto_functions_t, *pcrypto_functions_t;
Change the preceding line to this:
}PACKED crypto_functions_t, *pcrypto_functions_t;
Then, add the main.c file as shown in the following screenshot:
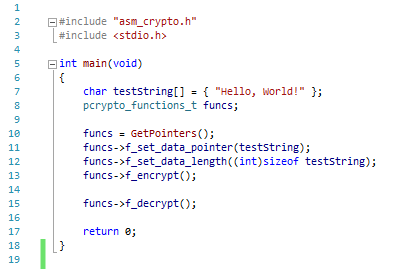
The code in the main.c file is more than self-explanatory. There are only two local variables; the testString variable represents the data we will process and funcs will store the pointer to the pointers structure in our Crypto Core.
Do not try to build the project yet as we have not told Visual Studio about our object file. Right-click on the project and select Properties. The following screenshot shows how to add our object file for a 64-bit platform project. The same should be done for a 32-bit project. You should just pay attention to which object file goes to which platform:
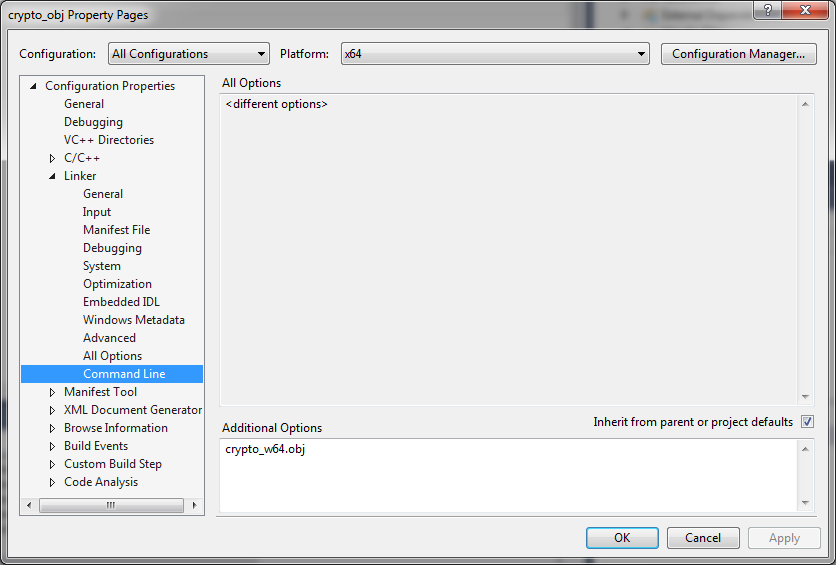
In the accompanying example project, the crypto_w64.obj file goes to the x64 platform, and crypto_w32.obj is for x86.
You are now free to build and run the project (either x86 or x64, given that the object files are specified correctly). I would suggest setting breakpoints at lines 13 and 15 of the main.c file in order to be able to spot the changes in memory pointed by testString. While running, you would get something similar to the following (similar because the key would be different with each build of our Crypto Core):
The preceding screenshot shows the data supplied to the core prior to encryption. The following screenshot shows the same data after it has been encrypted: