It is relatively straightforward to debug Spin code. You can insert commands to print the value of variables to the terminal. This is a time-honored way to debug code, and though tedious, it works. In Listings 11-1 and 11-2, I show how I monitor the value of a variable.
1 PUB MAIN
2 ...
3 UARTS.STR(DEBUG, string(" nsamps = "))
4 UARTS.DEC(DEBUG, nsamps)
5 UARTS.PUTC(DEBUG, CR)
Listing 11-1
Debugging Spin Code
with Print Commands
Insert print statements like this in your Spin code, and you can examine the value of variables at different places.
I find that the verbose set of commands gets inconvenient, so I have defined a method called PRINTF.
1
2 PUB MAIN
3 ...
4 PRINTF(DEBUG, string(" nc "), nc, 1)
5 ...
6 '
7 ' Convenience method to print `n' to port `p' with the following format :
8 ' PRINTF(DEBUG, string(" nc "), nc, 1)
9 ' nc :3, 0x03, 0 b0000011
10 PRI PRINTF(p, lbl, n, len)
11 ' p is the serial port, lbl is the string label
12 ' n is the number to print
13 ' len is the number of bytes to display in the hex and binary
14 UARTS.STR(p, lbl)
15 UARTS.PUTC(p, COLON)
16 UARTS.DEC(p, n)
17 UARTS.STR(p, string(COMMA, " 0x"))
18 UARTS.HEX(p, n, len *2)
19 UARTS.STR(p, string(COMMA, " 0b"))
20 UARTS.BIN(p, n, len *8)
21 UARTS.PUTC(p, CR)
22 UARTS.PUTC(p, LF)
Listing 11-2
Convenience Method to Print Out a Variable’s Value
We can’t do the same in PASM code, though. There isn’t a simple way to print to the terminal from PASM code, so I will demonstrate two different methods for examining variable values
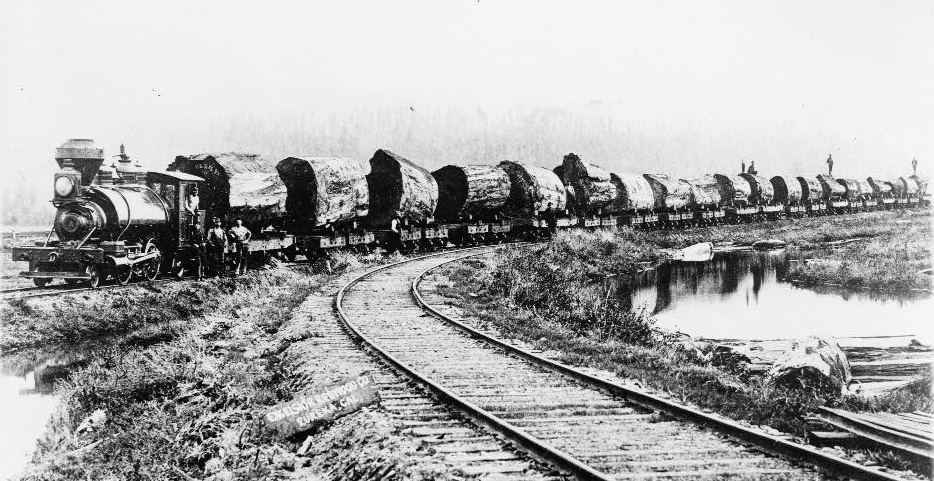
in PASM. These methods of debugging are referred to as logging (see Figure 11-1 for another example of logging; the size of those logs is astonishing and the sight of them cut down is quite sad!)
Figure 11-1
Redwood logs on train from forest to mill.
https://upload.wikimedia.org/wikipedia/commons/9/9a/Redwood_Logging_Train.jpg
.
11.1 Logging to a Hub Array
The first logging technique is to save values to a hub array
that can be printed out at leisure. The second is to write a long from one cog to another (from a PASM cog to a Spin cog) using a set of hardware pins and Serial Peripheral Interface (SPI). Here I will look at the first technique. We already looked at the SPI logging in Chapter 7.
- 1.We will define a new array in Spin called logBuf.
- 2.We will define a new variable in the PASM code called clogBufPtr.
- 3.Before the cog is launched, we will place the address of logBuf into clogBufPtr.
Recall from Chapter 6 that there are two ways to pass parameters to a PASM cog: by using the cognew command and by storing the parameter in the cog code before it is launched. We are using the second method in Listing 11-3.
1 CON
2 LOGLEN = 256
3
4 VAR
5 logBuf[LOGLEN]
6
7 PUB START
8 _clogBufPtr := @logBuf
9 ccogid := cognew(@STEIM, @myns)
10 ...
11
12 DAT 'pasm cog
13 STEIM ORG 0
14
15 ... instructions
16 rdlong _cns _cnsPtr wz
17
18 ... variables
19 _ccode24 long CODE24
20
21 _clogBufPtr long 0
22
23 ... reserved space
24 _cnsPtr res 1
25
26 FIT 496
27 ... system registers (PAR, CNT, etc)
Listing 11-3
Debugging PASM Code by Passing the Address of the Log Buffer in a Register
We can now write to logBuf from PASM
, and the Spin code can print out those values. There is one important caveat: the PASM code and the Spin code run at very different speeds. The PASM code will populate the logBuf array, and at some later time, the Spin code will print it out. For that reason, you should include a label during logging. This label will be some unique identifier that tells you where the log value was written, during which iteration of the loop, and so on.
11.2 Spin Code
Add the following to steim_pasm.spin:
1 CON
2 LOGLEN = 256
3 ...
4 VAR
5 byte logIdx
6
7 long logBuf[LOGLEN]
8
9 PUB GETLOG
10 '' return address of log array
11 return @logBuf
12
13 PUB GETLOGLEN
14 '' return length of log
15 return logIdx
Here we define a new array where the log values will be stored, as well as new methods GETLOG and GETLOGLEN that return the address and populated length of that array.
In the main Spin file steim_pasm_Demo.spin, you can use the code in Listing 11-4 to print out the contents of the log array.
1 VAR
2 byte loglen
3 long logBufPtr
4
5 PUB MAIN
6 ...
7
8 logBufPtr := COMPR.GETLOG
9 loglen := COMPR.GETLOGLEN
10 repeat j from 0 to loglen -1
11 UARTS.HEX(DEBUG, long [logBufPtr][j], 8)
Listing 11-4
Debugging PASM Code by Sharing a Log Buffer; Spin Code
11.3 PASM Code
Populating the log array is done with wrlong instructions in PASM. The hub address of the log array is available in _clogBufPtr. We first save that value to _clogBufPtrSav so that we can reset to that location when we reach the end of the array.
In Listing 11-5, we implement the logging code. In addition to the storage for the logged data itself, we define a variable _clogIdx and a constant _clogMaxIdx. Every time we write to the log array, we increment the former; when the index reaches the end of the array, we reset the index to the beginning of the array.
1
2 mov r0, par
3 add r0, #16
4 rdlong _ccomprcodebufPtr, r0
5
6 ''>>> ADD THIS TO INITIALIZATION SECTION OF PASM CODE
7 call #INIT_LOG
8 ''<<<
9 mov _cj, #0 ' j-th samp
10
11 ''>>> ADD THESE SUBROUTINE DEFENITIONS
12 INIT_LOG
13 mov _clogIdx, #0
14 mov _clogBufPtr, _clogBufPtrSav
15 INIT_LOG_ret ret
16
17 LOG
18 '' write logVal to logBuf
19 '' increment logIdx
20 '' treat as circular buffer
21 wrlong _clogVal, _clogBufPtr
22 add _clogBufPtr, #4
23 add _clogIdx, #1
24 wrlong _clogIdx, _clogIdxPtr
25
26 ' wrap around ?
27 test _clogIdx, _clogMaxIdx wz
28 if_nz jmp #:logdone
29
30 mov _clogIdx, #0
31 mov _clogBufPtr, _clogBufPtrSav
32 :logdone
33 LOG_ret ret
34
35 ...
36
37 ''>>> ADD THESE VARIABLE DECLARATIONS
38 _clogMaxIdx long LOGLEN -1 ' 0 to loglen -1
39 _clogIdx long 0
40 _clogVal long 0
41
42 _clogBufPtr long 0
43 _clogBufPtrSav long 0
44 ...
Listing 11-5
Debugging PASM Code by Sharing a Log Buffer; PASM Code
The LOG subroutine keeps track
of the index into the log array and resets to the start when it reaches the end. It writes the value in _clogVal to the current address in the log array, increments that address, and resets the address to the beginning of the array if needed.
11.4 Bug Fix
The failure at the end of the previous chapter can now be tracked down. By placing the following statements at strategic places, I discovered that I had made a mistake in writing the compression code longs:
mov _clogVal, xxx
call #LOG
When there are 128 samples, the compression code array is 8 longs in length (2 bits per sample). However, I was mistakenly writing a ninth long, which overwrote memory of another array. (As it turns out, this was the packBuf array, but it could have been anything.)
Figure 11-2 shows the compression flowchart again, but I have added a check to the right of “16th samp?” shape. If this is also the last sample, jump out of the loop and finalize.
If, for example, there are exactly 16 samples to compress, the compression code is written only once.
On the first sample to the 15th sample, control flows down from “16th samp?” to “Done?” and then back up to “16th samp?”
On the last sample, the “16th samp?” query is true, so we go to the right, but the “Done?” query is also true, so we exit the loop and write the compression code at the end (without that question, we would write the compression code twice). In Figure 11-3, we show the consequences of over-running ones bounds!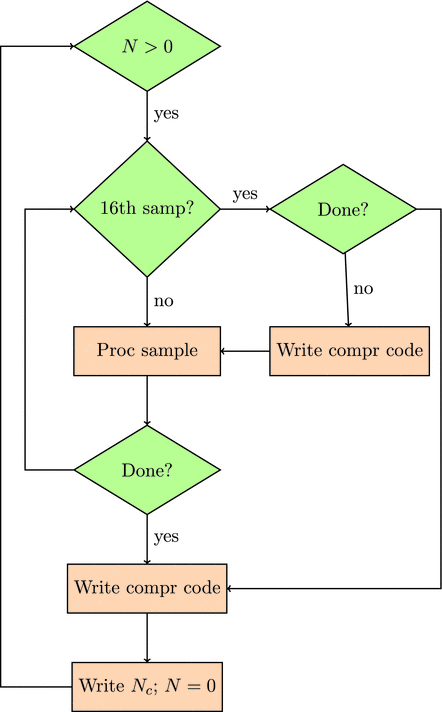
Figure 11-2
Flowchart for processing samples, with addition of a check for the final sample before writing the compression code. Compare this figure to Figure 9-1
.
PASM code will allow you modify any memory location. There is no checking of array lengths or bounds. It’s all up to you!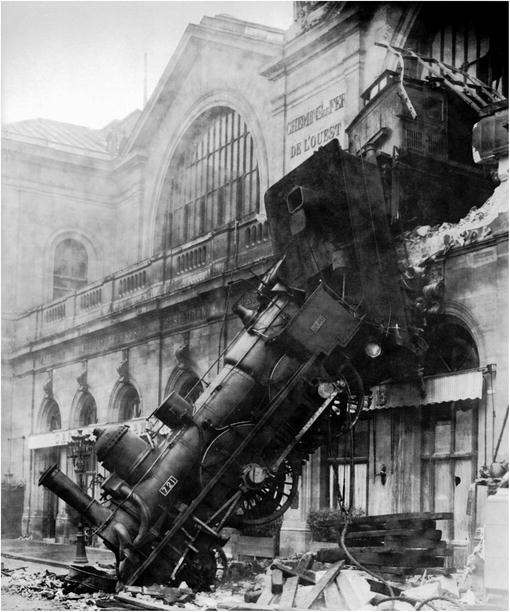
Figure 11-3
Train wreck at Gare Montparnasse, Paris, 1895. The train entered the station at a dangerously fast 40–60km/hr, and when the air brake on the locomotive failed, the train crossed the entire concourse (100m) and crashed through a 60cm thick wall before falling to the street below
.