In this chapter, we’ll cover the following:
Selective colorization in a scenic image
Selective colorization of an image of a classic motorcycle
This chapter is one I believe you’ll find easy and fun to follow. If you’ve ever seen the 1998 movie Pleasantville, then selective colorizing will probably seem familiar. In the movie, a teenage boy and his twin sister are transported into a fictional 1950s black and white sitcom. As the movie progresses, color begins to emerge here and there, mixed into a world made up of shades of gray. You can create some interesting images using this technique (Figure 8-1).
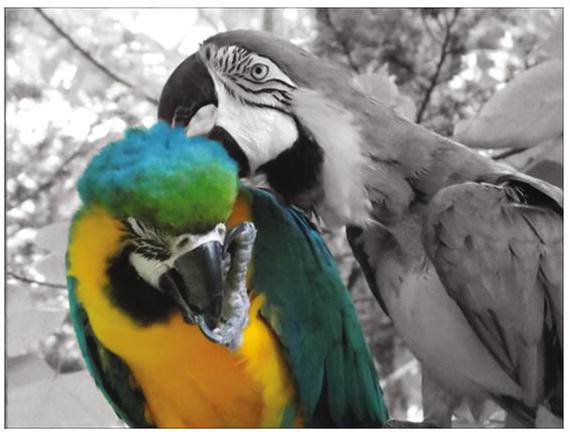
Figure 8-1. Mix color with black and white for an artistic effect
It’s a fun technique to experiment with. After you’ve done the tutorials in this chapter, give it a try using your own images.
The macaw in this example is endowed with vibrant colors, so there is a stark contrast between it and the black and white portion of the image. However, selective colorizing can be subtle as well. In Figure 8-2, there is a subtle emphasis on the figure and the surrounding area. The colors are pale, so there is a hint of color rather than a strong contrast.
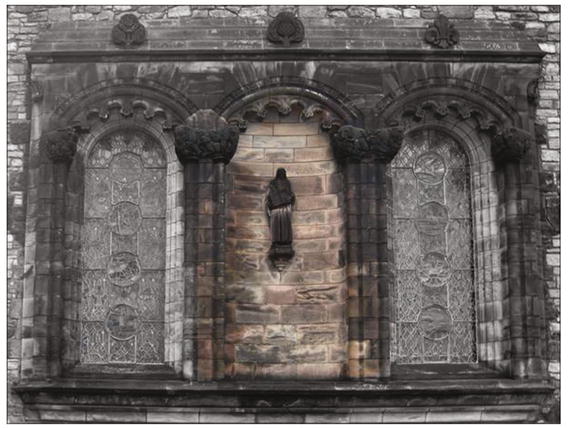
Figure 8-2. The pale colors create a subtle effect in this image
Tutorial 21: Selectively Applying Color (Little Boy)
Selective colorization basically involves removing the color from an image and then letting the original color come through in select areas. Photos of children often work quite well. In the upcoming tutorial, you’ll learn a method of accomplishing this using the photo shown in Figure 8-3.

Figure 8-3. Photographs of children often make good selective colorization projects
To selectively colorize this image, follow these steps:
Open the Ch8_Boy in Blue Coat.jpg file found in the Chapter 8 Practice Images folder.
Duplicate the background layer and rename the duplicate Black and White (or Grayscale). Open the Hue-Saturation dialog box (Colors ➤ Hue-Saturation) and move the Saturation slider to 0, then click OK (Figure 8-4).
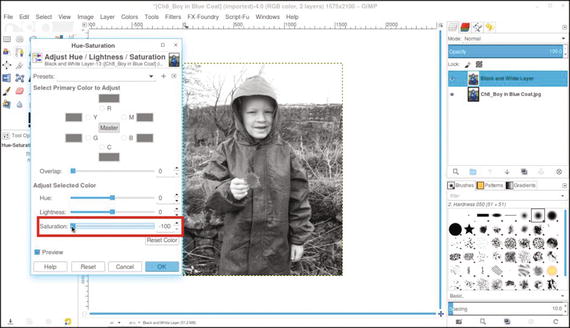
Figure 8-4. Lower the saturation to zero in the Hue-Saturation dialog
Add a layer mask to the duplicate layer (Layer ➤ Mask ➤ Add Layer Mask) initialized to white.
Click the black and white layer’s eyeball icon to hide it. Click on the background (original) layer to make it active.
Use the Fuzzy Select tool—with the “Anti-aliasing” option checked and Threshold set to 25—to click around in the blue coat and yellow flower while holding the Shift key down (Figure 8-5). It will select the majority of the coat and flower.

Figure 8-5. Hold the Shift key down while clicking around the coat and flower using the Fuzzy Select tool
Click the eyeball icon in the hidden layer to reveal it, and then click on the layer mask to make it active.
Use the Paint Bucket tool to fill the selected areas with black to reveal the underlying color (Figure 8-6).
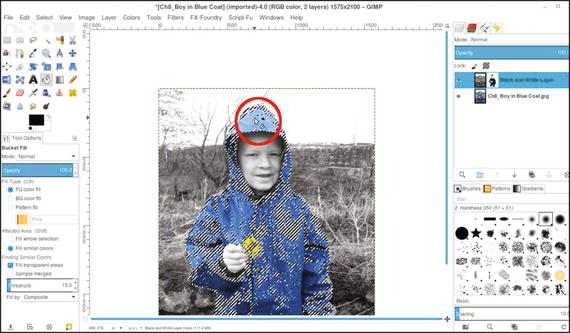
Figure 8-6. Fill in the selected areas with black to reveal the underlying color
Turn the selection off (Select ➤ None).
Using a brush with the 2.Hardness 050 setting and black as the active color, paint in the areas that the Fuzzy Select tool missed to reveal the remaining color. Zoom in and vary the brush size as needed (Figure 8-7).
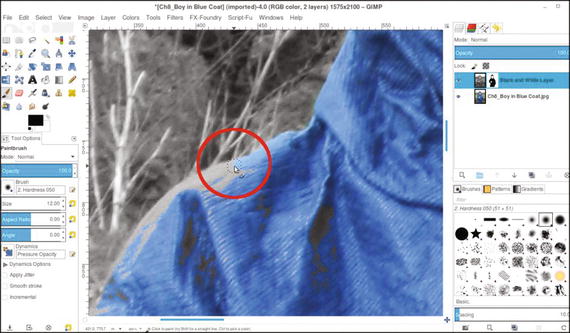
Figure 8-7. Paint in the areas the Fuzzy Select tool missed
By revealing the blue coat and the yellow flower, the result is an image with an artistic twist (Figure 8-8). If desired, save the image as an XCF file for future reference.
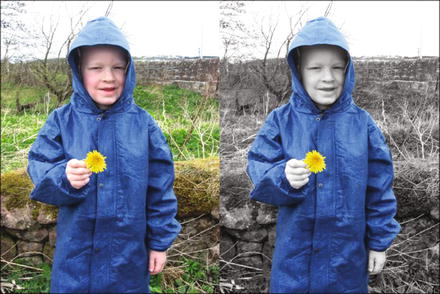
Figure 8-8. Before and after comparison
Tutorial 22: Selectively Applying Color (Classic Motorcycle)
In this tutorial, we’ll give an image of a motorcycle a nostalgic look. For this tutorial:
Open the Ch8_Classic Bike.jpg file found in the Chapter 8 Practice Images folder.
Duplicate the background layer (Layer ➤ Duplicate Layer) and rename the duplicate Black and White (or Grayscale). Open the Hue-Saturation dialog box (Colors Menu ➤ Hue-Saturation) and move the slider to lower the saturation to zero (Figure 8-9).
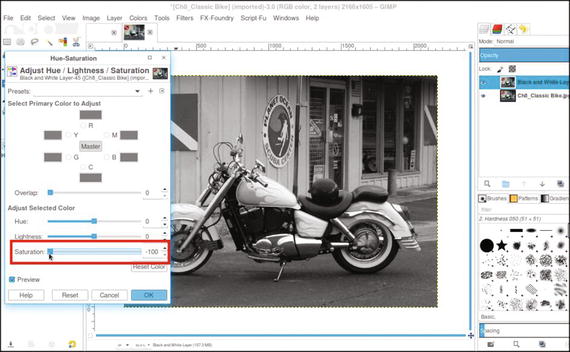
Figure 8-9. Lower the color saturation to zero.
Add a layer mask (Layer Menu ➤ Mask ➤ Add Layer Mask) initialized to white. Using a brush with the 2.Hardness 050 setting and black as the active color, paint in the mask to reveal the color in the flames painted on the motorcycle.
Since there is virtually no color in the rest of the motorcycle, precise brush size isn’t too important; just avoid painting into the background while revealing the color in the flames (Figure 8-10).
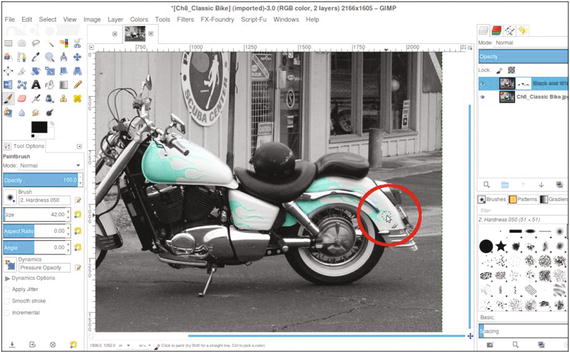
Figure 8-10. Revealing the color in the flames painted on the motorcycle
Paint in the layer mask to reveal the red in the tail light (Figure 8-11).
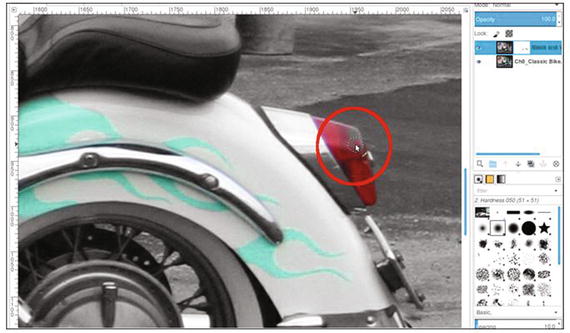
Figure 8-11. Revealing the red in the tail light
The final result creates an image with a nostalgic feel (Figure 8-12). If desired, save the image as an XCF file for future reference.
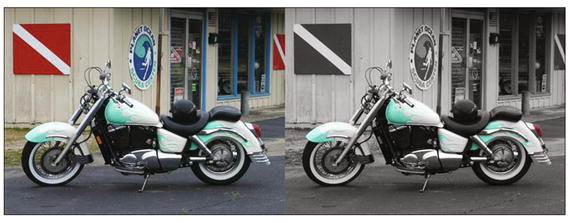
Figure 8-12. Before and after comparison
Like other forms of artistic expression, selective colorizing is subjective. How much or how little color to reveal will be up to the individual.
Note
The Hue-Saturation dialog is a quick and straightforward way of converting a color image to black and white. For some images, it isn’t always the best choice. In Chapter 10, we’ll look at several other methods of converting color to black and white.
Summary
This chapter covered a couple of ways to create images with an artistic slant by using selective colorization. The methods involved turning a full-color image into black and white on a separate layer and then revealing color in specific areas using the layer mask.
This process can give an image a surreal look, as was demonstrated in the two exercises.
In the next chapter, we’ll look at a few other techniques for creating artistic images by colorizing them using patterns combined with layer blending modes.