

In this chapter, we’ll cover the following:
Downloading and installing GIMP 2.8
The GIMP interface
The menu bar
The image navigation bar
The toolbox and important tool functions
Working with layers
GIMP is a very powerful image editor. If you are an absolute beginner using this program, this chapter will guide you in how to download GIMP. It will also provide a look at most of the basic tools and functions of the program. You’ll put most of these tools and functions into action when you follow the exercises in this book (the tutorials will show you how).
Of course, some working knowledge of GIMP or a similar editing program is always preferable. As this chapter is just an overview, the GIMP User Manual will provide much more detailed information and can be accessed from the official GIMP website at www.gimp.org .
If you’d like to go beyond colorizing images and master all of the general aspects of GIMP, I recommend the book GIMP for Absolute Beginners by Jan Smith with Roman Jóost and published by Apress.
For those interested in learning about digital retouching and restoration using GIMP, check out my book Beginning Photo Retouching and Restoration Using GIMP (also published by Apress).
Downloading and Installing GIMP 2.8
If you don’t already have GIMP installed on your computer, the first thing to do is go to the official GIMP website at www.gimp.org . This is a safe source from which to acquire GIMP; there are numerous other sources, but they might be unwanted advertisements or malware.
Next, just follow the steps that apply to your computer’s operating system, as outlined next. Remember: GIMP is free—no need to have a credit card ready!
Once you are on the GIMP website, you’ll see the Download button at the top of the home page (Figure 1-1). The GIMP website will automatically detect your computer’s operating system (unless your web browser has script-blocking enabled). Click the Download button, and you’ll be taken to the appropriate download link(s).
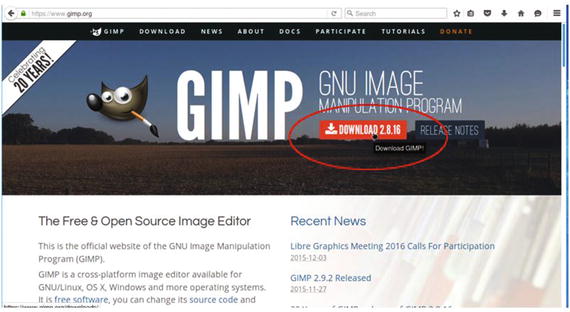
Figure 1-1. The Download button on the GIMP home page
GIMP for Windows
The following steps will assist you in installing GIMP 2.8 on Windows. These steps were performed on Windows 7 (the same steps will apply for Windows 8 or 10).
Once you are on the download page for Windows, click the Download GIMP 2.8.16 link (Figure 1-2).
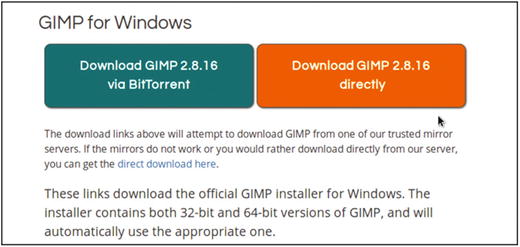
Figure 1-2. The download page for Windows
After the download completes, the GIMP installer can be found in the Downloads folder or in the place you normally designate for downloads. Double-click the GIMP installer, and the Open File-Security Warning dialog box (Figure 1-3) will open. Since the official website is a trusted source for acquiring GIMP, you can safely continue. Click the Run button, and GIMP will be installed on your system. The installation process might take several minutes.

Figure 1-3. Installing GIMP on Windows 7
GIMP for Linux and Unix-like Systems
If your computer’s operating system is a Linux distribution, then it’s likely GIMP is already installed.
An easy way to acquire GIMP for many of the popular Linux distributions (such as Ubuntu, Mint, Zorin, and so forth) is to download and install it from the Software Center (Figure 1-4).

Figure 1-4. Many Linux distributions make acquiring and installing GIMP easy from the Software Center
GIMP for Mac OS X
This page (Figure 1-5) is where you’ll find the download links for your Macintosh. You can download the GIMP installer and then open the downloaded DMG file. Drag the GIMP.app file to the Applications folder (older versions of GIMP required X11 to be installed).
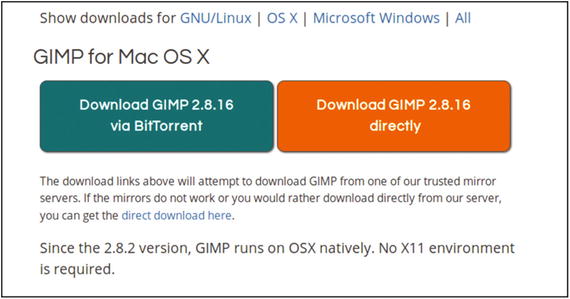
Figure 1-5. The GIMP download links for Mac OS X
Note
A great GIMP-related resource for the technically inclined Mac user is Partha’s Place, which provides GIMP builds with a number of plug-ins already added. To visit the site, log on to www.partha.com . Generally speaking, however, it’s best to stick with stable versions of GIMP and avoid beta versions.
Disabling Gatekeeper in Mac OS X 10.8
Newer versions of Mac OSX have a featured called Gatekeeper. It prevents the installation and running of non-Apple-registered software.
To temporarily disable Gatekeeper, follow these steps1:
Navigate to System Preferences from the Apple menu or from the Dock.
Click on the Security & Privacy preference pane under the Personal header.
In the Security & Privacy pane, click on the Lock icon on the bottom left.
Enter your Mac’s username and password and click the Unlock button.
Click the radio button next to “Anywhere.”
To re-enable Gatekeeper, after updating any necessary software, follow the preceding instructions until step 5 and click the radio button next to “Mac App Store and identified developers.” Then close the System Preferences window.
Launching GIMP
After GIMP is installed on your computer, locate the program launcher . The launcher icon usually displays the image of Wilbur, the GIMP mascot (Figure 1-6). However, some Linux distributions may display a different, generic icon (such as a paint palette).
Figure 1-6. The GIMP program launcher (usually) displays an image of Wilbur
Click the launcher, and the splash screen (Figure 1-7) emerges. The first launch will probably be a bit slow while GIMP acquires the system’s fonts and queries plug-ins.

Figure 1-7. The first GIMP launch might be a bit slow
The GIMP Interface
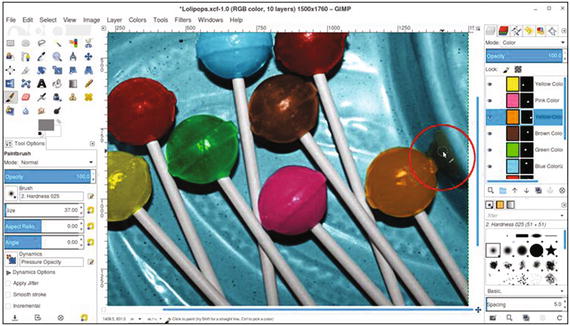
This is where it all happens—the digital darkroom where you’ll learn how to colorize your images (or those of your clients). The interface will differ slightly in appearance from one platform to another, but the operations are virtually the same across the board. I do most of my work on a Linux desktop computer (Zorin OS 10), so the majority of the screenshots throughout this book are taken from the Linux version of GIMP.
The interface is displayed in a multi-window mode upon its first launch (Figure 1-8). Each panel can be moved around independently.
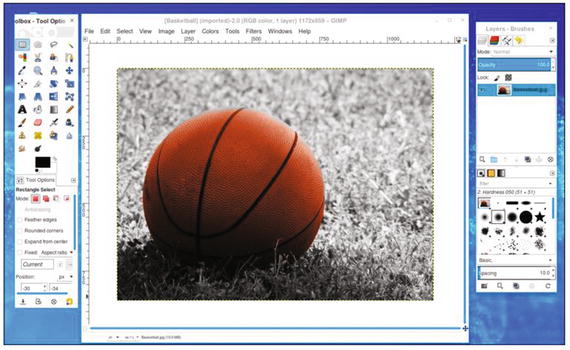
Figure 1-8. The GIMP interface as it appears in multi-window mode
Some GIMP users prefer a unified workspace. A new feature introduced in GIMP 2.8 is the single-window mode. To change the interface from multiple floating panels to the single window, go to the Image menu (above the image window) and select Windows ➤ Single-Window Mode . Figure 1-9 is an example of how GIMP looks in single-window mode. The workspace, toolbox, and layers palette are all unified. It’s really a matter of preference—use the mode you are most comfortable with.
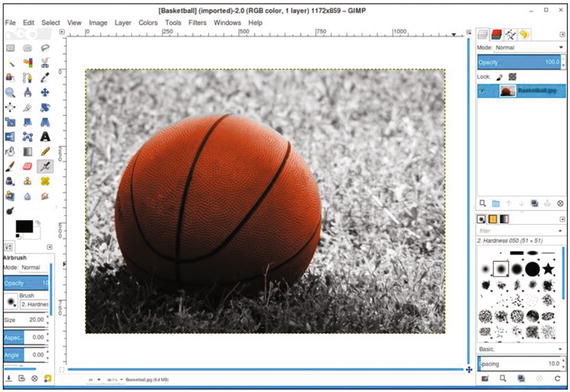
Figure 1-9. The GIMP interface as it appears in single-window mode
The Menu Bar
The menu bar is set atop the GIMP image window on Windows and Linux systems (Figure 1-10). It can be thought of as “Command Headquarters” from where virtually every function can be accessed. On Mac OSX, the menu is atop the monitor’s screen.
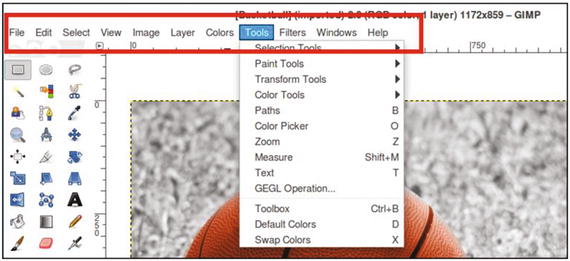
Figure 1-10. The menu bar allows access to almost every tool and function in GIMP
The following is a quick run-through of some (but not all) of the functions within each option:
File: Opens existing files, creates new files, saves, and exports
Edit: Undoes and redoes, copies, pastes, accesses preferences (on Mac OSX, preferences is found in the GIMP menu)
Select: Provides various options for choosing and modifying selections
View: Provides viewing options for images, layers, navigation, guides
Image: Provides options for adjusting image orientation, size, printing images, and canvas settings
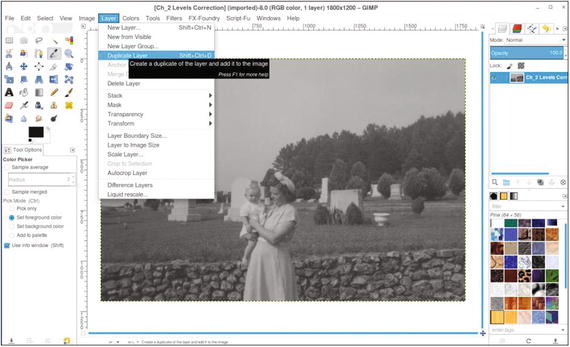
Layer: Creates new layers, duplicates existing layers, works with layer properties
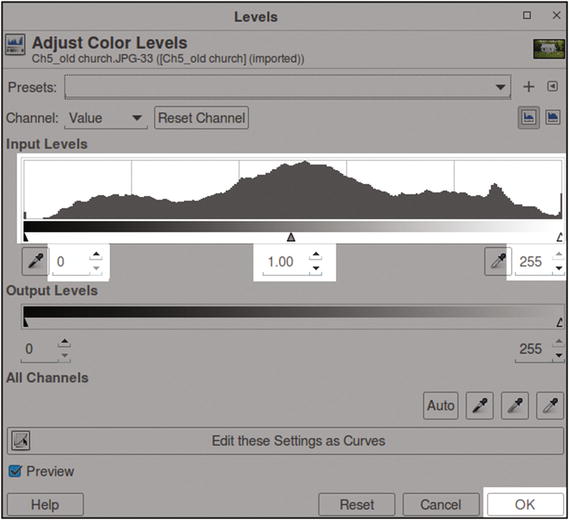
Colors: Accesses the color adjustment dialogs, such as Color Balance, Levels, Curves, and Hue/Saturation
Tools: Accesses the image-editing and color tools
Filters: Accesses the filters, such as Blur or Sharpen, as well as artistic and specialty filters
Windows: Accesses the recently closed docks, hiding docks, etc.
Help: Accesses the GIMP User Manual (if installed on your computer) and also links to the online GIMP User Manual
The Image Navigation Bar
This is a useful new feature for GIMP 2.8. The image navigation bar (which only works in single-window mode) allows you to easily browse through all of the images that are open in GIMP by viewing the thumbnails just above the image workspace (Figure 1-11).
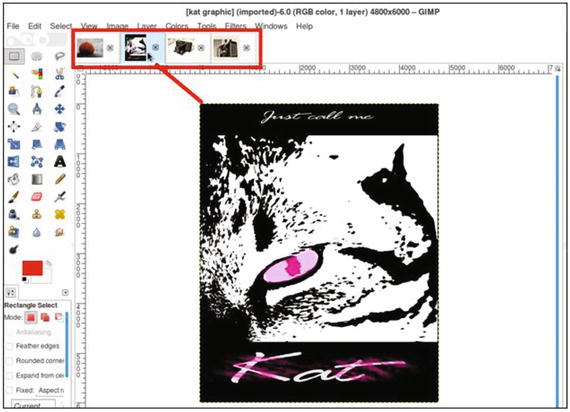
Figure 1-11. The image navigation bar
The Toolbox and Important Tool Functions
The toolbox groups many of the functions you’ll use on a routine basis. To identify each tool, hold the cursor over the icon. A brief description of its function and the keyboard shortcut will pop up in a small callout. Below the toolbox is the Tool Options dialog. In Figure 1-12, the Healing tool is active, so options such as brush size, hardness, dynamics, and so forth can be changed to suit the specific task at hand.
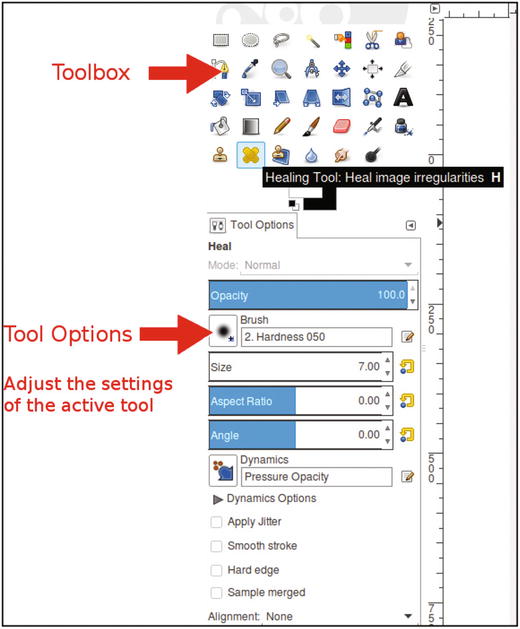
Figure 1-12. The toolbox and Tool Options dialog for active tools
The Selection Tools
GIMP offers a variety of selection tools that will enable you to isolate certain areas of the image you’re editing. This confines the changes you want to make to the pixels within the selection boundary, leaving the rest of the image unaltered.
Table 1-1. The Selection Tools’ Shortcuts and Functions
Icon | Name | Shortcut | Tool Function |
|---|---|---|---|
| Rectangle | R | Selects rectangular or square areas |
| Ellipse | E | Selects elliptical or circular areas |
| Free Select | F | Draws freeform and polygonal selections |
| Fuzzy Select | U | Selects continuous areas of color |
| Select by Color | Shift + O | Selects areas of similar color |
| Intelligent Scissors | I | Selects shapes using intelligent edge fitting |
| Foreground Select | (none) | Selects an area with foreground objects |


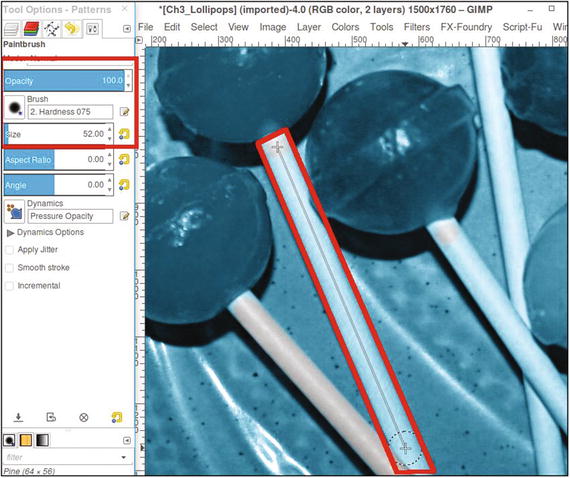
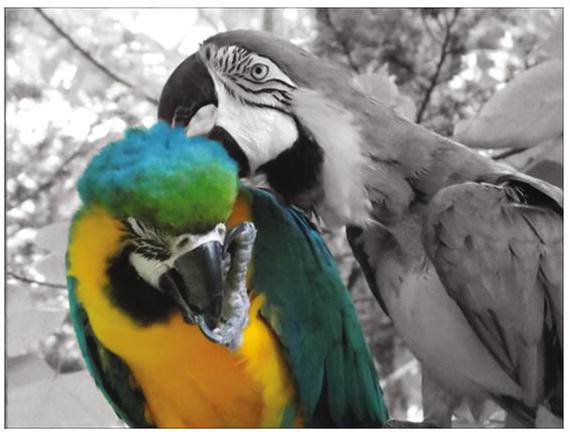
Two commonly used selection tools are the Free Select tool and the Fuzzy Select tool (Figure 1-13). With the Free Select tool, selections can be drawn around irregular shapes.
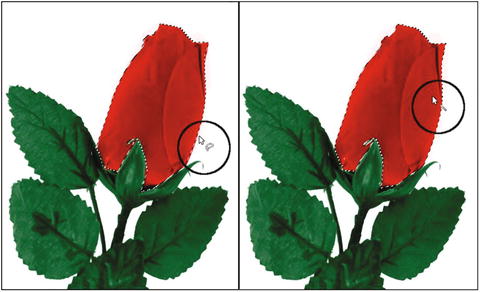
Figure 1-13. An example of a free selection and a selection by color range
When a selection is made, you’ll notice a border of “marching ants” around the area. Holding the Shift key allows multiple selections to be made while using these tools. The selection’s border can be hidden by navigating to the menu bar and choosing View ➤ Show Selection (Figure 1-14).
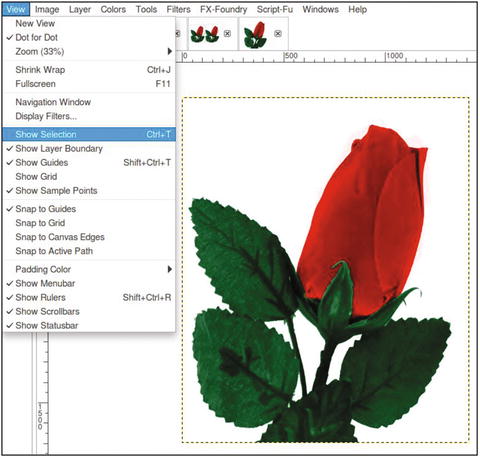
Figure 1-14. The selection’s border, or “marching ants,” can be hidden
To learn more about the selection tools, look in the Chapter 1 Practice Images folder. There are exercises that will give you some firsthand practice using these tools.
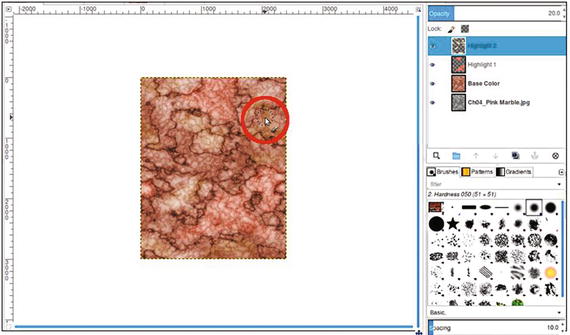
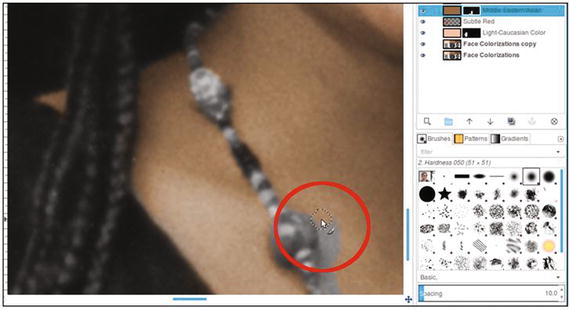
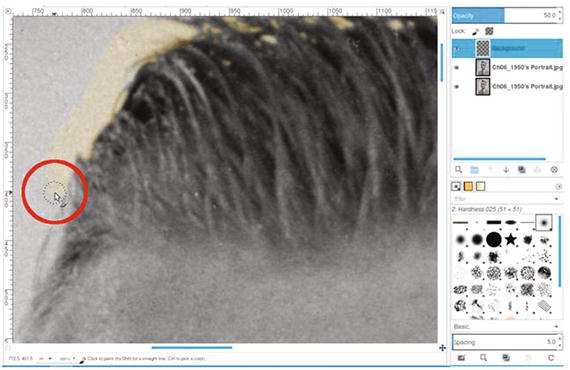
The Brush Tools
If you plan to colorize a black and white image that has some type of damage, it will be necessary to repair it first (which will be covered in a later chapter). The brush tools (brushes) in GIMP allow you to paint, repair flaws, and apply local exposure corrections (such as lightening or darkening specific areas).
The main brush tools you’ll be using for colorizing the tutorial images in this book are the Bucket Fill, the Paintbrush, and the Airbrush. To a lesser extent, you’ll use some of the other tools, such as the Eraser and the Dodge/Burn tool. Table 1-2 provides a look at their shortcuts and functions .
Table 1-2. The Brush Tools’ Shortcuts and Functions
Icon | Name | Shortcut | Tool Function |
|---|---|---|---|
| Bucket Fill | Shift + B | Fills an area with a color or a pattern |
| Blend | L | Fills an area with a gradient |
| Pencil | N | Draws hard-edged lines |
| Paintbrush | P | Paints smooth strokes using a brush nib |
| Eraser | Shift + E | Removes pixels from a layer |
| Airbrush | A | Paints using variable pressure, similar to a paint spray gun |
| Ink | K | Calligraphy-style painting |
| Clone | C | Copies pixels from one part of an image to another |
| Healing | H | Heals image irregularities by blending in surrounding texture and tone |
| Perspective Clone | (none) | Clones from an image source after applying perspective transformation |
| Blur/Sharpen | Shift + U | Selective blurring or sharpening using a brush |
| Smudge | S | Selective smudging using a brush |
| Dodge/Burn | Shift + D | Selective lightening or darkening using a brush |


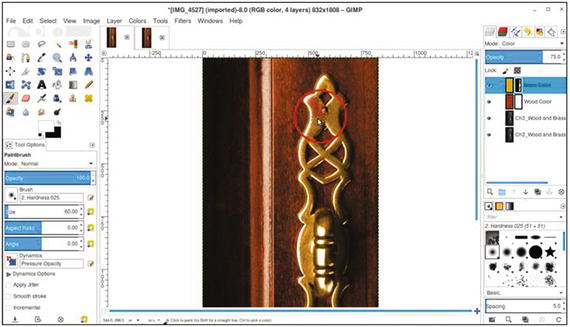
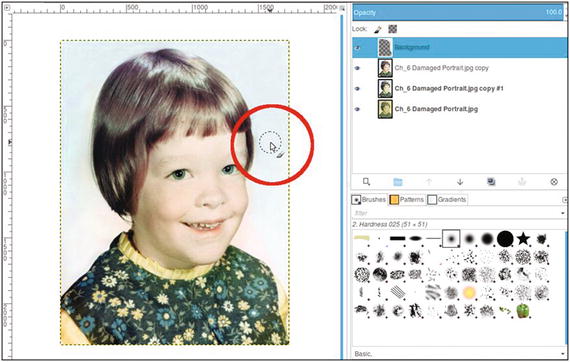
Out of all of the brushes used for fixing flaws, the “dynamic duo” of the set would be the Clone tool and the Healing tool. These are the two you’ll most often use to correct imperfections and repair damage on the images you edit (Figure 1-15) .
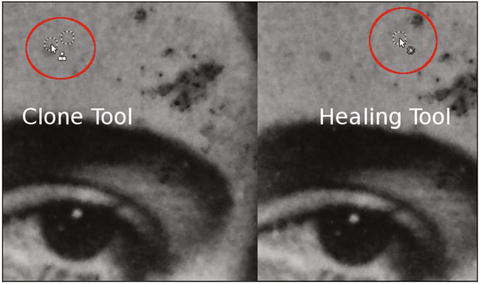
Figure 1-15. Repairing damage with the Clone tool and the Healing tool
The Clone tool works by sampling an area from one part of an image and pasting those pixels on a target area on another part. The Healing tool is a type of “smart clone” that takes the surrounding texture and tone of the sampled area into account and seamlessly blends the pixels in for a flawless repair. Generally, the Clone tool is better suited to repairing larger cracks and creases, and the Healing tool is usually best at removing facial blemishes in portrait retouching (although it can be good at repairing smaller cracks and creases).
The lessons in this book don’t require the use of either one of these tools. However, they are extremely useful and it’s likely you’ll use them in the future. To learn more about them, refer to the GIMP User Manual.
The Transform Tools
The transform tools allow you to alter the size, position, orientation, and perspective of the image and individual layers or selected areas. These features are extremely useful for straightening crooked images (Figure 1-16), correcting lens distortion, and more.
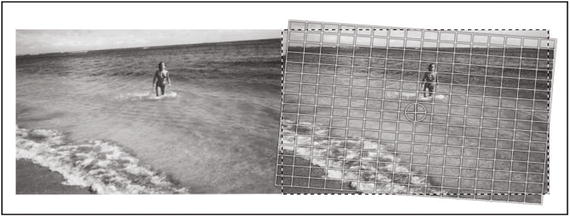
Figure 1-16. The Rotate tool helps to correct crooked images
It’s not unusual for clients to request various alterations prior to colorizing an image, so knowing how to use these tools can be helpful. Refer to Table 1-3 to become familiar with the name, shortcut, and function of each tool.
Table 1-3. The Transform Tools’ Shortcuts and Functions
Icon | Name | Shortcut | Tool Function |
|---|---|---|---|
| Move | M | Moves layers and selections |
| Align | Q | Aligns or arranges layers and other objects |
| Crop | Shift + C | Removes edge areas from the image or layer |
| Rotate | Shift + R | Rotates the active layer, selection, or path |
| Scale | Shift + T | Scales the active layer, selection, or path |
| Shear | Shift + S | Shears the active layer, selection, or path |
| Perspective | Shift + P | Changes the perspective of the active layer, selection, or path |
| Flip | Shift + F | Reverses layers, selections, or paths vertically or horizontally |
| Cage Transform | Shift + G | Deforms a selection with a cage |


Other Tools
The remaining tools are the Path tool, Color Picker, Zoom tool , Measure tool, and the Text tool . Power-GIMP users employ all the tools in the toolbox at one time or another, and the exercises in this book will use many of them. Although there are a number of tools you won’t use in the tutorials, it’s still a good idea to become familiar with them if you are new to GIMP.
Refer to Table 1-4 to become familiar with the name, shortcut, and function of each tool.
Table 1-4. The Other Tools’ Shortcuts and Functions
Icon | Name | Shortcut | Tool Function |
|---|---|---|---|
| Path | B | Creates and modifies paths |
| Color Picker | O | Selects colors from image pixels |
| Zoom | Z | Adjusts the magnification level of the image you are viewing |
| Measure | Shift + M | Shows distances and angles |
| Text | T | Creates or edits text layers |


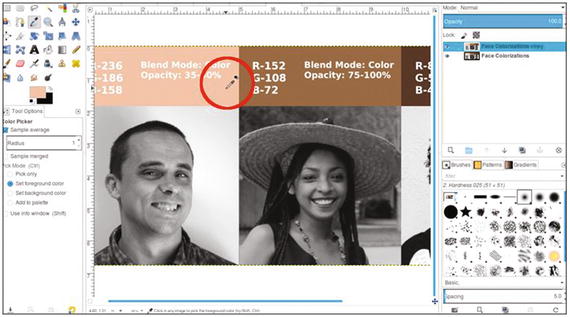
The Color Picker Tool
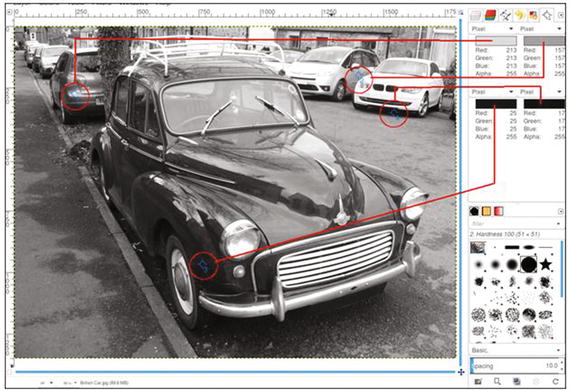
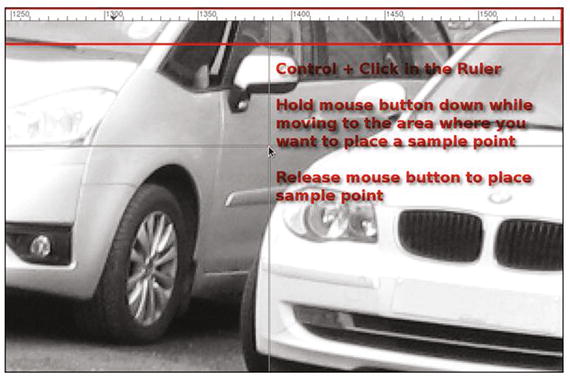
The Color Picker tool can be handy when colorizing images. One way it helps is to sample colors from reference color photos containing colors similar those that you want to use in your colorization project. It can be used to determine what percentages of red, green, and blue light make up the color you are sampling. In Figure 1-17, we can see that the sampled area contains 54% red, 1% green, and 2% blue.
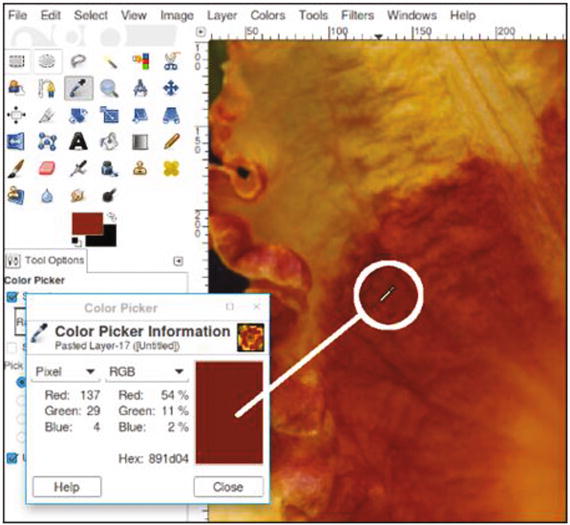
Figure 1-17. The Color Picker is a useful tool for colorizing images
Because monitor displays vary from one to another, the Color Picker tool is helpful in providing an accurate means of measuring colors. To learn more about this dialog, look in the Chapter 1 Practice Images folder. There is an exercise that will give you some firsthand practice with this dialog.
Note
The Color Picker can sample individual pixels or a range of pixels. It also displays readouts in RGB (Red, Green, Blue), HSV (Hue, Saturation, Value), or CMYK (Cyan, Magenta, Yellow, Black).
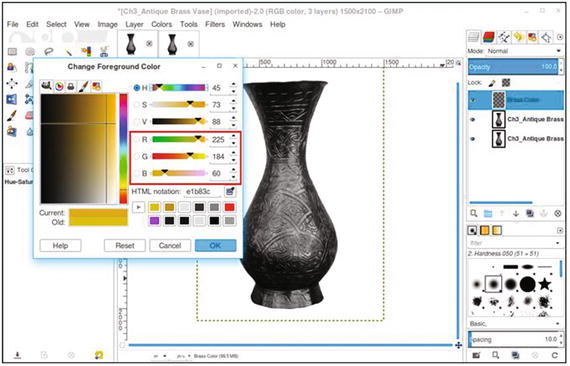
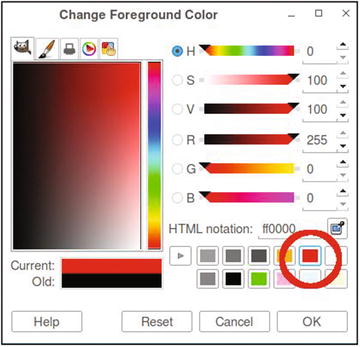
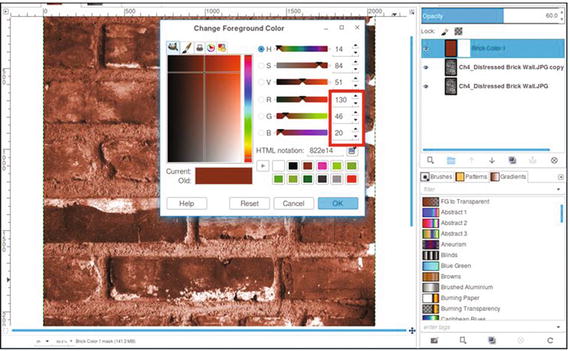
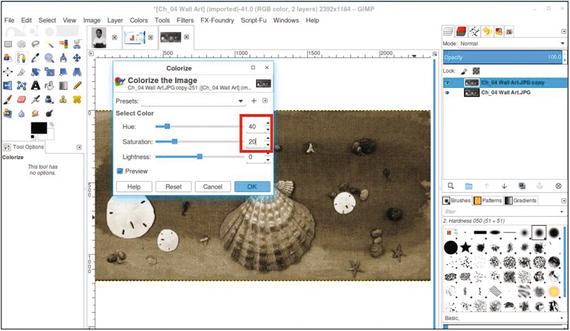
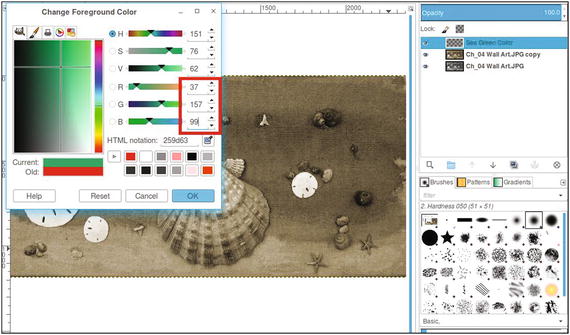
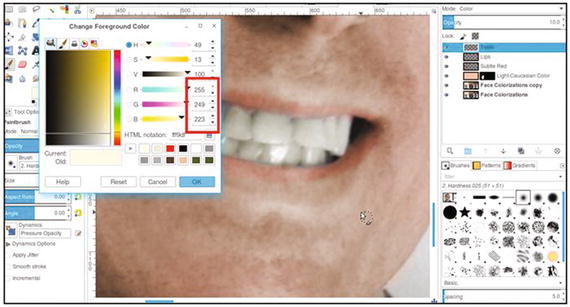
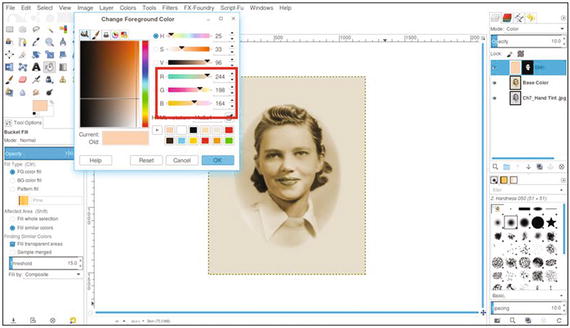
The Change Foreground Color Dialog
This feature is where you pick the colors for your colorization projects. You can sample a color as shown in Figure 1-18, or move the cursor within the color areas to select the values, or input them numerically. To learn more about this dialog, look in the Chapter 1 Practice Images folder. There is an exercise that will give you some firsthand practice with this dialog.
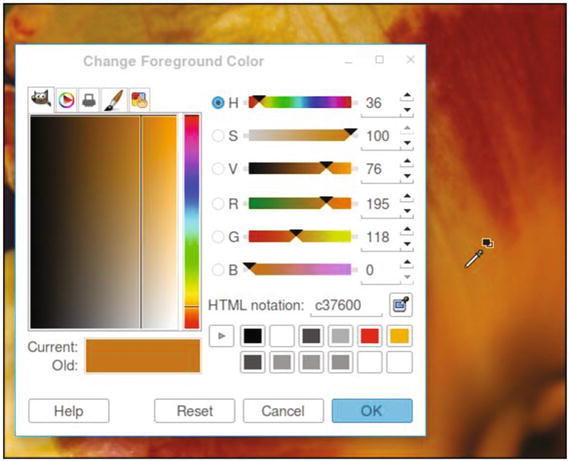
Figure 1-18. The Change Foreground Color dialog is where you’ll pick colors for your colorization projects
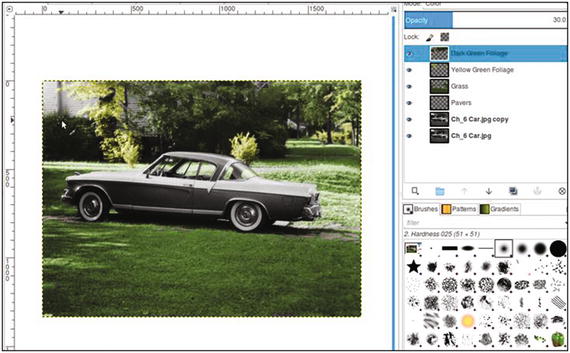
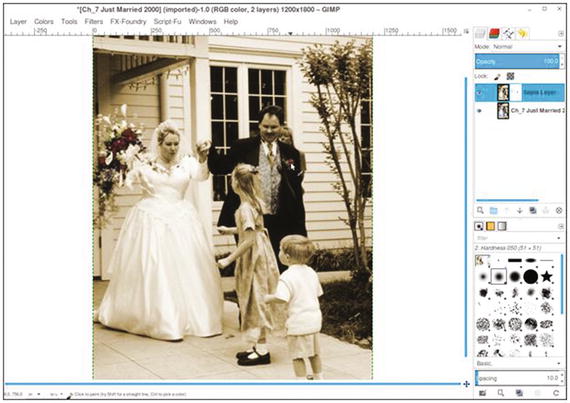
Working with Layers
Layers can be thought of as digital sheets of clear acetate, each one with a graphical element, stacked on top of one another. Layers are managed in the layers palette (Figure 1-19). Upon launching GIMP, you’ll normally find the layers palette on the right side of the workspace. Sometimes it can be closed inadvertently and be difficult to find again. When that happens, you can find it by navigating to the menu bar and clicking Windows ➤ Dockable Dialogs ➤ Layers.
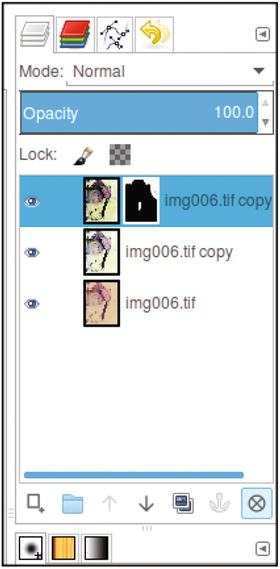
Figure 1-19. The layers palette
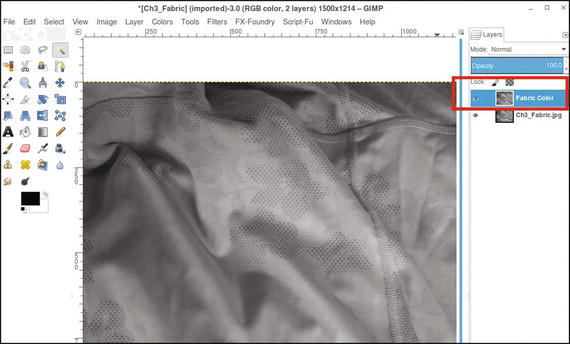
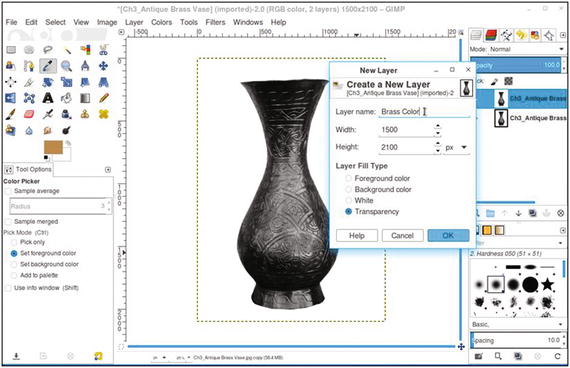
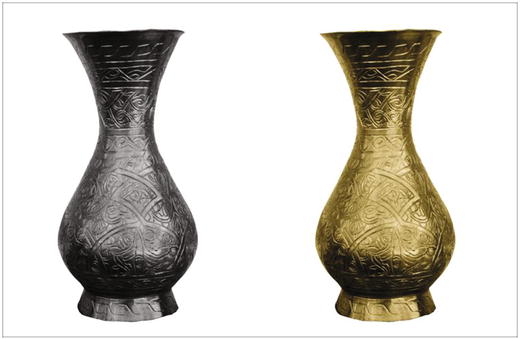
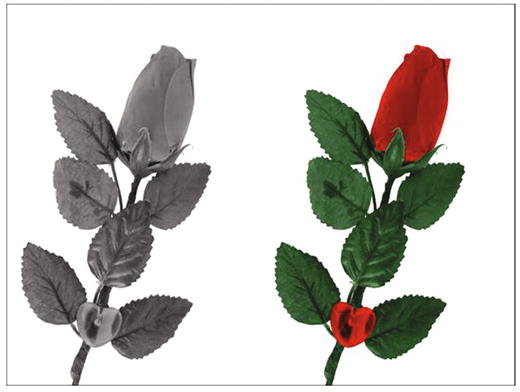
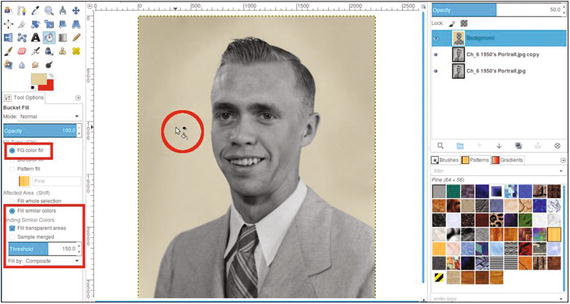
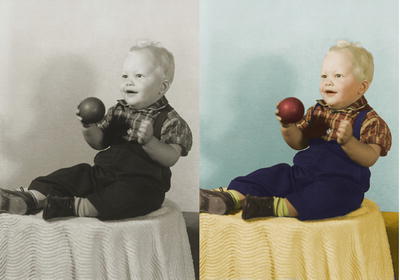
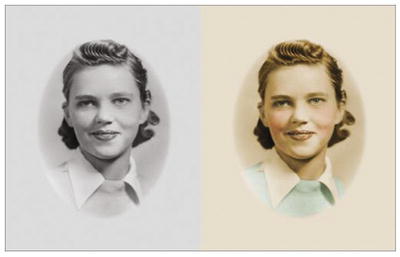
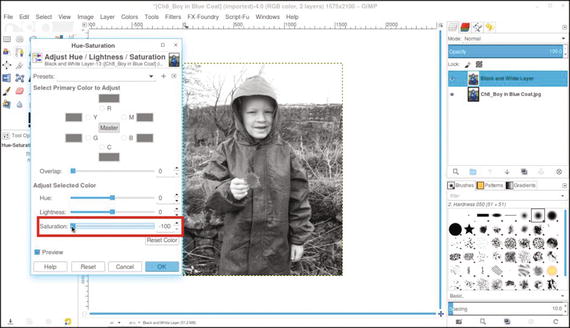
Layers allow editing to be done in a way that doesn’t directly affect the base image (represented as the bottom-most layer in the layers palette). In the example in Figure 1-20, to colorize the basketball a new layer was created and named Basketball Orange (it’s always a good idea to name each layer to keep track of them).

Figure 1-20. This illustrates how a layer is like a digital sheet of clear acetate on which color is applied without directly affecting the base image
The orange color is applied the new layer without affecting the original image.
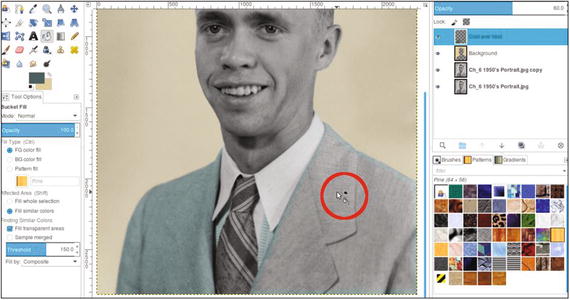
Layers are one of the most important aspects of photo editing. Sometimes it will be necessary to make revisions to your work, and having a layered version will make this much easier. Edits can be made to a specific layer without affecting the rest of the image.
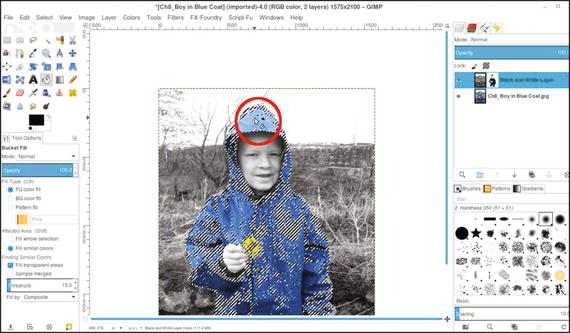
In Figure 1-21, the actual layer is shown in the GIMP layers palette. As can be seen, the orange being applied to colorize the basketball does not directly affect the base image.
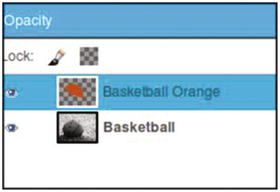
Figure 1-21. Color added to a separate layer
Note
You might end up having 10, 15, or more layers in your colorization projects depending on the degree of work involved. It’s good practice to name the layers as you create them. If you have a project with many layers, it will make it much easier to find a particular layer should you need to edit it.
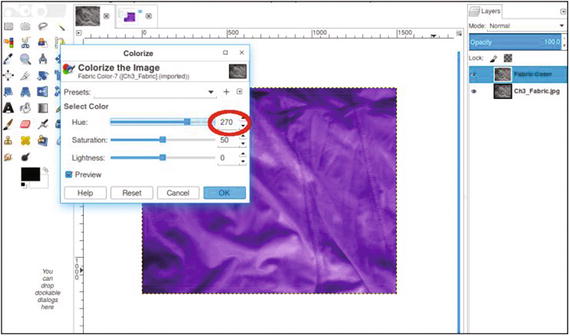
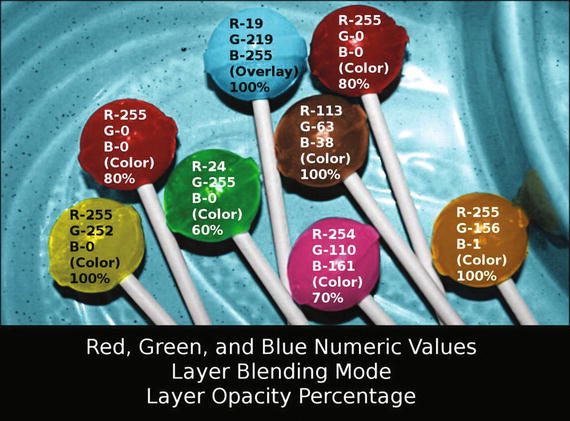
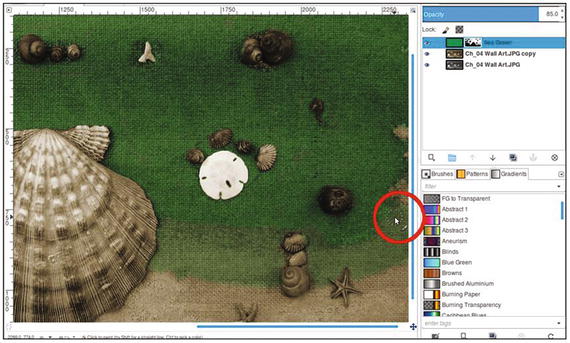
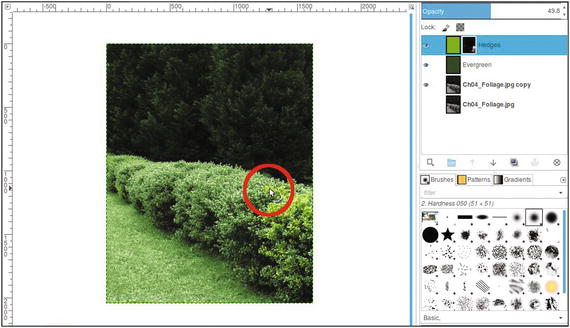
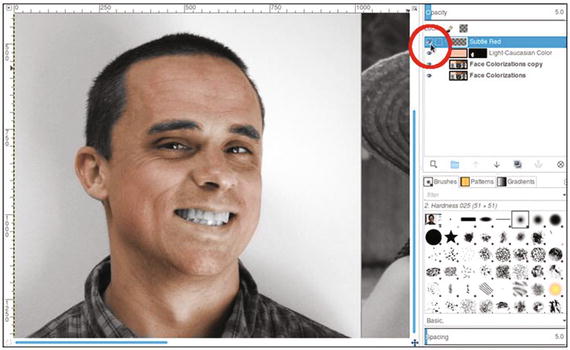
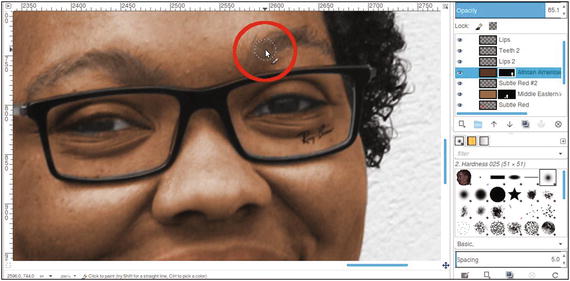
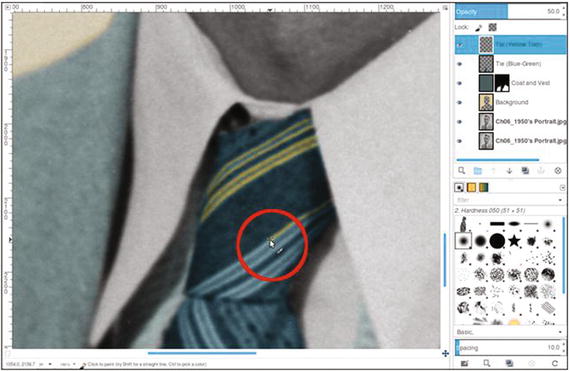
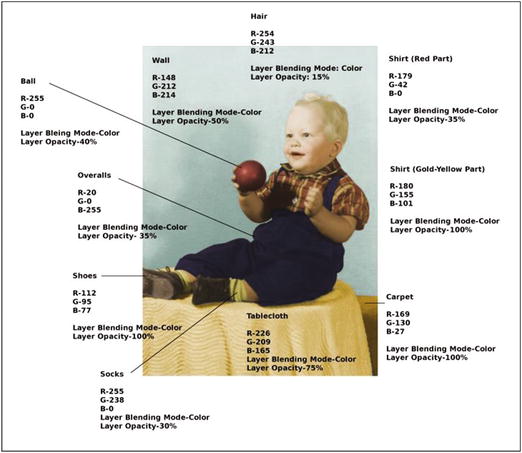
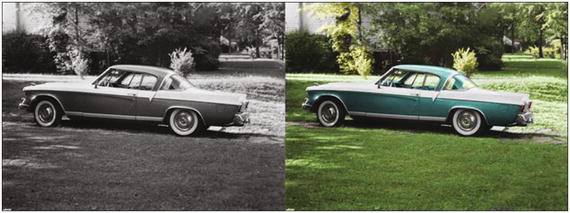
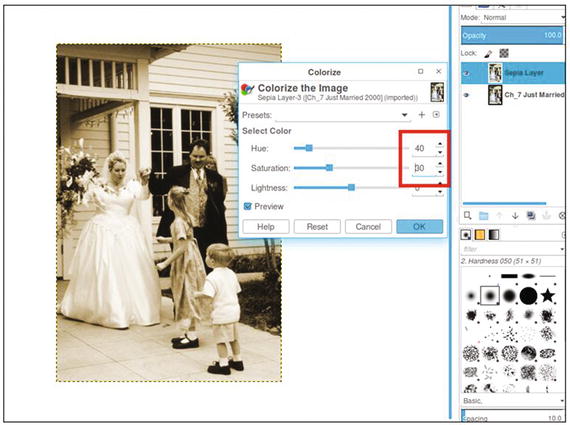
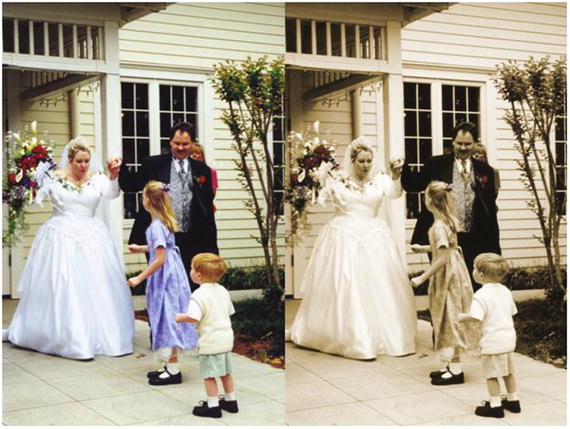
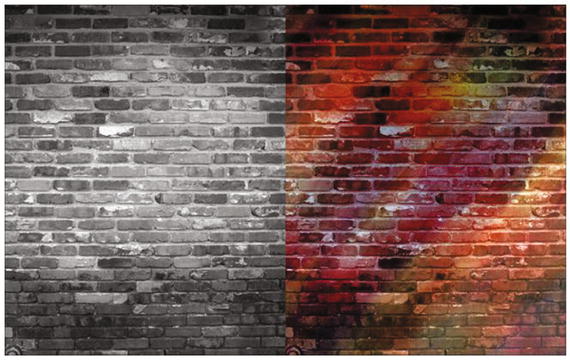
Layer Blending Modes
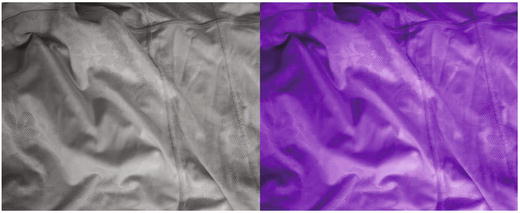
Layers have a variety of blending modes, which interact with the underlying layer in specific ways. For the purposes of this book, the two we’ll be concerned with mostly (but not exclusively) are Overlay and Color. These allow for the application of color in a translucent way—similar to applying water color to a drawing (Figure 1-22). These two blending modes add color without covering the drawn-in details. The Overlay mode generally applies a subtle color, while the Color mode applies it more intensely.
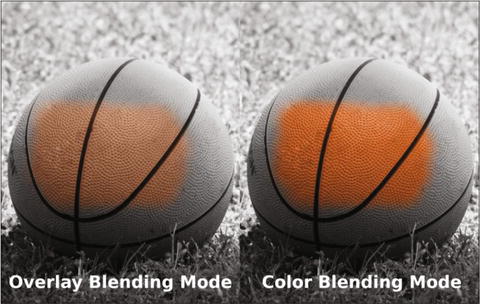
Figure 1-22. The Overlay and Color blending modes allow for the application of translucent colors
Layer Groups
Layer groupsare new to GIMP 2.8 and are very helpful for organizing large numbers of layers. This will help make your work go smoother when you work with complex images composed of a large number of layers.
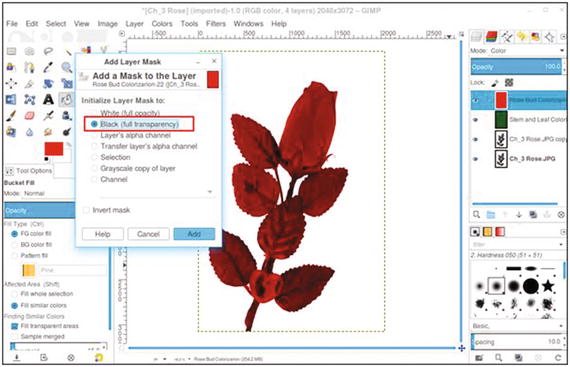
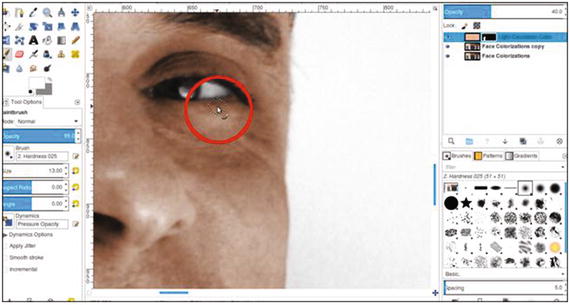
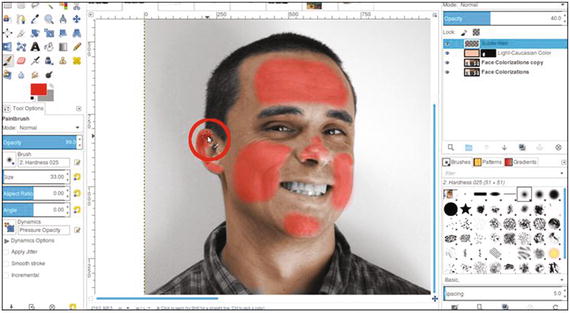
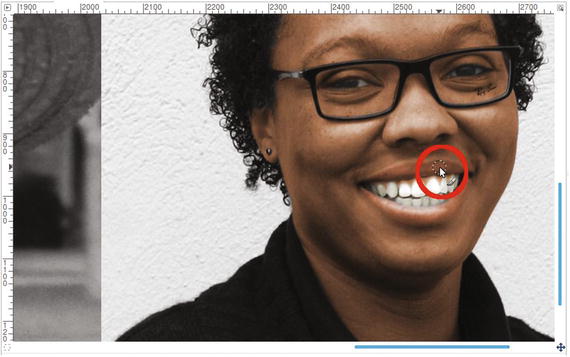
The Layer Mask
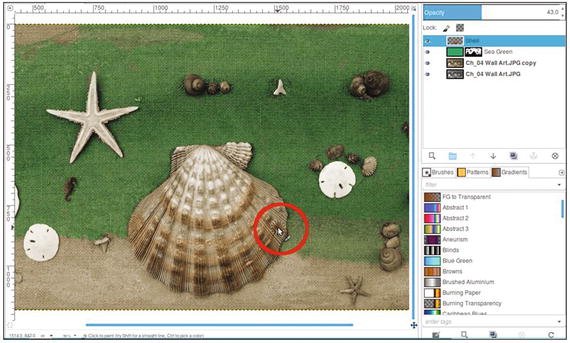
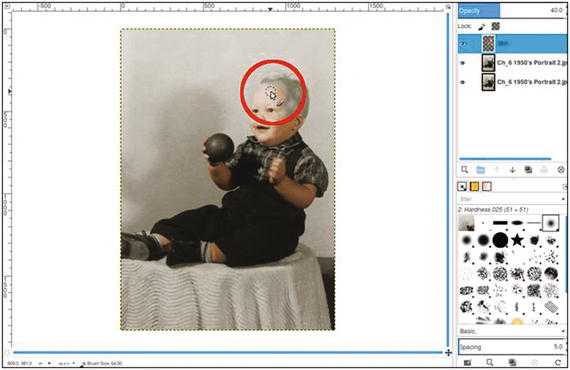
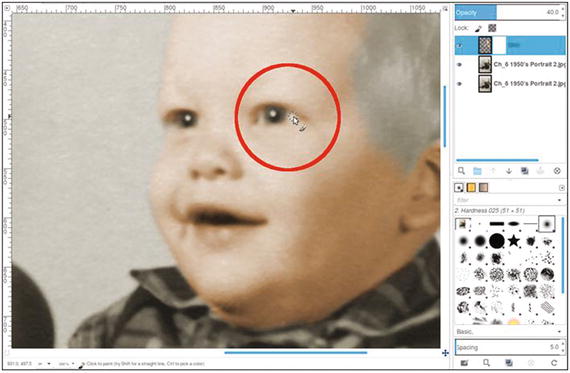
The layer maskis a feature that allows you to control the transparency of the pixels in an active layer. Essentially, you can make pixels opaque, semi-transparent, or transparent by applying white, various shades of gray, or black to the layer mask.
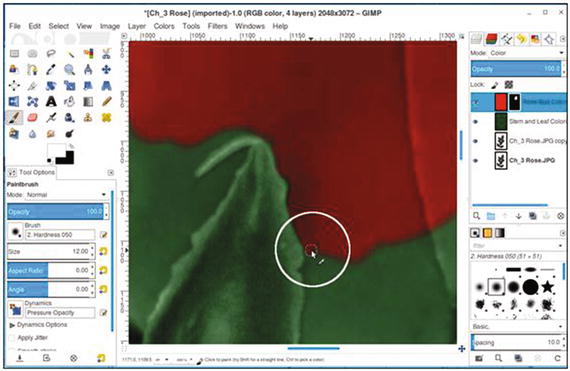
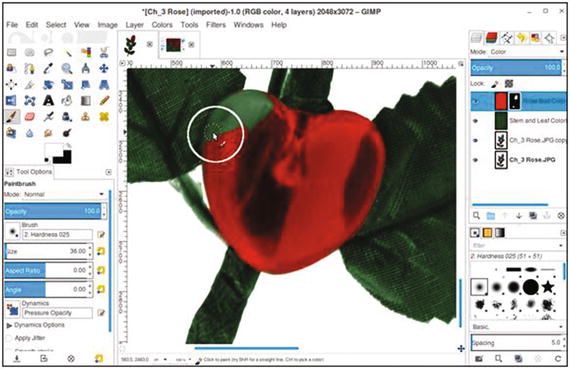
You’ll be using the layer mask for most of the tutorials in this book—it allows for a great deal of precision when colorizing images.
The layer mask can be set to either reveal or hide color. In Figure 1-23, the active layer (which will be used to add a single area of color to the image of the camera) is changed to the Color blending mode and then filled with a yellow-gold color. By adding a layer mask and using the “Initialize to Black” option, the yellow-gold filled layer becomes transparent. Using the Brush tool and painting in the layer mask with white reveals the color (don’t worry if it’s not quite clear now; it will begin to make sense when you work on the tutorials).
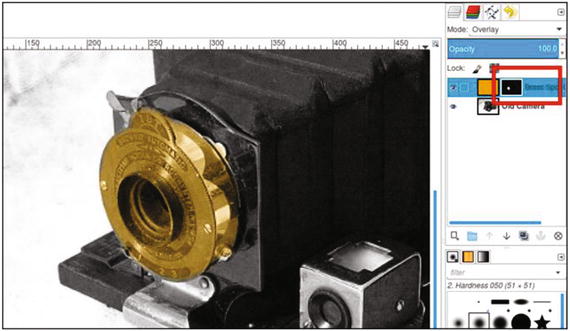
Figure 1-23. The layer mask initialized to black reveals pixels when painted with white
Note
This chapter has introduced you to a number of the features and tools you’ll use in GIMP. For more-detailed descriptions, access the GIMP User Manual by going to http://docs.gimp.org/2.8/en/ .
Summary
We looked at how to download and install GIMP 2.8 on your computer and had a cursory overview of the software. As mentioned earlier, the overview will help you to get acquainted with GIMP, but you also have access to the GIMP User Manual, which covers everything about this program in depth.
After completing Chapter 1 (and for those who are new to GIMP), the best way to get acquainted with this program is by trying out the simple exercises provided in the Chapter 1 Practice Images folder. After you are comfortable with what you’ve learned in Chapter 1, feel free to move on the next chapter, “An Introduction to Making Tonal Corrections.”
Footnotes
1 University of Chicago IT Services Documentation ( https://answers.uchicago.edu/page.php?id=25481 )