In this chapter, we’ll cover the following:
Creating a sepia tone
Creating a subtle, hand-tinted look
Combining sepia and color
In the first section of this book, we covered colorizing techniques to achieve a high degree of realism. Now, the book will go in a more artistic direction. This chapter will show you techniques designed to create the look of photography during its early years.
Tutorial 18: Creating a Sepia Tone
You’ve probably seen old photographs with a sepia tone from the late nineteenth or early twentieth century at some point (Figure 7-1). Sepia toning gives black and white images a warmer tone. The sepia tone varies somewhat, ranging from a yellow-brown to a red-brown hue. The chemical sepia toning process was widely used in the early years of photography.
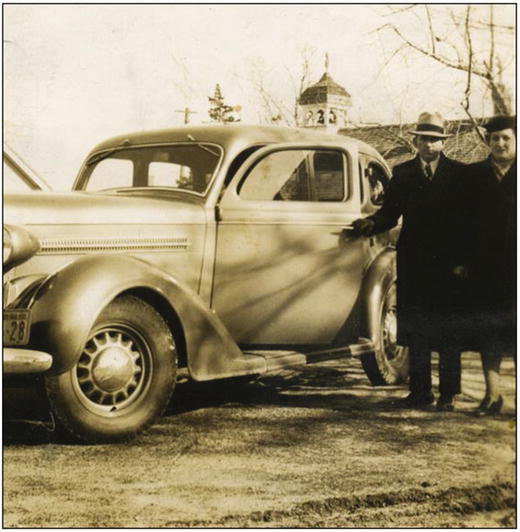
Figure 7-1. A sepia-toned photograph from the early twentieth century
Note
Sepia photos are often referred to as black and white, but they are technically monochrome, which simply means the image contains one color.
GIMP offers a quick and easy way to create a sepia tone that allows you to fine-tune the results. The hue and saturation can be adjusted to suit your taste (Figure 7-2).
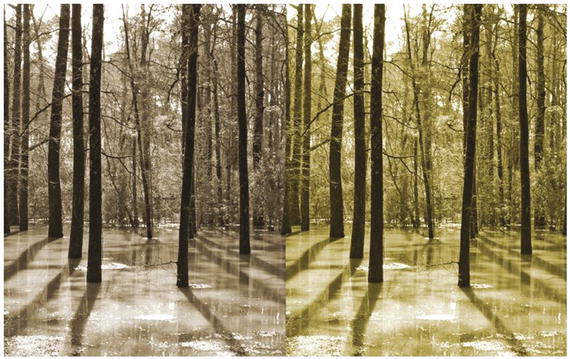
Figure 7-2. GIMP allows the sepia tone to be fine-tuned by adjusting the hue and saturation
To convert this image, follow these steps:
Open the Ch7_Trees and Water.jpg file found in the Chapter 7 Practice Images folder.
Duplicate the background layer (Layer ➤ Duplicate Layer). Rename the duplicate layer Sepia Layer. Open the Colorize dialog (Colors ➤ Colorize) and set the Hue slider to a value of about 40 and Saturation to around 30 (Figure 7-3). Adjust the sliders to suit you or, if you like the first attempt, click OK.
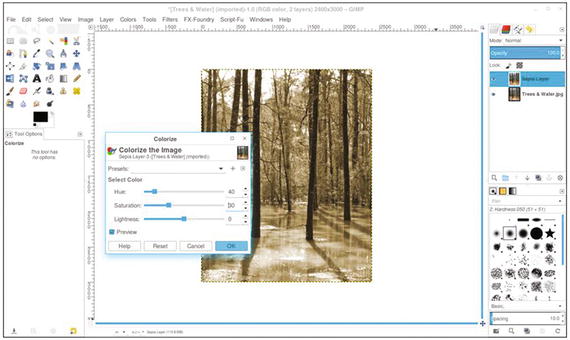
Figure 7-3. Use the Colorize dialog to create a sepia tone
Tutorial 19: Creating a Subtle, Hand-Tinted Look
The Introduction of this book mentioned briefly that in the early days of photography, hand tinting was a common way to apply color. Hand-tinted photos (at least, the way I see them) have a dream-like quality with muted and subtle colors (Figure 7-4). Of course, I’ve seen some hand-tinted pictures with bolder colors, so there are exceptions.
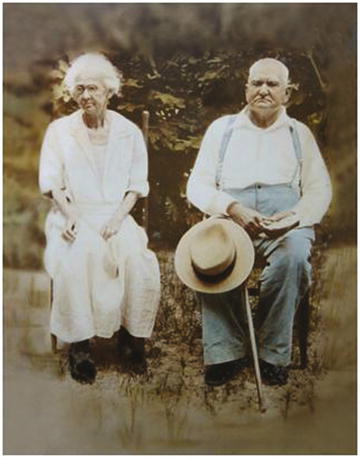
Figure 7-4. A hand-tinted photograph with muted colors
This black and white photo taken in 1939 (Figure 7-5) is a good candidate for applying a digital hand-tinted look.
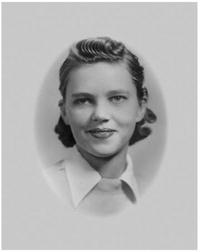
Figure 7-5. A suitable photograph for a hand-tinted look
To apply a hand-tinted look, follow these steps:
Open the Ch7_Hand Tint.jpg file found in the Chapter 7 Practice Images folder (Figure 7-5).
Duplicate the background layer (Layer ➤ Duplicate Layer) and rename the duplicate layer Base Color.
Open the Colorize dialog box (Colors ➤ Colorize) and set the Hue slider to a value of about 40 and Saturation to around 30 (Figure 7-6). This applies a base color (a light sepia tone) with an aged look.
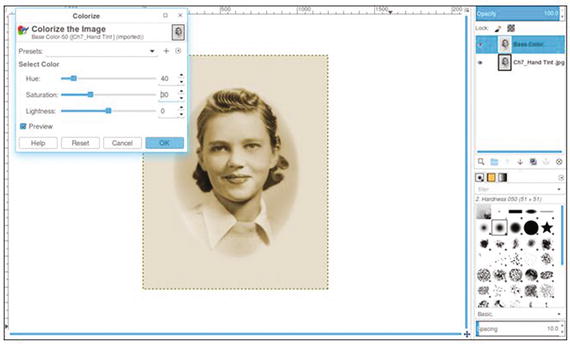
Figure 7-6. The Colorize dialog applies a base color
Create a new layer (Layer Menu ➤ New Layer), making sure Fill Type is set to Transparency, and name it Skin or Skin Color). Change the blending mode of the layer to Color and lower its opacity to 10–12%.
Open the Change Foreground Color dialog and choose a flesh color, or use the following numeric inputs: R-244, G-198, B-164 (Figure 7-7). Fill the layer with the flesh color using the Bucket Fill tool.
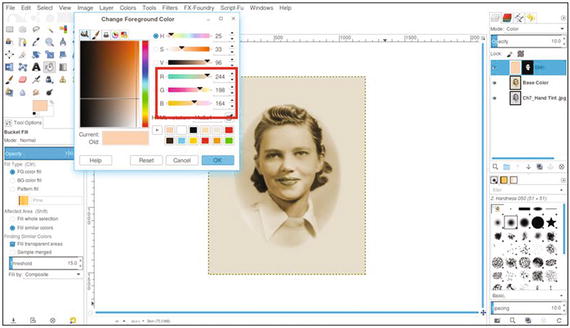
Figure 7-7. Flesh color to add skin tone
Add a layer mask (Layer Menu ➤ Mask ➤ Add Layer Mask) initialized to black. Using a brush set to 2.Hardness 050 and white as the active color, paint in the mask to reveal the skin color in the woman’s face. Paint around the eyes and mouth (confine to the flesh areas).
Create a new layer, making sure Fill Type is set to Transparency (Layer Menu ➤ New Layer) and name it Cheeks/Lips. Change the blending mode of the layer to Color and lower the opacity to 10–12%.
Open the Change Foreground Color dialog and choose red (numeric value R-255, G-0, B-0). Fill the layer with red using the Bucket Fill tool (Shift + B). Add a layer mask (Layer Menu ➤ Mask ➤ Add Layer Mask) initialized to black.
Using a brush set to 2.Hardness 050 and white as the active color, paint in the mask to reveal the cheeks and the lips (Figure 7-8).
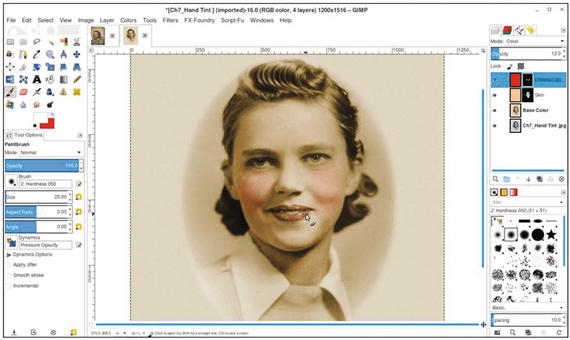
Figure 7-8. Adding a red hue to the cheeks and lips
Create a new layer, making sure Fill Type is set to Transparency (Layer Menu ➤ New Layer) and name it Eyes/Sweater. Change the blending mode of the layer to Color and lower the opacity to 10–12%.
Open the Choose Foreground Color dialog and choose a light blue (numeric value R-0, G-204, B-255). Fill the layer with blue using the Bucket Fill tool. Add a layer mask (Layer Menu ➤ Mask ➤ Add Layer Mask) initialized to black.
Using a brush set to 2.Hardness 050 and white as the active color, paint in the mask to reveal the eyes and the sweater (Figure 7-9). Adjust the brush and zoom in as needed to make sure you don’t paint into the vignette.
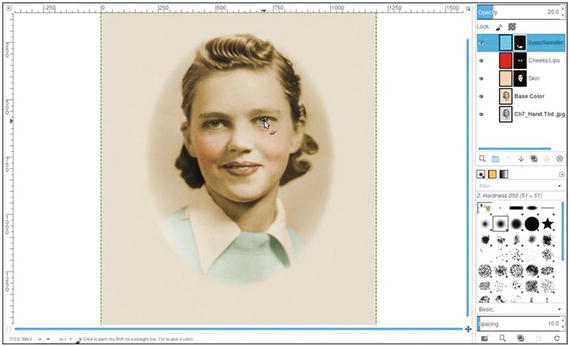
Figure 7-9. Adding a muted light blue to the eyes and sweater
Create a new layer (Layer Menu ➤ New Layer) and name it Hair. Change the blending mode to Overlay. The Overlay mode generally gives color less intensity, which works well for this exercise, since a subtle effect is desired.
Open the Choose Foreground Color dialog and choose a brown color (numeric value R-65, G-37, B-0). Fill the layer with brown using the Bucket Fill tool. Add a layer mask (Layer ➤ Mask ➤ Add Layer Mask) initialized to black.
Using a brush set to 2.Hardness 050 and white as the active color, paint in the mask to reveal the hair and eyebrows (Figure 7-10).
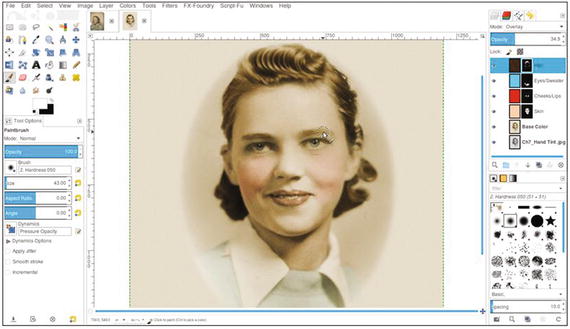
Figure 7-10. Adding a subtle brown to the hair and eyebrows
Lower the layer named Hair to about 10–12% opacity to make the effect subtle.
The key is keeping the colors soft and muted. Most of the layers will be around 10–12% opacity. The end result has an old-fashioned, hand-tinted quality (Figure 7-11). If desired, save the layered XCF file for future reference.
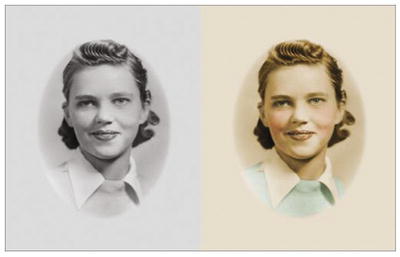
Figure 7-11. Before and after comparison
Tutorial 20: Combining Sepia and Color
This lesson will show you how to use a contemporary color photograph and give it an antique appearance. Instead of adding color, as was done in the previous tutorial, the color will be revealed in certain areas. This effect can give a special touch to wedding photos, so we’ll start with the one shown in Figure 7-12.
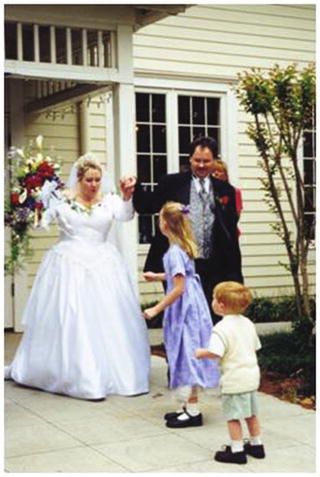
Figure 7-12. A wedding photo that will be digitally antiqued
To combine sepia and color, follow these steps:
Open the Ch7_Just Married 2000.jpg file found in the Chapter 7 Practice Images folder.
Duplicate the background layer (Layer ➤ Duplicate Layer) and rename it Sepia Layer. Open the Colorize dialog box (Colors ➤ Colorize) and set the Hue slider to a value of about 40 and Saturation to around 30 (Figure 7-13). Adjust the sliders to suit you or, if you like the first attempt, click OK.
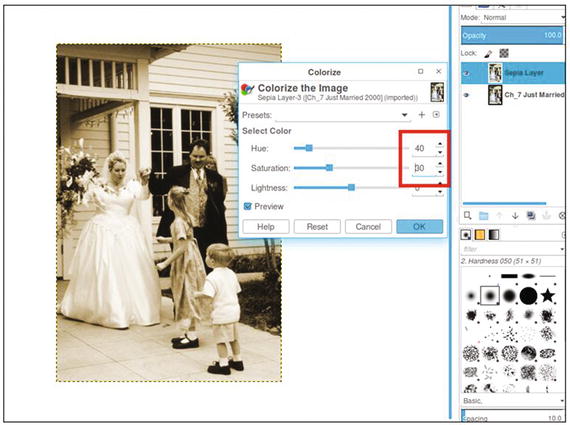
Figure 7-13. Applying a sepia tone using the Colorize dialog
Add a layer mask (Layer Menu ➤ Mask ➤ Add Layer Mask) activated to white. Using a brush set to 2.Hardness 050 and 50% gray as the active color, paint in the mask to reveal the colors of the bouquet and the groom’s boutonnière and vest—just enough for splashes of subtle color (Figure 7-14). After it is complete, you can save the layered XCF file for future reference.
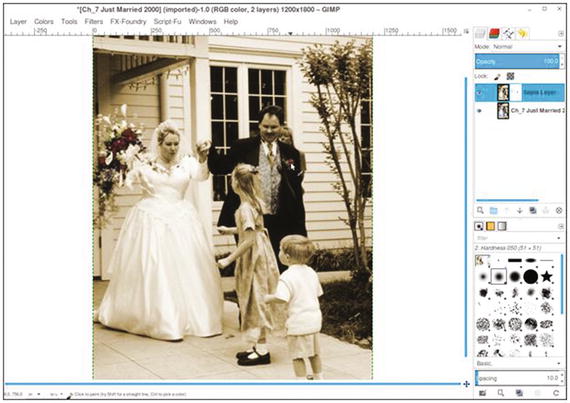
Figure 7-14. Painting in the layer mask with 50% gray to reveal muted colors
Note
Of course, there are no hard and fast rules about what colors should be revealed. This lesson is designed to acquaint you with the process. Experimentation is encouraged.
This is an easy and fun way to give photos a vintage look (Figure 7-15). I should mention here that since there’s an element of artistic expression involved, there is also a degree of subjectivity. I happen to like muted hints of color combined with sepia, but your taste might be different. If you’d prefer full, bold splashes of color, then paint in the layer mask using black to reveal all of the underlying colors you want to reveal.
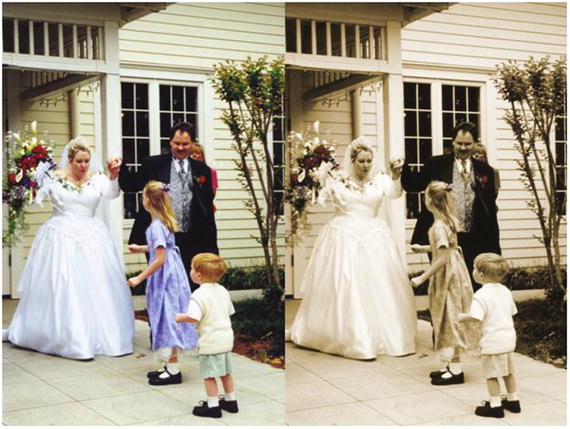
Figure 7-15. Before and after comparison
Summary
This chapter covered a few ways to give photos a vintage look. We first covered a simple way to apply a sepia tone using the Colorize dialog. Next, we covered applying soft colors to an old black and white photograph to give it a hand-tinted look. Finally, we combined sepia and soft color in a modern wedding photograph to give it an antiqued effect.
In the next chapter, we’ll look at selective colorization—mixing black and white with color for an interesting artistic effect.