
The CRUD and search models of web APIs are implemented through a set of *RepositoryInterface interfaces, found in the <VendorName>/<ModuleName>/Api/<EntityName>RepositoryInterface.php files.
The majority of these repository interfaces define a specific set of common methods:
- save
- get
- getById
- getList
- delete
- deleteById
The data type that flows through these methods follows a certain pattern, where each entity passing through an API has a data interface defined in a <VendorName>/<ModuleName>/Api/Data/<EntityName>Interface.php file.
Let's take a closer look at <MAGENTO_DIR>/module-cms/Api/BlockRepositoryInterface.php:
interface BlockRepositoryInterface
{
    public function save(
        \Magento\Cms\Api\Data\BlockInterface $block
    );

    public function getById($blockId);

    public function getList(
        \Magento\Framework\Api\SearchCriteriaInterface $searchCriteria
    );

    public function delete(
        \Magento\Cms\Api\Data\BlockInterface $block
    );

    public function deleteById($blockId);
}
The concrete implementations of repository interfaces can usually be found in the <VendorName>/<ModuleName>/Model/<EntityName>Repository.php or the <VendorName>/<ModuleName>/Model/ResourceModel/<EntityName>Repository.php files. The exact location is not that relevant, as webapi.xml should always use an interface for a class argument for its service element definition. The mapping between the interface and concrete implementation then happens in the module's di.xml file via a preference definition. From an integrator's point of view, using APIs does not require any knowledge of concrete implementations.
The Swagger URL, http://magelicious.loc/swagger, will generate a Swagger UI interface, that allows us to visualize and interact with the API's resources:
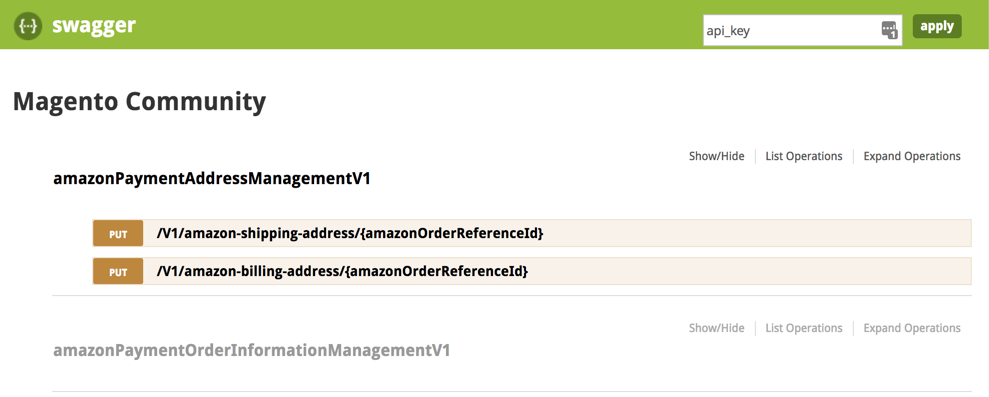
By default, documentation returned here is limited to anonymous users only. Generating a valid API key, via the POST /V1/integration/customer/token or POST /V1/integration/admin/token will unlock the documentation for all the resources available to a given user. While Swagger certainly has its place in development workflows, oftentimes the Postman tool is a more robust solution for those working extensively with APIs.
Let's go ahead and CRUD our way through the cmsBlock interface, using REST endpoints:
- save (create a new block) POST /V1/cmsBlock
- save (update an existing block by id) PUT /V1/cmsBlock/:id
- getById (get an existing block by id) GET /V1/cmsBlock/:blockId
- deleteById (delete an existing block) DELETE /V1/cmsBlock/:blockId
- getList (get an array of existing blocks) GET /V1/cmsBlock/search
We will be using the integrator type of user. This will be our Magento admin user, assigned either full resources, or at least the Resources | Content | Elements | Blocks resource under the Role Resource tab of the System | Permissions | User Roles | Edit | Add New Role screen.
We start with the admin login request, in order to obtain a token for later requests:
POST /index.php/rest/V1/integration/admin/token HTTP/1.1
Host: magelicious.loc
Content-Type: application/json
{
  "username": "branko",
  "password": "jrdJ%0i9a69n"
}
The successful JSON response should contain our API token, which we will be using for any subsequent API calls. The token itself is stored in the oauth_token table, under the token column. We further have consumer_id, admin_id, and customer_id columns in that table. These get filled depending on the user type we used to log in. Both consumer_id and admin_id are of the integrator type. These columns get filled accordingly depending on the user and authentication types used; as in customer versus integrator, and token-based vs OAuth-based vs session-based authentication.
Now let's create a new block via POST /V1/cmsBlock; this triggers the save method:
POST /rest/V1/cmsBlock HTTP/1.1
Host: magelicious.loc
Content-Type: application/json
Authorization: Bearer 8pcvbwrp97l5m1pvcdnis6e3930n4rsj
{
  "block": {
    "identifier": "x-block",
    "title": "The X Block",
    "content": "<p>The <strong>X Block</strong> Content...</p>",
    "active": true
  }
}
The successful JSON response should return our newly created block:
{
    "id": 1,
    "identifier": "x-block",
    "title": "The X Block",
    "content": "<p>The <strong>X Block</strong> Content...</p>",
    "active": true
}
Now let's update the existing cmsBlock via PUT /V1/cmsBlock/:id; this triggers the save method:
PUT /rest/V1/cmsBlock/1 HTTP/1.1
Host: magelicious.loc
Content-Type: application/json
Authorization: Bearer 8pcvbwrp97l5m1pvcdnis6e3930n4rsj
{
  "block": {
    "identifier": "y-block",
    "title": "The Y Block",
    "content": "<p>The <strong>Y Block</strong> Content...</p>",
    "active": true
  }
}
The successful JSON response should return the updated block:
{
    "id": 1,
    "identifier": "y-block",
    "title": "The Y Block",
    "content": "<p>The <strong>Y Block</strong> Content...</p>",
    "active": true
}
Let's now fetch one of the existing blocks via GET /V1/cmsBlock/:blockId; this triggers the getById method:
GET /rest/V1/cmsBlock/1 HTTP/1.1
Host: magelicious.loc
Content-Type: application/json
Authorization: Bearer 8pcvbwrp97l5m1pvcdnis6e3930n4rsj
The successful JSON response is structurally identical to that of the save method.
Now, let's try deleting one of the blocks via DELETE /V1/cmsBlock/:blockId; this triggers the deleteById method:
DELETE /rest/V1/cmsBlock/2 HTTP/1.1
Host: magelicious.loc
Content-Type: application/json
Authorization: Bearer 8pcvbwrp97l5m1pvcdnis6e3930n4rsj
The successful JSON response returns a single true or false.
Finally, let's try fetching the list of blocks via GET /V1/cmsBlock/search; this triggers the getList method:
GET /rest/V1/cmsBlock/search?searchCriteria[filter_groups][0][filters][0][field]=title&searchCriteria[filter_groups][0][filters][0][value]=%Block%&searchCriteria[filter_groups][0][filters][0][condition_type]=like HTTP/1.1
Host: magelicious.loc
Content-Type: application/json
Authorization: Bearer 8pcvbwrp97l5m1pvcdnis6e3930n4rsj
Sadly, the GET request does not allow for the body, so ?searchCriteria... has to be passed via a URL.
The successful JSON response returns an object comprised of items, search_criteria, and total_count top-level keys:
{
    "items": [
        {
            "id": 4,
            "identifier": "x-block",
            "title": "The X Block",
            "content": "The <strong>X Block</strong> Content...",
            "creation_time": "2018-06-23 07:30:06",
            "update_time": "2018-06-23 07:30:06",
            "active": true
        },
        {
            "id": 5,
            "identifier": "y-block",
            "title": "The Y Block",
            "content": "The <strong>Y Block</strong> Content...",
            "creation_time": "2018-06-23 07:30:14",
            "update_time": "2018-06-23 07:30:14",
            "active": true
        }
    ],
    "search_criteria": {...},
    "total_count": 2
}
We will address the search_criteria in more detail later on.