Magento 2 Development Quick Start Guide
Build better stores by extending Magento

BIRMINGHAM - MUMBAI

Copyright © 2018 Packt Publishing
All rights reserved. No part of this book may be reproduced, stored in a retrieval system, or transmitted in any form or by any means, without the prior written permission of the publisher, except in the case of brief quotations embedded in critical articles or reviews.
Every effort has been made in the preparation of this book to ensure the accuracy of the information presented. However, the information contained in this book is sold without warranty, either express or implied. Neither the author, nor Packt Publishing or its dealers and distributors, will be held liable for any damages caused or alleged to have been caused directly or indirectly by this book.
Packt Publishing has endeavored to provide trademark information about all of the companies and products mentioned in this book by the appropriate use of capitals. However, Packt Publishing cannot guarantee the accuracy of this information.
Commissioning Editor: Amarabha Banerjee
Acquisition Editor: Reshma Raman
Content Development Editor: Kirk Dsouza
Technical Editor: Vaibhav Dwivedi
Copy Editor: Safis Editing
Project Coordinator: Hardik Bhinde
Proofreader: Safis Editing
Indexer: Aishwarya Gangawane
Graphics: Alishon Mendonsa
Production Coordinator: Deepika Naik
First published: September 2018
Production reference: 1180918
Published by Packt Publishing Ltd.
Livery Place
35 Livery Street
Birmingham
B3 2PB, UK.
ISBN 978-1-78934-344-1

Mapt is an online digital library that gives you full access to over 5,000 books and videos, as well as industry leading tools to help you plan your personal development and advance your career. For more information, please visit our website.
Spend less time learning and more time coding with practical eBooks and Videos from over 4,000 industry professionals
Improve your learning with Skill Plans built especially for you
Get a free eBook or video every month
Mapt is fully searchable
Copy and paste, print, and bookmark content
Did you know that Packt offers eBook versions of every book published, with PDF and ePub files available? You can upgrade to the eBook version at www.packt.com and as a print book customer, you are entitled to a discount on the eBook copy. Get in touch with us at customercare@packtpub.com for more details.
At www.packt.com, you can also read a collection of free technical articles, sign up for a range of free newsletters, and receive exclusive discounts and offers on Packt books and eBooks.
Branko Ajzele is a respected and highly accomplished software developer, book author, solution specialist, consultant, and team leader. He currently works for Interactive Web Solutions Ltd (iWeb), where he holds the role of senior developer and is the director of iWeb's Croatia office.
Branko holds several respected IT certifications, including Zend Certified PHP Engineer, Magento Certified Developer, Magento Certified Developer Plus, Magento Certified Solution Specialist, Magento 2 Certified Solution Specialist, Magento 2 Certified Professional Developer, to mention just a few.
He was crowned the e-commerce Developer of the Year by the Digital Entrepreneur Awards in October 2014 for his excellent knowledge and expertise in e-commerce development.
Andrew "Pembo" Pemberton is a Certified Magento Developer with over 20 years' experience building websites. He is based in Stoke-on-Trent, UK and started building websites from the young age of 13. He has a degree in computer science from Staffordshire University.
Andrew is now the development director at iWeb (based in Stafford, UK), which, for over 20 years, has created industry-leading websites and now specializes in large scale Magento solutions and PIM-based projects for a wide range of clients.
Outside of his digital life, Andrew enjoys spending time with his family of pets, traveling with his wife, and being an avid gamer.
If you're interested in becoming an author for Packt, please visit authors.packtpub.com and apply today. We have worked with thousands of developers and tech professionals, just like you, to help them share their insight with the global tech community. You can make a general application, apply for a specific hot topic that we are recruiting an author for, or submit your own idea.
Magento is a popular open source e-commerce platform written in PHP. It is used primarily for building web shops, though it can easily be used for other types of websites as well. With the help of its powerful web API, we can build robust solutions that satisfy modern-day application requirements.
By the end of this book, the reader should be familiar with configuration files, models, collections, blocks, controllers, events, observers, plugins, UI components and other building elements of Magento.
This book is intended for PHP developers getting started with Magento v2.x development. Though compact in terms of page numbers, the book covers a wide range of functionality, allowing the reader to master day-to-day Magento skills in a clear and concise way. No previous Magento knowledge is required.
Chapter 1, Understanding the Magento Architecture, takes a look at some of the key Magento components. We will go through plugins and event observers and learn how they provide a powerful way of extending Magento, either by changing the behavior of existing functions or by running some follow-up code in response to certain events.
Chapter 2, Working with Entities, demonstrates how to differentiate between the three types of Magento models: non-persistable, persistable simple, and persistable EAV. We will take a look at the six different setup scripts and how they allow us a great deal of flexibility for schema and data management.
Chapter 3, Understanding Web API, shows the reader how to differentiate between types of web API users, authentication, and methods it provides. We will also take a look at how easy it is to create our own APIs with just a few lines of XML. We will see how the route definition allows for easy binding between what arrives via HTTP requests and what is executed in code, respecting the access list permissions in the process.
Chapter 4, Building and Distributing Extensions, discusses how to create a simple shipping module. We shall take a look at how easy it is to add specific shipping calculations as part of offline shipping methods. We will then package this module and distribute it via Packagist. This makes it easy for the end consumer to use our module with just a few simple console commands.
Chapter 5, Developing for Admin, walks the reader through building two very different screens in the Magento admin area. One utilizes the listing component, whereas the other utilizes the form component.
Chapter 6, Developing for Storefront, covers the bits and pieces involved in storefront development, which JS components make the most challenging part of. We will understand how to write new components, as well as how to override or bypass existing ones – an essential skill for any Magento developer, be it backend or frontend.
Chapter 7, Customizing Catalog Behavior, demonstrates building three distinctive functionalities, all of which relate to the catalog part of Magento. They demonstrate how easily Magento can be extended with new features without really overriding any of the core files. Using plugins and JS components are just some of the approaches we might take.
Chapter 8, Customizing Checkout Experience, demonstrates writing a small but functional order notes module. This will allow us to familiarize ourselves with an important aspect of customizing the checkout experience, the gist of which lies in understanding the checkout_index_index layout handle, the JavaScript window.checkoutConfig object, and uiComponent.
Chapter 9, Customizing Customer Interactions, walks the reader through building a small module that allows us to get a greater insight into Magento's customer data and sections mechanism. We will learn how to manage and build a single component, which will get used both on the customer's My Account page, as well as at the checkout.
To get the most out of the book, the reader is expected to have:
You can download the example code files for this book from your account at www.packtpub.com. If you purchased this book elsewhere, you can visit www.packtpub.com/support and register to have the files emailed directly to you.
You can download the code files by following these steps:
Once the file is downloaded, please make sure that you unzip or extract the folder using the latest version of:
The code bundle for the book is also hosted on GitHub at https://github.com/PacktPublishing/Magento-2-Quick-Start-Guide. In case there's an update to the code, it will be updated on the existing GitHub repository.
We also have other code bundles from our rich catalog of books and videos available at https://github.com/PacktPublishing. Check them out!
Visit the following link to check out videos of the code being run:
There are a number of text conventions used throughout this book.
CodeInText: Indicates code words in text, database table names, folder names, filenames, file extensions, pathnames, dummy URLs, user input, and Twitter handles. Here is an example: "The default area is the frontend, as defined by the default argument under modulestore/etc/di.xml."
A block of code is set as follows:
const AREA_GLOBAL = 'global';
const AREA_FRONTEND = 'frontend';
const AREA_ADMINHTML = 'adminhtml';
const AREA_DOC = 'doc';
const AREA_CRONTAB = 'crontab';
const AREA_WEBAPI_REST = 'webapi_rest';
const AREA_WEBAPI_SOAP = 'webapi_soap';
When we wish to draw your attention to a particular part of a code block, the relevant lines or items are set in bold:
const AREA_GLOBAL = 'global';
const AREA_FRONTEND = 'frontend';
const AREA_ADMINHTML = 'adminhtml';
const AREA_DOC = 'doc';
const AREA_CRONTAB = 'crontab';
const AREA_WEBAPI_REST = 'webapi_rest';
const AREA_WEBAPI_SOAP = 'webapi_soap';
Any command-line input or output is written as follows:
 php bin/magento setup:install \
--db-host="/Applications/MAMP/tmp/mysql/mysql.sock" \
--db-name=magelicious \
Bold: Indicates a new term, an important word, or words that you see onscreen. For example, words in menus or dialog boxes appear in the text like this. Here is an example: "The tab element of the file, which is used to provide a sidebar menu presence under Magento admin Stores | Settings | Configuration, is a nice example."
Feedback from our readers is always welcome.
General feedback: Email feedback@packtpub.com and mention the book title in the subject of your message. If you have questions about any aspect of this book, please email us at questions@packtpub.com.
Errata: Although we have taken every care to ensure the accuracy of our content, mistakes do happen. If you have found a mistake in this book, we would be grateful if you would report this to us. Please visit www.packtpub.com/submit-errata, selecting your book, clicking on the Errata Submission Form link, and entering the details.
Piracy: If you come across any illegal copies of our works in any form on the Internet, we would be grateful if you would provide us with the location address or website name. Please contact us at copyright@packtpub.com with a link to the material.
If you are interested in becoming an author: If there is a topic that you have expertise in and you are interested in either writing or contributing to a book, please visit authors.packtpub.com.
Please leave a review. Once you have read and used this book, why not leave a review on the site that you purchased it from? Potential readers can then see and use your unbiased opinion to make purchase decisions, we at Packt can understand what you think about our products, and our authors can see your feedback on their book. Thank you!
For more information about Packt, please visit packtpub.com.
Building web shops is a challenging and tedious job, and even more so if a platform you are working on is limited via features, extensibility, and the overall ecosystem it provides. Choosing the right platform can often make the difference between a project's success or failure. The abundance of available e-commerce software, from SaaS to self-hosted solutions, does not really make it an easy choice.
The Magento e-commerce platform has been around for over 10 years now. With its first stable release dating back to March 2008, it immediately caught the attention of developers as an extensible and feature-rich open source platform. Over time, Magento established itself as not just a stunning technical and feature-rich platform, but as a robust ecosystem as well. By allowing developers to validate their real-world skills through the Magento certification program, certain standards have been put into effect, making it easier for merchants to better recognize their solution partners. Training courses have been further provided for other roles in e-commerce business as well, such as merchants, marketers, system administrators, and business analysts.
In this chapter, we will take a look at some of the key must-knows about Magento:
To keep things compact as we move forward, let's assume the following throughout this book:
You will need to have basic knowledge of PHP, OOP, JavaScript, and XML. You will also need Apache, MySQL, and AMPPS installed on your system to execute the codes.
The code files of this chapter can be found on GitHub:
https://github.com/PacktPublishing/Magento-2-Quick-Start-Guide.
Check out the following video to see the Code in Action:
The Magento platform comes in two flavors:
The difference between the two comes mainly in the form of extra modules that were added to the Commerce version, whereas all the coding concepts and core features remain the same. It goes to say that any knowledge we obtain through following Magento Open Source examples is fully applicable to anyone working on Magento Commerce.
There are several ways that we can obtain source files for Magento Open Source:
Obtaining source files via a CLI from the composer repository is our preferred method. Assuming we are within the empty <PROJECT_DIR> directory, we can kick off this process via the following command:
composer create-project --repository-url=https://repo.magento.com/ magento/project-community-edition .
The dot (.) at the end of this command this tells the composer to pull the files into a current directory.
Once the Composer process is finished, we can start installing Magento. There are two ways we can install Magento:
Knowing how to install Magento via the command line is an essential skill in day-to-day development, as the majority of development requires the developer to tackle various bin/magento commands—not to mention the command line approach is somewhat faster and easily scripted.
Let's install Magento with the built-in php bin/magento setup:install command and a few of the required installation options as follows:
php bin/magento setup:install \
--db-host="/Applications/MAMP/tmp/mysql/mysql.sock" \
--db-name=magelicious \
--db-user=root
--db-password=root \
--admin-firstname=John \
--admin-lastname=Doe \
--admin-email=john@magelicious.loc \
--admin-user=john \
--admin-password=jrdJ%0i9a69n
After the preceding command has been executed, we should begin to see console progress, starting with something like the following:
Starting Magento installation:
File permissions check...
[Progress: 1 / 513]
Required extensions check...
[Progress: 2 / 513]
Enabling Maintenance Mode...
[Progress: 3 / 513]
Installing deployment configuration...
[Progress: 4 / 513]
Installing database schema:
Schema creation/updates:
Module 'Magento_Store':
[Progress: 5 / 513]
While it might take up to a few minutes, a successful installation should end with a message that's similar to the following:
[Progress: 508 / 513]
Installing admin user...
[Progress: 509 / 513]
Caches clearing:
Cache cleared successfully
[Progress: 510 / 513]
Disabling Maintenance Mode:
[Progress: 511 / 513]
Post installation file permissions check...
For security, remove write permissions from these directories: '/Users/branko/Projects/magelicious/app/etc'
[Progress: 512 / 513]
Write installation date...
[Progress: 513 / 513]
[SUCCESS]: Magento installation complete.
[SUCCESS]: Magento Admin URI: /admin_mxq00c
Nothing to import.
Right after installation, our first step should be to set Magento to developer mode by using the following command:
php bin/magento deploy:mode:set developer
We will take a closer look at Magento modes soon; for now, this is to be taken as is.
If all went well during the Magento installation, we should be able to open the storefront and admin in our browser.
Modes play a crucial role in Magento's development and deployment processes. They are handled by the deploy module, which can be found under the <MAGENTO_DIR>/module-deploy directory.
The built-in php bin/magento command provides us with the following deploy commands:
deploy
 deploy:mode:set Set application mode.
  deploy:mode:show Displays current application mode.
We already used the deploy:mode:set developer command to switch from default to developer mode.
Magento differentiates between following three modes:
The area is a logical component that organizes code for optimized request processing. While the majority of the time we don't really have to code anything specific regarding areas, understanding them is key to understanding Magento.
The Magento\Framework\App\Area class AREA_* constants hint at the following areas:
const AREA_GLOBAL = 'global';
const AREA_FRONTEND = 'frontend';
const AREA_ADMINHTML = 'adminhtml';
const AREA_DOC = 'doc';
const AREA_CRONTAB = 'crontab';
const AREA_WEBAPI_REST = 'webapi_rest';
const AREA_WEBAPI_SOAP = 'webapi_soap';
By doing a lookup for the <argument name="areas" string across all of the <MAGENTO_DIR> di.xml files, we can see that five of these areas have been explicitly added to the areas argument of the Magento\Framework\App\AreaList class:
The default area is frontend, as defined by the default argument under module-store/etc/di.xml. The global area is used as a fallback for files that are absent in the adminhtml and frontend areas.
Let's take a closer look at the <MAGENTO_DIR>/module-webapi/etc/di.xml file:
<type name="Magento\Framework\App\AreaList">
    <arguments>
        <argument name="areas" xsi:type="array">
            <item name="webapi_rest" xsi:type="array">
                <item name="frontName" xsi:type="string">rest</item>
            </item>
            <item name="webapi_soap" xsi:type="array">
                <item name="frontName" xsi:type="string">soap</item>
            </item>
        </argument>
    </arguments>
</type>
The frontName is what sometimes appears at the front of the URL, whereas the area name is used internally to refer to the area in configuration files. Different areas defined by Magento can contain different code for processing URLs and requests. This allows Magento to load only the dependent code for the specified area.
When developing modules, we define which resources are visible and accessible in a given area. This way, we get to control the specific area behavior if needed. An example of one such behavior might be the definition of the event observer under the frontend area for customer_save_after event. This observer would only trigger on customer save operations that are triggered from the storefront, which usually indicates a customer register action. The adminhtml area operations, such as Magento admin manually creating a customer, would fail to trigger this observer, as it was defined under the frontend area.
On occasion, we might need to run some code that only executes under certain areas. In such cases, emulation helps us emulate any store programmatically. The Magento\Store\Model\App\Emulation class provides the startEnvironmentEmulation and stopEnvironmentEmulation methods, which we can use for this purpose, as per the following partial example:
protected $storeRepository;
protected $emulation;

public function __construct(
    \Magento\Store\Api\StoreRepositoryInterface $storeRepository,
    \Magento\Store\Model\App\Emulation $emulation
) {
    $this->storeRepository = $storeRepository;
    $this->emulation = $emulation;
}

public function test() {
    $store = $this->storeRepository->get('store-to-emulate');
    $this->emulation->startEnvironmentEmulation(
        $store->getId(),
        \Magento\Framework\App\Area::AREA_FRONTEND
    );
    // Code to execute in emulated environment
    $this->emulation->stopEnvironmentEmulation();
}
While it is not a common thing to do, we can further register new areas ourselves. This is easily done by using the module's di.xml.
URLs in Magento have the format of <AreaFrontName>/<VendorName>/<ModuleName>/<ControllerName>/<ActionName>, but this does not mean that we actually use the area, vendor, or module name in the URL any time we wish to access a certain controller. For example, the area for a request is defined by the first request path segment, such as admin for adminhtml area, and none for frontend area.
We use the router class to assign a URL to a corresponding controller and its action. The router's match method finds a matching controller, which is determined by an incoming request.
Conceptually, creating a new router is as simple as doing the following:
By doing a lookup for the name="routerList" string across all of the <MAGENTO_DIR> di.xml files, we can see the following router definitions:
Let's take a closer look at the robots router under <MAGENTO_DIR>/module-robots. etc/frontend/di.xml injects the new item under the routerList argument as follows:
<type name="Magento\Framework\App\RouterList">
    <arguments>
        <argument name="routerList" xsi:type="array">
            <item name="robots" xsi:type="array">
                <item name="class" xsi:type="string">Magento\Robots\Controller\Router</item>
                <item name="disable" xsi:type="boolean">false</item>
                <item name="sortOrder" xsi:type="string">10</item>
            </item>
        </argument>
    </arguments>
</type>
The Magento\Robots\Controller\Router class has been further defined as per the following partial extract:
class Router implements \Magento\Framework\App\RouterInterface {
    // Magento\Framework\App\ActionFactory
    private $actionFactory;
    // Magento\Framework\App\Router\ActionList
    private $actionList;
    // Magento\Framework\App\Route\ConfigInterface
    private $routeConfig;

    public function match(\Magento\Framework\App\RequestInterface $request) {
        $identifier = trim($request->getPathInfo(), '/');
        if ($identifier !== 'robots.txt') {
            return null;
        }

        $modules = $this->routeConfig->getModulesByFrontName('robots');
        if (empty($modules)) {
            return null;
        }

        $actionClassName = $this->actionList->get($modules[0], null, 'index', 'index');
        $actionInstance = $this->actionFactory->create($actionClassName);
        return $actionInstance;
    }
}
The match method checks if the robots.txt file was requested and returns the instance of the matched \Magento\Framework\App\ActionInterface type. By following this simple implementation, we can easily create the route of our own.
Conceptually, creating a new controller is as simple as doing the following:
By doing a lookup for the <route string across the <MAGENTO_DIR> routes.xml files, we can see that Magento uses hundreds of route definitions, which are spread across its modules. Each route represents one controller.
Let's take a closer look at one of Magento's controllers, <MAGENTO_DIR>/module-customer, which maps to the http://magelicious.loc/customer/address/form URL. The route itself is registered via frontend/di.xml under the standard router with a customer ID and a customer frontName, as follows:
<router id="standard">
    <route id="customer" frontName="customer">
        <module name="Magento_Customer" />
    </route>
</router>
The abstract controller file Controller/Address.php is defined partially as follows:
abstract class Address extends \Magento\Framework\App\Action\Action {
    // The rest of the code...
}
The abstract controller is where we want to add functionality and dependencies that are shared across all of the child action controllers.
We can further see three different action controllers defined within the subdirectory which has the same name as the abstract class. The Controller/Address directory contains six action controllers: Delete.php, Edit.php, Form.php, FormPost.php, Index.php, and NewAction.php. Let's take a closer look at the following partial Form.php file's content:
class Form extends \Magento\Customer\Controller\Address {
    public function execute() {
        /** @var \Magento\Framework\View\Result\Page $resultPage */
        $resultPage = $this->resultPageFactory->create();
        $navigationBlock = $resultPage->getLayout()->getBlock('customer_account_navigation');
        if ($navigationBlock) {
            $navigationBlock->setActive('customer/address');
        }
        return $resultPage;
    }
}
The example here uses the create method of the injected Magento\Framework\View\Result\PageFactory type to create a new page result. The various types of controller results can be found within the <MAGENTO_DIR>/framework directory:
We can take the unified way of creating result instances by using the create method of \Magento\Framework\Controller\ResultFactory. The ResultFactory defines the TYPE_* constant for each of the mentioned controller result types:
const TYPE_JSON = 'json';
const TYPE_RAW = 'raw';
const TYPE_REDIRECT = 'redirect';
const TYPE_FORWARD = 'forward';
const TYPE_LAYOUT = 'layout';
const TYPE_PAGE = 'page';
Keeping these constants in mind, we can easily write our action controller code as follows:
$resultRedirect = $this->resultFactory->create(ResultFactory::TYPE_REDIRECT);
$resultRedirect->setPath('adminhtml/*/index');
return $resultRedirect;
The top-level Magento structure is rather simple. When we strip away (seemingly) non-relevant files such as licenses, sample files, and changelogs, what remains looks much like the following:
app/
    code/
    design/
    etc/
        config.php
        env.php
bin/
composer.json
composer.lock
dev/
generated/
index.php
lib/
phpserver/
pub/
    static/
        adminhtml/
        frontend/
setup/
update/
var/
    cache/
    log/
    page_cache/
    view_preprocessed/
        pub/
            static/
                adminhtml/
                frontend/
vendor/
    composer/
    magento/
    symfony/
The app/code/<VendorName>/<ModuleName> directory, <MAGELICIOUS_DIR> for short, is where our custom code will reside.
The vendor/magento directory, <MAGENTO_DIR> for short, is where Magento source code resides, as per the following partial listing:
vendor/
    magento/
        composer/
        framework/
        language-de_de/
        language-en_us/
        magento-composer-installer/
        magento2-base/
        module-catalog/
        module-checkout/
        theme-adminhtml-backend/
        theme-frontend-blank/
        theme-frontend-luma/
The individual module directory is where things get interesting. Let's take a quick look at the structure of one of the simpler Magento modules, <MAGENTO_DIR>/module-contact:
Block/
Controller/
etc/
Helper/
i18n/
Model/
Test/
view/
composer.json
LICENSE.txt
LICENSE_AFL.txt
README.md
registration.php
This is by no means the final structure of the individual module. There are other directories the module can define, as we will see as we move forward throughout this book.
Let's create the most minimal module there is in Magento. Our module will be called Core and it will belong to the Magelicious vendor. The formula for determining the directory of custom modules is app/code/<VendorName>/<ModuleName>, or in our case <MAGELICIOUS_DIR>/Core.
We start off by creating the <MAGELICIOUS_DIR>/Core/registration.php file with the following content:
\Magento\Framework\Component\ComponentRegistrar::register(
    \Magento\Framework\Component\ComponentRegistrar::MODULE,
    'Magelicious_Core',
    __DIR__
);
The registration.php file is essentially the entry point of our module. The register method of the Magento\Framework\Component\ComponentRegistrar class provides the ability to statically register components, whereas a component can be more than just a module, as defined via the following constants:
Next, we will create the <MAGELICIOUS_DIR>/Core/etc/module.xml file with the following content:
<config>
    <module name="Magelicious_Core" setup_version="1.0.0">
        <sequence>
            <module name="Magento_Store"/>
            <module name="Magento_Backend"/>
            <module name="Magento_Config"/>
        </sequence>
    </module>
</config>
The name and setup_version attributes of a module element are considered required. The sequence, on the other hand, is optional. We use it to define any potential dependencies around other Magento modules.
Finally, we add composer.json with the following content:
{
    "name": "magelicious/module-core",
    "description": "The core module",
    "require": {
        "php": "^7.0.0"
    },
    "type": "magento2-module",
    "version": "1.0.0",
    "license": [
        "OSL-3.0",
        "AFL-3.0"
    ],
    "autoload": {
        "files": [
            "registration.php"
        ],
        "psr-4": {
            "Magelicious\\Core\\": ""
        }
    }
}
Magento supports the following composer.json types:
Though composer.json is not required for our custom module to be seen by Magento, it is recommended to add it to any component we are building.
You can trigger module installation by running the php bin/magento module:enable Magelicious_Core command, like so:
$ php bin/magento module:enable Magelicious_Core
The following modules have been enabled:
- Magelicious_Core

To make sure that the enabled modules are properly registered, run 'setup:upgrade'.
Cache cleared successfully.
Generated classes cleared successfully. Please run the 'setup:di:compile' command to generate classes.
Info: Some modules might require static view files to be cleared. To do this, run 'module:enable' with the --clear-static-content option to clear them.
You can run the php bin/magento setup:upgrade command to trigger any install and/or update scripts that need to be triggered:
Cache cleared successfully
File system cleanup:
generated/code/Composer
generated/code/Magento
generated/code/Symfony
Updating modules:
Schema creation/updates:
Module 'Magento_Store':
...
Module 'Magento_CmsUrlRewrite':
Module 'Magelicious_Core':
Module 'Magento_ConfigurableImportExport':
...
Nothing to import.
This finishes our module installation.
To confirm our module was installed correctly, perform the following:
At the moment, our module does absolutely nothing, aside from just sitting there. However, these few simple steps are the basis for us moving forward with Magento development, because the majority of things in Magento are done via a module, alongside other types of components, which we have already mentioned.
Magento makes extensive use of caching. The System | Tools | Cache Management section enables us to Enable | Disable | Refresh the cache from the comfort of the graphical interface. During development, the use of the console is more convenient and faster.
The following cache-related commands are supported:
cache
  cache:clean Cleans cache type(s)
  cache:disable Disables cache type(s)
  cache:enable Enables cache type(s)
  cache:flush Flushes cache storage used by cache type(s)
  cache:status Checks cache status
Out of the box, Magento Open Source comes with 14 different cache types. We can easily get the status of each cache type by running the php bin/magento cache:status command, which gives the following output:
Current status:
                config: 0
                layout: 0
            block_html: 0
           collections: 0
            reflection: 0
                db_ddl: 0
                   eav: 0
 customer_notification: 0
      the_custom_cache: 1
    config_integration: 0
config_integration_api: 0
             full_page: 0
             translate: 0
     config_webservice: 0
We can use the enable | disable | clean cache commands to impact one or more cache types at once.
If built-in cache types are not enough, we can always create our own.
Creating a new cache type in Magento is as easy as doing the following:
Create the <MAGELICIOUS_DIR>/Core/etc/cache.xml file with the following content:
<config>
    <type name="the_custom_cache" translate="label,description" instance="Magelicious\Core\Model\Cache\TheCustomCache">
        <label>The Custom Cache</label>
        <description>Our custom cache type</description>
    </type>
</config>
Create the <MAGELICIOUS_DIR>/Core/Model/Cache/TheCustomCache.php file with the following content:
class TheCustomCache extends \Magento\Framework\Cache\Frontend\Decorator\TagScope {
    const TYPE_IDENTIFIER = 'the_custom_cache';
    const CACHE_TAG = 'THE_CUSTOM_CACHE';

    public function __construct(\Magento\Framework\App\Cache\Type\FrontendPool $cacheFrontendPool) {
        parent::__construct($cacheFrontendPool->get(self::TYPE_IDENTIFIER), self::CACHE_TAG);
    }
}
The TYPE_IDENTIFIER is used internally as a cache type code that is unique among all cache types. The CACHE_TAG is a cache tag that's used to distinguish the cache type from all other caches. Running cache:status should now show our custom cache type on the list.
We can use the instance of Magento\Framework\App\Cache\TypeListInterface to invalidate the cache, as follows:
$this->typeList->invalidate(\Magelicious\Core\Model\Cache\TheCustomCache::TYPE_IDENTIFIER);
We can use the instance of Magento\Framework\App\Cache\Manager $cacheManager to programmatically execute the same enable | disable | clean operations as per the following example:
$cacheManager->setEnabled(
    [\Magelicious\Core\Model\Cache\TheCustomCache::TYPE_IDENTIFIER],
    true
);

$cacheManager->clean([\Magelicious\Core\Model\Cache\TheCustomCache::TYPE_IDENTIFIER]);

$cacheManager->flush([\Magelicious\Core\Model\Cache\TheCustomCache::TYPE_IDENTIFIER]);
Saving data to cache requires serialization, as per the following example:
// \Magento\Framework\Config\CacheInterface $cache
// \Magento\Framework\Serialize\SerializerInterface $serializer
// \Magento\Framework\App\Cache\StateInterface $cacheState

$isCacheEnabled = $cacheState->isEnabled(\Magelicious\Core\Model\Cache\TheCustomCache::TYPE_IDENTIFIER);

$cacheId = 'some-unique-identifier';

if ($isCacheEnabled) {
    $cache->save(
        $serializer->serialize('some-data'),
        $cacheId,
        [
            \Magelicious\Core\Model\Cache\TheCustomCache::CACHE_TAG
        ]
    );
}
Reading data from the cache is as easy as per the following example:
if ($cacheData = $this->cache->load($cacheId);) {
    $someData = $this->getSerializer()->unserialize($cacheData);
} else {
    $someData = $this->fetchSomeData();
}
Dependency injection has become a de facto standard of modern-day software. Magento makes heavy use of this technique, based on mappings found in di.xml files. The workload of Magento's dependency injection is handled by the Magento\Framework\ObjectManager\ObjectManager instance, which implements the lightweight Magento\Framework\ObjectManagerInterface.
The di.xml file configures the object manager, telling it how to handle the following:
These features allow for a great degree of flexibility and extensibility, as we will soon see.
Every module can have a global and area-specific di.xml file.
Magento loads configuration files in the following order:
When Magento reads all of these configuration files, it merges them all together by appending all nodes.
Argument injection is done via preference and type definitions within the di.xml.
By performing a lookup for the <preference string across the entire <MAGENTO_DIR> directory's di.xml files, we can see that Magento uses hundreds of preference definitions, spread across the majority of its modules.
Let's take a quick look at one of the __construct method, of the type Magento\Eav\Model\Attribute\Data\AbstractData:
public function __construct(
    \Magento\Framework\Stdlib\DateTime\TimezoneInterface $localeDate,
    \Psr\Log\LoggerInterface $logger,
    \Magento\Framework\Locale\ResolverInterface $localeResolver
) {
    $this->_localeDate = $localeDate;
    $this->_logger = $logger;
    $this->_localeResolver = $localeResolver;
}
We can find the preference definitions for these interfaces under the <MAGENTO_DIR>/magento2-base/app/etc/di.xml file:
<preference for="Magento\Framework\Stdlib\DateTime\TimezoneInterface" type="Magento\Framework\Stdlib\DateTime\Timezone" />
<preference for="Psr\Log\LoggerInterface" type="Magento\Framework\Logger\Monolog" />
<preference for="Magento\Framework\Locale\ResolverInterface" type="Magento\Framework\Locale\Resolver" />
Theoretically, we can use the object manager directly, as follows:
class Type {
    protected $objectManager;

    public function __construct(
        \Magento\Framework\ObjectManagerInterface $objectManager
    ) {
        $this->objectManager = $objectManager;
    }

    public function example() {
        $this->objectManager->create(\Fully\Qualified\Class\Name::class);
        $this->objectManager->get(\Fully\Qualified\Class\Name::class);
        \Magento\Framework\App\ObjectManager::getInstance()
            ->create(\Fully\Qualified\Class\Name::class);
        \Magento\Framework\App\ObjectManager::getInstance()
            ->get(\Fully\Qualified\Class\Name::class);
    }
}
By doing a lookup for the <type string across the entire <MAGENTO_DIR> directory's di.xml files, we can see that Magento uses over a thousand type definitions, spread across the majority of its modules.
Here is a very simple example, taken from the <MAGENTO_DIR>/module-customer/etc/di.xml file:
<type name="Magento\Customer\Model\Visitor">
    <arguments>
        <argument name="ignoredUserAgents" xsi:type="array">
            <item name="google1" xsi:type="string">Googlebot/1.0 (googlebot@googlebot.com http://googlebot.com/)</item>
            <item name="google2" xsi:type="string">Mozilla/5.0 (compatible; Googlebot/2.1; +http://www.google.com/bot.html)</item>
            <item name="google3" xsi:type="string">Googlebot/2.1 (+http://www.googlebot.com/bot.html)</item>
        </argument>
    </arguments>
</type>
Looking into the source of the Magento\Customer\Model\Visitor class, we can see that it has its constructor defined by the $ignoredUserAgents = [] array. Using the type element, the preceding example injects the ignoredUserAgents argument with the given array values.
When configuration files for a given scope get merged, array arguments with the same name get merged into a new array. However, if any new configuration is loaded at a later time, either by a more specific scope or through the code, then any array definitions in the new configuration will replace the loaded configuration instead of merging.
The list of available item type values goes well beyond just a string, and includes the following:
Argument injection often goes hand in hand with virtual types, as we will soon see.
Virtual types are a very neat feature of Magento that allow us to change the arguments of a specific injectable dependency and thus change the behavior of a particular class type.
The <MAGENTO_DIR>/module-checkout/etc/di.xml file provides a simple example of virtualType and its usage:
<virtualType name="Magento\Checkout\Model\Session\Storage" type="Magento\Framework\Session\Storage">
    <arguments>
        <argument name="namespace" xsi:type="string">checkout</argument>
    </arguments>
</virtualType>
<type name="Magento\Checkout\Model\Session">
    <arguments>
        <argument name="storage" xsi:type="object">Magento\Checkout\Model\Session\Storage</argument>
    </arguments>
</type>
The virtualType here (virtually) extends Magento\Framework\Session\Storage by rewriting its constructor's $namespace = 'default' argument to $namespace = 'checkout'. However, this change does not kick in on its own, as the Magento\Checkout\Model\Session\Storage virtual type must be used first. It is used in this case, via a type definition, where the storage argument is replaced entirely by the virtual type.
By doing a lookup for the <virtualType string across the entire <MAGENTO_DIR> directory's di.xml files, we can see that Magento uses hundreds of virtual types across the majority of its modules.
A more complex example of virtual type usage can be found under the Magento_LayeredNavigation module.
The <MAGENTO_DIR>/module-layered-navigation/etc/frontend/di.xml file defines two virtual types, as follows:
<virtualType name="Magento\LayeredNavigation\Block\Navigation\Category" type="Magento\LayeredNavigation\Block\Navigation">
    <arguments>
        <argument name="filterList" xsi:type="object">categoryFilterList</argument>
    </arguments>
</virtualType>

<virtualType name="Magento\LayeredNavigation\Block\Navigation\Search" type="Magento\LayeredNavigation\Block\Navigation">
    <arguments>
        <argument name="filterList" xsi:type="object">searchFilterList</argument>
    </arguments>
</virtualType>
Here, we have two virtual types defined, each changing the filterList argument of the Magento\LayeredNavigation\Block\Navigation class. categoryFilterList and searchFilterList are the names of two other virtual types that are defined in <MAGENTO_DIR>/module-catalog-search/etc/di.xml, as visible here: https://github.com/magento/magento2/blob/2.2/app/code/Magento/CatalogSearch/etc/di.xml.
The Magento\LayeredNavigation\Block\Navigation\Category and Magento\LayeredNavigation\Block\Navigation\Search virtual types are then used in layout files for block definition, as follows:
<!-- view/frontend/layout/catalog_category_view_type_layered.xml -->
<referenceContainer name="sidebar.main">
    <block class="Magento\LayeredNavigation\Block\Navigation\Category" ...
</referenceContainer>

<!-- view/frontend/layout/catalogsearch_result_index.xml -->
<referenceContainer name="sidebar.main">
    <block class="Magento\LayeredNavigation\Block\Navigation\Search" ...
</referenceContainer>
What this effectively does is tell Magento that, for the category view page and search page, use the virtual type for class, thus instructing it to go through all the argument changes specified in the virtual type.
This is an interesting example as it reveals the potential complexity of using virtual types. Basically, we have one virtual type (Magento\LayeredNavigation\Block\Navigation\Search) changing the single filterList argument of a real type (Magento\LayeredNavigation\Block\Navigation) with another virtual type (categoryFilterList). Likewise, we just learned how the class property of the block element is capable of not just accepting the fully qualified class name, but the virtualType name as well.
Proxy classes are used when object creation is expensive and a class' constructor is unusually resource-intensive. To avoid unnecessary performance impact, Magento uses Proxy classes to turn given types into becoming lazy-loaded versions of them.
A quick lookup for the \Proxy</argument> string across all Magento di.xml files reveals over a hundred occurrences of this string. It goes to say that Magento extensively uses proxies across its code.
The type definition under <MAGENTO_DIR>/module-customer/etc/di.xml is a nice example of using proxies:
<type name="Magento\Customer\Model\Session">
    <arguments>
        <argument name="configShare" xsi:type="object">Magento\Customer\Model\Config\Share\Proxy</argument>
        <argument name="customerUrl" xsi:type="object">Magento\Customer\Model\Url\Proxy</argument>
        <argument name="customerResource" xsi:type="object">Magento\Customer\Model\ResourceModel\Customer\Proxy</argument>
        <argument name="storage" xsi:type="object">Magento\Customer\Model\Session\Storage</argument>
        <argument name="customerRepository" xsi:type="object">Magento\Customer\Api\CustomerRepositoryInterface\Proxy</argument>
    </arguments>
</type>
If we look at the constructor of the Magento\Customer\Model\Session type, we can see that none of the four arguments (configShare, customerUrl, customerResource, and customerRepository) were declared as Proxy within the PHP file. They where rewritten through di.xml. These Proxy types do not really exist just yet, as the Magento dependency injection (di) compilation process creates them. They are automatically generated under the generated directory.
Once it is compiled, the Magento\Customer\Model\Url\Proxy type can easily be found under the generated/code/Magento/Customer/Model/Url/Proxy.php file. Let's take a partial look at it:
class Proxy extends \Magento\Customer\Model\Url
implements \Magento\Framework\ObjectManager\NoninterceptableInterface {
    public function __construct(
        \Magento\Framework\ObjectManagerInterface $objectManager,
        $instanceName = '\\Magento\\Customer\\Model\\Url',
        $shared = true) {
        $this->_objectManager = $objectManager;
        $this->_instanceName = $instanceName;
        $this->_isShared = $shared;
    }

    public function __sleep() {
        return ['_subject', '_isShared', '_instanceName'];
    }

    public function __wakeup() {
        $this->_objectManager = \Magento\Framework\App\ObjectManager::getInstance();
    }

    public function __clone() {
        $this->_subject = clone $this->_getSubject();
    }

    protected function _getSubject() {
        if (!$this->_subject) {
            $this->_subject = true === $this->_isShared
                ? $this->_objectManager->get($this->_instanceName)
                : $this->_objectManager->create($this->_instanceName);
        }
        return $this->_subject;
    }

    public function getLoginUrl() {
        return $this->_getSubject()->getLoginUrl();
    }

    public function getLoginUrlParams() {
        return $this->_getSubject()->getLoginUrlParams();
    }
}
The composition of the Proxy class shows the mechanism by which it wraps around the original Magento\Customer\Model\Url type. This now means that, across Magento, every time the Magento\Customer\Model\Url type is requested, the Magento\Customer\Model\Url\Proxy is going to get passed instead. Unlike the original type's __construct method which might be performance heavy, the autogenerated Proxy's __construct method is a lightweight one. This eliminates possible performance bottlenecks. The _getSubject method is used to instantiate/lazy load the original type whenever any of the original type public methods are called. For example, the call to the getLoginUrl method would go through the proxy.
Every proxy generated by Magento implements Magento\Framework\ObjectManager\NoninterceptableInterface. Though the interface itself is empty, it is used as a marker to identify proxies for which we don't need to generate interceptors (plugins).
When writing custom types, such as Magelicious\Core\Model\Customer, we could easily specify the proxy right there in the constructor:
class Customer {
    public function __construct(
        \Magento\Customer\Model\Url\Proxy $customerUrl
    ) {
        //...
    }
}
This approach, however, is a bad practice. The way to do this properly is to specify __construct with an original Magento\Customer\Model\Url type and then add the di.xml as follows:
<type name="Magelicious\Core\Model\Customer">
    <arguments>
        <argument name="customerUrl" xsi:type="object">Magento\Customer\Model\Url\Proxy</argument>
    </arguments>
</type>
Factories are classes that create other classes—much like the object manager, except this time we are encouraged to use them directly. Their purpose is to instantiate the non-injectable classes—those that we should not inject directly into __construct. The beauty of using factories is that, most of the time, we don't even have to write them, as they are automatically generated by Magento unless we need to implement some sort of specific behavior for our factory classes.
By doing a lookup for the Factory $ string across the entire <MAGENTO_DIR> directory's *.php files, we can see thousands of factory examples, spread across the majority of Magento's modules.
While a great deal of these factories actually exist, others are automatically generated when needed.
Let's take a quick look at one automatically generated factory, that of Magento\Newsletter\Model\SubscriberFactory, which is used in several Magento modules such as the newsletter, subscriber, and review modules:
class SubscriberFactory {
    protected $_objectManager = null;
    protected $_instanceName = null;

    public function __construct(
        \Magento\Framework\ObjectManagerInterface $objectManager,
        $instanceName = '\\Magento\\Newsletter\\Model\\Subscriber'
    ) {
        $this->_objectManager = $objectManager;
        $this->_instanceName = $instanceName;
    }

    public function create(array $data = array()) {
        return $this->_objectManager->create($this->_instanceName, $data);
    }
}
The autogenerated factory code is essentially just a thin wrapper on top of an object manager create method.
Factories work well with the di.xml preference mechanism, which means we can easily pass interfaces into the constructor, like so:
public function __construct(
    \Magento\CatalogInventory\Api\StockItemRepositoryInterface $stockItemRepository,
    \Magento\CatalogInventory\Api\StockItemCriteriaInterfaceFactory $stockItemCriteriaFactory
) {
    $this->stockItemRepository = $stockItemRepository;
    $this->stockItemCriteriaFactory = $stockItemCriteriaFactory;
}

// $criteria = $this->stockItemCriteriaFactory->create();
// $result = $this->stockItemRepository->getList($criteria);
The preference mechanism makes sure that concrete implementations get passed to the object instance when its constructor is invoked.
Plugins are likely one of the most powerful features of Magento. They allow us to modify the behavior of public class functions by intercepting a function call and running code before, after, or around that function call.
Before we eagerly start using them, it is worth emphasizing how plugins can't be used on the following:
Plugins can be used on the following:
By doing a lookup for the <plugin string across the entire <MAGENTO_DIR> directory's di.xml files, we can see hundreds of plugin examples spread across the majority of Magento's modules.
The before plugin, as its name suggests, runs before the observed method.
When writing a before plugin, there are a few key points to remember:
Let's take a look at one of Magento's before plugin implementations, the one specified in the <MAGENTO_DIR>module-payment/etc/frontend/di.xml file:
<type name="Magento\Checkout\Block\Checkout\LayoutProcessor">
    <plugin name="ProcessPaymentConfiguration"
            type="Magento\Payment\Plugin\PaymentConfigurationProcess"/>
</type>
The original method this plugin is targeting is the process method of the Magento\Checkout\Block\Checkout\LayoutProcessor class:
public function process($jsLayout) {
    // The rest of the code...
    return $jsLayout;
}
The implementation of the before plugin is provided via the beforeProcess method of the Magento\Payment\Plugin\PaymentConfigurationProcess class, as per the following partial example:
public function beforeProcess(
    \Magento\Checkout\Block\Checkout\LayoutProcessor $processor,
    $jsLayout) {
    // The rest of the code...
    return [$jsLayout];
}
The around plugin runs around the observed method in a way that allows us to run some code before and after the original method call. This is a very powerful concept, as we get to change the incoming parameters as well as the return value of a function.
When writing the around plugin, there are a few key points to remember:
Let's take a look at one of Magento's around plugin implementations, the one specified in the <MAGENTO_DIR>module-grouped-product/etc/di.xml file:
<type name="Magento\Catalog\Model\ResourceModel\Product\Link">
    <plugin name="groupedProductLinkProcessor" type="Magento\GroupedProduct\Model\ResourceModel\Product\Link\RelationPersister" />
</type>
The original method of this plugin is targeting the deleteProductLink method of the Magento\Catalog\Model\ResourceModel\Product\Link class:
public function deleteProductLink($linkId) {
    return $this->getConnection()
            ->delete($this->getMainTable(), ['link_id = ?' => $linkId]);
}
The implementation of the around plugin is provided via the aroundDeleteProductLink method of the Magento\GroupedProduct\Model\ResourceModel\Product\Link\RelationPersister class, as per the following partial example:
public function aroundDeleteProductLink(
    \Magento\GroupedProduct\Model\ResourceModel\Product\Link $subject,
    \Closure $proceed, $linkId) {
    // The rest of the code...
    $result = $proceed($linkId);
    // The rest of the code...
    return $result;
}
The after plugin, as its name suggests, runs after the observed method.
When writing the after plugin, there are a few key points to remember:
Let's take a look at one of Magento's after plugin implementations, the one specified in the module-catalog/etc/di.xml file:
<type name="Magento\Indexer\Model\Config\Data">
    <plugin name="indexerProductFlatConfigGet"
        type="Magento\Catalog\Model\Indexer\Product\Flat\Plugin\IndexerConfigData" />
</type>
The original method this plugin is targeting is the get method of the Magento\Indexer\Model\Config\Data class:
public function get($path = null, $default = null) {
    // The rest of the code...
    return $data;
}
The implementation of the after plugin is provided via the afterGet method of the Magento\Catalog\Model\Indexer\Product\Flat\Plugin\IndexerConfigData class, as per the following partial example:
public function afterGet(Magento\Indexer\Model\Config\Data, $data, $path = null, $default = null) {
    // The rest of the code...
    return $data;
}
Special care should be taken when using plugins. While they provide great flexibility, they also make it easy to induce bugs, performance bottlenecks, and other less obvious types of instabilities – even more so if several plugins are observing the same method.
Magento has a neat publish-subscribe pattern implementation that we call events and observers. By dispatching events when certain actions are triggered, we can run our custom code in response to the triggered event. The events are dispatched using the Magento\Framework\Event\Manager class, which implements Magento\Framework\Event\ManagerInterface.
To dispatch an event, we simply call the dispatch method of the event manager instance, providing it with the name of the event we are dispatching with an optional array of data we wish to pass on to the observers, as per the following example taken from the <MAGENTO_DIR>/module-customer/Controller/Account/CreatePost.php file:
$this->_eventManager->dispatch(
    'customer_register_success',
    ['account_controller' => $this, 'customer' => $customer]
);
Observers are registered via an events.xml file, as per the following example from the <MAGENTO_DIR>/module-persistent/etc/frontend/events.xml file:
<event name="customer_register_success">
  <observer name="persistent" instance="Magento\Persistent\Observer\RemovePersistentCookieOnRegisterObserver" />
</event>
By doing a lookup for the eventManager->dispatch string across the entire <MAGENTO_DIR> directory's *.php files, we can see hundreds of events examples, spread across the majority of Magento's modules. While all of these events are of the same technical importance, we might say that some are likely to be used more on a day to day basis than others.
This makes it worth taking some time to study the following classes and the events they dispatch:
Some more important events can be found in a few of the types defined under the <MAGENTO_DIR>/framework/View directory:
Let's take a closer look at one of these events, the one found in the <MAGENTO_DIR>/framework/Model/AbstractModel.php file:
public function afterCommitCallback() {
    $this->_eventManager->dispatch('model_save_commit_after', ['object' => $this]);
    $this->_eventManager->dispatch($this->_eventPrefix . '_save_commit_after', $this->_getEventData());
    return $this;
}

protected function _getEventData() {
    return [
        'data_object' => $this,
        $this->_eventObject => $this,
    ];
}
The $_eventPrefix and $_eventObject type properties are particularly important here. If we glimpse over types such as Magento\Catalog\Model\Product, Magento\Catalog\Model\Category, Magento\Customer\Model\Customer, Magento\Quote\Model\Quote, Magento\Sales\Model\Order, and others, we can see that a great deal of these entity types are essentially extending from Magento\Framework\Model\AbstractModel and provide their own values to replace $_eventPrefix = 'core_abstract' and $_eventObject = 'object'. What this means is that we can use events such as $this->_eventPrefix . '_save_commit_after' to specify observers via events.xml.
Let's take a look at the following example, taken from the <MAGENTO_DIR>/module-downloadable/etc/events.xml file:
<config>
    <event name="sales_order_save_commit_after">
        <observer name="downloadable_observer" instance="Magento\Downloadable\Observer\SetLinkStatusObserver" />
    </event>
</config>
Observers are placed inside the <ModuleDir>/Observer directory. Every observer implements a single execute method on the Magento\Framework\Event\ObserverInterface class:
class SetLinkStatusObserver implements \Magento\Framework\Event\ObserverInterface {
    public function execute(\Magento\Framework\Event\Observer $observer) {
        $order = $observer->getEvent()->getOrder();
    }
}
Much like plugins, badly implemented observers can easily cause bugs or even break the entire application. This is why we need to keep our observer small and computationally efficient—to avoid performance bottlenecks.
The cyclical event loop is a trap that's easy to fall into. This happens when an observer, at some point, is dispatching the same event that it listens to. For example, if an observer listens to the model_save_before event, and then tries to save the same entity again within the observer, this would trigger a cyclical event loop.
To make our observers as specific as possible, we need to declare them in an appropriate scope:
Unlike plugins, observers are used for triggering the follow-up functionality, rather than changing the behavior of functions or data which is part of the event they are observing.
The built-in bin/magento tool plays a major role – not just in Magento development, but in production deployments as well.
Right out of the box, it provides a dozen commands that we can use to manage caches, indexers, dependency compilation, deploying static view files, creating CSS from LESS, putting our store to maintenance, installing modules, and more.
Quite easily, Magento enables us to add our own commands to its Symfony-like command-line interface (CLI). The Magento CLI essentially extends from Symfony\Component\Console\Command.
The real value in creating our own command lies in the arguments and options that we can make available, thus passing dynamic information to the command.
Magento console commands reside under the <ModuleName>/Console directory, which can further be organized to better accommodate our commands. Magento mostly uses the <ModuleName>/Console/Command directory to place the actual CLI command class, whereas various options and other accompanying classes reside in the <ModuleName>/Console directory.
Conceptually, creating a new CLI command is as easy as doing the following:
Let's create our own simple console command. We will start off by creating the <MAGELICIOUS_DIR>/Core/Console/Command/RunStockImportCommand.php file with the following content:
use Symfony\Component\Console\Command\Command;
use Symfony\Component\Console\Input\InputArgument;
use Symfony\Component\Console\Input\InputOption;
use Symfony\Component\Console\Input\InputInterface;
use Symfony\Component\Console\Output\OutputInterface;

class RunStockImportCommand extends Command {
    const ORDER_ID_ARGUMENT = 'order_id';
    const DAYS_BACK_OPTION = 'days_back';

    protected function configure() {
        $this->setName('magelicious:stock:import')
            ->setDescription('The Magelicious Stock Import.')
            ->setDefinition([
                new InputArgument(
                    self::ORDER_ID_ARGUMENT, /* name */
                    InputArgument::REQUIRED, /* mode REQUIRED or OPTIONAL */
                    'The argument to set.', /* description */
                    null /* default */
                ),
                new InputOption(
                    self::DAYS_BACK_OPTION, /* name */
                    null, /* shortcut */
                    InputOption::VALUE_OPTIONAL, /* VALUE_NONE or VALUE_REQUIRED or VALUE_OPTIONAL or VALUE_IS_ARRAY */
                    'The option to set.' /* description */
                )
            ]);
        parent::configure();
    }

    protected function execute(InputInterface $input, OutputInterface $output) {
        try {
            $output->setDecorated(true);
            // $input->getArgument(self::ORDER_ID_ARGUMENT);
            // $input->getOption(self::DAYS_BACK_OPTION);
            // green text
            $output->writeln('<info>The info message.</info>');
            // yellow text
            $output->writeln('<comment>The comment message.</comment>');
            // black text on a cyan background
            $output->writeln('<question>The question message.</question>');
            return \Magento\Framework\Console\Cli::RETURN_SUCCESS;
        } catch (\Exception $e) {
            // white text on a red background
            $output->writeln('<error>' . $e->getMessage() . '</error>');
            if ($output->getVerbosity() >= OutputInterface::VERBOSITY_VERBOSE) {
                $output->writeln($e->getTraceAsString());
            }
            return \Magento\Framework\Console\Cli::RETURN_FAILURE;
        }
    }
}
We then wire it up via <MAGELICIOUS_DIR>/etc/di.xml, as follows:
<type name="Magento\Framework\Console\CommandListInterface">
    <arguments>
        <argument name="commands" xsi:type="array">
            <item name="runStockImport" xsi:type="object">Magelicious\Core\Console\Command\RunStockImportCommand</item>
        </argument>
    </arguments>
</type>
We can now clear the cache and the compiled directories either by running the php bin/magento cache:clean config followed by php bin/magento setup:di:compile, or by running rm -rf generated/* and rm -rf var/cache/*.
Now, if we run the php bin/magento command, we should see our command on the list:
magelicious
  magelicious:stock:import The Magelicious Stock Import.
If we now test our method by running php bin/magento magelicious:stock:import, this should immediately trigger an error, as follows:
[Symfony\Component\Console\Exception\RuntimeException]
Not enough arguments (missing: "order_id").

magelicious:stock:import [--days_back [DAYS_BACK]] [--] <order_id>
Either of the following calls should work:
php bin/magento magelicious:stock:import 000000060
php bin/magento magelicious:stock:import 000000060 --days_back=7
Creating a new cron job is as easy as doing the following:
Let's create a simple cron job. We will start off by creating the <MAGELICIOUS_DIR>/Core/etc/crontab.xml file with the following content:
<group id="default">
    <job name="the_job" instance="Magelicious\Core\Cron\TheJob" method="execute">
        <schedule>*/15 * * * *</schedule>
    </job>
</group>
The instance and method values map to the class and method within that class, which will be executed when cron job is run. The schedule is a cron, like the expression for when the job is to be executed. Unless there are specific requirements telling us otherwise, we can safely use the default group.
We then create the <MAGELICIOUS_DIR>/Core/Cron/TheJob.php file with the following content:
class TheJob {
    public function execute() {
        // ...
    }
}
The Magento console command supports several console commands:
cron
  cron:install Generates and installs crontab for current user
  cron:remove Removes tasks from crontab
  cron:run Runs jobs by schedule
To get our cron job running, we need to make sure that crontab is installed, by running php bin/magento cron:install. This command generates and installs crontab for the current user. We can confirm that by following up with the crontab -e command, like so:
#~ MAGENTO START 6f7c468a10aea2972eab1da53c8d2fce
* * * * * /bin/php /magelicious/bin/magento cron:run 2>&1 | grep -v "Ran jobs by schedule" >> /magelicious/var/log/magento.cron.log
* * * * * /bin/php /magelicious/update/cron.php >> /magelicious/var/log/update.cron.log
* * * * * /bin/php /magelicious/bin/magento setup:cron:run >> /magelicious/var/log/setup.cron.log
#~ MAGENTO END 6f7c468a10aea2972eab1da53c8d2fce
Now, if we execute php bin/magento cron:run, the_job should find its way under the cron_schedule table.
Magento Open Source provides two cron groups: default and index. While the majority of times our cron jobs will be placed under the default group, there might be a need to create a completely new cron group. Luckily, this is quite easy.
To create a new cron group, all we need is a <MAGELICIOUS_DIR>/etc/cron_groups.xml file with the following content:
<config>
    <group id="magelicious">
        <schedule_generate_every>15</schedule_generate_every>
        <schedule_ahead_for>20</schedule_ahead_for>
        <schedule_lifetime>15</schedule_lifetime>
        <history_cleanup_every>10</history_cleanup_every>
        <history_success_lifetime>10080</history_success_lifetime>
        <history_failure_lifetime>10080</history_failure_lifetime>
        <use_separate_process>0</use_separate_process>
    </group>
</config>
While group information is not stored in the cron_schedule table, we can use it via the Magento CLI to run jobs that are specific to a certain group:
php bin/magento cron:run --group=default
In this chapter, we touched upon some of Magento's keys components. Plugins and event observers provide a powerful way of extending Magento, either by changing the behavior of existing functions or by running some follow-up code in response to certain events.
Moving forward, we will deepen our Magento knowledge further by looking into the install and update scripts, the Entity–Attribute–Value model (EAV), creating new EAV types, indexers, extension, and custom attributes.
Every Magento module hosts its models within the Models directory. Some of these models are persistable, while others are non-persistable. A great deal of custom, third-party, and core Magento modules persist data to the database. Data persistence is one of the key functionalities that platforms like Magento need to deal with. Terminology-wise, Magento uses terms such as model, resource model, and collection for a group of three classes that deal with data persistence, that is, create, read, update, and delete (CRUD) operations.
To better understand the overall mechanism of entities, we are going to take a closer look at the following:
You will need to have basic knowledge of PHP, OOP, JavaScript, and XML. You will also need Apache, MySQL, and AMPPS installed on your system to execute the codes.
The code files of this chapter can be found on GitHub:
https://github.com/PacktPublishing/Magento-2-Quick-Start-Guide.
Check out the following video to see the Code in Action:
There are two types of persistence models in Magento: simple and Entity–attribute–value (EAV). The term entity is tossed around interchangeably between the two types of models. We can think of an entity as any persistable model.
The Subscriber entity of the Magento_Newsletter module is an example of a simple model. We can see that it's comprised of the following:
The Customer entity of the Magento_Customer module is an example of an EAV model. We can see that it's comprised of the following:
What differentiates EAV from simple models is essentially their resource model and collection classes. The resource model is our link to the database—our persistor, if you will.
When a subscriber is saved, its data gets saved horizontally in the database. Data from the subscriber model gets dumped into the single newsletter_subscriber table.
When a customer is saved, its data gets saved vertically in the database. Data from the customer model gets dumped into the following tables:
The decision as to where to store a value for an individual attribute is contained in the eav_attribute.backend_type column. The SELECT DISTINCT backend_type FROM eav_attribute; query reveals the following:
Next to the eav_attribute table, the remaining relevant information is scattered around the dozen of other eav_* tables, the most important being the eav_attribute_* tables:
The SELECT entity_type_code, entity_model FROM eav_entity_type; query indicates that the following Magento entities are from an EAV model:
However, not all of them use the EAV model to its full extent, as indicated by the SELECT DISTINCT entity_type_id FROM eav_attribute; query, which points only to the following:
What this means is that only four models in Magento Open Source really use EAV models for managing their attributes and storing data vertically through EAV tables. The rest are all flat tables, as all attributes and their values are in a single table.
The EAV models are inherently more complex to work with. They come in handy for cases where dynamic attribute creation is needed, ideally via an admin interface, as is the case with products. The majority of the time, however, simple models will do the job.
Unlike EAV models, creating simple models is pretty straightforward. Let's go ahead and create a model, resource model, and a collection for a Log entity.
We will start off by creating the <MAGELICIOUS_DIR>/Core/Model/Log.php file with the following content:
class Log extends \Magento\Framework\Model\AbstractModel {
    protected $_eventPrefix = 'magelicious_core_log';
    protected $_eventObject = 'log';

    protected function _construct() {
        $this->_init(\Magelicious\Core\Model\ResourceModel\Log::class);
    }
}
The use of $_eventPrefix and $_eventObject is not mandatory, but it is highly recommended. These values are used by the Magento\Framework\Model\AbstractModel event dispatcher and add to the future extensibility of our module. While Magento uses the <ModuleName>_<ModelName> convention for $_eventPrefix naming, we might be safer using <VendorName>_<ModuleName>_<ModelName>. The $_eventObject, by convention, usually bears the name of the model itself.
We then create the <MAGELICIOUS_DIR>/Core/Model/ResourceModel/Log.php file with the following content:
class Log extends \Magento\Framework\Model\ResourceModel\Db\AbstractDb {
    protected function _construct() {
        $this->_init('magelicious_core_log', 'entity_id');
    }
}
The _init method here takes two arguments: the magelicious_core_log value for the $mainTable argument and the entity_id value for the $idFieldName argument. The $idFieldName is the name of the primary column in the designated database. It's worth noting that the magelicious_core_log table still doesn't exist, but we will address that in a bit.
We will then create the <MAGELICIOUS_DIR>/Core/Model/ResourceModel/Log/Collection.php file with the following content:
class Collection extends \Magento\Framework\Model\ResourceModel\Db\Collection\AbstractCollection {
    protected function _construct() {
        $this->_init(
            \Magelicious\Core\Model\Log::class,
            \Magelicious\Core\Model\ResourceModel\Log::class
        );
    }
}
The _init method here takes two arguments: the string names of $model and $resourceModel. Magento uses the <FULLY_QUALIFIED_CLASS_NAME>::class syntax for this, as it uses a nifty solution instead of passing class strings around.
Both EAV and simple models extend from the Magento\Framework\Model\AbstractModel class, which further extends from Magento\Framework\DataObject. The DataObject has some neat methods worth memorizing.
Group of the following methods deal with data transformation:
The other groups of these methods, implemented through the magic __call method, enables the following neat syntax:
To quickly put this magic into perspective, let's manually create the magelicious_core_log table as follows:
CREATE TABLE `magelicious_core_log` (
  `entity_id` int(10) unsigned NOT NULL AUTO_INCREMENT,
  `severity_level` varchar(24) NOT NULL,
  `note` text NOT NULL,
  `created_at` timestamp NOT NULL DEFAULT CURRENT_TIMESTAMP ON UPDATE CURRENT_TIMESTAMP,
  PRIMARY KEY (`entity_id`)
) ENGINE=InnoDB DEFAULT CHARSET=utf8;
With the magic of DataObject, our empty Magelicious\Core\Model\Log model will still be able to save its data, as follows:
$log->setCreatedAt(new \DateTime());
$log->setSeverityLevel('info');
$log->setNote('Just Some Note');
$log->save();
While this example would work, there is far more to it than this. Creating tables manually is not a viable option for building modules. Magento has just the right mechanism for this, which is called setup scripts.
Every time a module is installed via a php bin/magento module:enable command, Magento shows the following message: To make sure that the enabled modules are properly registered, run 'setup:upgrade'. The php bin/magento setup:upgrade command upgrades the Magento application, database data, and schema. Once triggered, the upgrade command instantiates Magento\Setup\Model\Installer, which then goes through a series of methods. Its getSchemaDataHandler method reveals the types of available setup scripts:
These scripts live under the <VendorName>/<ModuleName>/Setup directory.
Once successfully finished, the setup:upgrade command makes a new entry, or updates an existing one, in the setup_module table. There, we can see the schema_version and data_version values logged against each module.
Let's take a closer look at writing each of those scripts.
The InstallSchema script is used when we wish to add new columns to existing tables or create new tables. This script is run only when a module is enabled. Once enabled, the module gets a corresponding entry under the setup_module.schema_version table column. This entry prevents the InstallSchema script running on any subsequent setup:upgrade command where the module's setup_version remains the same.
Let's go ahead and create the <MAGELICIOUS_DIR>/Core/Setup/InstallSchema.php file with the following content:
use \Magento\Framework\Setup\InstallSchemaInterface;
use Magento\Framework\Setup\ModuleContextInterface;
use Magento\Framework\Setup\SchemaSetupInterface;

class InstallSchema implements InstallSchemaInterface {
    public function install(SchemaSetupInterface $setup, ModuleContextInterface $context) {
        $setup->startSetup();
        echo 'InstallSchema->install()' . PHP_EOL;
        $setup->endSetup();
    }
}
The use of $setup->startSetup(); and $setup->endSetup(); is a common practice among the majority of setup scripts. The implementation of these two methods deals with running additional environment setup steps, such as setting SQL_MODE and FOREIGN_KEY_CHECKS, as can be seen under Magento\Framework\DB\Adapter\Pdo\Mysql.
To make something useful out of it, let's go ahead and replace the echo line with the code that actually creates our magelicious_core_log table:
$table = $setup->getConnection()
    ->newTable($setup->getTable('magelicious_core_log'))
    ->addColumn(
        'entity_id',
        \Magento\Framework\DB\Ddl\Table::TYPE_INTEGER,
        null,
        ['identity' => true, 'unsigned' => true, 'nullable' => false, 'primary' => true],
        'Entity ID'
    )->addColumn(
        'severity_level',
        \Magento\Framework\DB\Ddl\Table::TYPE_TEXT,
        24,
        ['nullable' => false],
        'Severity Level'
    )->addColumn(
        'note',
        \Magento\Framework\DB\Ddl\Table::TYPE_TEXT,
        null,
        ['nullable' => false],
        'Note'
    )->addColumn(
        'created_at',
        \Magento\Framework\DB\Ddl\Table::TYPE_TIMESTAMP,
        null,
        ['nullable' => false],
        'Created At'
    )->setComment('Magelicious Core Log Table');
$setup->getConnection()->createTable($table);
$setup->getConnection() gets us the database adapter instance. From there on, we get access to methods that are needed for database table creation. When it comes to InstallSchema scripts, the majority of the time, the following methods will do the job:
The magelicious_core_log table here is essentially storage behind our Magelicious\Core\Model\Log simple model. If our model was an EAV model, we would be using the same InstallSchema script to create tables such as the following:
However, in the case of the EAV model, the actual attributes severity_level and note would then likely be added via an InstallData script. This is because attributes definitions are essentially data under the eav_attribute_* tables—primarily the eav_attribute table. Therefore, attributes are created inside of the InstallData and UpgradeData scripts.
The UpgradeSchema script is used when we wish to create new tables or add columns to existing tables. Given that it is run on every setup:upgrade, where setup_module.schema_version is lower than setup_version under <VendorName>/<ModuleName>/etc/module.xml, we are in charge of controlling the code for a specific version. This is usually done via the if-ed version_compare approach.
To better demonstrate this, let's create the <MAGELICIOUS_DIR>/Core/Setup/UpgradeSchema.php file with the following content:
use \Magento\Framework\Setup\UpgradeSchemaInterface;
use Magento\Framework\Setup\ModuleContextInterface;
use Magento\Framework\Setup\SchemaSetupInterface;

class UpgradeSchema implements UpgradeSchemaInterface {
    public function upgrade(SchemaSetupInterface $setup, ModuleContextInterface $context) {
        $setup->startSetup();
        if (version_compare($context->getVersion(), '2.0.2') < 0) {
            $this->upgradeToVersionTwoZeroTwo($setup);
        }
        $setup->endSetup();
    }

    private function upgradeToVersionTwoZeroTwo(SchemaSetupInterface $setup) {
        echo 'UpgradeSchema->upgradeToVersionTwoZeroTwo()' . PHP_EOL;
    }
}
The if-ed version_compare here reads as follows: if the current module version is equal to 2.0.2, then execute the upgradeToVersionTwoZeroTwo method. If we were to release an updated version of our module, we would need to properly bump up the setup_version of <VendorName>/<ModuleName>/etc/module.xml, or else UpgradeSchema does not make a lot of sense. Likewise, we should always be sure to target a specific module version, thus avoiding code that executes on every version change.
When it comes to UpgradeSchema scripts, the following methods of a database adapter instance, alongside the previously mentioned one, will be of interest:
The Recurring scripts executes on each and every setup:upgrade command, regardless of the schema_version or data_version logged against the setup_module table.
Let's create the <MAGELICIOUS_DIR>/Core/Setup/Recurring.php file with the following content:
use Magento\Framework\Setup\InstallSchemaInterface;
use Magento\Framework\Setup\ModuleContextInterface;
use Magento\Framework\Setup\SchemaSetupInterface;

class Recurring implements InstallSchemaInterface {
    public function install(SchemaSetupInterface $setup, ModuleContextInterface $context) {
        $setup->startSetup();
        echo 'Recurring->install()' . PHP_EOL;
        $setup->endSetup();
    }
}
Though interesting, the Recurring scripts are rarely used in Magento. Only a handful of them are used, and that is mostly for installing external foreign keys. This is not to say that we cannot use them for our purposes – it is just that their use case is quite limited when we think about it.
The InstallData script is used when we wish to add new data to existing tables. This script is run only when a module is enabled. Once enabled, the module gets a corresponding entry under the setup_module.data_version table column. This entry prevents the InstallData script to run on any subsequent setup:upgrade command execution, where the module's setup_version remains the same.
Let's create the <MAGELICIOUS_DIR>/Core/Setup/InstallData.php file with the following content:
use \Magento\Framework\Setup\InstallDataInterface;
use Magento\Framework\Setup\ModuleContextInterface;
use Magento\Framework\Setup\ModuleDataSetupInterface;

class InstallData implements InstallDataInterface {
    public function install(ModuleDataSetupInterface $setup, ModuleContextInterface $context) {
        $setup->startSetup();
        echo 'InstallData->install()' . PHP_EOL;
        $setup->endSetup();
    }
}
Chances are, we will be interacting with this type of script more often than not. Replacing the echo line with modified pieces of the equivalent Magento InstallData script might give us a better understanding of the possibilities behind these scripts.
Let's create the <MAGELICIOUS_DIR>/Core/Setup/UpgradeData.php file with the following content:
use Magento\Framework\Setup\ModuleContextInterface;
use Magento\Framework\Setup\ModuleDataSetupInterface;

class UpgradeData implements \Magento\Framework\Setup\UpgradeDataInterface {
    public function upgrade(ModuleDataSetupInterface $setup, ModuleContextInterface $context) {
 $setup->startSetup();
 if (version_compare($context->getVersion(), '2.0.2') < 0) {
 $this->upgradeToVersionTwoZeroTwo($setup);
 }
 $setup->endSetup();
    }

    private function upgradeToVersionTwoZeroTwo(ModuleDataSetupInterface $setup) {
        echo 'UpgradeData->upgradeToVersionTwoZeroTwo()' . PHP_EOL;
    }
}
Let's go ahead and replace the echo line with something practical, like adding a new column to an existing table:
$salesSetup = $this->salesSetupFactory->create(['setup' => $setup]);
$salesSetup->addAttribute('order', 'merchant_note', [
    'type' => \Magento\Framework\DB\Ddl\Table::TYPE_TEXT,
    'visible' => false,
    'required' => false
]);
Here, we used the instance of Magento\Sales\Setup\SalesSetupFactory, injected through __construct. This further creates an instance of the Magento\Sales\Setup\SalesSetup class. We need this class in order to create sales EAV attributes. The order entity is somewhat of a strange mix; while it is registered as an EAV type of entity under the eav_entity_type table, it does not really use eav_attribute_* tables – it uses a single sales_order table to store its attributes. We could have easily used (Install|Upgrade)Schema scripts to simply add a new column via $setup->getConnection()->addColumn(). Once executed, this code adds the merchant_note column to the sales_order table. We will use this column later on, as we reach the Extending entities section.
Much like recurring scripts, the RecurringData scripts are rarely used in Magento. They also execute on each and every setup:upgrade command, regardless of the schema_version or data_version logged against the setup_module table. Magento Open Source uses merely three RecurringData scripts throughout its codebase.
Let's create the <MAGELICIOUS_DIR>/Core/Setup/RecurringData.php file with the following content:
use Magento\Framework\Setup\InstallDataInterface;
use Magento\Framework\Setup\ModuleContextInterface;
use Magento\Framework\Setup\ModuleDataSetupInterface;

class RecurringData implements InstallDataInterface {
    public function install(ModuleDataSetupInterface $setup, ModuleContextInterface $context) {
        $setup->startSetup();
        echo 'RecurringData->install()' . PHP_EOL;
        $setup->endSetup();
    }
}
The setup scripts provide a way for us to manage the data and its representation in the database. Whereas adding a new attribute to simple model is likely a case of extending its table by an extra column (*Schema scripts), adding a new attribute to an EAV model is a matter of adding new data under the eav_attribute table (*Data scripts).
We extend entities by adding additional attributes to them. Referring back to the magical getter and setter methods mentioned in the context of Magento\Framework\DataObject, the logical thinking might be: what's the big deal; can't we just add new database columns via UpgradeSchema and use magical getter and setter methods to go around it? The answer is both yes and no, but mainly leaning toward no – we will soon learn why.
To better explain this, let's take a look at Magento\Sales\Model\Order, the entity model. This model implements the Magento\Sales\Api\Data\OrderInterface interface, which further extends Magento\Framework\Api\ExtensibleDataInterface. Here, we can see a constant defining a key for the extension attributes object. This is somewhat of a starting point for extending entities. Suffice to say, there is an extra abstraction layer on top of some of the models. This abstraction layer, called service contracts, is a set of PHP interfaces that ensure a well-defined, durable API that other modules and third-party extensions might implement.
This, however, is easier said than done. When you think about it, if we had a module that's already heavily in use, adding even a simple attribute to one of its entity models might break its functionality. This is where extension attributes come into the picture.
Creating a new extension attribute for an existing entity is usually a case of doing the following:
Moving forward, we are going to create extension attributes for the order entity, that is, customer_note and merchant_note.
We can imagine customer_note as an attribute that does not persist its value(s) in the sales_order table as order entity does, whereas merchant_note attribute does. This is why we created the sales_order.merchant_note column earlier via the UpgradeData
script.
Let's go ahead and create the <MAGELICIOUS_DIR>/Core/Api/Data/CustomerNoteInterface.php file with the following content:
interface CustomerNoteInterface extends \Magento\Framework\Api\ExtensibleDataInterface
{
    const CREATED_BY = 'created_by';
    const NOTE = 'note';

    public function setCreatedBy($createdBy);
    public function getCreatedBy();
    public function setNote($note);
    public function getNote();
}
The customer_note attribute is going to be a full-blown object, so we will create an interface for it.
We will then create the <MAGELICIOUS_DIR>/Core/Model/CustomerNote.php file with the following content:
class CustomerNote extends \Magento\Framework\Model\AbstractExtensibleModel implements \Magelicious\Core\Api\Data\CustomerNoteInterface
{
    public function setCreatedBy($createdBy) {
        return $this->setData(self::CREATED_BY, $createdBy);
    }

    public function getCreatedBy() {
        return $this->getData(self::CREATED_BY);
    }

    public function getNote() {
        return $this->getData(self::NOTE);
    }

    public function setNote($note) {
        return $this->setData(self::NOTE, $note);
    }
}
This class is essentially our customer_note entity model. To keep things minimal, we will just implement the CustomerNoteInterface, without any extra logic.
We will then go ahead and create the <MAGELICIOUS_DIR>/Core/etc/extension_attributes.xml file with the following content:
<?xml version="1.0"?>

<config>
    <extension_attributes for="Magento\Sales\Api\Data\OrderInterface">
        <attribute code="customer_note" type="Magelicious\Core\Api\Data\CustomerNoteInterface"/>
        <attribute code="merchant_note" type="string"/>
    </extension_attributes>
</config>
The extension_attributes.xml file is where we register our extension attributes. The type argument allows us to register either complex types, such as an interface, or scalar types, such as a string or integer. With the extension attributes registered, it is time to register the corresponding plugins. This is done via the di.xml file.
Let's go ahead and create the <MAGELICIOUS_DIR>/Core/etc/di.xml file with the following content:
<?xml version="1.0"?>

<config>
    <preference for="Magelicious\Core\Api\Data\CustomerNoteInterface" type="Magelicious\Core\Model\CustomerNote"/>
    <type name="Magento\Sales\Api\OrderRepositoryInterface">
        <plugin name="customerNoteToOrderRepository" type="Magelicious\Core\Plugin\CustomerNoteToOrderRepository"/>
        <plugin name="merchantNoteToOrderRepository" type="Magelicious\Core\Plugin\MerchantNoteToOrderRepository"/>
    </type>
</config>
The reason for registering plugins in the first place is to have our customer_note and merchant_note attributes available on the getList, get, and save methods of the Magento\Sales\Api\OrderRepositoryInterface interface. The repository interfaces are the main way of CRUD-ing entities under service contracts. Without proper plugins, Magento simply would not see our attributes.
Let's create the <MAGELICIOUS_DIR>/Core/Plugin/CustomerNoteToOrderRepository.php file with the following content:
class CustomerNoteToOrderRepository {
    protected $orderExtensionFactory;
    protected $customerNoteInterfaceFactory;

    public function __construct(
        \Magento\Sales\Api\Data\OrderExtensionFactory $orderExtensionFactory,
        \Magelicious\Core\Api\Data\CustomerNoteInterfaceFactory $customerNoteInterfaceFactory
    ) {
        $this->orderExtensionFactory = $orderExtensionFactory;
        $this->customerNoteInterfaceFactory = $customerNoteInterfaceFactory;
    }

    private function getCustomerNoteAttribute(
        \Magento\Sales\Api\Data\OrderInterface $resultOrder
    ) {
        $extensionAttributes = $resultOrder->getExtensionAttributes() ?: $this->orderExtensionFactory->create();

        // TODO: Get customer note from somewhere (below we fake it)
        $customerNote = $this->customerNoteInterfaceFactory->create()
            ->setCreatedBy('Mark')
            ->setNote('The note ' . \time());

        $extensionAttributes->setCustomerNote($customerNote);
        $resultOrder->setExtensionAttributes($extensionAttributes);
        return $resultOrder;
    }

    private function saveCustomerNoteAttribute(
        \Magento\Sales\Api\Data\OrderInterface $resultOrder
    ) {
        $extensionAttributes = $resultOrder->getExtensionAttributes();
        if ($extensionAttributes && $extensionAttributes->getCustomerNote()) {
            // TODO: Save $extensionAttributes->getCustomerNote() somewhere
        }
        return $resultOrder;
    }
}
Right now, there are no plugin methods defined. getCustomerNoteAttribute and saveCustomerNoteAttribute are essentially helper methods that we will soon use.
Let's extend our CustomerNoteToOrderRepository class by adding the after plugin for the getList method, as follows:
public function afterGetList(
    \Magento\Sales\Api\OrderRepositoryInterface $subject,
    \Magento\Sales\Model\ResourceModel\Order\Collection $resultOrder
) {
    foreach ($resultOrder->getItems() as $order) {
        $this->afterGet($subject, $order);
    }
    return $resultOrder;
}
Now, let's extend our CustomerNoteToOrderRepository class by adding the after plugin for the get method, as follows:
public function afterGet(
    \Magento\Sales\Api\OrderRepositoryInterface $subject,
    \Magento\Sales\Api\Data\OrderInterface $resultOrder
) {
    $resultOrder = $this->getCustomerNoteAttribute($resultOrder);
    return $resultOrder;
}
Finally, let's extend our CustomerNoteToOrderRepository class by adding the after plugin for the save method, as follows:
public function afterSave(
    \Magento\Sales\Api\OrderRepositoryInterface $subject,
    \Magento\Sales\Api\Data\OrderInterface $resultOrder
) {
    $resultOrder = $this->saveCustomerNoteAttribute($resultOrder);
    return $resultOrder;
}
With the plugins for customer_note sorted, let's go ahead and address the plugins for merchant_note. We will create the <MAGELICIOUS_DIR>/Core/Plugin/MerchantNoteToOrderRepository.php file with the following content:
class MerchantNoteToOrderRepository {
    protected $orderExtensionFactory;

    public function __construct(
        \Magento\Sales\Api\Data\OrderExtensionFactory $orderExtensionFactory
    ) {
        $this->orderExtensionFactory = $orderExtensionFactory;
    }

    private function getMerchantNoteAttribute(
        \Magento\Sales\Api\Data\OrderInterface $order
    ) {
        $extensionAttributes = $order->getExtensionAttributes() ?: $this->orderExtensionFactory->create();
        $extensionAttributes->setMerchantNote($order->getData('merchant_note'));
        $order->setExtensionAttributes($extensionAttributes);
        return $order;
    }

    private function saveMerchantNoteAttribute(
        \Magento\Sales\Api\Data\OrderInterface $order
    ) {
        $extensionAttributes = $order->getExtensionAttributes();
        if ($extensionAttributes && $extensionAttributes->getMerchantNote()) {
            $order->setData('merchant_note', $extensionAttributes->getMerchantNote());
        }
        return $order;
    }
}
Right now, there are no plugin methods defined. getMerchantNoteAttribute and saveMerchantNoteAttribute are essentially helper methods that we will soon use.
Let's extend our MerchantNoteToOrderRepository class by adding the after plugin for the getList method, as follows:
public function afterGetList(
    \Magento\Sales\Api\OrderRepositoryInterface $subject,
    \Magento\Sales\Model\ResourceModel\Order\Collection $order
) {
    foreach ($order->getItems() as $_order) {
        $this->afterGet($subject, $_order);
    }
    return $order;
}
Now, let's extend our MerchantNoteToOrderRepository class by adding the after plugin for the get method, as follows:
public function afterGet(
    \Magento\Sales\Api\OrderRepositoryInterface $subject,
    \Magento\Sales\Api\Data\OrderInterface $order
) {
    $order = $this->getMerchantNoteAttribute($order);
    return $order;
}
Finally, let's extend our MerchantNoteToOrderRepository class by adding the before plugin for the save method, as follows:
public function beforeSave(
    \Magento\Sales\Api\OrderRepositoryInterface $subject,
    \Magento\Sales\Api\Data\OrderInterface $order
) {
    $order = $this->saveMerchantNoteAttribute($order);
    return [$order];
}
The obvious difference here is that, with MerchantNoteToOrderRepository, we are using beforeSave, whereas we used afterSave with CustomerNoteToOrderRepository. The reason for this is that merchant_note is to be saved directly on the entity whose repository we are plugging into, that is, its table in the sales_order database. This way, we use its Magento\Framework\DataObject properties of setData to fetch what was assumingly note already set via extension attributes and pass it onto the object's merchant_note property before it is saved. Magento's built-in save mechanism then takes over and stores the property, as long as the corresponding column exists in the database.
With the plugins in place, our attributes should now be visible and persistable when used through the OrderRepositoryInterface. Without getting too deep into the web API at this point, we can quickly test this via performing the following REST request:
GET /index.php/rest/V1/orders?searchCriteria[filter_groups][0][filters][0][field]=entity_id&searchCriteria[filter_groups][0][filters][0][value]=1
Host: magelicious.loc
Content-Type: application/json
Authorization: Bearer 0vq6d4kabpxgc5kysb2sybf3n4ct771x
Whereas the Bearer token is something we get by running the following REST login action:
POST /index.php/rest/V1/integration/admin/token
Host: magelicious.loc
Content-Type: application/json
{"username": "john", "password": "grdM%0i9a49n"}
The successful response of GET /V1/orders should yield a result of the following partial structure:
{
  "items": [
    {
      "extension_attributes": {
        "shipping_assignments": [...],
        "customer_note": {
          "created_by": "Mark",
          "note": "Note ABC"
        },
        "merchant_note": "Note XYZ"
      }
    }
  ]
}
The OrderRepositoryInterface to web API REST relationship maps out as follows:
We will learn more about the web API in the next chapter. The example given here was merely for the purpose of visualizing the work we have done around plugins. Using extension attributes, with the help of plugins, we have essentially extended the Magento web API.
Throughout this chapter, we learned how to differentiate the three types of Magento models: non-persistable, persistable simple, and persistable EAV. The inners of EAV models are left out of scope due to their inherently complex nature. We then took a look through six different setup scripts. These give us a great deal of flexibility over schema and data management. Combined with extension attributes, we get a powerful mechanism for extending built-in entities. Though somewhat tedious, the extension attributes mechanism use of interfaces ensures that integrators can extend this built-in functionality with complex data types.
Moving forward, we are going to take a look at the powerful web API that's implemented in Magento.
Web application programming interfaces (API) play a major role in modern application development. They allow various third-party integrators to interact with applications through the HTTP layer. Magento supports both Representational State Transfer (REST) and Simple Object Access Protocol ( SOAP) APIs. Its web API framework is based on the create, read, update, delete (CRUD) and search (search criteria) models. The scope of functionality that APIs offer is quite big, allowing us to use them for a wide range of tasks, such as creating a completely new shopping application, integrating with customer relationship management (CRM) systems, enterprise resource planning (ERP) systems, and content management systems (CMS), as well as creating JavaScript widgets in the Magento storefront itself.
Moving forward, we are going to take a closer look at the following web API sections:
You will need to have basic knowledge of PHP, OOP, JavaScript, and XML. You will also need Apache, MySQL, and AMPPS installed on your system to execute the codes.
The code files of this chapter can be found on GitHub:
https://github.com/PacktPublishing/Magento-2-Quick-Start-Guide.
Check out the following video to see the Code in Action:
The Magento web API framework differentiates three fundamental types of users:
<resources>
  <resource ref="anonymous" />
</resources>
<resources>
  <resource ref="self"/>
</resources>
<resources>
  <resource ref="Magento_Cms::save"" />
</resources>
To further understand what this means, we need to understand the link between <VendorName>/<ModuleName>/acl.xml and <VendorName>/<ModuleName>/webapi.xml.
The acl.xml is where we define our access resources. Let's take a closer look at the partial extract of one such resource, defined in the <MAGENTO_DIR>/module-cms/etc/acl.xml file:
<config>
  <acl>
    <resources>
      <resource id="Magento_Backend::admin">
        <resource id="Magento_Backend::content">
          <resource id="Magento_Backend::content_elements">
            <resource id="Magento_Cms::page" title="Pages">
              <resource id="Magento_Cms::save" title="Save Page"/>
            </resource>
          </resource>
        </resource>
      </resource>
    </resources>
  </acl>
</config>
Our focus here is on the Magento_Cms::save resource. Magento merges all of these individual acl.xml files into one big ACL tree. We can see this tree in two places in the Magento admin area:
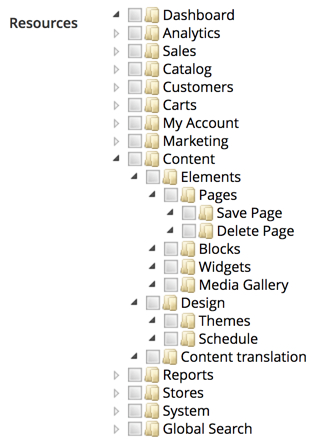
These are the two screens where we define access permissions for a standard admin user and a special web API integrator user. This is not to say that a standard admin user cannot execute web API calls. The difference will become more obvious when we get to the Types of authentication section.
To this point, these resources don't really do anything on their own. Simply defining them within acl.xml won't magically make a CMS page in this case access-protected, or anything like that. This is where controllers come into the mix, as one example of an access-controlling mechanism. A quick lookup against Magento_Cms::save string usage, reveals a Magento\Cms\Controller\Adminhtml\Page\Edit class using it as part of its const ADMIN_RESOURCE = 'Magento_Cms::save' definition.
The ADMIN_RESOURCE constant is defined further down the inheritance chain, on the \Magento\Backend\App\AbstractAction as const ADMIN_RESOURCE = 'Magento_Backend::admin'. This is further used by the _isAllowed method implementation as follows:
protected function _isAllowed()
{
  return $this->_authorization->isAllowed(static::ADMIN_RESOURCE);
}
The AbstractAction class here is the basis for pretty much any Magento admin controller. This means that the controller is the one that utilizes the resource defined in acl.xml, whereas definitions in acl.xml serve the purpose of building the ACL tree, which we can manage from the Magento admin interface. This means that anyone trying to access the cms/page/edit URL in admin must have a Magento_Cms::save resource permission to do so. Otherwise, the _isAllowed method, reading the ADMIN_RESOURCE value, will return false and forbid access to the page.
Web APIs, on the other hand, don't use controllers, so there is no access to the ADMIN_RESOURCE constant and the _isAllowed method. APIs use webapi.xml to define routes. Let's follow up with the CMS page save analogue, as per the <MAGENTO_DIR>/module-cms/etc/webapi.xml file:
<routes>
  <route url="/V1/cmsPage" method="POST">
    <service class="Magento\Cms\Api\PageRepositoryInterface" method="save"/>
    <resources>
      <resource ref="Magento_Cms::page"/>
    </resources>
  </route>
  <route url="/V1/cmsPage/:id" method="PUT">
    <service class="Magento\Cms\Api\PageRepositoryInterface" method="save"/>
    <resources>
      <resource ref="Magento_Cms::page"/>
    </resources>
  </route>
</routes>
The individual route definition binds together a few things. The url and method argument of a route element specify what URL will trigger this route. The class and method arguments of a service element specify which interface and method on that interface will execute once the route is triggered. Finally, the ref argument of a resource element specifies the security check to be executed. If a user executing a web API call is unauthenticated or authenticated with a role that does not have Magento_Cms::page, the request won't execute the service method specified.
The customer type of user is the most convenient for working with widgets. The Magento checkout is an excellent example of that. The whole checkout is a fully AJAX-enabled app on its own, separate from the usual Magento storefront, such as its CMS, category, and product pages.
Magento supports three different types of authentication methods:
Using OAuth-based authentication exceeds the scope of this book, which is why moving forward, all of our examples will use simpler token-based authentication.
Magento supports two types of APIs:
The great thing about these two is that we don't get to write two different APIs in Magento. The approach to writing APIs is unified, so to speak. We define some interfaces, classes, and configurations, and Magento then generates the API endpoints for both REST and SOAP on its own. Thus, the REST vs. SOAP choice really only becomes a question when we consume APIs, not while we write them.
Using SOAP services exceeds the scope of this book, which is why moving forward, all of our examples will use REST APIs.
The CRUD and search models of web APIs are implemented through a set of *RepositoryInterface interfaces, found in the <VendorName>/<ModuleName>/Api/<EntityName>RepositoryInterface.php files.
The majority of these repository interfaces define a specific set of common methods:
The data type that flows through these methods follows a certain pattern, where each entity passing through an API has a data interface defined in a <VendorName>/<ModuleName>/Api/Data/<EntityName>Interface.php file.
Let's take a closer look at <MAGENTO_DIR>/module-cms/Api/BlockRepositoryInterface.php:
interface BlockRepositoryInterface
{
    public function save(
        \Magento\Cms\Api\Data\BlockInterface $block
    );

    public function getById($blockId);

    public function getList(
        \Magento\Framework\Api\SearchCriteriaInterface $searchCriteria
    );

    public function delete(
        \Magento\Cms\Api\Data\BlockInterface $block
    );

    public function deleteById($blockId);
}
The concrete implementations of repository interfaces can usually be found in the <VendorName>/<ModuleName>/Model/<EntityName>Repository.php or the <VendorName>/<ModuleName>/Model/ResourceModel/<EntityName>Repository.php files. The exact location is not that relevant, as webapi.xml should always use an interface for a class argument for its service element definition. The mapping between the interface and concrete implementation then happens in the module's di.xml file via a preference definition. From an integrator's point of view, using APIs does not require any knowledge of concrete implementations.
The Swagger URL, http://magelicious.loc/swagger, will generate a Swagger UI interface, that allows us to visualize and interact with the API's resources:
By default, documentation returned here is limited to anonymous users only. Generating a valid API key, via the POST /V1/integration/customer/token or POST /V1/integration/admin/token will unlock the documentation for all the resources available to a given user. While Swagger certainly has its place in development workflows, oftentimes the Postman tool is a more robust solution for those working extensively with APIs.
Let's go ahead and CRUD our way through the cmsBlock interface, using REST endpoints:
We will be using the integrator type of user. This will be our Magento admin user, assigned either full resources, or at least the Resources | Content | Elements | Blocks resource under the Role Resource tab of the System | Permissions | User Roles | Edit | Add New Role screen.
We start with the admin login request, in order to obtain a token for later requests:
POST /index.php/rest/V1/integration/admin/token HTTP/1.1
Host: magelicious.loc
Content-Type: application/json
{
  "username": "branko",
  "password": "jrdJ%0i9a69n"
}
The successful JSON response should contain our API token, which we will be using for any subsequent API calls. The token itself is stored in the oauth_token table, under the token column. We further have consumer_id, admin_id, and customer_id columns in that table. These get filled depending on the user type we used to log in. Both consumer_id and admin_id are of the integrator type. These columns get filled accordingly depending on the user and authentication types used; as in customer versus integrator, and token-based vs OAuth-based vs session-based authentication.
Now let's create a new block via POST /V1/cmsBlock; this triggers the save method:
POST /rest/V1/cmsBlock HTTP/1.1
Host: magelicious.loc
Content-Type: application/json
Authorization: Bearer 8pcvbwrp97l5m1pvcdnis6e3930n4rsj
{
  "block": {
    "identifier": "x-block",
    "title": "The X Block",
    "content": "<p>The <strong>X Block</strong> Content...</p>",
    "active": true
  }
}
The successful JSON response should return our newly created block:
{
    "id": 1,
    "identifier": "x-block",
    "title": "The X Block",
    "content": "<p>The <strong>X Block</strong> Content...</p>",
    "active": true
}
Now let's update the existing cmsBlock via PUT /V1/cmsBlock/:id; this triggers the save method:
PUT /rest/V1/cmsBlock/1 HTTP/1.1
Host: magelicious.loc
Content-Type: application/json
Authorization: Bearer 8pcvbwrp97l5m1pvcdnis6e3930n4rsj
{
  "block": {
    "identifier": "y-block",
    "title": "The Y Block",
    "content": "<p>The <strong>Y Block</strong> Content...</p>",
    "active": true
  }
}
The successful JSON response should return the updated block:
{
    "id": 1,
    "identifier": "y-block",
    "title": "The Y Block",
    "content": "<p>The <strong>Y Block</strong> Content...</p>",
    "active": true
}
Let's now fetch one of the existing blocks via GET /V1/cmsBlock/:blockId; this triggers the getById method:
GET /rest/V1/cmsBlock/1 HTTP/1.1
Host: magelicious.loc
Content-Type: application/json
Authorization: Bearer 8pcvbwrp97l5m1pvcdnis6e3930n4rsj
The successful JSON response is structurally identical to that of the save method.
Now, let's try deleting one of the blocks via DELETE /V1/cmsBlock/:blockId; this triggers the deleteById method:
DELETE /rest/V1/cmsBlock/2 HTTP/1.1
Host: magelicious.loc
Content-Type: application/json
Authorization: Bearer 8pcvbwrp97l5m1pvcdnis6e3930n4rsj
The successful JSON response returns a single true or false.
Finally, let's try fetching the list of blocks via GET /V1/cmsBlock/search; this triggers the getList method:
GET /rest/V1/cmsBlock/search?searchCriteria[filter_groups][0][filters][0][field]=title&searchCriteria[filter_groups][0][filters][0][value]=%Block%&searchCriteria[filter_groups][0][filters][0][condition_type]=like HTTP/1.1
Host: magelicious.loc
Content-Type: application/json
Authorization: Bearer 8pcvbwrp97l5m1pvcdnis6e3930n4rsj
Sadly, the GET request does not allow for the body, so ?searchCriteria... has to be passed via a URL.
The successful JSON response returns an object comprised of items, search_criteria, and total_count top-level keys:
{
    "items": [
        {
            "id": 4,
            "identifier": "x-block",
            "title": "The X Block",
            "content": "The <strong>X Block</strong> Content...",
            "creation_time": "2018-06-23 07:30:06",
            "update_time": "2018-06-23 07:30:06",
            "active": true
        },
        {
            "id": 5,
            "identifier": "y-block",
            "title": "The Y Block",
            "content": "The <strong>Y Block</strong> Content...",
            "creation_time": "2018-06-23 07:30:14",
            "update_time": "2018-06-23 07:30:14",
            "active": true
        }
    ],
    "search_criteria": {...},
    "total_count": 2
}
We will address the search_criteria in more detail later on.
Let's go ahead and create a miniature, yet full-blown Magento module Magelicious_Boxy that demonstrates the entire flow of creating a custom web API.
We start off by defining a module <MAGELICIOUS_DIR>/Boxy/registration.php as follows:
\Magento\Framework\Component\ComponentRegistrar::register(
    \Magento\Framework\Component\ComponentRegistrar::MODULE,
    'Magelicious_Boxy',
    __DIR__
);
We then define the <MAGELICIOUS_DIR>/Boxy/etc/module.xml as follows:
<config>
    <module name="Magelicious_Boxy" setup_version="2.0.2"/>
</config>
We then define the <MAGELICIOUS_DIR>/Boxy/Setup/InstallSchema.php that adds the following table:
$table = $setup->getConnection()
  ->newTable($setup->getTable('magelicious_boxy_box'))
  ->addColumn(
    'entity_id',
    \Magento\Framework\DB\Ddl\Table::TYPE_INTEGER,
    null, [
    'identity' => true,
    'unsigned' => true,
    'nullable' => false,
    'primary' => true
  ], 'Entity ID'
  )
  ->addColumn(
    'title',
    \Magento\Framework\DB\Ddl\Table::TYPE_TEXT,
    32,
    ['nullable' => false], 'Title'
  )
  ->addColumn(
    'content',
    \Magento\Framework\DB\Ddl\Table::TYPE_TEXT,
    null,
    ['nullable' => false], 'Content'
  )
  ->setComment('Magelicious Boxy Box Table');
$setup->getConnection()->createTable($table);
We then define <MAGELICIOUS_DIR>/Boxy/Api/Data/BoxInterface.php as follows:
interface BoxInterface {
  const BOX_ID = 'box_id';
  const TITLE = 'title';
  const CONTENT = 'content';
  public function getId();
  public function getTitle();
  public function getContent();
  public function setId($id);
  public function setTitle($title);
  public function setContent($content);
}
We then define <MAGELICIOUS_DIR>/Boxy/Api/Data/BoxSearchResultsInterface.php as follows:
interface BoxSearchResultsInterface extends \Magento\Framework\Api\SearchResultsInterface
{
  public function getItems();
  public function setItems(array $items);
}
We then add the <MAGELICIOUS_DIR>/Boxy/Api/BoxRepositoryInterface.php as follows:
interface BoxRepositoryInterface
{
  public function save(\Magelicious\Boxy\Api\Data\BoxInterface $box);
  public function getById($boxId);
  public function getList(\Magento\Framework\Api\SearchCriteriaInterface $searchCriteria);
  public function delete(\Magelicious\Boxy\Api\Data\BoxInterface $box);
  public function deleteById($boxId);
}
We then define the <MAGELICIOUS_DIR>/Boxy/Model/Box.php as follows:
class Box extends \Magento\Framework\Model\AbstractModel implements \Magelicious\Boxy\Api\Data\BoxInterface
{
  protected function _construct() {
    $this->_init(\Magelicious\Boxy\Model\ResourceModel\Box::class);
  }

  public function getId() {
    return $this->getData(self::BOX_ID);
  }

  public function getTitle() {
  return $this->getData(self::TITLE);
  }

  public function getContent() {
    return $this->getData(self::CONTENT);
  }

  public function setId($id) {
    return $this->setData(self::BOX_ID, $id);
  }

  public function setTitle($title) {
    return $this->setData(self::TITLE, $title);
  }

  public function setContent($content) {
    return $this->setData(self::CONTENT, $content);
  }
}
We then define the <MAGELICIOUS_DIR>/Boxy/Model/ResourceModel/Box.php as follows:
class Box extends \Magento\Framework\Model\ResourceModel\Db\AbstractDb
{
  protected function _construct() {
    $this->_init('magelicious_boxy_box', 'entity_id');
  }
}
We then define the <MAGELICIOUS_DIR>/Boxy/Model/ResourceModel/Box/Collection.php as follows:
class Collection
{
  protected function _construct() {
    $this->_init(
        \Magelicious\Boxy\Model\Box::class,
        \Magelicious\Boxy\Model\ResourceModel\Box::class
    );
  }
}
We then define the <MAGELICIOUS_DIR>/Boxy/Model/BoxRepository.php as follows:
class BoxRepository implements \Magelicious\Boxy\Api\BoxRepositoryInterface
{
  protected $boxFactory;
  protected $boxResourceModel;
  protected $searchResultsFactory;
  protected $collectionProcessor;

  public function __construct(
    \Magelicious\Boxy\Api\Data\BoxInterfaceFactory $boxFactory,
    \Magelicious\Boxy\Model\ResourceModel\Box $boxResourceModel,
    \Magelicious\Boxy\Api\Data\BoxSearchResultsInterfaceFactory $searchResultsFactory,
    \Magento\Framework\Api\SearchCriteria\CollectionProcessorInterface $collectionProcessor
  )
  {
    $this->boxFactory = $boxFactory;
    $this->boxResourceModel = $boxResourceModel;
    $this->searchResultsFactory = $searchResultsFactory;
    $this->collectionProcessor = $collectionProcessor;
  }
  // Todo...
}
Let's go ahead and amend the BoxRepository with the save method as follows:
public function save(\Magelicious\Boxy\Api\Data\BoxInterface $box)
{
  try {
    $this->boxResourceModel->save($box);
  } catch (\Exception $e) {
    throw new \Magento\Framework\Exception\CouldNotSaveException(__($e->getMessage()));
  }
  return $box;
}
Let's go ahead and amend the BoxRepository with the getById method as follows:
public function getById($boxId) {
  $box = $this->boxFactory->create();
  $this->boxResourceModel->load($box, $boxId);
  if (!$box->getId()) {
    throw new \Magento\Framework\Exception\NoSuchEntityException(__('Box with id "%1" does not exist.', $boxId));
  }
  return $box;
}
Let's go ahead and amend the BoxRepository with the getList method as follows:
public function getList(\Magento\Framework\Api\SearchCriteriaInterface $searchCriteria) {
  $collection = $this->boxCollectionFactory->create();
  $this->collectionProcessor->process($searchCriteria, $collection);
  $searchResults = $this->searchResultsFactory->create();
  $searchResults->setSearchCriteria($searchCriteria);
  $searchResults->setItems($collection->getItems());
  $searchResults->setTotalCount($collection->getSize());
  return $searchResults;
}
Let's go ahead and amend the BoxRepository with the delete method as follows:
public function delete(\Magelicious\Boxy\Api\Data\BoxInterface $box) {
  try {
    $this->boxResourceModel->delete($box);
  } catch (\Exception $e) {
    throw new \Magento\Framework\Exception\CouldNotDeleteException(__($e->getMessage()));
  }
  return true;
}
Let's go ahead and amend the BoxRepository with the deleteById method as follows:
public function deleteById($boxId) {
  return $this->delete($this->getById($boxId));
}
We then define the <MAGELICIOUS_DIR>/Boxy/etc/di.xml as follows:
<config>
    <preference for="Magelicious\Boxy\Api\Data\BoxInterface" type="Magelicious\Boxy\Model\Box"/>
    <preference for="Magelicious\Boxy\Api\Data\BoxSearchResultsInterface" type="Magento\Framework\Api\SearchResults" />
    <preference for="Magelicious\Boxy\Api\BoxRepositoryInterface" type="Magelicious\Boxy\Model\BoxRepository"/>
</config>
We then define the <MAGELICIOUS_DIR>/Boxy/etc/acl.xml as follows:
<config>
  <acl>
    <resources>
      <resource id="Magento_Backend::admin">
        <resource id="Magento_Sales::sales">
          <resource id="Magento_Sales::sales_operation">
            <resource id="Magento_Sales::shipment">
              <resource id="Magelicious_Boxy::box" title="Boxy Box">
                <resource id="Magelicious_Boxy::box_get" title="Get"/>
                <resource id="Magelicious_Boxy::box_search" title="Search"/>
                <resource id="Magelicious_Boxy::box_save" title="Save"/>
                <resource id="Magelicious_Boxy::box_update" title="Update"/>
                <resource id="Magelicious_Boxy::box_delete" title="Delete"/>
              </resource>
            </resource>
          </resource>
        </resource>
      </resource>
    </resources>
  </acl>
</config>
We then define the <MAGELICIOUS_DIR>/Boxy/etc/webapi.xml as follows:
<routes>
  <route url="/V1/boxyBox/:boxId" method="GET">
    <service class="Magelicious\Boxy\Api\BoxRepositoryInterface" method="getById"/>
    <resources>
      <resource ref="Magelicious_Boxy::box_get"/>
    </resources>
  </route>
  <route url="/V1/boxyBox/search" method="GET">
    <service class="Magelicious\Boxy\Api\BoxRepositoryInterface" method="getList"/>
    <resources>
      <resource ref="Magelicious_Boxy::box_search"/>
    </resources>
  </route>
  <route url="/V1/boxyBox" method="POST">
    <service class="Magelicious\Boxy\Api\BoxRepositoryInterface" method="save"/>
    <resources>
      <resource ref="Magelicious_Boxy::box_save"/>
    </resources>
  </route>
  <route url="/V1/boxyBox/:id" method="PUT">
    <service class="Magelicious\Boxy\Api\BoxRepositoryInterface" method="save"/>
    <resources>
      <resource ref="Magelicious_Boxy::box_update"/>
    </resources>
  </route>
  <route url="/V1/boxyBox/:boxId" method="DELETE">
    <service class="Magelicious\Boxy\Api\BoxRepositoryInterface" method="deleteById"/>
    <resources>
      <resource ref="Magelicious_Boxy::box_delete"/>
    </resources>
  </route>
</routes>
With all these bits in place, our API is now ready. We should now be able to CRUD our way through Boxy Box the same way we did with the CMS block. While there certainly is a great deal of boilerplate code to go around, our API is now both REST-and SOAP-ready.
The searchCriteria parameter of a GET request allows for search results filtering. The key to using it comes down to understanding its structure and the available condition types.
Observing the \Magento\Framework\Api\SearchCriteriaInterface interface, and the Magento\Framework\Api\SearchCriteria class as its concrete implementation, we can easily conclude the following search_criteria structure:
"search_criteria": {
    "filter_groups": [],
    "current_page": 1,
    "page_size": 10,
    "sort_orders": []
}
Whereas the mandatory filter_groups parameter and its structure are shown as follows:
"filter_groups": [
  {
    "filters": [
      {
        "field": "fieldOrAttrName",
        "value": "fieldOrAttrValue",
        "condition_type": "eq"
      },
      {
        // Logical OR
      }
    ]
  },
  {
    // Logical AND
  }
],
Conditions nested under the individual filters key, correspond to the Logical OR condition.
The list of condition_type values includes:
Combining these condition types will allow us to filter search results pretty much any way we want.
The optional sort_orders parameter and its structure unfold as follows:
"sort_orders": [
  {
    "field": "fieldOrAttrName",
    "direction": "ASC"
  }
]
The list of direction values includes ASC for ascending and DESC for descending sort orders.
The searchCriteria is seemingly the most complex, yet most powerful aspect of a search API. Understanding how it works is essential for effective querying.
In this chapter, we have covered valuable web API elements. We learned how to differentiate between types of web API users, and the authentication and methods provided to do so. We also learned how easy it is to create our own APIs with just a few lines of XML. We saw how the route definition allows for easy binding between what comes via an HTTP request to what executes in code, respecting the access list permissions in the process. The value of building APIs as part of our distributable modules lies in their extensibility. APIs force us to embrace the interface way of thinking, thus allowing others to use and extend our code easily and securely. The preference mechanism we introduced in previous chapters, through di.xml files, allows others to change the behavior behind the interface easily.
Moving forward, we are going to take a more thorough and rounded look at building and distributing our extensions via Composer and Packagist.
At the very start of our journey, we mentioned Magento source files being distributed via three different channels: a source file archive, a Git repository, and a Composer repository. The Composer approach is the preferred way. Whether we are coding a module, library, theme or language component, using the Composer allows for an easy and automated dependency management, which is not possible otherwise. Magento's built-in Component Manager can update, uninstall, enable, or disable extensions installed via Composer. This implies sources from Packagist, Magento Marketplace, or other composer sources, as long as they have a composer.json file.
Moving forward, we are going to take a closer look at the following topics:
You will need to have basic knowledge of PHP, OOP, JavaScript, and XML. You will also need Apache, MySQL, and AMPPS installed on your system to execute the codes.
The code files of this chapter can be found on GitHub:
https://github.com/PacktPublishing/Magento-2-Quick-Start-Guide.
Check out the following video to see the Code in Action:
Out of the box, Magento provides several shipping methods of its own. Unlike payment methods, which tend to be less diverse among different web shops, shipping methods are often an area of customization among merchants, which is why building a customized shipping extension is an essential skill for every Magento developer.
There are two types of shipping methods:
Let's go ahead and create a Magento shipping extension Magelicious_RoyalTrek. The extension assumes an imaginary RoyalTrek carrier, with two offline shipping methods: RoyalTrek Standard and RoyalTrek 48h.
We will start off by defining <MAGELICIOUS_DIR>/RoyalTrek/registration.php as follows:
\Magento\Framework\Component\ComponentRegistrar::register(
    \Magento\Framework\Component\ComponentRegistrar::MODULE,
    'Magelicious_RoyalTrek',
    __DIR__
);
We can then define the <MAGELICIOUS_DIR>/RoyalTrek/etc/module.xml as follows:
<config>
    <module name="Magelicious_RoyalTrek" setup_version="1.0.0"/>
</config>
With these two files in place, Magento should already see our module, when enabled.
We can then go ahead and define the <MAGELICIOUS_DIR>/RoyalTrek/composer.json as follows:
{
  "name": "magelicious/module-royal-trek",
  "description": "The RoyalTrek shipping",
  "require": {
    "php": "7.0.2|7.0.4|~7.0.6|~7.1.0"
  },
  "type": "magento2-module",
  "version": "1.0.0",
  "license": [
    "OSL-3.0",
    "AFL-3.0"
  ],
  "autoload": {
    "files": [
      "registration.php"
    ],
    "psr-4": {
      "Magelicious\\RoyalTrek\\": ""
    }
  }
}
We can then define the <MAGELICIOUS_DIR>/RoyalTrek/etc/adminhtml/system.xml as follows:
<config>
  <system>
    <section id="carriers">
      <group id="royaltrek">
        <label>Royal Trek Shipping</label>
        <field id="active" type="select">
          <label>Enabled</label>
          <source_model>Magento\Config\Model\Config\Source\Yesno</source_model>
        </field>
        <field id="title" type="text">
          <label>Title</label>
        </field>
        <field id="sallowspecific" type="select">
          <label>Ship to Applicable Countries</label>
          <frontend_class>shipping-applicable-country</frontend_class>
          <source_model>Magento\Shipping\Model\Config\Source\Allspecificcountries</source_model>
        </field>
        <field id="specificcountry" type="multiselect">
          <label>Ship to Specific Countries</label>
          <can_be_empty>1</can_be_empty>
          <source_model>Magento\Directory\Model\Config\Source\Country</source_model>
        </field>
        <field id="showmethod" type="select"">
          <label>Show Method if Not Applicable</label>
          <source_model>Magento\Config\Model\Config\Source\Yesno</source_model>
        </field>
        <field id="specificerrmsg" type="textarea">
          <label>Displayed Error Message</label>
        </field>
        <field id="sort_order" type="text">
          <label>Sort Order</label>
          <validate>validate-number validate-zero-or-greater</validate>
        </field>
      </group>
      <!-- todo... -->
    </section>
  </system>
</config>
This sets the general configuration options for our shipping methods. The sallowspecific, specificcountry, showmethod, specificerrmsg and, sort_order are common configuration elements of each shipping method, as seen by examining the Magento\Shipping\Model\Carrier\AbstractCarrier class.
We can then extend the <MAGELICIOUS_DIR>/RoyalTrek/etc/adminhtml/system.xml with the following group:
<!-- The "RoyalTrek Standard" specific options -->
<group id="royaltrekstandard">
  <label><![CDATA[The "RoyalTrek Standard" shipping method]]></label>
  <fieldset_css>complex</fieldset_css>
  <field id="title" type="text">
    <label><![CDATA[Title]]></label>
  </field>
  <field id="shippingcost" type="text">
    <label><![CDATA[Shipping Cost]]></label>
    <validate>validate-number validate-zero-or-greater</validate>
  </field>
</group>
We are introducing an additional set of configuration options here, to be used with our RoyalTrek Standard method.
So, we then extend the <MAGELICIOUS_DIR>/RoyalTrek/etc/adminhtml/system.xml with the following group:
<!-- The "RoyalTrek 48h" specific options -->
<group id="royaltrek48hr">
  <label><![CDATA[The "RoyalTrek 48h" shipping method]]></label>
  <fieldset_css>complex</fieldset_css>
  <field id="title" type="text">
    <label><![CDATA[Title]]></label>
  </field>
  <field id="shippingcost" type="text">
    <label><![CDATA[Shipping Cost]]></label>
    <validate>validate-number validate-zero-or-greater</validate>
  </field>
</group>
We are introducing an additional set of configuration options here, to be used with our RoyalTrek 48h method.
We then define the <MAGELICIOUS_DIR>/RoyalTrek/etc/config.xml as follows:
<config>
  <default>
    <carriers>
      <royaltrek>
        <!-- DEFAULTS HERE -->
      </royaltrek>
    </carriers>
  </default>
</config>
The config > default > carriers > royaltrek nesting path matches the nesting path of the system.xml elements. We then replace the <!-- DEFAULTS HERE --> with following:
<active>1</active>
<title>Royal Trek Shipping</title>
<sallowspecific>0</sallowspecific>
<showmethod>0</showmethod>
<specificerrmsg>The Royal Trek shipping is not available.</specificerrmsg>
<sort_order>10</sort_order>
<model>Magelicious\RoyalTrek\Model\Carrier\RoyalTrek</model>
<royaltrekstandard>
    <title><![CDATA[RoyalTrek Standard]]></title>
    <shippingcost>4.99</shippingcost>
</royaltrekstandard>
<royaltrek48hr>
    <title><![CDATA[RoyalTrek 48h]]></title>
    <shippingcost>9.99</shippingcost>
</royaltrek48hr>
With this, we can set the default values for each of the configuration options made available via system.xml.
We then define the <MAGELICIOUS_DIR>/Model/Carrier/RoyalTrek.php as follows:
<?php

namespace Magelicious\RoyalTrek\Model\Carrier;

class RoyalTrek extends \Magento\Shipping\Model\Carrier\AbstractCarrier implements
  \Magento\Shipping\Model\Carrier\CarrierInterface {
  const CARRIER_CODE = 'royaltrek';

  const ROYAL_TREK_STANDARD = 'royaltrekstandard';
  const ROYAL_TREK_48HR = 'royaltrek48hr';

  protected $_code = self::CARRIER_CODE;
  protected $_isFixed = true;
  protected $_rateResultFactory;
  protected $_rateMethodFactory;

  public function __construct(
    \Magento\Framework\App\Config\ScopeConfigInterface $scopeConfig,
    \Magento\Quote\Model\Quote\Address\RateResult\ErrorFactory $rateErrorFactory,
    \Psr\Log\LoggerInterface $logger,
    \Magento\Shipping\Model\Rate\ResultFactory $rateResultFactory,
    \Magento\Quote\Model\Quote\Address\RateResult\MethodFactory $rateMethodFactory,
    array $data = []
  ) {
    $this->_rateResultFactory = $rateResultFactory;
    $this->_rateMethodFactory = $rateMethodFactory;
    parent::__construct($scopeConfig, $rateErrorFactory, $logger, $data);
  }

  public function collectRates(\Magento\Quote\Model\Quote\Address\RateRequest $request) {
    if (!$this->getConfigFlag('active')) {
      return false;
    }

    $result = $this->_rateResultFactory->create();
    // Todo...
    return $result;
  }

  public function getAllowedMethods() {
    return [
      self::ROYAL_TREK_STANDARD => $this->getConfigData(self::ROYAL_TREK_STANDARD . '/title'),
      self::ROYAL_TREK_48HR => $this->getConfigData(self::ROYAL_TREK_48HR . '/title'),
    ];
  }

  private function getMethodTitle($method) {
    return $this->getConfigData($method . '/title');
  }

  private function getMethodPrice($method) {
    return $this->getMethodCost($method);
  }

  private function getMethodCost($method) {
    return $this->getConfigData($method . '/shippingcost');
  }
}
The basic implementation of theMagelicious\RoyalTrek\Model\Carrier\RoyalTrek class is highly determined by the implementation of its underlying Magento\Shipping\Model\Carrier\AbstractCarrier parent class and Magento\Shipping\Model\Carrier\CarrierInterface interface. The bare minimum implies setting up the $_code value and implementing the collectRates method. The $_code value is an extremely important bit of information here. We need to make sure it is unique among all of the enabled shipping extensions. The collectRates method is where the actual shipping calculation implementation happens.
Let's go ahead and extend the <MAGELICIOUS_DIR>/Model/Carrier/RoyalTrek.php with the following:
$method = $this->_rateMethodFactory->create();
$method->setCarrier($this->_code);
$method->setCarrierTitle($this->getConfigData('title'));
$method->setMethod(self::ROYAL_TREK_STANDARD);
$method->setMethodTitle($this->getMethodTitle($method->getMethod()));
$method->setPrice($this->getMethodPrice($method->getMethod()));
$method->setCost($this->getMethodCost($method->getMethod()));
$method->setErrorMessage(__('The %1 method error message here.'));
$result->append($method);
Using the factory, we can create an instance of Magento\Quote\Model\Quote\Address\RateResult\Method. This is the individual shipping method that we wish to make available as a choice during checkout. We then set the required values for the carrier: method, price, cost, and possible error message. With our royaltrekstandard method properly set, we finally pass it on to the $result object.
Let's further extend the <MAGELICIOUS_DIR>/Model/Carrier/RoyalTrek.php with the following:
$method = $this->_rateMethodFactory->create();
$method->setCarrier($this->_code);
$method->setCarrierTitle($this->getConfigData('title'));
$method->setMethod(self::ROYAL_TREK_48HR);
$method->setMethodTitle($this->getMethodTitle($method->getMethod()));
$method->setPrice($this->getMethodPrice($method->getMethod()));
$method->setCost($this->getMethodCost($method->getMethod()));
$method->setErrorMessage(__('The %1 method error message here.'));
$result->append($method);
Much like with the previous example, here we should add our royaltrek48hr to the $result object.
The end result should bring forth our two RoyalTrek shipping methods to the storefront checkout Shipping step, as follows:
The Order Summary section of the Review & Payments step should also reflect on the method selected in the Shipping step, as follows:
Likewise, the admin Create New Order screens should also show our RoyalTrek shipping methods as follows:
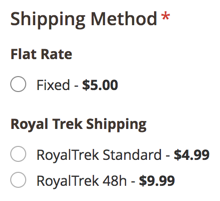
Finally, the successfully made order should reflect the RoyalTrek 48h shipping method selection in its new order email, and the customer's My Account area, as follows:
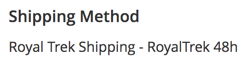
With our shipping methods confirmed as working, let's go ahead and look for a way of distributing it.
By default, the Packagist repository is the only registered repository in Composer. We can add more repositories to our Magento project by declaring them in composer.json. This way we get to register our own git repository as a source of packages, as follows:
composer config repositories.magelicious-royal-trek git git@github.com:foggyline/Magelicious_RoyalTrek.git
This command results in the modified composer.json file, with the repositories key amended as follows:
"repositories": {
    "0": {
        "type": "composer",
        "url": "https://repo.magento.com/"
    },
    "magelicious-royal-trek": {
        "type": "git",
        "url": "git@github.com:foggyline/Magelicious_RoyalTrek.git"
    }
},
We can see our magelicious-royal-trek entry added in there. The git value used for the type key tells the Composer we are using the git repository, located at the URL provided via the url key. The composer and git are not the only two values supported for the type. The actual type value could have easily been any other type of supported version control system:
We could also have simply used the vcs value for the type key, and relied on Composer's VCS driver to automatically detect the type based url value.
If we now execute composer require magelicious/royal-trek:dev-master, Composer will install our shipping module. While this new repositories approach works well, it is somewhat more suited for distributing private Magento extensions. Whenever we wish to distribute our extension publicly, a Packagist is a more convenient way to go.
Packagist is a free online repository service for Composer packages. We can use it to easily distribute our free Magento modules. The fact that Packagist is a default Composer repository, makes it the de facto repository for any Composer user. This is why having our free Magento modules available via Packagist is a preferred way of distribution.
Pushing our Magento module to Packagist is quite easy. Assuming we have our account created, we should start by clicking on the Submit button, which will land us on the following screen:
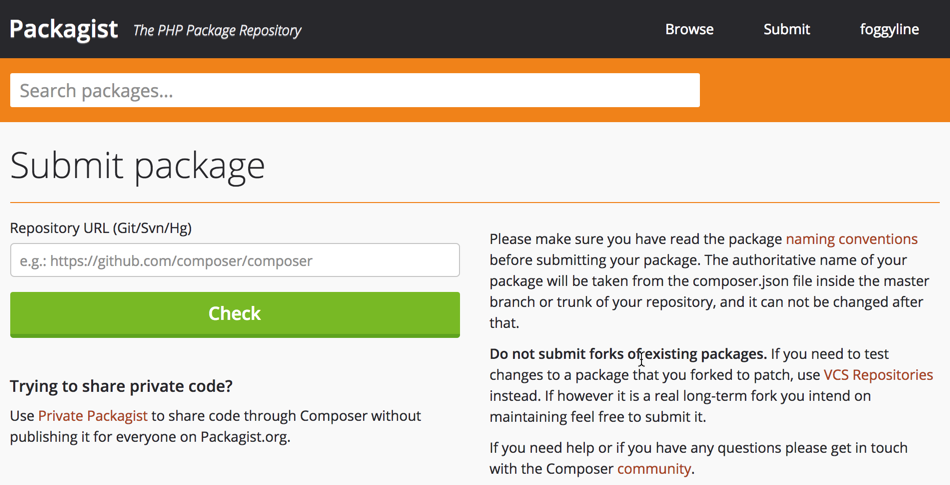
We need to provide a link to our Git repository here, and click the Check button, followed by the Submit button, if the valid repository was found. This should create our package, as per the following screen:
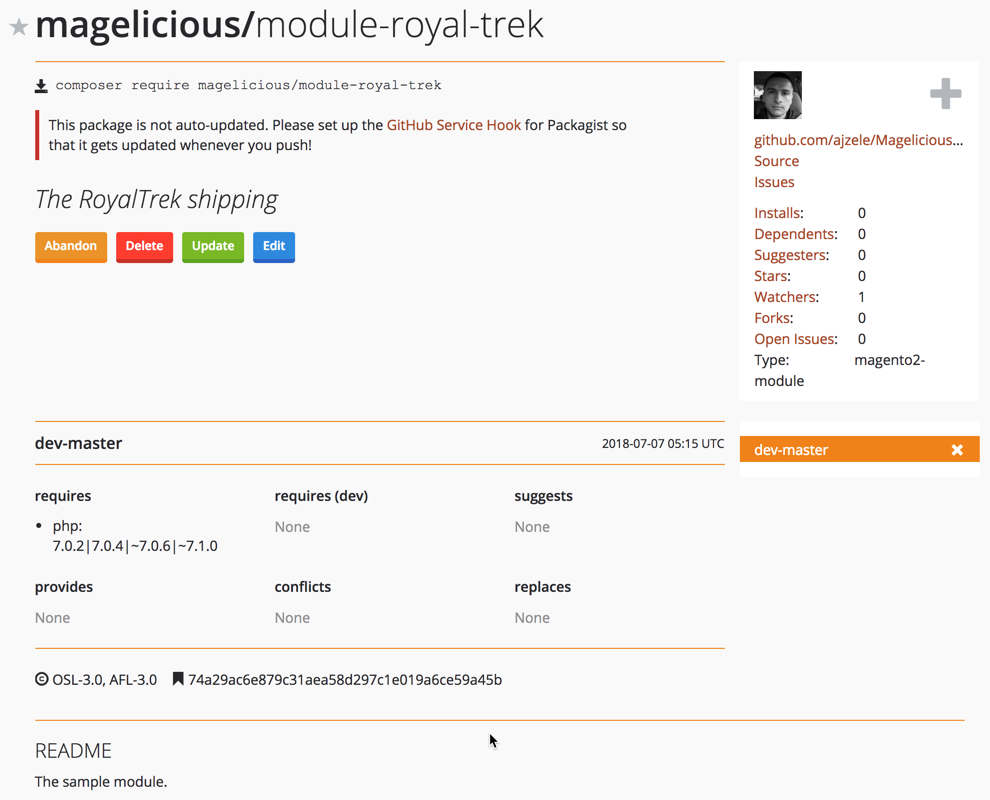
The Packagist says that our created package is now available for use via the composer require magelicious/module-royal-trek command. However, running this command now would be likely to give us the following error:
[InvalidArgumentException]
Could not find a matching version of package magelicious/module-royal-trek. Check the package spelling, your version constraint and that the package is available in a stability which matches your minimum-stability (stable).
Notice the dev-master label on our Packagist screen. Our branches automatically appear as dev versions in Packagist. Therefore, we can use the composer require magelicious/module-royal-trek:dev-master command to fetch the package. To change that, we need to specifically tag our git commits, as follows:
git add .
git commit -a -m 'The RoyalTrek shipping module, first version.'
git tag 1.0.0
git push origin 1.0.0
Once we have done that, we can go back to the Packagist package screen and hit the Update button. This should now show our 1.0.0 version:
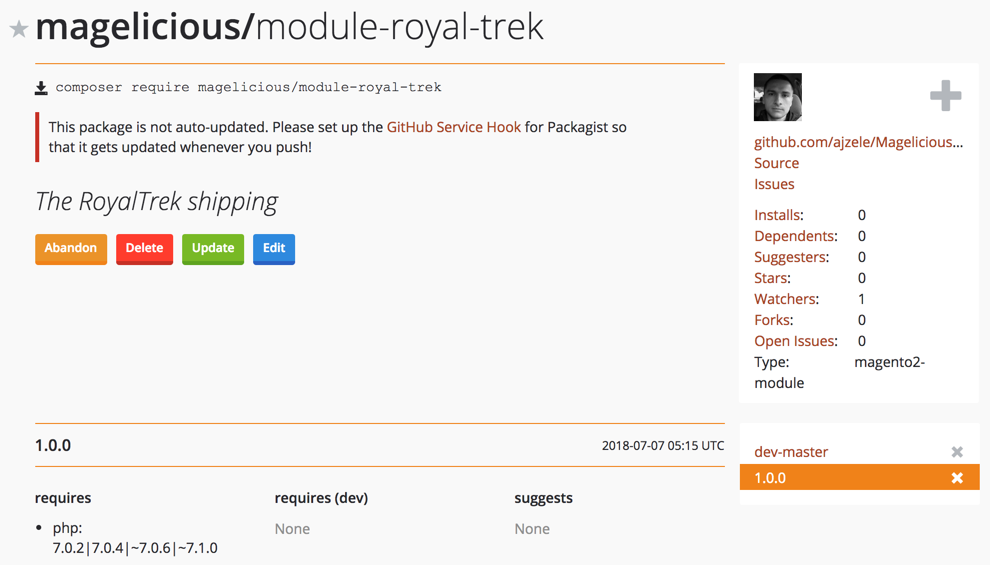
If we specify a version when requiring the package, Composer fetches the latest tagged version from the master. For example, composer require magelicious/module-royal-trek:2.4.x takes the latest 2.4 tagged version from the master branch.
When it comes to versioning, it is worth noting that setup_version found in module.xml, and version found in composer.json are two different types of versioning. Magento refers to them as marketing version and composer version. Marketing version might be thought of as something the merchant interacts with, while Composer version is something that developers interact with. The Magento_Catalog module, for example, uses the 2.2.4 marketing version for marketing, whereas its Composer version is 102.0.4. This is not to say that we cannot use the same versioning for both, as long as we remember that the setup_version, found in module.xml, is what drives our setup scripts.
Distributing future new versions of our Magelicious_RoyalTrek module would, therefore, come down to:
In this chapter, we learned how to create a simple shipping module. We saw how easy it is to add specific shipping calculations as part of offline shipping methods. We then packaged this module and distributed it via Packagist. This made it easy for the end consumer to use our module, with just a few simple console commands. Likewise, any future updates to our module should be frictionless for the end consumer, as composer can easily handle those via simple composer update commands.
Moving forward, we are going to take a look at some of the specifics of Magento admin area development.
At the very beginning of our journey, back in Chapter 1, Understanding Magento Architecture, we mentioned how Magento consists of different areas. Developing for Magento admin implies developing for the adminhtml area. While the majority of code is applicable across different areas, there are certain subtle differences. Unlike frontend which is mostly built via HTML (.phtml, .html), the Magento adminhtml area is mostly built via UI components which are referenced, stacked, and configured through .xml files. This is not to say that the same components cannot be used both for frontend and admin, because all UI components can be configured for both of these areas; we just need to configure styles manually for components on the frontend.
There are two basic UI components in Magento: listing and form. The rest are secondary components, which serve as extensions of basic components: listingToolbar, columns, filters, column, form, and field.
To get a better understanding of the adminhtml area, we are going to build a Magelicious_Minventory module, using some of these components. The idea behind the module is to provide a custom listing interface for a limited set of users, where they can easily bump up the product stock in certain increments without ever getting access to other areas of the Magento admin.
Our work here will consist of two major parts:
To keep things compact, we will use the <MODULE_DIR> to reference the MAGELICIOUS_DIR>/Minventory directory.
You will need to have basic knowledge of PHP, OOP, JavaScript, and XML. You will also need Apache, MySQL, and AMPPS installed on your system to execute the codes.
The code files of this chapter can be found on GitHub:
https://github.com/PacktPublishing/Magento-2-Quick-Start-Guide.
Check out the following video to see the Code in Action:
The listing is a basic component responsible for rendering grids, lists, and tiles, providing filtering, pagination, sorting, and other features. The listingElements group referenced in the vendor/magento/module-ui/etc/ui_configuration.xsd file provides a nice list of both primary and secondary listing components:
| actions | component | file | massaction | select |
| actionsColumn | container | filters | modal | selectionsColumn |
| bookmark | dataSource | form | multiline | tab |
| boolean | dataProvider | hidden | multiselect | text |
| button | date | htmlContent | nav | textarea |
| checkbox | dynamicRows | input | number | wysiwyg |
| checkboxset | insertForm | paging | ||
| column | exportButton | insertListing | price | |
| columns | field | listing | range | |
| columnsControls | fieldset | listingToolbar | radioset |
The key to using all of these components is to understand:
Moving forward, we will use the listing component, and a few of its secondary components to create the Micro Inventory screen as shown:
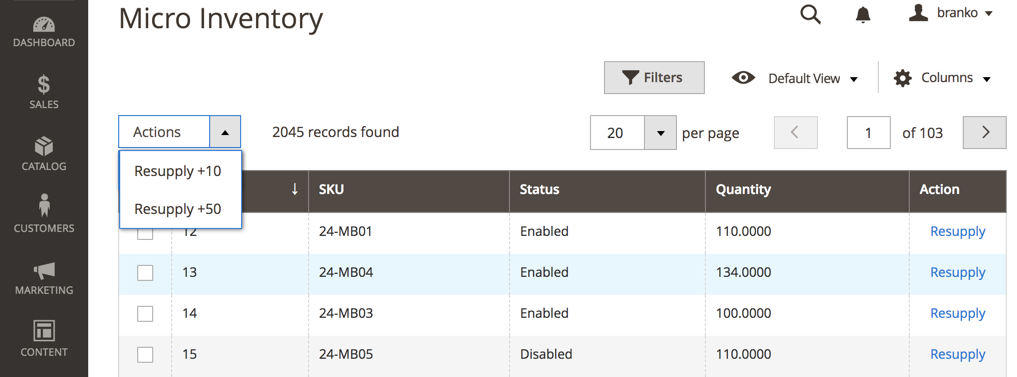
The grid itself is to consist of ID, SKU, Status, Quantity, and Action columns. The Resupply action will trigger redirection to a custom Stock Resupply screen, which we will address in the next section. The Actions selector in the upper left corner is to consist of two custom actions, allowing for fixed product stock increases.
Assuming we have defined our basic registration.php, composer.json, and etc/module.xml files, we can start dealing with the specifics of our module.
Let's start by defining the <MODULE_DIR>/etc/acl.xml as follows:
<config>
  <acl>
    <resources>
      <resource id="Magento_Backend::admin">
        <resource id="Magento_Catalog::catalog">
          <resource id="Magento_Catalog::catalog_inventory">
            <resource id="Magelicious_Minventory::minventory" title="Micro Inventory"/>
          </resource>
        </resource>
      </resource>
    </resources>
  </acl>
</config>
The requirement of our module was to provide a custom listing interface for a limited set of users. The access list entry, later referenced by our admin controller, ensures just that. The choice to nest our Magelicious_Minventory::minventory as a child of Magento_Catalog::catalog_inventory is based merely on logical grouping, as our module deals with inventory stock. We should now be able to see Micro Inventory under Roles Resources as shown:
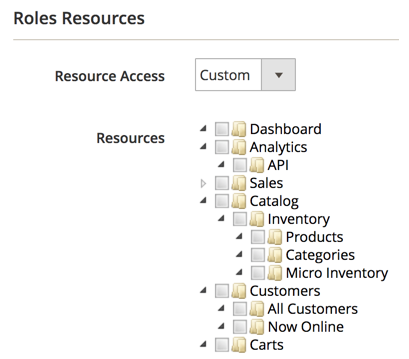
We then define the <MODULE_DIR>/etc/adminhtml/routes.xml as follows:
<config>
  <router id="admin">
    <route id="minventory" frontName="minventory">
      <module name="Magelicious_Minventory"/>
    </route>
  </router>
</config>
This will allow us to access our controller actions later on via http://magelicious.loc/index.php/<admin>/minventory/<controller>/<action> links.
We then define the <MODULE_DIR>/etc/adminhtml/menu.xml as follows:
<config>
  <menu>
    <add id="Magelicious_Minventory::minventory"
      title="Micro Inventory" translate="title"
      module="Magelicious_Minventory" sortOrder="100"
      parent="Magento_Catalog::inventory"
      action="minventory/product/index"
      resource="Magelicious_Minventory::minventory"/>
  </menu>
</config>
This positions our Micro Inventory menu right under the main Catalog | CATALOGUE menu, as shown:
When clicked, the menu's minventory/product/index action will throw us at <MODULE_DIR>/Controller/Adminhtml/Product/Index.php, which will be addressed later on.
We then define the <MODULE_DIR>/Model/Resupply.php as follows:
namespace Magelicious\Minventory\Model;

class Resupply
{
  protected $productRepository;
  protected $collectionFactory;
  protected $stockRegistry;

  public function __construct(
    \Magento\Catalog\Api\ProductRepositoryInterface $productRepository,
    \Magento\Catalog\Model\ResourceModel\Product\CollectionFactory $collectionFactory,
    \Magento\CatalogInventory\Api\StockRegistryInterface $stockRegistry
  )
  {
    $this->productRepository = $productRepository;
    $this->collectionFactory = $collectionFactory;
    $this->stockRegistry = $stockRegistry;
  }

  public function resupply($productId, $qty)
  {
    $product = $this->productRepository->getById($productId);
    $stockItem = $this->stockRegistry->getStockItemBySku($product->getSku());
    $stockItem->setQty($stockItem->getQty() + $qty);
    $stockItem->setIsInStock((bool)$stockItem->getQty());
    $this->stockRegistry->updateStockItemBySku($product->getSku(), $stockItem);
  }}
This class will serve as a centralized stock updater for our module, which will be updating stock from the Actions selector found on the Micro Inventory screen, as well as from the Save button action triggered on the Stock Resupply screen.
We then define the <MODULE_DIR>/Controller/Adminhtml/Product.php as follows:
namespace Magelicious\Minventory\Controller\Adminhtml;

abstract class Product extends \Magento\Backend\App\Action
{
  const ADMIN_RESOURCE = 'Magelicious_Minventory::minventory';
}
This is our controller file, the parent of the controller actions that we will soon define. We set the value of its ADMIN_RESOURCE constant to that defined in our acl.xml file. This will empower our controller to only allow access to users with proper resource roles.
We then define the <MODULE_DIR>/Controller/Adminhtml/Product/Index.php as follows:
namespace Magelicious\Minventory\Controller\Adminhtml\Product;

use \Magento\Framework\Controller\ResultFactory;

class Index extends \Magelicious\Minventory\Controller\Adminhtml\Product
{
  public function execute()
  {
    $resultPage = $this->resultFactory->create(ResultFactory::TYPE_PAGE);
    $resultPage->getConfig()->getTitle()->prepend((__('Micro Inventory')));
    return $resultPage;
  }
}
This controller action does not really do anything special. Aside from setting up the screen title, it merely provides a mechanism for loading the minventory_product_index.xml that we will address later on.
We then define the <MODULE_DIR>/Controller/Adminhtml/Product/MassResupply.php as follows:
namespace Magelicious\Minventory\Controller\Adminhtml\Product;

use \Magento\Framework\Controller\ResultFactory;

class MassResupply extends \Magelicious\Minventory\Controller\Adminhtml\Product
{
  protected $filter;
  protected $collectionFactory;
  protected $resupply;

  public function __construct(
    \Magento\Backend\App\Action\Context $context,
    \Magento\Ui\Component\MassAction\Filter $filter,
    \Magento\Catalog\Model\ResourceModel\Product\CollectionFactory $collectionFactory,
    \Magelicious\Minventory\Model\Resupply $resupply
  )
  {
    parent::__construct($context);
    $this->filter = $filter;
    $this->collectionFactory = $collectionFactory;
    $this->resupply = $resupply;
  }

  public function execute()
  {
    $redirectResult = $this->resultFactory->create(ResultFactory::TYPE_REDIRECT);
    $qty = $this->getRequest()->getParam('qty');
    $collection = $this->filter->getCollection($this->collectionFactory->create());

    $productResupplied = 0;
    foreach ($collection->getItems() as $product) {
      $this->resupply->resupply($product->getId(), $qty);
      $productResupplied++;
    }

    $this->messageManager->addSuccessMessage(__('A total of %1 record(s) have been resupplied.', $productResupplied));

    return $redirectResult->setPath('minventory/product/index');
  }
}
This controller action will be triggered by the Resupply +10 and Resupply +50 actions from the Micro Inventory screen. We can see it using the Magento\Ui\Component\MassAction\Filter to process the mass select options, binding them internally to product collection in order to filter products we have selected properly.
We then define the <MODULE_DIR>/view/adminhtml/layout/minventory_product_index.xml as follows:
<page>
  <update handle="styles"/>
  <body>
    <referenceContainer name="content">
      <uiComponent name="minventory_listing"/>
    </referenceContainer>
  </body>
</page>
This is the layout file that gets triggered when we land on <MODULE_DIR>/Controller/Adminhtml/Product/Index.php. The name of the file matches the <routeName>/<controllerName>/<controllerActionName> path. The actual layout here merely references the content container, to which it adds the minventory_listing component using the uiComponent element.
We then define the <MODULE_DIR>/view/adminhtml/ui_component/minventory_listing.xml as follows:
<listing>
    <argument name="data" xsi:type="array">
        <item name="js_config" xsi:type="array">
            <item name="provider" xsi:type="string">minventory_listing.minventory_listing_data_source</item>
        </item>
    </argument>
    <settings>
        <spinner>minventory_columns</spinner>
        <deps>
            <dep>minventory_listing.minventory_listing_data_source</dep>
        </deps>
    </settings>
    <!-- dataSource -->
    <!-- listingToolbar -->
    <!-- columns -->
</listing>
This is our listing component. The minventory_listing.minventory_listing_data_source is our data source defined under the dataSource element.
We then modify the minventory_listing.xml by replacing the <!-- dataSource --> with the following:
<dataSource name="minventory_listing_data_source" component="Magento_Ui/js/grid/provider">
    <settings>
        <storageConfig>
            <param name="indexField" xsi:type="string">entity_id</param>
        </storageConfig>
        <updateUrl path="mui/index/render"/>
    </settings>
    <dataProvider class="Magelicious\Minventory\Ui\DataProvider\Product\ProductDataProvider" name="minventory_listing_data_source">
        <settings>
            <requestFieldName>id</requestFieldName>
            <primaryFieldName>entity_id</primaryFieldName>
        </settings>
    </dataProvider>
</dataSource>
The most important part of the dataSource component is its dataProvider. We set its value to Magelicious\Minventory\Ui\DataProvider\Product\ProductDataProvider. The requestFieldName and primaryFieldName are not really that important in our case, as we are not really operating with full CRUD on the product entity, since we are merely focusing on updating the quantity through a few lines of custom code. Still, the component itself requires a certain minimal configuration, so we use what we would normally use for a product entity, but these can really be any values found on an entity.
We then define the <MODULE_DIR>/Ui/DataProvider/Product/ProductDataProvider.php as follows:
class ProductDataProvider extends \Magento\Ui\DataProvider\AbstractDataProvider {
    protected $collection;

    public function __construct(
        string $name,
        string $primaryFieldName,
        string $requestFieldName,
        \Magento\Catalog\Model\ResourceModel\Product\CollectionFactory $collectionFactory,
        array $meta = [],
        array $data = []
    ) {
        parent::__construct(
            $name,
            $primaryFieldName,
            $requestFieldName,
            $meta,
            $data
        );
        $this->collection = $collectionFactory->create();
    }

    public function getData() {
        if (!$this->getCollection()->isLoaded()) {
            $this->getCollection()->load();
        }
        $items = $this->getCollection()->toArray();
        return [
            'totalRecords' => $this->getCollection()->getSize(),
            'items' => array_values($items),
        ];
    }
}
The collection property is set mandatorily by the parent Magento\Ui\DataProvider\AbstractDataProvider, so we have to set its value to some kind of collection. Since we are working with products, it only makes sense to set it to an existing Magento\Catalog\Model\ResourceModel\Product\Collection, thus avoiding creating our own collection. The key method for our listing component is getData. This method feeds the listing component with the number of records in the data collection, as well as the data collection itself.
We then extend the ProductDataProvider.php with the following:
protected function joinQty() {
  if ($this->getCollection()) {
    $this->getCollection()->joinField(
      'qty',
      'cataloginventory_stock_item',
      'qty',
      'product_id=entity_id'
    );
  }
}
The qty field is not part of the default products collection, so we have to join the qty information from the cataloginventory_stock_item table to it. We must make sure to call this method before our collection is loaded.
We then modify the minventory_listing.xml by replacing the <!-- listingToolbar --> with the following:
<listingToolbar name="listing_top">
  <bookmark name="bookmarks"/>
  <columnsControls name="columns_controls"/>
  <filters name="listing_filters" />
  <paging name="listing_paging"/>
  <-- massaction -->
</listingToolbar>
The listingToolbar component is essentially a container for the listing-related elements like paging, mass actions, filters, and bookmarks. The bookmark component stores the active and changed states of data grids. The paging component provides navigation through the pages of the collection, otherwise, we would be forced to view the entire collection at once, which would not really be a performance-efficient approach. The filters component is responsible for rendering filters' interfaces and applying the actual filtering. This includes the states of filters, columns' positions, applied sorting, pagination, and so on.
The columnsControls component allows us to modify the visibility of the listing columns, shown as follows:
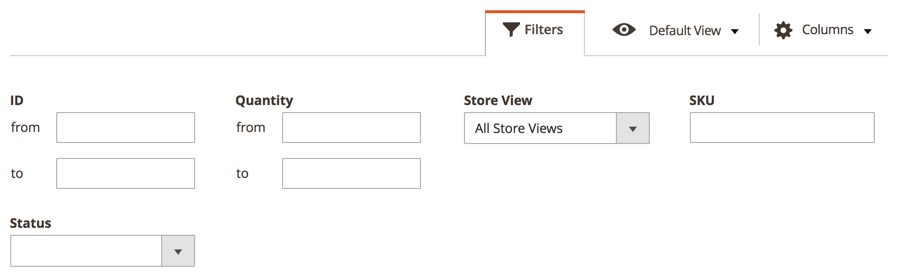
The possibility of filtering by Store View, as shown in the preceding screenshot, is easily added by modifying the minventory_listing.xml as follows:
<filters name="listing_filters">
  <filterSelect name="store_id" provider="${ $.parentName }">
    <settings>
      <options class="Magento\Store\Ui\Component\Listing\Column\Store\Options"/>
      <caption translate="true">All Store Views</caption>
      <label translate="true">Store View</label>
      <dataScope>store_id</dataScope>
    </settings>
  </filterSelect>
</filters>
Here we used the filterSelect component, with the Magento\Store\Ui\Component\Listing\Column\Store\Options class passed as an options parameter. This shows how easy it is to combine various components and to pull data from PHP classes.
Let's modify the minventory_listing.xml further by replacing the <-- massaction --> with the following:
<massaction name="listing_massaction" component="Magento_Ui/js/grid/tree-massactions">
  <action name="resupply">
    <settings>
      <type>resupply</type>
      <label translate="true">Resupply</label>
      <actions>
        <action name="0">
          <type>resupply_10</type>
          <label translate="true">Resupply +10</label>
          <url path="minventory/product/massResupply">
            <param name="qty">10</param>
          </url>
        </action>
        <action name="1">
          <type>resupply_50</type>
          <label translate="true">Resupply +50</label>
          <url path="minventory/product/massResupply">
            <param name="qty">50</param>
          </url>
        </action>
      </actions>
    </settings>
  </action>
</massaction>
Using the action component, we define the Resupply +10 and Resupply +50 actions used in the scope of the massaction component.
We then modify the minventory_listing.xml by replacing the <!-- columns --> with the following:
<columns name="minventory_columns" class="Magento\Catalog\Ui\Component\Listing\Columns">
  <settings>
    <childDefaults>
      <param name="fieldAction" xsi:type="array">
        <item name="provider" xsi:type="string">minventory_listing.minventory_listing.minventory_columns.actions</item>
        <item name="target" xsi:type="string">applyAction</item>
        <item name="params" xsi:type="array">
          <item name="0" xsi:type="string">resupply</item>
          <item name="1" xsi:type="string">${ $.$data.rowIndex }</item>
        </item>
      </param>
    </childDefaults>
  </settings>
  <!-- columns#2 -->
</columns>
The columns component definition, along with its child components, is likely to take the biggest chunk of our listing configuration. This is where we add our selection columns, regular columns, and action columns.
To demonstrate that further, we replace the <!-- columns#2 --> with the following:
<selectionsColumn name="ids" sortOrder="0">
  <settings>
    <indexField>entity_id</indexField>
  </settings>
</selectionsColumn>
<column name="entity_id" sortOrder="10">
  <settings>
    <filter>textRange</filter>
    <label translate="true">ID</label>
    <sorting>asc</sorting>
  </settings>
</column>
<column name="sku" sortOrder="20">
  <settings>
    <filter>text</filter>
    <label translate="true">SKU</label>
  </settings>
</column>
<column name="qty" sortOrder="30">
  <settings>
    <addField>true</addField>
    <filter>textRange</filter>
    <label translate="true">Quantity</label>
  </settings>
</column>
<actionsColumn name="resupply" class="Magelicious\Minventory\Ui\Component\Listing\Columns\Resupply" sortOrder="40">
  <settings>
    <indexField>entity_id</indexField>
  </settings>
</actionsColumn>
The actionsColumn points to a custom Magelicious\Minventory\Ui\Component\Listing\Columns\Resupply class, which we define under <MODULE_DIR>/Ui/Component/Listing/Columns/Resupply.php as follows:
class Resupply extends \Magento\Ui\Component\Listing\Columns\Column {
  protected $urlBuilder;

  public function __construct(
    \Magento\Framework\View\Element\UiComponent\ContextInterface $context,
    \Magento\Framework\View\Element\UiComponentFactory $uiComponentFactory,
    \Magento\Framework\UrlInterface $urlBuilder,
    array $components = [],
    array $data = []
  ) {
    $this->urlBuilder = $urlBuilder;
    parent::__construct($context, $uiComponentFactory, $components, $data);
  }

  public function prepareDataSource(array $dataSource) {
    if (isset($dataSource['data']['items'])) {
      $storeId = $this->context->getFilterParam('store_id');

      foreach ($dataSource['data']['items'] as &$item) {
        $item[$this->getData('name')]['resupply'] = [
          'href' => $this->urlBuilder->getUrl(
            'minventory/product/resupply',
            ['id' => $item['entity_id'], 'store' => $storeId]
          ),
          'label' => __('Resupply'),
          'hidden' => false,
        ];
      }
    }
    return $dataSource;
  }
}
The prepareDataSource method is where we inject our modifications. We traverse the $dataSource['data']['items'] structure until we come across our column, and then modify it accordingly with a proper href value. This, in turn, renders our resupply actions column as per the Micro Inventory screen.
With the Micro Inventory screen now sorted via the listing component, let's shift our focus onto the Stock Resupply screen built via the form component.
The form is a basic component responsible for performing CRUD operations on an entity. The listingElements group referenced under vendor/magento/module-ui/etc/ui_configuration.xsd file provides a nice list of both primary and secondary form components:
| bookmark | dataProvider | fileUploader | massaction | range |
| boolean | date | form | modal | radioset |
| button | dynamicRows | hidden | multiline | select |
| checkbox | htmlContent | multiselect | tab | |
| checkboxset | exportButton | input | nav | text |
| component | field | insertForm | number | textarea |
| container | fieldset | insertListing | paging | wysiwyg |
| dataSource | file | listing | price |
Moving forward, we will use the form component, and a few of its secondary components to create the Stock Resupply screen as shown:
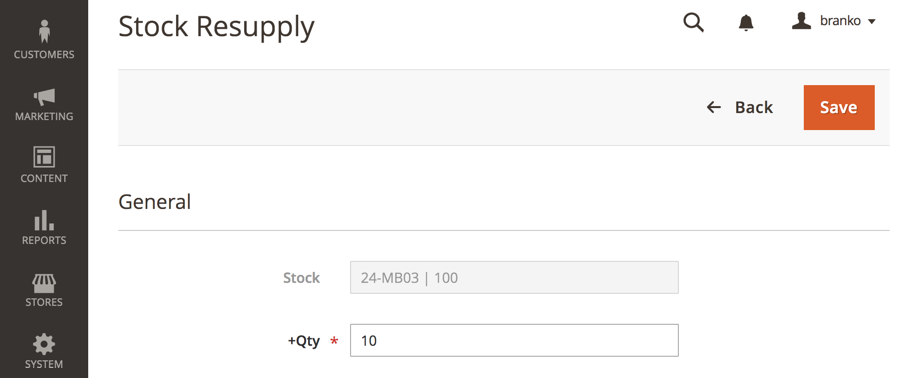
The form itself is to consist of Stock and +Qty fields. The Stock field will be a read-only field consisting of an SKU + current qty string. The Back button will take us back to the Micro Inventory listing, whereas the Save button will post the form to a special Resupply controller action, which will then increase the stock by a given +Qty amount. The Actions selector in the upper left corner is to consist of two custom actions, allowing for fixed product stock increases.
We start off by defining the <MODULE_DIR>/Controller/Adminhtml/Product/Resupply.php as follows:
use \Magento\Framework\Controller\ResultFactory;
class Resupply extends \Magelicious\Minventory\Controller\Adminhtml\Product {
  protected $stockRegistry;
  protected $productRepository;
  protected $resupply;

  public function __construct(
    \Magento\Backend\App\Action\Context $context,
    \Magento\Catalog\Api\ProductRepositoryInterface $productRepository,
    \Magento\CatalogInventory\Api\StockRegistryInterface $stockRegistry,
    \Magelicious\Minventory\Model\Resupply $resupply
  ) {
    parent::__construct($context);
    $this->productRepository = $productRepository;
    $this->stockRegistry = $stockRegistry;
    $this->resupply = $resupply;
  }

  public function execute() {
    if ($this->getRequest()->isPost()) {
      $this->resupply->resupply(
        $this->getRequest()->getParam('id'),
        $_POST['minventory_product']['qty']
      );
      $this->messageManager->addSuccessMessage(__('Successfully resupplied'));
      $redirectResult = $this->resultFactory->create(ResultFactory::TYPE_REDIRECT);
      return $redirectResult->setPath('minventory/product/index');
    } else {
      $resultPage = $this->resultFactory->create(ResultFactory::TYPE_PAGE);
      $resultPage->getConfig()->getTitle()->prepend((__('Stock Resupply')));
      return $resultPage;
    }
  }
}
Given the simplicity of our form, using the isPost() check on the request object, we allow ourselves to use the same controller action for rendering the Stock Resupply screen, as well as submitting the save action to it.
With controller action in place, we then define the <MODULE_DIR>/view/adminhtml/layout/minventory_product_resupply.xml as follows:
<page>
  <update handle="styles"/>
  <body>
    <referenceContainer name="content">
      <uiComponent name="minventory_resupply_form"/>
    </referenceContainer>
  </body>
</page>
Much like with the form listing, this layout file merely calls the minventory_resupply_form component, which is where all our visual elements of the Stock Resupply screen reside.
We then define the <MODULE_DIR>/view/adminhtml/ui_component/minventory_resupply_form.xml as follows:
<form>
  <argument name="data" xsi:type="array">
    <item name="js_config" xsi:type="array">
      <item name="provider" xsi:type="string">minventory_resupply_form.minventory_resupply_form_data_source</item>
      <item name="deps" xsi:type="string">minventory_resupply_form.minventory_resupply_form_data_source</item>
    </item>
    <item name="layout" xsi:type="array">
      <item name="type" xsi:type="string">tabs</item>
    </item>
  </argument>
  <settings>
    <buttons>
      <button name="save" class="Magelicious\Minventory\Block\Adminhtml\Product\Edit\Button\Save"/>
      <button name="back" class="Magelicious\Minventory\Block\Adminhtml\Product\Edit\Button\Back"/>
    </buttons>
  </settings>
  <!-- dataSource -->
  <!-- fieldset -->
</form>
Much like the listing component, the form component also requires a data provider.
We then modify the minventory_resupply_form.xml by replacing the <!-- dataSource --> with following:
<dataSource name="minventory_resupply_form_data_source">
  <argument name="data" xsi:type="array">
    <item name="js_config" xsi:type="array">
      <item name="component" xsi:type="string">Magento_Ui/js/form/provider</item>
    </item>
  </argument>
  <dataProvider class="Magelicious\Minventory\Ui\DataProvider\Product\Form\ProductDataProvider" name="minventory_resupply_form_data_source">
    <settings>
      <requestFieldName>id</requestFieldName>
      <primaryFieldName>entity_id</primaryFieldName>
    </settings>
  </dataProvider>
</dataSource>
Here we set the data provider, which points to our custom class, Magelicious\Minventory\Ui\DataProvider\Product\Form\ProductDataProvider.
We further modify the minventory_resupply_form.xml by replacing the <!-- fieldset --> with the following:
<fieldset name="minventory_product">
  <argument name="data" xsi:type="array">
    <item name="config" xsi:type="array">
      <item name="label" xsi:type="string" translate="true">General</item>
    </item>
  </argument>
  <field name="stock">
    <argument name="data" xsi:type="array">
      <item name="config" xsi:type="array">
        <item name="label" xsi:type="string">Stock</item>
        <item name="visible" xsi:type="boolean">true</item>
        <item name="dataType" xsi:type="string">text</item>
        <item name="formElement" xsi:type="string">input</item>
        <item name="disabled" xsi:type="string">true</item>
      </item>
    </argument>
  </field>
  <field name="qty">
    <argument name="data" xsi:type="array">
      <item name="config" xsi:type="array">
        <item name="label" xsi:type="string">+Qty</item>
        <item name="visible" xsi:type="boolean">true</item>
        <item name="dataType" xsi:type="string">text</item>
        <item name="formElement" xsi:type="string">input</item>
        <item name="focused" xsi:type="string">true</item>
        <item name="validation" xsi:type="array">
          <item name="required-entry" xsi:type="boolean">true</item>
          <item name="validate-zero-or-greater" xsi:type="boolean">true</item>
        </item>
      </item>
    </argument>
  </field>
</fieldset>
Here we defined fieldset with a General title, and two fields: stock and qty. The stock field was defined as disabled, as its purpose will be merely to merge the <SKU> | <qty> values for informational purposes. The structure of the individual field definition might seem overwhelming at first, but we can easily determine available arguments by observing the <component name="column" definition under the <MAGENTO_DIR>/module-ui/view/base/ui_component/etc/definition.map.xml.
We then define <MODULE_DIR>/Ui/DataProvider/Product/Form/ProductDataProvider.php as follows:
class ProductDataProvider extends \Magento\Ui\DataProvider\AbstractDataProvider {
  protected $loadedData;
  protected $productRepository;
  protected $stockRegistry;
  protected $request;

  public function __construct(
    string $name,
    string $primaryFieldName,
    string $requestFieldName,
    \Magento\Catalog\Model\ResourceModel\Product\CollectionFactory $collectionFactory,
    \Magento\Catalog\Api\ProductRepositoryInterface $productRepository,
    \Magento\CatalogInventory\Api\StockRegistryInterface $stockRegistry,
    \Magento\Framework\App\RequestInterface $request,
    array $meta = [], array $data = []
  ) {
    parent::__construct($name, $primaryFieldName, $requestFieldName, $meta, $data);
    $this->collection = $collectionFactory->create();
    $this->productRepository = $productRepository;
    $this->stockRegistry = $stockRegistry;
    $this->request = $request;
  }

  public function getData() {
    if (isset($this->loadedData)) {
      return $this->loadedData;
    }
    $id = $this->request->getParam('id');
    $product = $this->productRepository->getById($id);
    $stockItem = $this->stockRegistry->getStockItemBySku($product->getSku());
    $this->loadedData[$product->getId()]['minventory_product'] = [
      'stock' => __('%1 | %2', $product->getSku(), $stockItem->getQty()),
      'qty' => 10
    ];
    return $this->loadedData;
  }
}
Our data provider is expected to implement the getData method. This returns an array of data that feeds the form with proper values. The structure of the array might be difficult to grasp at first, so it helps to gloss over some of Magento's data providers. The stock and qty entries here will provide values for the fields defined via minventory_resupply_form.xml.
We then define <MODULE_DIR>/Block/Adminhtml/Product/Edit/Button/Back.php as follows:
class Back extends \Magento\Backend\Block\Template implements \Magento\Framework\View\Element\UiComponent\Control\ButtonProviderInterface
{
  public function getButtonData() {
    return [
      'label' => __('Back'),
      'on_click' => sprintf("location.href = '%s';", $this->getBackUrl()),
      'class' => 'back',
      'sort_order' => 10
    ];
  }

  public function getBackUrl() {
    return $this->getUrl('*/*/');
  }
}
The ButtonProviderInterface requires the getButtonData method implementation. The structure of the return array is somewhat blurry until we gloss over some of the other buttons that are defined across Magento. This renders our Back button as follows:
<button id="back" title="Back" type="button" class="action- scalable back" onclick="location.href = '... stripped away ...';" data-ui-id="back-button">
    <span>Back</span>
</button>
The Back button provides a go back to previous page functionality, which in our case is determined by the value of the getBackUrl method response.
We then define <MODULE_DIR>/Block/Adminhtml/Product/Edit/Button/Save.php as follows:
class Save extends \Magento\Backend\Block\Template implements \Magento\Framework\View\Element\UiComponent\Control\ButtonProviderInterface
{
  public function getButtonData() {
    return [
      'label' => __('Save'),
      'class' => 'save primary',
      'data_attribute' => [
        'mage-init' => ['button' => ['event' => 'save']],
        'form-role' => 'save',
      ],
      'sort_order' => 20,
    ];
  }
}
Much like with the previous button, we use a similar array structure for our button here. The difference is that this time we are passing the data_attribute as well. This renders our Save button as follows:
<button id="save" title="Save" type="button" class="action- scalable save primary ui-button ui-widget ui-state-default ui-corner-all ui-button-text-only" onclick="location.href = '... stripped away ...';" data-form-role="save" data-ui-id="save-button" role="button" aria-disabled="false"><span class="ui-button-text">
    <span>Save</span>
</span></button>
The mage-init part might seem confusing at the moment. Suffice it to say that it's a way of initializing a JS component, which is something we will address in more detail in the next chapter. Our Save essentially triggers the form's submission.
With this we have finished our form component definition, making the whole Stock Resupply screen functional.
In this chapter, we built two very different screens in the Magento admin area. One utilized the listing component, whereas the other utilized the form component. A great deal of our work involved configuration rather than coding, which stands to prove how powerful Magento UI components can be. While the amount of configuration might seem overwhelming at first, getting a grip on individual component configurations allows us to build complex interfaces quickly.
Moving forward, we are going to take a look at some of the specifics behind developing for the storefront area.
The Magento storefront is the customer-facing view of a Magento e-commerce platform. Developing for storefront implies developing for the frontend area. Whereas the adminhtml area is primarily built via means of UI components, the frontend area makes heavy use of JavaScript (JS) components that come in form of jQuery widgets and UI/KnockoutJS components. Aside from JS components, there are lots of other bits and pieces involved in storefront development, such as themes, layouts, templates, language packages, and CSS/LESS. Our focus, however, throughout this chapter will be on JS components, as they seem to be the most confusing and challenging part of the Magento frontend to overcome.
Moving forward, we are going to look into the following sections:
You will need to have basic knowledge of PHP, OOP, JavaScript, and XML. You will also need Apache, MySQL, and AMPPS installed on your system to execute the codes.
The code files of this chapter can be found on GitHub:
https://github.com/PacktPublishing/Magento-2-Quick-Start-Guide.
Check out the following video to see the Code in Action:
To get a better understanding of the frontend area, we are going to build a very lightweight Magelicious_Jsco module, to serve as a playground for our JS component exploration.
To this point, we should already be pretty familiar with the flow of creating a new module. Assuming we have defined our basic registration.php, composer.json, and etc/module.xml files, we can start dealing with the specifics of our Magelicious_Jsco module.
Let's start by defining <MODULE_DIR>/etc/frontend/routes.xml, as follows:
<config>
    <router id="standard">
        <route id="jsco" frontName="jsco">
            <module name="Magelicious_Jsco"/>
        </route>
    </router>
</config>
We then create <MODULE_DIR>/Controller/Playground.php, as follows:
namespace Magelicious\Jsco\Controller;
abstract class Playground extends \Magento\Framework\App\Action\Action
{
}
We then create <MODULE_DIR>/Controller/Playground/Index.php, as follows:
namespace Magelicious\Jsco\Controller\Playground;
use Magento\Framework\Controller\ResultFactory;
class Index extends \Magelicious\Jsco\Controller\Playground
{
    public function execute() {
        $resultPage = $this->resultFactory->create(ResultFactory::TYPE_PAGE);
        $resultPage->getConfig()->getTitle()->set(__('Playground'));
        return $resultPage;
    }
}
There's nothing really new to this point. We have merely created a route, controller, and controller action to support a page that we can access via the URL, such as http://magelicious.loc/jsco/playground. But the page itself is defined via XML layout, and we further create <MODULE_DIR>/view/frontend/layout/jsco_playground_index.xml, as follows:
<page xmlns:xsi="http://www.w3.org/2001/XMLSchema-instance" layout="empty"
 xsi:noNamespaceSchemaLocation="urn:magento:framework:View/Layout/etc/page_configuration.xsd">
  <body>
    <referenceContainer name="content">
      <block class="Magelicious\Jsco\Block\Test"
           name="jsco_test"
           template="Magelicious_Jsco::playground.phtml">
      </block>
    </referenceContainer>
  </body>
</page>
Note layout="empty" he
re; this is to limit ourselves to a nearly empty page to work with.
Finally, we create an empty <MODULE_DIR>view/frontend/templates/playground.phtml page. If we were to now open a link, such as http://magelicious.loc/jsco/playground, that would open a page with the Playground title shown. playground.phtml is where all of our sample code will go in, as we continue exploring this chapter.
Calling and initializing JS components might seem a bit challenging at first. There are two types of syntax notations used with Magento JS components:
To better understand the data-mage-init notation, let's take a look at a partial <PROJECT_DIR>/lib/web/mage/redirect-url.js file extract:
define([
    'jquery',
    'jquery/ui'
], function ($) {
    'use strict';
    $.widget('mage.redirectUrl', {
        options: {
            event: 'click',
            url: undefined
        },
        _bind: function () { /* ... */ },
        _create: function () { /* ... */ },
        _onEvent: function () { /* ... */ }
    });
    return $.mage.redirectUrl;
});
This here is a jQuery widget wrapped as an AMD module; more on that later on. data-mage-init knows how to interpret mage.redirectUrl as a redirectUrl component. By studying the redirectUrl widget code, we can see it can be used not only with the button and the link type of elements but with the select type as well. Let's go ahead and append our playground.phtml file with the following:
<a data-mage-init='{"redirectUrl":{"url":"http://test.url"}}'>
    <span><?= __('Test') ?></span>
</a>

<button type="button"
        data-mage-init='{"redirectUrl":{"url":"http://test.url"}}'>
    <span><?= __('Test') ?></span>
</button>

<select data-mage-init='{"redirectUrl": {"event":"change"}}'>
    <option value="http://test.url/1">Test#1</option>
    <option value="http://test.url/2">Test#2</option>
    <option value="http://test.url/3">Test#3</option>
</select>
While the click event works perfectly for link and button elements, the select element relies on a more specific change event. Therefore, our select element exploits the fact that the redirectUrl component accepts the event configuration option. This makes for a nice and clean little example of reusing a single component multiple time.
To better understand the <script type="text/x-magento-init" /> notation, let's take a look at a partial <MAGENTO_DIR>/module-cookie/view/frontend/web/js/notices.js file extract:
define([
    'jquery',
    'jquery/ui',
    'mage/cookies'
], function ($) {
    'use strict';
    $.widget('mage.cookieNotices', {
        _create: function () {
          //...
        }
    });
    return $.mage.cookieNotices;
});
Just like in our first example, this is just another jQuery widget essentially. What the cookieNotices widget does is take the given content and display it as cookie notice alert to the user, doing so until the user finally hits the Allow Cookies button. We can easily reuse this widget to inject our own content. While both cookieNotices and redirectUrl are jQuery widgets, the way they are used in Magento differs.
Let's go ahead and append our playground.phtml file with the following HTML bits:
<div id="playgroundCookieBlock" class="message global cookie"
style="display: none;">
  <p>
    <strong><?= $block->escapeHtml(__('We use cookies to make your experience better.')) ?></strong>
    <span><?= $block->escapeHtml(__('To comply with the new e-Privacy directive, we need to ask for your consent to set the cookies.')) ?></span>
    <?= $block->escapeHtml(__('<a href="%1">Learn more</a>.', 'http://magelicious.loc/privacy'), ['a']) ?>
  </p>
  <div class="actions">
    <button id="btn-cookie-allow" class="action allow primary">
      <span><?= $block->escapeHtml(__('Allow Cookies')) ?></span>
    </button>
  </div>
</div>
This is to simulate our intent for a custom cookie widget, with special content and a cookie name. Let's further append the playground.phtml file with a declarative call to cookieNotices JS component:
<script type="text/x-magento-init">
  {
    "#playgroundCookieBlock": {
      "cookieNotices": {
        "cookieAllowButtonSelector": "#btn-cookie-allow",
        "cookieName": "playgroundCookie",
        "cookieValue": "playgroundCookieValue",
        "cookieLifetime": "300",
        "noCookiesUrl": "http://magelicious.loc/no-cookies"
      }
    }
  }
</script>
Unlike the redirectUrl widget, which had a nice list of options defined at the very start of the widget definition, the cookieNotices widget does not have those. It merely references those options throughout the code, via this.options.<optionPushedViaMagentoInit> calls. This is really a default jQuery widget options object. The reason we are bringing it up is merely to understand how, most of the time, one needs to take a more involved approach toward inspecting existing JavaScript components code, instead of just focusing on the set of possible default options.
To better understand the <script> tag notation, let's take a look at a partial <MAGENTO_DIR>/module-ui/view/base/web/js/modal/modal.js file extract:
define([
  /* ... */
], function ( /* ... */ ) {
  'use strict';
  //...
  $.widget('mage.modal', {
    //...
  });
  return $.mage.modal;
});
As in the previous two examples, this again is just a jQuery widget. Now let's go ahead and append our playground.phtml file with the following HTML bits:
<div>
  <a href="#" id="playgroundModalLink">Show modal!</a>
</div>

<div id="playgroundModal">
  <p>Content...</p>
</div>
This is to simulate our intent of creating a modal box, with special content. Now, let's use the modal widget to turn this into an actual modal. We further append our playground.phtml file, as follows:
<script>
  require([
      'jquery',
      'mage/translate',
      'Magento_Ui/js/modal/modal'
    ], function ($, $t, modal) {
      var options = {
        title: 'Playground Modal',
        buttons: [{
          text: $t('Continue'),
          click: function () {
            this.closeModal();
          }
        }]
      };

      modal(options, $('#playgroundModal'));

      $('#playgroundModalLink').on('click', function () {
        $('#playgroundModal').modal('openModal');
      });
    }
  );
</script>
This time we are using the <script> tag approach to utilize the JS component.
To ensure our code evaluates on page load, we can further wrap our modal widget related code into a function, as follows:
<script>
  require([
      /* libraries ... */
    ], function ( /* params ... */ ) {
      $(function () {
        // Raw JS code...
      });
    }
  );
</script>
Likewise, we can use a RequireJS domReady module to execute our JS code on DOM:
<script>
  require([
    'jquery',
    'mage/translate',
    'domReady!'
  ], function ($, $t) {
    // Raw JS code...
  });
</script>
The ! character used in domReady! is a syntax reserved for plugins. While there is more to it, suffice to say that in a case of domReady! the plugin exists simply as a way of waiting until DOM gets loaded before invoking our function.
The choice of calling and initializing JS components depends on how they are written and how they are intended to be used. We use the declarative notation when our component requires initialization. The configuration is prepared on the backend and simply outputted to the page. We use the imperative notation on the pages that use raw JS code; this allows us to execute particular business logic.
To this point, we have been using things like redirectUrl and cookieNotices out of thin air, but how exactly do these components become available to our code? The answer is, via RequireJS, a library that underlies nearly every other JS feature built into Magento. The overall role of RequireJS is simple; it is a JS module system that implements the Asynchronous Module Definition (AMD) standard, which serves as an improvement over the web's current globals and script tags.
We have already seen the format of these AMD modules in the preceding examples, which comes down the following:
define(['dep1', 'dep2'], function (dep1, dep2) {
  return function () {
    // Module value to return
  };
});
The gist of AMD modules functionality comes down to each module being able to:
This strategy solves many of the conventional dependency issues, where dependencies are assumed to be immediately available when the function executes, which is not always the case.
If we were to do a View Page Source on our Playground page in a browser, we would see three <script type="text/javascript" src="..."> tags with their src attributes pointing to the following JS files:
frontend/Magento/luma/en_US/requirejs/require.js
frontend/Magento/luma/en_US/mage/requirejs/mixins.js
frontend/Magento/luma/en_US/requirejs-config.js
A quick look at the partial requirejs-config.js file reveals how these get loaded:
(function (require) {
  /* ... */
  (function () {
    var config = {
      map: {
        '*': {
          'redirectUrl': 'mage/redirect-url',
        }
      }
    };
    require.config(config);
  })();
  /* ... */
  (function () {
    var config = {
      map: {
        '*': {
          cookieNotices: 'Magento_Cookie/js/notices'
        }
      }
    };
    require.config(config);
  })();
  /* ... */
})(require);
These two mappings break down as follows:
Further observing the requirejs-config.js file, aside from map, there are a few other important keys whose roles are worth knowing:
var config = {
    map: {
        '*': {
            /* ... */
        }
    },
    paths: {
        /* ... */
    },
    shim: {
        /* ... */
    },
    deps: [
        /* ... */
    ],
    config: {
        mixins: {
            /* ... */
        }
    }
};
These break down as follows:
The takeaway here is that our own modules can define the requirejs-config.js file on their own, under the <MODULE_DIR>/view/frontend directory, allowing us to hook into the final Magento requirejs-config.js file that gets generated for the browser. This, in turn, allows us to easily register our own components, override existing mappings, paths, and other things.
While the majority of the time, we would want to leave the existing JS components to work their magic as is, there are times when business requirements are drastic enough to make the whole component unusable. Thinking in terms of PHP classes, we can imagine that class A implements X, whereas we want to have a completely different implementation of X, let's call it B, that shares very little with A. This is a case where simply having B extends A would not suffice, so we opt for directly B implements X. While there are no interfaces in pure JS, this does not mean we cannot completely replace one concrete class with another, as long as we ensure those few crucial methods are available via the new class.
Replacing JS classes is easy with Magento. Let's imagine we want to fully replace the redirectUrl component.
We start by creating the <MODULE_DIR>/view/frontend/requirejs-config.js file, as follows:
var config = {
  map: {
    '*': {
      redirectUrl: 'Magelicious_Jsco/js/redirect-url'
    }
  }
};
We then implement the actual Magelicious_Jsco/js/redirect-url as part of the <MODULE_DIR>/view/frontend/web/js/redirect-url.js file, as follows.
define([
    'jquery',
], function ($) {
    'use strict';
    $.widget('magelicious.redirectUrl', {
        _create: function () {
            // New implementation
            console.log('magelicious.redirectUrl');
        }
    });
    return $.magelicious.redirectUrl;
});
magelicious.redirectUrl matches the new name of our widget, whereas magelicious is our namespace and redirectUrl is the actual name of the widget within our namespace.
Once we refresh the static content via the php bin/magento setup:static-content:deploy command, we should now be able to see magelicious.redirectUrl show up in the browser console window. Clearly, the current implementation of redirectUrl would break the functionality we had with the original component, but it goes to show how easily we can fully replace the component with a new one.
Assuming we wish to extend the redirectUrl component instead of replacing it completely, we can do so in a similar fashion. The entry in our requirejs-config.js remains the same, whereas the difference lies in how we edit our redirect-url.js file:
define([
 'jquery',
 'jquery/ui',
 'mage/redirect-url'
], function ($) {
 'use strict';
 $.widget('magelicious.redirectUrl', $.mage.redirectUrl, {
 /* Override of parent _onEvent method */
 _onEvent: function () {
 // Call parent's _onEvent() method if needed
 return this._super();
 }
 });
 return $.magelicious.redirectUrl;
});
Using the _super or _superApply is a jQuery widget way of invoking methods of the same name in the parent widget. While this approach works, there is a more elegant solution called mixins.
The Magento mixins for JS are much like its plugins for PHP. To convert to the mixin approach, we replace our requirejs-config.js with content, as follows.
var config = {
  config: {
    mixins: {
      'mage/redirect-url': {
        'Magelicious_Jsco/js/redirect-url-mixin': true
      }
    }
  }
};
Note, that this time we are using the full path 'mage/redirect-url' instead of the redirectUrl alias on the left side of the mapping, whereas the right side of mapping points to our mixin. The convention is to use the -mixing suffix on top of the original JS filename.
We then create <MODULE_DIR>/view/frontend/web/js/redirect-url-mixin.js with content, as follows:
define([
 'jquery'
], function ($) {
 return function (originalWidget) {
 $.widget(
 'magelicious.redirectUrl',
 originalWidget, {
 /* Redefined _onEvent method */
 _onEvent: function () {
 console.log('_onEvent via mixin');
 // Call parent's _onEvent() method if needed
 return this._super();
 }
 }
 );
 return $.magelicious.redirectUrl;
 };
});
The example here might not do justice, as it merely looks more complex than the previous example of directly extending the widget. This is because we cannot simply do originalWidget._onEvent = function () { /* ... */ }; or originalWidget._proto._onEvent = function () { /* ... */ }; and thus override the widget method. Widget methods need to be overridden on the prototype, which, in our case, essentially means creating a new widget from the original.
If we were adding a mixin for a non-widget type of JS, such as Magento_Checkout/js/action/place-order, then the approach would be different, as shown in Magento_CheckoutAgreements/js/model/place-order-mixin .
Creating simple jQuery widgets components is pretty straightforward from a Magento point of view. The actual knowledge of building robust jQuery widgets depends on our knowledge of jQuery itself.
Let's assume our widget will be called welcome, and its purpose is to simply output Welcome %name% to the element, provided we passed on the name option during widget initialization.
We start by adding the mapping under our <MODULE_DIR>/view/frontend/requirejs-config.js file, as follows:
var config = {
map: {
'*': {
welcome: 'Magelicious_Jsco/js/welcome'
}
}
};
We then define the widget itself, as part of the <MODULE_DIR>/view/frontend/web/js/welcome.js file, as follows:
define([
'jquery',
'mage/translate'
], function ($, $t) {
'use strict';
$.widget('magelicious.welcome', {
_create: function () {
this.element.text($t('Welcome ' + this.options.name));
}
});
return $.magelicious.welcome;
});
We can see that our widget is quite simple. If we now run Magento's setup:static-content:deploy command, our widget should already be ready for use, as we can now initialize it from template files.
Finally, let's initialize our welcome widget by amending playground.phtml, as follows:
<?php $helper = $this->helper('Magento\Framework\Json\Helper\Data') ?>
<span data-mage-init='<?= $helper->jsonEncode(
['welcome' => ['name' => 'John Doe']]
) ?>'></span>
With this in place, we should now be able to see the Welcome John Doe message in our browser. While this little component seems quite an overkill for what it does, the concepts behind it are what matters.
To this point, we have only been dealing with jQuery widgets as components. While extremely powerful, jQuery widgets are not best suited for rendering robust components with complex HTML structures. The other type of JS components is what we refer to as UI/KnockoutJS components. Built on the shoulders of the KnockoutJS library, these components allow powerful templating of our data, among other things. Without getting too deep into the ins and outs of these type of components, suffice to say that the main construct we are referring to when we speak of UI/KnockoutJS components is uiComponent.
As per <MAGENTO_DIR>/module-ui/view/base/requirejs-config.js, the uiComponent maps to the Magento_Ui/js/lib/core/collection JS file. Inspecting the collection.js file, we can see that uiComponent extends uiElement, which maps to the Magento_Ui/js/lib/core/element/element JS file. The uiComponent and uiElement make use of the ko, underscore, mageUtils, uiRegistry, uiEvents, and uiClass libraries, among other things, so it's worth getting ourselves familiar with those.
Creating new UI/KnockoutJS components is a slightly more involved process than creating a jQuery widget.
We start by creating the proper mapping under our <MODULE_DIR>/view/frontend/requirejs-config.js file, as follows:
var config = {
map: {
'*': {
popularProducts: 'Magelicious_Jsco/js/popular-products'
}
}
};
This part is the same as with jQuery widgets. Here we simply register, or alias if you will, our component name to its file location.
We then define the component itself, under the <MODULE_DIR>/view/frontend/web/js/popular-products.js file, as follows:
define([
'jquery',
'uiComponent',
'ko',
'mage/translate'
], function ($, Component, ko, $t) {
'use strict';
return Component.extend({
defaults: {
template: 'Magelicious_Jsco/popular-products',
title: $t('Popular Products'),
products: [],
},
getTitle: function () {
return this.title;
}
});
}
);
The basis of all UI components is uiComponent. We pass on the instance of uiComponent as a Component parameter. We then implement the specifics of our component as part of the JSON object passed onto the Component.extend method.
With our component JS file now in place, we further create the template file referenced by the component. We do so under the <MODULE_DIR>/view/frontend/web/template/popular-products.html file, as follows:
<h4 data-bind="text: getTitle()"></h4>
<ul data-bind="foreach: products">
<li>
<span>
<span data-bind="text: title"></span>
(<span data-bind="text: sku"></span>)
</span>
</li>
</ul>
What happens in the HTML template files is all about KnockoutJS, which means a certain part of the KnockoutJS library is required in order to built UI/KnockoutJS components.
We then amend our jsco_playground_index.xml by adding the following line under <referenceContainer name="content">:
<block name="popular_products"
template="Magelicious_Jsco::popular-products.phtml" />
popular-products.phtml is where we will instantiate our UI/KnockoutJS component.
Finally, we create <MODULE_DIR>/view/frontend/templates/popular-products.phtml with content, as follows:
<?php $jsonHelper = $this->helper('Magento\Framework\Json\Helper\Data'); ?>
<div class="popular-products" data-bind="scope:'popular-products-scope'">
<!-- ko template: getTemplate() --><!-- /ko -->
</div>
<script type="text/x-magento-init">
{
".popular-products": {
"Magento_Ui/js/core/app": {
"components": {
"popular-products-scope": {
"component": "popularProducts",
"products": <?= /* @escapeNotVerified */ $jsonHelper->jsonEncode([
['sku' => 'sku1', 'title' => 'Title1'],
['sku' => 'sku2', 'title' => 'Title2']
]) ?>
}
}
}
}
}
</script>
Here we are using the declarative approach to initialize our component. The structure of the JSON object under the script tag might seem a bit confusing at first. The .popular-products key is essentially a selector, targeting whatever HTML element it might find. Magento_Ui/js/core/app is an alias for the app.js file, which creates the UI components instances according to the configuration of the JSON using theuiLayout component. components is a key under which we nest one or more components we wish to initialize. popular-products-scope is sort of a scope key assigned to our component, which we use to data-bind the scope value to the HTML element.
Clearing the cache and redeploying the static files, we should now be able to see our newly created component.
Extending UI/KnockoutJS components is a process similar to extending the jQuery widgets. Let's for a moment assume we have the Magelicious_Jsco2 module that wants to override our popularProducts component.
The way to do it would be to add the proper mapping under the map key of our <MODULE2_DIR>/view/frontend/requirejs-config.js file:
var config = {
map: {
'*': {
popularProducts: 'Magelicious_Jsco2/js/new-popular-products'
}
}
};
We then create the proper new-popular-products.js file, as follows:
define([
'jquery',
'Magelicious_Jsco/js/popular-products',
'ko',
'mage/translate',
], function ($, popularProductsComponent, ko, $t) {
'use strict';
return popularProductsComponent.extend({
getTitle: function () {
return 'NEW | ' + this._super();
}
});
}
);
The example here shows that we are no longer passing in the instance of uiComponent, rather the instance of the original Magelicious_Jsco/js/popular-products that we wish to extend. Simply using the extend method on our popularProductsComponent object allows us to extend it easily. By redefining the methods of the same name, such as getTitle, we effectively override the same method on the component we are running the extend on.
Though there are lots of other bits and pieces involved in storefront development, JS components make for the most challenging part of it. Understanding how to write new components, as well as how to override or bypass existing ones is an essential skill for any Magento developer, be it backend or frontend. Admittedly, this chapter took more of a backend/module-developer type of an approach on the subject.
Whenever there is a need to change the behavior of the underlying component, whether it is pure JS, a jQuery widget, or UI/KnockoutJS, we should consider the scope of changes in order to decide whether we should approach it by replacing, overriding, or using mixin.
Moving forward, we are going to take a look at some of the neat things we can do around customizing the storefront catalog behavior, most of which come down to plugins and JS components.
Right out of the box, Magento provides a pretty robust catalog functionality. Managing categories and products on a multi-store, multi-currency, multi-language level with a support for custom attributes, catalog search, catalog rules, and alike are features that are likely to suffice for most customers. Sometimes, however, certain integrations or larger and smaller features are requested, that build on top of the existing functionality. Whether to improve user experience or accommodate essential business requirements, catalog customization's play a major role in everyday Magento development.
We are going to customize our catalog behavior by:
These stand only as a small fragment of what's possible with Magento catalog customizations.
Moving forward, our work is to be done as part of the Magelicious_Catalog module, which we will develop throughout the chapter.
You will need to have basic knowledge of PHP, OOP, JavaScript, and XML. You will also need Apache, MySQL, and AMPPS installed on your system to execute the codes.
The code files of this chapter can be found on GitHub:
https://github.com/PacktPublishing/Magento-2-Quick-Start-Guide.
Check out the following video to see the Code in Action:
We have been asked to add a functionality that shows the size guide on a product view page. This is to appear as a new tab next to the existing Details, More Information, and Reviews tabs. The content of the size guide tab is to be the same for all products containing the size attribute. We also need it to be editable from Magento admin.
Let's take a moment to think about our approach here:
Assuming we have defined registration.php, composer.json, and etc/module.xml as basic module files, we can deal with the more specific details of our Magelicious_Catalog module.
We start by defining <MODULE_DIR>/Setup/InstallData.php with content, as follows:
namespace Magelicious\Catalog\Setup;
class InstallData implements \Magento\Framework\Setup\InstallDataInterface {
protected $searchCriteriaBuilder;
protected $blockRepository;
protected $blockFactory;
public function __construct(
\Magento\Framework\Api\SearchCriteriaBuilder $searchCriteriaBuilder,
\Magento\Cms\Api\BlockRepositoryInterface $blockRepository,
\Magento\Cms\Api\Data\BlockInterfaceFactory $blockFactory
) {
$this->searchCriteriaBuilder = $searchCriteriaBuilder;
$this->blockRepository = $blockRepository;
$this->blockFactory = $blockFactory;
}
public function install(
\Magento\Framework\Setup\ModuleDataSetupInterface $setup,
\Magento\Framework\Setup\ModuleContextInterface $context
) {
$setup->startSetup();
$searchCriteria = $this->searchCriteriaBuilder
->addFilter('identifier', 'size-guide', 'eq')
->create();
$blocks = $this->blockRepository->getList($searchCriteria)->getItems();
if (empty($blocks)) {
/* @var \Magento\Cms\Api\Data\BlockInterface $block */
$block = $this->blockFactory->create();
$block->setIdentifier('size-guide');
$block->setTitle('Size Guide');
$block->setContent('Size guide!');
$this->blockRepository->save($block);
}
$setup->endSetup();
}
}
The InstallData script ensures that the size-guide CMS block is created during module installation if it does not already exist. With this in place, we can already run the setup:upgrade command. This should install our module and create the size-guide CMS block.
We then define <MODULE_DIR>/Block/SizeGuide.php with content, as follows:
namespace Magelicious\Catalog\Block;
class SizeGuide extends \Magento\Cms\Block\Block implements \Magento\Framework\DataObject\IdentityInterface {
protected $product;
protected $coreRegistry;
public function __construct(
\Magento\Framework\View\Element\Context $context,
\Magento\Cms\Model\Template\FilterProvider $filterProvider,
\Magento\Store\Model\StoreManagerInterface $storeManager,
\Magento\Cms\Model\BlockFactory $blockFactory,
\Magento\Framework\Registry $coreRegistry,
array $data = []
) {
$this->coreRegistry = $coreRegistry;
parent::__construct($context, $filterProvider, $storeManager, $blockFactory, $data);
}
public function _toHtml() { /* ... */ }
public function getProduct() {
if (!$this->product) {
$this->product = $this->coreRegistry->registry('product');
}
return $this->product;
}
}
This is the actual block class that we will output on the product view page. The registry's object product key is already set by the parent class up the layout tree. This allows us to easily fetch the instance of the current product.
The _toHtml method is further implemented, as follows:
protected function _toHtml()
{
if ($this->getProduct()->getTypeId() == \Magento\ConfigurableProduct\Model\Product\Type\Configurable::TYPE_CODE) {
$configurableAttributes = $this->getProduct()->getTypeInstance()->getConfigurableAttributesAsArray($this->getProduct());
foreach ($configurableAttributes as $attribute) {
if (isset($attribute['attribute_code']) && $attribute['attribute_code'] == 'size') {
return parent::_toHtml();
}
}
}
return '';
}
This is the gist of our size guide functionality. The configurable type and size attribute code checks ensure that the output of _toHtml renders the size-guide block only for certain groups of products.
We finally define <MODULE_DIR>/view/frontend/layout/catalog_product_view.xml with content, as follows:
<page>
<body>
<referenceBlock name="product.info.details">
<block class="Magelicious\Catalog\Block\SizeGuide" name="size-guide" after="-" group="detailed_info">
<arguments>
<argument name="block_id" xsi:type="string">size-guide</argument>
<argument name="css_class" xsi:type="string">description</argument>
<argument name="at_label" xsi:type="string">none</argument>
<argument name="title" translate="true" xsi:type="string">Size Guide</argument>
</arguments>
</block>
</referenceBlock>
</body>
</page>
This is the glue that binds our SizeGuide block to a product view page, and, more specifically, the product.info.details block that neatly contains the Details, More Information, and Reviews tabs.
The final product view page result should look like this:

We have been asked to add a functionality that shows an active countdown with a You have %h %min %sec to catch our same day delivery offer message on a product view page, whereas the countdown is based on an optionally assigned daily cutoffAt time, set for every product individually, for every day of a week independently.
Let's take a moment to think about our approach here:
We start by bumping up the setup_version value of our <MODULE_DIR>/etc/module.xml file from 1.0.0 to 1.0.1. This allows us to introduce the <MODULE_DIR>/Setup/UpgradeData.php file with an upgrade, as follows:
protected function upgradeToVersionOneZeroOne(
\Magento\Framework\Setup\ModuleDataSetupInterface $setup
) {
$eavSetup = $this->eavSetupFactory->create(['setup' => $setup]);
$days = [
'monday', 'tuesday', 'wednesday', 'thursday',
'friday', 'saturday', 'sunday'
];
$sortOrder = 100;
foreach ($days as $day) {
$eavSetup->addAttribute(
\Magento\Catalog\Model\Product::ENTITY,
$day . '_cutoff_at',
[
'type' => 'varchar',
'label' => ucfirst($day) . ' Cutoff At',
'input' => 'text',
'required' => false,
'sort_order' => $sortOrder++,
'global' => \Magento\Eav\Model\Entity\Attribute\ScopedAttributeInterface::SCOPE_STORE,
'group' => 'Cutoff',
]
);
}
}
The addAttribute method here is run for each day of the week, thus creating monday_cutoff_at to sunday_cutoff_at product attributes. If, at this point, we were to run the Magento's setup:upgrade command, our UpgradeData script would get executed and schema_version and data_version numbers from within the setup_module table would get bumped to the 1.0.1 version. Likewise, going into the Magento admin area and editing or creating a new product, would show the following screen. This is where we enable the user to enter the time of the day in an <hour>:<minute> format, such as 15:30. This time, if entered, will later be used by the JS component to render the countdown functionality on the storefront product view page:
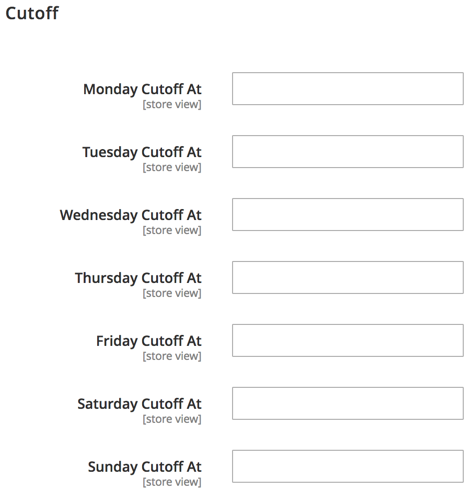
We then create <MODULE_DIR>/Block/Product/View/Cutoff.php, as follows:
namespace Magelicious\Catalog\Block\Product\View;
class Cutoff extends \Magento\Framework\View\Element\Template implements \Magento\Framework\DataObject\IdentityInterface
{
private $product;
protected $coreRegistry;
protected $localeDate;
public function __construct(
\Magento\Framework\View\Element\Template\Context $context,
\Magento\Framework\Registry $coreRegistry,
\Magento\Framework\Stdlib\DateTime\TimezoneInterface $localeDate,
array $data = []
) {
$this->coreRegistry = $coreRegistry;
$this->localeDate = $localeDate;
parent::__construct($context, $data);
}
public function getProduct() { /* ... */ }
public function getCutoffAt() { /* ... */ }
public function getIdentities() { /* ... */ }
}
We will use this class when we reach our layout update.
The getProduct method is further implemented, as follows:
public function getProduct()
{
if (!$this->product) {
$this->product = $this->coreRegistry->registry('product');
}
return $this->product;
}
As mentioned previously, the registry's product key is already set by the parent class up the layout tree, so we exploit that fact to fetch the current product.
The getCutoffAt method is further implemented, as follows:
public function getCutoffAt()
{
$timezone = new \DateTimeZone($this->localeDate->getConfigTimezone());
$now = new \DateTime('now', $timezone);
$day = strtolower($now->format('l'));
$cutoffAt = $this->getProduct()->getData($day . '_cutoff_at');
if ($cutoffAt) {
$timeForDay = \DateTime::createFromFormat(
'Y-m-d H:i',
$now->format('Y-m-d') . ' ' . $cutoffAt,
$timezone
);
if ($timeForDay instanceof \DateTime) {
return $timeForDay->format(DATE_ISO8601);
}
}
return 0;
}
This is the gist of our same day delivery functionality from the PHP side of things. We ensure we properly return the full date and time based on the product's $day . '_cutoff_at' attribute value; this will later be passed onto the JS component.
Finally, the getIdentities method is further implemented, as follows:
public function getIdentities()
{
$identities = $this->getProduct()->getIdentities();
$timezone = new \DateTimeZone($this->localeDate->getConfigTimezone());
$now = new \DateTime('now', $timezone);
$day = strtolower($now->format('l'));
return array_push($identities, $day);
}
The getIdentities method has been implemented in a way to ensure caching of this block is considered in a relation to product identity as well as the day of the week.
We then create the <MODULE_DIR>/view/frontend/requirejs-config.js file, as follows:
var config = {
map: {
'*': {
cutoffAt: 'Magelicious_Catalog/js/cutoff'
}
}
};
This registers the cutoffAt component with Magento, which points to our module's cutoff.js file.
We then create the <MODULE_DIR>/view/frontend/web/js/cutoff.js file, as follows:
define([
'jquery',
'uiComponent',
'ko',
'moment'
], function ($, Component, ko, moment) {
'use strict';
return Component.extend({
defaults: {
template: 'Magelicious_Catalog/cutoff',
expiresAt: null,
timerHide: false,
timerHours: null,
timerMinutes: null,
timerSeconds: null,
},
initialize: function () {
this._super();
this.countdown(this);
return this;
},
initObservable: function () {
this._super()
.observe('timerHide timerHours timerMinutes timerSeconds');
return this;
},
countdown: function (self) { /* ... */ }
});
}
);
Our JS component template value points to <MODULE_DIR>/view/frontend/web/template/cutoff.html, which we will soon address. expiresAt is the only real option that is expected to be passed on when the component is initialized. The observable timer* options will be used internally to control the functionality of our component.
The countdown function is further implemented, as follows:
countdown: function (self) {
var today = moment(new Date());
setInterval(function () {
self.expiresAt = moment(self.expiresAt).subtract(1, 'seconds');
var milliseconds = moment(self.expiresAt, 'DD/MM/YYYY HH:mm:ss').diff(moment(today, 'DD/MM/YYYY HH:mm:ss'));
var duration = moment.duration(milliseconds);
self.timerHours(duration.hours() >= 0 ? duration.hours() : 0);
self.timerMinutes(duration.minutes() >= 0 ? duration.minutes() : 0);
self.timerSeconds(duration.seconds() >= 0 ? duration.seconds() : 0);
if (self.timerHours() == 0
&& self.timerMinutes() == 0
&& self.timerSeconds() == 0
) {
self.timerHide(true);
}
}, 1000);
}
This here is the gist of our same day delivery functionality. Using the core JS setInterval method, we set up a simple per-second counter. With the few lines of code wrapped within setInterval, we control our observable timer* options bound to our cutoff.html template. This, in turn, results in the visual countdown effect.
We then create the <MODULE_DIR>/view/frontend/web/template/cutoff.html file, as follows:
<span class="cutoff-component" data-bind="ifnot: timerHide">
<span translate="'You have'"></span>
<span class="timer">
<span class="timer-part timer-part-hours">
<span class="numeric" data-bind="text: timerHours"></span>
<span class="label" data-bind="i18n: 'hours'"></span>
</span>
<span class="timer-part timer-part-minutes">
<span class="numeric" data-bind="text: timerMinutes"></span>
<span class="label" data-bind="i18n: 'minutes'"></span>
</span>
<span class="timer-part timer-part-seconds">
<span class="numeric" data-bind="text: timerSeconds"></span>
<span class="label" data-bind="i18n: 'seconds'"></span>
</span>
</span>
<span translate="'to catch our same day delivery offer.'"></span>
</span>
This is the template file behind our JS component. We see all those timer* options being bounded to proper span elements. Wrapping every timer* option in its own span allows for potential flexibility around styling later on.
We then create the <MODULE_DIR>/view/frontend/templates/product/view/cutoff.phtml file, as follows:
<?php /* @var \Magelicious\Catalog\Block\Product\View\Cutoff $block */ ?>
<?php $jsonHelper = $this->helper('Magento\Framework\Json\Helper\Data'); ?>
<div class="cutoff" data-bind="scope:'cutoff-scope'">
<!-- ko template: getTemplate() --><!-- /ko -->
</div>
<script type="text/x-magento-init">
{
".cutoff": {
"Magento_Ui/js/core/app": {
"components": {
"cutoff-scope": {
"component": "cutoffAt",
"expiresAt": <?= /* @escapeNotVerified */ $jsonHelper->jsonEncode($block->getCutoffAt()) ?>
}
}
}
}
}
</script>
This is the template file that initializes our JS component. With this file in place, we can finally glue things together by amending the body element of the <MODULE_DIR>/view/frontend/layout/catalog_product_view.xml file, as follows:
<referenceBlock name="product.info.extrahint">
<block name="cutoff"
class="Magelicious\Catalog\Block\Product\View\Cutoff"
template="Magelicious_Catalog::product/view/cutoff.phtml">
</block>
</referenceBlock>
The final product view page result should look like this:
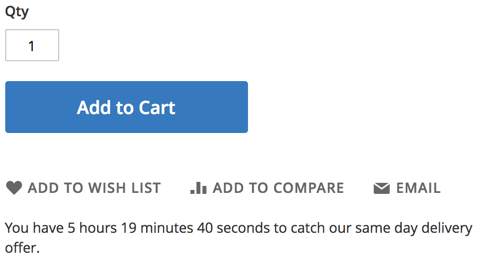
Once the timer reaches 0 hours 0 minutes 0 seconds, it should disappear.
We have been asked to add a functionality that flags every new product shown on the storefront category view and product view pages with a [NEW] prefix in front of its name. New implies anything within the 5 days of the product's created_at value.
Luckily for us, we can easily control a product's name via an after plugin on a product's getName method. All it takes is to define an afterGetName plugin with a category view and product view pages constraint, further filtered by a created_at constraint.
To register the plugin, we start by creating the <MODULE_DIR>/etc/frontend/di.xml file with content, as follows:
<config>
<type name="Magento\Catalog\Api\Data\ProductInterface">
<plugin name="newProductFlag" type="Magelicious\Catalog\Plugin\NewProductFlag"/>
</type>
</config>
We then create the <MODULE_DIR>/Plugin/NewProductFlag.php file with content, as follows:
namespace Magelicious\Catalog\Plugin;
class NewProductFlag
{
protected $request;
protected $localeDate;
public function __construct(
\Magento\Framework\App\RequestInterface $request,
\Magento\Framework\Stdlib\DateTime\TimezoneInterface $localeDate
)
{
$this->request = $request;
$this->localeDate = $localeDate;
}
public function afterGetName(\Magento\Catalog\Api\Data\ProductInterface $subject, $result)
{
$pages = ['catalog_product_view', 'catalog_category_view'];
if (in_array($this->request->getFullActionName(), $pages)) {
$timezone = new \DateTimeZone($this->localeDate->getConfigTimezone());
$now = new \DateTime('now', $timezone);
$createdAt = \DateTime::createFromFormat('Y-m-d H:i:s', $subject->getCreatedAt(), $timezone);
if ($now->diff($createdAt)->days < 5) {
return __('[NEW] ') . $result;
}
}
return $result;
}
}
The afterGetName is our after plugin targeting the product's getName method. Using the request's getFullActionName method, we make sure our plugin is constrained to only catalog_product_view and catalog_category_view pages, or else the original product name is returned. The use of the proper timezone and diff method assures that we further filter down to only those products that we consider new. Clearing the cache at this point should allow our functionality to kick in.
The final result should look like this:
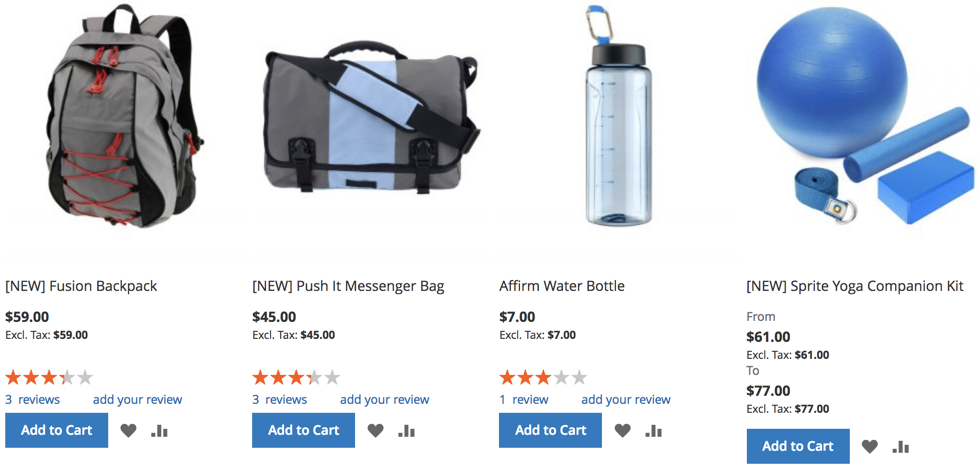
In this chapter, we have built three distinctive functionalities, all of which relate to the catalog part of Magento. Though very lightweight, they stand to show how easily Magento can be extended with new features without really overriding any of the core files. Using plugins and JS components are merely some of the approaches we might take. Quite often, we will find that a single requirement might be delivered with more than one approach. The main guiding rule for our code should always be: use the least intrusive. Catalog functionality plays a major role in the customer conversion process, so our priority should always be failsafe when possible.
Moving forward, we are going to take a look at some of the things we can do to customize the checkout.
While the default Magento checkout provides everything a shop needs to complete a transaction successfully, there are details specific to the individual businesses that often need to be addressed. A great deal of these details often relate to checkout customizations that allow for the capturing of additional information or engaging customers in agreements and subscription activities.
Moving forward, we are going to take a look at the following:
You will need to have basic knowledge of PHP, OOP, JavaScript, and XML. You will also need Apache, MySQL, and AMPPS installed on your system to execute the codes.
The code files of this chapter can be found on GitHub:
https://github.com/PacktPublishing/Magento-2-Quick-Start-Guide.
Check out the following video to see the Code in Action:
Unlike the mostly static CMS, category, and product pages, the checkout page has a more dynamic nature. It is an application on its own, primarily constructed out of JS components, which further utilize Magento's API endpoints to move us through the checkout steps. Magento's Magento\Checkout\Model\CompositeConfigProvider type allows us to push the necessary server-side information easily to the uiComponent of the storefronts.
A quick lookup for the name="configProviders" string across the content of di.xml in the <MAGENTO_DIR> directory reveals dozen of definitions. A closer look at the <MAGENTO_DIR>/module-tax/etc/frontend/di.xml reveals the following:
<type name="Magento\Checkout\Model\CompositeConfigProvider">
<arguments>
<argument name="configProviders" xsi:type="array">
<item name="tax_config_provider" xsi:type="object">Magento\Tax\Model\TaxConfigProvider</item>
</argument>
</arguments>
</type>
We are essentially injecting new items under the configProviders argument of the Magento\Checkout\Model\CompositeConfigProvider type. The implementation of a custom config provider, such as the Magento\Tax\Model\TaxConfigProvider, must implement the Magento\Checkout\Model\ConfigProviderInterface . The underlying getConfig method returns an array of key-value mappings, such as:
return [
'isDisplayShippingPriceExclTax' => $this->isDisplayShippingPriceExclTax(),
'isDisplayShippingBothPrices' => $this->isDisplayShippingBothPrices(),
'reviewShippingDisplayMode' => $this->getDisplayShippingMode(),
/* ... */
];
These, in turn, become available to the uiComponent, as observed in <MAGENTO_DIR>/module-tax/view/frontend/web/js/view/checkout/shipping_method/price.js:
isDisplayShippingPriceExclTax: window.checkoutConfig.isDisplayShippingPriceExclTax,
isDisplayShippingBothPrices: window.checkoutConfig.isDisplayShippingBothPrices,
We can see the values returned by the getConfig method now available under the JavaScript window.checkoutConfig object. This is a simple mechanism by which we can push our server-side data to our storefront when a page loads.
Now that we understand the mechanism behind the window.checkoutConfig object, let's put it to use by creating a small module that adds order notes functionality to the checkout. Our work is to be done as part of the Magelicious_OrderNotes module, with the final visual outcome, as follows:
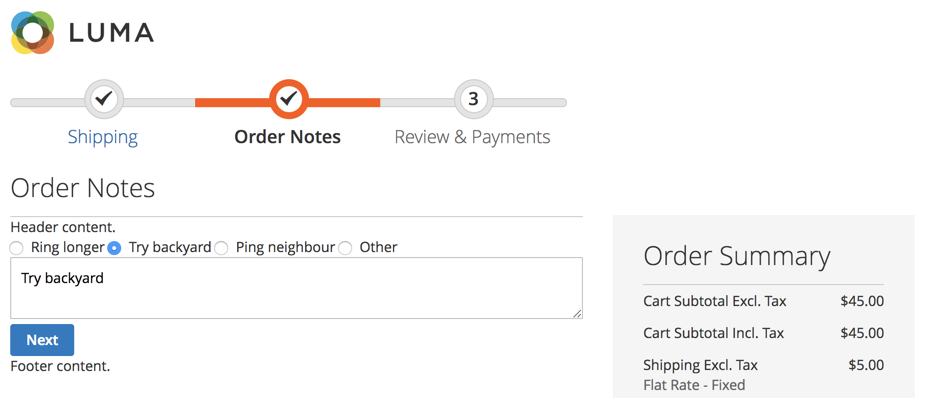
The idea behind the module is to provide a customer with an option of putting a note against their order. On top of that, we also provide a standard range of possible notes to choose from.
Assuming we have defined registration.php, composer.json, and etc/module.xml as basic module files, we can deal with the more specific details of our Magelicious_OrderNotes module.
We start by defining the <MODULE_DIR>/Setup/InstallSchema.php with content, as follows:
namespace Magelicious\OrderNotes\Setup;
class InstallSchema implements \Magento\Framework\Setup\InstallSchemaInterface
{
public function install(
\Magento\Framework\Setup\SchemaSetupInterface $setup,
\Magento\Framework\Setup\ModuleContextInterface $context
) {
$connection = $setup->getConnection();
$connection->addColumn(
$setup->getTable('quote'),
'order_notes',
[
'type' => \Magento\Framework\DB\Ddl\Table::TYPE_TEXT,
'nullable' => true,
'comment' => 'Order Notes'
]
);
$connection->addColumn(
$setup->getTable('sales_order'),
'order_notes',
[
'type' => \Magento\Framework\DB\Ddl\Table::TYPE_TEXT,
'nullable' => true,
'comment' => 'Order Notes'
]
);
}
}
Our InstallSchema script creates the necessary order_notes column in both the quote and sales_order tables. This is where we will store the value of the customer's checkout note, if there is any.
We then define the <MODULE_DIR>/etc/frontend/routes.xml with content, as follows:
<config>
<router id="standard">
<route id="ordernotes" frontName="ordernotes">
<module name="Magelicious_OrderNotes"/>
</route>
</router>
</config>
The route definition here ensures that Magento will recognize HTTP requests starting with ordernotes, and look for controller actions within our module.
We then define the <MODULE_DIR>/Controller/Index.php with content, as follows:
namespace Magelicious\OrderNotes\Controller;
abstract class Index extends \Magento\Framework\App\Action\Action
{
}
This is merely an empty base class, for our soon-to-follow controller action.
We then define the <MODULE_DIR>/Controller/Index/Process.php with content, as follows:
namespace Magelicious\OrderNotes\Controller\Index;
class Process extends \Magelicious\OrderNotes\Controller\Index
{
protected $checkoutSession;
protected $logger;
public function __construct(
\Magento\Framework\App\Action\Context $context,
\Magento\Checkout\Model\Session $checkoutSession,
\Psr\Log\LoggerInterface $logger
)
{
$this->checkoutSession = $checkoutSession;
$this->logger = $logger;
parent::__construct($context);
}
public function execute()
{
// implement...
}
}
This controller action should catch any HTTP ordernotes/index/process requests. We then extend the execute method, as follows:
public function execute()
{
$result = [];
try {
if ($notes = $this->getRequest()->getParam('order_notes', null)) {
$quote = $this->checkoutSession->getQuote();
$quote->setOrderNotes($notes);
$quote->save();
$result[$quote->getId()];
}
} catch (\Exception $e) {
$this->logger->critical($e);
$result = [
'error' => __('Something went wrong.'),
'errorcode' => $e->getCode(),
];
}
$resultJson = $this->resultFactory->create(\Magento\Framework\Controller\ResultFactory::TYPE_JSON);
$resultJson->setData($result);
return $resultJson;
}
This is where we are storing the order notes on our quote object. Later on, we will pull this onto our sales order object. We further define the <MODULE_DIR>/etc/frontend/di.xml with content, as follows:
<config>
<type name="Magento\Checkout\Model\CompositeConfigProvider">
<arguments>
<argument name="configProviders" xsi:type="array">
<item name="order_notes_config_provider" xsi:type="object">
Magelicious\OrderNotes\Model\ConfigProvider
</item>
</argument>
</arguments>
</type>
</config>
We are registering our configuration provider here. The order_notes_config_provider must be unique. We then define the <MODULE_DIR>/Model/ConfigProvider.php with content, as follows:
namespace Magelicious\OrderNotes\Model;
class ConfigProvider implements \Magento\Checkout\Model\ConfigProviderInterface
{
public function getConfig()
{
return [
'orderNotes' => [
'title' => __('Order Notes'),
'header' => __('Header content.'),
'footer' => __('Footer content.'),
'options' => [
['code' => 'ring', 'value' => __('Ring longer')],
['code' => 'backyard', 'value' => __('Try backyard')],
['code' => 'neighbour', 'value' => __('Ping neighbour')],
['code' => 'other', 'value' => __('Other')],
]
]
];
}
}
This is the implementation of our order_notes_config_provider configuration provider. We can pretty much return any array structure we wish. The top-level orderNotes will be accessible later via JS components as window.checkoutConfig.orderNotes. We further define the <MODULE_DIR>/view/frontend/layout/checkout_index_index.xml with content, as follows:
<page>
<body>
<referenceBlock name="checkout.root">
<arguments>
<argument name="jsLayout" xsi:type="array">
<item name="components" xsi:type="array">
<item name="checkout" xsi:type="array">
<item name="children" xsi:type="array">
<item name="steps" xsi:type="array">
<item name="children" xsi:type="array">
<item name="order-notes" xsi:type="array">
<item name="component" xsi:type="string">
Magelicious_OrderNotes/js/view/order-notes
</item>
<item name="sortOrder" xsi:type="string">2</item>
<!-- closing tags -->
There is quite a nesting structure here. Our order notes component is being injected under the children component of the checkout's steps component.
We then define the <MODULE_DIR>/view/frontend/web/js/view/order-notes.js with content, as follows:
define([
'ko',
'uiComponent',
'underscore',
'Magento_Checkout/js/model/step-navigator',
'jquery',
'mage/translate',
'mage/url'
], function (ko, Component, _, stepNavigator, $, $t, url) {
'use strict';
let checkoutConfigOrderNotes = window.checkoutConfig.orderNotes;
return Component.extend({
defaults: {
template: 'Magelicious_OrderNotes/order/notes'
},
isVisible: ko.observable(true),
initialize: function () {
// TODO
},
navigate: function () {
// TODO
},
navigateToNextStep: function () {
// TODO
}
});
});
This is our uiComponent, powered by Knockout. The template configuration points to the physical location of the .html file that is used as a component's template. The navigate and navigateToNextStep are responsible for navigation between the checkout steps during checkout. Let's extend the initialize function further, as follows:
initialize: function () {
this._super();
stepNavigator.registerStep(
'order_notes',
null,
$t('Order Notes'),
this.isVisible,
_.bind(this.navigate, this),
15
);
return this;
}
We use the initialize method to register our order_notes step with the stepNavigator.
Let's extend the navigateToNextStep function further, as follows:
navigateToNextStep: function () {
if ($(arguments[0]).is('form')) {
$.ajax({
type: 'POST',
url: url.build('ordernotes/index/process'),
data: $(arguments[0]).serialize(),
showLoader: true,
complete: function (response) {
stepNavigator.next();
}
});
}
}
We use the navigateToNextStep method to persist our data. The AJAX POST ordernotes/index/process action should grab the entire form and pass its data along.
Finally, let's add the helper methods for our .html template, as follows:
getTitle: function () {
return checkoutConfigOrderNotes.title;
},
getHeader: function () {
return checkoutConfigOrderNotes.header;
},
getFooter: function () {
return checkoutConfigOrderNotes.footer;
},
getNotesOptions: function () {
return checkoutConfigOrderNotes.options;
},
getCheckoutConfigOrderNotesTime: function () {
return checkoutConfigOrderNotes.time;
},
setOrderNotes: function (valObj, event) {
if (valObj.code == 'other') {
$('[name="order_notes"]').val('');
} else {
$('[name="order_notes"]').val(valObj.value);
}
return true;
},
These are just some of the helper methods we will bind to within our .html template. They merely pull the data out from the window.checkoutConfig.orderNotes object.
We then define the <MODULE_DIR>/view/frontend/web/template/order/notes.html with content, as follows:
<li id="order_notes" data-bind="fadeVisible: isVisible">
<div data-bind="text: getTitle()" data-role="title"></div>
<div id="step-content" data-role="content">
<div data-bind="text: getHeader()" data-role="header"></div>
<!-- form -->
<div data-bind="text: getFooter()" data-role="footer"></div>
</div>
</li>
This is our component template, which gives it a visual structure. We expand it further by replacing the <!-- form --> with the following:
<form data-bind="submit: navigateToNextStep" novalidate="novalidate">
<div data-bind="foreach: getNotesOptions()" class="field choice">
<input type="radio" name="order[notes]" class="radio"
data-bind="value: code, click: $parent.setOrderNotes"/>
<label data-bind="attr: {'for': code}" class="label">
<span data-bind="text: value"></span>
</label>
</div>
<textarea name="order_notes"></textarea>
<div class="actions-toolbar">
<div class="primary">
<button data-role="opc-continue" type="submit" class="button action continue primary">
<span><!-- ko i18n: 'Next'--><!-- /ko --></span>
</button>
</div>
</div>
</form>
The form itself is relatively simple, though it requires some knowledge of Knockout. Understanding the data binding is quite important. It allows us to bind not just text and the HTML values of HTML elements, but other attributes as well, such as the click.
We then define the <MODULE_DIR>/etc/webapi_rest/events.xml with content, as follows:
<config>
<event name="sales_model_service_quote_submit_before">
<observer name="orderNotesToOrder"
instance="Magelicious\OrderNotes\Observer\SaveOrderNotesToOrder"
shared="false"/>
</event>
</config>
The sales_model_service_quote_submit_before event is chosen because it allows us to gain access to both quote and order objects easily at the right time in the order creation process.
We then define the <MODULE_DIR>/Observer/SaveOrderNotesToOrder.php with content, as follows:
namespace Magelicious\OrderNotes\Observer;
class SaveOrderNotesToOrder implements \Magento\Framework\Event\ObserverInterface
{
public function execute(\Magento\Framework\Event\Observer $observer)
{
$event = $observer->getEvent();
if ($notes = $event->getQuote()->getOrderNotes()) {
$event->getOrder()
->setOrderNotes($notes)
->addStatusHistoryComment('Customer note: ' . $notes);
}
return $this;
}
}
Here, we are grabbing the instance of an order object and setting the order notes to the value fetched from the order notes value of a previously stored quote. This makes the customer note appear under the Comments History tab of the Magento admin order View screen, as follows:
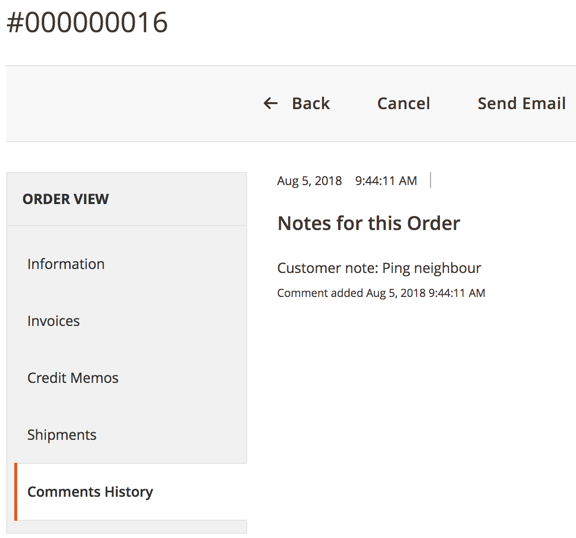
With this, we have finalized our little module. Even though the module's functionality is quite simple, the steps for getting it up and running were somewhat involved.
In this chapter, we have built a small, but functional, order notes module. This allowed us to familiarize ourselves with an important aspect of customizing the checkout experience. The gist of this lies in understanding the checkout_index_index layout handle, the JavaScript window.checkoutConfig object, and the uiComponent.
Failure to deliver consistent and stable checkout experiences is bound to result in a loss of conversions. Given the number and complexity of the components involved, it is best to keep the number of checkout customizations to a minimum.
Moving forward, we are going to take a look at some of the things we can do regarding the customization of customer interactions.
Along with the catalog and checkout, customer-related functionality is central to Magento. The customer's My Account area allows control over addresses, orders, billing agreements, product wishlists, product reviews, newsletter subscriptions, and more. Customizing customer functionality often includes changes to the Sign In and Create an Account processes, as well as modifying existing, or adding new functionality under the My Account area.
Depending on the dynamics and intricacy of our functionality, JS components are often friendlier solutions than server-side PHTML templates. They allow us to engage the customer without necessarily reloading entire pages, thus improving the overall customer experience. As with any client to server-side communication, the question of passing and updating the data remains to be addressed. This is where we turn our focus to Magento's section mechanism.
Moving forward we are going to take a look at the following:
You will need to have basic knowledge of PHP, OOP, JavaScript, and XML. You will also need Apache, MySQL, and AMPPS installed on your system to execute the codes.
The code files of this chapter can be found on GitHub:
https://github.com/PacktPublishing/Magento-2-Quick-Start-Guide.
Check out the following video to see the Code in Action:
Our previous chapter touched upon config providers and the window.checkoutConfig object; a mechanism by which we can push our server-side data to our storefront when a page loads. The section mechanism allows us to push data to a browser page upon any named HTTP POST request.
Let's take a quick look at the <MAGENTO_DIR>/module-review/etc/frontend/sections.xml file:
<action name="review/product/post">
<section name="review"/>
</action>
The definition provided here is to be interpreted as: "any storefront HTTP POST review/product/post request is to trigger a review section load," where review section load means Magento triggering an additional AJAX request following the completion of an observed HTTP POST. The result of this section load action, in this case, is the refresh of section data, retrievable via customerData.get('review') , as we will soon see.
Now let's take a look at the <MAGENTO_DIR>/module-review/etc/frontend/di.xml file:
<type name="Magento\Customer\CustomerData\SectionPoolInterface">
<arguments>
<argument name="sectionSourceMap" xsi:type="array">
<item name="review" xsi:type="string">Magento\Review\CustomerData\Review</item>
</argument>
</arguments>
</type>
We are essentially injecting new items under the sectionSourceMap argument of the Magento\Customer\CustomerData\SectionPoolInterface type. The implementation of a custom section, such as the Magento\Review\CustomerData\Review, must implement the Magento\Customer\CustomerData\SectionSourceInterface . The underlying getSectionData method returns an array of key-value mappings, such as:
return [
'nickname' => '',
'title' => '',
'detail' => ''
]
These, in turn, become available to the uiComponent, as observed in the partial <MAGENTO_DIR>/module-review/view/frontend/web/js/view/review.js file:
define([
'uiComponent',
'Magento_Customer/js/customer-data',
'Magento_Customer/js/view/customer'
], function (Component, customerData) {
'use strict';
return Component.extend({
initialize: function () {
this.review = customerData.get('review') ...
},
nickname: function () {
return this.review().nickname ...
}
});
});
The get method of the customerData object can be used to fetch the sectionSourceMap data, such as customerData.get('review'). This data is refreshed every time an HTTP POST is made to the review/product/post route. This is because following any HTTP POST review/product/post, Magento will trigger an HTTP GET customer/section/load/?sections=review&update_section_id=true&_=1533836467415, which in turn updates customerData accordingly.
Now that we understand the mechanism behind the customerData object and the section load, let's put it to use by creating a small module that adds contact preferences functionality under the customer's My Account area, as well as under the checkout. Our work is to be done as part of the Magelicious_ContactPreferences module, with the final visual outcome as follows:
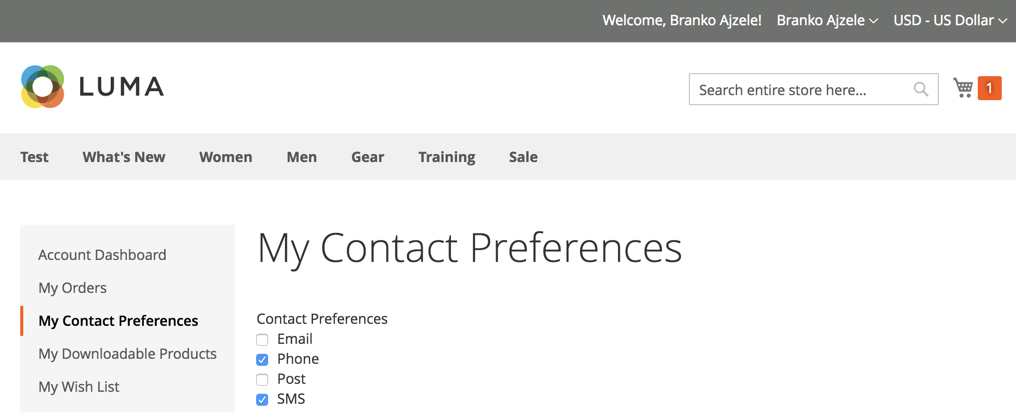
By contrast, the customer's checkout area would show contact preferences, as follows:
The idea behind the module is to provide a customer with an option of choosing preferred contact preferences, so that a merchant may follow up with the delivery process accordingly.
Assuming we have defined registration.php, composer.json, and etc/module.xml as basic module files, we can deal with the more specific details of our Magelicious_ContactPreferences module.
We start by defining the <MODULE_DIR>/Setup/InstallData.php, as follows:
$customerSetup = $this->customerSetupFactory->create(['setup' => $setup]);
$customerSetup->addAttribute(
\Magento\Customer\Model\Customer::ENTITY,
'contact_preferences',
[
'type' => 'varchar',
'label' => 'Contact Preferences',
'input' => 'multiselect',
'source' => \Magelicious\ContactPreferences\Model\Entity\Attribute\Source\Contact\Preferences::class,
'required' => 0,
'sort_order' => 99,
'position' => 99,
'system' => 0,
'visible' => 1,
'global' => \Magento\Catalog\Model\ResourceModel\Eav\Attribute::SCOPE_GLOBAL,
]
);
$contactPreferencesAttr = $customerSetup
->getEavConfig()
->getAttribute(
\Magento\Customer\Model\Customer::ENTITY,
'contact_preferences'
);
$contactPreferencesAttr->setData('used_in_forms', ['adminhtml_customer']);
$contactPreferencesAttr->save();
We are instructing Magento to create a multiselect type of attribute. The attribute becomes visible under the Magento admin area, with a customer editing screen as follows:

We then define the <MODULE_DIR>/Model/Entity/Attribute/Source/Contact/Preferences.php, as follows:
namespace Magelicious\ContactPreferences\Model\Entity\Attribute\Source\Contact;
class Preferences extends \Magento\Eav\Model\Entity\Attribute\Source\AbstractSource
{
const VALUE_EMAIL = 'email';
const VALUE_PHONE = 'phone';
const VALUE_POST = 'post';
const VALUE_SMS = 'sms';
public function getAllOptions()
{
return [
['label' => __('Email'), 'value' => self::VALUE_EMAIL],
['label' => __('Phone'), 'value' => self::VALUE_PHONE],
['label' => __('Post'), 'value' => self::VALUE_POST],
['label' => __('SMS'), 'value' => self::VALUE_SMS],
];
}
}
These are the contact preference options we want to provide as our attribute source. We will use this class not just for installation, but later on as well.
We then define the <MODULE_DIR>/etc/frontend/routes.xml, as follows:
<config>
<router id="standard">
<route id="customer" frontName="customer">
<module name="Magelicious_ContactPreferences" before="Magento_Customer"/>
</route>
</router>
</config>
Unlike our route definitions in previous chapters, here we are using an already existing route name customer. The attribute before it allows us to insert our module before the Magento_Customer module, allowing us to respond to the same customer/* routes. We should be very careful with this approach, not to detach some of the existing controller actions. In our case, we are only doing this so that we might use the customer/contact/preferences URL later on.
We then define the <MODULE_DIR>/Controller/Contact/Preferences.php, as follows:
namespace Magelicious\ContactPreferences\Controller\Contact;
class Preferences extends \Magento\Customer\Controller\AbstractAccount
{
public function execute()
{
if ($this->getRequest()->isPost()) {
$resultJson = $this->resultFactory->create(\Magento\Framework\Controller\ResultFactory::TYPE_JSON);
if ($this->getRequest()->getParam('load')) {
// Merely for triggering "contact_preferences" section
} else {
// SAVE PREFERENCES
}
return $resultJson;
} else {
$resultPage = $this->resultFactory->create(\Magento\Framework\Controller\ResultFactory::TYPE_PAGE);
$resultPage->getConfig()->getTitle()->set(__('My Contact Preferences'));
return $resultPage;
}
}
}
This is the only controller action we will have. We will use the same action for handling three different intents. This is not an ideal example of how one should write code in this scenario, but it is a compact one. The first intent we will handle is the section load trigger, the second is the actual preference save, and the third is the page load. These will become clear as we move forward.
We then replace the SAVE PREFERENCES comment with the following:
// \Magento\Framework\App\Action\Context $context
// \Magento\Customer\Model\Session $customerSession
// \Magento\Customer\Api\CustomerRepositoryInterface $customerRepository
// \Psr\Log\LoggerInterface $logger
try {
$preferences = implode(',',
array_keys(
array_filter($this->getRequest()->getParams(), function ($_checked, $_preference) {
return filter_var($_checked, FILTER_VALIDATE_BOOLEAN);
}, ARRAY_FILTER_USE_BOTH)
)
);
$customer = $this->customerRepository->getById($this->customerSession->getCustomerId());
$customer->setCustomAttribute('contact_preferences', $preferences);
$this->customerRepository->save($customer);
$this->messageManager->addSuccessMessage(__('Successfully saved contact preferences.'));
} catch (\Exception $e) {
$this->logger->critical($e);
$this->messageManager->addErrorMessage(__('Error saving contact preferences.'));
}
Here we are handling the actual saving of the chosen contact preferences. The request parameters are expected to be in the <preference_name>=<true|false> format. We use the implode to turn the incoming request and pass it onto the repository's setCustomAttribute method. This is because, by default, Magento stores the multiselect attribute as a comma-separated string in the database. The addSuccessMessage and addErrorMessage calls are interesting here. One might expect that we would return these messages as part of a JSON response. But, we don't really need a JSON response body here. This is because Magento has the messages section defined under <MAGENTO_DIR>/module-theme/etc/frontend/sections.xml as <action name="*">. What this means is that messages get refreshed upon every section load and, since our controller action is mapped in our own sections.xml, the load of our section will also load messages.
We then define the <MODULE_DIR>/view/frontend/layout/customer_account.xml, as follows:
<page>
<body>
<referenceBlock name="customer_account_navigation">
<block class="Magento\Customer\Block\Account\SortLinkInterface" name="customer-account-navigation-contact-preferences-link">
<arguments>
<argument name="path" xsi:type="string">customer/contact/preferences</argument>
<argument name="label" xsi:type="string" translate="true">My Contact Preferences</argument>
<argument name="sortOrder" xsi:type="number">230</argument>
</arguments>
</block>
</referenceBlock>
</body>
</page>
The definitions here inject a new menu item under the customer's My Account screen. The customer_account_navigation block, originally defined under <MAGENTO_DIR>/module-customer/view/frontend/layout/customer_account.xml, is in charge of rendering the sidebar menu. By injecting the new block of Magento\Customer\Block\Account\SortLinkInterface type, we can easily add new menu items.
We then define the <MODULE_DIR>/view/frontend/layout/customer_contact_preferences.xml, as follows:
<page>
<update handle="customer_account"/>
<body>
<referenceContainer name="content">
<block name="contact_preferences"
template="Magelicious_ContactPreferences::customer/contact/preferences.phtml" cacheable="false"/>
</referenceContainer>
</body>
</page>
This is the block that will get loaded into the content area of a page, once we click on our newly added My Contact Preferences link. Since the only role of the contact_preferences block will be to load the JS component, we omit the class definition that we would normally have on custom blocks.
We then define the <MODULE_DIR>/view/frontend/templates/customer/contact/preferences.phtml, as follows:
<div class="contact-preferences" data-bind="scope:'contact-preferences-scope'">
<!-- ko template: getTemplate() --><!-- /ko -->
</div>
<script type="text/x-magento-init">
{
".contact-preferences": {
"Magento_Ui/js/core/app": {
"components": {
"contact-preferences-scope": {
"component": "contactPreferences"
}
}
}
}
}
</script>
The only purpose of the template here is to load the JS contactPreferences component. We can see that no data is passed from the server-side .phtml template to the JS component. We will use the section and customerData mechanisms later on for that.
We then define the <MODULE_DIR>/view/frontend/requirejs-config.js, as follows:
var config = {
map: {
'*': {
contactPreferences: 'Magelicious_ContactPreferences/js/view/contact-preferences'
}
}
};
Here we map the component name, contactPreferences, to its physical location in our module directory.
We then define the <MODULE_DIR>/view/frontend/web/js/view/contact-preferences.js, as follows:
define([
'uiComponent',
'jquery',
'mage/url',
'Magento_Customer/js/customer-data'
], function (Component, $, url, customerData) {
'use strict';
let contactPreferences = customerData.get('contact_preferences');
return Component.extend({
defaults: {
template: 'Magelicious_ContactPreferences/contact-preferences'
},
initialize: function () { /* ... */ },
isCustomerLoggedIn: function () {
return contactPreferences().isCustomerLoggedIn;
},
getSelectOptions: function () {
return contactPreferences().selectOptions;
},
saveContactPreferences: function () { /* ... */ }
});
});
This is our JS component, the core of our client-side functionality. We inject the Magento_Customer/js/customer-data component as a customerData object. This gives us access to data we are pushing from the server side via the getSectionData method of the Magelicious\ContactPreferences\CustomerData\Preferences class. The string value contact_preferences passed to the get method of the customerData object must match the item name under the sectionSourceMap of our di.xml definition.
Let's extend the initialize function further, as follows:
initialize: function () {
this._super();
$.ajax({
type: 'POST',
url: url.build('customer/contact/preferences'),
data: {'load': true},
showLoader: true
});
}
The addition of an AJAX request call within the component's initialize method is more of a trick to trigger the contact_preferences section load in our case. We are doing it simply because sections do not load on HTTP GET requests, as that might load the same customer/contact/preferences page. Rather, they load on HTTP POST events. This way we ensure that the contact_preferences section will load when our component is initialized, thus providing it with the necessary data. We are far from saying that this is a recommended approach for general JS component development, though.
Let's extend the saveContactPreferences function further, as follows:
saveContactPreferences: function () {
let preferences = {};
$('.contact_preference').children(':checkbox').each(function () {
preferences[$(this).attr('name')] = $(this).attr('checked') ? true : false;
});
$.ajax({
type: 'POST',
url: url.build('customer/contact/preferences'),
data: preferences,
showLoader: true,
complete: function (response) {
// some actions...
}
});
return true;
}
The saveContactPreferences method will be triggered every time a customer clicks on the contact preference on the storefront, whether it is an act of checking or unchecking individual contact preferences.
We then define the <MODULE_DIR>/view/frontend/web/template/contact-preferences.html, as follows:
<div data-bind="if: isCustomerLoggedIn()">
<div data-role="title" data-bind="i18n: 'Contact Preferences'"></div>
<div data-role="content">
<div class="contact_preference" repeat="foreach: getSelectOptions(), item: '$option'">
<input type="checkbox"
click="saveContactPreferences"
ko-checked="$option().checked"
attr="name: $option().value"/>
<label text="$option().label" attr="for: $option().value"/>
</div>
</div>
</div>
The HTML defined here visually sets our component. A basic knowledge of Knockout JS is required in order to utilize the repeat directive, fed with the array of data coming from the getSelectOptions method, which by now we know originates from the server side.
We then define the <MODULE_DIR>/etc/frontend/sections.xml, as follows:
<config>
<action name="customer/contact/preferences">
<section name="contact_preferences"/>
</action>
</config>
With this, we make the necessary mapping between HTTP POST customer/contact/preferences requests and the contact_preferences section we expect to load.
We then define the <MODULE_DIR>/etc/frontend/di.xml, as follows:
<config>
<type name="Magento\Customer\CustomerData\SectionPoolInterface">
<arguments>
<argument name="sectionSourceMap" xsi:type="array">
<item name="contact_preferences" xsi:type="string">Magelicious\ContactPreferences\CustomerData\Preferences</item>
</argument>
</arguments>
</type>
</config>
Here we inject our contact_preferences section, instructing Magento where to read its data from. With this in place, any HTTP POST customer/contact/preferences request is expected to trigger a follow-up AJAX POST customer/section/load/?sections=contact_preferences%2Cmessages&update_section_id=true&_=1533887023603 request that, in turn, returns data much like the following:
{
"contact_preferences": {
"selectOptions": [
{
"label": "Email",
"value": "email",
"checked": true
},
{ ... }
],
"isCustomerLoggedIn": true,
"data_id": 1533875246
},
"messages": {
"messages": [
{
"type": "success",
"text": "Successfully saved contact preferences."
}
],
"data_id": 1533875246
}
}
If we were to enable our module at this point, we should be able to see it working under the customer's My Account screen. Though simple, the steps of getting everything linked were somewhat involved. The benefit of this approach, where data is sent via the sections mechanism, is that our component plays nicely with full-page caching. The needed customer-related data is simply fetched by additional AJAX calls, instead of caching it on a per-customer basis, and thus this bypasses the purpose of full-page caching.
With our component now working on the customer's My Account page, let's go ahead and add it to the checkout's Review & Payments step as well.
By tapping into the checkout_index_index layout handle, and nesting our component under the desired children element, we can easily add it to the checkout page. We do so with the <MODULE_DIR>/view/frontend/layout/checkout_index_index.xml file, as follows:
<page>
<body>
<referenceBlock name="checkout.root">
<arguments>
<argument name="jsLayout" xsi:type="array">
<item name="components" xsi:type="array">
<item name="checkout" xsi:type="array">
<item name="children" xsi:type="array">
<item name="steps" xsi:type="array">
<item name="children" xsi:type="array">
<item name="billing-step" xsi:type="array">
<item name="children" xsi:type="array">
<item name="payment" xsi:type="array">
<item name="children" xsi:type="array">
<item name="afterMethods" xsi:type="array">
<item name="children" xsi:type="array">
<item name="contact-preferences" xsi:type="array">
<item name="component" xsi:type="string">Magelicious_ContactPreferences/js/view/contact-preferences</item>
<!-- closing tags -->
The nesting structure of checkout_index_index.xml is quite robust. There are several places where we can actually insert our own component. Most of the time, this might be trial and error. In this case, we opted for the children area of afterMethods. This should position it under the checkout's Review & Payments step, right after the payments method list.
In this chapter, we have built a small module that allowed us to get a greater insight into Magento's customerData and sections mechanisms. We managed to build a single component, that got used both on the customer's My Account page, as well as on the checkout.
With this, we have reached the end of our book. The topics we have covered should be enough to get us going with Magento development, but the sheer size of the platform and the intricate specifics of its individual modules leave plenty more to explore further on. It goes without saying that our journey has merely begun.
If you enjoyed this book, you may be interested in these other books by Packt:

Magento 2 Beginners Guide
Gabriel Guarino
ISBN: 9781785880766

Magento 2 Developer's Guide
Branko Ajzele
ISBN: 9781785886584
Please share your thoughts on this book with others by leaving a review on the site that you bought it from. If you purchased the book from Amazon, please leave us an honest review on this book's Amazon page. This is vital so that other potential readers can see and use your unbiased opinion to make purchasing decisions, we can understand what our customers think about our products, and our authors can see your feedback on the title that they have worked with Packt to create. It will only take a few minutes of your time, but is valuable to other potential customers, our authors, and Packt. Thank you!
Copyright © 2018 Packt Publishing
All rights reserved. No part of this book may be reproduced, stored in a retrieval system, or transmitted in any form or by any means, without the prior written permission of the publisher, except in the case of brief quotations embedded in critical articles or reviews.
Every effort has been made in the preparation of this book to ensure the accuracy of the information presented. However, the information contained in this book is sold without warranty, either express or implied. Neither the author, nor Packt Publishing or its dealers and distributors, will be held liable for any damages caused or alleged to have been caused directly or indirectly by this book.
Packt Publishing has endeavored to provide trademark information about all of the companies and products mentioned in this book by the appropriate use of capitals. However, Packt Publishing cannot guarantee the accuracy of this information.
Commissioning Editor: Amarabha Banerjee
Acquisition Editor: Reshma Raman
Content Development Editor: Kirk Dsouza
Technical Editor: Vaibhav Dwivedi
Copy Editor: Safis Editing
Project Coordinator: Hardik Bhinde
Proofreader: Safis Editing
Indexer: Aishwarya Gangawane
Graphics: Alishon Mendonsa
Production Coordinator: Deepika Naik
First published: September 2018
Production reference: 1180918
Published by Packt Publishing Ltd.
Livery Place
35 Livery Street
Birmingham
B3 2PB, UK.
ISBN 978-1-78934-344-1
Mapt is an online digital library that gives you full access to over 5,000 books and videos, as well as industry leading tools to help you plan your personal development and advance your career. For more information, please visit our website.
Spend less time learning and more time coding with practical eBooks and Videos from over 4,000 industry professionals
Improve your learning with Skill Plans built especially for you
Get a free eBook or video every month
Mapt is fully searchable
Copy and paste, print, and bookmark content
Did you know that Packt offers eBook versions of every book published, with PDF and ePub files available? You can upgrade to the eBook version at www.packt.com and as a print book customer, you are entitled to a discount on the eBook copy. Get in touch with us at customercare@packtpub.com for more details.
At www.packt.com, you can also read a collection of free technical articles, sign up for a range of free newsletters, and receive exclusive discounts and offers on Packt books and eBooks.
Branko Ajzele is a respected and highly accomplished software developer, book author, solution specialist, consultant, and team leader. He currently works for Interactive Web Solutions Ltd (iWeb), where he holds the role of senior developer and is the director of iWeb's Croatia office.
Branko holds several respected IT certifications, including Zend Certified PHP Engineer, Magento Certified Developer, Magento Certified Developer Plus, Magento Certified Solution Specialist, Magento 2 Certified Solution Specialist, Magento 2 Certified Professional Developer, to mention just a few.
He was crowned the e-commerce Developer of the Year by the Digital Entrepreneur Awards in October 2014 for his excellent knowledge and expertise in e-commerce development.
Andrew "Pembo" Pemberton is a Certified Magento Developer with over 20 years' experience building websites. He is based in Stoke-on-Trent, UK and started building websites from the young age of 13. He has a degree in computer science from Staffordshire University.
Andrew is now the development director at iWeb (based in Stafford, UK), which, for over 20 years, has created industry-leading websites and now specializes in large scale Magento solutions and PIM-based projects for a wide range of clients.
Outside of his digital life, Andrew enjoys spending time with his family of pets, traveling with his wife, and being an avid gamer.
If you're interested in becoming an author for Packt, please visit authors.packtpub.com and apply today. We have worked with thousands of developers and tech professionals, just like you, to help them share their insight with the global tech community. You can make a general application, apply for a specific hot topic that we are recruiting an author for, or submit your own idea.
Magento is a popular open source e-commerce platform written in PHP. It is used primarily for building web shops, though it can easily be used for other types of websites as well. With the help of its powerful web API, we can build robust solutions that satisfy modern-day application requirements.
By the end of this book, the reader should be familiar with configuration files, models, collections, blocks, controllers, events, observers, plugins, UI components and other building elements of Magento.
This book is intended for PHP developers getting started with Magento v2.x development. Though compact in terms of page numbers, the book covers a wide range of functionality, allowing the reader to master day-to-day Magento skills in a clear and concise way. No previous Magento knowledge is required.
Chapter 1, Understanding the Magento Architecture, takes a look at some of the key Magento components. We will go through plugins and event observers and learn how they provide a powerful way of extending Magento, either by changing the behavior of existing functions or by running some follow-up code in response to certain events.
Chapter 2, Working with Entities, demonstrates how to differentiate between the three types of Magento models: non-persistable, persistable simple, and persistable EAV. We will take a look at the six different setup scripts and how they allow us a great deal of flexibility for schema and data management.
Chapter 3, Understanding Web API, shows the reader how to differentiate between types of web API users, authentication, and methods it provides. We will also take a look at how easy it is to create our own APIs with just a few lines of XML. We will see how the route definition allows for easy binding between what arrives via HTTP requests and what is executed in code, respecting the access list permissions in the process.
Chapter 4, Building and Distributing Extensions, discusses how to create a simple shipping module. We shall take a look at how easy it is to add specific shipping calculations as part of offline shipping methods. We will then package this module and distribute it via Packagist. This makes it easy for the end consumer to use our module with just a few simple console commands.
Chapter 5, Developing for Admin, walks the reader through building two very different screens in the Magento admin area. One utilizes the listing component, whereas the other utilizes the form component.
Chapter 6, Developing for Storefront, covers the bits and pieces involved in storefront development, which JS components make the most challenging part of. We will understand how to write new components, as well as how to override or bypass existing ones – an essential skill for any Magento developer, be it backend or frontend.
Chapter 7, Customizing Catalog Behavior, demonstrates building three distinctive functionalities, all of which relate to the catalog part of Magento. They demonstrate how easily Magento can be extended with new features without really overriding any of the core files. Using plugins and JS components are just some of the approaches we might take.
Chapter 8, Customizing Checkout Experience, demonstrates writing a small but functional order notes module. This will allow us to familiarize ourselves with an important aspect of customizing the checkout experience, the gist of which lies in understanding the checkout_index_index layout handle, the JavaScript window.checkoutConfig object, and uiComponent.
Chapter 9, Customizing Customer Interactions, walks the reader through building a small module that allows us to get a greater insight into Magento's customer data and sections mechanism. We will learn how to manage and build a single component, which will get used both on the customer's My Account page, as well as at the checkout.
To get the most out of the book, the reader is expected to have:
You can download the example code files for this book from your account at www.packtpub.com. If you purchased this book elsewhere, you can visit www.packtpub.com/support and register to have the files emailed directly to you.
You can download the code files by following these steps:
Once the file is downloaded, please make sure that you unzip or extract the folder using the latest version of:
The code bundle for the book is also hosted on GitHub at https://github.com/PacktPublishing/Magento-2-Quick-Start-Guide. In case there's an update to the code, it will be updated on the existing GitHub repository.
We also have other code bundles from our rich catalog of books and videos available at https://github.com/PacktPublishing. Check them out!
Visit the following link to check out videos of the code being run:
There are a number of text conventions used throughout this book.
CodeInText: Indicates code words in text, database table names, folder names, filenames, file extensions, pathnames, dummy URLs, user input, and Twitter handles. Here is an example: "The default area is the frontend, as defined by the default argument under modulestore/etc/di.xml."
A block of code is set as follows:
const AREA_GLOBAL = 'global';
const AREA_FRONTEND = 'frontend';
const AREA_ADMINHTML = 'adminhtml';
const AREA_DOC = 'doc';
const AREA_CRONTAB = 'crontab';
const AREA_WEBAPI_REST = 'webapi_rest';
const AREA_WEBAPI_SOAP = 'webapi_soap';
When we wish to draw your attention to a particular part of a code block, the relevant lines or items are set in bold:
const AREA_GLOBAL = 'global';
const AREA_FRONTEND = 'frontend';
const AREA_ADMINHTML = 'adminhtml';
const AREA_DOC = 'doc';
const AREA_CRONTAB = 'crontab';
const AREA_WEBAPI_REST = 'webapi_rest';
const AREA_WEBAPI_SOAP = 'webapi_soap';
Any command-line input or output is written as follows:
php bin/magento setup:install \
--db-host="/Applications/MAMP/tmp/mysql/mysql.sock" \
--db-name=magelicious \
Bold: Indicates a new term, an important word, or words that you see onscreen. For example, words in menus or dialog boxes appear in the text like this. Here is an example: "The tab element of the file, which is used to provide a sidebar menu presence under Magento admin Stores | Settings | Configuration, is a nice example."
Feedback from our readers is always welcome.
General feedback: Email feedback@packtpub.com and mention the book title in the subject of your message. If you have questions about any aspect of this book, please email us at questions@packtpub.com.
Errata: Although we have taken every care to ensure the accuracy of our content, mistakes do happen. If you have found a mistake in this book, we would be grateful if you would report this to us. Please visit www.packtpub.com/submit-errata, selecting your book, clicking on the Errata Submission Form link, and entering the details.
Piracy: If you come across any illegal copies of our works in any form on the Internet, we would be grateful if you would provide us with the location address or website name. Please contact us at copyright@packtpub.com with a link to the material.
If you are interested in becoming an author: If there is a topic that you have expertise in and you are interested in either writing or contributing to a book, please visit authors.packtpub.com.
Please leave a review. Once you have read and used this book, why not leave a review on the site that you purchased it from? Potential readers can then see and use your unbiased opinion to make purchase decisions, we at Packt can understand what you think about our products, and our authors can see your feedback on their book. Thank you!
For more information about Packt, please visit packtpub.com.
Building web shops is a challenging and tedious job, and even more so if a platform you are working on is limited via features, extensibility, and the overall ecosystem it provides. Choosing the right platform can often make the difference between a project's success or failure. The abundance of available e-commerce software, from SaaS to self-hosted solutions, does not really make it an easy choice.
The Magento e-commerce platform has been around for over 10 years now. With its first stable release dating back to March 2008, it immediately caught the attention of developers as an extensible and feature-rich open source platform. Over time, Magento established itself as not just a stunning technical and feature-rich platform, but as a robust ecosystem as well. By allowing developers to validate their real-world skills through the Magento certification program, certain standards have been put into effect, making it easier for merchants to better recognize their solution partners. Training courses have been further provided for other roles in e-commerce business as well, such as merchants, marketers, system administrators, and business analysts.
In this chapter, we will take a look at some of the key must-knows about Magento:
To keep things compact as we move forward, let's assume the following throughout this book:
You will need to have basic knowledge of PHP, OOP, JavaScript, and XML. You will also need Apache, MySQL, and AMPPS installed on your system to execute the codes.
The code files of this chapter can be found on GitHub:
https://github.com/PacktPublishing/Magento-2-Quick-Start-Guide.
Check out the following video to see the Code in Action:
The Magento platform comes in two flavors:
The difference between the two comes mainly in the form of extra modules that were added to the Commerce version, whereas all the coding concepts and core features remain the same. It goes to say that any knowledge we obtain through following Magento Open Source examples is fully applicable to anyone working on Magento Commerce.
There are several ways that we can obtain source files for Magento Open Source:
Obtaining source files via a CLI from the composer repository is our preferred method. Assuming we are within the empty <PROJECT_DIR> directory, we can kick off this process via the following command:
composer create-project --repository-url=https://repo.magento.com/ magento/project-community-edition .
The dot (.) at the end of this command this tells the composer to pull the files into a current directory.
Once the Composer process is finished, we can start installing Magento. There are two ways we can install Magento:
Knowing how to install Magento via the command line is an essential skill in day-to-day development, as the majority of development requires the developer to tackle various bin/magento commands—not to mention the command line approach is somewhat faster and easily scripted.
Let's install Magento with the built-in php bin/magento setup:install command and a few of the required installation options as follows:
php bin/magento setup:install \
--db-host="/Applications/MAMP/tmp/mysql/mysql.sock" \
--db-name=magelicious \
--db-user=root
--db-password=root \
--admin-firstname=John \
--admin-lastname=Doe \
--admin-email=john@magelicious.loc \
--admin-user=john \
--admin-password=jrdJ%0i9a69n
After the preceding command has been executed, we should begin to see console progress, starting with something like the following:
Starting Magento installation:
File permissions check...
[Progress: 1 / 513]
Required extensions check...
[Progress: 2 / 513]
Enabling Maintenance Mode...
[Progress: 3 / 513]
Installing deployment configuration...
[Progress: 4 / 513]
Installing database schema:
Schema creation/updates:
Module 'Magento_Store':
[Progress: 5 / 513]
While it might take up to a few minutes, a successful installation should end with a message that's similar to the following:
[Progress: 508 / 513]
Installing admin user...
[Progress: 509 / 513]
Caches clearing:
Cache cleared successfully
[Progress: 510 / 513]
Disabling Maintenance Mode:
[Progress: 511 / 513]
Post installation file permissions check...
For security, remove write permissions from these directories: '/Users/branko/Projects/magelicious/app/etc'
[Progress: 512 / 513]
Write installation date...
[Progress: 513 / 513]
[SUCCESS]: Magento installation complete.
[SUCCESS]: Magento Admin URI: /admin_mxq00c
Nothing to import.
Right after installation, our first step should be to set Magento to developer mode by using the following command:
php bin/magento deploy:mode:set developer
We will take a closer look at Magento modes soon; for now, this is to be taken as is.
If all went well during the Magento installation, we should be able to open the storefront and admin in our browser.
Modes play a crucial role in Magento's development and deployment processes. They are handled by the deploy module, which can be found under the <MAGENTO_DIR>/module-deploy directory.
The built-in php bin/magento command provides us with the following deploy commands:
deploy
deploy:mode:set Set application mode.
deploy:mode:show Displays current application mode.
We already used the deploy:mode:set developer command to switch from default to developer mode.
Magento differentiates between following three modes:
The area is a logical component that organizes code for optimized request processing. While the majority of the time we don't really have to code anything specific regarding areas, understanding them is key to understanding Magento.
The Magento\Framework\App\Area class AREA_* constants hint at the following areas:
const AREA_GLOBAL = 'global';
const AREA_FRONTEND = 'frontend';
const AREA_ADMINHTML = 'adminhtml';
const AREA_DOC = 'doc';
const AREA_CRONTAB = 'crontab';
const AREA_WEBAPI_REST = 'webapi_rest';
const AREA_WEBAPI_SOAP = 'webapi_soap';
By doing a lookup for the <argument name="areas" string across all of the <MAGENTO_DIR> di.xml files, we can see that five of these areas have been explicitly added to the areas argument of the Magento\Framework\App\AreaList class:
The default area is frontend, as defined by the default argument under module-store/etc/di.xml. The global area is used as a fallback for files that are absent in the adminhtml and frontend areas.
Let's take a closer look at the <MAGENTO_DIR>/module-webapi/etc/di.xml file:
<type name="Magento\Framework\App\AreaList">
<arguments>
<argument name="areas" xsi:type="array">
<item name="webapi_rest" xsi:type="array">
<item name="frontName" xsi:type="string">rest</item>
</item>
<item name="webapi_soap" xsi:type="array">
<item name="frontName" xsi:type="string">soap</item>
</item>
</argument>
</arguments>
</type>
The frontName is what sometimes appears at the front of the URL, whereas the area name is used internally to refer to the area in configuration files. Different areas defined by Magento can contain different code for processing URLs and requests. This allows Magento to load only the dependent code for the specified area.
When developing modules, we define which resources are visible and accessible in a given area. This way, we get to control the specific area behavior if needed. An example of one such behavior might be the definition of the event observer under the frontend area for customer_save_after event. This observer would only trigger on customer save operations that are triggered from the storefront, which usually indicates a customer register action. The adminhtml area operations, such as Magento admin manually creating a customer, would fail to trigger this observer, as it was defined under the frontend area.
On occasion, we might need to run some code that only executes under certain areas. In such cases, emulation helps us emulate any store programmatically. The Magento\Store\Model\App\Emulation class provides the startEnvironmentEmulation and stopEnvironmentEmulation methods, which we can use for this purpose, as per the following partial example:
protected $storeRepository;
protected $emulation;
public function __construct(
\Magento\Store\Api\StoreRepositoryInterface $storeRepository,
\Magento\Store\Model\App\Emulation $emulation
) {
$this->storeRepository = $storeRepository;
$this->emulation = $emulation;
}
public function test() {
$store = $this->storeRepository->get('store-to-emulate');
$this->emulation->startEnvironmentEmulation(
$store->getId(),
\Magento\Framework\App\Area::AREA_FRONTEND
);
// Code to execute in emulated environment
$this->emulation->stopEnvironmentEmulation();
}
While it is not a common thing to do, we can further register new areas ourselves. This is easily done by using the module's di.xml.
URLs in Magento have the format of <AreaFrontName>/<VendorName>/<ModuleName>/<ControllerName>/<ActionName>, but this does not mean that we actually use the area, vendor, or module name in the URL any time we wish to access a certain controller. For example, the area for a request is defined by the first request path segment, such as admin for adminhtml area, and none for frontend area.
We use the router class to assign a URL to a corresponding controller and its action. The router's match method finds a matching controller, which is determined by an incoming request.
Conceptually, creating a new router is as simple as doing the following:
By doing a lookup for the name="routerList" string across all of the <MAGENTO_DIR> di.xml files, we can see the following router definitions:
Let's take a closer look at the robots router under <MAGENTO_DIR>/module-robots. etc/frontend/di.xml injects the new item under the routerList argument as follows:
<type name="Magento\Framework\App\RouterList">
<arguments>
<argument name="routerList" xsi:type="array">
<item name="robots" xsi:type="array">
<item name="class" xsi:type="string">Magento\Robots\Controller\Router</item>
<item name="disable" xsi:type="boolean">false</item>
<item name="sortOrder" xsi:type="string">10</item>
</item>
</argument>
</arguments>
</type>
The Magento\Robots\Controller\Router class has been further defined as per the following partial extract:
class Router implements \Magento\Framework\App\RouterInterface {
// Magento\Framework\App\ActionFactory
private $actionFactory;
// Magento\Framework\App\Router\ActionList
private $actionList;
// Magento\Framework\App\Route\ConfigInterface
private $routeConfig;
public function match(\Magento\Framework\App\RequestInterface $request) {
$identifier = trim($request->getPathInfo(), '/');
if ($identifier !== 'robots.txt') {
return null;
}
$modules = $this->routeConfig->getModulesByFrontName('robots');
if (empty($modules)) {
return null;
}
$actionClassName = $this->actionList->get($modules[0], null, 'index', 'index');
$actionInstance = $this->actionFactory->create($actionClassName);
return $actionInstance;
}
}
The match method checks if the robots.txt file was requested and returns the instance of the matched \Magento\Framework\App\ActionInterface type. By following this simple implementation, we can easily create the route of our own.
Conceptually, creating a new controller is as simple as doing the following:
By doing a lookup for the <route string across the <MAGENTO_DIR> routes.xml files, we can see that Magento uses hundreds of route definitions, which are spread across its modules. Each route represents one controller.
Let's take a closer look at one of Magento's controllers, <MAGENTO_DIR>/module-customer, which maps to the http://magelicious.loc/customer/address/form URL. The route itself is registered via frontend/di.xml under the standard router with a customer ID and a customer frontName, as follows:
<router id="standard">
<route id="customer" frontName="customer">
<module name="Magento_Customer" />
</route>
</router>
The abstract controller file Controller/Address.php is defined partially as follows:
abstract class Address extends \Magento\Framework\App\Action\Action {
// The rest of the code...
}
The abstract controller is where we want to add functionality and dependencies that are shared across all of the child action controllers.
We can further see three different action controllers defined within the subdirectory which has the same name as the abstract class. The Controller/Address directory contains six action controllers: Delete.php, Edit.php, Form.php, FormPost.php, Index.php, and NewAction.php. Let's take a closer look at the following partial Form.php file's content:
class Form extends \Magento\Customer\Controller\Address {
public function execute() {
/** @var \Magento\Framework\View\Result\Page $resultPage */
$resultPage = $this->resultPageFactory->create();
$navigationBlock = $resultPage->getLayout()->getBlock('customer_account_navigation');
if ($navigationBlock) {
$navigationBlock->setActive('customer/address');
}
return $resultPage;
}
}
The example here uses the create method of the injected Magento\Framework\View\Result\PageFactory type to create a new page result. The various types of controller results can be found within the <MAGENTO_DIR>/framework directory:
We can take the unified way of creating result instances by using the create method of \Magento\Framework\Controller\ResultFactory. The ResultFactory defines the TYPE_* constant for each of the mentioned controller result types:
const TYPE_JSON = 'json';
const TYPE_RAW = 'raw';
const TYPE_REDIRECT = 'redirect';
const TYPE_FORWARD = 'forward';
const TYPE_LAYOUT = 'layout';
const TYPE_PAGE = 'page';
Keeping these constants in mind, we can easily write our action controller code as follows:
$resultRedirect = $this->resultFactory->create(ResultFactory::TYPE_REDIRECT);
$resultRedirect->setPath('adminhtml/*/index');
return $resultRedirect;
The top-level Magento structure is rather simple. When we strip away (seemingly) non-relevant files such as licenses, sample files, and changelogs, what remains looks much like the following:
app/
code/
design/
etc/
config.php
env.php
bin/
composer.json
composer.lock
dev/
generated/
index.php
lib/
phpserver/
pub/
static/
adminhtml/
frontend/
setup/
update/
var/
cache/
log/
page_cache/
view_preprocessed/
pub/
static/
adminhtml/
frontend/
vendor/
composer/
magento/
symfony/
The app/code/<VendorName>/<ModuleName> directory, <MAGELICIOUS_DIR> for short, is where our custom code will reside.
The vendor/magento directory, <MAGENTO_DIR> for short, is where Magento source code resides, as per the following partial listing:
vendor/
magento/
composer/
framework/
language-de_de/
language-en_us/
magento-composer-installer/
magento2-base/
module-catalog/
module-checkout/
theme-adminhtml-backend/
theme-frontend-blank/
theme-frontend-luma/
The individual module directory is where things get interesting. Let's take a quick look at the structure of one of the simpler Magento modules, <MAGENTO_DIR>/module-contact:
Block/
Controller/
etc/
Helper/
i18n/
Model/
Test/
view/
composer.json
LICENSE.txt
LICENSE_AFL.txt
README.md
registration.php
This is by no means the final structure of the individual module. There are other directories the module can define, as we will see as we move forward throughout this book.
Let's create the most minimal module there is in Magento. Our module will be called Core and it will belong to the Magelicious vendor. The formula for determining the directory of custom modules is app/code/<VendorName>/<ModuleName>, or in our case <MAGELICIOUS_DIR>/Core.
We start off by creating the <MAGELICIOUS_DIR>/Core/registration.php file with the following content:
\Magento\Framework\Component\ComponentRegistrar::register(
\Magento\Framework\Component\ComponentRegistrar::MODULE,
'Magelicious_Core',
__DIR__
);
The registration.php file is essentially the entry point of our module. The register method of the Magento\Framework\Component\ComponentRegistrar class provides the ability to statically register components, whereas a component can be more than just a module, as defined via the following constants:
Next, we will create the <MAGELICIOUS_DIR>/Core/etc/module.xml file with the following content:
<config>
<module name="Magelicious_Core" setup_version="1.0.0">
<sequence>
<module name="Magento_Store"/>
<module name="Magento_Backend"/>
<module name="Magento_Config"/>
</sequence>
</module>
</config>
The name and setup_version attributes of a module element are considered required. The sequence, on the other hand, is optional. We use it to define any potential dependencies around other Magento modules.
Finally, we add composer.json with the following content:
{
"name": "magelicious/module-core",
"description": "The core module",
"require": {
"php": "^7.0.0"
},
"type": "magento2-module",
"version": "1.0.0",
"license": [
"OSL-3.0",
"AFL-3.0"
],
"autoload": {
"files": [
"registration.php"
],
"psr-4": {
"Magelicious\\Core\\": ""
}
}
}
Magento supports the following composer.json types:
Though composer.json is not required for our custom module to be seen by Magento, it is recommended to add it to any component we are building.
You can trigger module installation by running the php bin/magento module:enable Magelicious_Core command, like so:
$ php bin/magento module:enable Magelicious_Core
The following modules have been enabled:
- Magelicious_Core
To make sure that the enabled modules are properly registered, run 'setup:upgrade'.
Cache cleared successfully.
Generated classes cleared successfully. Please run the 'setup:di:compile' command to generate classes.
Info: Some modules might require static view files to be cleared. To do this, run 'module:enable' with the --clear-static-content option to clear them.
You can run the php bin/magento setup:upgrade command to trigger any install and/or update scripts that need to be triggered:
Cache cleared successfully
File system cleanup:
generated/code/Composer
generated/code/Magento
generated/code/Symfony
Updating modules:
Schema creation/updates:
Module 'Magento_Store':
...
Module 'Magento_CmsUrlRewrite':
Module 'Magelicious_Core':
Module 'Magento_ConfigurableImportExport':
...
Nothing to import.
This finishes our module installation.
To confirm our module was installed correctly, perform the following:
At the moment, our module does absolutely nothing, aside from just sitting there. However, these few simple steps are the basis for us moving forward with Magento development, because the majority of things in Magento are done via a module, alongside other types of components, which we have already mentioned.
Magento makes extensive use of caching. The System | Tools | Cache Management section enables us to Enable | Disable | Refresh the cache from the comfort of the graphical interface. During development, the use of the console is more convenient and faster.
The following cache-related commands are supported:
cache
cache:clean Cleans cache type(s)
cache:disable Disables cache type(s)
cache:enable Enables cache type(s)
cache:flush Flushes cache storage used by cache type(s)
cache:status Checks cache status
Out of the box, Magento Open Source comes with 14 different cache types. We can easily get the status of each cache type by running the php bin/magento cache:status command, which gives the following output:
Current status:
config: 0
layout: 0
block_html: 0
collections: 0
reflection: 0
db_ddl: 0
eav: 0
customer_notification: 0
the_custom_cache: 1
config_integration: 0
config_integration_api: 0
full_page: 0
translate: 0
config_webservice: 0
We can use the enable | disable | clean cache commands to impact one or more cache types at once.
If built-in cache types are not enough, we can always create our own.
Creating a new cache type in Magento is as easy as doing the following:
Create the <MAGELICIOUS_DIR>/Core/etc/cache.xml file with the following content:
<config>
<type name="the_custom_cache" translate="label,description" instance="Magelicious\Core\Model\Cache\TheCustomCache">
<label>The Custom Cache</label>
<description>Our custom cache type</description>
</type>
</config>
Create the <MAGELICIOUS_DIR>/Core/Model/Cache/TheCustomCache.php file with the following content:
class TheCustomCache extends \Magento\Framework\Cache\Frontend\Decorator\TagScope {
const TYPE_IDENTIFIER = 'the_custom_cache';
const CACHE_TAG = 'THE_CUSTOM_CACHE';
public function __construct(\Magento\Framework\App\Cache\Type\FrontendPool $cacheFrontendPool) {
parent::__construct($cacheFrontendPool->get(self::TYPE_IDENTIFIER), self::CACHE_TAG);
}
}
The TYPE_IDENTIFIER is used internally as a cache type code that is unique among all cache types. The CACHE_TAG is a cache tag that's used to distinguish the cache type from all other caches. Running cache:status should now show our custom cache type on the list.
We can use the instance of Magento\Framework\App\Cache\TypeListInterface to invalidate the cache, as follows:
$this->typeList->invalidate(\Magelicious\Core\Model\Cache\TheCustomCache::TYPE_IDENTIFIER);
We can use the instance of Magento\Framework\App\Cache\Manager $cacheManager to programmatically execute the same enable | disable | clean operations as per the following example:
$cacheManager->setEnabled(
[\Magelicious\Core\Model\Cache\TheCustomCache::TYPE_IDENTIFIER],
true
);
$cacheManager->clean([\Magelicious\Core\Model\Cache\TheCustomCache::TYPE_IDENTIFIER]);
$cacheManager->flush([\Magelicious\Core\Model\Cache\TheCustomCache::TYPE_IDENTIFIER]);
Saving data to cache requires serialization, as per the following example:
// \Magento\Framework\Config\CacheInterface $cache
// \Magento\Framework\Serialize\SerializerInterface $serializer
// \Magento\Framework\App\Cache\StateInterface $cacheState
$isCacheEnabled = $cacheState->isEnabled(\Magelicious\Core\Model\Cache\TheCustomCache::TYPE_IDENTIFIER);
$cacheId = 'some-unique-identifier';
if ($isCacheEnabled) {
$cache->save(
$serializer->serialize('some-data'),
$cacheId,
[
\Magelicious\Core\Model\Cache\TheCustomCache::CACHE_TAG
]
);
}
Reading data from the cache is as easy as per the following example:
if ($cacheData = $this->cache->load($cacheId);) {
$someData = $this->getSerializer()->unserialize($cacheData);
} else {
$someData = $this->fetchSomeData();
}
Dependency injection has become a de facto standard of modern-day software. Magento makes heavy use of this technique, based on mappings found in di.xml files. The workload of Magento's dependency injection is handled by the Magento\Framework\ObjectManager\ObjectManager instance, which implements the lightweight Magento\Framework\ObjectManagerInterface.
The di.xml file configures the object manager, telling it how to handle the following:
These features allow for a great degree of flexibility and extensibility, as we will soon see.
Every module can have a global and area-specific di.xml file.
Magento loads configuration files in the following order:
When Magento reads all of these configuration files, it merges them all together by appending all nodes.
Argument injection is done via preference and type definitions within the di.xml.
By performing a lookup for the <preference string across the entire <MAGENTO_DIR> directory's di.xml files, we can see that Magento uses hundreds of preference definitions, spread across the majority of its modules.
Let's take a quick look at one of the __construct method, of the type Magento\Eav\Model\Attribute\Data\AbstractData:
public function __construct(
\Magento\Framework\Stdlib\DateTime\TimezoneInterface $localeDate,
\Psr\Log\LoggerInterface $logger,
\Magento\Framework\Locale\ResolverInterface $localeResolver
) {
$this->_localeDate = $localeDate;
$this->_logger = $logger;
$this->_localeResolver = $localeResolver;
}
We can find the preference definitions for these interfaces under the <MAGENTO_DIR>/magento2-base/app/etc/di.xml file:
<preference for="Magento\Framework\Stdlib\DateTime\TimezoneInterface" type="Magento\Framework\Stdlib\DateTime\Timezone" />
<preference for="Psr\Log\LoggerInterface" type="Magento\Framework\Logger\Monolog" />
<preference for="Magento\Framework\Locale\ResolverInterface" type="Magento\Framework\Locale\Resolver" />
Theoretically, we can use the object manager directly, as follows:
class Type {
protected $objectManager;
public function __construct(
\Magento\Framework\ObjectManagerInterface $objectManager
) {
$this->objectManager = $objectManager;
}
public function example() {
$this->objectManager->create(\Fully\Qualified\Class\Name::class);
$this->objectManager->get(\Fully\Qualified\Class\Name::class);
\Magento\Framework\App\ObjectManager::getInstance()
->create(\Fully\Qualified\Class\Name::class);
\Magento\Framework\App\ObjectManager::getInstance()
->get(\Fully\Qualified\Class\Name::class);
}
}
By doing a lookup for the <type string across the entire <MAGENTO_DIR> directory's di.xml files, we can see that Magento uses over a thousand type definitions, spread across the majority of its modules.
Here is a very simple example, taken from the <MAGENTO_DIR>/module-customer/etc/di.xml file:
<type name="Magento\Customer\Model\Visitor">
<arguments>
<argument name="ignoredUserAgents" xsi:type="array">
<item name="google1" xsi:type="string">Googlebot/1.0 (googlebot@googlebot.com http://googlebot.com/)</item>
<item name="google2" xsi:type="string">Mozilla/5.0 (compatible; Googlebot/2.1; +http://www.google.com/bot.html)</item>
<item name="google3" xsi:type="string">Googlebot/2.1 (+http://www.googlebot.com/bot.html)</item>
</argument>
</arguments>
</type>
Looking into the source of the Magento\Customer\Model\Visitor class, we can see that it has its constructor defined by the $ignoredUserAgents = [] array. Using the type element, the preceding example injects the ignoredUserAgents argument with the given array values.
When configuration files for a given scope get merged, array arguments with the same name get merged into a new array. However, if any new configuration is loaded at a later time, either by a more specific scope or through the code, then any array definitions in the new configuration will replace the loaded configuration instead of merging.
The list of available item type values goes well beyond just a string, and includes the following:
Argument injection often goes hand in hand with virtual types, as we will soon see.
Virtual types are a very neat feature of Magento that allow us to change the arguments of a specific injectable dependency and thus change the behavior of a particular class type.
The <MAGENTO_DIR>/module-checkout/etc/di.xml file provides a simple example of virtualType and its usage:
<virtualType name="Magento\Checkout\Model\Session\Storage" type="Magento\Framework\Session\Storage">
<arguments>
<argument name="namespace" xsi:type="string">checkout</argument>
</arguments>
</virtualType>
<type name="Magento\Checkout\Model\Session">
<arguments>
<argument name="storage" xsi:type="object">Magento\Checkout\Model\Session\Storage</argument>
</arguments>
</type>
The virtualType here (virtually) extends Magento\Framework\Session\Storage by rewriting its constructor's $namespace = 'default' argument to $namespace = 'checkout'. However, this change does not kick in on its own, as the Magento\Checkout\Model\Session\Storage virtual type must be used first. It is used in this case, via a type definition, where the storage argument is replaced entirely by the virtual type.
By doing a lookup for the <virtualType string across the entire <MAGENTO_DIR> directory's di.xml files, we can see that Magento uses hundreds of virtual types across the majority of its modules.
A more complex example of virtual type usage can be found under the Magento_LayeredNavigation module.
The <MAGENTO_DIR>/module-layered-navigation/etc/frontend/di.xml file defines two virtual types, as follows:
<virtualType name="Magento\LayeredNavigation\Block\Navigation\Category" type="Magento\LayeredNavigation\Block\Navigation">
<arguments>
<argument name="filterList" xsi:type="object">categoryFilterList</argument>
</arguments>
</virtualType>
<virtualType name="Magento\LayeredNavigation\Block\Navigation\Search" type="Magento\LayeredNavigation\Block\Navigation">
<arguments>
<argument name="filterList" xsi:type="object">searchFilterList</argument>
</arguments>
</virtualType>
Here, we have two virtual types defined, each changing the filterList argument of the Magento\LayeredNavigation\Block\Navigation class. categoryFilterList and searchFilterList are the names of two other virtual types that are defined in <MAGENTO_DIR>/module-catalog-search/etc/di.xml, as visible here: https://github.com/magento/magento2/blob/2.2/app/code/Magento/CatalogSearch/etc/di.xml.
The Magento\LayeredNavigation\Block\Navigation\Category and Magento\LayeredNavigation\Block\Navigation\Search virtual types are then used in layout files for block definition, as follows:
<!-- view/frontend/layout/catalog_category_view_type_layered.xml -->
<referenceContainer name="sidebar.main">
<block class="Magento\LayeredNavigation\Block\Navigation\Category" ...
</referenceContainer>
<!-- view/frontend/layout/catalogsearch_result_index.xml -->
<referenceContainer name="sidebar.main">
<block class="Magento\LayeredNavigation\Block\Navigation\Search" ...
</referenceContainer>
What this effectively does is tell Magento that, for the category view page and search page, use the virtual type for class, thus instructing it to go through all the argument changes specified in the virtual type.
This is an interesting example as it reveals the potential complexity of using virtual types. Basically, we have one virtual type (Magento\LayeredNavigation\Block\Navigation\Search) changing the single filterList argument of a real type (Magento\LayeredNavigation\Block\Navigation) with another virtual type (categoryFilterList). Likewise, we just learned how the class property of the block element is capable of not just accepting the fully qualified class name, but the virtualType name as well.
Proxy classes are used when object creation is expensive and a class' constructor is unusually resource-intensive. To avoid unnecessary performance impact, Magento uses Proxy classes to turn given types into becoming lazy-loaded versions of them.
A quick lookup for the \Proxy</argument> string across all Magento di.xml files reveals over a hundred occurrences of this string. It goes to say that Magento extensively uses proxies across its code.
The type definition under <MAGENTO_DIR>/module-customer/etc/di.xml is a nice example of using proxies:
<type name="Magento\Customer\Model\Session">
<arguments>
<argument name="configShare" xsi:type="object">Magento\Customer\Model\Config\Share\Proxy</argument>
<argument name="customerUrl" xsi:type="object">Magento\Customer\Model\Url\Proxy</argument>
<argument name="customerResource" xsi:type="object">Magento\Customer\Model\ResourceModel\Customer\Proxy</argument>
<argument name="storage" xsi:type="object">Magento\Customer\Model\Session\Storage</argument>
<argument name="customerRepository" xsi:type="object">Magento\Customer\Api\CustomerRepositoryInterface\Proxy</argument>
</arguments>
</type>
If we look at the constructor of the Magento\Customer\Model\Session type, we can see that none of the four arguments (configShare, customerUrl, customerResource, and customerRepository) were declared as Proxy within the PHP file. They where rewritten through di.xml. These Proxy types do not really exist just yet, as the Magento dependency injection (di) compilation process creates them. They are automatically generated under the generated directory.
Once it is compiled, the Magento\Customer\Model\Url\Proxy type can easily be found under the generated/code/Magento/Customer/Model/Url/Proxy.php file. Let's take a partial look at it:
class Proxy extends \Magento\Customer\Model\Url
implements \Magento\Framework\ObjectManager\NoninterceptableInterface {
public function __construct(
\Magento\Framework\ObjectManagerInterface $objectManager,
$instanceName = '\\Magento\\Customer\\Model\\Url',
$shared = true) {
$this->_objectManager = $objectManager;
$this->_instanceName = $instanceName;
$this->_isShared = $shared;
}
public function __sleep() {
return ['_subject', '_isShared', '_instanceName'];
}
public function __wakeup() {
$this->_objectManager = \Magento\Framework\App\ObjectManager::getInstance();
}
public function __clone() {
$this->_subject = clone $this->_getSubject();
}
protected function _getSubject() {
if (!$this->_subject) {
$this->_subject = true === $this->_isShared
? $this->_objectManager->get($this->_instanceName)
: $this->_objectManager->create($this->_instanceName);
}
return $this->_subject;
}
public function getLoginUrl() {
return $this->_getSubject()->getLoginUrl();
}
public function getLoginUrlParams() {
return $this->_getSubject()->getLoginUrlParams();
}
}
The composition of the Proxy class shows the mechanism by which it wraps around the original Magento\Customer\Model\Url type. This now means that, across Magento, every time the Magento\Customer\Model\Url type is requested, the Magento\Customer\Model\Url\Proxy is going to get passed instead. Unlike the original type's __construct method which might be performance heavy, the autogenerated Proxy's __construct method is a lightweight one. This eliminates possible performance bottlenecks. The _getSubject method is used to instantiate/lazy load the original type whenever any of the original type public methods are called. For example, the call to the getLoginUrl method would go through the proxy.
Every proxy generated by Magento implements Magento\Framework\ObjectManager\NoninterceptableInterface. Though the interface itself is empty, it is used as a marker to identify proxies for which we don't need to generate interceptors (plugins).
When writing custom types, such as Magelicious\Core\Model\Customer, we could easily specify the proxy right there in the constructor:
class Customer {
public function __construct(
\Magento\Customer\Model\Url\Proxy $customerUrl
) {
//...
}
}
This approach, however, is a bad practice. The way to do this properly is to specify __construct with an original Magento\Customer\Model\Url type and then add the di.xml as follows:
<type name="Magelicious\Core\Model\Customer">
<arguments>
<argument name="customerUrl" xsi:type="object">Magento\Customer\Model\Url\Proxy</argument>
</arguments>
</type>
Factories are classes that create other classes—much like the object manager, except this time we are encouraged to use them directly. Their purpose is to instantiate the non-injectable classes—those that we should not inject directly into __construct. The beauty of using factories is that, most of the time, we don't even have to write them, as they are automatically generated by Magento unless we need to implement some sort of specific behavior for our factory classes.
By doing a lookup for the Factory $ string across the entire <MAGENTO_DIR> directory's *.php files, we can see thousands of factory examples, spread across the majority of Magento's modules.
While a great deal of these factories actually exist, others are automatically generated when needed.
Let's take a quick look at one automatically generated factory, that of Magento\Newsletter\Model\SubscriberFactory, which is used in several Magento modules such as the newsletter, subscriber, and review modules:
class SubscriberFactory {
protected $_objectManager = null;
protected $_instanceName = null;
public function __construct(
\Magento\Framework\ObjectManagerInterface $objectManager,
$instanceName = '\\Magento\\Newsletter\\Model\\Subscriber'
) {
$this->_objectManager = $objectManager;
$this->_instanceName = $instanceName;
}
public function create(array $data = array()) {
return $this->_objectManager->create($this->_instanceName, $data);
}
}
The autogenerated factory code is essentially just a thin wrapper on top of an object manager create method.
Factories work well with the di.xml preference mechanism, which means we can easily pass interfaces into the constructor, like so:
public function __construct(
\Magento\CatalogInventory\Api\StockItemRepositoryInterface $stockItemRepository,
\Magento\CatalogInventory\Api\StockItemCriteriaInterfaceFactory $stockItemCriteriaFactory
) {
$this->stockItemRepository = $stockItemRepository;
$this->stockItemCriteriaFactory = $stockItemCriteriaFactory;
}
// $criteria = $this->stockItemCriteriaFactory->create();
// $result = $this->stockItemRepository->getList($criteria);
The preference mechanism makes sure that concrete implementations get passed to the object instance when its constructor is invoked.
Plugins are likely one of the most powerful features of Magento. They allow us to modify the behavior of public class functions by intercepting a function call and running code before, after, or around that function call.
Before we eagerly start using them, it is worth emphasizing how plugins can't be used on the following:
Plugins can be used on the following:
By doing a lookup for the <plugin string across the entire <MAGENTO_DIR> directory's di.xml files, we can see hundreds of plugin examples spread across the majority of Magento's modules.
The before plugin, as its name suggests, runs before the observed method.
When writing a before plugin, there are a few key points to remember:
Let's take a look at one of Magento's before plugin implementations, the one specified in the <MAGENTO_DIR>module-payment/etc/frontend/di.xml file:
<type name="Magento\Checkout\Block\Checkout\LayoutProcessor">
<plugin name="ProcessPaymentConfiguration"
type="Magento\Payment\Plugin\PaymentConfigurationProcess"/>
</type>
The original method this plugin is targeting is the process method of the Magento\Checkout\Block\Checkout\LayoutProcessor class:
public function process($jsLayout) {
// The rest of the code...
return $jsLayout;
}
The implementation of the before plugin is provided via the beforeProcess method of the Magento\Payment\Plugin\PaymentConfigurationProcess class, as per the following partial example:
public function beforeProcess(
\Magento\Checkout\Block\Checkout\LayoutProcessor $processor,
$jsLayout) {
// The rest of the code...
return [$jsLayout];
}
The around plugin runs around the observed method in a way that allows us to run some code before and after the original method call. This is a very powerful concept, as we get to change the incoming parameters as well as the return value of a function.
When writing the around plugin, there are a few key points to remember:
Let's take a look at one of Magento's around plugin implementations, the one specified in the <MAGENTO_DIR>module-grouped-product/etc/di.xml file:
<type name="Magento\Catalog\Model\ResourceModel\Product\Link">
<plugin name="groupedProductLinkProcessor" type="Magento\GroupedProduct\Model\ResourceModel\Product\Link\RelationPersister" />
</type>
The original method of this plugin is targeting the deleteProductLink method of the Magento\Catalog\Model\ResourceModel\Product\Link class:
public function deleteProductLink($linkId) {
return $this->getConnection()
->delete($this->getMainTable(), ['link_id = ?' => $linkId]);
}
The implementation of the around plugin is provided via the aroundDeleteProductLink method of the Magento\GroupedProduct\Model\ResourceModel\Product\Link\RelationPersister class, as per the following partial example:
public function aroundDeleteProductLink(
\Magento\GroupedProduct\Model\ResourceModel\Product\Link $subject,
\Closure $proceed, $linkId) {
// The rest of the code...
$result = $proceed($linkId);
// The rest of the code...
return $result;
}
The after plugin, as its name suggests, runs after the observed method.
When writing the after plugin, there are a few key points to remember:
Let's take a look at one of Magento's after plugin implementations, the one specified in the module-catalog/etc/di.xml file:
<type name="Magento\Indexer\Model\Config\Data">
<plugin name="indexerProductFlatConfigGet"
type="Magento\Catalog\Model\Indexer\Product\Flat\Plugin\IndexerConfigData" />
</type>
The original method this plugin is targeting is the get method of the Magento\Indexer\Model\Config\Data class:
public function get($path = null, $default = null) {
// The rest of the code...
return $data;
}
The implementation of the after plugin is provided via the afterGet method of the Magento\Catalog\Model\Indexer\Product\Flat\Plugin\IndexerConfigData class, as per the following partial example:
public function afterGet(Magento\Indexer\Model\Config\Data, $data, $path = null, $default = null) {
// The rest of the code...
return $data;
}
Special care should be taken when using plugins. While they provide great flexibility, they also make it easy to induce bugs, performance bottlenecks, and other less obvious types of instabilities – even more so if several plugins are observing the same method.
Magento has a neat publish-subscribe pattern implementation that we call events and observers. By dispatching events when certain actions are triggered, we can run our custom code in response to the triggered event. The events are dispatched using the Magento\Framework\Event\Manager class, which implements Magento\Framework\Event\ManagerInterface.
To dispatch an event, we simply call the dispatch method of the event manager instance, providing it with the name of the event we are dispatching with an optional array of data we wish to pass on to the observers, as per the following example taken from the <MAGENTO_DIR>/module-customer/Controller/Account/CreatePost.php file:
$this->_eventManager->dispatch(
'customer_register_success',
['account_controller' => $this, 'customer' => $customer]
);
Observers are registered via an events.xml file, as per the following example from the <MAGENTO_DIR>/module-persistent/etc/frontend/events.xml file:
<event name="customer_register_success">
<observer name="persistent" instance="Magento\Persistent\Observer\RemovePersistentCookieOnRegisterObserver" />
</event>
By doing a lookup for the eventManager->dispatch string across the entire <MAGENTO_DIR> directory's *.php files, we can see hundreds of events examples, spread across the majority of Magento's modules. While all of these events are of the same technical importance, we might say that some are likely to be used more on a day to day basis than others.
This makes it worth taking some time to study the following classes and the events they dispatch:
Some more important events can be found in a few of the types defined under the <MAGENTO_DIR>/framework/View directory:
Let's take a closer look at one of these events, the one found in the <MAGENTO_DIR>/framework/Model/AbstractModel.php file:
public function afterCommitCallback() {
$this->_eventManager->dispatch('model_save_commit_after', ['object' => $this]);
$this->_eventManager->dispatch($this->_eventPrefix . '_save_commit_after', $this->_getEventData());
return $this;
}
protected function _getEventData() {
return [
'data_object' => $this,
$this->_eventObject => $this,
];
}
The $_eventPrefix and $_eventObject type properties are particularly important here. If we glimpse over types such as Magento\Catalog\Model\Product, Magento\Catalog\Model\Category, Magento\Customer\Model\Customer, Magento\Quote\Model\Quote, Magento\Sales\Model\Order, and others, we can see that a great deal of these entity types are essentially extending from Magento\Framework\Model\AbstractModel and provide their own values to replace $_eventPrefix = 'core_abstract' and $_eventObject = 'object'. What this means is that we can use events such as $this->_eventPrefix . '_save_commit_after' to specify observers via events.xml.
Let's take a look at the following example, taken from the <MAGENTO_DIR>/module-downloadable/etc/events.xml file:
<config>
<event name="sales_order_save_commit_after">
<observer name="downloadable_observer" instance="Magento\Downloadable\Observer\SetLinkStatusObserver" />
</event>
</config>
Observers are placed inside the <ModuleDir>/Observer directory. Every observer implements a single execute method on the Magento\Framework\Event\ObserverInterface class:
class SetLinkStatusObserver implements \Magento\Framework\Event\ObserverInterface {
public function execute(\Magento\Framework\Event\Observer $observer) {
$order = $observer->getEvent()->getOrder();
}
}
Much like plugins, badly implemented observers can easily cause bugs or even break the entire application. This is why we need to keep our observer small and computationally efficient—to avoid performance bottlenecks.
The cyclical event loop is a trap that's easy to fall into. This happens when an observer, at some point, is dispatching the same event that it listens to. For example, if an observer listens to the model_save_before event, and then tries to save the same entity again within the observer, this would trigger a cyclical event loop.
To make our observers as specific as possible, we need to declare them in an appropriate scope:
Unlike plugins, observers are used for triggering the follow-up functionality, rather than changing the behavior of functions or data which is part of the event they are observing.
The built-in bin/magento tool plays a major role – not just in Magento development, but in production deployments as well.
Right out of the box, it provides a dozen commands that we can use to manage caches, indexers, dependency compilation, deploying static view files, creating CSS from LESS, putting our store to maintenance, installing modules, and more.
Quite easily, Magento enables us to add our own commands to its Symfony-like command-line interface (CLI). The Magento CLI essentially extends from Symfony\Component\Console\Command.
The real value in creating our own command lies in the arguments and options that we can make available, thus passing dynamic information to the command.
Magento console commands reside under the <ModuleName>/Console directory, which can further be organized to better accommodate our commands. Magento mostly uses the <ModuleName>/Console/Command directory to place the actual CLI command class, whereas various options and other accompanying classes reside in the <ModuleName>/Console directory.
Conceptually, creating a new CLI command is as easy as doing the following:
Let's create our own simple console command. We will start off by creating the <MAGELICIOUS_DIR>/Core/Console/Command/RunStockImportCommand.php file with the following content:
use Symfony\Component\Console\Command\Command;
use Symfony\Component\Console\Input\InputArgument;
use Symfony\Component\Console\Input\InputOption;
use Symfony\Component\Console\Input\InputInterface;
use Symfony\Component\Console\Output\OutputInterface;
class RunStockImportCommand extends Command {
const ORDER_ID_ARGUMENT = 'order_id';
const DAYS_BACK_OPTION = 'days_back';
protected function configure() {
$this->setName('magelicious:stock:import')
->setDescription('The Magelicious Stock Import.')
->setDefinition([
new InputArgument(
self::ORDER_ID_ARGUMENT, /* name */
InputArgument::REQUIRED, /* mode REQUIRED or OPTIONAL */
'The argument to set.', /* description */
null /* default */
),
new InputOption(
self::DAYS_BACK_OPTION, /* name */
null, /* shortcut */
InputOption::VALUE_OPTIONAL, /* VALUE_NONE or VALUE_REQUIRED or VALUE_OPTIONAL or VALUE_IS_ARRAY */
'The option to set.' /* description */
)
]);
parent::configure();
}
protected function execute(InputInterface $input, OutputInterface $output) {
try {
$output->setDecorated(true);
// $input->getArgument(self::ORDER_ID_ARGUMENT);
// $input->getOption(self::DAYS_BACK_OPTION);
// green text
$output->writeln('<info>The info message.</info>');
// yellow text
$output->writeln('<comment>The comment message.</comment>');
// black text on a cyan background
$output->writeln('<question>The question message.</question>');
return \Magento\Framework\Console\Cli::RETURN_SUCCESS;
} catch (\Exception $e) {
// white text on a red background
$output->writeln('<error>' . $e->getMessage() . '</error>');
if ($output->getVerbosity() >= OutputInterface::VERBOSITY_VERBOSE) {
$output->writeln($e->getTraceAsString());
}
return \Magento\Framework\Console\Cli::RETURN_FAILURE;
}
}
}
We then wire it up via <MAGELICIOUS_DIR>/etc/di.xml, as follows:
<type name="Magento\Framework\Console\CommandListInterface">
<arguments>
<argument name="commands" xsi:type="array">
<item name="runStockImport" xsi:type="object">Magelicious\Core\Console\Command\RunStockImportCommand</item>
</argument>
</arguments>
</type>
We can now clear the cache and the compiled directories either by running the php bin/magento cache:clean config followed by php bin/magento setup:di:compile, or by running rm -rf generated/* and rm -rf var/cache/*.
Now, if we run the php bin/magento command, we should see our command on the list:
magelicious
magelicious:stock:import The Magelicious Stock Import.
If we now test our method by running php bin/magento magelicious:stock:import, this should immediately trigger an error, as follows:
[Symfony\Component\Console\Exception\RuntimeException]
Not enough arguments (missing: "order_id").
magelicious:stock:import [--days_back [DAYS_BACK]] [--] <order_id>
Either of the following calls should work:
php bin/magento magelicious:stock:import 000000060
php bin/magento magelicious:stock:import 000000060 --days_back=7
Creating a new cron job is as easy as doing the following:
Let's create a simple cron job. We will start off by creating the <MAGELICIOUS_DIR>/Core/etc/crontab.xml file with the following content:
<group id="default">
<job name="the_job" instance="Magelicious\Core\Cron\TheJob" method="execute">
<schedule>*/15 * * * *</schedule>
</job>
</group>
The instance and method values map to the class and method within that class, which will be executed when cron job is run. The schedule is a cron, like the expression for when the job is to be executed. Unless there are specific requirements telling us otherwise, we can safely use the default group.
We then create the <MAGELICIOUS_DIR>/Core/Cron/TheJob.php file with the following content:
class TheJob {
public function execute() {
// ...
}
}
The Magento console command supports several console commands:
cron
cron:install Generates and installs crontab for current user
cron:remove Removes tasks from crontab
cron:run Runs jobs by schedule
To get our cron job running, we need to make sure that crontab is installed, by running php bin/magento cron:install. This command generates and installs crontab for the current user. We can confirm that by following up with the crontab -e command, like so:
#~ MAGENTO START 6f7c468a10aea2972eab1da53c8d2fce
* * * * * /bin/php /magelicious/bin/magento cron:run 2>&1 | grep -v "Ran jobs by schedule" >> /magelicious/var/log/magento.cron.log
* * * * * /bin/php /magelicious/update/cron.php >> /magelicious/var/log/update.cron.log
* * * * * /bin/php /magelicious/bin/magento setup:cron:run >> /magelicious/var/log/setup.cron.log
#~ MAGENTO END 6f7c468a10aea2972eab1da53c8d2fce
Now, if we execute php bin/magento cron:run, the_job should find its way under the cron_schedule table.
Magento Open Source provides two cron groups: default and index. While the majority of times our cron jobs will be placed under the default group, there might be a need to create a completely new cron group. Luckily, this is quite easy.
To create a new cron group, all we need is a <MAGELICIOUS_DIR>/etc/cron_groups.xml file with the following content:
<config>
<group id="magelicious">
<schedule_generate_every>15</schedule_generate_every>
<schedule_ahead_for>20</schedule_ahead_for>
<schedule_lifetime>15</schedule_lifetime>
<history_cleanup_every>10</history_cleanup_every>
<history_success_lifetime>10080</history_success_lifetime>
<history_failure_lifetime>10080</history_failure_lifetime>
<use_separate_process>0</use_separate_process>
</group>
</config>
While group information is not stored in the cron_schedule table, we can use it via the Magento CLI to run jobs that are specific to a certain group:
php bin/magento cron:run --group=default
In this chapter, we touched upon some of Magento's keys components. Plugins and event observers provide a powerful way of extending Magento, either by changing the behavior of existing functions or by running some follow-up code in response to certain events.
Moving forward, we will deepen our Magento knowledge further by looking into the install and update scripts, the Entity–Attribute–Value model (EAV), creating new EAV types, indexers, extension, and custom attributes.
Every Magento module hosts its models within the Models directory. Some of these models are persistable, while others are non-persistable. A great deal of custom, third-party, and core Magento modules persist data to the database. Data persistence is one of the key functionalities that platforms like Magento need to deal with. Terminology-wise, Magento uses terms such as model, resource model, and collection for a group of three classes that deal with data persistence, that is, create, read, update, and delete (CRUD) operations.
To better understand the overall mechanism of entities, we are going to take a closer look at the following:
You will need to have basic knowledge of PHP, OOP, JavaScript, and XML. You will also need Apache, MySQL, and AMPPS installed on your system to execute the codes.
The code files of this chapter can be found on GitHub:
https://github.com/PacktPublishing/Magento-2-Quick-Start-Guide.
Check out the following video to see the Code in Action:
There are two types of persistence models in Magento: simple and Entity–attribute–value (EAV). The term entity is tossed around interchangeably between the two types of models. We can think of an entity as any persistable model.
The Subscriber entity of the Magento_Newsletter module is an example of a simple model. We can see that it's comprised of the following:
The Customer entity of the Magento_Customer module is an example of an EAV model. We can see that it's comprised of the following:
What differentiates EAV from simple models is essentially their resource model and collection classes. The resource model is our link to the database—our persistor, if you will.
When a subscriber is saved, its data gets saved horizontally in the database. Data from the subscriber model gets dumped into the single newsletter_subscriber table.
When a customer is saved, its data gets saved vertically in the database. Data from the customer model gets dumped into the following tables:
The decision as to where to store a value for an individual attribute is contained in the eav_attribute.backend_type column. The SELECT DISTINCT backend_type FROM eav_attribute; query reveals the following:
Next to the eav_attribute table, the remaining relevant information is scattered around the dozen of other eav_* tables, the most important being the eav_attribute_* tables:
The SELECT entity_type_code, entity_model FROM eav_entity_type; query indicates that the following Magento entities are from an EAV model:
However, not all of them use the EAV model to its full extent, as indicated by the SELECT DISTINCT entity_type_id FROM eav_attribute; query, which points only to the following:
What this means is that only four models in Magento Open Source really use EAV models for managing their attributes and storing data vertically through EAV tables. The rest are all flat tables, as all attributes and their values are in a single table.
The EAV models are inherently more complex to work with. They come in handy for cases where dynamic attribute creation is needed, ideally via an admin interface, as is the case with products. The majority of the time, however, simple models will do the job.
Unlike EAV models, creating simple models is pretty straightforward. Let's go ahead and create a model, resource model, and a collection for a Log entity.
We will start off by creating the <MAGELICIOUS_DIR>/Core/Model/Log.php file with the following content:
class Log extends \Magento\Framework\Model\AbstractModel {
protected $_eventPrefix = 'magelicious_core_log';
protected $_eventObject = 'log';
protected function _construct() {
$this->_init(\Magelicious\Core\Model\ResourceModel\Log::class);
}
}
The use of $_eventPrefix and $_eventObject is not mandatory, but it is highly recommended. These values are used by the Magento\Framework\Model\AbstractModel event dispatcher and add to the future extensibility of our module. While Magento uses the <ModuleName>_<ModelName> convention for $_eventPrefix naming, we might be safer using <VendorName>_<ModuleName>_<ModelName>. The $_eventObject, by convention, usually bears the name of the model itself.
We then create the <MAGELICIOUS_DIR>/Core/Model/ResourceModel/Log.php file with the following content:
class Log extends \Magento\Framework\Model\ResourceModel\Db\AbstractDb {
protected function _construct() {
$this->_init('magelicious_core_log', 'entity_id');
}
}
The _init method here takes two arguments: the magelicious_core_log value for the $mainTable argument and the entity_id value for the $idFieldName argument. The $idFieldName is the name of the primary column in the designated database. It's worth noting that the magelicious_core_log table still doesn't exist, but we will address that in a bit.
We will then create the <MAGELICIOUS_DIR>/Core/Model/ResourceModel/Log/Collection.php file with the following content:
class Collection extends \Magento\Framework\Model\ResourceModel\Db\Collection\AbstractCollection {
protected function _construct() {
$this->_init(
\Magelicious\Core\Model\Log::class,
\Magelicious\Core\Model\ResourceModel\Log::class
);
}
}
The _init method here takes two arguments: the string names of $model and $resourceModel. Magento uses the <FULLY_QUALIFIED_CLASS_NAME>::class syntax for this, as it uses a nifty solution instead of passing class strings around.
Both EAV and simple models extend from the Magento\Framework\Model\AbstractModel class, which further extends from Magento\Framework\DataObject. The DataObject has some neat methods worth memorizing.
Group of the following methods deal with data transformation:
The other groups of these methods, implemented through the magic __call method, enables the following neat syntax:
To quickly put this magic into perspective, let's manually create the magelicious_core_log table as follows:
CREATE TABLE `magelicious_core_log` (
`entity_id` int(10) unsigned NOT NULL AUTO_INCREMENT,
`severity_level` varchar(24) NOT NULL,
`note` text NOT NULL,
`created_at` timestamp NOT NULL DEFAULT CURRENT_TIMESTAMP ON UPDATE CURRENT_TIMESTAMP,
PRIMARY KEY (`entity_id`)
) ENGINE=InnoDB DEFAULT CHARSET=utf8;
With the magic of DataObject, our empty Magelicious\Core\Model\Log model will still be able to save its data, as follows:
$log->setCreatedAt(new \DateTime());
$log->setSeverityLevel('info');
$log->setNote('Just Some Note');
$log->save();
While this example would work, there is far more to it than this. Creating tables manually is not a viable option for building modules. Magento has just the right mechanism for this, which is called setup scripts.
Every time a module is installed via a php bin/magento module:enable command, Magento shows the following message: To make sure that the enabled modules are properly registered, run 'setup:upgrade'. The php bin/magento setup:upgrade command upgrades the Magento application, database data, and schema. Once triggered, the upgrade command instantiates Magento\Setup\Model\Installer, which then goes through a series of methods. Its getSchemaDataHandler method reveals the types of available setup scripts:
These scripts live under the <VendorName>/<ModuleName>/Setup directory.
Once successfully finished, the setup:upgrade command makes a new entry, or updates an existing one, in the setup_module table. There, we can see the schema_version and data_version values logged against each module.
Let's take a closer look at writing each of those scripts.
The InstallSchema script is used when we wish to add new columns to existing tables or create new tables. This script is run only when a module is enabled. Once enabled, the module gets a corresponding entry under the setup_module.schema_version table column. This entry prevents the InstallSchema script running on any subsequent setup:upgrade command where the module's setup_version remains the same.
Let's go ahead and create the <MAGELICIOUS_DIR>/Core/Setup/InstallSchema.php file with the following content:
use \Magento\Framework\Setup\InstallSchemaInterface;
use Magento\Framework\Setup\ModuleContextInterface;
use Magento\Framework\Setup\SchemaSetupInterface;
class InstallSchema implements InstallSchemaInterface {
public function install(SchemaSetupInterface $setup, ModuleContextInterface $context) {
$setup->startSetup();
echo 'InstallSchema->install()' . PHP_EOL;
$setup->endSetup();
}
}
The use of $setup->startSetup(); and $setup->endSetup(); is a common practice among the majority of setup scripts. The implementation of these two methods deals with running additional environment setup steps, such as setting SQL_MODE and FOREIGN_KEY_CHECKS, as can be seen under Magento\Framework\DB\Adapter\Pdo\Mysql.
To make something useful out of it, let's go ahead and replace the echo line with the code that actually creates our magelicious_core_log table:
$table = $setup->getConnection()
->newTable($setup->getTable('magelicious_core_log'))
->addColumn(
'entity_id',
\Magento\Framework\DB\Ddl\Table::TYPE_INTEGER,
null,
['identity' => true, 'unsigned' => true, 'nullable' => false, 'primary' => true],
'Entity ID'
)->addColumn(
'severity_level',
\Magento\Framework\DB\Ddl\Table::TYPE_TEXT,
24,
['nullable' => false],
'Severity Level'
)->addColumn(
'note',
\Magento\Framework\DB\Ddl\Table::TYPE_TEXT,
null,
['nullable' => false],
'Note'
)->addColumn(
'created_at',
\Magento\Framework\DB\Ddl\Table::TYPE_TIMESTAMP,
null,
['nullable' => false],
'Created At'
)->setComment('Magelicious Core Log Table');
$setup->getConnection()->createTable($table);
$setup->getConnection() gets us the database adapter instance. From there on, we get access to methods that are needed for database table creation. When it comes to InstallSchema scripts, the majority of the time, the following methods will do the job:
The magelicious_core_log table here is essentially storage behind our Magelicious\Core\Model\Log simple model. If our model was an EAV model, we would be using the same InstallSchema script to create tables such as the following:
However, in the case of the EAV model, the actual attributes severity_level and note would then likely be added via an InstallData script. This is because attributes definitions are essentially data under the eav_attribute_* tables—primarily the eav_attribute table. Therefore, attributes are created inside of the InstallData and UpgradeData scripts.
The UpgradeSchema script is used when we wish to create new tables or add columns to existing tables. Given that it is run on every setup:upgrade, where setup_module.schema_version is lower than setup_version under <VendorName>/<ModuleName>/etc/module.xml, we are in charge of controlling the code for a specific version. This is usually done via the if-ed version_compare approach.
To better demonstrate this, let's create the <MAGELICIOUS_DIR>/Core/Setup/UpgradeSchema.php file with the following content:
use \Magento\Framework\Setup\UpgradeSchemaInterface;
use Magento\Framework\Setup\ModuleContextInterface;
use Magento\Framework\Setup\SchemaSetupInterface;
class UpgradeSchema implements UpgradeSchemaInterface {
public function upgrade(SchemaSetupInterface $setup, ModuleContextInterface $context) {
$setup->startSetup();
if (version_compare($context->getVersion(), '2.0.2') < 0) {
$this->upgradeToVersionTwoZeroTwo($setup);
}
$setup->endSetup();
}
private function upgradeToVersionTwoZeroTwo(SchemaSetupInterface $setup) {
echo 'UpgradeSchema->upgradeToVersionTwoZeroTwo()' . PHP_EOL;
}
}
The if-ed version_compare here reads as follows: if the current module version is equal to 2.0.2, then execute the upgradeToVersionTwoZeroTwo method. If we were to release an updated version of our module, we would need to properly bump up the setup_version of <VendorName>/<ModuleName>/etc/module.xml, or else UpgradeSchema does not make a lot of sense. Likewise, we should always be sure to target a specific module version, thus avoiding code that executes on every version change.
When it comes to UpgradeSchema scripts, the following methods of a database adapter instance, alongside the previously mentioned one, will be of interest:
The Recurring scripts executes on each and every setup:upgrade command, regardless of the schema_version or data_version logged against the setup_module table.
Let's create the <MAGELICIOUS_DIR>/Core/Setup/Recurring.php file with the following content:
use Magento\Framework\Setup\InstallSchemaInterface;
use Magento\Framework\Setup\ModuleContextInterface;
use Magento\Framework\Setup\SchemaSetupInterface;
class Recurring implements InstallSchemaInterface {
public function install(SchemaSetupInterface $setup, ModuleContextInterface $context) {
$setup->startSetup();
echo 'Recurring->install()' . PHP_EOL;
$setup->endSetup();
}
}
Though interesting, the Recurring scripts are rarely used in Magento. Only a handful of them are used, and that is mostly for installing external foreign keys. This is not to say that we cannot use them for our purposes – it is just that their use case is quite limited when we think about it.
The InstallData script is used when we wish to add new data to existing tables. This script is run only when a module is enabled. Once enabled, the module gets a corresponding entry under the setup_module.data_version table column. This entry prevents the InstallData script to run on any subsequent setup:upgrade command execution, where the module's setup_version remains the same.
Let's create the <MAGELICIOUS_DIR>/Core/Setup/InstallData.php file with the following content:
use \Magento\Framework\Setup\InstallDataInterface;
use Magento\Framework\Setup\ModuleContextInterface;
use Magento\Framework\Setup\ModuleDataSetupInterface;
class InstallData implements InstallDataInterface {
public function install(ModuleDataSetupInterface $setup, ModuleContextInterface $context) {
$setup->startSetup();
echo 'InstallData->install()' . PHP_EOL;
$setup->endSetup();
}
}
Chances are, we will be interacting with this type of script more often than not. Replacing the echo line with modified pieces of the equivalent Magento InstallData script might give us a better understanding of the possibilities behind these scripts.
Let's create the <MAGELICIOUS_DIR>/Core/Setup/UpgradeData.php file with the following content:
use Magento\Framework\Setup\ModuleContextInterface;
use Magento\Framework\Setup\ModuleDataSetupInterface;
class UpgradeData implements \Magento\Framework\Setup\UpgradeDataInterface {
public function upgrade(ModuleDataSetupInterface $setup, ModuleContextInterface $context) {
$setup->startSetup();
if (version_compare($context->getVersion(), '2.0.2') < 0) {
$this->upgradeToVersionTwoZeroTwo($setup);
}
$setup->endSetup();
}
private function upgradeToVersionTwoZeroTwo(ModuleDataSetupInterface $setup) {
echo 'UpgradeData->upgradeToVersionTwoZeroTwo()' . PHP_EOL;
}
}
Let's go ahead and replace the echo line with something practical, like adding a new column to an existing table:
$salesSetup = $this->salesSetupFactory->create(['setup' => $setup]);
$salesSetup->addAttribute('order', 'merchant_note', [
'type' => \Magento\Framework\DB\Ddl\Table::TYPE_TEXT,
'visible' => false,
'required' => false
]);
Here, we used the instance of Magento\Sales\Setup\SalesSetupFactory, injected through __construct. This further creates an instance of the Magento\Sales\Setup\SalesSetup class. We need this class in order to create sales EAV attributes. The order entity is somewhat of a strange mix; while it is registered as an EAV type of entity under the eav_entity_type table, it does not really use eav_attribute_* tables – it uses a single sales_order table to store its attributes. We could have easily used (Install|Upgrade)Schema scripts to simply add a new column via $setup->getConnection()->addColumn(). Once executed, this code adds the merchant_note column to the sales_order table. We will use this column later on, as we reach the Extending entities section.
Much like recurring scripts, the RecurringData scripts are rarely used in Magento. They also execute on each and every setup:upgrade command, regardless of the schema_version or data_version logged against the setup_module table. Magento Open Source uses merely three RecurringData scripts throughout its codebase.
Let's create the <MAGELICIOUS_DIR>/Core/Setup/RecurringData.php file with the following content:
use Magento\Framework\Setup\InstallDataInterface;
use Magento\Framework\Setup\ModuleContextInterface;
use Magento\Framework\Setup\ModuleDataSetupInterface;
class RecurringData implements InstallDataInterface {
public function install(ModuleDataSetupInterface $setup, ModuleContextInterface $context) {
$setup->startSetup();
echo 'RecurringData->install()' . PHP_EOL;
$setup->endSetup();
}
}
The setup scripts provide a way for us to manage the data and its representation in the database. Whereas adding a new attribute to simple model is likely a case of extending its table by an extra column (*Schema scripts), adding a new attribute to an EAV model is a matter of adding new data under the eav_attribute table (*Data scripts).
We extend entities by adding additional attributes to them. Referring back to the magical getter and setter methods mentioned in the context of Magento\Framework\DataObject, the logical thinking might be: what's the big deal; can't we just add new database columns via UpgradeSchema and use magical getter and setter methods to go around it? The answer is both yes and no, but mainly leaning toward no – we will soon learn why.
To better explain this, let's take a look at Magento\Sales\Model\Order, the entity model. This model implements the Magento\Sales\Api\Data\OrderInterface interface, which further extends Magento\Framework\Api\ExtensibleDataInterface. Here, we can see a constant defining a key for the extension attributes object. This is somewhat of a starting point for extending entities. Suffice to say, there is an extra abstraction layer on top of some of the models. This abstraction layer, called service contracts, is a set of PHP interfaces that ensure a well-defined, durable API that other modules and third-party extensions might implement.
This, however, is easier said than done. When you think about it, if we had a module that's already heavily in use, adding even a simple attribute to one of its entity models might break its functionality. This is where extension attributes come into the picture.
Creating a new extension attribute for an existing entity is usually a case of doing the following:
Moving forward, we are going to create extension attributes for the order entity, that is, customer_note and merchant_note.
We can imagine customer_note as an attribute that does not persist its value(s) in the sales_order table as order entity does, whereas merchant_note attribute does. This is why we created the sales_order.merchant_note column earlier via the UpgradeData
script.
Let's go ahead and create the <MAGELICIOUS_DIR>/Core/Api/Data/CustomerNoteInterface.php file with the following content:
interface CustomerNoteInterface extends \Magento\Framework\Api\ExtensibleDataInterface
{
const CREATED_BY = 'created_by';
const NOTE = 'note';
public function setCreatedBy($createdBy);
public function getCreatedBy();
public function setNote($note);
public function getNote();
}
The customer_note attribute is going to be a full-blown object, so we will create an interface for it.
We will then create the <MAGELICIOUS_DIR>/Core/Model/CustomerNote.php file with the following content:
class CustomerNote extends \Magento\Framework\Model\AbstractExtensibleModel implements \Magelicious\Core\Api\Data\CustomerNoteInterface
{
public function setCreatedBy($createdBy) {
return $this->setData(self::CREATED_BY, $createdBy);
}
public function getCreatedBy() {
return $this->getData(self::CREATED_BY);
}
public function getNote() {
return $this->getData(self::NOTE);
}
public function setNote($note) {
return $this->setData(self::NOTE, $note);
}
}
This class is essentially our customer_note entity model. To keep things minimal, we will just implement the CustomerNoteInterface, without any extra logic.
We will then go ahead and create the <MAGELICIOUS_DIR>/Core/etc/extension_attributes.xml file with the following content:
<?xml version="1.0"?>
<config>
<extension_attributes for="Magento\Sales\Api\Data\OrderInterface">
<attribute code="customer_note" type="Magelicious\Core\Api\Data\CustomerNoteInterface"/>
<attribute code="merchant_note" type="string"/>
</extension_attributes>
</config>
The extension_attributes.xml file is where we register our extension attributes. The type argument allows us to register either complex types, such as an interface, or scalar types, such as a string or integer. With the extension attributes registered, it is time to register the corresponding plugins. This is done via the di.xml file.
Let's go ahead and create the <MAGELICIOUS_DIR>/Core/etc/di.xml file with the following content:
<?xml version="1.0"?>
<config>
<preference for="Magelicious\Core\Api\Data\CustomerNoteInterface" type="Magelicious\Core\Model\CustomerNote"/>
<type name="Magento\Sales\Api\OrderRepositoryInterface">
<plugin name="customerNoteToOrderRepository" type="Magelicious\Core\Plugin\CustomerNoteToOrderRepository"/>
<plugin name="merchantNoteToOrderRepository" type="Magelicious\Core\Plugin\MerchantNoteToOrderRepository"/>
</type>
</config>
The reason for registering plugins in the first place is to have our customer_note and merchant_note attributes available on the getList, get, and save methods of the Magento\Sales\Api\OrderRepositoryInterface interface. The repository interfaces are the main way of CRUD-ing entities under service contracts. Without proper plugins, Magento simply would not see our attributes.
Let's create the <MAGELICIOUS_DIR>/Core/Plugin/CustomerNoteToOrderRepository.php file with the following content:
class CustomerNoteToOrderRepository {
protected $orderExtensionFactory;
protected $customerNoteInterfaceFactory;
public function __construct(
\Magento\Sales\Api\Data\OrderExtensionFactory $orderExtensionFactory,
\Magelicious\Core\Api\Data\CustomerNoteInterfaceFactory $customerNoteInterfaceFactory
) {
$this->orderExtensionFactory = $orderExtensionFactory;
$this->customerNoteInterfaceFactory = $customerNoteInterfaceFactory;
}
private function getCustomerNoteAttribute(
\Magento\Sales\Api\Data\OrderInterface $resultOrder
) {
$extensionAttributes = $resultOrder->getExtensionAttributes() ?: $this->orderExtensionFactory->create();
// TODO: Get customer note from somewhere (below we fake it)
$customerNote = $this->customerNoteInterfaceFactory->create()
->setCreatedBy('Mark')
->setNote('The note ' . \time());
$extensionAttributes->setCustomerNote($customerNote);
$resultOrder->setExtensionAttributes($extensionAttributes);
return $resultOrder;
}
private function saveCustomerNoteAttribute(
\Magento\Sales\Api\Data\OrderInterface $resultOrder
) {
$extensionAttributes = $resultOrder->getExtensionAttributes();
if ($extensionAttributes && $extensionAttributes->getCustomerNote()) {
// TODO: Save $extensionAttributes->getCustomerNote() somewhere
}
return $resultOrder;
}
}
Right now, there are no plugin methods defined. getCustomerNoteAttribute and saveCustomerNoteAttribute are essentially helper methods that we will soon use.
Let's extend our CustomerNoteToOrderRepository class by adding the after plugin for the getList method, as follows:
public function afterGetList(
\Magento\Sales\Api\OrderRepositoryInterface $subject,
\Magento\Sales\Model\ResourceModel\Order\Collection $resultOrder
) {
foreach ($resultOrder->getItems() as $order) {
$this->afterGet($subject, $order);
}
return $resultOrder;
}
Now, let's extend our CustomerNoteToOrderRepository class by adding the after plugin for the get method, as follows:
public function afterGet(
\Magento\Sales\Api\OrderRepositoryInterface $subject,
\Magento\Sales\Api\Data\OrderInterface $resultOrder
) {
$resultOrder = $this->getCustomerNoteAttribute($resultOrder);
return $resultOrder;
}
Finally, let's extend our CustomerNoteToOrderRepository class by adding the after plugin for the save method, as follows:
public function afterSave(
\Magento\Sales\Api\OrderRepositoryInterface $subject,
\Magento\Sales\Api\Data\OrderInterface $resultOrder
) {
$resultOrder = $this->saveCustomerNoteAttribute($resultOrder);
return $resultOrder;
}
With the plugins for customer_note sorted, let's go ahead and address the plugins for merchant_note. We will create the <MAGELICIOUS_DIR>/Core/Plugin/MerchantNoteToOrderRepository.php file with the following content:
class MerchantNoteToOrderRepository {
protected $orderExtensionFactory;
public function __construct(
\Magento\Sales\Api\Data\OrderExtensionFactory $orderExtensionFactory
) {
$this->orderExtensionFactory = $orderExtensionFactory;
}
private function getMerchantNoteAttribute(
\Magento\Sales\Api\Data\OrderInterface $order
) {
$extensionAttributes = $order->getExtensionAttributes() ?: $this->orderExtensionFactory->create();
$extensionAttributes->setMerchantNote($order->getData('merchant_note'));
$order->setExtensionAttributes($extensionAttributes);
return $order;
}
private function saveMerchantNoteAttribute(
\Magento\Sales\Api\Data\OrderInterface $order
) {
$extensionAttributes = $order->getExtensionAttributes();
if ($extensionAttributes && $extensionAttributes->getMerchantNote()) {
$order->setData('merchant_note', $extensionAttributes->getMerchantNote());
}
return $order;
}
}
Right now, there are no plugin methods defined. getMerchantNoteAttribute and saveMerchantNoteAttribute are essentially helper methods that we will soon use.
Let's extend our MerchantNoteToOrderRepository class by adding the after plugin for the getList method, as follows:
public function afterGetList(
\Magento\Sales\Api\OrderRepositoryInterface $subject,
\Magento\Sales\Model\ResourceModel\Order\Collection $order
) {
foreach ($order->getItems() as $_order) {
$this->afterGet($subject, $_order);
}
return $order;
}
Now, let's extend our MerchantNoteToOrderRepository class by adding the after plugin for the get method, as follows:
public function afterGet(
\Magento\Sales\Api\OrderRepositoryInterface $subject,
\Magento\Sales\Api\Data\OrderInterface $order
) {
$order = $this->getMerchantNoteAttribute($order);
return $order;
}
Finally, let's extend our MerchantNoteToOrderRepository class by adding the before plugin for the save method, as follows:
public function beforeSave(
\Magento\Sales\Api\OrderRepositoryInterface $subject,
\Magento\Sales\Api\Data\OrderInterface $order
) {
$order = $this->saveMerchantNoteAttribute($order);
return [$order];
}
The obvious difference here is that, with MerchantNoteToOrderRepository, we are using beforeSave, whereas we used afterSave with CustomerNoteToOrderRepository. The reason for this is that merchant_note is to be saved directly on the entity whose repository we are plugging into, that is, its table in the sales_order database. This way, we use its Magento\Framework\DataObject properties of setData to fetch what was assumingly note already set via extension attributes and pass it onto the object's merchant_note property before it is saved. Magento's built-in save mechanism then takes over and stores the property, as long as the corresponding column exists in the database.
With the plugins in place, our attributes should now be visible and persistable when used through the OrderRepositoryInterface. Without getting too deep into the web API at this point, we can quickly test this via performing the following REST request:
GET /index.php/rest/V1/orders?searchCriteria[filter_groups][0][filters][0][field]=entity_id&searchCriteria[filter_groups][0][filters][0][value]=1
Host: magelicious.loc
Content-Type: application/json
Authorization: Bearer 0vq6d4kabpxgc5kysb2sybf3n4ct771x
Whereas the Bearer token is something we get by running the following REST login action:
POST /index.php/rest/V1/integration/admin/token
Host: magelicious.loc
Content-Type: application/json
{"username": "john", "password": "grdM%0i9a49n"}
The successful response of GET /V1/orders should yield a result of the following partial structure:
{
"items": [
{
"extension_attributes": {
"shipping_assignments": [...],
"customer_note": {
"created_by": "Mark",
"note": "Note ABC"
},
"merchant_note": "Note XYZ"
}
}
]
}
The OrderRepositoryInterface to web API REST relationship maps out as follows:
We will learn more about the web API in the next chapter. The example given here was merely for the purpose of visualizing the work we have done around plugins. Using extension attributes, with the help of plugins, we have essentially extended the Magento web API.
Throughout this chapter, we learned how to differentiate the three types of Magento models: non-persistable, persistable simple, and persistable EAV. The inners of EAV models are left out of scope due to their inherently complex nature. We then took a look through six different setup scripts. These give us a great deal of flexibility over schema and data management. Combined with extension attributes, we get a powerful mechanism for extending built-in entities. Though somewhat tedious, the extension attributes mechanism use of interfaces ensures that integrators can extend this built-in functionality with complex data types.
Moving forward, we are going to take a look at the powerful web API that's implemented in Magento.
Web application programming interfaces (API) play a major role in modern application development. They allow various third-party integrators to interact with applications through the HTTP layer. Magento supports both Representational State Transfer (REST) and Simple Object Access Protocol ( SOAP) APIs. Its web API framework is based on the create, read, update, delete (CRUD) and search (search criteria) models. The scope of functionality that APIs offer is quite big, allowing us to use them for a wide range of tasks, such as creating a completely new shopping application, integrating with customer relationship management (CRM) systems, enterprise resource planning (ERP) systems, and content management systems (CMS), as well as creating JavaScript widgets in the Magento storefront itself.
Moving forward, we are going to take a closer look at the following web API sections:
You will need to have basic knowledge of PHP, OOP, JavaScript, and XML. You will also need Apache, MySQL, and AMPPS installed on your system to execute the codes.
The code files of this chapter can be found on GitHub:
https://github.com/PacktPublishing/Magento-2-Quick-Start-Guide.
Check out the following video to see the Code in Action:
The Magento web API framework differentiates three fundamental types of users:
<resources>
<resource ref="anonymous" />
</resources>
<resources>
<resource ref="self"/>
</resources>
<resources>
<resource ref="Magento_Cms::save"" />
</resources>
To further understand what this means, we need to understand the link between <VendorName>/<ModuleName>/acl.xml and <VendorName>/<ModuleName>/webapi.xml.
The acl.xml is where we define our access resources. Let's take a closer look at the partial extract of one such resource, defined in the <MAGENTO_DIR>/module-cms/etc/acl.xml file:
<config>
<acl>
<resources>
<resource id="Magento_Backend::admin">
<resource id="Magento_Backend::content">
<resource id="Magento_Backend::content_elements">
<resource id="Magento_Cms::page" title="Pages">
<resource id="Magento_Cms::save" title="Save Page"/>
</resource>
</resource>
</resource>
</resource>
</resources>
</acl>
</config>
Our focus here is on the Magento_Cms::save resource. Magento merges all of these individual acl.xml files into one big ACL tree. We can see this tree in two places in the Magento admin area:
These are the two screens where we define access permissions for a standard admin user and a special web API integrator user. This is not to say that a standard admin user cannot execute web API calls. The difference will become more obvious when we get to the Types of authentication section.
To this point, these resources don't really do anything on their own. Simply defining them within acl.xml won't magically make a CMS page in this case access-protected, or anything like that. This is where controllers come into the mix, as one example of an access-controlling mechanism. A quick lookup against Magento_Cms::save string usage, reveals a Magento\Cms\Controller\Adminhtml\Page\Edit class using it as part of its const ADMIN_RESOURCE = 'Magento_Cms::save' definition.
The ADMIN_RESOURCE constant is defined further down the inheritance chain, on the \Magento\Backend\App\AbstractAction as const ADMIN_RESOURCE = 'Magento_Backend::admin'. This is further used by the _isAllowed method implementation as follows:
protected function _isAllowed()
{
return $this->_authorization->isAllowed(static::ADMIN_RESOURCE);
}
The AbstractAction class here is the basis for pretty much any Magento admin controller. This means that the controller is the one that utilizes the resource defined in acl.xml, whereas definitions in acl.xml serve the purpose of building the ACL tree, which we can manage from the Magento admin interface. This means that anyone trying to access the cms/page/edit URL in admin must have a Magento_Cms::save resource permission to do so. Otherwise, the _isAllowed method, reading the ADMIN_RESOURCE value, will return false and forbid access to the page.
Web APIs, on the other hand, don't use controllers, so there is no access to the ADMIN_RESOURCE constant and the _isAllowed method. APIs use webapi.xml to define routes. Let's follow up with the CMS page save analogue, as per the <MAGENTO_DIR>/module-cms/etc/webapi.xml file:
<routes>
<route url="/V1/cmsPage" method="POST">
<service class="Magento\Cms\Api\PageRepositoryInterface" method="save"/>
<resources>
<resource ref="Magento_Cms::page"/>
</resources>
</route>
<route url="/V1/cmsPage/:id" method="PUT">
<service class="Magento\Cms\Api\PageRepositoryInterface" method="save"/>
<resources>
<resource ref="Magento_Cms::page"/>
</resources>
</route>
</routes>
The individual route definition binds together a few things. The url and method argument of a route element specify what URL will trigger this route. The class and method arguments of a service element specify which interface and method on that interface will execute once the route is triggered. Finally, the ref argument of a resource element specifies the security check to be executed. If a user executing a web API call is unauthenticated or authenticated with a role that does not have Magento_Cms::page, the request won't execute the service method specified.
The customer type of user is the most convenient for working with widgets. The Magento checkout is an excellent example of that. The whole checkout is a fully AJAX-enabled app on its own, separate from the usual Magento storefront, such as its CMS, category, and product pages.
Magento supports three different types of authentication methods:
Using OAuth-based authentication exceeds the scope of this book, which is why moving forward, all of our examples will use simpler token-based authentication.
Magento supports two types of APIs:
The great thing about these two is that we don't get to write two different APIs in Magento. The approach to writing APIs is unified, so to speak. We define some interfaces, classes, and configurations, and Magento then generates the API endpoints for both REST and SOAP on its own. Thus, the REST vs. SOAP choice really only becomes a question when we consume APIs, not while we write them.
Using SOAP services exceeds the scope of this book, which is why moving forward, all of our examples will use REST APIs.
The CRUD and search models of web APIs are implemented through a set of *RepositoryInterface interfaces, found in the <VendorName>/<ModuleName>/Api/<EntityName>RepositoryInterface.php files.
The majority of these repository interfaces define a specific set of common methods:
The data type that flows through these methods follows a certain pattern, where each entity passing through an API has a data interface defined in a <VendorName>/<ModuleName>/Api/Data/<EntityName>Interface.php file.
Let's take a closer look at <MAGENTO_DIR>/module-cms/Api/BlockRepositoryInterface.php:
interface BlockRepositoryInterface
{
public function save(
\Magento\Cms\Api\Data\BlockInterface $block
);
public function getById($blockId);
public function getList(
\Magento\Framework\Api\SearchCriteriaInterface $searchCriteria
);
public function delete(
\Magento\Cms\Api\Data\BlockInterface $block
);
public function deleteById($blockId);
}
The concrete implementations of repository interfaces can usually be found in the <VendorName>/<ModuleName>/Model/<EntityName>Repository.php or the <VendorName>/<ModuleName>/Model/ResourceModel/<EntityName>Repository.php files. The exact location is not that relevant, as webapi.xml should always use an interface for a class argument for its service element definition. The mapping between the interface and concrete implementation then happens in the module's di.xml file via a preference definition. From an integrator's point of view, using APIs does not require any knowledge of concrete implementations.
The Swagger URL, http://magelicious.loc/swagger, will generate a Swagger UI interface, that allows us to visualize and interact with the API's resources:
By default, documentation returned here is limited to anonymous users only. Generating a valid API key, via the POST /V1/integration/customer/token or POST /V1/integration/admin/token will unlock the documentation for all the resources available to a given user. While Swagger certainly has its place in development workflows, oftentimes the Postman tool is a more robust solution for those working extensively with APIs.
Let's go ahead and CRUD our way through the cmsBlock interface, using REST endpoints:
We will be using the integrator type of user. This will be our Magento admin user, assigned either full resources, or at least the Resources | Content | Elements | Blocks resource under the Role Resource tab of the System | Permissions | User Roles | Edit | Add New Role screen.
We start with the admin login request, in order to obtain a token for later requests:
POST /index.php/rest/V1/integration/admin/token HTTP/1.1
Host: magelicious.loc
Content-Type: application/json
{
"username": "branko",
"password": "jrdJ%0i9a69n"
}
The successful JSON response should contain our API token, which we will be using for any subsequent API calls. The token itself is stored in the oauth_token table, under the token column. We further have consumer_id, admin_id, and customer_id columns in that table. These get filled depending on the user type we used to log in. Both consumer_id and admin_id are of the integrator type. These columns get filled accordingly depending on the user and authentication types used; as in customer versus integrator, and token-based vs OAuth-based vs session-based authentication.
Now let's create a new block via POST /V1/cmsBlock; this triggers the save method:
POST /rest/V1/cmsBlock HTTP/1.1
Host: magelicious.loc
Content-Type: application/json
Authorization: Bearer 8pcvbwrp97l5m1pvcdnis6e3930n4rsj
{
"block": {
"identifier": "x-block",
"title": "The X Block",
"content": "<p>The <strong>X Block</strong> Content...</p>",
"active": true
}
}
The successful JSON response should return our newly created block:
{
"id": 1,
"identifier": "x-block",
"title": "The X Block",
"content": "<p>The <strong>X Block</strong> Content...</p>",
"active": true
}
Now let's update the existing cmsBlock via PUT /V1/cmsBlock/:id; this triggers the save method:
PUT /rest/V1/cmsBlock/1 HTTP/1.1
Host: magelicious.loc
Content-Type: application/json
Authorization: Bearer 8pcvbwrp97l5m1pvcdnis6e3930n4rsj
{
"block": {
"identifier": "y-block",
"title": "The Y Block",
"content": "<p>The <strong>Y Block</strong> Content...</p>",
"active": true
}
}
The successful JSON response should return the updated block:
{
"id": 1,
"identifier": "y-block",
"title": "The Y Block",
"content": "<p>The <strong>Y Block</strong> Content...</p>",
"active": true
}
Let's now fetch one of the existing blocks via GET /V1/cmsBlock/:blockId; this triggers the getById method:
GET /rest/V1/cmsBlock/1 HTTP/1.1
Host: magelicious.loc
Content-Type: application/json
Authorization: Bearer 8pcvbwrp97l5m1pvcdnis6e3930n4rsj
The successful JSON response is structurally identical to that of the save method.
Now, let's try deleting one of the blocks via DELETE /V1/cmsBlock/:blockId; this triggers the deleteById method:
DELETE /rest/V1/cmsBlock/2 HTTP/1.1
Host: magelicious.loc
Content-Type: application/json
Authorization: Bearer 8pcvbwrp97l5m1pvcdnis6e3930n4rsj
The successful JSON response returns a single true or false.
Finally, let's try fetching the list of blocks via GET /V1/cmsBlock/search; this triggers the getList method:
GET /rest/V1/cmsBlock/search?searchCriteria[filter_groups][0][filters][0][field]=title&searchCriteria[filter_groups][0][filters][0][value]=%Block%&searchCriteria[filter_groups][0][filters][0][condition_type]=like HTTP/1.1
Host: magelicious.loc
Content-Type: application/json
Authorization: Bearer 8pcvbwrp97l5m1pvcdnis6e3930n4rsj
Sadly, the GET request does not allow for the body, so ?searchCriteria... has to be passed via a URL.
The successful JSON response returns an object comprised of items, search_criteria, and total_count top-level keys:
{
"items": [
{
"id": 4,
"identifier": "x-block",
"title": "The X Block",
"content": "The <strong>X Block</strong> Content...",
"creation_time": "2018-06-23 07:30:06",
"update_time": "2018-06-23 07:30:06",
"active": true
},
{
"id": 5,
"identifier": "y-block",
"title": "The Y Block",
"content": "The <strong>Y Block</strong> Content...",
"creation_time": "2018-06-23 07:30:14",
"update_time": "2018-06-23 07:30:14",
"active": true
}
],
"search_criteria": {...},
"total_count": 2
}
We will address the search_criteria in more detail later on.
Let's go ahead and create a miniature, yet full-blown Magento module Magelicious_Boxy that demonstrates the entire flow of creating a custom web API.
We start off by defining a module <MAGELICIOUS_DIR>/Boxy/registration.php as follows:
\Magento\Framework\Component\ComponentRegistrar::register(
\Magento\Framework\Component\ComponentRegistrar::MODULE,
'Magelicious_Boxy',
__DIR__
);
We then define the <MAGELICIOUS_DIR>/Boxy/etc/module.xml as follows:
<config>
<module name="Magelicious_Boxy" setup_version="2.0.2"/>
</config>
We then define the <MAGELICIOUS_DIR>/Boxy/Setup/InstallSchema.php that adds the following table:
$table = $setup->getConnection()
->newTable($setup->getTable('magelicious_boxy_box'))
->addColumn(
'entity_id',
\Magento\Framework\DB\Ddl\Table::TYPE_INTEGER,
null, [
'identity' => true,
'unsigned' => true,
'nullable' => false,
'primary' => true
], 'Entity ID'
)
->addColumn(
'title',
\Magento\Framework\DB\Ddl\Table::TYPE_TEXT,
32,
['nullable' => false], 'Title'
)
->addColumn(
'content',
\Magento\Framework\DB\Ddl\Table::TYPE_TEXT,
null,
['nullable' => false], 'Content'
)
->setComment('Magelicious Boxy Box Table');
$setup->getConnection()->createTable($table);
We then define <MAGELICIOUS_DIR>/Boxy/Api/Data/BoxInterface.php as follows:
interface BoxInterface {
const BOX_ID = 'box_id';
const TITLE = 'title';
const CONTENT = 'content';
public function getId();
public function getTitle();
public function getContent();
public function setId($id);
public function setTitle($title);
public function setContent($content);
}
We then define <MAGELICIOUS_DIR>/Boxy/Api/Data/BoxSearchResultsInterface.php as follows:
interface BoxSearchResultsInterface extends \Magento\Framework\Api\SearchResultsInterface
{
public function getItems();
public function setItems(array $items);
}
We then add the <MAGELICIOUS_DIR>/Boxy/Api/BoxRepositoryInterface.php as follows:
interface BoxRepositoryInterface
{
public function save(\Magelicious\Boxy\Api\Data\BoxInterface $box);
public function getById($boxId);
public function getList(\Magento\Framework\Api\SearchCriteriaInterface $searchCriteria);
public function delete(\Magelicious\Boxy\Api\Data\BoxInterface $box);
public function deleteById($boxId);
}
We then define the <MAGELICIOUS_DIR>/Boxy/Model/Box.php as follows:
class Box extends \Magento\Framework\Model\AbstractModel implements \Magelicious\Boxy\Api\Data\BoxInterface
{
protected function _construct() {
$this->_init(\Magelicious\Boxy\Model\ResourceModel\Box::class);
}
public function getId() {
return $this->getData(self::BOX_ID);
}
public function getTitle() {
return $this->getData(self::TITLE);
}
public function getContent() {
return $this->getData(self::CONTENT);
}
public function setId($id) {
return $this->setData(self::BOX_ID, $id);
}
public function setTitle($title) {
return $this->setData(self::TITLE, $title);
}
public function setContent($content) {
return $this->setData(self::CONTENT, $content);
}
}
We then define the <MAGELICIOUS_DIR>/Boxy/Model/ResourceModel/Box.php as follows:
class Box extends \Magento\Framework\Model\ResourceModel\Db\AbstractDb
{
protected function _construct() {
$this->_init('magelicious_boxy_box', 'entity_id');
}
}
We then define the <MAGELICIOUS_DIR>/Boxy/Model/ResourceModel/Box/Collection.php as follows:
class Collection
{
protected function _construct() {
$this->_init(
\Magelicious\Boxy\Model\Box::class,
\Magelicious\Boxy\Model\ResourceModel\Box::class
);
}
}
We then define the <MAGELICIOUS_DIR>/Boxy/Model/BoxRepository.php as follows:
class BoxRepository implements \Magelicious\Boxy\Api\BoxRepositoryInterface
{
protected $boxFactory;
protected $boxResourceModel;
protected $searchResultsFactory;
protected $collectionProcessor;
public function __construct(
\Magelicious\Boxy\Api\Data\BoxInterfaceFactory $boxFactory,
\Magelicious\Boxy\Model\ResourceModel\Box $boxResourceModel,
\Magelicious\Boxy\Api\Data\BoxSearchResultsInterfaceFactory $searchResultsFactory,
\Magento\Framework\Api\SearchCriteria\CollectionProcessorInterface $collectionProcessor
)
{
$this->boxFactory = $boxFactory;
$this->boxResourceModel = $boxResourceModel;
$this->searchResultsFactory = $searchResultsFactory;
$this->collectionProcessor = $collectionProcessor;
}
// Todo...
}
Let's go ahead and amend the BoxRepository with the save method as follows:
public function save(\Magelicious\Boxy\Api\Data\BoxInterface $box)
{
try {
$this->boxResourceModel->save($box);
} catch (\Exception $e) {
throw new \Magento\Framework\Exception\CouldNotSaveException(__($e->getMessage()));
}
return $box;
}
Let's go ahead and amend the BoxRepository with the getById method as follows:
public function getById($boxId) {
$box = $this->boxFactory->create();
$this->boxResourceModel->load($box, $boxId);
if (!$box->getId()) {
throw new \Magento\Framework\Exception\NoSuchEntityException(__('Box with id "%1" does not exist.', $boxId));
}
return $box;
}
Let's go ahead and amend the BoxRepository with the getList method as follows:
public function getList(\Magento\Framework\Api\SearchCriteriaInterface $searchCriteria) {
$collection = $this->boxCollectionFactory->create();
$this->collectionProcessor->process($searchCriteria, $collection);
$searchResults = $this->searchResultsFactory->create();
$searchResults->setSearchCriteria($searchCriteria);
$searchResults->setItems($collection->getItems());
$searchResults->setTotalCount($collection->getSize());
return $searchResults;
}
Let's go ahead and amend the BoxRepository with the delete method as follows:
public function delete(\Magelicious\Boxy\Api\Data\BoxInterface $box) {
try {
$this->boxResourceModel->delete($box);
} catch (\Exception $e) {
throw new \Magento\Framework\Exception\CouldNotDeleteException(__($e->getMessage()));
}
return true;
}
Let's go ahead and amend the BoxRepository with the deleteById method as follows:
public function deleteById($boxId) {
return $this->delete($this->getById($boxId));
}
We then define the <MAGELICIOUS_DIR>/Boxy/etc/di.xml as follows:
<config>
<preference for="Magelicious\Boxy\Api\Data\BoxInterface" type="Magelicious\Boxy\Model\Box"/>
<preference for="Magelicious\Boxy\Api\Data\BoxSearchResultsInterface" type="Magento\Framework\Api\SearchResults" />
<preference for="Magelicious\Boxy\Api\BoxRepositoryInterface" type="Magelicious\Boxy\Model\BoxRepository"/>
</config>
We then define the <MAGELICIOUS_DIR>/Boxy/etc/acl.xml as follows:
<config>
<acl>
<resources>
<resource id="Magento_Backend::admin">
<resource id="Magento_Sales::sales">
<resource id="Magento_Sales::sales_operation">
<resource id="Magento_Sales::shipment">
<resource id="Magelicious_Boxy::box" title="Boxy Box">
<resource id="Magelicious_Boxy::box_get" title="Get"/>
<resource id="Magelicious_Boxy::box_search" title="Search"/>
<resource id="Magelicious_Boxy::box_save" title="Save"/>
<resource id="Magelicious_Boxy::box_update" title="Update"/>
<resource id="Magelicious_Boxy::box_delete" title="Delete"/>
</resource>
</resource>
</resource>
</resource>
</resource>
</resources>
</acl>
</config>
We then define the <MAGELICIOUS_DIR>/Boxy/etc/webapi.xml as follows:
<routes>
<route url="/V1/boxyBox/:boxId" method="GET">
<service class="Magelicious\Boxy\Api\BoxRepositoryInterface" method="getById"/>
<resources>
<resource ref="Magelicious_Boxy::box_get"/>
</resources>
</route>
<route url="/V1/boxyBox/search" method="GET">
<service class="Magelicious\Boxy\Api\BoxRepositoryInterface" method="getList"/>
<resources>
<resource ref="Magelicious_Boxy::box_search"/>
</resources>
</route>
<route url="/V1/boxyBox" method="POST">
<service class="Magelicious\Boxy\Api\BoxRepositoryInterface" method="save"/>
<resources>
<resource ref="Magelicious_Boxy::box_save"/>
</resources>
</route>
<route url="/V1/boxyBox/:id" method="PUT">
<service class="Magelicious\Boxy\Api\BoxRepositoryInterface" method="save"/>
<resources>
<resource ref="Magelicious_Boxy::box_update"/>
</resources>
</route>
<route url="/V1/boxyBox/:boxId" method="DELETE">
<service class="Magelicious\Boxy\Api\BoxRepositoryInterface" method="deleteById"/>
<resources>
<resource ref="Magelicious_Boxy::box_delete"/>
</resources>
</route>
</routes>
With all these bits in place, our API is now ready. We should now be able to CRUD our way through Boxy Box the same way we did with the CMS block. While there certainly is a great deal of boilerplate code to go around, our API is now both REST-and SOAP-ready.
The searchCriteria parameter of a GET request allows for search results filtering. The key to using it comes down to understanding its structure and the available condition types.
Observing the \Magento\Framework\Api\SearchCriteriaInterface interface, and the Magento\Framework\Api\SearchCriteria class as its concrete implementation, we can easily conclude the following search_criteria structure:
"search_criteria": {
"filter_groups": [],
"current_page": 1,
"page_size": 10,
"sort_orders": []
}
Whereas the mandatory filter_groups parameter and its structure are shown as follows:
"filter_groups": [
{
"filters": [
{
"field": "fieldOrAttrName",
"value": "fieldOrAttrValue",
"condition_type": "eq"
},
{
// Logical OR
}
]
},
{
// Logical AND
}
],
Conditions nested under the individual filters key, correspond to the Logical OR condition.
The list of condition_type values includes:
Combining these condition types will allow us to filter search results pretty much any way we want.
The optional sort_orders parameter and its structure unfold as follows:
"sort_orders": [
{
"field": "fieldOrAttrName",
"direction": "ASC"
}
]
The list of direction values includes ASC for ascending and DESC for descending sort orders.
The searchCriteria is seemingly the most complex, yet most powerful aspect of a search API. Understanding how it works is essential for effective querying.
In this chapter, we have covered valuable web API elements. We learned how to differentiate between types of web API users, and the authentication and methods provided to do so. We also learned how easy it is to create our own APIs with just a few lines of XML. We saw how the route definition allows for easy binding between what comes via an HTTP request to what executes in code, respecting the access list permissions in the process. The value of building APIs as part of our distributable modules lies in their extensibility. APIs force us to embrace the interface way of thinking, thus allowing others to use and extend our code easily and securely. The preference mechanism we introduced in previous chapters, through di.xml files, allows others to change the behavior behind the interface easily.
Moving forward, we are going to take a more thorough and rounded look at building and distributing our extensions via Composer and Packagist.
At the very start of our journey, we mentioned Magento source files being distributed via three different channels: a source file archive, a Git repository, and a Composer repository. The Composer approach is the preferred way. Whether we are coding a module, library, theme or language component, using the Composer allows for an easy and automated dependency management, which is not possible otherwise. Magento's built-in Component Manager can update, uninstall, enable, or disable extensions installed via Composer. This implies sources from Packagist, Magento Marketplace, or other composer sources, as long as they have a composer.json file.
Moving forward, we are going to take a closer look at the following topics:
You will need to have basic knowledge of PHP, OOP, JavaScript, and XML. You will also need Apache, MySQL, and AMPPS installed on your system to execute the codes.
The code files of this chapter can be found on GitHub:
https://github.com/PacktPublishing/Magento-2-Quick-Start-Guide.
Check out the following video to see the Code in Action:
Out of the box, Magento provides several shipping methods of its own. Unlike payment methods, which tend to be less diverse among different web shops, shipping methods are often an area of customization among merchants, which is why building a customized shipping extension is an essential skill for every Magento developer.
There are two types of shipping methods:
Let's go ahead and create a Magento shipping extension Magelicious_RoyalTrek. The extension assumes an imaginary RoyalTrek carrier, with two offline shipping methods: RoyalTrek Standard and RoyalTrek 48h.
We will start off by defining <MAGELICIOUS_DIR>/RoyalTrek/registration.php as follows:
\Magento\Framework\Component\ComponentRegistrar::register(
\Magento\Framework\Component\ComponentRegistrar::MODULE,
'Magelicious_RoyalTrek',
__DIR__
);
We can then define the <MAGELICIOUS_DIR>/RoyalTrek/etc/module.xml as follows:
<config>
<module name="Magelicious_RoyalTrek" setup_version="1.0.0"/>
</config>
With these two files in place, Magento should already see our module, when enabled.
We can then go ahead and define the <MAGELICIOUS_DIR>/RoyalTrek/composer.json as follows:
{
"name": "magelicious/module-royal-trek",
"description": "The RoyalTrek shipping",
"require": {
"php": "7.0.2|7.0.4|~7.0.6|~7.1.0"
},
"type": "magento2-module",
"version": "1.0.0",
"license": [
"OSL-3.0",
"AFL-3.0"
],
"autoload": {
"files": [
"registration.php"
],
"psr-4": {
"Magelicious\\RoyalTrek\\": ""
}
}
}
We can then define the <MAGELICIOUS_DIR>/RoyalTrek/etc/adminhtml/system.xml as follows:
<config>
<system>
<section id="carriers">
<group id="royaltrek">
<label>Royal Trek Shipping</label>
<field id="active" type="select">
<label>Enabled</label>
<source_model>Magento\Config\Model\Config\Source\Yesno</source_model>
</field>
<field id="title" type="text">
<label>Title</label>
</field>
<field id="sallowspecific" type="select">
<label>Ship to Applicable Countries</label>
<frontend_class>shipping-applicable-country</frontend_class>
<source_model>Magento\Shipping\Model\Config\Source\Allspecificcountries</source_model>
</field>
<field id="specificcountry" type="multiselect">
<label>Ship to Specific Countries</label>
<can_be_empty>1</can_be_empty>
<source_model>Magento\Directory\Model\Config\Source\Country</source_model>
</field>
<field id="showmethod" type="select"">
<label>Show Method if Not Applicable</label>
<source_model>Magento\Config\Model\Config\Source\Yesno</source_model>
</field>
<field id="specificerrmsg" type="textarea">
<label>Displayed Error Message</label>
</field>
<field id="sort_order" type="text">
<label>Sort Order</label>
<validate>validate-number validate-zero-or-greater</validate>
</field>
</group>
<!-- todo... -->
</section>
</system>
</config>
This sets the general configuration options for our shipping methods. The sallowspecific, specificcountry, showmethod, specificerrmsg and, sort_order are common configuration elements of each shipping method, as seen by examining the Magento\Shipping\Model\Carrier\AbstractCarrier class.
We can then extend the <MAGELICIOUS_DIR>/RoyalTrek/etc/adminhtml/system.xml with the following group:
<!-- The "RoyalTrek Standard" specific options -->
<group id="royaltrekstandard">
<label><![CDATA[The "RoyalTrek Standard" shipping method]]></label>
<fieldset_css>complex</fieldset_css>
<field id="title" type="text">
<label><![CDATA[Title]]></label>
</field>
<field id="shippingcost" type="text">
<label><![CDATA[Shipping Cost]]></label>
<validate>validate-number validate-zero-or-greater</validate>
</field>
</group>
We are introducing an additional set of configuration options here, to be used with our RoyalTrek Standard method.
So, we then extend the <MAGELICIOUS_DIR>/RoyalTrek/etc/adminhtml/system.xml with the following group:
<!-- The "RoyalTrek 48h" specific options -->
<group id="royaltrek48hr">
<label><![CDATA[The "RoyalTrek 48h" shipping method]]></label>
<fieldset_css>complex</fieldset_css>
<field id="title" type="text">
<label><![CDATA[Title]]></label>
</field>
<field id="shippingcost" type="text">
<label><![CDATA[Shipping Cost]]></label>
<validate>validate-number validate-zero-or-greater</validate>
</field>
</group>
We are introducing an additional set of configuration options here, to be used with our RoyalTrek 48h method.
We then define the <MAGELICIOUS_DIR>/RoyalTrek/etc/config.xml as follows:
<config>
<default>
<carriers>
<royaltrek>
<!-- DEFAULTS HERE -->
</royaltrek>
</carriers>
</default>
</config>
The config > default > carriers > royaltrek nesting path matches the nesting path of the system.xml elements. We then replace the <!-- DEFAULTS HERE --> with following:
<active>1</active>
<title>Royal Trek Shipping</title>
<sallowspecific>0</sallowspecific>
<showmethod>0</showmethod>
<specificerrmsg>The Royal Trek shipping is not available.</specificerrmsg>
<sort_order>10</sort_order>
<model>Magelicious\RoyalTrek\Model\Carrier\RoyalTrek</model>
<royaltrekstandard>
<title><![CDATA[RoyalTrek Standard]]></title>
<shippingcost>4.99</shippingcost>
</royaltrekstandard>
<royaltrek48hr>
<title><![CDATA[RoyalTrek 48h]]></title>
<shippingcost>9.99</shippingcost>
</royaltrek48hr>
With this, we can set the default values for each of the configuration options made available via system.xml.
We then define the <MAGELICIOUS_DIR>/Model/Carrier/RoyalTrek.php as follows:
<?php
namespace Magelicious\RoyalTrek\Model\Carrier;
class RoyalTrek extends \Magento\Shipping\Model\Carrier\AbstractCarrier implements
\Magento\Shipping\Model\Carrier\CarrierInterface {
const CARRIER_CODE = 'royaltrek';
const ROYAL_TREK_STANDARD = 'royaltrekstandard';
const ROYAL_TREK_48HR = 'royaltrek48hr';
protected $_code = self::CARRIER_CODE;
protected $_isFixed = true;
protected $_rateResultFactory;
protected $_rateMethodFactory;
public function __construct(
\Magento\Framework\App\Config\ScopeConfigInterface $scopeConfig,
\Magento\Quote\Model\Quote\Address\RateResult\ErrorFactory $rateErrorFactory,
\Psr\Log\LoggerInterface $logger,
\Magento\Shipping\Model\Rate\ResultFactory $rateResultFactory,
\Magento\Quote\Model\Quote\Address\RateResult\MethodFactory $rateMethodFactory,
array $data = []
) {
$this->_rateResultFactory = $rateResultFactory;
$this->_rateMethodFactory = $rateMethodFactory;
parent::__construct($scopeConfig, $rateErrorFactory, $logger, $data);
}
public function collectRates(\Magento\Quote\Model\Quote\Address\RateRequest $request) {
if (!$this->getConfigFlag('active')) {
return false;
}
$result = $this->_rateResultFactory->create();
// Todo...
return $result;
}
public function getAllowedMethods() {
return [
self::ROYAL_TREK_STANDARD => $this->getConfigData(self::ROYAL_TREK_STANDARD . '/title'),
self::ROYAL_TREK_48HR => $this->getConfigData(self::ROYAL_TREK_48HR . '/title'),
];
}
private function getMethodTitle($method) {
return $this->getConfigData($method . '/title');
}
private function getMethodPrice($method) {
return $this->getMethodCost($method);
}
private function getMethodCost($method) {
return $this->getConfigData($method . '/shippingcost');
}
}
The basic implementation of theMagelicious\RoyalTrek\Model\Carrier\RoyalTrek class is highly determined by the implementation of its underlying Magento\Shipping\Model\Carrier\AbstractCarrier parent class and Magento\Shipping\Model\Carrier\CarrierInterface interface. The bare minimum implies setting up the $_code value and implementing the collectRates method. The $_code value is an extremely important bit of information here. We need to make sure it is unique among all of the enabled shipping extensions. The collectRates method is where the actual shipping calculation implementation happens.
Let's go ahead and extend the <MAGELICIOUS_DIR>/Model/Carrier/RoyalTrek.php with the following:
$method = $this->_rateMethodFactory->create();
$method->setCarrier($this->_code);
$method->setCarrierTitle($this->getConfigData('title'));
$method->setMethod(self::ROYAL_TREK_STANDARD);
$method->setMethodTitle($this->getMethodTitle($method->getMethod()));
$method->setPrice($this->getMethodPrice($method->getMethod()));
$method->setCost($this->getMethodCost($method->getMethod()));
$method->setErrorMessage(__('The %1 method error message here.'));
$result->append($method);
Using the factory, we can create an instance of Magento\Quote\Model\Quote\Address\RateResult\Method. This is the individual shipping method that we wish to make available as a choice during checkout. We then set the required values for the carrier: method, price, cost, and possible error message. With our royaltrekstandard method properly set, we finally pass it on to the $result object.
Let's further extend the <MAGELICIOUS_DIR>/Model/Carrier/RoyalTrek.php with the following:
$method = $this->_rateMethodFactory->create();
$method->setCarrier($this->_code);
$method->setCarrierTitle($this->getConfigData('title'));
$method->setMethod(self::ROYAL_TREK_48HR);
$method->setMethodTitle($this->getMethodTitle($method->getMethod()));
$method->setPrice($this->getMethodPrice($method->getMethod()));
$method->setCost($this->getMethodCost($method->getMethod()));
$method->setErrorMessage(__('The %1 method error message here.'));
$result->append($method);
Much like with the previous example, here we should add our royaltrek48hr to the $result object.
The end result should bring forth our two RoyalTrek shipping methods to the storefront checkout Shipping step, as follows:
The Order Summary section of the Review & Payments step should also reflect on the method selected in the Shipping step, as follows:
Likewise, the admin Create New Order screens should also show our RoyalTrek shipping methods as follows:
Finally, the successfully made order should reflect the RoyalTrek 48h shipping method selection in its new order email, and the customer's My Account area, as follows:
With our shipping methods confirmed as working, let's go ahead and look for a way of distributing it.
By default, the Packagist repository is the only registered repository in Composer. We can add more repositories to our Magento project by declaring them in composer.json. This way we get to register our own git repository as a source of packages, as follows:
composer config repositories.magelicious-royal-trek git git@github.com:foggyline/Magelicious_RoyalTrek.git
This command results in the modified composer.json file, with the repositories key amended as follows:
"repositories": {
"0": {
"type": "composer",
"url": "https://repo.magento.com/"
},
"magelicious-royal-trek": {
"type": "git",
"url": "git@github.com:foggyline/Magelicious_RoyalTrek.git"
}
},
We can see our magelicious-royal-trek entry added in there. The git value used for the type key tells the Composer we are using the git repository, located at the URL provided via the url key. The composer and git are not the only two values supported for the type. The actual type value could have easily been any other type of supported version control system:
We could also have simply used the vcs value for the type key, and relied on Composer's VCS driver to automatically detect the type based url value.
If we now execute composer require magelicious/royal-trek:dev-master, Composer will install our shipping module. While this new repositories approach works well, it is somewhat more suited for distributing private Magento extensions. Whenever we wish to distribute our extension publicly, a Packagist is a more convenient way to go.
Packagist is a free online repository service for Composer packages. We can use it to easily distribute our free Magento modules. The fact that Packagist is a default Composer repository, makes it the de facto repository for any Composer user. This is why having our free Magento modules available via Packagist is a preferred way of distribution.
Pushing our Magento module to Packagist is quite easy. Assuming we have our account created, we should start by clicking on the Submit button, which will land us on the following screen:
We need to provide a link to our Git repository here, and click the Check button, followed by the Submit button, if the valid repository was found. This should create our package, as per the following screen:
The Packagist says that our created package is now available for use via the composer require magelicious/module-royal-trek command. However, running this command now would be likely to give us the following error:
[InvalidArgumentException]
Could not find a matching version of package magelicious/module-royal-trek. Check the package spelling, your version constraint and that the package is available in a stability which matches your minimum-stability (stable).
Notice the dev-master label on our Packagist screen. Our branches automatically appear as dev versions in Packagist. Therefore, we can use the composer require magelicious/module-royal-trek:dev-master command to fetch the package. To change that, we need to specifically tag our git commits, as follows:
git add .
git commit -a -m 'The RoyalTrek shipping module, first version.'
git tag 1.0.0
git push origin 1.0.0
Once we have done that, we can go back to the Packagist package screen and hit the Update button. This should now show our 1.0.0 version:
If we specify a version when requiring the package, Composer fetches the latest tagged version from the master. For example, composer require magelicious/module-royal-trek:2.4.x takes the latest 2.4 tagged version from the master branch.
When it comes to versioning, it is worth noting that setup_version found in module.xml, and version found in composer.json are two different types of versioning. Magento refers to them as marketing version and composer version. Marketing version might be thought of as something the merchant interacts with, while Composer version is something that developers interact with. The Magento_Catalog module, for example, uses the 2.2.4 marketing version for marketing, whereas its Composer version is 102.0.4. This is not to say that we cannot use the same versioning for both, as long as we remember that the setup_version, found in module.xml, is what drives our setup scripts.
Distributing future new versions of our Magelicious_RoyalTrek module would, therefore, come down to:
In this chapter, we learned how to create a simple shipping module. We saw how easy it is to add specific shipping calculations as part of offline shipping methods. We then packaged this module and distributed it via Packagist. This made it easy for the end consumer to use our module, with just a few simple console commands. Likewise, any future updates to our module should be frictionless for the end consumer, as composer can easily handle those via simple composer update commands.
Moving forward, we are going to take a look at some of the specifics of Magento admin area development.
At the very beginning of our journey, back in Chapter 1, Understanding Magento Architecture, we mentioned how Magento consists of different areas. Developing for Magento admin implies developing for the adminhtml area. While the majority of code is applicable across different areas, there are certain subtle differences. Unlike frontend which is mostly built via HTML (.phtml, .html), the Magento adminhtml area is mostly built via UI components which are referenced, stacked, and configured through .xml files. This is not to say that the same components cannot be used both for frontend and admin, because all UI components can be configured for both of these areas; we just need to configure styles manually for components on the frontend.
There are two basic UI components in Magento: listing and form. The rest are secondary components, which serve as extensions of basic components: listingToolbar, columns, filters, column, form, and field.
To get a better understanding of the adminhtml area, we are going to build a Magelicious_Minventory module, using some of these components. The idea behind the module is to provide a custom listing interface for a limited set of users, where they can easily bump up the product stock in certain increments without ever getting access to other areas of the Magento admin.
Our work here will consist of two major parts:
To keep things compact, we will use the <MODULE_DIR> to reference the MAGELICIOUS_DIR>/Minventory directory.
You will need to have basic knowledge of PHP, OOP, JavaScript, and XML. You will also need Apache, MySQL, and AMPPS installed on your system to execute the codes.
The code files of this chapter can be found on GitHub:
https://github.com/PacktPublishing/Magento-2-Quick-Start-Guide.
Check out the following video to see the Code in Action:
The listing is a basic component responsible for rendering grids, lists, and tiles, providing filtering, pagination, sorting, and other features. The listingElements group referenced in the vendor/magento/module-ui/etc/ui_configuration.xsd file provides a nice list of both primary and secondary listing components:
| actions | component | file | massaction | select |
| actionsColumn | container | filters | modal | selectionsColumn |
| bookmark | dataSource | form | multiline | tab |
| boolean | dataProvider | hidden | multiselect | text |
| button | date | htmlContent | nav | textarea |
| checkbox | dynamicRows | input | number | wysiwyg |
| checkboxset | insertForm | paging | ||
| column | exportButton | insertListing | price | |
| columns | field | listing | range | |
| columnsControls | fieldset | listingToolbar | radioset |
The key to using all of these components is to understand:
Moving forward, we will use the listing component, and a few of its secondary components to create the Micro Inventory screen as shown:
The grid itself is to consist of ID, SKU, Status, Quantity, and Action columns. The Resupply action will trigger redirection to a custom Stock Resupply screen, which we will address in the next section. The Actions selector in the upper left corner is to consist of two custom actions, allowing for fixed product stock increases.
Assuming we have defined our basic registration.php, composer.json, and etc/module.xml files, we can start dealing with the specifics of our module.
Let's start by defining the <MODULE_DIR>/etc/acl.xml as follows:
<config>
<acl>
<resources>
<resource id="Magento_Backend::admin">
<resource id="Magento_Catalog::catalog">
<resource id="Magento_Catalog::catalog_inventory">
<resource id="Magelicious_Minventory::minventory" title="Micro Inventory"/>
</resource>
</resource>
</resource>
</resources>
</acl>
</config>
The requirement of our module was to provide a custom listing interface for a limited set of users. The access list entry, later referenced by our admin controller, ensures just that. The choice to nest our Magelicious_Minventory::minventory as a child of Magento_Catalog::catalog_inventory is based merely on logical grouping, as our module deals with inventory stock. We should now be able to see Micro Inventory under Roles Resources as shown:
We then define the <MODULE_DIR>/etc/adminhtml/routes.xml as follows:
<config>
<router id="admin">
<route id="minventory" frontName="minventory">
<module name="Magelicious_Minventory"/>
</route>
</router>
</config>
This will allow us to access our controller actions later on via http://magelicious.loc/index.php/<admin>/minventory/<controller>/<action> links.
We then define the <MODULE_DIR>/etc/adminhtml/menu.xml as follows:
<config>
<menu>
<add id="Magelicious_Minventory::minventory"
title="Micro Inventory" translate="title"
module="Magelicious_Minventory" sortOrder="100"
parent="Magento_Catalog::inventory"
action="minventory/product/index"
resource="Magelicious_Minventory::minventory"/>
</menu>
</config>
This positions our Micro Inventory menu right under the main Catalog | CATALOGUE menu, as shown:
When clicked, the menu's minventory/product/index action will throw us at <MODULE_DIR>/Controller/Adminhtml/Product/Index.php, which will be addressed later on.
We then define the <MODULE_DIR>/Model/Resupply.php as follows:
namespace Magelicious\Minventory\Model;
class Resupply
{
protected $productRepository;
protected $collectionFactory;
protected $stockRegistry;
public function __construct(
\Magento\Catalog\Api\ProductRepositoryInterface $productRepository,
\Magento\Catalog\Model\ResourceModel\Product\CollectionFactory $collectionFactory,
\Magento\CatalogInventory\Api\StockRegistryInterface $stockRegistry
)
{
$this->productRepository = $productRepository;
$this->collectionFactory = $collectionFactory;
$this->stockRegistry = $stockRegistry;
}
public function resupply($productId, $qty)
{
$product = $this->productRepository->getById($productId);
$stockItem = $this->stockRegistry->getStockItemBySku($product->getSku());
$stockItem->setQty($stockItem->getQty() + $qty);
$stockItem->setIsInStock((bool)$stockItem->getQty());
$this->stockRegistry->updateStockItemBySku($product->getSku(), $stockItem);
}}
This class will serve as a centralized stock updater for our module, which will be updating stock from the Actions selector found on the Micro Inventory screen, as well as from the Save button action triggered on the Stock Resupply screen.
We then define the <MODULE_DIR>/Controller/Adminhtml/Product.php as follows:
namespace Magelicious\Minventory\Controller\Adminhtml;
abstract class Product extends \Magento\Backend\App\Action
{
const ADMIN_RESOURCE = 'Magelicious_Minventory::minventory';
}
This is our controller file, the parent of the controller actions that we will soon define. We set the value of its ADMIN_RESOURCE constant to that defined in our acl.xml file. This will empower our controller to only allow access to users with proper resource roles.
We then define the <MODULE_DIR>/Controller/Adminhtml/Product/Index.php as follows:
namespace Magelicious\Minventory\Controller\Adminhtml\Product;
use \Magento\Framework\Controller\ResultFactory;
class Index extends \Magelicious\Minventory\Controller\Adminhtml\Product
{
public function execute()
{
$resultPage = $this->resultFactory->create(ResultFactory::TYPE_PAGE);
$resultPage->getConfig()->getTitle()->prepend((__('Micro Inventory')));
return $resultPage;
}
}
This controller action does not really do anything special. Aside from setting up the screen title, it merely provides a mechanism for loading the minventory_product_index.xml that we will address later on.
We then define the <MODULE_DIR>/Controller/Adminhtml/Product/MassResupply.php as follows:
namespace Magelicious\Minventory\Controller\Adminhtml\Product;
use \Magento\Framework\Controller\ResultFactory;
class MassResupply extends \Magelicious\Minventory\Controller\Adminhtml\Product
{
protected $filter;
protected $collectionFactory;
protected $resupply;
public function __construct(
\Magento\Backend\App\Action\Context $context,
\Magento\Ui\Component\MassAction\Filter $filter,
\Magento\Catalog\Model\ResourceModel\Product\CollectionFactory $collectionFactory,
\Magelicious\Minventory\Model\Resupply $resupply
)
{
parent::__construct($context);
$this->filter = $filter;
$this->collectionFactory = $collectionFactory;
$this->resupply = $resupply;
}
public function execute()
{
$redirectResult = $this->resultFactory->create(ResultFactory::TYPE_REDIRECT);
$qty = $this->getRequest()->getParam('qty');
$collection = $this->filter->getCollection($this->collectionFactory->create());
$productResupplied = 0;
foreach ($collection->getItems() as $product) {
$this->resupply->resupply($product->getId(), $qty);
$productResupplied++;
}
$this->messageManager->addSuccessMessage(__('A total of %1 record(s) have been resupplied.', $productResupplied));
return $redirectResult->setPath('minventory/product/index');
}
}
This controller action will be triggered by the Resupply +10 and Resupply +50 actions from the Micro Inventory screen. We can see it using the Magento\Ui\Component\MassAction\Filter to process the mass select options, binding them internally to product collection in order to filter products we have selected properly.
We then define the <MODULE_DIR>/view/adminhtml/layout/minventory_product_index.xml as follows:
<page>
<update handle="styles"/>
<body>
<referenceContainer name="content">
<uiComponent name="minventory_listing"/>
</referenceContainer>
</body>
</page>
This is the layout file that gets triggered when we land on <MODULE_DIR>/Controller/Adminhtml/Product/Index.php. The name of the file matches the <routeName>/<controllerName>/<controllerActionName> path. The actual layout here merely references the content container, to which it adds the minventory_listing component using the uiComponent element.
We then define the <MODULE_DIR>/view/adminhtml/ui_component/minventory_listing.xml as follows:
<listing>
<argument name="data" xsi:type="array">
<item name="js_config" xsi:type="array">
<item name="provider" xsi:type="string">minventory_listing.minventory_listing_data_source</item>
</item>
</argument>
<settings>
<spinner>minventory_columns</spinner>
<deps>
<dep>minventory_listing.minventory_listing_data_source</dep>
</deps>
</settings>
<!-- dataSource -->
<!-- listingToolbar -->
<!-- columns -->
</listing>
This is our listing component. The minventory_listing.minventory_listing_data_source is our data source defined under the dataSource element.
We then modify the minventory_listing.xml by replacing the <!-- dataSource --> with the following:
<dataSource name="minventory_listing_data_source" component="Magento_Ui/js/grid/provider">
<settings>
<storageConfig>
<param name="indexField" xsi:type="string">entity_id</param>
</storageConfig>
<updateUrl path="mui/index/render"/>
</settings>
<dataProvider class="Magelicious\Minventory\Ui\DataProvider\Product\ProductDataProvider" name="minventory_listing_data_source">
<settings>
<requestFieldName>id</requestFieldName>
<primaryFieldName>entity_id</primaryFieldName>
</settings>
</dataProvider>
</dataSource>
The most important part of the dataSource component is its dataProvider. We set its value to Magelicious\Minventory\Ui\DataProvider\Product\ProductDataProvider. The requestFieldName and primaryFieldName are not really that important in our case, as we are not really operating with full CRUD on the product entity, since we are merely focusing on updating the quantity through a few lines of custom code. Still, the component itself requires a certain minimal configuration, so we use what we would normally use for a product entity, but these can really be any values found on an entity.
We then define the <MODULE_DIR>/Ui/DataProvider/Product/ProductDataProvider.php as follows:
class ProductDataProvider extends \Magento\Ui\DataProvider\AbstractDataProvider {
protected $collection;
public function __construct(
string $name,
string $primaryFieldName,
string $requestFieldName,
\Magento\Catalog\Model\ResourceModel\Product\CollectionFactory $collectionFactory,
array $meta = [],
array $data = []
) {
parent::__construct(
$name,
$primaryFieldName,
$requestFieldName,
$meta,
$data
);
$this->collection = $collectionFactory->create();
}
public function getData() {
if (!$this->getCollection()->isLoaded()) {
$this->getCollection()->load();
}
$items = $this->getCollection()->toArray();
return [
'totalRecords' => $this->getCollection()->getSize(),
'items' => array_values($items),
];
}
}
The collection property is set mandatorily by the parent Magento\Ui\DataProvider\AbstractDataProvider, so we have to set its value to some kind of collection. Since we are working with products, it only makes sense to set it to an existing Magento\Catalog\Model\ResourceModel\Product\Collection, thus avoiding creating our own collection. The key method for our listing component is getData. This method feeds the listing component with the number of records in the data collection, as well as the data collection itself.
We then extend the ProductDataProvider.php with the following:
protected function joinQty() {
if ($this->getCollection()) {
$this->getCollection()->joinField(
'qty',
'cataloginventory_stock_item',
'qty',
'product_id=entity_id'
);
}
}
The qty field is not part of the default products collection, so we have to join the qty information from the cataloginventory_stock_item table to it. We must make sure to call this method before our collection is loaded.
We then modify the minventory_listing.xml by replacing the <!-- listingToolbar --> with the following:
<listingToolbar name="listing_top">
<bookmark name="bookmarks"/>
<columnsControls name="columns_controls"/>
<filters name="listing_filters" />
<paging name="listing_paging"/>
<-- massaction -->
</listingToolbar>
The listingToolbar component is essentially a container for the listing-related elements like paging, mass actions, filters, and bookmarks. The bookmark component stores the active and changed states of data grids. The paging component provides navigation through the pages of the collection, otherwise, we would be forced to view the entire collection at once, which would not really be a performance-efficient approach. The filters component is responsible for rendering filters' interfaces and applying the actual filtering. This includes the states of filters, columns' positions, applied sorting, pagination, and so on.
The columnsControls component allows us to modify the visibility of the listing columns, shown as follows:
The possibility of filtering by Store View, as shown in the preceding screenshot, is easily added by modifying the minventory_listing.xml as follows:
<filters name="listing_filters">
<filterSelect name="store_id" provider="${ $.parentName }">
<settings>
<options class="Magento\Store\Ui\Component\Listing\Column\Store\Options"/>
<caption translate="true">All Store Views</caption>
<label translate="true">Store View</label>
<dataScope>store_id</dataScope>
</settings>
</filterSelect>
</filters>
Here we used the filterSelect component, with the Magento\Store\Ui\Component\Listing\Column\Store\Options class passed as an options parameter. This shows how easy it is to combine various components and to pull data from PHP classes.
Let's modify the minventory_listing.xml further by replacing the <-- massaction --> with the following:
<massaction name="listing_massaction" component="Magento_Ui/js/grid/tree-massactions">
<action name="resupply">
<settings>
<type>resupply</type>
<label translate="true">Resupply</label>
<actions>
<action name="0">
<type>resupply_10</type>
<label translate="true">Resupply +10</label>
<url path="minventory/product/massResupply">
<param name="qty">10</param>
</url>
</action>
<action name="1">
<type>resupply_50</type>
<label translate="true">Resupply +50</label>
<url path="minventory/product/massResupply">
<param name="qty">50</param>
</url>
</action>
</actions>
</settings>
</action>
</massaction>
Using the action component, we define the Resupply +10 and Resupply +50 actions used in the scope of the massaction component.
We then modify the minventory_listing.xml by replacing the <!-- columns --> with the following:
<columns name="minventory_columns" class="Magento\Catalog\Ui\Component\Listing\Columns">
<settings>
<childDefaults>
<param name="fieldAction" xsi:type="array">
<item name="provider" xsi:type="string">minventory_listing.minventory_listing.minventory_columns.actions</item>
<item name="target" xsi:type="string">applyAction</item>
<item name="params" xsi:type="array">
<item name="0" xsi:type="string">resupply</item>
<item name="1" xsi:type="string">${ $.$data.rowIndex }</item>
</item>
</param>
</childDefaults>
</settings>
<!-- columns#2 -->
</columns>
The columns component definition, along with its child components, is likely to take the biggest chunk of our listing configuration. This is where we add our selection columns, regular columns, and action columns.
To demonstrate that further, we replace the <!-- columns#2 --> with the following:
<selectionsColumn name="ids" sortOrder="0">
<settings>
<indexField>entity_id</indexField>
</settings>
</selectionsColumn>
<column name="entity_id" sortOrder="10">
<settings>
<filter>textRange</filter>
<label translate="true">ID</label>
<sorting>asc</sorting>
</settings>
</column>
<column name="sku" sortOrder="20">
<settings>
<filter>text</filter>
<label translate="true">SKU</label>
</settings>
</column>
<column name="qty" sortOrder="30">
<settings>
<addField>true</addField>
<filter>textRange</filter>
<label translate="true">Quantity</label>
</settings>
</column>
<actionsColumn name="resupply" class="Magelicious\Minventory\Ui\Component\Listing\Columns\Resupply" sortOrder="40">
<settings>
<indexField>entity_id</indexField>
</settings>
</actionsColumn>
The actionsColumn points to a custom Magelicious\Minventory\Ui\Component\Listing\Columns\Resupply class, which we define under <MODULE_DIR>/Ui/Component/Listing/Columns/Resupply.php as follows:
class Resupply extends \Magento\Ui\Component\Listing\Columns\Column {
protected $urlBuilder;
public function __construct(
\Magento\Framework\View\Element\UiComponent\ContextInterface $context,
\Magento\Framework\View\Element\UiComponentFactory $uiComponentFactory,
\Magento\Framework\UrlInterface $urlBuilder,
array $components = [],
array $data = []
) {
$this->urlBuilder = $urlBuilder;
parent::__construct($context, $uiComponentFactory, $components, $data);
}
public function prepareDataSource(array $dataSource) {
if (isset($dataSource['data']['items'])) {
$storeId = $this->context->getFilterParam('store_id');
foreach ($dataSource['data']['items'] as &$item) {
$item[$this->getData('name')]['resupply'] = [
'href' => $this->urlBuilder->getUrl(
'minventory/product/resupply',
['id' => $item['entity_id'], 'store' => $storeId]
),
'label' => __('Resupply'),
'hidden' => false,
];
}
}
return $dataSource;
}
}
The prepareDataSource method is where we inject our modifications. We traverse the $dataSource['data']['items'] structure until we come across our column, and then modify it accordingly with a proper href value. This, in turn, renders our resupply actions column as per the Micro Inventory screen.
With the Micro Inventory screen now sorted via the listing component, let's shift our focus onto the Stock Resupply screen built via the form component.
The form is a basic component responsible for performing CRUD operations on an entity. The listingElements group referenced under vendor/magento/module-ui/etc/ui_configuration.xsd file provides a nice list of both primary and secondary form components:
| bookmark | dataProvider | fileUploader | massaction | range |
| boolean | date | form | modal | radioset |
| button | dynamicRows | hidden | multiline | select |
| checkbox | htmlContent | multiselect | tab | |
| checkboxset | exportButton | input | nav | text |
| component | field | insertForm | number | textarea |
| container | fieldset | insertListing | paging | wysiwyg |
| dataSource | file | listing | price |
Moving forward, we will use the form component, and a few of its secondary components to create the Stock Resupply screen as shown:
The form itself is to consist of Stock and +Qty fields. The Stock field will be a read-only field consisting of an SKU + current qty string. The Back button will take us back to the Micro Inventory listing, whereas the Save button will post the form to a special Resupply controller action, which will then increase the stock by a given +Qty amount. The Actions selector in the upper left corner is to consist of two custom actions, allowing for fixed product stock increases.
We start off by defining the <MODULE_DIR>/Controller/Adminhtml/Product/Resupply.php as follows:
use \Magento\Framework\Controller\ResultFactory;
class Resupply extends \Magelicious\Minventory\Controller\Adminhtml\Product {
protected $stockRegistry;
protected $productRepository;
protected $resupply;
public function __construct(
\Magento\Backend\App\Action\Context $context,
\Magento\Catalog\Api\ProductRepositoryInterface $productRepository,
\Magento\CatalogInventory\Api\StockRegistryInterface $stockRegistry,
\Magelicious\Minventory\Model\Resupply $resupply
) {
parent::__construct($context);
$this->productRepository = $productRepository;
$this->stockRegistry = $stockRegistry;
$this->resupply = $resupply;
}
public function execute() {
if ($this->getRequest()->isPost()) {
$this->resupply->resupply(
$this->getRequest()->getParam('id'),
$_POST['minventory_product']['qty']
);
$this->messageManager->addSuccessMessage(__('Successfully resupplied'));
$redirectResult = $this->resultFactory->create(ResultFactory::TYPE_REDIRECT);
return $redirectResult->setPath('minventory/product/index');
} else {
$resultPage = $this->resultFactory->create(ResultFactory::TYPE_PAGE);
$resultPage->getConfig()->getTitle()->prepend((__('Stock Resupply')));
return $resultPage;
}
}
}
Given the simplicity of our form, using the isPost() check on the request object, we allow ourselves to use the same controller action for rendering the Stock Resupply screen, as well as submitting the save action to it.
With controller action in place, we then define the <MODULE_DIR>/view/adminhtml/layout/minventory_product_resupply.xml as follows:
<page>
<update handle="styles"/>
<body>
<referenceContainer name="content">
<uiComponent name="minventory_resupply_form"/>
</referenceContainer>
</body>
</page>
Much like with the form listing, this layout file merely calls the minventory_resupply_form component, which is where all our visual elements of the Stock Resupply screen reside.
We then define the <MODULE_DIR>/view/adminhtml/ui_component/minventory_resupply_form.xml as follows:
<form>
<argument name="data" xsi:type="array">
<item name="js_config" xsi:type="array">
<item name="provider" xsi:type="string">minventory_resupply_form.minventory_resupply_form_data_source</item>
<item name="deps" xsi:type="string">minventory_resupply_form.minventory_resupply_form_data_source</item>
</item>
<item name="layout" xsi:type="array">
<item name="type" xsi:type="string">tabs</item>
</item>
</argument>
<settings>
<buttons>
<button name="save" class="Magelicious\Minventory\Block\Adminhtml\Product\Edit\Button\Save"/>
<button name="back" class="Magelicious\Minventory\Block\Adminhtml\Product\Edit\Button\Back"/>
</buttons>
</settings>
<!-- dataSource -->
<!-- fieldset -->
</form>
Much like the listing component, the form component also requires a data provider.
We then modify the minventory_resupply_form.xml by replacing the <!-- dataSource --> with following:
<dataSource name="minventory_resupply_form_data_source">
<argument name="data" xsi:type="array">
<item name="js_config" xsi:type="array">
<item name="component" xsi:type="string">Magento_Ui/js/form/provider</item>
</item>
</argument>
<dataProvider class="Magelicious\Minventory\Ui\DataProvider\Product\Form\ProductDataProvider" name="minventory_resupply_form_data_source">
<settings>
<requestFieldName>id</requestFieldName>
<primaryFieldName>entity_id</primaryFieldName>
</settings>
</dataProvider>
</dataSource>
Here we set the data provider, which points to our custom class, Magelicious\Minventory\Ui\DataProvider\Product\Form\ProductDataProvider.
We further modify the minventory_resupply_form.xml by replacing the <!-- fieldset --> with the following:
<fieldset name="minventory_product">
<argument name="data" xsi:type="array">
<item name="config" xsi:type="array">
<item name="label" xsi:type="string" translate="true">General</item>
</item>
</argument>
<field name="stock">
<argument name="data" xsi:type="array">
<item name="config" xsi:type="array">
<item name="label" xsi:type="string">Stock</item>
<item name="visible" xsi:type="boolean">true</item>
<item name="dataType" xsi:type="string">text</item>
<item name="formElement" xsi:type="string">input</item>
<item name="disabled" xsi:type="string">true</item>
</item>
</argument>
</field>
<field name="qty">
<argument name="data" xsi:type="array">
<item name="config" xsi:type="array">
<item name="label" xsi:type="string">+Qty</item>
<item name="visible" xsi:type="boolean">true</item>
<item name="dataType" xsi:type="string">text</item>
<item name="formElement" xsi:type="string">input</item>
<item name="focused" xsi:type="string">true</item>
<item name="validation" xsi:type="array">
<item name="required-entry" xsi:type="boolean">true</item>
<item name="validate-zero-or-greater" xsi:type="boolean">true</item>
</item>
</item>
</argument>
</field>
</fieldset>
Here we defined fieldset with a General title, and two fields: stock and qty. The stock field was defined as disabled, as its purpose will be merely to merge the <SKU> | <qty> values for informational purposes. The structure of the individual field definition might seem overwhelming at first, but we can easily determine available arguments by observing the <component name="column" definition under the <MAGENTO_DIR>/module-ui/view/base/ui_component/etc/definition.map.xml.
We then define <MODULE_DIR>/Ui/DataProvider/Product/Form/ProductDataProvider.php as follows:
class ProductDataProvider extends \Magento\Ui\DataProvider\AbstractDataProvider {
protected $loadedData;
protected $productRepository;
protected $stockRegistry;
protected $request;
public function __construct(
string $name,
string $primaryFieldName,
string $requestFieldName,
\Magento\Catalog\Model\ResourceModel\Product\CollectionFactory $collectionFactory,
\Magento\Catalog\Api\ProductRepositoryInterface $productRepository,
\Magento\CatalogInventory\Api\StockRegistryInterface $stockRegistry,
\Magento\Framework\App\RequestInterface $request,
array $meta = [], array $data = []
) {
parent::__construct($name, $primaryFieldName, $requestFieldName, $meta, $data);
$this->collection = $collectionFactory->create();
$this->productRepository = $productRepository;
$this->stockRegistry = $stockRegistry;
$this->request = $request;
}
public function getData() {
if (isset($this->loadedData)) {
return $this->loadedData;
}
$id = $this->request->getParam('id');
$product = $this->productRepository->getById($id);
$stockItem = $this->stockRegistry->getStockItemBySku($product->getSku());
$this->loadedData[$product->getId()]['minventory_product'] = [
'stock' => __('%1 | %2', $product->getSku(), $stockItem->getQty()),
'qty' => 10
];
return $this->loadedData;
}
}
Our data provider is expected to implement the getData method. This returns an array of data that feeds the form with proper values. The structure of the array might be difficult to grasp at first, so it helps to gloss over some of Magento's data providers. The stock and qty entries here will provide values for the fields defined via minventory_resupply_form.xml.
We then define <MODULE_DIR>/Block/Adminhtml/Product/Edit/Button/Back.php as follows:
class Back extends \Magento\Backend\Block\Template implements \Magento\Framework\View\Element\UiComponent\Control\ButtonProviderInterface
{
public function getButtonData() {
return [
'label' => __('Back'),
'on_click' => sprintf("location.href = '%s';", $this->getBackUrl()),
'class' => 'back',
'sort_order' => 10
];
}
public function getBackUrl() {
return $this->getUrl('*/*/');
}
}
The ButtonProviderInterface requires the getButtonData method implementation. The structure of the return array is somewhat blurry until we gloss over some of the other buttons that are defined across Magento. This renders our Back button as follows:
<button id="back" title="Back" type="button" class="action- scalable back" onclick="location.href = '... stripped away ...';" data-ui-id="back-button">
<span>Back</span>
</button>
The Back button provides a go back to previous page functionality, which in our case is determined by the value of the getBackUrl method response.
We then define <MODULE_DIR>/Block/Adminhtml/Product/Edit/Button/Save.php as follows:
class Save extends \Magento\Backend\Block\Template implements \Magento\Framework\View\Element\UiComponent\Control\ButtonProviderInterface
{
public function getButtonData() {
return [
'label' => __('Save'),
'class' => 'save primary',
'data_attribute' => [
'mage-init' => ['button' => ['event' => 'save']],
'form-role' => 'save',
],
'sort_order' => 20,
];
}
}
Much like with the previous button, we use a similar array structure for our button here. The difference is that this time we are passing the data_attribute as well. This renders our Save button as follows:
<button id="save" title="Save" type="button" class="action- scalable save primary ui-button ui-widget ui-state-default ui-corner-all ui-button-text-only" onclick="location.href = '... stripped away ...';" data-form-role="save" data-ui-id="save-button" role="button" aria-disabled="false"><span class="ui-button-text">
<span>Save</span>
</span></button>
The mage-init part might seem confusing at the moment. Suffice it to say that it's a way of initializing a JS component, which is something we will address in more detail in the next chapter. Our Save essentially triggers the form's submission.
With this we have finished our form component definition, making the whole Stock Resupply screen functional.
In this chapter, we built two very different screens in the Magento admin area. One utilized the listing component, whereas the other utilized the form component. A great deal of our work involved configuration rather than coding, which stands to prove how powerful Magento UI components can be. While the amount of configuration might seem overwhelming at first, getting a grip on individual component configurations allows us to build complex interfaces quickly.
Moving forward, we are going to take a look at some of the specifics behind developing for the storefront area.
The Magento storefront is the customer-facing view of a Magento e-commerce platform. Developing for storefront implies developing for the frontend area. Whereas the adminhtml area is primarily built via means of UI components, the frontend area makes heavy use of JavaScript (JS) components that come in form of jQuery widgets and UI/KnockoutJS components. Aside from JS components, there are lots of other bits and pieces involved in storefront development, such as themes, layouts, templates, language packages, and CSS/LESS. Our focus, however, throughout this chapter will be on JS components, as they seem to be the most confusing and challenging part of the Magento frontend to overcome.
Moving forward, we are going to look into the following sections:
You will need to have basic knowledge of PHP, OOP, JavaScript, and XML. You will also need Apache, MySQL, and AMPPS installed on your system to execute the codes.
The code files of this chapter can be found on GitHub:
https://github.com/PacktPublishing/Magento-2-Quick-Start-Guide.
Check out the following video to see the Code in Action:
To get a better understanding of the frontend area, we are going to build a very lightweight Magelicious_Jsco module, to serve as a playground for our JS component exploration.
To this point, we should already be pretty familiar with the flow of creating a new module. Assuming we have defined our basic registration.php, composer.json, and etc/module.xml files, we can start dealing with the specifics of our Magelicious_Jsco module.
Let's start by defining <MODULE_DIR>/etc/frontend/routes.xml, as follows:
<config>
<router id="standard">
<route id="jsco" frontName="jsco">
<module name="Magelicious_Jsco"/>
</route>
</router>
</config>
We then create <MODULE_DIR>/Controller/Playground.php, as follows:
namespace Magelicious\Jsco\Controller;
abstract class Playground extends \Magento\Framework\App\Action\Action
{
}
We then create <MODULE_DIR>/Controller/Playground/Index.php, as follows:
namespace Magelicious\Jsco\Controller\Playground;
use Magento\Framework\Controller\ResultFactory;
class Index extends \Magelicious\Jsco\Controller\Playground
{
public function execute() {
$resultPage = $this->resultFactory->create(ResultFactory::TYPE_PAGE);
$resultPage->getConfig()->getTitle()->set(__('Playground'));
return $resultPage;
}
}
There's nothing really new to this point. We have merely created a route, controller, and controller action to support a page that we can access via the URL, such as http://magelicious.loc/jsco/playground. But the page itself is defined via XML layout, and we further create <MODULE_DIR>/view/frontend/layout/jsco_playground_index.xml, as follows:
<page xmlns:xsi="http://www.w3.org/2001/XMLSchema-instance" layout="empty"
xsi:noNamespaceSchemaLocation="urn:magento:framework:View/Layout/etc/page_configuration.xsd">
<body>
<referenceContainer name="content">
<block class="Magelicious\Jsco\Block\Test"
name="jsco_test"
template="Magelicious_Jsco::playground.phtml">
</block>
</referenceContainer>
</body>
</page>
Note layout="empty" he
re; this is to limit ourselves to a nearly empty page to work with.
Finally, we create an empty <MODULE_DIR>view/frontend/templates/playground.phtml page. If we were to now open a link, such as http://magelicious.loc/jsco/playground, that would open a page with the Playground title shown. playground.phtml is where all of our sample code will go in, as we continue exploring this chapter.
Calling and initializing JS components might seem a bit challenging at first. There are two types of syntax notations used with Magento JS components:
To better understand the data-mage-init notation, let's take a look at a partial <PROJECT_DIR>/lib/web/mage/redirect-url.js file extract:
define([
'jquery',
'jquery/ui'
], function ($) {
'use strict';
$.widget('mage.redirectUrl', {
options: {
event: 'click',
url: undefined
},
_bind: function () { /* ... */ },
_create: function () { /* ... */ },
_onEvent: function () { /* ... */ }
});
return $.mage.redirectUrl;
});
This here is a jQuery widget wrapped as an AMD module; more on that later on. data-mage-init knows how to interpret mage.redirectUrl as a redirectUrl component. By studying the redirectUrl widget code, we can see it can be used not only with the button and the link type of elements but with the select type as well. Let's go ahead and append our playground.phtml file with the following:
<a data-mage-init='{"redirectUrl":{"url":"http://test.url"}}'>
<span><?= __('Test') ?></span>
</a>
<button type="button"
data-mage-init='{"redirectUrl":{"url":"http://test.url"}}'>
<span><?= __('Test') ?></span>
</button>
<select data-mage-init='{"redirectUrl": {"event":"change"}}'>
<option value="http://test.url/1">Test#1</option>
<option value="http://test.url/2">Test#2</option>
<option value="http://test.url/3">Test#3</option>
</select>
While the click event works perfectly for link and button elements, the select element relies on a more specific change event. Therefore, our select element exploits the fact that the redirectUrl component accepts the event configuration option. This makes for a nice and clean little example of reusing a single component multiple time.
To better understand the <script type="text/x-magento-init" /> notation, let's take a look at a partial <MAGENTO_DIR>/module-cookie/view/frontend/web/js/notices.js file extract:
define([
'jquery',
'jquery/ui',
'mage/cookies'
], function ($) {
'use strict';
$.widget('mage.cookieNotices', {
_create: function () {
//...
}
});
return $.mage.cookieNotices;
});
Just like in our first example, this is just another jQuery widget essentially. What the cookieNotices widget does is take the given content and display it as cookie notice alert to the user, doing so until the user finally hits the Allow Cookies button. We can easily reuse this widget to inject our own content. While both cookieNotices and redirectUrl are jQuery widgets, the way they are used in Magento differs.
Let's go ahead and append our playground.phtml file with the following HTML bits:
<div id="playgroundCookieBlock" class="message global cookie"
style="display: none;">
<p>
<strong><?= $block->escapeHtml(__('We use cookies to make your experience better.')) ?></strong>
<span><?= $block->escapeHtml(__('To comply with the new e-Privacy directive, we need to ask for your consent to set the cookies.')) ?></span>
<?= $block->escapeHtml(__('<a href="%1">Learn more</a>.', 'http://magelicious.loc/privacy'), ['a']) ?>
</p>
<div class="actions">
<button id="btn-cookie-allow" class="action allow primary">
<span><?= $block->escapeHtml(__('Allow Cookies')) ?></span>
</button>
</div>
</div>
This is to simulate our intent for a custom cookie widget, with special content and a cookie name. Let's further append the playground.phtml file with a declarative call to cookieNotices JS component:
<script type="text/x-magento-init">
{
"#playgroundCookieBlock": {
"cookieNotices": {
"cookieAllowButtonSelector": "#btn-cookie-allow",
"cookieName": "playgroundCookie",
"cookieValue": "playgroundCookieValue",
"cookieLifetime": "300",
"noCookiesUrl": "http://magelicious.loc/no-cookies"
}
}
}
</script>
Unlike the redirectUrl widget, which had a nice list of options defined at the very start of the widget definition, the cookieNotices widget does not have those. It merely references those options throughout the code, via this.options.<optionPushedViaMagentoInit> calls. This is really a default jQuery widget options object. The reason we are bringing it up is merely to understand how, most of the time, one needs to take a more involved approach toward inspecting existing JavaScript components code, instead of just focusing on the set of possible default options.
To better understand the <script> tag notation, let's take a look at a partial <MAGENTO_DIR>/module-ui/view/base/web/js/modal/modal.js file extract:
define([
/* ... */
], function ( /* ... */ ) {
'use strict';
//...
$.widget('mage.modal', {
//...
});
return $.mage.modal;
});
As in the previous two examples, this again is just a jQuery widget. Now let's go ahead and append our playground.phtml file with the following HTML bits:
<div>
<a href="#" id="playgroundModalLink">Show modal!</a>
</div>
<div id="playgroundModal">
<p>Content...</p>
</div>
This is to simulate our intent of creating a modal box, with special content. Now, let's use the modal widget to turn this into an actual modal. We further append our playground.phtml file, as follows:
<script>
require([
'jquery',
'mage/translate',
'Magento_Ui/js/modal/modal'
], function ($, $t, modal) {
var options = {
title: 'Playground Modal',
buttons: [{
text: $t('Continue'),
click: function () {
this.closeModal();
}
}]
};
modal(options, $('#playgroundModal'));
$('#playgroundModalLink').on('click', function () {
$('#playgroundModal').modal('openModal');
});
}
);
</script>
This time we are using the <script> tag approach to utilize the JS component.
To ensure our code evaluates on page load, we can further wrap our modal widget related code into a function, as follows:
<script>
require([
/* libraries ... */
], function ( /* params ... */ ) {
$(function () {
// Raw JS code...
});
}
);
</script>
Likewise, we can use a RequireJS domReady module to execute our JS code on DOM:
<script>
require([
'jquery',
'mage/translate',
'domReady!'
], function ($, $t) {
// Raw JS code...
});
</script>
The ! character used in domReady! is a syntax reserved for plugins. While there is more to it, suffice to say that in a case of domReady! the plugin exists simply as a way of waiting until DOM gets loaded before invoking our function.
The choice of calling and initializing JS components depends on how they are written and how they are intended to be used. We use the declarative notation when our component requires initialization. The configuration is prepared on the backend and simply outputted to the page. We use the imperative notation on the pages that use raw JS code; this allows us to execute particular business logic.
To this point, we have been using things like redirectUrl and cookieNotices out of thin air, but how exactly do these components become available to our code? The answer is, via RequireJS, a library that underlies nearly every other JS feature built into Magento. The overall role of RequireJS is simple; it is a JS module system that implements the Asynchronous Module Definition (AMD) standard, which serves as an improvement over the web's current globals and script tags.
We have already seen the format of these AMD modules in the preceding examples, which comes down the following:
define(['dep1', 'dep2'], function (dep1, dep2) {
return function () {
// Module value to return
};
});
The gist of AMD modules functionality comes down to each module being able to:
This strategy solves many of the conventional dependency issues, where dependencies are assumed to be immediately available when the function executes, which is not always the case.
If we were to do a View Page Source on our Playground page in a browser, we would see three <script type="text/javascript" src="..."> tags with their src attributes pointing to the following JS files:
frontend/Magento/luma/en_US/requirejs/require.js
frontend/Magento/luma/en_US/mage/requirejs/mixins.js
frontend/Magento/luma/en_US/requirejs-config.js
A quick look at the partial requirejs-config.js file reveals how these get loaded:
(function (require) {
/* ... */
(function () {
var config = {
map: {
'*': {
'redirectUrl': 'mage/redirect-url',
}
}
};
require.config(config);
})();
/* ... */
(function () {
var config = {
map: {
'*': {
cookieNotices: 'Magento_Cookie/js/notices'
}
}
};
require.config(config);
})();
/* ... */
})(require);
These two mappings break down as follows:
Further observing the requirejs-config.js file, aside from map, there are a few other important keys whose roles are worth knowing:
var config = {
map: {
'*': {
/* ... */
}
},
paths: {
/* ... */
},
shim: {
/* ... */
},
deps: [
/* ... */
],
config: {
mixins: {
/* ... */
}
}
};
These break down as follows:
The takeaway here is that our own modules can define the requirejs-config.js file on their own, under the <MODULE_DIR>/view/frontend directory, allowing us to hook into the final Magento requirejs-config.js file that gets generated for the browser. This, in turn, allows us to easily register our own components, override existing mappings, paths, and other things.
While the majority of the time, we would want to leave the existing JS components to work their magic as is, there are times when business requirements are drastic enough to make the whole component unusable. Thinking in terms of PHP classes, we can imagine that class A implements X, whereas we want to have a completely different implementation of X, let's call it B, that shares very little with A. This is a case where simply having B extends A would not suffice, so we opt for directly B implements X. While there are no interfaces in pure JS, this does not mean we cannot completely replace one concrete class with another, as long as we ensure those few crucial methods are available via the new class.
Replacing JS classes is easy with Magento. Let's imagine we want to fully replace the redirectUrl component.
We start by creating the <MODULE_DIR>/view/frontend/requirejs-config.js file, as follows:
var config = {
map: {
'*': {
redirectUrl: 'Magelicious_Jsco/js/redirect-url'
}
}
};
We then implement the actual Magelicious_Jsco/js/redirect-url as part of the <MODULE_DIR>/view/frontend/web/js/redirect-url.js file, as follows.
define([
'jquery',
], function ($) {
'use strict';
$.widget('magelicious.redirectUrl', {
_create: function () {
// New implementation
console.log('magelicious.redirectUrl');
}
});
return $.magelicious.redirectUrl;
});
magelicious.redirectUrl matches the new name of our widget, whereas magelicious is our namespace and redirectUrl is the actual name of the widget within our namespace.
Once we refresh the static content via the php bin/magento setup:static-content:deploy command, we should now be able to see magelicious.redirectUrl show up in the browser console window. Clearly, the current implementation of redirectUrl would break the functionality we had with the original component, but it goes to show how easily we can fully replace the component with a new one.
Assuming we wish to extend the redirectUrl component instead of replacing it completely, we can do so in a similar fashion. The entry in our requirejs-config.js remains the same, whereas the difference lies in how we edit our redirect-url.js file:
define([
'jquery',
'jquery/ui',
'mage/redirect-url'
], function ($) {
'use strict';
$.widget('magelicious.redirectUrl', $.mage.redirectUrl, {
/* Override of parent _onEvent method */
_onEvent: function () {
// Call parent's _onEvent() method if needed
return this._super();
}
});
return $.magelicious.redirectUrl;
});
Using the _super or _superApply is a jQuery widget way of invoking methods of the same name in the parent widget. While this approach works, there is a more elegant solution called mixins.
The Magento mixins for JS are much like its plugins for PHP. To convert to the mixin approach, we replace our requirejs-config.js with content, as follows.
var config = {
config: {
mixins: {
'mage/redirect-url': {
'Magelicious_Jsco/js/redirect-url-mixin': true
}
}
}
};
Note, that this time we are using the full path 'mage/redirect-url' instead of the redirectUrl alias on the left side of the mapping, whereas the right side of mapping points to our mixin. The convention is to use the -mixing suffix on top of the original JS filename.
We then create <MODULE_DIR>/view/frontend/web/js/redirect-url-mixin.js with content, as follows:
define([
'jquery'
], function ($) {
return function (originalWidget) {
$.widget(
'magelicious.redirectUrl',
originalWidget, {
/* Redefined _onEvent method */
_onEvent: function () {
console.log('_onEvent via mixin');
// Call parent's _onEvent() method if needed
return this._super();
}
}
);
return $.magelicious.redirectUrl;
};
});
The example here might not do justice, as it merely looks more complex than the previous example of directly extending the widget. This is because we cannot simply do originalWidget._onEvent = function () { /* ... */ }; or originalWidget._proto._onEvent = function () { /* ... */ }; and thus override the widget method. Widget methods need to be overridden on the prototype, which, in our case, essentially means creating a new widget from the original.
If we were adding a mixin for a non-widget type of JS, such as Magento_Checkout/js/action/place-order, then the approach would be different, as shown in Magento_CheckoutAgreements/js/model/place-order-mixin .
Creating simple jQuery widgets components is pretty straightforward from a Magento point of view. The actual knowledge of building robust jQuery widgets depends on our knowledge of jQuery itself.
Let's assume our widget will be called welcome, and its purpose is to simply output Welcome %name% to the element, provided we passed on the name option during widget initialization.
We start by adding the mapping under our <MODULE_DIR>/view/frontend/requirejs-config.js file, as follows:
var config = {
map: {
'*': {
welcome: 'Magelicious_Jsco/js/welcome'
}
}
};
We then define the widget itself, as part of the <MODULE_DIR>/view/frontend/web/js/welcome.js file, as follows:
define([
'jquery',
'mage/translate'
], function ($, $t) {
'use strict';
$.widget('magelicious.welcome', {
_create: function () {
this.element.text($t('Welcome ' + this.options.name));
}
});
return $.magelicious.welcome;
});
We can see that our widget is quite simple. If we now run Magento's setup:static-content:deploy command, our widget should already be ready for use, as we can now initialize it from template files.
Finally, let's initialize our welcome widget by amending playground.phtml, as follows:
<?php $helper = $this->helper('Magento\Framework\Json\Helper\Data') ?>
<span data-mage-init='<?= $helper->jsonEncode(
['welcome' => ['name' => 'John Doe']]
) ?>'></span>
With this in place, we should now be able to see the Welcome John Doe message in our browser. While this little component seems quite an overkill for what it does, the concepts behind it are what matters.
To this point, we have only been dealing with jQuery widgets as components. While extremely powerful, jQuery widgets are not best suited for rendering robust components with complex HTML structures. The other type of JS components is what we refer to as UI/KnockoutJS components. Built on the shoulders of the KnockoutJS library, these components allow powerful templating of our data, among other things. Without getting too deep into the ins and outs of these type of components, suffice to say that the main construct we are referring to when we speak of UI/KnockoutJS components is uiComponent.
As per <MAGENTO_DIR>/module-ui/view/base/requirejs-config.js, the uiComponent maps to the Magento_Ui/js/lib/core/collection JS file. Inspecting the collection.js file, we can see that uiComponent extends uiElement, which maps to the Magento_Ui/js/lib/core/element/element JS file. The uiComponent and uiElement make use of the ko, underscore, mageUtils, uiRegistry, uiEvents, and uiClass libraries, among other things, so it's worth getting ourselves familiar with those.
Creating new UI/KnockoutJS components is a slightly more involved process than creating a jQuery widget.
We start by creating the proper mapping under our <MODULE_DIR>/view/frontend/requirejs-config.js file, as follows:
var config = {
map: {
'*': {
popularProducts: 'Magelicious_Jsco/js/popular-products'
}
}
};
This part is the same as with jQuery widgets. Here we simply register, or alias if you will, our component name to its file location.
We then define the component itself, under the <MODULE_DIR>/view/frontend/web/js/popular-products.js file, as follows:
define([
'jquery',
'uiComponent',
'ko',
'mage/translate'
], function ($, Component, ko, $t) {
'use strict';
return Component.extend({
defaults: {
template: 'Magelicious_Jsco/popular-products',
title: $t('Popular Products'),
products: [],
},
getTitle: function () {
return this.title;
}
});
}
);
The basis of all UI components is uiComponent. We pass on the instance of uiComponent as a Component parameter. We then implement the specifics of our component as part of the JSON object passed onto the Component.extend method.
With our component JS file now in place, we further create the template file referenced by the component. We do so under the <MODULE_DIR>/view/frontend/web/template/popular-products.html file, as follows:
<h4 data-bind="text: getTitle()"></h4>
<ul data-bind="foreach: products">
<li>
<span>
<span data-bind="text: title"></span>
(<span data-bind="text: sku"></span>)
</span>
</li>
</ul>
What happens in the HTML template files is all about KnockoutJS, which means a certain part of the KnockoutJS library is required in order to built UI/KnockoutJS components.
We then amend our jsco_playground_index.xml by adding the following line under <referenceContainer name="content">:
<block name="popular_products"
template="Magelicious_Jsco::popular-products.phtml" />
popular-products.phtml is where we will instantiate our UI/KnockoutJS component.
Finally, we create <MODULE_DIR>/view/frontend/templates/popular-products.phtml with content, as follows:
<?php $jsonHelper = $this->helper('Magento\Framework\Json\Helper\Data'); ?>
<div class="popular-products" data-bind="scope:'popular-products-scope'">
<!-- ko template: getTemplate() --><!-- /ko -->
</div>
<script type="text/x-magento-init">
{
".popular-products": {
"Magento_Ui/js/core/app": {
"components": {
"popular-products-scope": {
"component": "popularProducts",
"products": <?= /* @escapeNotVerified */ $jsonHelper->jsonEncode([
['sku' => 'sku1', 'title' => 'Title1'],
['sku' => 'sku2', 'title' => 'Title2']
]) ?>
}
}
}
}
}
</script>
Here we are using the declarative approach to initialize our component. The structure of the JSON object under the script tag might seem a bit confusing at first. The .popular-products key is essentially a selector, targeting whatever HTML element it might find. Magento_Ui/js/core/app is an alias for the app.js file, which creates the UI components instances according to the configuration of the JSON using theuiLayout component. components is a key under which we nest one or more components we wish to initialize. popular-products-scope is sort of a scope key assigned to our component, which we use to data-bind the scope value to the HTML element.
Clearing the cache and redeploying the static files, we should now be able to see our newly created component.
Extending UI/KnockoutJS components is a process similar to extending the jQuery widgets. Let's for a moment assume we have the Magelicious_Jsco2 module that wants to override our popularProducts component.
The way to do it would be to add the proper mapping under the map key of our <MODULE2_DIR>/view/frontend/requirejs-config.js file:
var config = {
map: {
'*': {
popularProducts: 'Magelicious_Jsco2/js/new-popular-products'
}
}
};
We then create the proper new-popular-products.js file, as follows:
define([
'jquery',
'Magelicious_Jsco/js/popular-products',
'ko',
'mage/translate',
], function ($, popularProductsComponent, ko, $t) {
'use strict';
return popularProductsComponent.extend({
getTitle: function () {
return 'NEW | ' + this._super();
}
});
}
);
The example here shows that we are no longer passing in the instance of uiComponent, rather the instance of the original Magelicious_Jsco/js/popular-products that we wish to extend. Simply using the extend method on our popularProductsComponent object allows us to extend it easily. By redefining the methods of the same name, such as getTitle, we effectively override the same method on the component we are running the extend on.
Though there are lots of other bits and pieces involved in storefront development, JS components make for the most challenging part of it. Understanding how to write new components, as well as how to override or bypass existing ones is an essential skill for any Magento developer, be it backend or frontend. Admittedly, this chapter took more of a backend/module-developer type of an approach on the subject.
Whenever there is a need to change the behavior of the underlying component, whether it is pure JS, a jQuery widget, or UI/KnockoutJS, we should consider the scope of changes in order to decide whether we should approach it by replacing, overriding, or using mixin.
Moving forward, we are going to take a look at some of the neat things we can do around customizing the storefront catalog behavior, most of which come down to plugins and JS components.
Right out of the box, Magento provides a pretty robust catalog functionality. Managing categories and products on a multi-store, multi-currency, multi-language level with a support for custom attributes, catalog search, catalog rules, and alike are features that are likely to suffice for most customers. Sometimes, however, certain integrations or larger and smaller features are requested, that build on top of the existing functionality. Whether to improve user experience or accommodate essential business requirements, catalog customization's play a major role in everyday Magento development.
We are going to customize our catalog behavior by:
These stand only as a small fragment of what's possible with Magento catalog customizations.
Moving forward, our work is to be done as part of the Magelicious_Catalog module, which we will develop throughout the chapter.
You will need to have basic knowledge of PHP, OOP, JavaScript, and XML. You will also need Apache, MySQL, and AMPPS installed on your system to execute the codes.
The code files of this chapter can be found on GitHub:
https://github.com/PacktPublishing/Magento-2-Quick-Start-Guide.
Check out the following video to see the Code in Action:
We have been asked to add a functionality that shows the size guide on a product view page. This is to appear as a new tab next to the existing Details, More Information, and Reviews tabs. The content of the size guide tab is to be the same for all products containing the size attribute. We also need it to be editable from Magento admin.
Let's take a moment to think about our approach here:
Assuming we have defined registration.php, composer.json, and etc/module.xml as basic module files, we can deal with the more specific details of our Magelicious_Catalog module.
We start by defining <MODULE_DIR>/Setup/InstallData.php with content, as follows:
namespace Magelicious\Catalog\Setup;
class InstallData implements \Magento\Framework\Setup\InstallDataInterface {
protected $searchCriteriaBuilder;
protected $blockRepository;
protected $blockFactory;
public function __construct(
\Magento\Framework\Api\SearchCriteriaBuilder $searchCriteriaBuilder,
\Magento\Cms\Api\BlockRepositoryInterface $blockRepository,
\Magento\Cms\Api\Data\BlockInterfaceFactory $blockFactory
) {
$this->searchCriteriaBuilder = $searchCriteriaBuilder;
$this->blockRepository = $blockRepository;
$this->blockFactory = $blockFactory;
}
public function install(
\Magento\Framework\Setup\ModuleDataSetupInterface $setup,
\Magento\Framework\Setup\ModuleContextInterface $context
) {
$setup->startSetup();
$searchCriteria = $this->searchCriteriaBuilder
->addFilter('identifier', 'size-guide', 'eq')
->create();
$blocks = $this->blockRepository->getList($searchCriteria)->getItems();
if (empty($blocks)) {
/* @var \Magento\Cms\Api\Data\BlockInterface $block */
$block = $this->blockFactory->create();
$block->setIdentifier('size-guide');
$block->setTitle('Size Guide');
$block->setContent('Size guide!');
$this->blockRepository->save($block);
}
$setup->endSetup();
}
}
The InstallData script ensures that the size-guide CMS block is created during module installation if it does not already exist. With this in place, we can already run the setup:upgrade command. This should install our module and create the size-guide CMS block.
We then define <MODULE_DIR>/Block/SizeGuide.php with content, as follows:
namespace Magelicious\Catalog\Block;
class SizeGuide extends \Magento\Cms\Block\Block implements \Magento\Framework\DataObject\IdentityInterface {
protected $product;
protected $coreRegistry;
public function __construct(
\Magento\Framework\View\Element\Context $context,
\Magento\Cms\Model\Template\FilterProvider $filterProvider,
\Magento\Store\Model\StoreManagerInterface $storeManager,
\Magento\Cms\Model\BlockFactory $blockFactory,
\Magento\Framework\Registry $coreRegistry,
array $data = []
) {
$this->coreRegistry = $coreRegistry;
parent::__construct($context, $filterProvider, $storeManager, $blockFactory, $data);
}
public function _toHtml() { /* ... */ }
public function getProduct() {
if (!$this->product) {
$this->product = $this->coreRegistry->registry('product');
}
return $this->product;
}
}
This is the actual block class that we will output on the product view page. The registry's object product key is already set by the parent class up the layout tree. This allows us to easily fetch the instance of the current product.
The _toHtml method is further implemented, as follows:
protected function _toHtml()
{
if ($this->getProduct()->getTypeId() == \Magento\ConfigurableProduct\Model\Product\Type\Configurable::TYPE_CODE) {
$configurableAttributes = $this->getProduct()->getTypeInstance()->getConfigurableAttributesAsArray($this->getProduct());
foreach ($configurableAttributes as $attribute) {
if (isset($attribute['attribute_code']) && $attribute['attribute_code'] == 'size') {
return parent::_toHtml();
}
}
}
return '';
}
This is the gist of our size guide functionality. The configurable type and size attribute code checks ensure that the output of _toHtml renders the size-guide block only for certain groups of products.
We finally define <MODULE_DIR>/view/frontend/layout/catalog_product_view.xml with content, as follows:
<page>
<body>
<referenceBlock name="product.info.details">
<block class="Magelicious\Catalog\Block\SizeGuide" name="size-guide" after="-" group="detailed_info">
<arguments>
<argument name="block_id" xsi:type="string">size-guide</argument>
<argument name="css_class" xsi:type="string">description</argument>
<argument name="at_label" xsi:type="string">none</argument>
<argument name="title" translate="true" xsi:type="string">Size Guide</argument>
</arguments>
</block>
</referenceBlock>
</body>
</page>
This is the glue that binds our SizeGuide block to a product view page, and, more specifically, the product.info.details block that neatly contains the Details, More Information, and Reviews tabs.
The final product view page result should look like this:
We have been asked to add a functionality that shows an active countdown with a You have %h %min %sec to catch our same day delivery offer message on a product view page, whereas the countdown is based on an optionally assigned daily cutoffAt time, set for every product individually, for every day of a week independently.
Let's take a moment to think about our approach here:
We start by bumping up the setup_version value of our <MODULE_DIR>/etc/module.xml file from 1.0.0 to 1.0.1. This allows us to introduce the <MODULE_DIR>/Setup/UpgradeData.php file with an upgrade, as follows:
protected function upgradeToVersionOneZeroOne(
\Magento\Framework\Setup\ModuleDataSetupInterface $setup
) {
$eavSetup = $this->eavSetupFactory->create(['setup' => $setup]);
$days = [
'monday', 'tuesday', 'wednesday', 'thursday',
'friday', 'saturday', 'sunday'
];
$sortOrder = 100;
foreach ($days as $day) {
$eavSetup->addAttribute(
\Magento\Catalog\Model\Product::ENTITY,
$day . '_cutoff_at',
[
'type' => 'varchar',
'label' => ucfirst($day) . ' Cutoff At',
'input' => 'text',
'required' => false,
'sort_order' => $sortOrder++,
'global' => \Magento\Eav\Model\Entity\Attribute\ScopedAttributeInterface::SCOPE_STORE,
'group' => 'Cutoff',
]
);
}
}
The addAttribute method here is run for each day of the week, thus creating monday_cutoff_at to sunday_cutoff_at product attributes. If, at this point, we were to run the Magento's setup:upgrade command, our UpgradeData script would get executed and schema_version and data_version numbers from within the setup_module table would get bumped to the 1.0.1 version. Likewise, going into the Magento admin area and editing or creating a new product, would show the following screen. This is where we enable the user to enter the time of the day in an <hour>:<minute> format, such as 15:30. This time, if entered, will later be used by the JS component to render the countdown functionality on the storefront product view page:
We then create <MODULE_DIR>/Block/Product/View/Cutoff.php, as follows:
namespace Magelicious\Catalog\Block\Product\View;
class Cutoff extends \Magento\Framework\View\Element\Template implements \Magento\Framework\DataObject\IdentityInterface
{
private $product;
protected $coreRegistry;
protected $localeDate;
public function __construct(
\Magento\Framework\View\Element\Template\Context $context,
\Magento\Framework\Registry $coreRegistry,
\Magento\Framework\Stdlib\DateTime\TimezoneInterface $localeDate,
array $data = []
) {
$this->coreRegistry = $coreRegistry;
$this->localeDate = $localeDate;
parent::__construct($context, $data);
}
public function getProduct() { /* ... */ }
public function getCutoffAt() { /* ... */ }
public function getIdentities() { /* ... */ }
}
We will use this class when we reach our layout update.
The getProduct method is further implemented, as follows:
public function getProduct()
{
if (!$this->product) {
$this->product = $this->coreRegistry->registry('product');
}
return $this->product;
}
As mentioned previously, the registry's product key is already set by the parent class up the layout tree, so we exploit that fact to fetch the current product.
The getCutoffAt method is further implemented, as follows:
public function getCutoffAt()
{
$timezone = new \DateTimeZone($this->localeDate->getConfigTimezone());
$now = new \DateTime('now', $timezone);
$day = strtolower($now->format('l'));
$cutoffAt = $this->getProduct()->getData($day . '_cutoff_at');
if ($cutoffAt) {
$timeForDay = \DateTime::createFromFormat(
'Y-m-d H:i',
$now->format('Y-m-d') . ' ' . $cutoffAt,
$timezone
);
if ($timeForDay instanceof \DateTime) {
return $timeForDay->format(DATE_ISO8601);
}
}
return 0;
}
This is the gist of our same day delivery functionality from the PHP side of things. We ensure we properly return the full date and time based on the product's $day . '_cutoff_at' attribute value; this will later be passed onto the JS component.
Finally, the getIdentities method is further implemented, as follows:
public function getIdentities()
{
$identities = $this->getProduct()->getIdentities();
$timezone = new \DateTimeZone($this->localeDate->getConfigTimezone());
$now = new \DateTime('now', $timezone);
$day = strtolower($now->format('l'));
return array_push($identities, $day);
}
The getIdentities method has been implemented in a way to ensure caching of this block is considered in a relation to product identity as well as the day of the week.
We then create the <MODULE_DIR>/view/frontend/requirejs-config.js file, as follows:
var config = {
map: {
'*': {
cutoffAt: 'Magelicious_Catalog/js/cutoff'
}
}
};
This registers the cutoffAt component with Magento, which points to our module's cutoff.js file.
We then create the <MODULE_DIR>/view/frontend/web/js/cutoff.js file, as follows:
define([
'jquery',
'uiComponent',
'ko',
'moment'
], function ($, Component, ko, moment) {
'use strict';
return Component.extend({
defaults: {
template: 'Magelicious_Catalog/cutoff',
expiresAt: null,
timerHide: false,
timerHours: null,
timerMinutes: null,
timerSeconds: null,
},
initialize: function () {
this._super();
this.countdown(this);
return this;
},
initObservable: function () {
this._super()
.observe('timerHide timerHours timerMinutes timerSeconds');
return this;
},
countdown: function (self) { /* ... */ }
});
}
);
Our JS component template value points to <MODULE_DIR>/view/frontend/web/template/cutoff.html, which we will soon address. expiresAt is the only real option that is expected to be passed on when the component is initialized. The observable timer* options will be used internally to control the functionality of our component.
The countdown function is further implemented, as follows:
countdown: function (self) {
var today = moment(new Date());
setInterval(function () {
self.expiresAt = moment(self.expiresAt).subtract(1, 'seconds');
var milliseconds = moment(self.expiresAt, 'DD/MM/YYYY HH:mm:ss').diff(moment(today, 'DD/MM/YYYY HH:mm:ss'));
var duration = moment.duration(milliseconds);
self.timerHours(duration.hours() >= 0 ? duration.hours() : 0);
self.timerMinutes(duration.minutes() >= 0 ? duration.minutes() : 0);
self.timerSeconds(duration.seconds() >= 0 ? duration.seconds() : 0);
if (self.timerHours() == 0
&& self.timerMinutes() == 0
&& self.timerSeconds() == 0
) {
self.timerHide(true);
}
}, 1000);
}
This here is the gist of our same day delivery functionality. Using the core JS setInterval method, we set up a simple per-second counter. With the few lines of code wrapped within setInterval, we control our observable timer* options bound to our cutoff.html template. This, in turn, results in the visual countdown effect.
We then create the <MODULE_DIR>/view/frontend/web/template/cutoff.html file, as follows:
<span class="cutoff-component" data-bind="ifnot: timerHide">
<span translate="'You have'"></span>
<span class="timer">
<span class="timer-part timer-part-hours">
<span class="numeric" data-bind="text: timerHours"></span>
<span class="label" data-bind="i18n: 'hours'"></span>
</span>
<span class="timer-part timer-part-minutes">
<span class="numeric" data-bind="text: timerMinutes"></span>
<span class="label" data-bind="i18n: 'minutes'"></span>
</span>
<span class="timer-part timer-part-seconds">
<span class="numeric" data-bind="text: timerSeconds"></span>
<span class="label" data-bind="i18n: 'seconds'"></span>
</span>
</span>
<span translate="'to catch our same day delivery offer.'"></span>
</span>
This is the template file behind our JS component. We see all those timer* options being bounded to proper span elements. Wrapping every timer* option in its own span allows for potential flexibility around styling later on.
We then create the <MODULE_DIR>/view/frontend/templates/product/view/cutoff.phtml file, as follows:
<?php /* @var \Magelicious\Catalog\Block\Product\View\Cutoff $block */ ?>
<?php $jsonHelper = $this->helper('Magento\Framework\Json\Helper\Data'); ?>
<div class="cutoff" data-bind="scope:'cutoff-scope'">
<!-- ko template: getTemplate() --><!-- /ko -->
</div>
<script type="text/x-magento-init">
{
".cutoff": {
"Magento_Ui/js/core/app": {
"components": {
"cutoff-scope": {
"component": "cutoffAt",
"expiresAt": <?= /* @escapeNotVerified */ $jsonHelper->jsonEncode($block->getCutoffAt()) ?>
}
}
}
}
}
</script>
This is the template file that initializes our JS component. With this file in place, we can finally glue things together by amending the body element of the <MODULE_DIR>/view/frontend/layout/catalog_product_view.xml file, as follows:
<referenceBlock name="product.info.extrahint">
<block name="cutoff"
class="Magelicious\Catalog\Block\Product\View\Cutoff"
template="Magelicious_Catalog::product/view/cutoff.phtml">
</block>
</referenceBlock>
The final product view page result should look like this:
Once the timer reaches 0 hours 0 minutes 0 seconds, it should disappear.
We have been asked to add a functionality that flags every new product shown on the storefront category view and product view pages with a [NEW] prefix in front of its name. New implies anything within the 5 days of the product's created_at value.
Luckily for us, we can easily control a product's name via an after plugin on a product's getName method. All it takes is to define an afterGetName plugin with a category view and product view pages constraint, further filtered by a created_at constraint.
To register the plugin, we start by creating the <MODULE_DIR>/etc/frontend/di.xml file with content, as follows:
<config>
<type name="Magento\Catalog\Api\Data\ProductInterface">
<plugin name="newProductFlag" type="Magelicious\Catalog\Plugin\NewProductFlag"/>
</type>
</config>
We then create the <MODULE_DIR>/Plugin/NewProductFlag.php file with content, as follows:
namespace Magelicious\Catalog\Plugin;
class NewProductFlag
{
protected $request;
protected $localeDate;
public function __construct(
\Magento\Framework\App\RequestInterface $request,
\Magento\Framework\Stdlib\DateTime\TimezoneInterface $localeDate
)
{
$this->request = $request;
$this->localeDate = $localeDate;
}
public function afterGetName(\Magento\Catalog\Api\Data\ProductInterface $subject, $result)
{
$pages = ['catalog_product_view', 'catalog_category_view'];
if (in_array($this->request->getFullActionName(), $pages)) {
$timezone = new \DateTimeZone($this->localeDate->getConfigTimezone());
$now = new \DateTime('now', $timezone);
$createdAt = \DateTime::createFromFormat('Y-m-d H:i:s', $subject->getCreatedAt(), $timezone);
if ($now->diff($createdAt)->days < 5) {
return __('[NEW] ') . $result;
}
}
return $result;
}
}
The afterGetName is our after plugin targeting the product's getName method. Using the request's getFullActionName method, we make sure our plugin is constrained to only catalog_product_view and catalog_category_view pages, or else the original product name is returned. The use of the proper timezone and diff method assures that we further filter down to only those products that we consider new. Clearing the cache at this point should allow our functionality to kick in.
The final result should look like this:
In this chapter, we have built three distinctive functionalities, all of which relate to the catalog part of Magento. Though very lightweight, they stand to show how easily Magento can be extended with new features without really overriding any of the core files. Using plugins and JS components are merely some of the approaches we might take. Quite often, we will find that a single requirement might be delivered with more than one approach. The main guiding rule for our code should always be: use the least intrusive. Catalog functionality plays a major role in the customer conversion process, so our priority should always be failsafe when possible.
Moving forward, we are going to take a look at some of the things we can do to customize the checkout.
While the default Magento checkout provides everything a shop needs to complete a transaction successfully, there are details specific to the individual businesses that often need to be addressed. A great deal of these details often relate to checkout customizations that allow for the capturing of additional information or engaging customers in agreements and subscription activities.
Moving forward, we are going to take a look at the following:
You will need to have basic knowledge of PHP, OOP, JavaScript, and XML. You will also need Apache, MySQL, and AMPPS installed on your system to execute the codes.
The code files of this chapter can be found on GitHub:
https://github.com/PacktPublishing/Magento-2-Quick-Start-Guide.
Check out the following video to see the Code in Action:
Unlike the mostly static CMS, category, and product pages, the checkout page has a more dynamic nature. It is an application on its own, primarily constructed out of JS components, which further utilize Magento's API endpoints to move us through the checkout steps. Magento's Magento\Checkout\Model\CompositeConfigProvider type allows us to push the necessary server-side information easily to the uiComponent of the storefronts.
A quick lookup for the name="configProviders" string across the content of di.xml in the <MAGENTO_DIR> directory reveals dozen of definitions. A closer look at the <MAGENTO_DIR>/module-tax/etc/frontend/di.xml reveals the following:
<type name="Magento\Checkout\Model\CompositeConfigProvider">
<arguments>
<argument name="configProviders" xsi:type="array">
<item name="tax_config_provider" xsi:type="object">Magento\Tax\Model\TaxConfigProvider</item>
</argument>
</arguments>
</type>
We are essentially injecting new items under the configProviders argument of the Magento\Checkout\Model\CompositeConfigProvider type. The implementation of a custom config provider, such as the Magento\Tax\Model\TaxConfigProvider, must implement the Magento\Checkout\Model\ConfigProviderInterface . The underlying getConfig method returns an array of key-value mappings, such as:
return [
'isDisplayShippingPriceExclTax' => $this->isDisplayShippingPriceExclTax(),
'isDisplayShippingBothPrices' => $this->isDisplayShippingBothPrices(),
'reviewShippingDisplayMode' => $this->getDisplayShippingMode(),
/* ... */
];
These, in turn, become available to the uiComponent, as observed in <MAGENTO_DIR>/module-tax/view/frontend/web/js/view/checkout/shipping_method/price.js:
isDisplayShippingPriceExclTax: window.checkoutConfig.isDisplayShippingPriceExclTax,
isDisplayShippingBothPrices: window.checkoutConfig.isDisplayShippingBothPrices,
We can see the values returned by the getConfig method now available under the JavaScript window.checkoutConfig object. This is a simple mechanism by which we can push our server-side data to our storefront when a page loads.
Now that we understand the mechanism behind the window.checkoutConfig object, let's put it to use by creating a small module that adds order notes functionality to the checkout. Our work is to be done as part of the Magelicious_OrderNotes module, with the final visual outcome, as follows:
The idea behind the module is to provide a customer with an option of putting a note against their order. On top of that, we also provide a standard range of possible notes to choose from.
Assuming we have defined registration.php, composer.json, and etc/module.xml as basic module files, we can deal with the more specific details of our Magelicious_OrderNotes module.
We start by defining the <MODULE_DIR>/Setup/InstallSchema.php with content, as follows:
namespace Magelicious\OrderNotes\Setup;
class InstallSchema implements \Magento\Framework\Setup\InstallSchemaInterface
{
public function install(
\Magento\Framework\Setup\SchemaSetupInterface $setup,
\Magento\Framework\Setup\ModuleContextInterface $context
) {
$connection = $setup->getConnection();
$connection->addColumn(
$setup->getTable('quote'),
'order_notes',
[
'type' => \Magento\Framework\DB\Ddl\Table::TYPE_TEXT,
'nullable' => true,
'comment' => 'Order Notes'
]
);
$connection->addColumn(
$setup->getTable('sales_order'),
'order_notes',
[
'type' => \Magento\Framework\DB\Ddl\Table::TYPE_TEXT,
'nullable' => true,
'comment' => 'Order Notes'
]
);
}
}
Our InstallSchema script creates the necessary order_notes column in both the quote and sales_order tables. This is where we will store the value of the customer's checkout note, if there is any.
We then define the <MODULE_DIR>/etc/frontend/routes.xml with content, as follows:
<config>
<router id="standard">
<route id="ordernotes" frontName="ordernotes">
<module name="Magelicious_OrderNotes"/>
</route>
</router>
</config>
The route definition here ensures that Magento will recognize HTTP requests starting with ordernotes, and look for controller actions within our module.
We then define the <MODULE_DIR>/Controller/Index.php with content, as follows:
namespace Magelicious\OrderNotes\Controller;
abstract class Index extends \Magento\Framework\App\Action\Action
{
}
This is merely an empty base class, for our soon-to-follow controller action.
We then define the <MODULE_DIR>/Controller/Index/Process.php with content, as follows:
namespace Magelicious\OrderNotes\Controller\Index;
class Process extends \Magelicious\OrderNotes\Controller\Index
{
protected $checkoutSession;
protected $logger;
public function __construct(
\Magento\Framework\App\Action\Context $context,
\Magento\Checkout\Model\Session $checkoutSession,
\Psr\Log\LoggerInterface $logger
)
{
$this->checkoutSession = $checkoutSession;
$this->logger = $logger;
parent::__construct($context);
}
public function execute()
{
// implement...
}
}
This controller action should catch any HTTP ordernotes/index/process requests. We then extend the execute method, as follows:
public function execute()
{
$result = [];
try {
if ($notes = $this->getRequest()->getParam('order_notes', null)) {
$quote = $this->checkoutSession->getQuote();
$quote->setOrderNotes($notes);
$quote->save();
$result[$quote->getId()];
}
} catch (\Exception $e) {
$this->logger->critical($e);
$result = [
'error' => __('Something went wrong.'),
'errorcode' => $e->getCode(),
];
}
$resultJson = $this->resultFactory->create(\Magento\Framework\Controller\ResultFactory::TYPE_JSON);
$resultJson->setData($result);
return $resultJson;
}
This is where we are storing the order notes on our quote object. Later on, we will pull this onto our sales order object. We further define the <MODULE_DIR>/etc/frontend/di.xml with content, as follows:
<config>
<type name="Magento\Checkout\Model\CompositeConfigProvider">
<arguments>
<argument name="configProviders" xsi:type="array">
<item name="order_notes_config_provider" xsi:type="object">
Magelicious\OrderNotes\Model\ConfigProvider
</item>
</argument>
</arguments>
</type>
</config>
We are registering our configuration provider here. The order_notes_config_provider must be unique. We then define the <MODULE_DIR>/Model/ConfigProvider.php with content, as follows:
namespace Magelicious\OrderNotes\Model;
class ConfigProvider implements \Magento\Checkout\Model\ConfigProviderInterface
{
public function getConfig()
{
return [
'orderNotes' => [
'title' => __('Order Notes'),
'header' => __('Header content.'),
'footer' => __('Footer content.'),
'options' => [
['code' => 'ring', 'value' => __('Ring longer')],
['code' => 'backyard', 'value' => __('Try backyard')],
['code' => 'neighbour', 'value' => __('Ping neighbour')],
['code' => 'other', 'value' => __('Other')],
]
]
];
}
}
This is the implementation of our order_notes_config_provider configuration provider. We can pretty much return any array structure we wish. The top-level orderNotes will be accessible later via JS components as window.checkoutConfig.orderNotes. We further define the <MODULE_DIR>/view/frontend/layout/checkout_index_index.xml with content, as follows:
<page>
<body>
<referenceBlock name="checkout.root">
<arguments>
<argument name="jsLayout" xsi:type="array">
<item name="components" xsi:type="array">
<item name="checkout" xsi:type="array">
<item name="children" xsi:type="array">
<item name="steps" xsi:type="array">
<item name="children" xsi:type="array">
<item name="order-notes" xsi:type="array">
<item name="component" xsi:type="string">
Magelicious_OrderNotes/js/view/order-notes
</item>
<item name="sortOrder" xsi:type="string">2</item>
<!-- closing tags -->
There is quite a nesting structure here. Our order notes component is being injected under the children component of the checkout's steps component.
We then define the <MODULE_DIR>/view/frontend/web/js/view/order-notes.js with content, as follows:
define([
'ko',
'uiComponent',
'underscore',
'Magento_Checkout/js/model/step-navigator',
'jquery',
'mage/translate',
'mage/url'
], function (ko, Component, _, stepNavigator, $, $t, url) {
'use strict';
let checkoutConfigOrderNotes = window.checkoutConfig.orderNotes;
return Component.extend({
defaults: {
template: 'Magelicious_OrderNotes/order/notes'
},
isVisible: ko.observable(true),
initialize: function () {
// TODO
},
navigate: function () {
// TODO
},
navigateToNextStep: function () {
// TODO
}
});
});
This is our uiComponent, powered by Knockout. The template configuration points to the physical location of the .html file that is used as a component's template. The navigate and navigateToNextStep are responsible for navigation between the checkout steps during checkout. Let's extend the initialize function further, as follows:
initialize: function () {
this._super();
stepNavigator.registerStep(
'order_notes',
null,
$t('Order Notes'),
this.isVisible,
_.bind(this.navigate, this),
15
);
return this;
}
We use the initialize method to register our order_notes step with the stepNavigator.
Let's extend the navigateToNextStep function further, as follows:
navigateToNextStep: function () {
if ($(arguments[0]).is('form')) {
$.ajax({
type: 'POST',
url: url.build('ordernotes/index/process'),
data: $(arguments[0]).serialize(),
showLoader: true,
complete: function (response) {
stepNavigator.next();
}
});
}
}
We use the navigateToNextStep method to persist our data. The AJAX POST ordernotes/index/process action should grab the entire form and pass its data along.
Finally, let's add the helper methods for our .html template, as follows:
getTitle: function () {
return checkoutConfigOrderNotes.title;
},
getHeader: function () {
return checkoutConfigOrderNotes.header;
},
getFooter: function () {
return checkoutConfigOrderNotes.footer;
},
getNotesOptions: function () {
return checkoutConfigOrderNotes.options;
},
getCheckoutConfigOrderNotesTime: function () {
return checkoutConfigOrderNotes.time;
},
setOrderNotes: function (valObj, event) {
if (valObj.code == 'other') {
$('[name="order_notes"]').val('');
} else {
$('[name="order_notes"]').val(valObj.value);
}
return true;
},
These are just some of the helper methods we will bind to within our .html template. They merely pull the data out from the window.checkoutConfig.orderNotes object.
We then define the <MODULE_DIR>/view/frontend/web/template/order/notes.html with content, as follows:
<li id="order_notes" data-bind="fadeVisible: isVisible">
<div data-bind="text: getTitle()" data-role="title"></div>
<div id="step-content" data-role="content">
<div data-bind="text: getHeader()" data-role="header"></div>
<!-- form -->
<div data-bind="text: getFooter()" data-role="footer"></div>
</div>
</li>
This is our component template, which gives it a visual structure. We expand it further by replacing the <!-- form --> with the following:
<form data-bind="submit: navigateToNextStep" novalidate="novalidate">
<div data-bind="foreach: getNotesOptions()" class="field choice">
<input type="radio" name="order[notes]" class="radio"
data-bind="value: code, click: $parent.setOrderNotes"/>
<label data-bind="attr: {'for': code}" class="label">
<span data-bind="text: value"></span>
</label>
</div>
<textarea name="order_notes"></textarea>
<div class="actions-toolbar">
<div class="primary">
<button data-role="opc-continue" type="submit" class="button action continue primary">
<span><!-- ko i18n: 'Next'--><!-- /ko --></span>
</button>
</div>
</div>
</form>
The form itself is relatively simple, though it requires some knowledge of Knockout. Understanding the data binding is quite important. It allows us to bind not just text and the HTML values of HTML elements, but other attributes as well, such as the click.
We then define the <MODULE_DIR>/etc/webapi_rest/events.xml with content, as follows:
<config>
<event name="sales_model_service_quote_submit_before">
<observer name="orderNotesToOrder"
instance="Magelicious\OrderNotes\Observer\SaveOrderNotesToOrder"
shared="false"/>
</event>
</config>
The sales_model_service_quote_submit_before event is chosen because it allows us to gain access to both quote and order objects easily at the right time in the order creation process.
We then define the <MODULE_DIR>/Observer/SaveOrderNotesToOrder.php with content, as follows:
namespace Magelicious\OrderNotes\Observer;
class SaveOrderNotesToOrder implements \Magento\Framework\Event\ObserverInterface
{
public function execute(\Magento\Framework\Event\Observer $observer)
{
$event = $observer->getEvent();
if ($notes = $event->getQuote()->getOrderNotes()) {
$event->getOrder()
->setOrderNotes($notes)
->addStatusHistoryComment('Customer note: ' . $notes);
}
return $this;
}
}
Here, we are grabbing the instance of an order object and setting the order notes to the value fetched from the order notes value of a previously stored quote. This makes the customer note appear under the Comments History tab of the Magento admin order View screen, as follows:
With this, we have finalized our little module. Even though the module's functionality is quite simple, the steps for getting it up and running were somewhat involved.
In this chapter, we have built a small, but functional, order notes module. This allowed us to familiarize ourselves with an important aspect of customizing the checkout experience. The gist of this lies in understanding the checkout_index_index layout handle, the JavaScript window.checkoutConfig object, and the uiComponent.
Failure to deliver consistent and stable checkout experiences is bound to result in a loss of conversions. Given the number and complexity of the components involved, it is best to keep the number of checkout customizations to a minimum.
Moving forward, we are going to take a look at some of the things we can do regarding the customization of customer interactions.
Along with the catalog and checkout, customer-related functionality is central to Magento. The customer's My Account area allows control over addresses, orders, billing agreements, product wishlists, product reviews, newsletter subscriptions, and more. Customizing customer functionality often includes changes to the Sign In and Create an Account processes, as well as modifying existing, or adding new functionality under the My Account area.
Depending on the dynamics and intricacy of our functionality, JS components are often friendlier solutions than server-side PHTML templates. They allow us to engage the customer without necessarily reloading entire pages, thus improving the overall customer experience. As with any client to server-side communication, the question of passing and updating the data remains to be addressed. This is where we turn our focus to Magento's section mechanism.
Moving forward we are going to take a look at the following:
You will need to have basic knowledge of PHP, OOP, JavaScript, and XML. You will also need Apache, MySQL, and AMPPS installed on your system to execute the codes.
The code files of this chapter can be found on GitHub:
https://github.com/PacktPublishing/Magento-2-Quick-Start-Guide.
Check out the following video to see the Code in Action:
Our previous chapter touched upon config providers and the window.checkoutConfig object; a mechanism by which we can push our server-side data to our storefront when a page loads. The section mechanism allows us to push data to a browser page upon any named HTTP POST request.
Let's take a quick look at the <MAGENTO_DIR>/module-review/etc/frontend/sections.xml file:
<action name="review/product/post">
<section name="review"/>
</action>
The definition provided here is to be interpreted as: "any storefront HTTP POST review/product/post request is to trigger a review section load," where review section load means Magento triggering an additional AJAX request following the completion of an observed HTTP POST. The result of this section load action, in this case, is the refresh of section data, retrievable via customerData.get('review') , as we will soon see.
Now let's take a look at the <MAGENTO_DIR>/module-review/etc/frontend/di.xml file:
<type name="Magento\Customer\CustomerData\SectionPoolInterface">
<arguments>
<argument name="sectionSourceMap" xsi:type="array">
<item name="review" xsi:type="string">Magento\Review\CustomerData\Review</item>
</argument>
</arguments>
</type>
We are essentially injecting new items under the sectionSourceMap argument of the Magento\Customer\CustomerData\SectionPoolInterface type. The implementation of a custom section, such as the Magento\Review\CustomerData\Review, must implement the Magento\Customer\CustomerData\SectionSourceInterface . The underlying getSectionData method returns an array of key-value mappings, such as:
return [
'nickname' => '',
'title' => '',
'detail' => ''
]
These, in turn, become available to the uiComponent, as observed in the partial <MAGENTO_DIR>/module-review/view/frontend/web/js/view/review.js file:
define([
'uiComponent',
'Magento_Customer/js/customer-data',
'Magento_Customer/js/view/customer'
], function (Component, customerData) {
'use strict';
return Component.extend({
initialize: function () {
this.review = customerData.get('review') ...
},
nickname: function () {
return this.review().nickname ...
}
});
});
The get method of the customerData object can be used to fetch the sectionSourceMap data, such as customerData.get('review'). This data is refreshed every time an HTTP POST is made to the review/product/post route. This is because following any HTTP POST review/product/post, Magento will trigger an HTTP GET customer/section/load/?sections=review&update_section_id=true&_=1533836467415, which in turn updates customerData accordingly.
Now that we understand the mechanism behind the customerData object and the section load, let's put it to use by creating a small module that adds contact preferences functionality under the customer's My Account area, as well as under the checkout. Our work is to be done as part of the Magelicious_ContactPreferences module, with the final visual outcome as follows:
By contrast, the customer's checkout area would show contact preferences, as follows:
The idea behind the module is to provide a customer with an option of choosing preferred contact preferences, so that a merchant may follow up with the delivery process accordingly.
Assuming we have defined registration.php, composer.json, and etc/module.xml as basic module files, we can deal with the more specific details of our Magelicious_ContactPreferences module.
We start by defining the <MODULE_DIR>/Setup/InstallData.php, as follows:
$customerSetup = $this->customerSetupFactory->create(['setup' => $setup]);
$customerSetup->addAttribute(
\Magento\Customer\Model\Customer::ENTITY,
'contact_preferences',
[
'type' => 'varchar',
'label' => 'Contact Preferences',
'input' => 'multiselect',
'source' => \Magelicious\ContactPreferences\Model\Entity\Attribute\Source\Contact\Preferences::class,
'required' => 0,
'sort_order' => 99,
'position' => 99,
'system' => 0,
'visible' => 1,
'global' => \Magento\Catalog\Model\ResourceModel\Eav\Attribute::SCOPE_GLOBAL,
]
);
$contactPreferencesAttr = $customerSetup
->getEavConfig()
->getAttribute(
\Magento\Customer\Model\Customer::ENTITY,
'contact_preferences'
);
$contactPreferencesAttr->setData('used_in_forms', ['adminhtml_customer']);
$contactPreferencesAttr->save();
We are instructing Magento to create a multiselect type of attribute. The attribute becomes visible under the Magento admin area, with a customer editing screen as follows:
We then define the <MODULE_DIR>/Model/Entity/Attribute/Source/Contact/Preferences.php, as follows:
namespace Magelicious\ContactPreferences\Model\Entity\Attribute\Source\Contact;
class Preferences extends \Magento\Eav\Model\Entity\Attribute\Source\AbstractSource
{
const VALUE_EMAIL = 'email';
const VALUE_PHONE = 'phone';
const VALUE_POST = 'post';
const VALUE_SMS = 'sms';
public function getAllOptions()
{
return [
['label' => __('Email'), 'value' => self::VALUE_EMAIL],
['label' => __('Phone'), 'value' => self::VALUE_PHONE],
['label' => __('Post'), 'value' => self::VALUE_POST],
['label' => __('SMS'), 'value' => self::VALUE_SMS],
];
}
}
These are the contact preference options we want to provide as our attribute source. We will use this class not just for installation, but later on as well.
We then define the <MODULE_DIR>/etc/frontend/routes.xml, as follows:
<config>
<router id="standard">
<route id="customer" frontName="customer">
<module name="Magelicious_ContactPreferences" before="Magento_Customer"/>
</route>
</router>
</config>
Unlike our route definitions in previous chapters, here we are using an already existing route name customer. The attribute before it allows us to insert our module before the Magento_Customer module, allowing us to respond to the same customer/* routes. We should be very careful with this approach, not to detach some of the existing controller actions. In our case, we are only doing this so that we might use the customer/contact/preferences URL later on.
We then define the <MODULE_DIR>/Controller/Contact/Preferences.php, as follows:
namespace Magelicious\ContactPreferences\Controller\Contact;
class Preferences extends \Magento\Customer\Controller\AbstractAccount
{
public function execute()
{
if ($this->getRequest()->isPost()) {
$resultJson = $this->resultFactory->create(\Magento\Framework\Controller\ResultFactory::TYPE_JSON);
if ($this->getRequest()->getParam('load')) {
// Merely for triggering "contact_preferences" section
} else {
// SAVE PREFERENCES
}
return $resultJson;
} else {
$resultPage = $this->resultFactory->create(\Magento\Framework\Controller\ResultFactory::TYPE_PAGE);
$resultPage->getConfig()->getTitle()->set(__('My Contact Preferences'));
return $resultPage;
}
}
}
This is the only controller action we will have. We will use the same action for handling three different intents. This is not an ideal example of how one should write code in this scenario, but it is a compact one. The first intent we will handle is the section load trigger, the second is the actual preference save, and the third is the page load. These will become clear as we move forward.
We then replace the SAVE PREFERENCES comment with the following:
// \Magento\Framework\App\Action\Context $context
// \Magento\Customer\Model\Session $customerSession
// \Magento\Customer\Api\CustomerRepositoryInterface $customerRepository
// \Psr\Log\LoggerInterface $logger
try {
$preferences = implode(',',
array_keys(
array_filter($this->getRequest()->getParams(), function ($_checked, $_preference) {
return filter_var($_checked, FILTER_VALIDATE_BOOLEAN);
}, ARRAY_FILTER_USE_BOTH)
)
);
$customer = $this->customerRepository->getById($this->customerSession->getCustomerId());
$customer->setCustomAttribute('contact_preferences', $preferences);
$this->customerRepository->save($customer);
$this->messageManager->addSuccessMessage(__('Successfully saved contact preferences.'));
} catch (\Exception $e) {
$this->logger->critical($e);
$this->messageManager->addErrorMessage(__('Error saving contact preferences.'));
}
Here we are handling the actual saving of the chosen contact preferences. The request parameters are expected to be in the <preference_name>=<true|false> format. We use the implode to turn the incoming request and pass it onto the repository's setCustomAttribute method. This is because, by default, Magento stores the multiselect attribute as a comma-separated string in the database. The addSuccessMessage and addErrorMessage calls are interesting here. One might expect that we would return these messages as part of a JSON response. But, we don't really need a JSON response body here. This is because Magento has the messages section defined under <MAGENTO_DIR>/module-theme/etc/frontend/sections.xml as <action name="*">. What this means is that messages get refreshed upon every section load and, since our controller action is mapped in our own sections.xml, the load of our section will also load messages.
We then define the <MODULE_DIR>/view/frontend/layout/customer_account.xml, as follows:
<page>
<body>
<referenceBlock name="customer_account_navigation">
<block class="Magento\Customer\Block\Account\SortLinkInterface" name="customer-account-navigation-contact-preferences-link">
<arguments>
<argument name="path" xsi:type="string">customer/contact/preferences</argument>
<argument name="label" xsi:type="string" translate="true">My Contact Preferences</argument>
<argument name="sortOrder" xsi:type="number">230</argument>
</arguments>
</block>
</referenceBlock>
</body>
</page>
The definitions here inject a new menu item under the customer's My Account screen. The customer_account_navigation block, originally defined under <MAGENTO_DIR>/module-customer/view/frontend/layout/customer_account.xml, is in charge of rendering the sidebar menu. By injecting the new block of Magento\Customer\Block\Account\SortLinkInterface type, we can easily add new menu items.
We then define the <MODULE_DIR>/view/frontend/layout/customer_contact_preferences.xml, as follows:
<page>
<update handle="customer_account"/>
<body>
<referenceContainer name="content">
<block name="contact_preferences"
template="Magelicious_ContactPreferences::customer/contact/preferences.phtml" cacheable="false"/>
</referenceContainer>
</body>
</page>
This is the block that will get loaded into the content area of a page, once we click on our newly added My Contact Preferences link. Since the only role of the contact_preferences block will be to load the JS component, we omit the class definition that we would normally have on custom blocks.
We then define the <MODULE_DIR>/view/frontend/templates/customer/contact/preferences.phtml, as follows:
<div class="contact-preferences" data-bind="scope:'contact-preferences-scope'">
<!-- ko template: getTemplate() --><!-- /ko -->
</div>
<script type="text/x-magento-init">
{
".contact-preferences": {
"Magento_Ui/js/core/app": {
"components": {
"contact-preferences-scope": {
"component": "contactPreferences"
}
}
}
}
}
</script>
The only purpose of the template here is to load the JS contactPreferences component. We can see that no data is passed from the server-side .phtml template to the JS component. We will use the section and customerData mechanisms later on for that.
We then define the <MODULE_DIR>/view/frontend/requirejs-config.js, as follows:
var config = {
map: {
'*': {
contactPreferences: 'Magelicious_ContactPreferences/js/view/contact-preferences'
}
}
};
Here we map the component name, contactPreferences, to its physical location in our module directory.
We then define the <MODULE_DIR>/view/frontend/web/js/view/contact-preferences.js, as follows:
define([
'uiComponent',
'jquery',
'mage/url',
'Magento_Customer/js/customer-data'
], function (Component, $, url, customerData) {
'use strict';
let contactPreferences = customerData.get('contact_preferences');
return Component.extend({
defaults: {
template: 'Magelicious_ContactPreferences/contact-preferences'
},
initialize: function () { /* ... */ },
isCustomerLoggedIn: function () {
return contactPreferences().isCustomerLoggedIn;
},
getSelectOptions: function () {
return contactPreferences().selectOptions;
},
saveContactPreferences: function () { /* ... */ }
});
});
This is our JS component, the core of our client-side functionality. We inject the Magento_Customer/js/customer-data component as a customerData object. This gives us access to data we are pushing from the server side via the getSectionData method of the Magelicious\ContactPreferences\CustomerData\Preferences class. The string value contact_preferences passed to the get method of the customerData object must match the item name under the sectionSourceMap of our di.xml definition.
Let's extend the initialize function further, as follows:
initialize: function () {
this._super();
$.ajax({
type: 'POST',
url: url.build('customer/contact/preferences'),
data: {'load': true},
showLoader: true
});
}
The addition of an AJAX request call within the component's initialize method is more of a trick to trigger the contact_preferences section load in our case. We are doing it simply because sections do not load on HTTP GET requests, as that might load the same customer/contact/preferences page. Rather, they load on HTTP POST events. This way we ensure that the contact_preferences section will load when our component is initialized, thus providing it with the necessary data. We are far from saying that this is a recommended approach for general JS component development, though.
Let's extend the saveContactPreferences function further, as follows:
saveContactPreferences: function () {
let preferences = {};
$('.contact_preference').children(':checkbox').each(function () {
preferences[$(this).attr('name')] = $(this).attr('checked') ? true : false;
});
$.ajax({
type: 'POST',
url: url.build('customer/contact/preferences'),
data: preferences,
showLoader: true,
complete: function (response) {
// some actions...
}
});
return true;
}
The saveContactPreferences method will be triggered every time a customer clicks on the contact preference on the storefront, whether it is an act of checking or unchecking individual contact preferences.
We then define the <MODULE_DIR>/view/frontend/web/template/contact-preferences.html, as follows:
<div data-bind="if: isCustomerLoggedIn()">
<div data-role="title" data-bind="i18n: 'Contact Preferences'"></div>
<div data-role="content">
<div class="contact_preference" repeat="foreach: getSelectOptions(), item: '$option'">
<input type="checkbox"
click="saveContactPreferences"
ko-checked="$option().checked"
attr="name: $option().value"/>
<label text="$option().label" attr="for: $option().value"/>
</div>
</div>
</div>
The HTML defined here visually sets our component. A basic knowledge of Knockout JS is required in order to utilize the repeat directive, fed with the array of data coming from the getSelectOptions method, which by now we know originates from the server side.
We then define the <MODULE_DIR>/etc/frontend/sections.xml, as follows:
<config>
<action name="customer/contact/preferences">
<section name="contact_preferences"/>
</action>
</config>
With this, we make the necessary mapping between HTTP POST customer/contact/preferences requests and the contact_preferences section we expect to load.
We then define the <MODULE_DIR>/etc/frontend/di.xml, as follows:
<config>
<type name="Magento\Customer\CustomerData\SectionPoolInterface">
<arguments>
<argument name="sectionSourceMap" xsi:type="array">
<item name="contact_preferences" xsi:type="string">Magelicious\ContactPreferences\CustomerData\Preferences</item>
</argument>
</arguments>
</type>
</config>
Here we inject our contact_preferences section, instructing Magento where to read its data from. With this in place, any HTTP POST customer/contact/preferences request is expected to trigger a follow-up AJAX POST customer/section/load/?sections=contact_preferences%2Cmessages&update_section_id=true&_=1533887023603 request that, in turn, returns data much like the following:
{
"contact_preferences": {
"selectOptions": [
{
"label": "Email",
"value": "email",
"checked": true
},
{ ... }
],
"isCustomerLoggedIn": true,
"data_id": 1533875246
},
"messages": {
"messages": [
{
"type": "success",
"text": "Successfully saved contact preferences."
}
],
"data_id": 1533875246
}
}
If we were to enable our module at this point, we should be able to see it working under the customer's My Account screen. Though simple, the steps of getting everything linked were somewhat involved. The benefit of this approach, where data is sent via the sections mechanism, is that our component plays nicely with full-page caching. The needed customer-related data is simply fetched by additional AJAX calls, instead of caching it on a per-customer basis, and thus this bypasses the purpose of full-page caching.
With our component now working on the customer's My Account page, let's go ahead and add it to the checkout's Review & Payments step as well.
By tapping into the checkout_index_index layout handle, and nesting our component under the desired children element, we can easily add it to the checkout page. We do so with the <MODULE_DIR>/view/frontend/layout/checkout_index_index.xml file, as follows:
<page>
<body>
<referenceBlock name="checkout.root">
<arguments>
<argument name="jsLayout" xsi:type="array">
<item name="components" xsi:type="array">
<item name="checkout" xsi:type="array">
<item name="children" xsi:type="array">
<item name="steps" xsi:type="array">
<item name="children" xsi:type="array">
<item name="billing-step" xsi:type="array">
<item name="children" xsi:type="array">
<item name="payment" xsi:type="array">
<item name="children" xsi:type="array">
<item name="afterMethods" xsi:type="array">
<item name="children" xsi:type="array">
<item name="contact-preferences" xsi:type="array">
<item name="component" xsi:type="string">Magelicious_ContactPreferences/js/view/contact-preferences</item>
<!-- closing tags -->
The nesting structure of checkout_index_index.xml is quite robust. There are several places where we can actually insert our own component. Most of the time, this might be trial and error. In this case, we opted for the children area of afterMethods. This should position it under the checkout's Review & Payments step, right after the payments method list.
In this chapter, we have built a small module that allowed us to get a greater insight into Magento's customerData and sections mechanisms. We managed to build a single component, that got used both on the customer's My Account page, as well as on the checkout.
With this, we have reached the end of our book. The topics we have covered should be enough to get us going with Magento development, but the sheer size of the platform and the intricate specifics of its individual modules leave plenty more to explore further on. It goes without saying that our journey has merely begun.
If you enjoyed this book, you may be interested in these other books by Packt:
Magento 2 Beginners Guide
Gabriel Guarino
ISBN: 9781785880766
Magento 2 Developer's Guide
Branko Ajzele
ISBN: 9781785886584
Please share your thoughts on this book with others by leaving a review on the site that you bought it from. If you purchased the book from Amazon, please leave us an honest review on this book's Amazon page. This is vital so that other potential readers can see and use your unbiased opinion to make purchasing decisions, we can understand what our customers think about our products, and our authors can see your feedback on the title that they have worked with Packt to create. It will only take a few minutes of your time, but is valuable to other potential customers, our authors, and Packt. Thank you!