
You bought this book to learn to program using Python and to learn about the Raspberry Pi. You also want to build some cool projects, learn how the Pi runs Linux, and learn how you can use Python to interface with the Pi and various add-ons.

Possible lab safety outfit
The Darwin Awards
If you’re not aware of them already, the Darwin Awards are humorous awards bestowed yearly upon those members of the human race who have managed to remove themselves from the gene pool, either through death or sterilization, due to their own stupidity. Past winners have included thieves who electrocuted themselves while stealing copper wire from electrical substations, drivers who switched places with their passengers while driving at highway speeds, and drug users who injected poppy seeds into their veins.
The 9V battery electrocution incident took place when a Navy sailor, in an attempt to measure his body’s electrical resistance, stuck the pointed probes of his 9V multimeter into his thumbs, making his blood a perfect conductor. The current traveled across his heart, disrupting his heartbeat and killing him.
You can read more about the Darwin Awards at their website: www.darwinawards.com .
Basic Electricity Concepts
. . . and he spake, and spake thusly: “There shall be one law, and that law is of Ohm, and it is that V is equal to I times R.”
V = I × R I = V ÷ R R = V ÷ I

Common electrical equations
As an example, a common way of illustrating the different electrical concepts is with water and different sized pipes. In a “water circuit,” the water power is provided by a pump. In an electrical circuit, the power is provided by a battery. In a water circuit, the pump takes water at low pressure, increases the pressure, and sends the water on its way around the circuit. In an electrical circuit, the battery takes “low-pressure” voltage, increases its volts, and sends it on its way around the circuit. In both cases, the current means the flow—of either electrons or water—around the circuit. The resistance of the circuit is analogous to how large the water pipe is. If the pipe is large, it offers less resistance to the water flowing through it. In a circuit, if the wire has less resistance it allows the electrons to flow more freely. This, in turn, affects the power.
Power increases with resistance and current. Think of power as the “speed” of the electricity; if you have a certain amount of water flowing from the end of a hose and you hold your finger over the end, increasing the resistance, the speed of the water increases. Increasing the resistance of the circuit increases the power. There are byproducts to this, of course. Partially blocking the end of a hose increases the friction at the mouth of the hose, and thus the heat. Likewise, increasing the resistance of a circuit often means increased heat. Heat is bad for circuits, especially fragile items like integrated circuits (ICs), so many electronic components that produce heat (because of internal resistance, among other reasons) often have a heat sink built in to dissipate the heat they create.
At its most fundamental, electricity is nothing more than electrons moving back and forth along a wire or some other path. That path is always the path of least resistance. Given the choice of two ways to travel, electrons will always take the easiest path, whether it’s through a wire, a screwdriver, or a human torso. Your goal, when working with these electrons, is to ensure that the easiest path does not involve your body. You won’t always be successful; I’ve been shocked more times than I can count. (In fact, in addition to the multiple electric shocks I’ve experienced with batteries and power supplies, I’ve actually been struck by lightning three times.) A conscientious experimenter should try to reduce these incidents, if for no other reason than that they can hurt! Rubber gloves can help (though wearing them all the time is a bit impractical), as can rubber boots or rubber-soled shoes. The reason rubber boots are a good idea, in addition to their being extremely fashionable, is that electrons always want to connect to ground. That “ground” may be a power ground, like the terminal of a battery; a chassis ground, like an engine block in a car; or the actual ground, called an earth ground . A rubber barrier between yourself and the ground discourages those electrons from making the journey through your body.
With the electricity basics under your belt, let’s talk about the tools you’ll need to build your projects.
Required Tools for Robotics
All engineers need good tools, and as a budding hobbyist/experimenter/engineer, you’re no exception. That dented, banged-up screwdriver sitting in your kitchen’s junk drawer may be fine for prying staples out of the wall, but if you try to use it for any delicate work on your projects, you’re just asking for trouble. Likewise, a pair of wire cutters with huge gaps in the teeth won’t do you any good when you’re trying to reach inside a tiny opening to clip the red wire before the timer reaches zero. To build cool things, you need good tools. The following sections will describe the necessary tools you should have.
Screwdrivers
You need a good set of small jeweler’s screwdrivers. Spend the extra $10 and get a good-quality set that will last you a long time, preferably one made out of hardened steel. The set should have at least three regular and three Phillips screwdrivers, with the regular sizes ranging from 3/64 of an inch to 1/8 of an inch, and the Phillips sizes including both #0 and #1. A good screwdriver is worth its weight in gold because it’s less likely to strip the screw or develop a damaged tip that fails to grip the screw at all.
In addition, make sure you have on hand a regular, standard-sized screwdriver and a Phillips #2, because you’re apt to be assembling/disassembling ordinary-sized items as well as miniature ones. I suggest you get a ratcheting screwdriver with a set of different bits so you’ll be prepared for most if not all of your projects.
Pliers and Wire Strippers

Needle-nosed pliers
You can probably get away without a regular pair of pliers, though I wouldn’t recommend it. Take good care of your pliers, and they’ll take good care of you. It’s difficult to bend wire or cut contacts with a pair of pliers that has gaps or doesn’t close correctly.
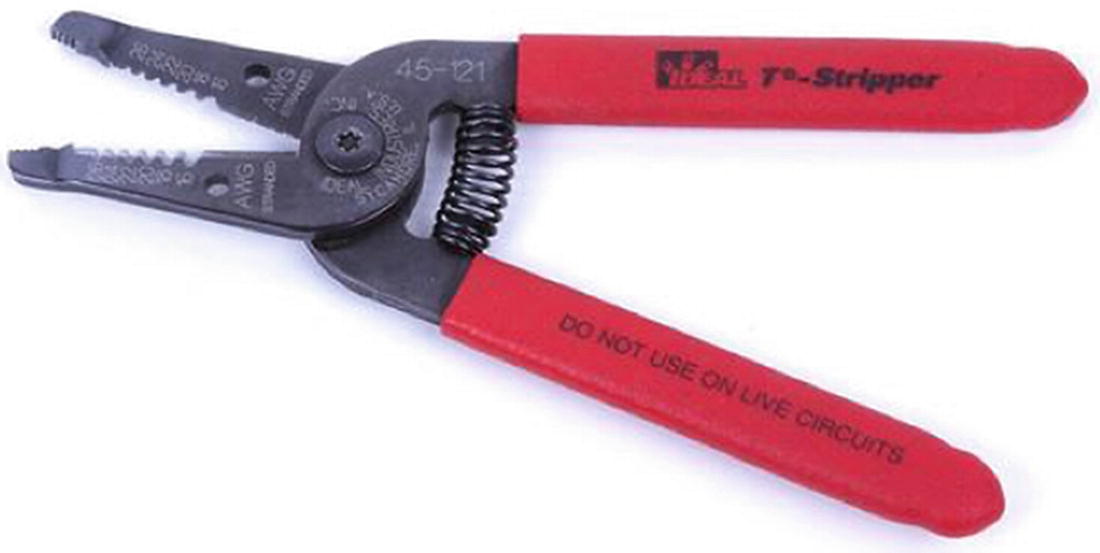
Wire strippers, version 1

Wire strippers, version 2
I actually use both because, although I appreciate being able to choose my wire size in the pair shown in Figure 4-4, I often come across odd-sized wire that doesn’t fit in any of that model’s pre-sized holes. That’s where the strippers shown in Figure 4-5 come into play. These are much faster to use, and if you’re stripping a lot of wires at once you’ll appreciate the speed and convenience.
Wire Cutters
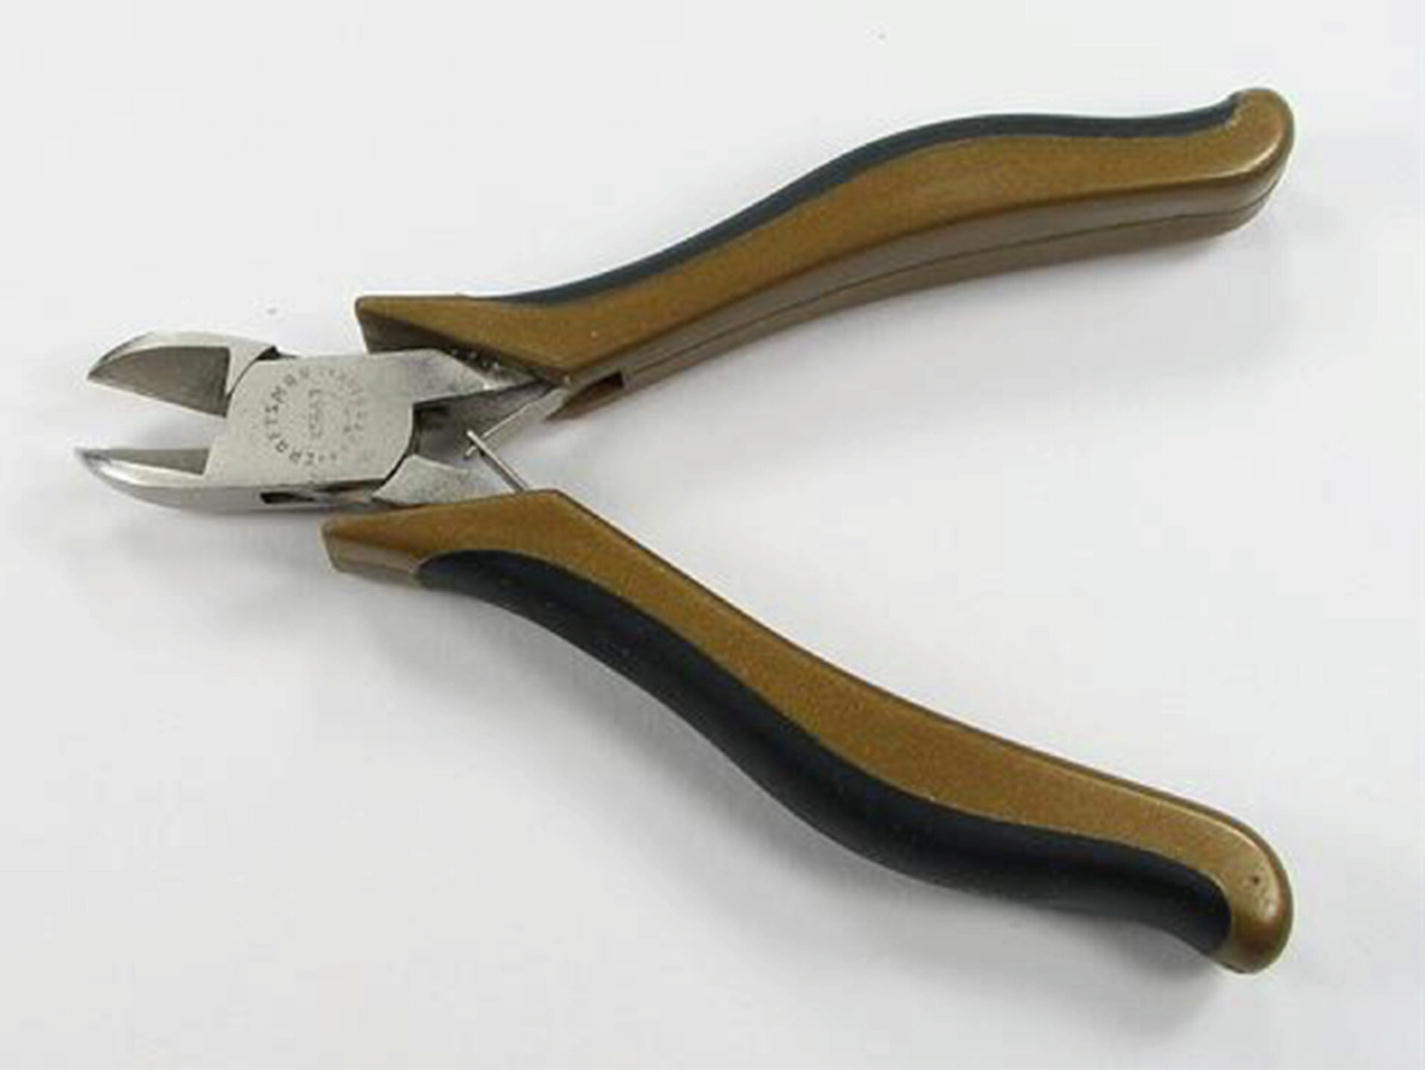
Wire cutters

Fine wire cutters
The regular-sized cutters are great for everyday work, but the smaller cutters are invaluable when you have to snip tiny, broken solder joints or the frayed ends of #24-gauge wire.
Files
You won’t need anything fancy when it comes to files, just a set of small files with varying cuts, or roughness. The finer cuts can be used for roughening a joint before soldering it or removing a bit of solder from a wire end before inserting it into a breadboard, while the rougher cuts can be used to reshape metal and plastic enclosures, increase hole sizes, and various other tasks.
Magnifying Light

Magnifying light
Hot-Glue Gun
At some point, you’ll need to stick things to other things—like one servo to another, or a printed circuit board (PCB) to a robot’s platform body—and it may not be feasible to use screws or bolts. One of the best ways to do this is with a hot-glue gun. Ignore the stigma of scrapbooking and paper plate/macaroni designs and get a good glue gun. Hot glue works surprisingly well in all sorts of applications—wood to plastic, plastic to plastic, wood to metal, and so on.
Assorted Glues
Speaking of glue, you’ll probably want to pick up an assortment of other, non-hot-glue-gun glues. Superglue is a must-have (get a brand-name version, though, not a store brand), as is modeling cement. I also have a stockpile of five-minute epoxy and rubber cement and recently discovered Gorilla Glue is one of the most awesome glues yet. You may also find a use for those cold-welding sticks—the ones where you mix two putty-like substances together to form a “clay” that hardens to a steel-like consistency.
Add tape to this list as well; get some regular transparent tape, some double-sided tape, masking tape, electrical tape, and—of course—duct tape.
Multimeter
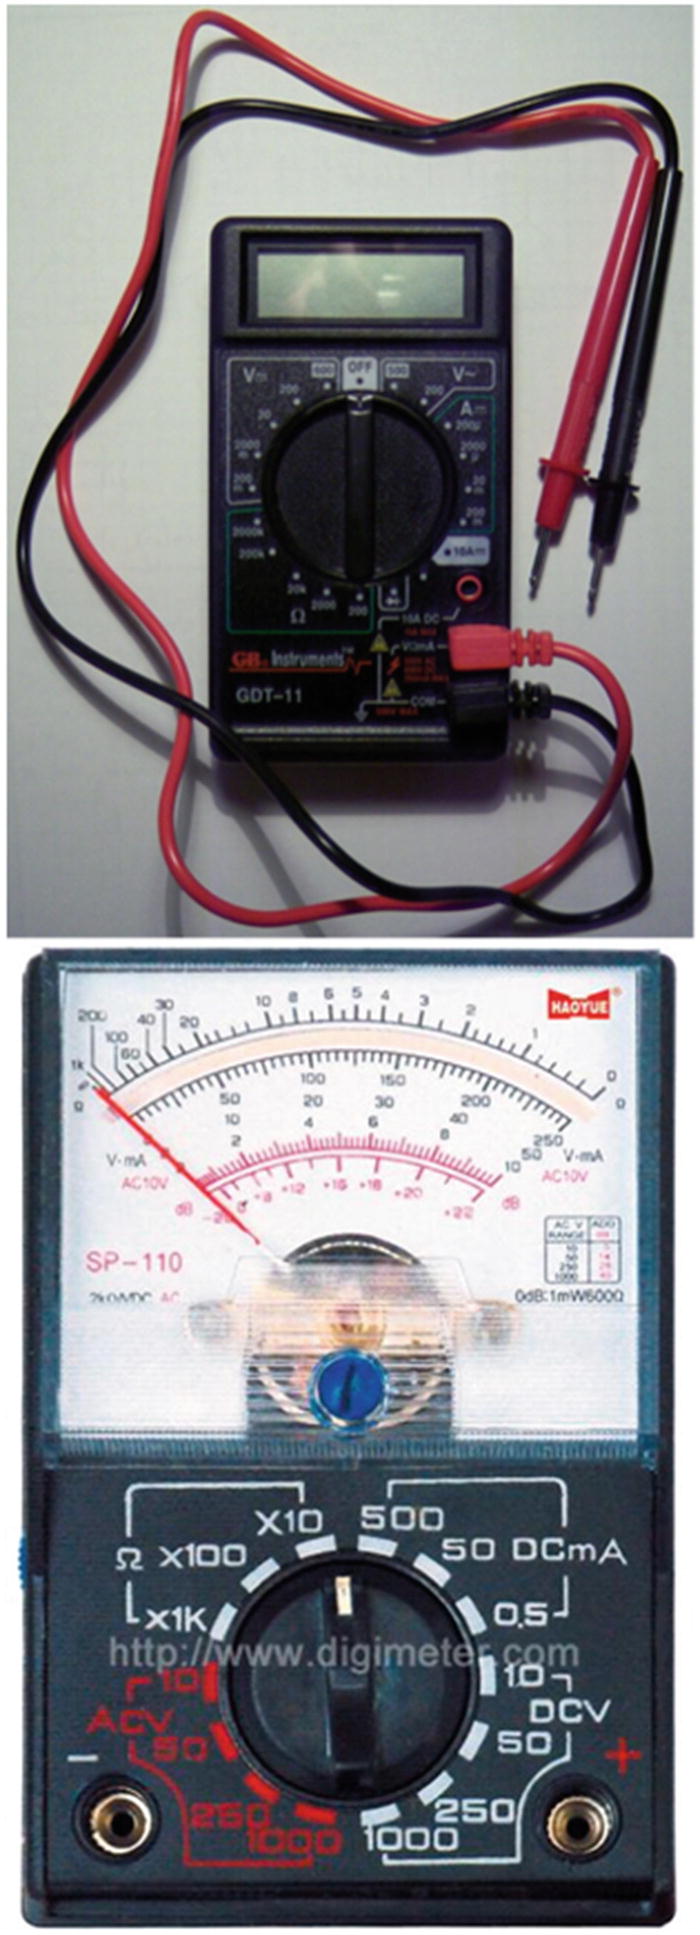
Analog and digital multimeters (© www.digimeter.com )
When choosing your multimeter, make sure it can measure both AC and DC voltage levels as it’s likely you’ll be using both at some point. It should be able to measure resistance and continuity as well as current. The meters that give off a sound when two points are connected are very helpful when you’re trying to trace wires or a short in a system. The most important characteristic to look for, however, is ease of use. If you don’t know how to use the multimeter, you won’t use it, and you’d be wasting an important tool. So, get one you like that makes sense to you and then spend some time with the manual learning how to use it.
Power Supplies
When it comes to powering your experiments and projects, there are a few different routes you can take. Obviously, you’ll often be using batteries or battery packs, and I’ll talk about those for each specific project. However, when it comes to powering a prototype or just determining if a particular configuration works, you can’t go wrong with a wall wart—the AC-to-DC converters that come with almost all electronic devices these days.
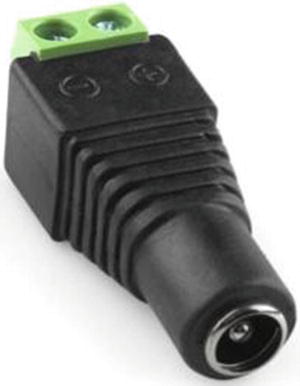
Power plug adapter
I tend to pick up power supplies whenever I see them, or keep them when I throw a device away at home, so I have a pretty good assortment. Try to find at least a 9V and a 12V, with different current ratings, because these are common voltage sources. If your device runs well with your 12V source, for example, that means it’ll probably run well in your car. If you happen across an uncommon power supply, such as an AC-to-AC transformer, definitely keep it—it might come in handy!
Breadboard

Prototyping breadboard setup
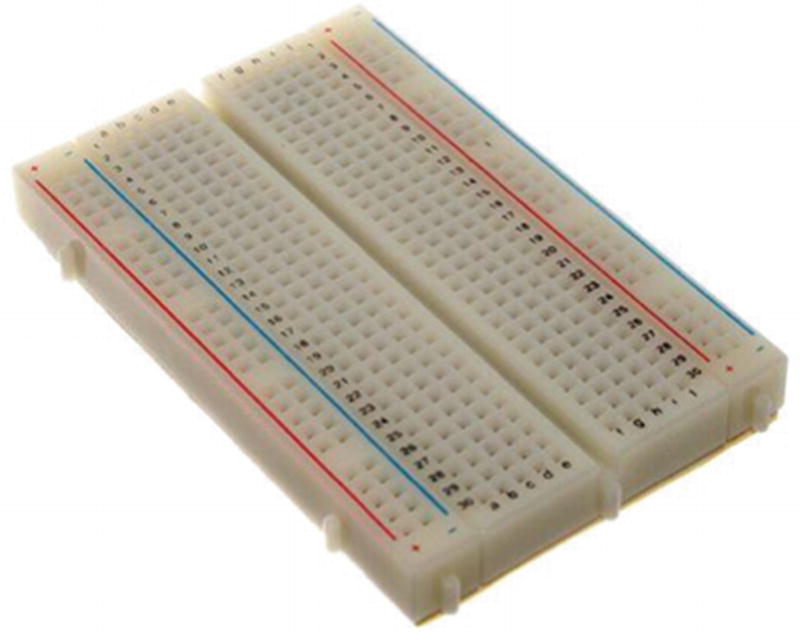
Analog breadboard
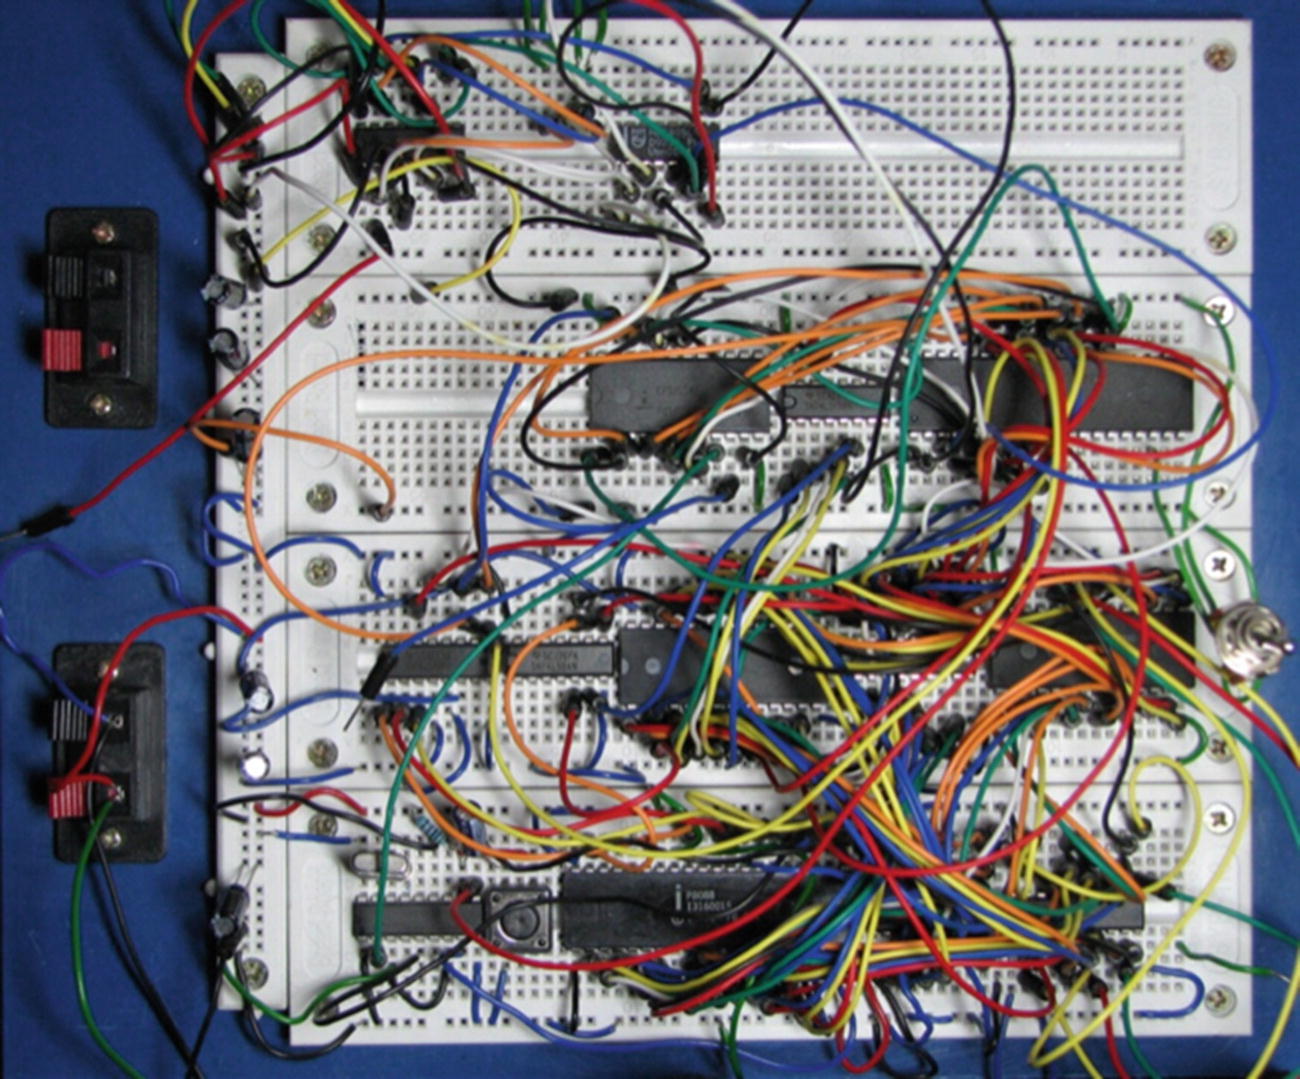
Breadboarding gone horribly wrong
Yes, you’ll be debugging that conglomeration of wires, and no, I can’t help you. But I feel for you—I truly do.
Power Strip
You’ll need a power strip, but it doesn’t have to be anything elaborate. It’s just a good idea to have all of your electronics—desk lamp, soldering iron, Pi, and so on—plugged into one source so that you have a failsafe way to abort if you need to. One flip of a switch, and everything goes off. Get one with a surge protector built in if you can.
Soldering Iron
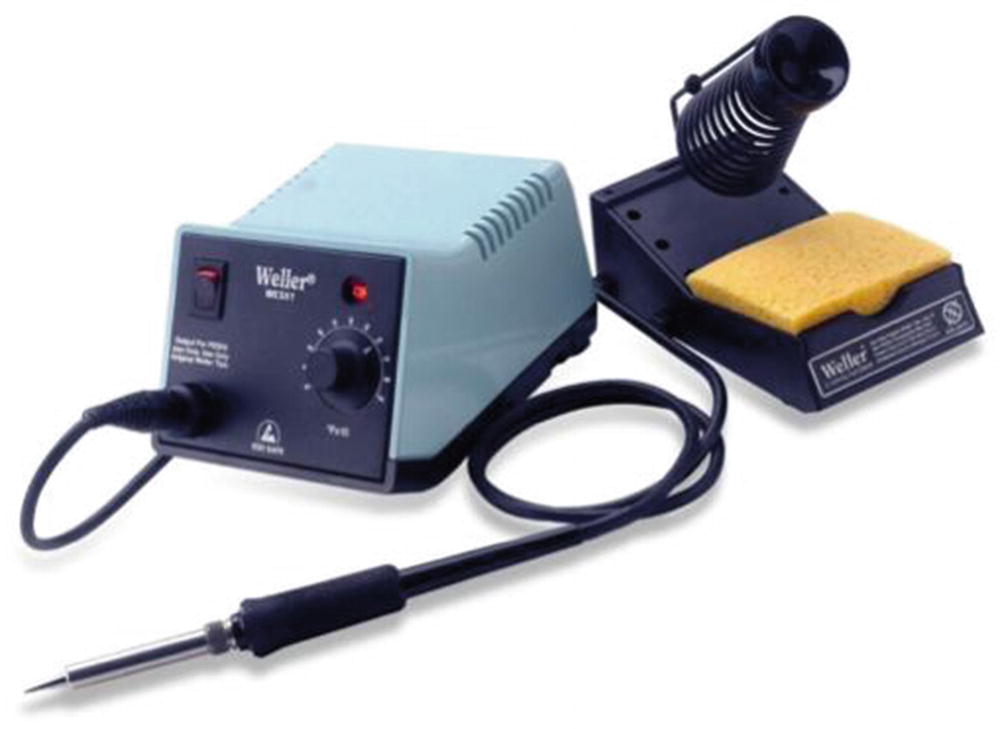
Soldering station
It’s easily the best $100 I ever spent in my electronics career. Get one with a stand, adjustable heat, and tips you can swap. Trust me: your projects will thank you when you can use the correct temperature to make the solder melt without melting your circuit, or when you can use even heat to remove a bad solder joint.

Helping-hands tool
A helping-hands tool comes in very handy when you need two hands to hold a connection and another two hands to solder that connection and you’ve burned your wife’s fingers one too many times and your kid is nowhere to be found. You can even make your own out of stiff baling wire, alligator clips, and a wooden stand.
General Safety Rules
Here is where I get to act like your mother and ask if you’re being safe. After all, although we’re building relatively innocuous projects in this book, you’re still dealing with some components that can seriously hurt you. The tip of your soldering iron, for instance, averages around 450°F. Hot glue, even the low-temp variety, melts at about 250°F. Sure, programming is a fairly harmless activity, but you’ll also be cutting, drilling, sanding, and doing any number of other tasks that have the capability to badly injure you. So, please take this safety talk seriously.
Working with Heat
Keep in mind at all times that you are surrounded by tools and components that can get very hot, and it would behoove you to remember which objects those are and treat them accordingly. Not only is the soldering iron hot, but the solder you’re using melts at around 350°F, which means that the part you just soldered is hot! Give it a few seconds to cool before you touch it and see if your joint is solid. Wait until your hot glue cools to at least a gel-like state before you touch it. Speaking from personal experience: the worst thing about hot glue is that you can’t just shake it off when you get it stuck to your finger. Instead, it stays right there on your finger and sizzles.
Working with Sharp Objects
Cut away from your body.
Keep your tools sharp.
Cutting toward yourself, even lightly or for a very small cut, is simply asking for trouble. One slip with an X-ACTO knife and you could be committing hara-kiri, or at the very least heading to the emergency room for stitches. Believe me, stitches are no fun, particularly when the doctor injects an anesthetic into the cut. And if you lose a finger completely, robotics experimenting will immediately become at least 10 percent more difficult because you will have only nine fingers to work with rather than ten—an immediate 10 percent cut.
Keep your blades sharp because, as any chef knows, a dull knife is a dangerous knife. If your utility-knife blade is getting dull, switch it out for a new one. The same thing goes for your X-ACTO knife blade. A dull blade is much more likely to slip and cut you, while a sharp knife will simply cut deeper into whatever it is you’re hacking away at.
Wear Safety Glasses
Get a pair of safety glasses or goggles. This is not negotiable—if you don’t have a pair, get one before you do any experimenting. Your sight is too important to lose it to a flying speck of metal from your wire snips or a spark from your grinding wheel. If you have a pair that is uncomfortable, get another pair—you’re more likely to wear them if they’re a comfortable fit. I prefer safety glasses, but many people prefer the goggles that hold fast to your head with an elastic band since they won’t fall off. Whichever you prefer, take care of them to avoid scratches and breakage, and wear them when you’re working.
Fire Extinguishers at the Ready
Let me tell you a little story. When I was building my first little mobile robot with the Pi, I was using a Lithium Polymer (LiPo) battery for the first time. It was a small 11.1V, 1300mAh battery. I was connecting it to my servo motors, and I managed to short the negative and positive terminals together with an alligator clip.
Immediately after the loud pop! and the spark, the pack began to heat up incredibly fast, and the packaging started to swell. Thinking as fast as I could, I managed to disconnect the alligator clips, drop the pack onto the middle of the floor, and throw a glass of water onto the battery. I narrowly managed to escape an explosion, and I found out later that those LiPo batteries pack quite a punch.
The moral of this story is that although I used a glass of water, I had a fire extinguisher nearby that I was ready to use if needed, and so should you. They’re not expensive, and they’re well worth the cost when it comes to possibly saving your house or workshop from a fire. Get an extinguisher and be sure to keep it charged.
Also, be sure to learn how to use your fire extinguisher before you need it. Think of it as being like bear spray as you’re hiking in the wilds of Alaska and need to fend off a bear. You would definitely practice using it before you go hiking, since it can be extremely difficult to read directions while running from an angry grizzly. Your fire extinguisher is similar—it can be very difficult to read and follow the instructions while your workshop is turning into a remake of The Towering Inferno. Become familiar with it, and hopefully you will never have to use it.
Keep a First-Aid Kit Handy
Although this should go without saying, always have a first-aid kit nearby. You don’t need a full Level 1 Emergency Kit that you could take on an Antarctic expedition, but a small, well-stocked kit should be somewhere in close proximity. The kit should contain some Band-Aids, alcohol, cotton swabs, and maybe a few other odds and ends. It’s difficult to solder a joint when you’re bleeding all over it.
Work in a Ventilated Area
One important detail to remember when you’re working is to keep your workshop well ventilated because you’ll most likely be sanding, painting, sawing, and doing various other activities that can fill the air (and your lungs) with dangerous substances. You may not be painting enough to be too worried about paint fumes, but you’ll definitely be around solder fumes, for instance. Solder contains lead—not much, but some—and lead is poisonous. If you come into contact with too much of it too often, it can lead to lead poisoning. Symptoms include abdominal pain, confusion, headache, and irritability. In severe cases, it can lead to seizures and even death, neither of which facilitate further robotics experimentation.
Even though you’re unlikely to come into contact with enough lead to poison yourself while soldering, be aware that it is toxic. Don’t breathe the fumes, and wash your hands thoroughly and often after touching soldered parts. You should work in a well-ventilated area, with windows open, or at least a fan going. Some experimenters hook up an old computer fan to a dryer-vent hose for a customized smoke-away solution.
Organizing Your Workplace
As you progress in your experimenting endeavors by buying additional tools, parts, chips, boards, and so forth, you’re going to need a way to organize it all. Keeping your work area organized could just as easily fall under safety, since having everything stored neatly in its place can eliminate workplace hazards as well.
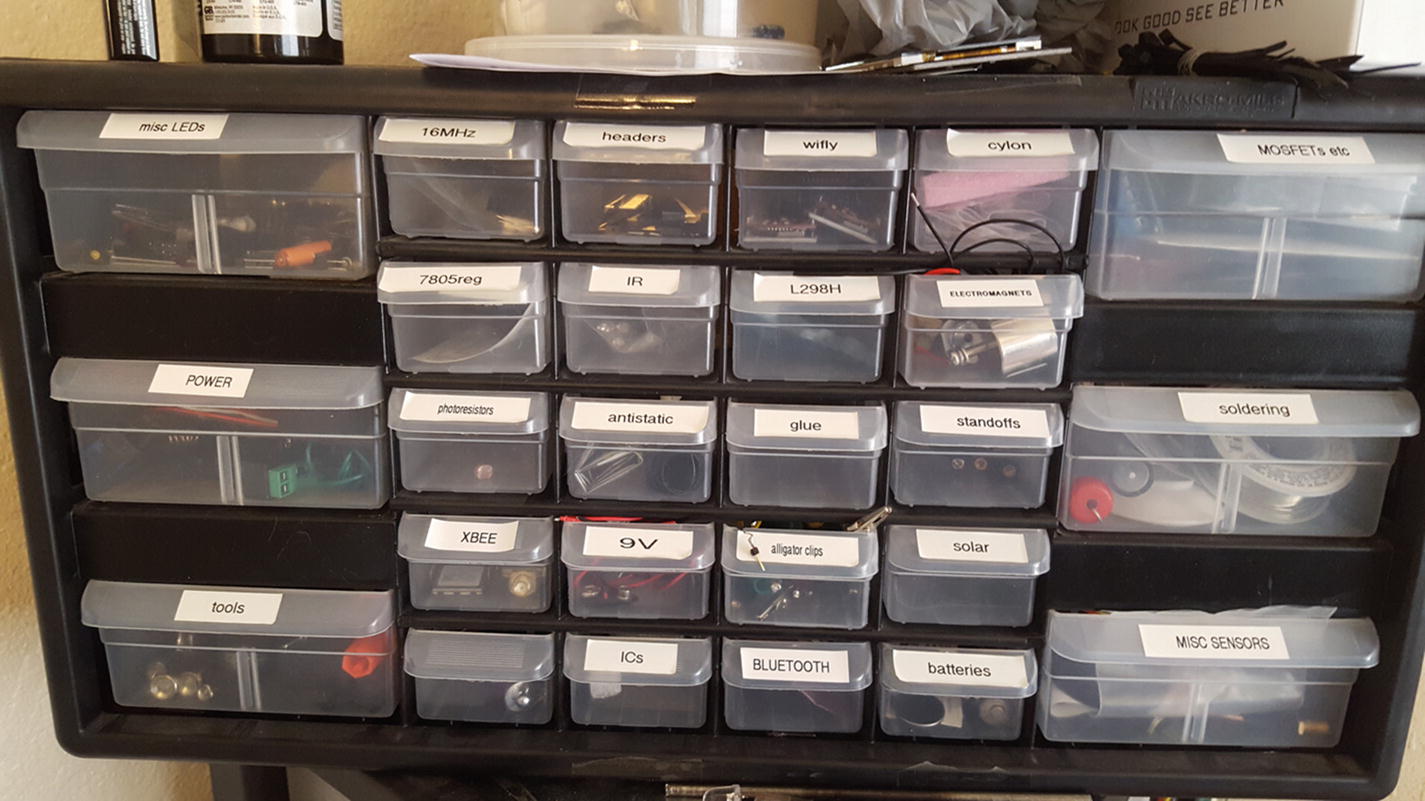
Small parts storage area
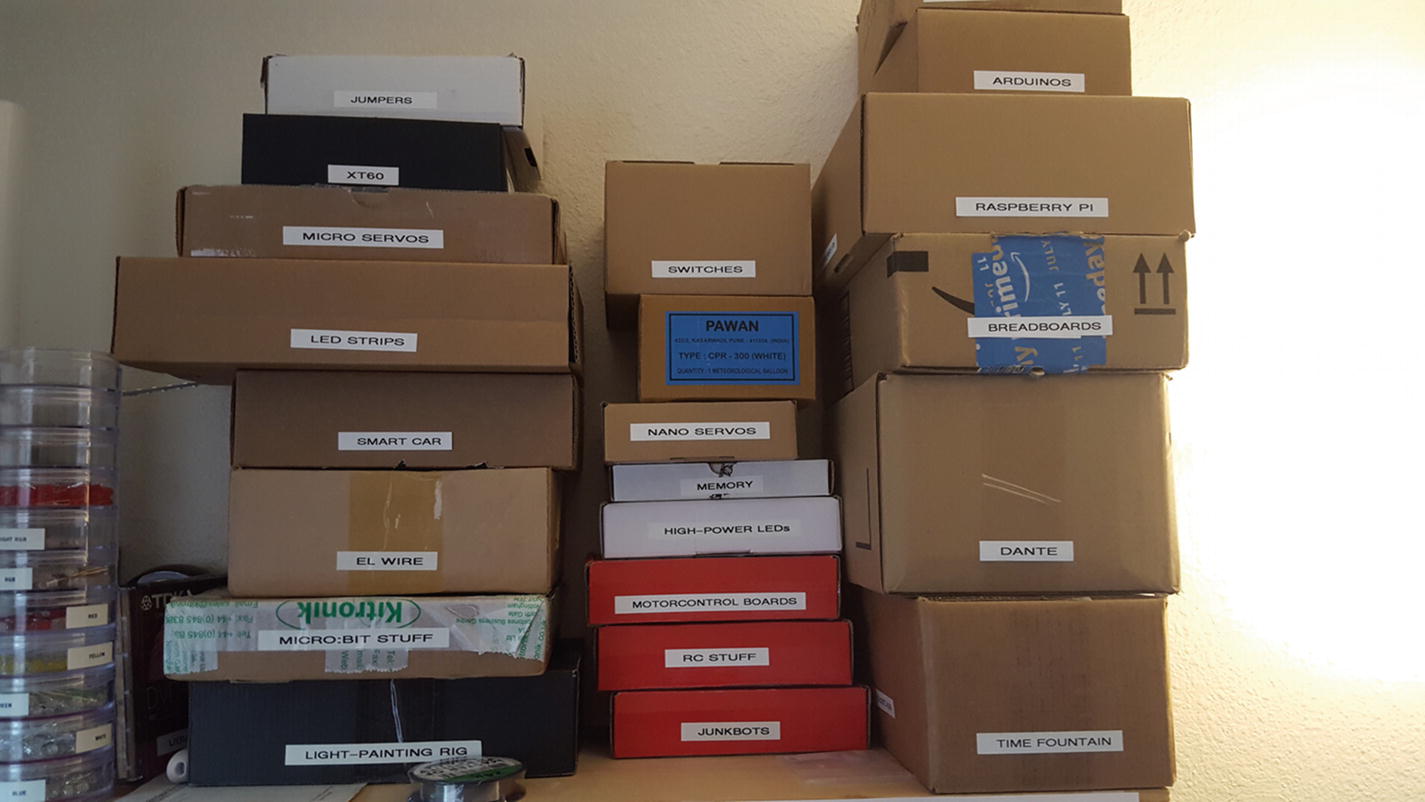
Project storage area
Notice the labels; buy yourself a label maker! Easily another of my best purchases—you can label drawers, power supplies, cords, the children . . . the possibilities are endless. Also, once you get going and have more than one project in progress at a time, you may find it easier to separate by project rather than by part, at least some of the time. Some things, like switches, are used everywhere, but I know that when it’s time to attack my time fountain again or do some more light painting, I can find all of the parts I’ve been working with in those respective boxes.
I must add here that when it comes to organizing a shop, especially where tools are concerned, check out Adam Savage’s Tested series on YouTube. There are many videos where he explains how he organizes his tools and how he builds—if necessary—the containers in which he stores his equipment. It’s inspiring and bound to give you a lot of ideas, even if you’re only using a small corner in the back of your kitchen.
In general, just keep your area clean. Not only is it much more efficient to find things when they’re where they’re supposed to be, but tripping over a power-supply cord when holding an X-ACTO knife can be a dangerous incident. Get your tool or part from its place, use it, and then put it back. (This is another area where you may have to do as I say, not as I do. You’ll be seeing pics of my workspace throughout the book, and I can’t guarantee it’ll always be the neatest space. I tend to spread out when I work. But you get the idea.)
Bonus: Soldering Techniques
In this last section of this introductory electronics chapter, I’ll give you a few tips on how to solder. Soldering is an art as much as a skill, and it does take practice. If you’ve never soldered before, your first joints are bound to be lumpy, ugly clumps, but improvement can be swift if you stick with it. No more than a few hours spent soldering components together for practice can make a huge difference when you do it for a real project.
- 1.
Prepare your surfaces . If you’re connecting wires—to other wires or to another surface—strip the insulation off of the last half-inch or so and twirl the strands together to make a compact bunch. Other metal parts may need to be cleaned, and if it’s a particularly smooth surface, roughing it with sandpaper may help the solder stick better to it.
- 2.
Tin if necessary. Tinning a surface is simply melting a little solder onto it before you stick it to another surface. It’s a good practice to get into when attaching wire to an IC leg, for instance. To tin a wire, heat it from the bottom with the soldering iron and hold the solder to the top. When the wire gets hot enough, the solder will melt right into it.
- 3.
Connect the parts. If you can, connect the parts mechanically—twist wires together, wrap wires around an IC leg, and so forth. If that’s not possible, that’s where your helping-hands tool comes into play—use it to hold the parts together.
- 4.
Heat the parts. With a clean soldering iron tip, heat the joint while holding the solder to it. When the connection heats up enough, the solder will melt and flow onto the joint.
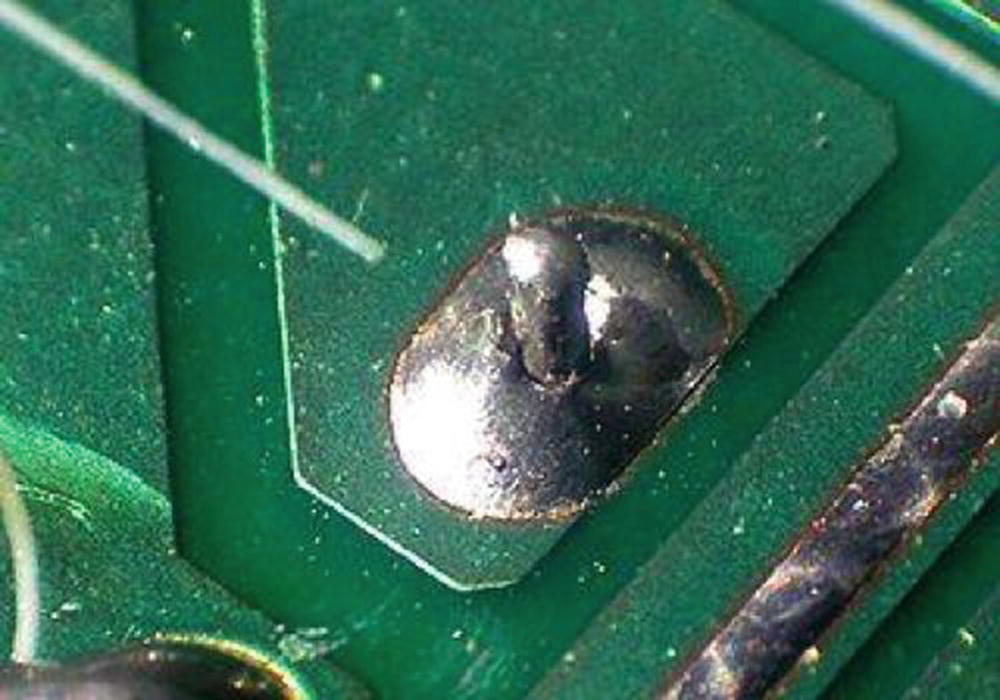
Cold solder joint. Note the poor connection.

Good solder joint
Again, don’t stress too much about your soldering skills or lack thereof. With a little practice you’ll be soldering circuits like an expert.
Aside from just doing it, perhaps the best way to learn to solder well is to watch it, and the magic of YouTube now makes that possible. A quick search for “how to solder” brings up over 300,000 results. I can’t pick any two or three that stand out, but if you watch a few you should get the idea. Makezine, an incredibly informative online blog, has a good page with resources on learning how to solder. It’s located at http://makezine.com/2006/04/10/how-to-solder-resources/ .
Summary
After being introduced to some basic electricity principles, you learned your way around some of the common electronics tools in the lab and learned the basics of how to use them safely. I also introduced you to soldering and pointed you in the direction of some resources that can help you learn to do it better.
Let’s gather our tools and head into the projects, starting with a simple one that doesn’t require any tools—the WebBot.