Many of us have long dreamed of flight, of soaring through the air, free as a bird. Or, as the pilot John Magee Jr. put it, slipping the “surly bonds of Earth,” dancing through the skies “on laughter-silvered wings,” and topping “the wind-swept heights with easy grace.”
Unfortunately, slipping the surly bonds of Earth often takes time and money that we don’t have, and this may partly explain the advent of the radio-controlled (RC) airplane. While we may not be able to afford ground or flight school, a 1:12 scale Piper Cub can go a long way toward making us feel less grounded, and we get the chance to fly an actual airplane without having to step foot off terra firma .
The problem, however, is that while we can control the plane from the ground, it’s not quite like actually being there. While there are complicated, expensive ways of attaching a small video camera to your RC plane or drone, it’d be nice if you could do something similar with your Pi. And it’d be really cool if you could keep track of your flight and then load the coordinates into Google Earth to see what your flight looked like.
Well, in this project you can do just that. The plan for this project is to put the Pi, a camera, and a GPS receiver aboard an RC plane and then fly it. The Pi’s camera will take pictures during the flight, and the GPS will log location data. Then, when you return home, you’ll use a Python script to parse the location data into a KML file you can upload to Google Earth.
Note
This chapter contains some advanced programming concepts—perhaps more advanced than anything you’ve come across thus far, like threads and even a little bit of object-oriented programming (OOP). But they are not terribly complicated, and I’ll explain the concepts as they arise.
A Shopping List of Parts
Raspberry Pi (with camera)
GPS receiver ( https://www.adafruit.com/products/746 )
Antenna for receiver (optional) ( https://www.adafruit.com/products/851 and https://www.adafruit.com/products/960 )
Medium-sized RC airplane
RC battery and 5V regulator to power the Pi
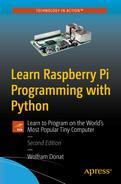
The Switch (Image ©Flyzone Planes at http://www.flyzoneplanes.com )
This plane is sturdy enough to endure a few crashes while you learn to fly it, steady enough to be flown by an absolute beginner, and—most important—powerful enough to carry the extra weight of a Pi, GPS receiver, and battery to power them both. Its name comes from the fact that as you become more adept at flying, you can remove the wings from the steady “top” configuration and switch them to a lower, “mid” configuration for more aerobatic maneuvers. As you’ll see, the “top” configuration is perfect not just because it’s easy for beginners, but also because the Pi and GPS can sit comfortably atop the wing.
Ready? Let’s start by creating a directory for our plane program:
and then navigate into it by typing cd plane.
Now, let’s get the Pi to communicate with our GPS device.
Connecting the GPS Receiver to the Pi
To get your Pi to talk to the GPS receiver, you first need to connect the two. To do this, we’ll use the Python library called gpsd and the Pi’s UART (Universal Asynchronous Receiver/Transmitter) interface (pins 7 and 8). The Python gpsd module is part of a larger library of code designed to allow devices such as the Pi to monitor attached GPS and AIS receivers, with ports to C, C++, Java, and Python. It allows you to “read” the National Marine Electronics Association (NMEA) –formatted data transmitted by most GPS receivers.
The UART interface is an old one. It’s basically a serial (RS-232) connection, but for our purposes it’s all we need. It consists of a positive (+) and negative (-) connection for power, as well as transmit and receive pins. Start by typing the following line to install the software needed to read the GPS, gpsd, and its associated programs:
Next, we need to disable the default gpsd systemd service, as the one we installed should overwrite it. Do this with
Now, we need to disable the serial getty service:
We also need to force the Pi’s CPU to a fixed frequency and enable the UART interface. Ordinarily, the CPU’s frequency will vary according to the load, but this can unfortunately screw with sensitive items like GPS modules. This will slightly affect your Pi’s performance, but it’s unlikely you’ll notice much of a difference. To do this, edit the /boot/config.txt file:
and change the last line from
to
Now, reboot by typing
Connect the receiver’s VIN to the Pi’s 5V (pin #2).
Connect the GND to Pi pin #6.
Connect the Rx to Pi Tx (pin #8).
Connect the Tx to Pi Rx (pin #10).
When the receiver’s LED starts to blink, you’ll know you have power. The GPS receiver we’re using has two blink rates. When it’s powered but has no GPS fix, it blinks once per second. When it has a fix, it blinks once per fifteen seconds.
When you have a fix, you can test your gpsd program. Enter
(to kill any running instances) and then
Then, start the generic GPS client by typing
The cgps client is a generic viewer; it simply takes the data the gpsd program is receiving and displays it to the user.

The cgps stream
If you see nothing but zeros, it means the GPS can’t find a satellite fix. You may have to wait a few minutes or even give the GPS a clear view of the sky. My experience is that this particular GPS board, even without the optional antenna, is very sensitive. When I added the antenna, I had no problem getting a GPS signal, even in my house. (Press “Q” to stop the stream and return to your terminal prompt.)
Once we know that the GPS unit is working and communicating with the Pi, we need to put that information into a format we can use in a log file. Although the generic client, cgps, that we used here is useful for viewing coordinates and testing our connections, unfortunately it’s really difficult to get usable information from it. For this reason, we’ll use the Python gps module to interact with the receiver.
Note
The gps module allows you to communicate with many different GPS receivers, not just the one we’re using in this project. There are a few receivers that generate proprietary data streams, but most of them output the same NMEA-formatted data as the chip we’re using here.
Setting Up a Log File
When we get the stream from the GPS, we need to have a place to store it for later use, as it won’t do us much good if we’re just printing it to a (nonconnected) screen during the flight. What we can do is set up a log file using Python’s logging module, and then, when the Pi is back on the ground, we can parse the file and put it into a format we can use in Google Earth.
Setting up the log file is very simple. Start by typing
These two lines import the module, declare the log’s file name and what gets logged, and give the format of each line. We’ll save each GPS call in three strings: the longitude, latitude, and altitude—the three coordinates used by Google Earth. (They’re actually saved as floats, not strings, which means that we’ll have to convert them to strings when we write them to the log file.) To write a line to the log file, the format is simply this:
It is not necessary to use the newline (\n) character, because each time you call the logging.info() function, it begins on a new line.
In case you’re wondering, yes, we could simply write the GPS data to a regular file, but logging is an important, useful concept that many programmers either don’t fully understand or skip over completely. In the case of Python’s logging module, you can set log entries to be entered depending on the severity of the event being tracked. There are five severities possible: DEBUG, INFO, WARNING, ERROR, and CRITICAL.
The Five Severities (Levels)
While I’m using the term severities to describe log entries, perhaps levels might be a better term. When a program executes (no matter what language it’s written in), it normally generates events that can be logged by the logging module. DEBUG events are detailed and are usually used only to diagnose problems. INFO events are confirmations that things are working correctly. WARNING events do just that—they warn that while things are still working, there may be a problem in the near future. ERROR and CRITICAL events happen only when something breaks, and CRITICAL normally means that the program can’t continue working. The default level is WARNING, which means that unless you set your logging function differently, events given a DEBUG or INFO severity (because they are below WARNING) will not be logged.
To see the logging module in action, type python to start up a Python prompt and enter the following:
The second line will output
while the third line, classified as an INFO level, will not be sent to the console. If, on the other hand, you enter
it sets the default level to DEBUG, meaning that every event will be logged or outputted, regardless of severity. Entering the file name and format, as we did earlier, sets the log file and how events are written to it.
Note
Logging events is an important skill to know for any programmer; if you want to learn about Python’s logging module in more depth, I highly recommend you read the Python documentation at http://docs.python.org/2/howto/logging.html .
Formatting a KML File
A KML file is a special kind of XML (eXtensible Markup Language) used by Google Earth to delineate landmarks, objects, and even paths. It looks similar to an HTML file, with opening and closing < > tags for different levels of information, such as <Document> and </Document> and <coordinates> and </coordinates>. Once we have the log file from the GPS, we need to format the included coordinates in a KML file that Google Earth can recognize. Luckily, this is very easy, since we formatted the log file to just have longitude, latitude, and altitude, separated by spaces—with format='%(message)s' and the logging.info() line. Now, we can parse each line in the log file, separate it by spaces with string.split(), and write it into a preformatted .kml file. By using the write() function, we can write each line to the new file, called kml in the script, like so:
Since we know how the final KML file needs to look for Google Earth to use it, we can actually write a program that parses the file before our plane ever leaves the ground. That way, all we need to do is get the data to input from the actual log file, which we’ll get when the plane lands. The other parts of the file that don’t require actual coordinates can be formatted ahead of time.
For instance, every Google Earth–compatible KML file begins with the line
which is then followed by
and so on. So, we can write our script to add those lines to our final plane.kml file.

KML file in Google Earth
Remember that because we’re only polling the GPS unit every 30 seconds , we won’t have a nice curved line. Instead, the path will connect the places where the plane was at those intervals, and the connections will be straight lines. As you can see in Figure 10-3, I used a parking lot for my test flights. My advice to a beginning flyer is to use a grassy field if you can, as crash landings in grass are likely to be easier on your plane! Everything in Alaska was covered by snow during my test flights, so it didn’t really matter where I tested things.
Using Threading and Objects
An important programming feature we’ll be using in this program is threads. You may have seen them before; I even use them in one or two of the other projects in this book. Threads are important because they allow your program and processor to do several tasks at once, and they don’t tie up all the memory and processing power doing one simple task. A simple call to import threading gives you the full power of threads and all they can do for you.
What Do Threads Actually Do?
Threads allow your computer to (seemingly) execute several tasks at once. I say “seemingly” because the processor can still execute only one process at a time, but threads allow it to switch back and forth between processes so fast it seems to be executing them simultaneously. As an example, say you’re working on your computer, with a word processor open in one window and an Internet browser open in another. While the word processor runs in one thread, another thread (executed between your key strokes) keeps your browser updated, still another one checks your email client for new messages, and so on.
What we’ll do with them in this program is poll the GPS receiver. By using a thread, our main buffer won’t fill up with data as we continue to get data, yet we can still log the data in our log file for later use. To use threads in the most efficient way possible, we’ll create an object called a Poller that will request information from the GPS receiver every so often (let’s say every three seconds) using the gps module. Every time we get a position reading, we’ll update the log and take a picture.
Objects, Classes, And Functions, Oh My!
Right about now, you’re probably starting to freak out a bit: “Objects? Classes? What’s he talking about?” To quote Douglas Adams, “Don't Panic.” Consider this an easy, non-stressful introduction to object-oriented programming (OOP) .
Think of a class as a set of similar objects that share certain characteristics. For instance, squares, triangles, and pentagons are all members of the shape class—they have sides, a calculable perimeter, and a calculable area. An object is one particular member, or instance, of that class: myRectangle, for example, is a certain instance of the shape class.
When you define a class, you define its characteristics, such as the fact that a shape has sides and is a closed object. You can also define functions that are unique to that class. To illustrate, every member of the shape class can have a function defined that specifies how to calculate its perimeter. That calculation may vary according to the individual shape object, so it is unique to that object, but every shape object has a defineArea() function.
The thread we create in our final program will contain one object—a member of the Thread class—with a set of variables and functions unique to it. So, when we start our thread, it will have an associated GPS polling function that will handle the location retrieval and picture taking.
Our thread object will be defined like so:
From the main portion of the program, we can start the thread by declaring a new myObject object (a new thread):
and then starting it with
The thread is now running with its own instance of the myObject, called newObject . Our thread (as shown in the final code at the end of the chapter) will be initiated with threading.Thread.__init__(self). Once it has been started, it will continue to execute its function (in our case, collecting GPS data and taking pictures) until we quit the program.
Setting Up Automatic Startup
Because it’s likely that we won’t have a monitor or keyboard plugged in when we power up the Pi before we strap it to the plane, we’ll need to make sure that our GPS logging script starts automatically. The easiest way to do that is to add an entry to the /etc/rc.local file (as explained in the sidebar “What Is the rc.local File?”). In our case, if our GPS logging code is called getGPS.py, and it’s stored in our Documents/plane folder, we can add the line
to the rc.local file. Open it with
and add the line
to the file before the last exit 0 line in the file.
What Is The rc.local File?
The rc.local file is a standard part of the Linux kernel. It is one of the system startup rc files and resides in the /etc/ directory. After the kernel initializes all devices at startup, it goes through the rc files one by one, running the scripts contained in each. The rc.local file is the last one to run and contains scripts that don’t fit in any of the other files. For this reason, this file is editable by the system administrator and is often used (as it is here) to keep scripts that need to be run whenever the computer starts.
An important detail to remember about adding scripts in this file is that because it is not executed as any particular user, you must give the script’s complete path, not merely ~/Documents/myscript.py, for example, but rather /home/pi/Documents/myscript.py.
However, that’s not all we need to do. Before the GPS program will even work, we need to turn on the GPS feed again, as we did when we were testing the generic GPS client (earlier in “Connecting the GPS Receiver to the Pi”). So, we also need to put that line into /etc/rc.local:
Finally, we need to wait for the GPS unit to get a fix on some satellites before we start logging; otherwise, we’ll be logging a whole lot of 0.0,0.0,nan coordinates. (The nan stands for not a number.) My experience is that it takes about 30 seconds for the unit to get a fix and start returning real data, so waiting 45 seconds before starting the script is probably safe. To do that, just put
after the sudo gpsd line you just added, and the system will wait 45 seconds before starting the Python script in the next line. When you’re done, your /etc/rc.local file should end like this:
Save and exit, and the script will now run on startup.
Connecting the Bits
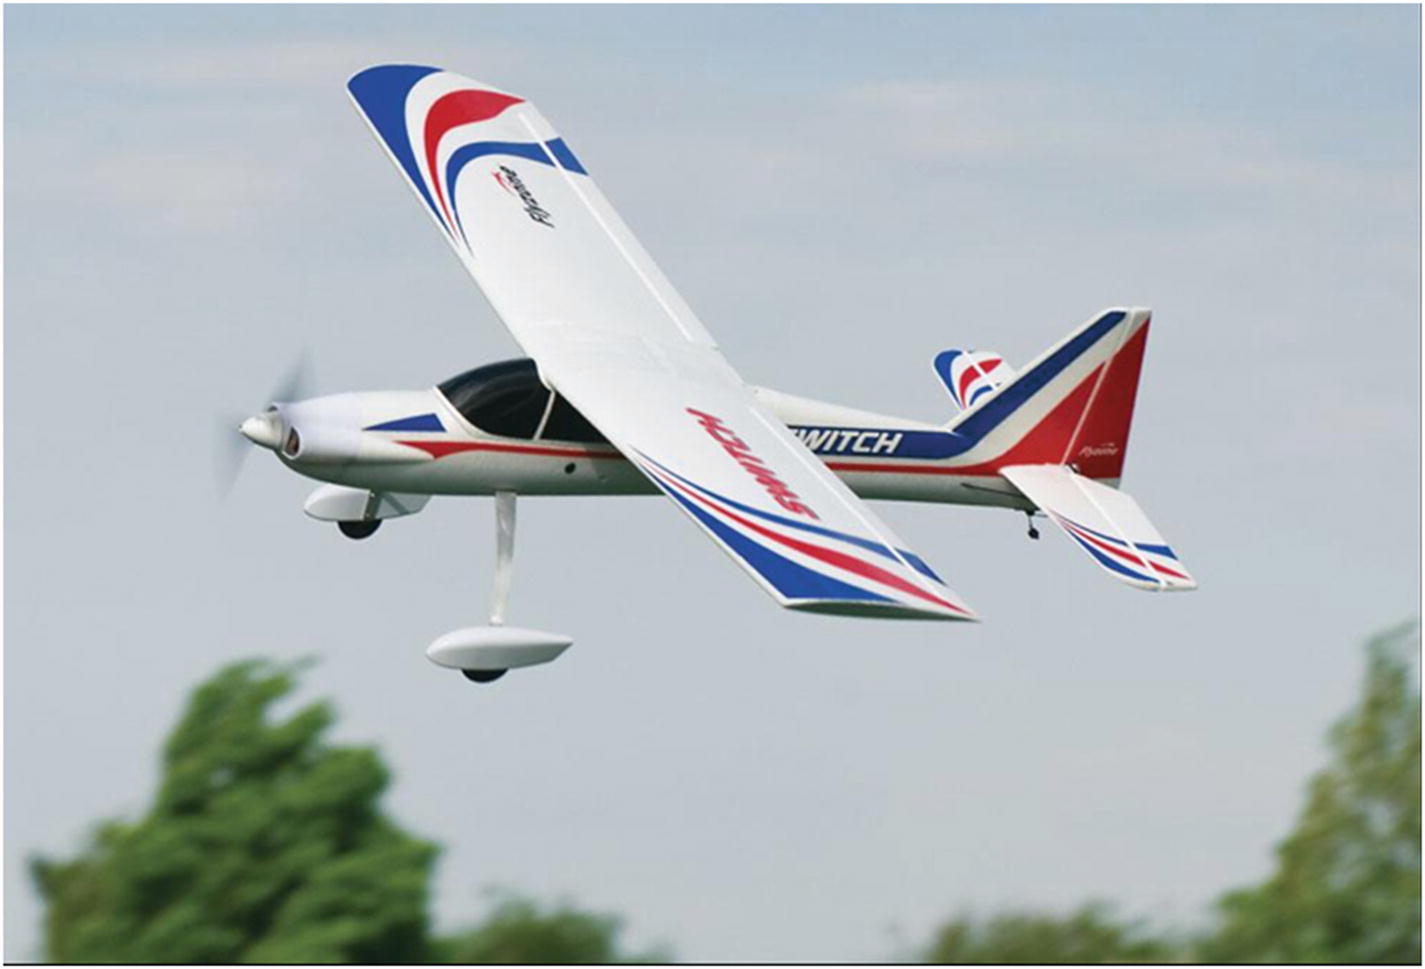
Lithium Polymer (LiPo) batteries

Hacked car charger
The middle terminal goes to the battery’s (+) lead, and one of the outer terminals goes to GND. Then, a simple USB cable gets plugged into the Pi, and you have power.
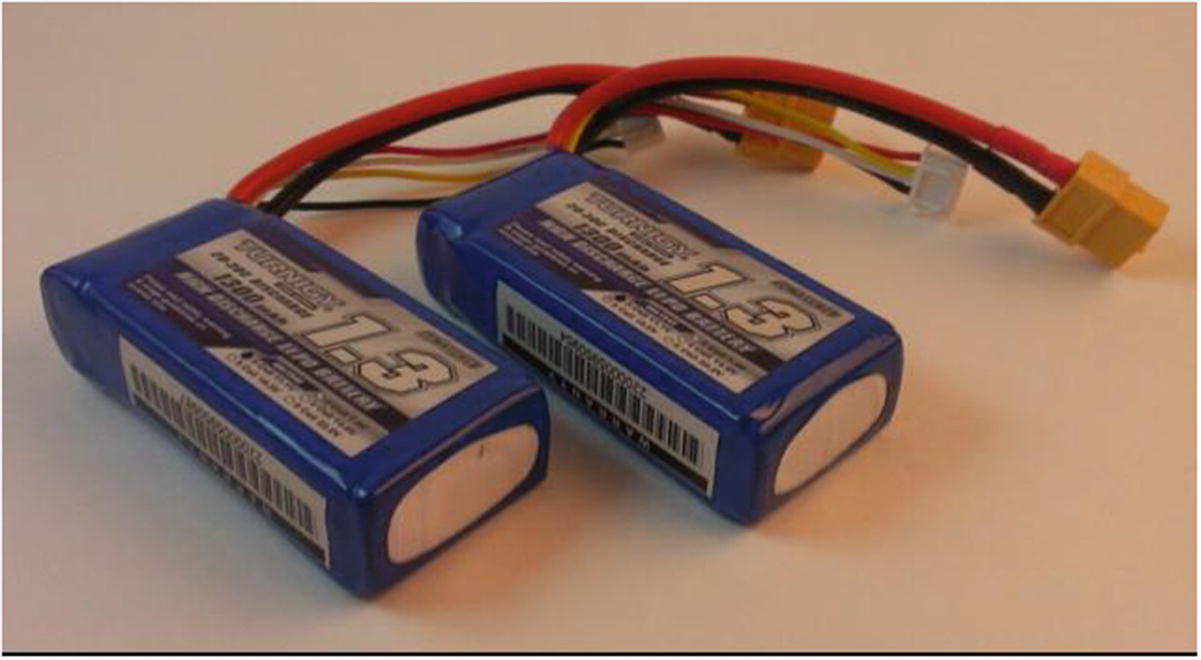
An overview of the setup
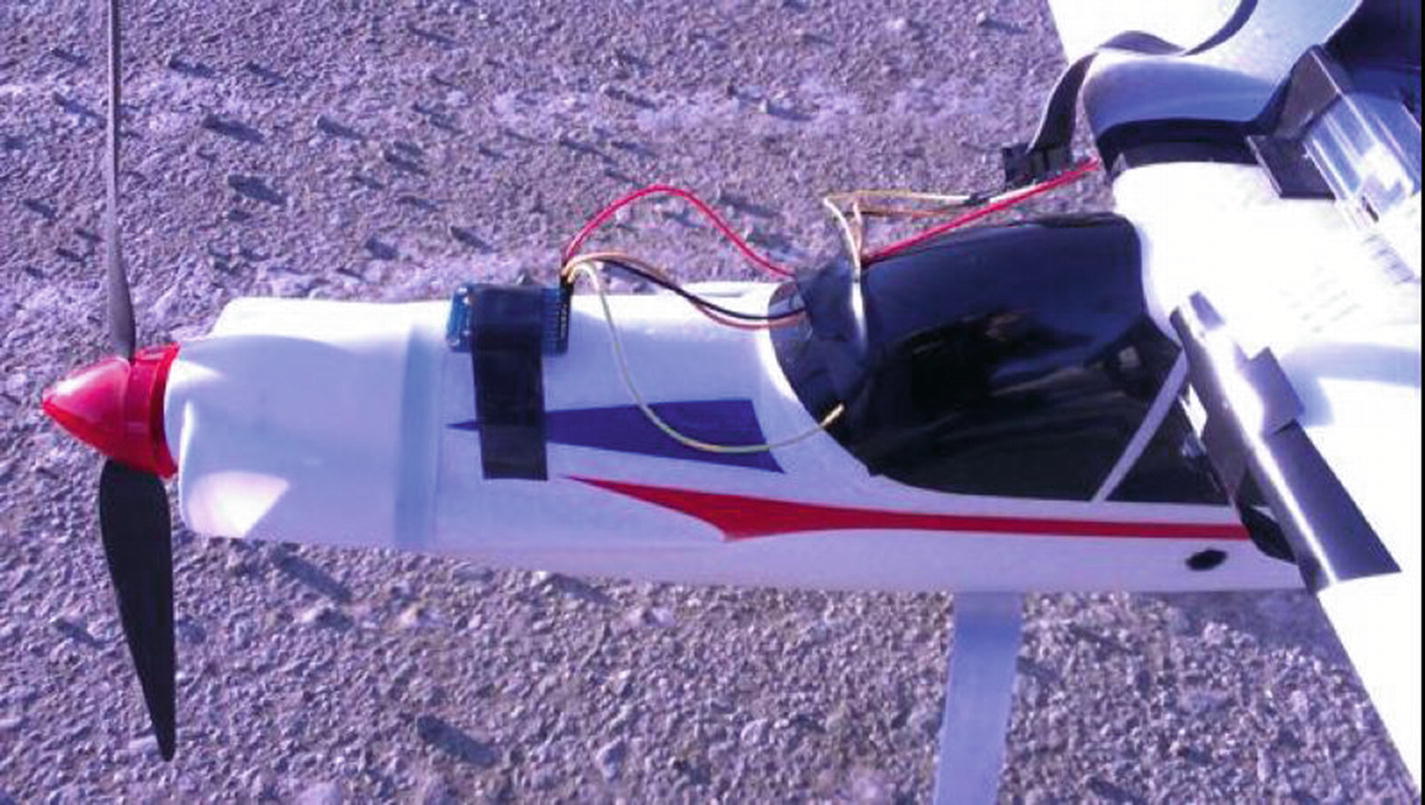
Closeup of GPS unit on plane’s nose
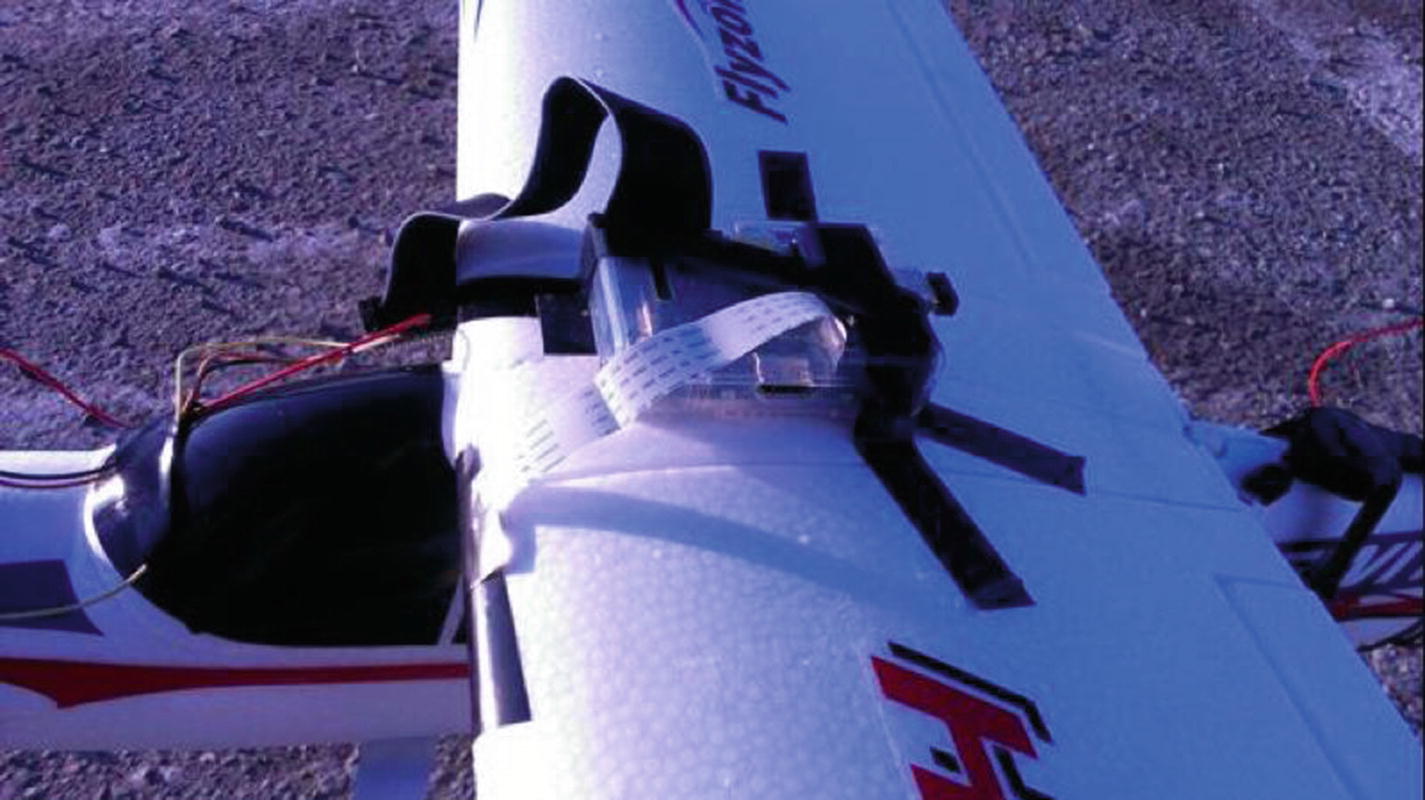
Closeup of Pi on plane’s wing
When you’re ready to go and have done all your pre-flight checks, plug in the Pi and wait 45 seconds for the plane.py script to start and for the GPS unit to acquire some satellites. Then, take off and get some great pictures!
When you’re back home with the Pi, log in to it and run the .kml conversion script, called kml.py here. That script will open the locations.log file created by the plane.py script, parse its text, and write all of its included locations into a valid .kml file, called plane.kml .
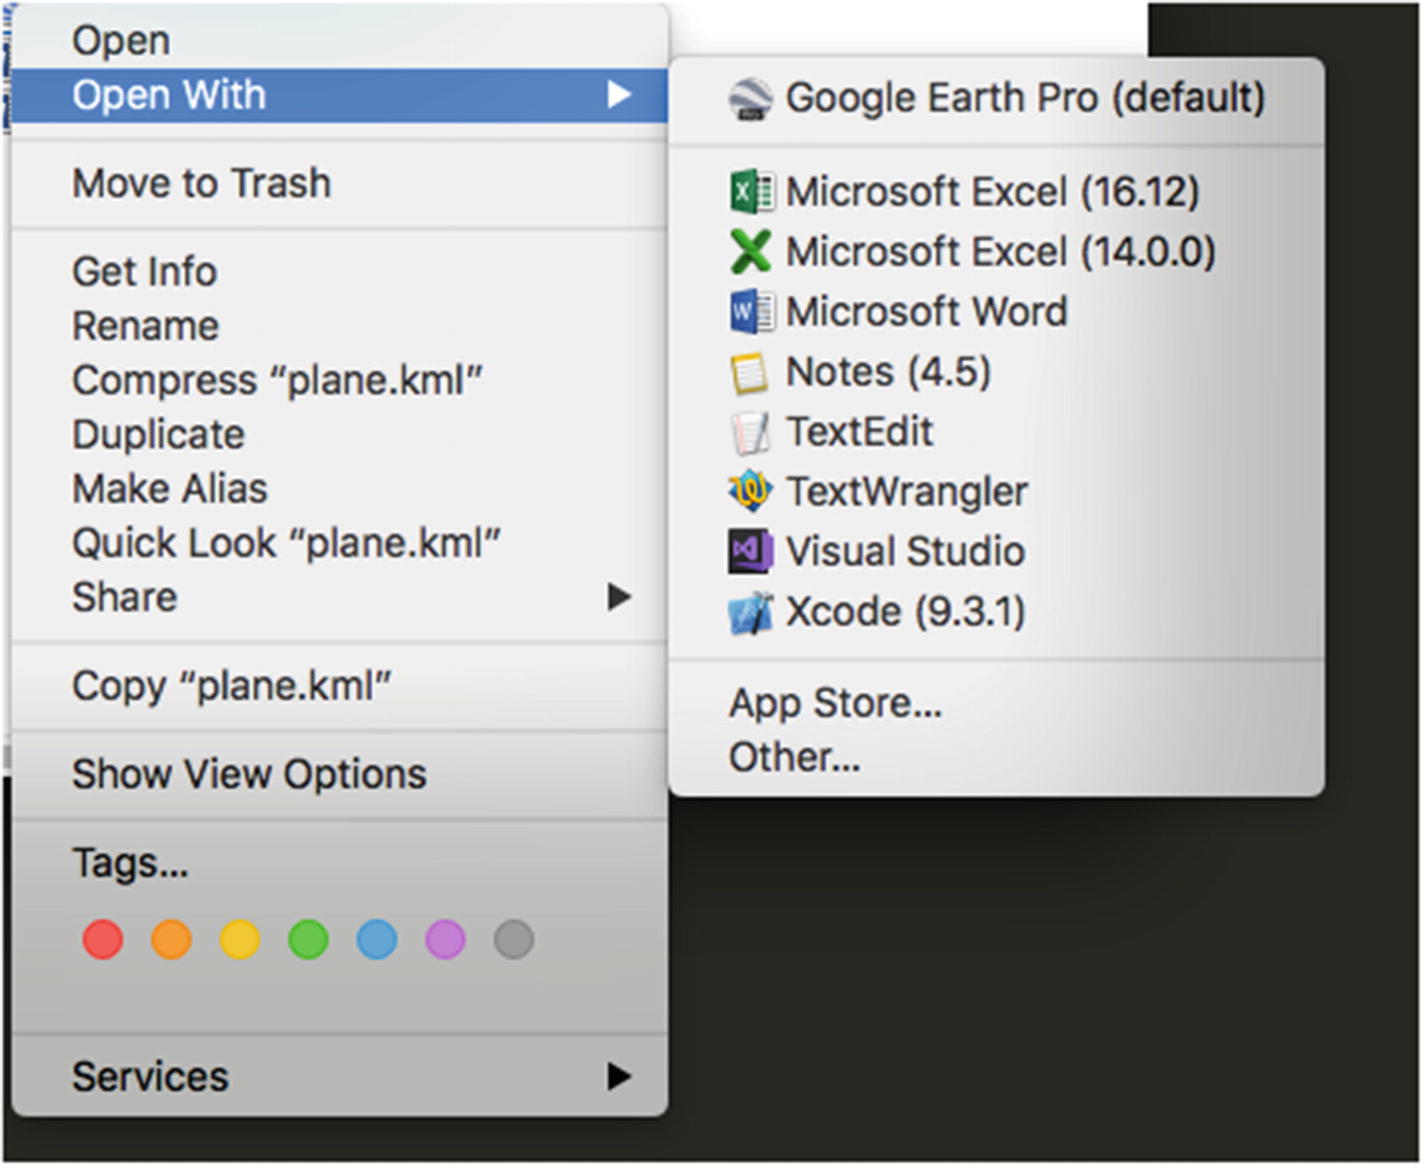
Opening plane.kml with Google Earth Pro on a Mac
When the file is loaded, you’ll get an image like the one of the parking lot in Figure 10-3 earlier in the chapter. The pictures taken by your camera, meanwhile, will be located in the same folder as your gpstest.py file or wherever you specify in your script. (See the final code at the end of this chapter for an example.)
Here’s a final hint: Because you put the gps script in your /etc/rc.local file, it will continue to start every time you power up until you remove that line from the file. If you want to kill the gps script so that it’s not running in the background and using processor resources, but you haven’t gotten around to deleting its line from rc.local, type
into a terminal. This command shows you all processes currently running on the Pi. To stop the Python script, look for a process titled “python” and note the PID (Process ID) in the first column. Press “Q” to quit top, and then type
where xxxx is the PID you noted earlier. That will kill the Python script until you remove its line from rc.local and reboot.
The Final Code
The final code consists of two parts: the plane program and the KML conversion program.
The Plane Program
This portion of the program is what runs while the plane is in the air, taking pictures and logging GPS coordinates. It’s available as plane.py from Apress.com:
KML Conversion Program
This program is run when the Pi is back on the ground. It takes the GPS logging file and converts it to a KML file. It’s available as kml.py from Apress.com:
Summary
In this chapter, we connected a GPS to the Pi and read its input via the Pi’s UART connections. We then put that information into a Python log file. We strapped the Pi and the GPS to a radio-controlled airplane and logged our flight, taking pictures every few seconds as we flew. Then, after landing the plane, we transcoded our GPS log file to a KML file and put that file into Google Earth to see a satellite display of our final flight path. This chapter demonstrated the true portability of the Raspberry Pi.
In the next chapter, we’ll take the Pi even higher by sending it in a weather balloon to the upper atmosphere.