The Raspberry Pi uses Linux as its standard operating system, which means if you don’t know anything about this awesome OS, you’re going to have to learn. Don’t worry—I’ll try to make this as painless as possible.

The Linux users’ playground (©2006 Marcin Wichary)
However, fear not. While some of us still heartily embrace that culture and all that it stands for, that doesn’t mean you have to. Linux has come a long way since it was first introduced, and it is now not only a real powerhouse of an operating system, but also extremely user friendly (at least, most of its distributions are). The most popular flavors of Linux are Ubuntu and Mint. Both are visually so similar to Windows and Mac that many people find switching to them fun and easy. Another popular version of Linux is Debian, which is the distribution that the Pi’s operating system, Raspbian, is based on. When it first began, Debian was the only distribution of Linux that was truly “open”—allowing any developer and user to contribute. It still remains the largest distributor of Linux that is not a commercial entity.
Okay, enough horn-tooting. In order to really use the Pi, you’ll need at least a basic understanding of Linux and how it works. So, let’s get started.
The Linux Story
Linux is an operating system loosely based on the Unix operating system. It has always been free and open source, and it was first released in 1991 by its creator, Linus Torvalds. It is written in the C programming language and was originally designed to run on Intel’s x86-based computers. In the intervening 20+ years, it has been ported to every imaginable device, from mainframes and supercomputers to tablets, televisions, refrigerators, and video-game consoles. The Android operating system is built on top of the Linux kernel—the nugget of code on which an operating system is built.
Like most computer software, Linux was not born in a black hole. It owes its beginning to operating systems and kernels such as Unix, BSD, GNU, and MINIX. In fact, Torvalds has said on occasion that if the GNU kernel had been complete or if BSD had been available in the early 1990s, he probably would not have written his own kernel. He began his work on the kernel with MINIX and eventually added many GNU software applications. He also switched his licensing to the GNU GPL, which states that code can be reused as long as it is released under a similar license.
In the following years, Linux spread, both in user acceptance and in devices. With all of the aforementioned devices running Linux, it is the most widely adopted operating system in the world.
Getting Started with Linux on the Pi
To interact with your Pi, you’re going to be doing a lot of work with the terminal—also called the command-line interface , or CLI. With your Raspberry Pi desktop up and running, double-click the terminal icon to start it. Because you’re already logged in, you won’t be asked for a username and password; rather, the prompt will show something like this:
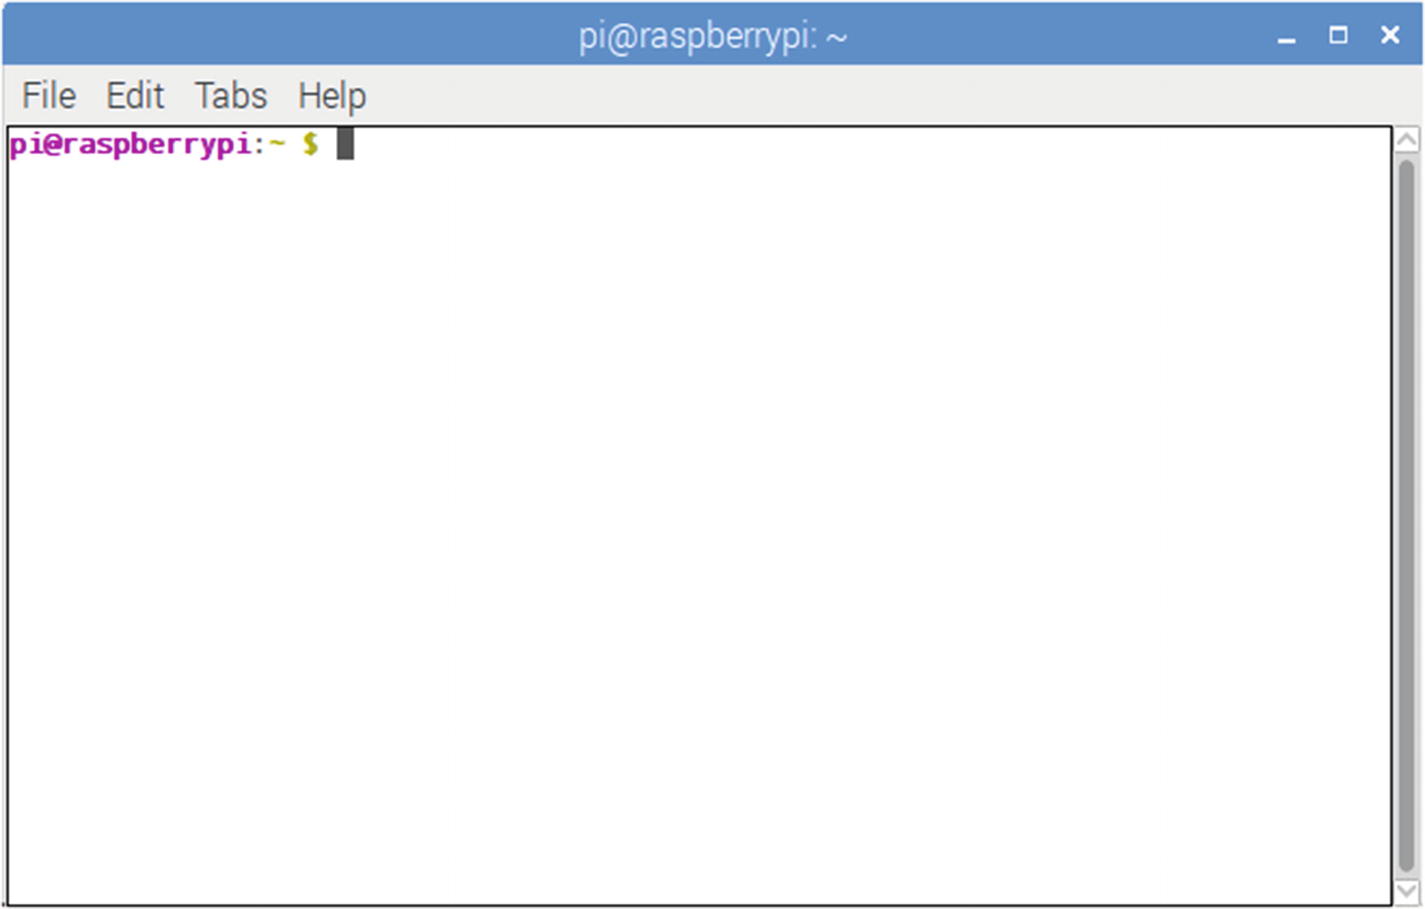
The Raspberry Pi terminal
If you were in a different directory, the prompt would display that directory, such as
Linux Files and the File System
As an operating system, Linux is completely built around files and the file system. A file is any piece of information—be it text, image, video, or other—that is identified by a file name and a location. That location, also called a directory path , helps keep each file completely distinguishable from all others, because the location is technically part of the file name. For example,
is different from
User data files containing information you create, such as text files or images
System data files containing information used by the system, such as logons, passwords, and so on
Directory files, also called folders , which can contain files and other directories. Directories contained within directories are called subdirectories , and they can be nested almost as far as you care to contemplate.
Special files representing hardware devices or some placeholder used by the OS
Executable files, which are programs or shell scripts that contain instructions for the operating system
The entire file system in Linux is contained within one root folder, represented by a single /. Within that folder are subfolders, such as bin/, home/, proc/, var/, and dev/. Each has more subdirectories in it. In fact, if you could zoom out and look at the file system in a three-dimensional sort of way, it would look similar to a giant, upside-down tree. The /home/ folder is your default home directory, and each user has one on a Linux (and Unix) system. Within that directory, you are free to create, execute, and delete files. If you need to manipulate, edit, or delete system files, you may need to either log in as the root user or execute the command sudo.
Root User Versus sudo
In every Linux installation, there is a user, designated as the root, who is able to administer all files on the system, including system-level files. Most user accounts can’t edit files in the /var/ directory, for example, but the root user can. Because of this power and the potential to misuse it (even accidentally), Linux users don’t log in as root unless it’s absolutely necessary; when they do, they log in, do what they need to, and log out again. There is a saying among Linux geeks: “Only noobs log in as root”; in other words, only neophytes log in and stay logged in as the root user.
There is a shortcut for logging in as a root user, however: sudo. sudo stands for super user do, and it simply tells the system to execute the command as if you were the root user. The system will ask for the root password and then execute the command. Again, the system does not double-check with you to see if you really want to do that, so when you’re using sudo, be doubly careful you know the result of the command you just typed before you press Enter!
Commands
Common Linux Commands
Command | Meaning |
|---|---|
ls | List files in current directory |
cd | Change directory |
pwd | Print working directory |
rm filename | Remove filename |
mkdir directoryname | Make directory named directoryname |
rmdir directoryname | Remove empty directory |
cat textfile | Display contents of textfile in the terminal |
mv oldfile newfile | Move (rename) oldfile to newfile |
cp oldfile newfile | Copy oldfile to newfile |
man command | Display manual of command |
date | Read system date/time |
echo | Echo what is typed in terminal |
grep | Search program that uses regular expressions |
sudo | Perform as root user |
./program | Run program |
exit | Quit terminal session |
man: Without a doubt, this is the most important command. If you are unsure of what a particular command does or what parameters/flags it uses, typing man command into your terminal brings up the Unix manual page with all of the information you’d ever want to know. When you bring up a page, it normally starts with the name of the command and is followed by a synopsis of its various permutations, a detailed description of the command, all of its options and flags, and what those options and flags do. While you’re in the manual view, just press Enter to scroll and press q to return to the terminal.
ls: This command lists the files in whatever directory you happen to be in; using flags like –l and –a includes information such as file permissions and modification dates. When you use the –l flag, the first part of every entry shows as something like
drwxr-xr-xIn this case, this means that the entry is a directory (d); the owner can read, write, and execute files (rwx); group members can read and execute files (r-x); and all users can read and execute files (r-x). In most of our work with the Pi, you will be the owner of the files, so file permissions shouldn’t affect you too much. There will be times, however, when you need to make a file executable; this is what the chmod command is for, but we’ll get to that in another chapter—such as the chapter dealing with the home media server (Chapter 7). ls has some other very useful flags as well. ls –F lists the current files in the directory, but with a trailing “/” after all the contents that are themselves directories. ls –a lists all the files, including the “hidden” files (those whose names begin with a period [.] or a double period [..], which normally doesn’t show in a standard ls display).
cd directory name: This command takes you to the directory you named, just as you would assume. A few special directory names include cd ~, which takes you to your home directory (the “~”, or tilde, signified your home directory), and cd ../, which takes you up one directory in the folder structure. In other words, if you’re in the ~/Desktop/MyFiles/ directory, typing
cd ../would place you in the ~/Desktop/ directory, while typing
cd ../../would place you in your home directory (~/) and typing
cd ../MyOtherFiles/would take you out of the MyFiles directory on your desktop and put you in the MyOtherFiles directory on your desktop.
Tip
If you simply type cd and press Enter, you’ll be taken back to your home directory, no matter where you are.
pwd: This is a good command to know. When you’re lost, pwd simply tells you what directory you’re in, with the answer given as the path from the root directory. It is especially useful when you’re four or five folders deep within a directory structure that may have repeated folder names, like
/Users/wdonat/Desktop/MyApplication/bin/samples/Linux/bin/and the terminal prompt simply reads
pi@raspberrypi: /bin $rm: Using the command rm is like dragging a file into the trash, with one important difference: for all intents and purposes, you can’t undo it, so be sure you really want to delete that file!
mkdir and rmdir: The commands mkdir and rmdir create and delete directories. The caveat with rmdir is that the directory must be empty or the operating system will not allow you to remove it. You can, however, use the –p option with rmdir, which will remove a folder’s (also empty) parent folders. For instance, typing
rmdir –p /foo/bar/this_directorywill delete this_directory/, bar/, and foo/, in that order.
mv and cp: The commands mv and cp, while fairly straightforward, can take some getting used to. mv doesn’t move a file so much as it renames it while destroying the old file in the process. Typing
mv myfile.txt myfile2.txtwill rename myfile.txt to myfile2.txt. In the mv command structure, you can specify directory levels, so in a sense you can mv a file from one folder to another. For instance, say you have a file named myfile.txt in the MyFiles folder on your desktop. You can move and rename it (from within the folder) by typing
mv myfile.txt ../MyOtherFiles/myfile2.txtmyfile.txt will be gone from your current directory, while a copy of it, named myfile2.txt, will appear in the MyOtherFiles folder on your desktop.
cp is similar to mv, but it copies rather than renames, so you don’t lose the original file. Again, you can specify directory levels, so cp is handy for copying across folders. For example, typing
cp myfile.txt ../myfile.txtplaces a copy of myfile.txt on your desktop (assuming you were still in the Desktop/MyFiles/ directory.)
cat: Using cat is a fast way to preview a file, like a text file, without actually opening it in a text editor. Typing cat filename will show you the contents of a file in your terminal, even if it’s not a text file. (Try performing cat on an image file, and you’ll see a bunch of gibberish.) If you want to preview the file line-by-line rather than outputting the entire file at once into your terminal, use the more command—or, alternatively, the less command. This will fill the screen with the first batch of text, and pressing the Enter key will advance through the file, one line at a time.
date: Using date (without an argument) simply prints the system’s date and time to the terminal. With an argument, it allows you to set that date and time.
echo: This command merely echoes what you type back to you in the terminal. This is not a terribly useful command in a terminal interactive session, but when you write shell scripts (pre-scripted sets of commands that are run in the terminal), it is similar to a computer programming language’s print statement.
grep: Though man is probably the most important of these commands, grep is probably the most powerful. It is a search program that can search files and directories, using whatever input you give it in the form of regular expressions, and “pipe” that output to the screen or to another file. Its use of regular expressions is what makes it so powerful; if you’re not familiar with them, a regular expression is a sequence of characters that form a search pattern, and often that sequence of characters seems like a foreign language. As a quick example,
grep ^a.ple fruitlist.txtwill search fruitlist.txt for all lines that begin with an “a,” followed a single character, followed by “ple” and print those results to the screen. Using the “|” or pipe, allows you to send those results to different output, such as a text file. grep’s power and complexity is such that you could write chapters about it; for now, just be aware that it exists.
./program: This command to run an executable file is pretty simple—just type a period, followed by the forward slash, followed by the name of the program. Note that this works only on files that are executable by your username; it’ll give you an error if the file doesn’t have the correct permissions or simply isn’t an executable file.
exit: The final important command is simply exit. This stops whatever job is running in the terminal (also called a shell) and closes the terminal itself.
Exercise: Navigating in the Linux File System
The terminal icon
When it opens, make sure you’re in the home directory by typing
And then type
The terminal should print out
Now, make a directory by typing
and then, without entering it, make a subdirectory within it by typing
If you now type ls, you should see mydirectory listed as an available directory. You can now type
and you’ll be in your newly created subdirectory.
Let’s test the echo function. In the terminal, type
The terminal should respond with
True to its name, echo merely repeats the arguments you give it. However, you can “echo” something to other output formats as well; the default simply happens to be the screen. For instance, you can create a text file by using echo and the ‘>‘ operator. Type
If you then list the contents of your directory by typing ls, you’ll see file.txt listed. Type
to see its contents, and you should see
in the terminal. Go ahead and create another text file called file2.txt by typing
Now, rename your first file to file1.txt by typing
If you now list the contents of the current directory, you’ll see file1.txt and file2.txt. You can cat each file to make sure they’re the ones you created.
Next, let’s copy file1.txt to the directory one level up in the folder structure. Type
If you now list the contents of your home directory by typing
you’ll see that file2.txt is there, while it has disappeared from your current directory. Congratulations! You’ve now successfully accomplished the most common file operations in the Linux command line (or shell)!
Speaking of shells, Linux has several available in most distributions.
Shells in Linux
Bash Keyboard Shortcuts
Key or Key Combination | Function |
|---|---|
Ctrl + A | Move cursor to beginning of line |
Ctrl + C | Stop currently-executing process |
Ctrl + D | Log out; equivalent to exit |
Ctrl + E | Move cursor to end of line |
Ctrl + H | Delete character in front of cursor |
Ctrl + L | Clear terminal |
Ctrl + R | Search command history |
Ctrl + Z | Suspend a program |
Arrow Left/Right | Move cursor left/right one character |
Arrow Up/Down | Scrolls through previous commands |
Shift + PageUp/PageDown | Move one page up/down in terminal output |
Tab | Command or file name completion |
Tab Tab | Show all command or file-name possibilities |
Tab: Pressing the Tab key when you’re in the middle of typing a long file name will either complete the file name for you or offer you a list of choices. For example, if you are in the /Desktop/MyFiles/ directory and would like to quickly scan the myextralongfilename.txt file, simply type cat myextr and then press Tab. Bash will fill in the file name for you, assuming there are no other files with similar beginnings. If there are others that start with myextr, bash will make an error sound; in this case, press Tab again to see a list of choices.
Tab Tab: This shortcut works with commands as well. In your terminal, type l and press the Tab key twice. Bash will respond with all available commands that start with “l.” (It can be a fairly long list.) You can repeat the process by adding one letter at a time and pressing Tab twice again. The shell will fill in all possible commands or files, giving you a preview of all possible outcomes.
Package Managers
When you need to install a program from an online source in Windows, you normally download an .exe or .msi file, double-click it, and follow the instructions to install the program. Similarly, if you’re using a Mac, you download a .dmg file and either copy the extracted file onto your hard drive or use the included installation package.
Linux, however, is a little different. Linux keeps track of its software using a package-management system, or package manager. The package manager is used to download, install, upgrade, configure, and remove programs for the operating system. Most package managers maintain an internal database of installed software as well as all dependencies and conflicts to prevent problems when installing software. Package managers vary by distribution. Debian (and the Pi) uses aptitude, while Fedora uses the RPM package manager and Puppy Linux uses PETget. If you have experience playing downloaded games, you may be familiar with Steam games; you may be surprised to learn that Steam’s interface is a variant of a package manager. Most package managers have both command-line and graphics interfaces. Ubuntu, for instance, uses the Synaptic front end for its aptitude manager.
Like Ubuntu, the Raspberry Pi uses the aptitude package manager, and you’ll probably do most of your work with it in the terminal. The common command to use to install a piece of software is
- 1.
Determine which of its software sources, or repositories, has the requested file.
- 2.
Contact that repository and determine what dependencies are necessary.
- 3.
Download and install those dependencies.
- 4.
Download and install the requested software.
If this seems easy, it should—it’s supposed to be. You may run into problems when you request a piece of software not included in your installed repositories, but even this is normally an easy fix. If this should happen, just type
into your terminal. When that’s done, type
to let your package manager know about the new repository and to get a list of available packages from it, and then type
again. Luckily, the default repositories (or repos) included in Raspbian include most of the software you’ll ever need, so (for this book, anyway) you probably won’t run into this problem.
Text Editors
Unlike Windows and Mac, which have Notepad, Wordpad, and Textedit, Linux has several possibilities when it comes to text editors. There is a standard editor called gedit installed on most distributions. Not only is it rather lightweight, it is also not included on the Pi. The Pi’s built-in text editor, Leafpad, is decent. You may also find yourself getting comfortable with nano, another text editor that is pre-installed on the Pi and has a very intuitive interface. But if you do any serious programming work on the Pi, you may eventually want to upgrade to one of Linux’s two powerhouses: vi or emacs.
Both vi and emacs are not only powerful editors; they can be used as IDEs (Integrated Development Environments) as well, with keyword text coloring/syntax highlighting and word completion. Both are extensible and customizable; emacs, for instance, has over 2,000 built-in commands, while vi can be customized with its many ports and clones. In fact, one of vi’s clones, Vim (Vi Improved), is included with almost every Linux distribution and is the one I’ll discuss here because it is more of an IDE than its predecessor, vi. Emacs can be user-programmable with Lisp extensions, but is very similar to vi for every sense of aesthetic you may have.
There is, however, a sort of war going on between emacs and Vim. Linux and Unix users strongly prefer one or the other, and they will get surprisingly animated when discussing/arguing the pros and cons of each. As a conscientious writer, I will introduce you to both programs here, but as a die-hard emacs user, I will do my best to sway your choice away from the swill that is Vim. As we discuss programs and scripts throughout the book, I won’t mention how they’re written, merely what the end result looks like. You may even decide you like the Pi’s default text editor, which is perfectly all right as well.
Vim Versus emacs Versus nano
Vim is a modal editor. It has two modes: insert and normal. In insert mode, your keystrokes become part of the document. Normal mode is used to control the editing session. For example, if you type an “i” while in normal mode, it switches you to insert mode. If you then type an “i” again, an “i” will be placed at the cursor’s position, exactly as you would expect a text editor to operate. By switching back and forth between these two modes, you create and edit your document.
Emacs, on the other hand, has a more intuitive interface. You can move throughout the document using the arrow keys, and when you press a key, you can expect it to appear wherever the cursor happens to be. Special commands, like copy/paste, save, and so forth are called by pressing the Control key, followed by a sequence of others, usually starting with the “x.” So, for instance, if you wanted to save the current document, you would press Ctrl-x, then Ctrl-s, highlighted in the emacs menu as C-x C-s.
Nano, on the other other hand, is more intuitive than both of the others. You enter text as you would in any other editor, and the commands you use are always shown at the bottom of the screen.
If you would like to experiment with one or all three of them (always a good idea before you make up your mind one way or the other), make sure you have all of them installed. To do that, start by typing
and
Nano should be preinstalled on the Pi; emacs and Vim, however, are not. Be aware that emacs is a rather large download, so installing it and its dependencies may take a little while. Go have a cup of coffee or eat dinner, and when you come back it should be waiting for you.
Using Vim
As I said, Vim is a modal editor, meaning that you switch in and out of insert and normal modes. To start a test file, navigate to your desktop and type
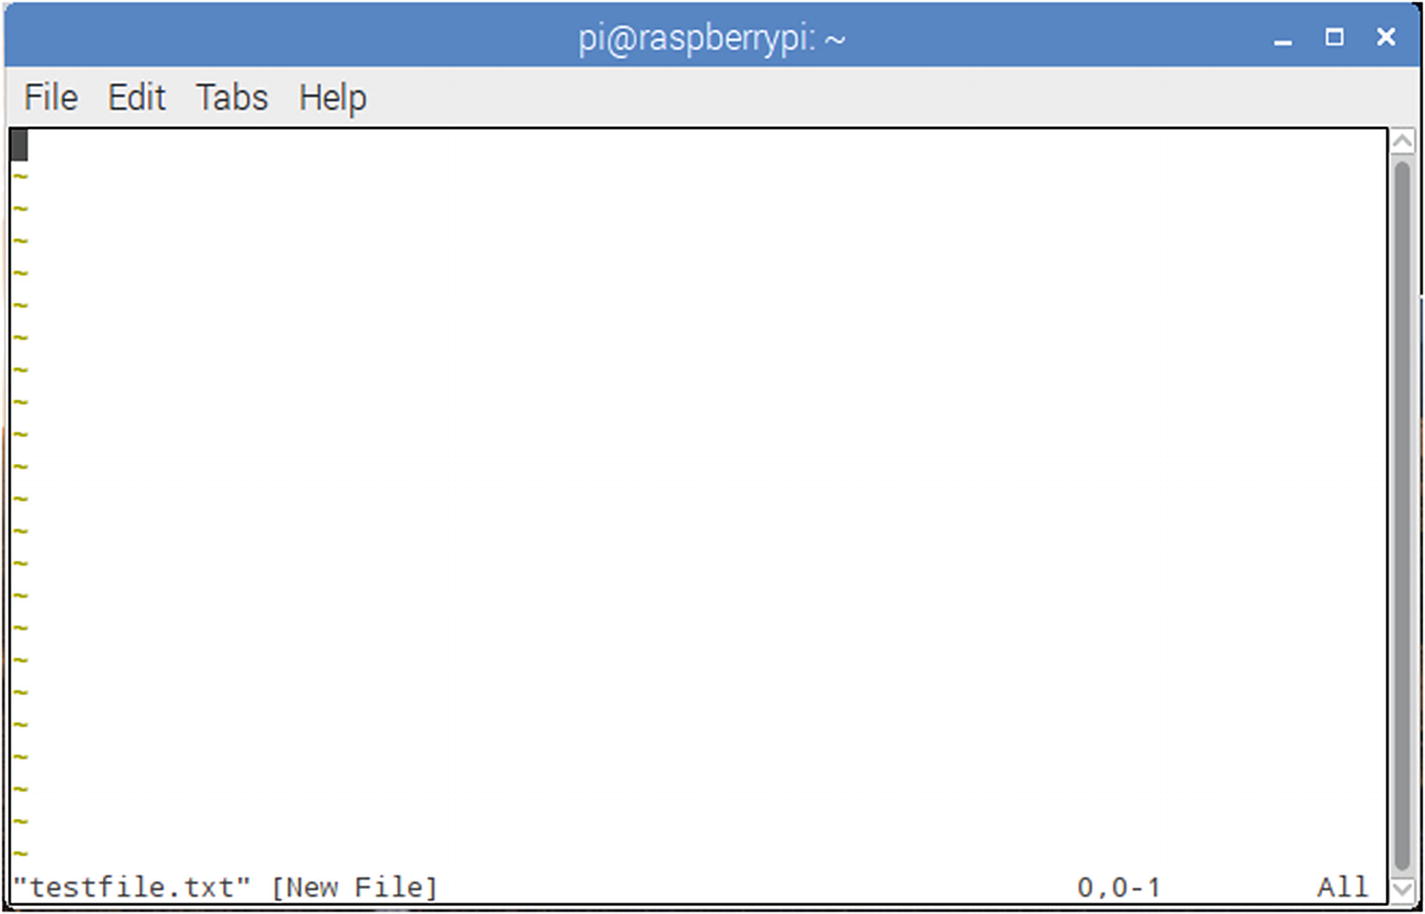
Testfile.txt in Vim
Vim opens in normal mode, meaning that you cannot edit the file right away. To do so, you must enter insert mode by typing “i”. The word “INSERT” will appear at the bottom left—a handy way of reminding you whether you’re in insert or normal mode. When you’re done typing, press the Esc key to return to normal mode. In normal mode, you can move around the document with the arrow keys, just as you can in insert mode, but you can’t change or add anything until you type “i”. To save a file, make sure you’re in normal mode by pressing the Esc key at least once. Then, type “:w” (without the quotes) and press Enter. To save and exit at the same time, type “:x” (again, without quotes) and press Enter. Obviously, if you’re in insert mode when you type these characters, all you’ll succeed in doing is adding :w or :x to your document.
Vim takes a lot of getting used to, and many people have trouble adjusting to the two different modes of operation. If you decide you like it, there are many tutorials online to teach you to use it to its full potential.
Using emacs
Emacs (to me, at least) is a bit more intuitive than Vim, particularly when you’re first starting to use it. To start, open a terminal and navigate to where you want your test file, such as the desktop. Once there, type
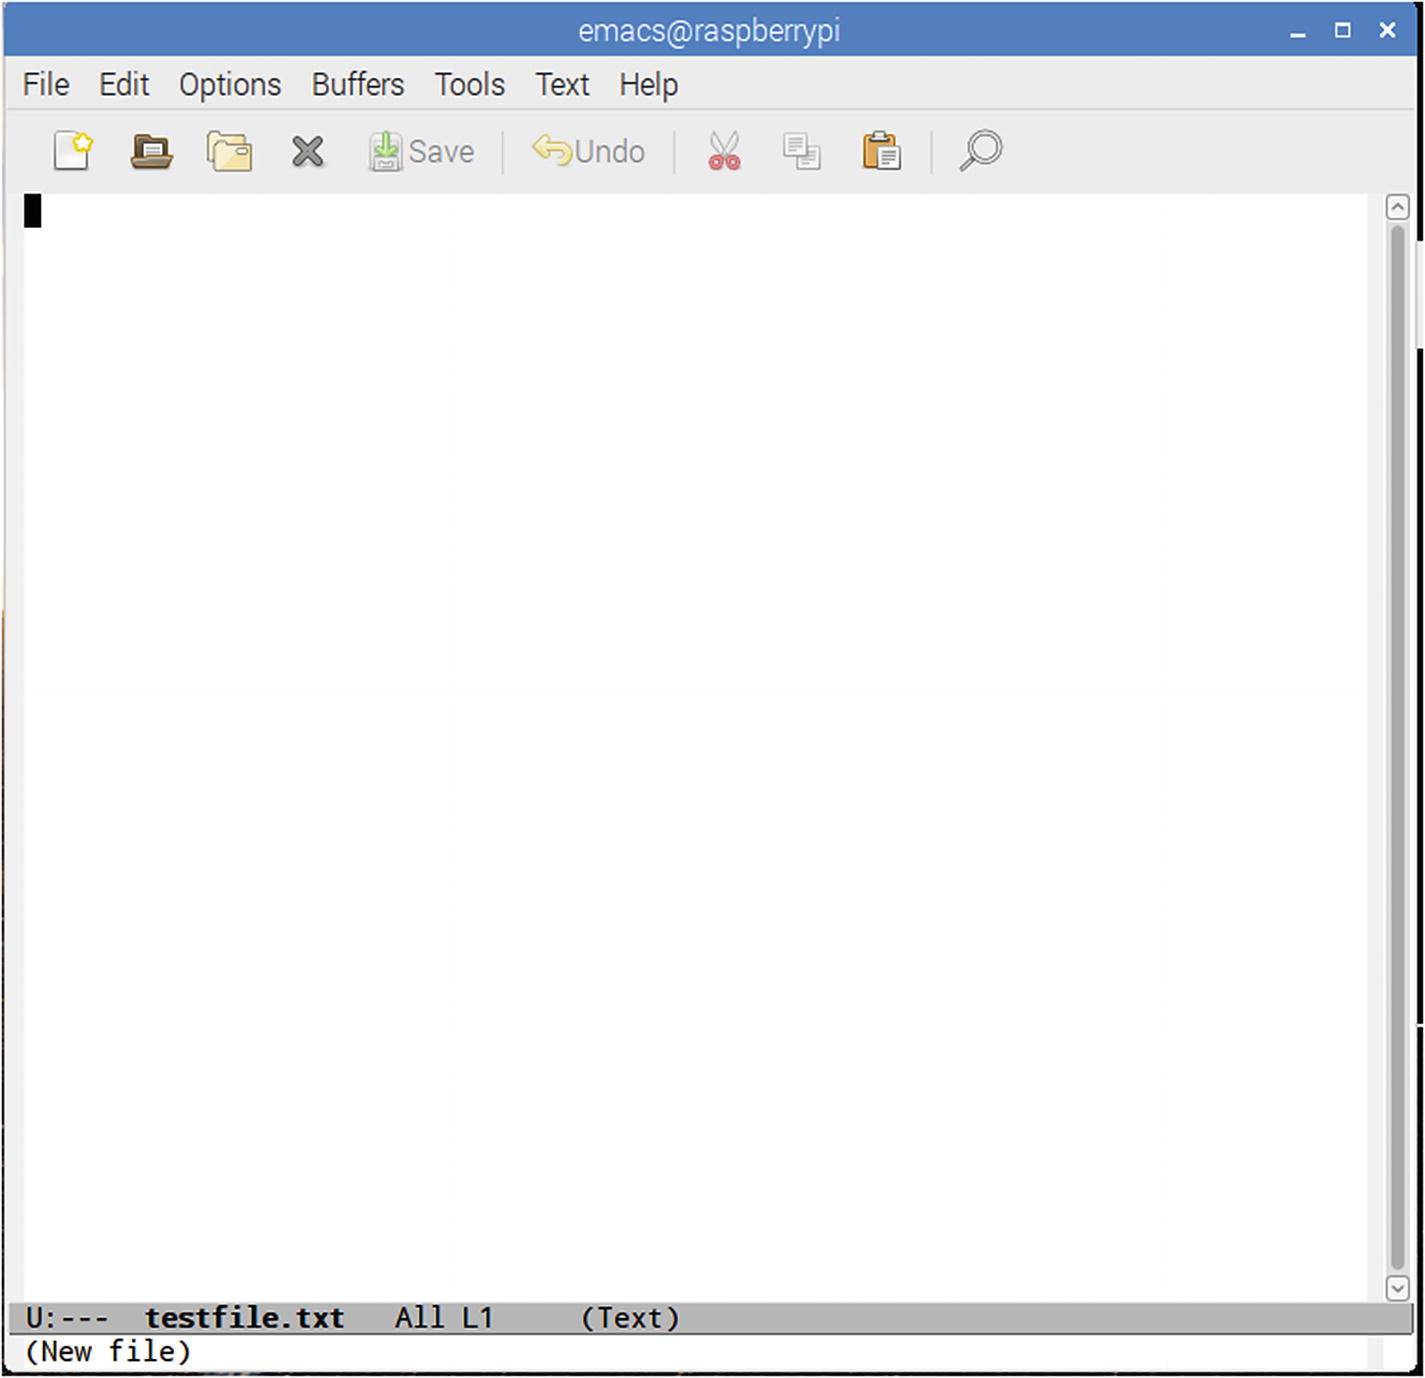
Testfile.txt in emacs
Common Commands in emacs
Command | Keystroke(s) |
|---|---|
Open/New | Ctrl+x + Ctrl+f |
Close | Ctrl+x + Ctrl+c |
Save | Ctrl+x + Ctrl+s |
Cut | Ctrl+w |
Copy | Alt+w* |
Paste | Ctrl+y |
Jump to beginning of line | Ctrl+a |
Jump to end of line | Ctrl+e |
Start/end select | Ctrl+space |
So, for instance, if you want to move a line of text, move your cursor to the beginning of the line. Press Ctrl and the space bar; the status text at the bottom left of the window will read “Mark activated.” Then, move your cursor to the end of the line with Ctrl and “e.” The status text will disappear. Now, cut the selected text by pressing Ctrl+w, move your cursor to where you want to paste it, and press Ctrl+y.
It does take some getting used to, so if you decide you like emacs, there are many tutorials online that can help you learn the keystrokes. Once you learn it, it can be very powerful, but always remember this: most if not all of these commands are accessible from the menu.
Using nano
As mentioned earlier, nano is probably the easiest of the three editors to use and get used to. To start a file in nano, simply type
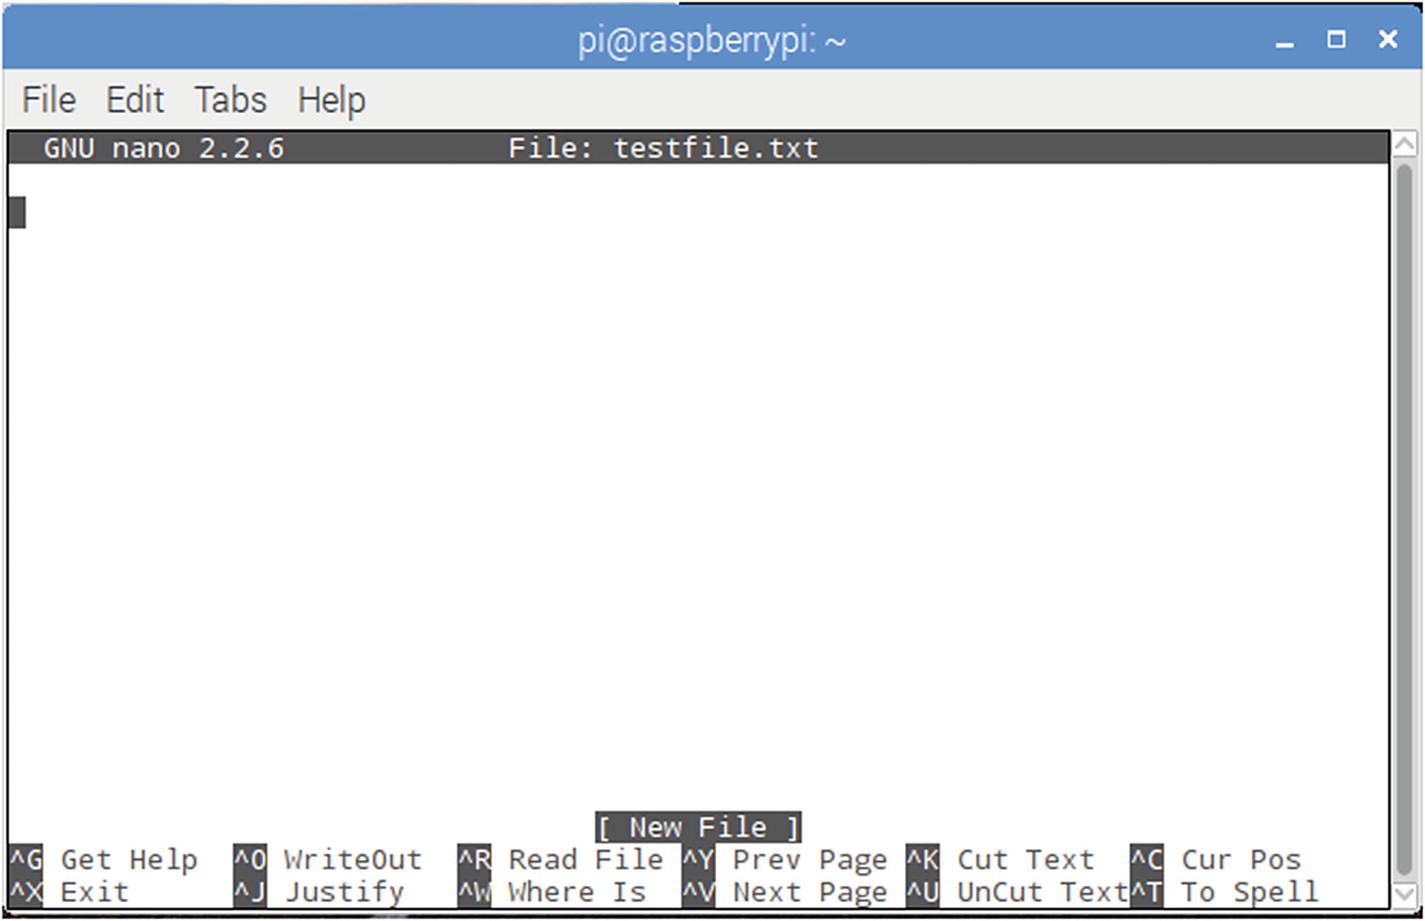
Testfile.txt in nano
As you can see, common commands are listed at the bottom, with the caret character (^) signifying the Ctrl key. To save a file, type Ctrl+X to exit. You’ll be asked if you want to save the file and under what name. In general, type “Y” and then hit Enter to save the file you’ve opened or created.
Default Text Editor
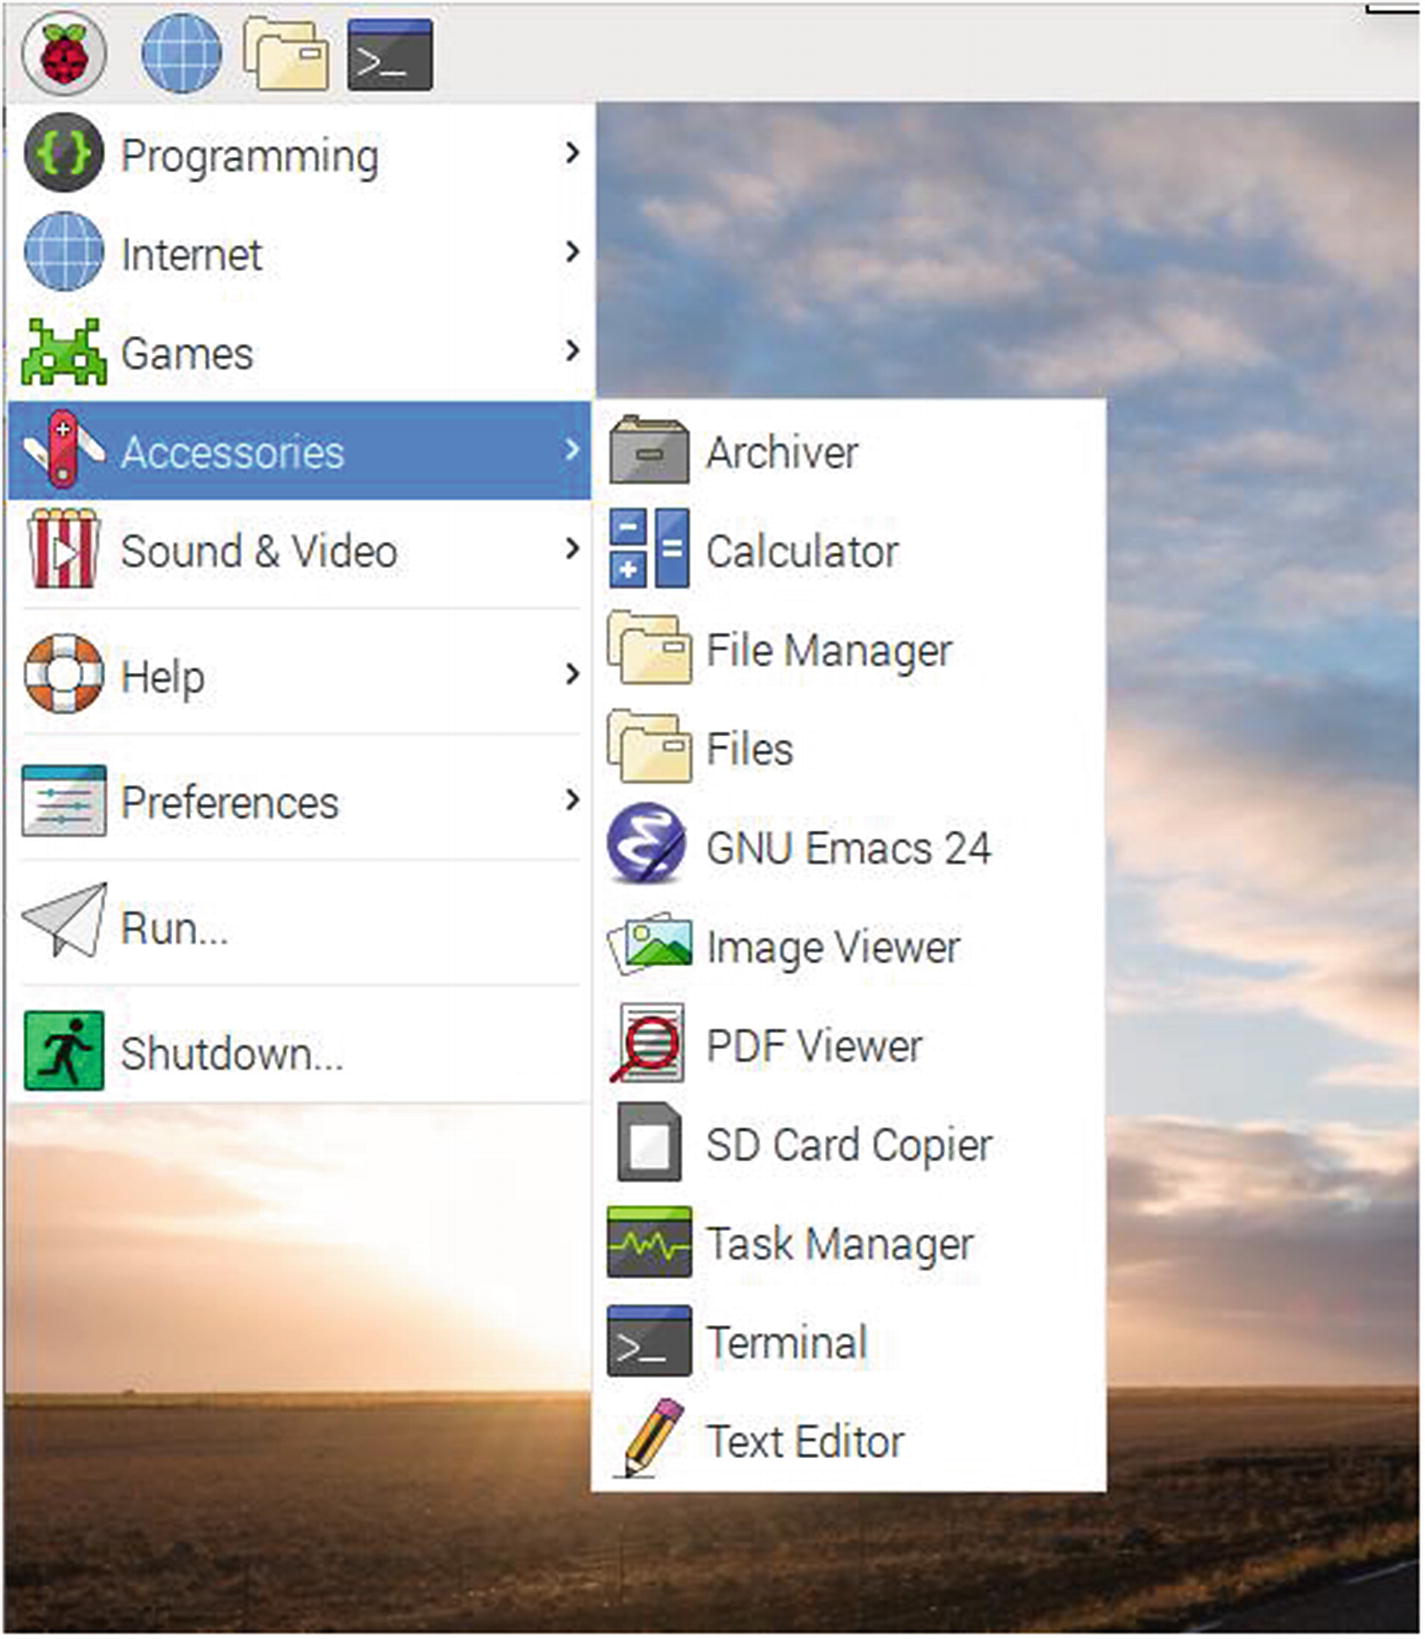
Opening the default text editor
As you’ll see, it looks like most editors you’re used to. If you’re comfortable using it, please do. I don’t mention it much because its one main drawback is that it’s only usable if you’re working on the Pi’s graphic desktop. If you’re remotely logged into the Pi and are working solely through the command line, the text editor is inaccessible.
Summary
This concludes your introduction to Linux. While it in no way makes you an expert, it should give you a healthy appreciation for all that this powerful OS can do. You learned the basics of how to navigate through your file system using only the command line, and you were introduced to the shell. You’ve also been introduced to the text editors available to you and have hopefully chosen one that you are comfortable with. Once you’ve muddled around with it on your Pi enough, you may find yourself installing Linux on one or more of your other machines. It’s okay—I won’t tell anybody.
In the next chapter, I’ll do my best to give you a solid introduction to Python.