Table of Contents for
TCP/IP Network Administration, 3rd Edition
 TCP/IP Network Administration, 3rd Edition
Published by
O'Reilly Media, Inc., 2002
TCP/IP Network Administration, 3rd Edition
Published by
O'Reilly Media, Inc., 2002
- Cover
- TCP/IP Network Administration, 3rd Edition
- Dedication
- Preface
- 1. Overview of TCP/IP
- 2. Delivering the Data
- 3. Network Services
- 4. Getting Started
- 5. Basic Configuration
- 6. Configuring the Interface
- 7. Configuring Routing
- 8. Configuring DNS
- 9. Local Network Services
- 10. sendmail
- 11. Configuring Apache
- 12. Network Security
- 13. Troubleshooting TCP/IP
- A. PPP Tools
- B. A gated Reference
- C. A named Reference
- D. A dhcpd Reference
- E. A sendmail Reference
- F. Solaris httpd.conf File
- G. RFC Excerpts
- Index
- Index
- Index
- Index
- Index
- Index
- Index
- Index
- Index
- Index
- Index
- Index
- Index
- Index
- Index
- Index
- Index
- Index
- Index
- Index
- Index
- Index
- Index
- Index
- Index
- Index
- Index
- About the Author
- Colophon
- Copyright
Web servers provide the leading method for delivering information over an IP network. The Web is best known for providing information over the global Internet, yet it can just as effectively provide information to internal staff as it does to external customers. All but the smallest networks can benefit from a well-run web server, which can advertise products and offer support services to external customers, as well as coordinate and disseminate information to users within your organization. The Web is the single most effective tool for delivering on-demand information to end users.
Most Unix web servers are built with Apache software. Apache is freely available web server software with origins in the National Center for Supercomputer Applications (NCSA) web server, the first widely used web server. Because of these “ancient” roots, Apache has undergone years of testing and development. Because it is the most widely deployed web server software on the Internet, you will probably use Apache to build your Unix web server.
In this chapter, we focus on installing and configuring an Apache server. The large number of configuration options can make Apache configuration appear more complex than it really is. This chapter provides an example of a simple configuration to get Apache up and running quickly.
Our focus is configuration and administration of the service, not the design of the content provided by the service; web page design is beyond the scope of this book. If you’re lucky, your organization has trained web designers; if you’re not so lucky, you may be expected to take on this artistic task yourself. O’Reilly has books that can help you: try HTML and XHTML: The Definitive Guide, by Chuck Musciano and Bill Kennedy, or Web Design in a Nutshell, by Jennifer Niederst.
The Apache server software is bundled with many Unix systems. Frequently, Apache is installed as part of the initial operating system installation. For example, the initial installation of a Red Hat system presents a screen that allows the user to select the Apache software by clicking on an icon labeled Apache Web Server.
Frequently, users select the Apache server software even when they
don’t plan to run a web server. You might be surprised to find an Apache
server installed and running on client desktop workstations. Try a
ps test:
$ ps ax | grep httpd
  321  ?  S    0:00 httpd
  324  ?  S    0:00 httpd
  325  ?  S    0:00 httpd
  326  ?  S    0:00 httpd
  329  ?  S    0:00 (httpd)
  330  ?  S    0:00 (httpd)
  331  ?  S    0:00 (httpd)
  332  ?  S    0:00 (httpd)
  333  ?  S    0:00 (httpd)
  334  ?  S    0:00 (httpd)
  335  ?  S    0:00 (httpd)
  2539  p1 D    0:00 grep http
The daemon that Apache installs to provide web services is the
Hypertext Transport Protocol daemon (httpd). Use the process status (ps)
command to check for all processes in the system, and the grep command to display only those with the
name httpd. Running this test on a
freshly installed system will show you if Apache is installed and
running.
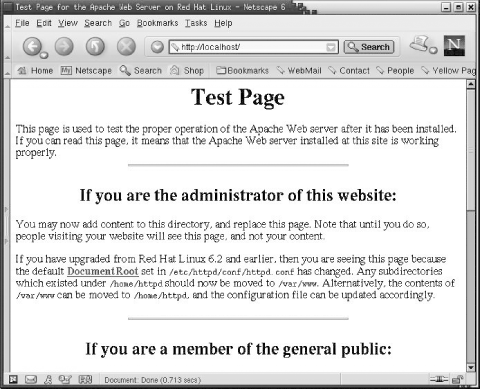
If Apache is running, start the Netscape web browser and enter “localhost” in the search box. Figure 11-1 shows the result on a sample Red Hat 7 system. Not only is Apache installed and running, it is configured and responding with a web page. Users of desktop Linux systems are sometimes surprised to find out they are running a fully functional web server. Of course, if you’re the administrator of a web server system, this is exactly what you want to see—Apache installed, up, and running.
If the Apache software is not installed on your system, you need
to install the package. The easiest way to install optional software on
a Linux system is to use a package manager. Several good ones are
available. Most Linux systems support the Red Hat Package Manager
(rpm), so we’ll use that in the
following example.
Use the Red Hat Package Manager to install needed software,
remove unneeded software, and check what software is installed.
rpm has many options for the
developers who build the packages, but for a network administrator,
rpm comes down to three basic
commands:
You must know the name of a package to install it with rpm. To find the full name of the Apache
package, mount the Linux CD-ROM and look in the
RPMS directory. Here is an example from a Red Hat
7.2 system:
$ cd /mnt/cdrom/RedHat/RPMS
$ ls *apache*
apache-1.3.20-16.i386.rpm
apacheconf-0.8.1-1.noarch.rpm
This example assumes that the CD-ROM was mounted on /mnt/cdrom. It shows that two Apache software packages are included in the Red Hat distribution: the web server software and a Red Hat configuration tool. Install apache-1.3.20-16.i386.rpm with this command to get the web server software:
# rpm -- install apache-1.3.20-16.i386.rpmAfter installing the package, check that it is installed with
this rpm command:
$ rpm  -- query apache
apache-1.3.20-16
Once the Apache package is installed, make sure the httpd daemons are started at boot time. On a Red Hat system, the script
/etc/init.d/httpd starts the daemons. Use chkconfig or a similar command to add the
script to the boot process. The following example adds the
httpd startup script to the boot process for
runlevels 3 and 5:
# chkconfig  -- list httpd
httpd           0:off   1:off   2:off   3:off   4:off   5:off   6:off
# chkconfig  -- level 35  httpd on
# chkconfig  -- list httpd
httpd           0:off   1:off   2:off   3:on    4:off   5:on    6:off
The first chkconfig
command lists the status of the
httpd script for every runlevel. The response
shows that httpd is off for all seven runlevels,
meaning that the script is not run. We want to start the web server at
runlevel 3, which is the multiuser runlevel, and at runlevel 5, which
is the default runlevel for this Red Hat system. The second chkconfig command does this. The --level argument specifies that runlevel 3
and runlevel 5 are affected—note that the 3 and the 5 are run together
with no intervening spaces. The httpd on
argument says that the httpd script should be
executed for those two runlevels. The last chkconfig command again lists the status of
the httpd script for all runlevels. This time it
shows that httpd will be executed for runlevel 3
and runlevel 5.
The next time this Red Hat system reboots, the web server will be running. To start the web server without rebooting, invoke the httpd script from the command line:
# /etc/init.d/httpd start
Starting httpd:                                            [  OK  ]
Installing Apache on a Linux system is straightforward. It is often installed during the initial system setup; if not, it can usually be installed from the CDs that came with the system. Installing Apache on a Solaris system is just as simple because Solaris 8 also includes Apache as part of the operating system. If your Unix system does not include Apache, download it from the Internet.
Apache is available from http://www.apache.org in both
source and binary forms. The Apache source is available for Unix
systems in both compressed and zipped tarballs. You can download and
compile the source, but the easiest way to get Apache is as a
precompiled binary. Figure
11-2 shows just some of the versions of Unix for which
precompiled httpd server daemons
are available.
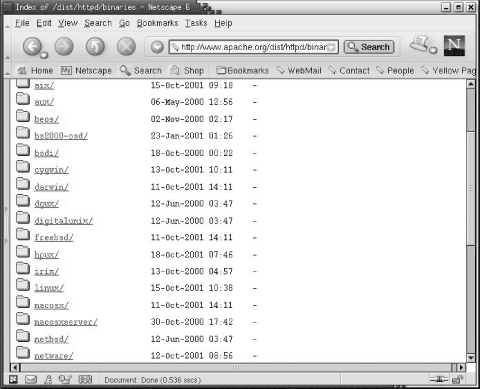
The binaries are listed by operating system. Assume you have a
FreeBSD system. Click on the freebsd link, and you’re presented with a
long list of zipped tarballs. Each tarball relates to a different
version of FreeBSD and contains an Apache binary distribution. Select
the binary that is appropriate for your version of FreeBSD and
download it to a working directory. Make a backup copy of the current
daemon and extract the new daemon with tar. The software should now be installed
and ready to run with the configuration files from your current
configuration.
Apache configuration traditionally involves three files:
- httpd.conf
This is the primary configuration file. It traditionally contains configuration settings for the HTTP protocol and for the operation of the server. This file is processed first.
- srm.conf
This file traditionally contains configuration settings to help the server respond to client requests. The settings include how to handle different MIME types, how to format output, and the location of HTTP documents and Common Gateway Interface (CGI) scripts. This file is processed second.
- access.conf
This file traditionally defines access control for the server and the information the server provides. This file is processed last.
All three files have a similar structure: they are all written as ASCII text files, comments begin with a #, and the files are well commented. Most of the directives in the files are written in the form of an option followed by a value.
We say that these three files traditionally handle Apache configuration, but common practice today has diverged from that approach. There is overlap in the function of the three files. You may think you know where a certain value should be set, only to be surprised to find it in another file. In fact, any Apache configuration directive can be used in any of the configuration files—the traditional division of the files into server, data, and security functions was essentially arbitrary. Some administrators still follow tradition, but it is most common for the entire configuration to be defined in the httpd.conf file. This is the recommended approach, and the one we use in this chapter.
Different systems put the httpd.conf
file in different directories. On a Solaris system, the file is stored in the
/etc/apache directory; on a Red Hat system, it is found in the
/etc/httpd/conf directory; and on Caldera systems,
in the /etc/httpd/apache/conf directory. The Apache
manpage should tell you where httpd.conf is located
on your system; if it doesn’t, look in the script that starts httpd at boot time. The location of the
httpd.conf file will either be defined by a script
variable or by the -f argument on the
httpd command line. Of course, a very
simple way to locate the file is with the find command, as in this Caldera Linux example:
# find / -name httpd.conf -print
/etc/httpd/apache/conf/httpd.conf
Once you find httpd.conf, customize it for
your system. The Apache configuration file is large and complex;
however, it is preconfigured, so your server will run with only a little
input from you. Edit the httpd.conf file to set the
web administrator’s email address in ServerAdmin and the server’s
hostname in ServerName. With those small changes, the httpd configuration provided with your Unix
system will probably be ready to run. Let’s look at a Solaris 8
example.
The first step to configure Apache on a Solaris system is to copy the file httpd.conf-example to httpd.conf:
# cd /etc/apache
# cp httpd.conf-example httpd.conf
Use an editor to put valid ServerAdmin and ServerName values into the configuration. In the Solaris example, we change ServerAdmin from:
ServerAdmin you@your.address
to:
ServerAdmin webmaster@www.wrotethebook.com
We change ServerName from:
#ServerName new.host.name
to:
ServerName www.wrotethebook.com
Once these minimal changes are made, the server can be started.
The easiest way to do this on a Solaris system is to run the
/etc/init.d/apache script file. The script
accepts three possible arguments: start, restart, and stop. Since httpd is not yet running, there is no daemon
to stop or restart, so we use the start command:
# /etc/init.d/apache start
httpd starting.
# ps -ef | grep '/httpd'
  nobody   474   473  0 12:57:27 ?        0:00 /usr/apache/bin/httpd
  nobody   475   473  0 12:57:27 ?        0:00 /usr/apache/bin/httpd
  nobody   476   473  0 12:57:27 ?        0:00 /usr/apache/bin/httpd
    root   473     1  0 12:57:26 ?        0:00 /usr/apache/bin/httpd
  nobody   477   473  0 12:57:27 ?        0:00 /usr/apache/bin/httpd
  nobody   478   473  0 12:57:27 ?        0:00 /usr/apache/bin/httpd
    root   501   358  0 13:10:04 pts/2    0:00 grep /httpd
After running the apache startup script,
run ps to verify that the httpd daemon is running.[124] In this example, several copies of the daemon are
running, just as we saw earlier in the Linux example. This group of
daemons is called the swarm, and we’ll examine
the Apache configuration directives that control the size of the swarm
later.
Now that the daemons are running, run Netscape. Enter “localhost” in the location box, and you should see something like Figure 11-3.
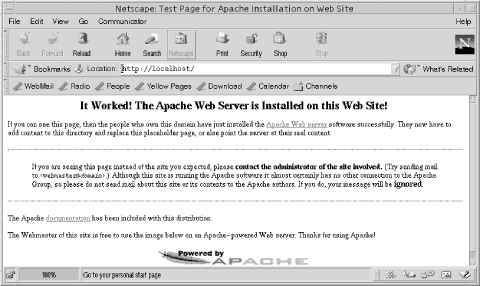
Our Solaris Apache server is now up, running, and serving data. Of course, this is not really the data we want to serve our clients. There are two solutions to this problem: either put the correct data in the directory that the server is using, or configure the server to use the directory in which the correct data is located.
The DocumentRoot directive points the server to the directory that contains web page information. By default, the Solaris server gets web pages from the /var/apache/htdocs directory, as you can see by checking the value for DocumentRoot in the httpd.conf file:
# grep '^DocumentRoot' httpd.conf
DocumentRoot "/var/apache/htdocs"
# ls /var/apache/htdocs
apache_pb.gif  index.html
The /var/apache/htdocs directory contains only two files. The GIF file is the Apache feather graphic seen at the bottom of the web page in Figure 11-3. The index.html file is the HTML document that creates this web page. By default, Apache looks for a file named index.html and uses it as the home page if a specific page has not been requested. You can put your own index.html file in this directory, along with any other supporting files and directories you need, and Apache will start serving your data. Alternately, you can edit the httpd.conf file to change the value in the DocumentRoot directive to point to the directory where you store your data. The choice is yours. Either way, you need to create HTML documents for the web server to display.
Although the Solaris server can run after modifying only two or three configuration directives, you still need to understand the full range of Apache configuration. Given the importance of web services for most networks, Apache is too essential for you to ignore. To properly debug a misconfigured web server, you need to understand the entire httpd.conf file. The following sections examine this file in detail.
It’s helpful to know the default configuration when you’re called upon to correct the configuration of someone else’s system. In this section we examine the values set in the default configuration on a Solaris 8 system. (The default Solaris 8 configuration file is listed in Appendix F.)
Here we focus on the directives that are actually used in the Solaris 8 configuration, and a few others that show important Apache features. There are some other directives that we don’t discuss. If you need additional information about any directive, there are many places to look. The full httpd.conf file contains many comments, which explain the purpose of each directive and are an excellent source of information. The Apache web site (http://www.apache.org) provides online documentation. Two excellent books on Apache configuration are Apache: The Definitive Guide, by Ben and Peter Laurie (O’Reilly), and Linux Apache Web Server Administration, by Charles Aulds (Sybex). However, you’ll probably find more information about the httpd.conf file than you need for an average configuration right here in this chapter.
The httpd.conf file that comes with Solaris
has 160 active configuration lines. To tackle that much information, the
following sections organize the configuration directives into different
groups. Note that the configuration file itself organizes directives by
scope: global environment directives, main server directives, and
virtual host directives. (Virtual hosts are explained later in this
chapter.) Although that organization is great for httpd when it is processing the file, it’s not
so great for a human reading the file. Here, related directives are
grouped by function to make the individual directives more
understandable. Once you understand the individual directives, you will
understand the entire configuration.
We start our look at the httpd.conf file with the directives that load dynamically loadable modules. These modules must be loaded before the directives they provide can be used in the configuration, so it makes sense to discuss loading the modules before we discuss the features they provide. Understanding dynamically loadable modules is a good place to start understanding Apache configuration.
The two directives that appear most in the Solaris httpd.conf file are LoadModule and AddModule. Together, they make up more than 60 of the 160 active lines in the httpd.conf file. All 60 of these lines configure the Dynamic Shared Object (DSO) modules used by the Apache web server.
Apache is composed of many software modules. Like kernel
modules, DSO modules can be compiled into Apache or loaded at runtime.
Running httpd with the -l command-line option lists all the modules
compiled into Apache. The following example is from a Solaris 8
system:
$ /usr/apache/bin/httpd -l
Compiled-in modules:
  http_core.c
  mod_so.c
Some systems may have many modules compiled into the Apache daemon. Solaris and Red Hat systems are delivered with only the following two modules compiled in:
- http_core.c
This is the core module. It is always statically linked into the Apache kernel, and it provides the basic functions that must be found in every Apache web server. This module is required; all other modules are optional.
- mod_so.c
This module provides runtime support for Dynamic Shared Object modules. It is required if you plan to dynamically link in other modules at runtime. If modules are loaded through the httpd.conf file, this module must be installed in Apache to support those modules. For this reason it is often statically linked into the Apache kernel.
In addition to these statically linked modules, Solaris uses many dynamically loadable modules. The LoadModule and AddModule directives are used in the httpd.conf file to load DSOs. First, each module is identified by a LoadModule directive. For example, this line in the Solaris httpd.conf file identifies the module that tracks users through the use of cookies:
LoadModule usertrack_module /usr/apache/libexec/mod_usertrack.so
The LoadModule directive is followed by the module name and the path of the shared object file.
Before a module can be used, it must be added to the list of modules that are available to Apache. The first step in building the new module list is to clear the old one. This is done with the ClearModuleList directive. ClearModuleList has no arguments or options. It occurs in the httpd.conf file after the last LoadModule directive and before the first AddModule directive.
The AddModule directive adds a module name to the module list. The module list must include all optional modules, both those compiled into the server and those that are dynamically loaded. On our sample Solaris system, that means that there is one more AddModule directive in the httpd.conf file than there are LoadModule directives. The extra AddModule directive handles mod_so.c, which is the only optional module compiled into Apache on our sample system.[125]
Mostly, however, LoadModule and AddModule directives occur in pairs: there is one AddModule directive for every LoadModule directive. For example, the following AddModule directive in the Solaris httpd.conf file adds the usertrack_module defined by the LoadModule directive shown previously to the module list:
AddModule mod_usertrack.c
The AddModule directive is followed by the name of the source file for the module being loaded. Notice that this is the name of the source file that produced the object module, not the module name seen in the LoadModule directive. This name is identical to the object filename except for the extension. In the LoadModule directive, which uses the shared object extension .so, the object filename is mod_usertrack.so. AddModule uses the source filename extension .c, so the module name is mod_usertrack.c.
Table 11-1 lists all the modules referenced by AddModule directives in the Solaris 8 httpd.conf file.
Table 11-1. DSO modules loaded in the Solaris configuration
Module | Function |
|---|---|
mod_access | Enables allow/deny type access controls. |
mod_actions | Enables the use of user-defined handlers for specific MIME types or access methods. |
mod_alias | Allows references to documents and scripts outside the document root. |
mod_asis | Defines file types returned without headers. |
mod_auth | Enables user authentication. |
mod_auth_anon | Enables anonymous logins. |
mod_auth_dbm | Enables use of a DBM authentication file. |
mod_autoindex | Enables automatic index generation. |
mod_cern_meta | Enables compatibility with old CERN web servers. |
mod_cgi | Enables execution of CGI programs. |
mod_digest | Enables MD5 authentication. |
mod_dir | Controls formatting of directory listings. |
mod_env | Allows CGI scripts and server-side includes (SSI) to inherit all shell environment variables. |
mod_expires | Set the date for the Expires: header. |
mod_headers | Enables customized response headers. |
mod_imap | Processes image map files. |
mod_include | Processes SSI files. |
mod_info | Enables use of the server-info handler. |
mod_log_config | Enables use of custom log formats. |
mod_mime | Provides support for MIME files. |
mod_mime_magic | Determines the MIME type of a file from its content. |
mod_negotiation | Enables MIME content negotiation. |
mod_perl | Provides support for the Perl language. |
mod_proxy | Enables web caching. |
mod_rewrite | Enables URI-to-filename mapping. |
mod_setenvif | Sets environment variables from client information. |
mod_so | Provides runtime support for dynamic shared objects (DSOs). |
mod_speling | Automatically corrects minor spelling errors. |
mod_status | Provides web-based access to the server-info report. |
mod_unique_id | Generates a unique request identifier for each request. |
mod_userdir | Defines where users can create public web pages. |
mod_usertrack | Provides user tracking through a unique identifier called a cookie. |
mod_vhost_alias | Provides support for name-based virtual hosts. |
If you decide to add modules to your configuration, do so very carefully. The order of the LoadModule and AddModule directives in the httpd.conf file is critical. Don’t change things without knowing what you’re doing. Before proceeding with a new installation, read the documentation that comes with your new module and the modules documentation found in the manual/mod directory of the Apache distribution. See the previously mentioned book Linux Apache Web Server Administration for detailed advice about adding new modules.
Once the DSOs are loaded, the directives that they provide can be used in the configuration file. Let’s continue looking at the Solaris httpd.conf file by examining some of the basic configuration directives.
This section covers six different directives. The directives as they appear in the sample configuration we created for our Solaris system are:
ServerAdmin webmaster@www.wrotethebook.com
ServerName www.wrotethebook.com
UseCanonicalName On
ServerRoot "/var/apache"
ServerType standalone
Port 80
Two of the basic directives, ServerAdmin and ServerName, were touched upon earlier in the chapter. ServerAdmin defines the email address of the web server administrator. This is set to a bogus value, you@your.host, in the default Solaris configuration. You should change this to the full email address of the real web administrator before starting the server.
ServerName defines the hostname returned to clients when they read data from this server. In the default Solaris configuration, the ServerName directive is commented out, which means that the “real” hostname is sent to clients. Thus, if the name assigned to the first network interface is crab.wrotethebook.com, then that is the name sent to clients. Many Apache experts suggest defining an explicit value for ServerName in order to document your configuration and to ensure that you get exactly the value you want. Earlier, we set ServerName to www.wrotethebook.com, so that even though the web server is running on crab, the server will be known as www.wrotethebook.com during web interactions. Of course, www.wrotethebook.com must be a valid hostname configured in DNS. (See Chapter 8, where www is defined as a nickname for crab in the wrotethebook.com zone file.)
A configuration directive related to ServerName is UseCanonicalName, which defines how httpd builds “self-referencing” URLs. A
self-referencing URL contains the name of the server itself in the
hostname portion of the URL. For example, on the server
www.wrotethebook.com, a URL that starts with
http://www.wrotethebook.com would be a
self-referencing URL. The hostname in the URL should be a
canonical name, which is a name that DNS can
resolve to a valid IP address. When UseCanonicalName is set to on, as
it is in the default Solaris configuration, the value in ServerName is
used to identify the server in self-referencing URLs. For most
configurations, leave it set to on. If it is set to off, the value
that came in the query from the client is used.
The ServerRoot option defines the directory that contains
important files used by httpd,
including error files, log files, and the three configuration files:
httpd.conf, srm.conf, and
access.conf. In the Solaris configuration,
ServerRoot points to /var/apache. This is
surprising in that the Solaris httpd configuration files are actually
located in /etc/apache, so clearly something else
is at work.
Solaris uses the -f option on
the httpd command line to override
the location of the httpd.conf file at runtime.
httpd is started at boot time using
the script /etc/init.d/apache. That script
defines a variable named CONF_FILE that contains the value
/etc/apache/httpd.conf. This variable is used
with the httpd command that
launches the web server, and it is this variable that defines the
location of the configuration file on a Solaris system.
The ServerType option defines how the server is started. If
the server starts from a startup script at boot time, the option is
set to standalone. If the server is
run on demand by inetd, the option
is set to inetd. The default
Solaris configuration sets ServerType to standalone, which is the best value; web
servers are usually in high demand, so it is best to start them at
boot time. It is possible, of course, for a user to set up a small,
rarely used web site on a desktop workstation, in which case running
the server from inetd may be
desirable. But the web server you create for your network should be
standalone.
Port defines the TCP port number used by the server. The standard port number is 80. On occasion, private web servers run on other port numbers. For example, Solaris runs the AnswerBook2 server on port 8888. Other popular alternative ports for special-purpose web sites are 8080 and 8000. If you change the port number, you must then tell your users the nonstandard port number. For example, http://jerboas.wrotethebook.com:8080 is a URL for a web site running on TCP port 8080 on host jerboas.wrotethebook.com.
When ServerType is set to inetd, it is usually desirable to set Port
to something other than 80. The reason for this is that the ports
under 1024 are “privileged” ports. If 80 is used, httpd must be run from inetd with the userid root. This is a
potential security problem, as an intruder might be able to exploit
the web site to get root access. Using port 80 is okay when ServerType
is standalone because the initial
httpd process does not provide
direct client service. Instead it starts several other HTTP daemons,
called the swarm, to provide client services. The
daemons in the swarm do not run with root privilege.
In the original web server design, the server would create separate
processes to handle individual requests. This placed a heavy load on
the CPU when the server was busy and had a major negative impact on
responsiveness. It was possible for the entire system to be
overwhelmed by httpd
processes.
Apache uses a different approach. A swarm of server processes
starts at boot time (the ps command
earlier in the chapter shows several httpd processes running on the Solaris
system), and all the processes in the swarm share the workload. If all
the persistent httpd processes
become busy, spare processes are started to share the work. Five
directives in the Apache configuration control how the swarm of server child processes is
managed. They are:
- MinSpareServers
This directive sets the minimum number of idle server processes that must be maintained. In the Solaris configuration, this is set to 5, which is the default value used in the Apache distribution. When the number of idle processes drops below 5, another process is created to maintain the correct number of idle processes. Five is a good value for an average server; it allows a burst of up to five quick requests to be handled without making the client wait for a child process to start. A lightly used server might have a lower number, and a heavily used server could benefit from a higher number. However, you don’t want too many idle servers waiting around for requests that may never come.
- MaxSpareServers
This directive sets the maximum number of idle server processes that may be maintained. It prevents too many idle servers from sitting around with nothing to do. If the number of idle servers exceeds MaxSpareServers, the excess idle servers are killed. In the Solaris configuration, MaxSpareServers is set to 10, which is the default value that ships with the Apache distribution. Set this value to about twice the value set for MinSpareServers.
- StartServers
This directive defines the number of
httpddaemons started at boot time. In the Solaris configuration, it is set to 5. The effect of this directive can be seen in the output of thepscommand earlier in this chapter, which showed that sixhttpddaemons were running. One of these is the parent process that manages the swarm; the other five are the child processes that actually handle client requests for data.- MaxClients
This directive sets the maximum number of client connections that can be serviced simultaneously. HTTP connection requests beyond the number set by MaxClients are rejected. Solaris sets this to 150, which is the most commonly used value. MaxClients prevents the server from consuming all system resources when it receives an overwhelming number of client requests. MaxClients should be increased only if you have an extremely powerful system with fast disks and a large amount of memory. It is generally best to handle additional clients by adding additional servers. The upper limit for MaxClients is set by HARD_SERVER_LIMIT, which is compiled into Apache. The default for HARD_SERVER_LIMIT is 256.
- MaxRequestsPerChild
This directive defines the number of client requests a child process can handle before it must terminate. Solaris sets MaxRequestsPerChild to 0, which means “unlimited”—a child process can keep handling client requests for as long as the system is up and running. This directive should always be set to 0, unless you know for a fact that the library you used to compile Apache has a memory leak.
The User and Group directives define the UID and GID under which the
swarm of httpd processes are run.
When httpd starts at boot time, it
runs as a root process, binds to port 80, and then starts a group of
child processes that provide the actual web services. These child
processes are the ones given the UID and GID defined in the file. The
UID and GID should provide the least possible system privileges to the
web server. On the Solaris system, this is the user
nobody and the group nobody.
The previous ps command output
shows this clearly. One httpd
process belongs to root and five other httpd processes belong to the user
nobody. An alternative to using
nobody is to create a userid and groupid just for
httpd. If you do this, create the
file permissions granted to the new user account very carefully. The
advantage of creating a special user and group for httpd is that you can use group permissions
for added protection, and you won’t be completely dependent on the
world permissions granted to nobody.
The DocumentRoot directive defines the directory that contains the web server documents. For security reasons, this is not the same directory that holds the configuration files. As we saw earlier, the Solaris setting for DocumentRoot is:
DocumentRoot "/var/apache/htdocs"
To apply directives to a specific directory, create a container for those directives. Three of the httpd.conf directives used to create containers are:
<Directorypathname>The Directory directive creates a container for directives that apply to the directory identified by
pathname. Any configuration directives that occur after the Directory directive and before the next</Directory>statement apply only to the specified directory.<Locationdocument>The Location directive creates a container for directives that apply to a specific
document. Any configuration directives that occur after the Location directive and before the next</Location>statement apply only to the specified document.<Filesfilename>The Files directive creates a container for directives that apply to the file identified by
filename. Any configuration directives that occur after the Files directive and before the next</Files>statement apply only to the specified file.filenamecan refer to more than one file if it contains the Unix wildcard character*or?. Additionally, if the Files directive is followed by an optional~(tilde), thefilenamefield is interpreted as a regular expression.
Directories and files are easy to understand: they are parts of the Unix filesystem that every system administrator knows. Documents, on the other hand, are specific to the web server. The screenful of information that appears in response to a web query is a document; it can be made up of many files from different directories. The Location container provides an easy way to refer to a complex document as a single entity. We will see examples of Location and Files containers later in this chapter. Here we look at Directory containers.
The Solaris configuration defines a Directory container for the server’s root directory and for the DocumentRoot:
<Directory />
    Options FollowSymLinks
    AllowOverride None
</Directory>
<Directory "/var/apache/htdocs">
    Options Indexes FollowSymLinks
    AllowOverride None
    Order allow,deny
    Allow from all
</Directory>
Each Directory container starts with a Directory directive and ends with a </Directory> tag. Both containers shown here enclose configuration statements that apply to only a single directory. The purpose of the directives inside these containers is covered later in Section 11.4. For now, it is sufficient to understand that containers are used inside the httpd.conf file to limit the scope of various configuration directives.
The Alias directive and the ScriptAlias directive both map a URL path to a directory on the server. For example, the Solaris configuration contains the following three directives:
Alias /icons/ "/var/apache/icons/"
Alias /manuals/ "/usr/apache/htdocs/manual/"
ScriptAlias /cgi-bin/ "/var/apache/cgi-bin/"
The first line maps the URL path /icons/ to the directory /var/apache/icons/. Thus a request for www.wrotethebook.com/icons/ is mapped to www.wrotethebook.com/var/apache/icons/. The second directive maps the URL path /manuals/ to www.wrotethebook.com/usr/apache/htdocs/manual/.
You may have several Alias directives to handle several
different mappings, but you will have only one ScriptAlias directive.
The ScriptAlias directive functions in exactly the same ways as the
Alias directive, except that the directory it points to contains
executable CGI programs. Therefore, httpd grants this directory execution
privileges. ScriptAlias is particularly important because it allows
you to maintain executable web scripts in a directory separate from
the DocumentRoot. CGI scripts are the single biggest security threat
to your server; maintaining them separately allows you to have tighter
control over who has access to the scripts.
The Solaris configuration has containers for the /var/apache/icons directory and the /var/apache/cgi-bin directory, but none for the /usr/apache/htdocs/manual directory. Just because a directory is defined inside the httpd.conf file does not mean that a Directory container must be created for that directory. The /var/apache/icons and the /var/apache/cgi-bin containers are shown here:
<Directory "/var/apache/icons">
    Options Indexes MultiViews
    AllowOverride None
    Order allow,deny
    Allow from all
</Directory>
<Directory "/var/apache/cgi-bin">
    AllowOverride None
    Options None
    Order allow,deny
    Allow from all
</Directory>
These containers enclose AllowOverride, Options, Order, and Allow statements—all of which relate to security. Most of the directives found in containers have security implications, and have been placed in containers to provide special security settings for a file, document, or directory. All of the directives used in the containers shown above are covered in Section 11.4 later in this chapter.
The UserDir directive enables personal user web pages and points to the directory that contains the user pages. UserDir usually points to public_html, and it does in the Solaris configuration. With this default setting, users create a directory named public_html in their home directories to hold their personal web pages. When a request comes in for www.wrotethebook.com/~sara, for example, it is mapped to www.wrotethebook.com/export/home/sara/public_html. An alternative is to define a full pathname on the UserDir directive line such as /export/home/userpages. Then the administrator creates the directory and allows each user to store personal pages in subdirectories of this directory, so that a request for www.wrotethebook.com/~sara will map to www.wrotethebook.com/export/home/userpages/sara. The advantage of this approach is that it makes it easier for you to monitor the content of user pages. The disadvantage is that a separate user web directory tree must be created and protected separately, whereas a web folder within the user’s home directory will inherit the protection of that user’s home.
The PidFile and ScoreBoardFile directives define the paths of files that
relate to process status. The PidFile is the file in which httpd stores its process ID, and the
ScoreBoardFile is the file where httpd writes process status
information.
The DirectoryIndex option defines the name of the file retrieved if the client’s request does not include a filename. Our Solaris system has the following value for this option:
DirectoryIndex index.html
Given the value defined for DocumentRoot and this value, if the server gets a request for http://www.wrotethebook.com, it gives the client the file /var/apache/htdocs/index.html. If it gets a request for http://www.wrotethebook.com/books/, it gives the client the file /var/apache/htdocs/books/index.html. The DocumentRoot is prepended to every request, and the DirectoryIndex is appended to any request that doesn’t end in a filename.
Earlier in this chapter, we saw from an ls of
/var/apache/htdocs that the directory contains a
file named index.html. But what if it didn’t?
What would Apache send to the client? If the file
index.html is not found in the directory,
httpd sends the client a listing of
the directory, if the configuration permits it. A directory listing is
allowed if the Options directive in the Directory container for the
directory contains the keyword Indexes. (More on Options later.) If a
directory index is allowed, several different directives control how
that directory listing is formatted.
The keyword FancyIndexing
is used on the IndexOptions directive line to enable a “fancy index” of
the directory when Apache is forced to send the client a directory
listing. When fancy indexing is enabled, httpd creates a directory list that includes
graphics, links, and other advanced features. The Solaris configuration enables fancy indexing with the
IndexOptions directive, and it contains about 20 extra lines to help
configure the fancy index. Solaris uses the following directives
to define the graphics and features used in the fancy
directory listing:
- IndexIgnore
Identifies the files that should not be included in the directory listing. Files can be specified by name, partial name, extension, or by standard wildcard characters.
- HeaderName
Specifies the name of a file that contains information to be displayed at the top of the directory listing.
- ReadmeName
Specifies the name of a file that contains information to be displayed at the bottom of the directory listing.
- AddIconByEncoding
Points to the icon used to represent a file based on its MIME encoding type.
- AddIconByType
Points to the icon used to represent a file based on its MIME file type.
- AddIcon
Points to the icon used to represent a file based on its extension.
- DefaultIcon
Points to the icon file used to represent a file that has not been given an icon by any other option.
MIME file types and file extensions play a major role in helping the server determine how a file should be handled. Specifying MIME options is also a major part of the Solaris httpd.conf file. The directives involved are:
- DefaultType
Defines the MIME type that is used when the server cannot determine the type of a file. In the Solaris configuration this is set to text/plain. Thus, when a file has no file extension, the server assumes it is a plain-text file.
- AddEncoding
Maps a MIME encoding type to a file extension. The Solaris configuration contains two AddEncoding directives:
AddEncoding x-compress Z
AddEncoding x-gzip gz tgz
The first directive maps the extension
Zto the MIME encoding type x-compress. The second line maps the extensionsgzandtgzto MIME encoding type x-gzip.- AddLanguage
Maps a MIME language type to a file extension. The Solaris configuration contains mappings for six languages, e.g.,
.enfor English and.frfor French.- LanguagePriority
Sets the priority of the language encoding used when preparing multiviews, and the language used when the client does not specify a preference. In the Solaris configuration, the priority is English (
en), French (fr), and German (de). This means that English, French, and German views will be prepared if multiviews are used. The client will be sent the English version if no language preference is specified.- AddType
Maps a MIME file type to a file extension. The Solaris configuration has only one AddType directive; it maps MIME type application/x-tar to the extension
.tgz. A configuration can have several AddType directives.
Another directive that is commonly used to process files based
on the filename extension is the AddHandler directive. This directive
maps a file handler to a file extension. A file handler is a program
that knows how to process a specific file type. For example, the
handler cgi-script is able to
execute CGI files. The Solaris configuration does not define any
optional handlers, so all the AddHandler directives are commented
out.
The KeepAlive directive enables the use of persistent connections. Without persistent connections, the client must make a new connection to the server for every link the user selects. Because HTTP runs over TCP, every connection requires a connection setup, adding time to every file retrieval. With persistent connections, the server waits to see if the client has additional requests before it closes the connection. Therefore, the client does not need to create a new connection to request a new document. The KeepAliveTimeout defines the number of seconds the server holds a persistent connection open waiting to see if the client has additional requests. The Solaris configuration turns KeepAlive on and sets KeepAliveTimeout to 15 seconds.
MaxKeepAliveRequests defines the maximum number of requests that will be accepted on a “kept-alive” connection before a new TCP connection is required. Solaris sets this value to 100, which is the Apache default. Setting MaxKeepAliveRequests to 0 allows unlimited requests. 100 is a good value for this parameter: few users request 100 document transfers, so the value essentially creates a persistent connection for all reasonable cases. If the client does request more than 100 document transfers, it might indicate a problem with the client system, so requiring another connection request is probably a good idea.
Timeout defines the number of seconds the server waits for a transfer to complete. The value needs to be large enough to handle the size of the files your site sends as well as the low performance of the modem connections of your clients. But if it is set too high, the server will hold open connections for clients that may have gone offline. The Solaris configuration has the Timeout set to 5 minutes (300 seconds), which is a very common setting.
BrowserMatch is a different type of tuning parameter: it reduces performance for compatibility’s sake. The Solaris configuration contains the following five BrowserMatch directives:
BrowserMatch "Mozilla/2" nokeepalive
BrowserMatch "MSIE 4\.0b2;" nokeepalive downgrade-1.0 force-response-1.0
BrowserMatch "RealPlayer 4\.0" force-response-1.0
BrowserMatch "Java/1\.0" force-response-1.0
BrowserMatch "JDK/1\.0" force-response-1.0
The BrowserMatch statements are used to present information in
ways that are compatible with the capabilities of different web
browsers. For example, a browser may be able to handle only HTTP 1.0,
not HTTP 1.1. In this case, downgrade-1.0 is used on the BrowserMatch
line to ensure that the server uses only HTTP 1.0 when dealing with
that browser.
In the Solaris configuration, keepalives are disabled for two browsers. One browser is offered only HTTP 1.0 during the connection, and responses are formatted to be compatible with HTTP 1.0 for four different browsers.
Don’t fiddle with the BrowserMatch directives. These settings are shipped as defaults in the Apache distribution, and are set to handle the limitations of different browsers. These are tuning parameters, but they are used by the Apache developers to adjust to the limitations of older browsers.
HostnameLookups tells httpd whether or not it should log hostnames
as well as IP addresses. The advantage of enabling hostname logging is
that you get a more readable log. The disadvantage is that httpd has the added overhead of DNS name
lookups. Setting this to off, as in the Solaris configuration,
enhances server performance. The HostnameLookups directive affects
what is logged, but its major impact is on system performance, which
is why we cover it under tuning parameters instead of logging directives.
Log files provide a great deal of information about the web server. The following seven lines define the Apache logging configuration in the default Solaris 8 httpd.conf file:
ErrorLog /var/apache/logs/error_log
LogLevel warn
LogFormat "%h %l %u %t \"%r\" %>s %b \"%{Referer}i\" \"%{User-Agent}i\"" combined
LogFormat "%h %l %u %t \"%r\" %>s %b" common
LogFormat "%{Referer}i -> %U" referer
LogFormat "%{User-agent}i" agent
CustomLog /var/apache/logs/access_log common
ErrorLog defines the path of the error log file. Use the error
log to track and correct failures. You should review the log at least
once a day to check for problems. To keep a close eye on the file
while you’re logged in, use the tail command with the -f option:
$ tail -l 1 -f /var/log/httpd/apache/error_logThe tail command prints the
tail end of a file; in the example, the file is
/var/log/httpd/apache/error_log. The -l option is the lines option. It tells
tail how many lines from the end of
the file to print. In this case, -l 1 directs tail to print
the (one) last line in the file. The -f option keeps the tail process running so that you will see
each record as it is written to the file. This allows you to monitor
the file in real time.
The LogLevel directive defines the type of events written to the
error log. The Solaris configuration sets LogLevel to warn, which specifies that warnings and
other more critical errors are to be written to the log. This is a
safe setting for an error log because it logs a wide variety of
operational errors. LogLevel has eight possible settings: debug, info, notice, warn, error, crit, alert, and emerg. The log levels are cumulative. For
example, warn provides warnings,
errors, critical messages, alerts, and emergency messages; debug provides all types of logging, which
causes the file to grow at a very rapid rate; emerg keeps the file small but notifies you
only of disasters. warn is a good
compromise between not enough detail and too much detail.
Just as important as reporting errors, the logs provide information about who is using the server, how much it is being used, and how well it is servicing the users. Web servers are used to distribute information; if no one wants or uses the information, you need to know it. The LogFormat and CustomLog directives do not configure the error log, but rather how server activity is logged.
The LogFormat directives define the format of log file entries. A LogFormat directive contains two things: the layout of a file entry and a label used in the httpd.conf file to identify the log entry. The layout of the entry is placed directly after the LogFormat keyword and is enclosed in quotes. The layout is defined using literals and variables.
Examining a sample LogFormat directive shows how the variables are used. The basic Apache log file conforms to the Common Log Format (CLF). CLF is a standard used by all web server vendors, and using this format means that the logs generated by Apache servers can be processed by any log analysis tool that conforms to the standard. The format of a standard CLF entry is clearly defined by the second LogFormat directive in the Solaris httpd.conf file:
LogFormat "%h %l %u %t \"%r\" %>s %b" common
This LogFormat directive specifies exactly the information required for a CLF log entry. It does this using seven different LogFormat variables:
%hLogs the IP address of the client. If HostnameLookups is set to on, this is the client’s fully qualified hostname. On the sample Solaris system, this would be the client’s IP address because HostnameLookups is turned off to enhance server performance.
%lLogs the username used to log in to the client, if available. The name is retrieved using the
identdprotocol; however, most clients do not runidentdand thus do not provide this information. Therefore, this field usually contains a hyphen to indicate a missing value. Likewise, if the server does not have a value for a field, the log contains a hyphen in the field.%uLogs the username used to access a password-protected web page. This should match a name you defined in the AuthUser file or the AuthDBMUser database you created on the server. (AuthUser and AuthDBMUser are covered in Section 11.4 of this chapter.) Most documents are not password protected, and therefore this field contains a hyphen in most log entries.
%tLogs the date and time the log entry was made.
%rLogs the first line of the client’s request. This often contains the URL of the requested document. The
\"characters in the LogFormat directive indicate that quotes should be inserted in the output. In the log file, the client’s request will be enclosed in quotes.%>sLogs the status of the last request. This is the three-digit response code that the server returned to the client.
%bLogs the number of bytes contained in the document sent to the client.
Apache log entries are not limited to the CLF format. The LogFormat directive lets you define what information is logged. A wide variety of information can be logged.
The Solaris configuration contains three additional LogFormat directives that demonstrate some optional log formats. The three directives are:
LogFormat "%{User-agent}i" agent
LogFormat "%{Referer}i -> %U" referer
LogFormat "%h %l %u %t \"%r\" %>s %b \"%{Referer}i\" \"%{User-Agent}i\""
combined
All of these directives log the contents of HTTP headers. For
example, the first directive logs the value received from the client
in the User-agent header.
User-agent is the user program
that generates the document request; generally this is the name of a
browser. The format that logs the header is:
%{User-agent}iThis format works for any header: simply replace User-agent with the name of the header.
The i indicates that this is an
input header; output headers are indicated by an o. Apache can log the contents of any
header records received or sent.
The second LogFormat directive logs the contents of the
Referer header received from the
client (%{Referer}i), the literal
characters dash and greater-than sign (->), and the requested URL (%U). Referer is the name of the remote site
that referred the client to your web site; %U is the document to which the site
referred the client.
The last LogFormat directive starts with the CLF (%h %l %u %t \"%r\" %>s %b \") and adds
to that the values from the Referer header and the User-agent header. This format is labeled
combined because it combines the
CLF with other information; the other two formats are also aptly
labeled as agent and referer. Yet none of these formats is
actually used in the Solaris configuration. Simply creating a
LogFormat is not enough to generate a log file; you must also add a
matching CustomLog directive to map the format to a file, as
explained later.
In the LogFormat directive, the layout of the log entry is
enclosed in quotes. The label that occurs after the closing quote is
not part of the format. In the LogFormat directive that defines the
CLF format, the label common is
an arbitrary string used to tie the LogFormat directive to a
CustomLog directive. In the Solaris configuration, that particular
LogFormat is tied to the file
/var/apache/logs/access_log defined by this
line:
CustomLog /var/apache/logs/access_log common
The label common binds the
two directives together. Thus the CLF entries defined by this
LogFormat directive are written to the file defined by this
CustomLog directive.
In the Solaris configuration, the other CustomLog directives
that create the agent, referer, and combined log files are commented
out:
#CustomLog /var/apache/logs/referer_log referer
#CustomLog /var/apache/logs/agent_log agent
#CustomLog /var/apache/logs/access_log combined
The referer_log stores the URL of the source page that linked to your web server. This helps you determine what sites are pointing to your web pages. Entries in the referer_log are defined by this line:
LogFormat "%{Referer}i -> %U" refererTo create the log, uncomment this line:
CustomLog /var/apache/logs/referer_log referer
The agent_log identifies the browsers that are used to access your site, and is defined by this LogFormat statement:
LogFormat "%{User-agent}i" agentTo create the log, uncomment this line:
CustomLog /var/apache/logs/agent_log agent
Lastly, the format for the expanded CLF log is defined by this line:
LogFormat "%h %l %u %t \"%r\" %>s %b \"%{Referer}i\" \"%{User-Agent}i\"" combinedTo create a combined log, uncomment this line:
CustomLog /var/apache/logs/access_log combined
and comment this line:
#CustomLog /var/apache/logs/access_log common
These changes cause the combined log format to be used to build a
log file named /var/apache/logs/access_log.
This is the same log file that is used by the default common log format. To avoid duplicate log
entries, turn off common logging
when you turn on combined
logging. In effect, these changes switch the
access_log file from using the common log format to logging the combined log entry.
Each LogFormat statement and its associated CustomLog statement end with the same label. The label is an arbitrary name used to bind the format and the file together.
Apache also supports conditional logging to identify fields that are logged only when certain status codes are returned by the server. The status codes are listed in Table 11-2.
Table 11-2. Apache server status codes
Status code | Meaning |
|---|---|
200: OK | A valid request |
302: Found | The document was found |
304: Not Modified | The requested document has not been modified |
400: Bad Request | An invalid request |
401: Unauthorized | The client or user is denied access |
403: Forbidden | The requested access is not allowed |
404: Not Found | The requested document does not exist |
500 Server Error | An unspecified server error occurred |
503: Out of Resources (Service Unavailable) | The server has insufficient resources to honor the request |
501: Not Implemented | The requested server feature is not available |
502: Bad Gateway | The client specified an invalid gateway |
To make a field conditional, put one or more status codes on
the field in the LogFormat entry. If multiple status codes are used,
separate them with commas. Assume that you want to log the browser
name only if the browser requests a service that is not implemented
in your server. Combine the Not Implemented (501) status code with
User-agent header in this
manner:
%501{User-agent}iIf this value appears in the LogFormat statement, the name of the browser is logged only when the status code is 501.
Place an exclamation mark in front of the status codes to specify that you want to log a field only when the status code does not contain the specified values. For example, to log the address of the site that referred the user to your web page only if the status code is not one of the good status codes, add the following to a LogFormat:
%!200,302,304{Referer}iThis particular conditional log entry is very useful, as it tells you when a remote page has a stale link pointing to your web site.
Combine these features with the common log format to create a more useful
log entry. Here we modify the Solaris combined format to include conditional
logging:
LogFormat "%h %l %u %t \"%r\" %>s %b \"%!200,302,304{Referer}i\" \"%{User-Agent}i\"" combinedThis entry provides all the data of the CLF and thus can be analyzed by standard tools. But it also provides the browser name and, when the user requests a stale link, it provides the address of the remote site that references that link.
Despite the fact that the Solaris configuration file contains over 160 active lines, there are some interesting Apache features that the Solaris configuration does not exploit. Before we move on to the important ongoing tasks of server security and server monitoring, the following sections provide a quick overview of three features not included in the default Solaris configuration: proxies and caching, multi-homed server configuration, and virtual hosts.
Servers that act as intermediaries between clients and web servers are called proxy servers. When firewalls are used, direct web access is often blocked. Instead, users connect to the proxy server through the local network, and the proxy server is trusted to connect to the remote web server. Proxy servers can maintain cached copies of remote servers’ web pages to improve performance by reducing the amount of traffic sent over the wide area network and by reducing the contention for popular web sites. The options that control caching behavior are:
- CacheNegotiatedDocs
Allows proxy servers to cache web pages from your server. By default, Apache asks proxy servers not to cache your server’s web pages. This option takes no command-line arguments.
- ProxyRequests
Setting this option to on turns your server into a proxy server. By default, this is set to off.
- ProxyVia
Enables or disables the use of
Via:headers, which aid in tracking where cached pages actually came from.- CacheRoot
Specifies the directory path where cached web pages are written when this server is configured as a proxy server. To avoid making the directory writable by the user nobody, create a special userid for
httpdwhen you run a proxy server.- CacheSize
Sets the maximum size of the cache in kilobytes. The default is 5.
- CacheGcInterval
Sets the time interval (in hours) at which the server prunes the cache. The default is 4. Given the defaults, the server prunes the cache down to 5 kilobytes every 4 hours.
- CacheMaxExpire
Sets the maximum number of hours a document can be held in the cache without requesting a fresh copy from the remote server. The default is 24 hours. With the default, a cached document can be up to a day out of date.
- CacheLastModifiedFactor
Sets the length of time a document is cached based on when it was last modified. The default factor is 0.1. Therefore, if a document that was modified 10 hours ago is retrieved, it is held in the cache for only 1 hour before a fresh copy is requested. The assumption is that if a document changes frequently, the time of its last modification will be recent; thus, documents that change frequently are cached for only a short period of time. Regardless, nothing is cached longer than CacheMaxExpire.
- CacheDefaultExpire
Sets a default cache expiration value for protocols that do not provide the value. The default is 1 hour.
- NoCache
Defines a list of servers whose pages you do not want to cache. If you know that a server has constantly changing information, you won’t want to cache information from that server because your cache will always be out of date. Listing the name of that server on the NoCache command line means that queries are sent directly to the server, and responses from the server are not saved in the cache.
All of these directives are commented out in the Solaris configuration. By default, the Solaris Apache server is not configured to be a proxy server. If you need to create a proxy server, refer to a book dedicated to Apache configuration such as Linux Apache Web Server Administration.
Web servers with more than one IP address are said to be multi-homed. A multi-homed web server needs to know what address it should listen to for incoming server requests. There are two configuration options to handle this:
- BindAddress
Specifies the address used for server interactions. The default value is *, which means that the server should respond to web service requests addressed to any of its valid IP addresses. If a specific address is used on the BindAddress line, only requests for that address are honored.
- Listen
Specifies addresses and ports to monitor for web service requests in addition to the default port and address. Address and port pairs are separated by a colon. For example, to monitor port 8080 on IP address 172.16.12.5, enter
Listen 172.16.12.5:8080. If a port is entered with no address, the address of the server is used. If the Listen directive is not used,httpdmonitors only the port defined by the Port directive.
The BindAddress and Listen directives are commented out of the Solaris configuration.
Some of the options commented out of the sample httpd.conf file are used if your server hosts multiple web sites. For example, to host web sites for fish.edu and mammals.com on the crab.wrotethebook.com server, add these lines to the httpd.conf file:
<VirtualHost "www.fish.edu">
DocumentRoot /var/apache/fish
ServerName www.fish.edu
</VirtualHost>
<VirtualHost "www.mammals.com">
DocumentRoot /var/apache/mammals
ServerName www.mammals.com
</VirtualHost>
Each VirtualHost option defines a hostname alias that your server responds to. For this to be valid, DNS must define the alias with a CNAME record. Our example requires CNAME records that assign crab.wrotethebook.com the aliases of www.fish.edu and www.mammals.com. When crab receives a server request addressed to one of these aliases, it uses the configuration parameters defined here to override its normal settings. Therefore, when it gets a request for www.fish.edu, it uses www.fish.edu as its ServerName value instead of its own server name, and /var/apache/fish as the DocumentRoot.
Web servers are vulnerable to all of the normal security problems discussed in Chapter 12, but they also have their own special security considerations. In addition to guarding against the usual threats, web servers should be set up to protect the integrity of the information they disseminate as well as the information they receive from the client.
Access to the information on the server is protected by access controls. You can control access to the server at the host level and at the user level in the httpd.conf configuration file. Access control is important for protecting internal and private web pages, but most web information is intended for dissemination to the world at large. For these global web pages, you don’t want to limit access in any way, but you still want to protect the integrity of the information on the pages.
One of the unique security risks for a web server is the possibility of an intruder changing the information on your web pages. We have all heard of high-profile incidents in which intruders alter the home page of some government agency to include comical or pornographic material. Although these attacks are not intended to do long-term harm to the server, they can certainly embarrass the organization that runs the web site.
Unix file permissions protect the files and directories where web documents are stored. The server does not need write permissions, but it does need to read and execute these files. Executable files, if they are poorly designed, are always a potential security threat.
Apache itself is reliable and reasonably secure. The biggest threat to the security of your server is the code that you write for your server to execute, most commonly Common Gateway Interface programs and Server Side Includes.
CGI programs can be written in C, Perl, Python, or other programming languages. Badly written CGI programs represent one of the biggest threats to server security: intruders can exploit poor code by forcing buffer overflows or passing shell commands through the program to the system. To avoid this, you must be very careful about the code that you make available on your system. You should personally review all programs included in the cgi-bin directory. Try to write programs that do not allow free-form user input; use pull-down menus instead of keyboard input where possible. Limit and validate what comes in from the user to your system.
To make it easier to review your CGI scripts, keep them all in the ScriptAlias directory. Don’t allow scripts to be executed from any other directory unless you’re positive no one can place a script there that you have not personally reviewed. In the next section, we’ll see how to control which directories allow CGI execution when we discuss the Options directive.
Server Side Includes (SSI) are also a potential problem for the same reason as CGI programs. Server Side Includes are also called Server Parsed HTML, and the files often have the .shtml file extension. These files are processed by the server before they are sent to the client, and they can include other files or execute code from script files. If user input is used to dynamically modify an SSI file, the file is vulnerable to the same type of attacks as CGI scripts.
SSI commands are embedded inside HTML comments, and therefore
begin with <!-- and conclude
with -->. The SSI commands are
listed in Table
11-3.
Table 11-3. Server Side Include commands
Command | Function |
|---|---|
#config | Formats the display of file size and time. |
#echo | Displays variables. |
#exec | Executes a CGI script or a shell command. |
#flastmod | Displays the date a document was last modified. |
#fsize | Displays the size of a document. |
#include | Inserts another file into the current document. |
The most secure way to operate is to disallow all SSI processing. This is the default unless All or Includes is specified by an Options directive in the httpd.conf file. A compromise setting is to allow SSI processing but disallow the #include and #exec commands. These are the greatest security threats because #include writes data to the document from an external file, and #exec enables script and command execution. Use IncludesNOEXEC on the Options directive for this setting. Let’s now look at how Options are set for individual directories.
The httpd.conf file can define server controls for all web documents or for documents in individual directories. The Options directive specifies what server options are permitted for documents. Placing the Options directive inside a Directory container limits the scope of the directive to that specific directory. The Solaris configuration provides an example:
<Directory />
    Options FollowSymLinks
    AllowOverride None
</Directory>
<Directory "/var/apache/htdocs">
    Options Indexes FollowSymLinks
    AllowOverride None
    Order allow,deny
    Allow from all
</Directory>
<Directory "/var/apache/icons">
    Options Indexes MultiViews
    AllowOverride None
    Order allow,deny
    Allow from all
</Directory>
<Directory "/var/apache/cgi-bin">
    AllowOverride None
    Options None
    Order allow,deny
    Allow from all
</Directory>
This configuration defines server option controls for four directories: the root (/), /var/apache/htdocs, /var/apache/icons, and /var/apache/cgi-bin. The example shows four possible values for the Options directive: FollowSymLinks, Indexes, None, and MultiViews. The Options directive has several possible settings:
- All
Permits the use of all server options.
- ExecCGI
Permits the execution of CGI scripts from this directory. The ExecCGI option allows CGI scripts to be executed from directories other than the directory pointed to by the ScriptAlias directive. Many administrators set this option for the ScriptAlias directory, but doing so is somewhat redundant: the ScriptAlias directive already defines /var/apache/cgi-bin as the script directory. In the example, Options is set to None for the /var/apache/cgi-bin directory without undoing the effect of the ScriptAlias directive.
- FollowSymLinks
Permits the use of symbolic links. If this is allowed, the server treats a symbolic link as if it were a document in the directory.
- Includes
Permits the use of Server Side Includes (SSI).
- IncludesNOEXEC
Permits Server Side Includes (SSI) files that do not contain #exec and #include commands.
- Indexes
Permits a server-generated listing of the directory if an index.html file is not found.
- MultiViews
Permits the document language to be negotiated. See the AddLanguage and LanguagePriority directives discussed earlier in Section 11.3.6.
- None
Disallows all server options. My personal favorite!
- SymLinksIfOwnerMatch
Permits the use of symbolic links if the target file of the link is owned by the same userid as the link itself.
Use server options with care. The None and MultiViews options used in the Solaris configuration should not cause security problems, although MultiViews consumes server resources. The Indexes option poses a slight security risk, as it exposes a listing of the directory contents if no index.html file is found, which may be more information than you want to share with the world. FollowSymLinks has the potential for security problems because symbolic links can increase the number of directories in which documents are stored. The more directories you have, the more difficult it is to secure them, because each must have the proper permissions set and be monitored for possible file corruption. (See Chapter 12 for information on Tripwire, a tool that helps monitor files.)
The Directory containers in the previous example also contain AllowOverride directives. These directives limit the amount of configuration control given to the individual directories.
The statement AccessFileName
.htaccess enables directory-level
configuration control and states that the name of the directory
configuration file is .htaccess. If the server
finds a file with this name in a directory from which it is retrieving
information, it applies the configuration lines defined in the file
before it releases the data. The AccessFileName directive delegates
configuration control to the people who create and manage the
individual web pages, giving them a file in which they can write
configuration directives. The configuration directives in the
.htaccess file are the same as those in the
httpd.conf file that defines systemwide
configuration. The Solaris configuration contains the AccessFileName .htaccess line, so directory-level
configuration is allowed on Solaris systems by default.
The AllowOverride directive can be used to limit the amount of configuration control given to individual directories. It defines when the .htaccess file is allowed to override the configuration values set in httpd.conf. Placing the AllowOverride directives inside a Directory container limits the scope of AllowOverride to that specific directory, as we saw in the previous example.
The AllowOverride directive has many possible settings. In
addition to the keywords All, which
permits the .htaccess file to override everything
defined in the configuration files, and None, which allows no overrides, individual
directives can be permitted through this directive. For example, to
allow an .htaccess file to define file extension
mappings, specify AllowOverride
AddType. When this value is used on
an AllowOverride directive, AddType directives can be used in the
directory’s .htaccess file to define file
extension mappings. AllowOverride can be used to permit just about
anything in the configuration to be overridden by the
.htaccess file.
The Options and AllowOverride directives limit access to server features and configuration controls, and can help keep information safe from corruption. Sometimes, however, you have information you want to keep safe from widespread distribution. Access controls limit the distribution of information.
Use the httpd.conf file to define host and user access controls. A few examples will make this capability clear. Let’s start with an example of host access controls:
<Directory "/var/apache/htdocs/internal">
Order deny,allow
Deny from all
Allow from wrotethebook.com
</Directory>
This shows access controls for the directory /var/apache/htdocs/internal. The access controls are designed to grant access only to those hosts within the wrotethebook.com domain. The Directory container encloses three access control directives:
-
Order Defines the order in which the access control rules are evaluated.
deny,allowtellshttpdto apply the deny rule first, and then permit exceptions to that rule based on the allow rule. In the example, we block access from everyone with the deny rule and then permit exceptions for systems that are part of the wrotethebook.com domain with the allow rule. This is an example of access rules that might be used to protect an internal web site.-
Deny from Identifies the hosts not allowed to access web documents found in the /var/apache/htdocs/internal directory. The hosts can be identified by full or partial hostnames or IP addresses. Each Deny from directive can identify only one source; to specify multiple sources, use multiple Deny from directives. However, if a domain name or a network address is used, the source can encompass every host in an entire domain or network. The keyword
allblocks all hosts.-
Allow from Identifies hosts that are granted access to documents in the directory. The hosts can be identified by full or partial hostnames or IP addresses. Each Allow from directive can identify only one source; to specify multiple sources, use multiple Allow from directives. However, if a domain name or a network address is used, the source can encompass every host in an entire domain or network. The keyword
allallows all hosts.
The example here controls access on a host-by-host basis. This type of control is commonly used to segregate information for internal users from information for external customers. It is also possible to control file access at the user and group level.
User authentication can be required before granting access to a document or directory. It is generally used to limit information to a small group. An example of user access control is:
<Directory "/var/apache/htdocs/internal/accounting">
AuthName "Accounting"
AuthType Basic
AuthUserFile /etc/apache/http.passwords
AuthGroupFile /etc/apache/http.groups
Require hdqtrs rec bill pay
Order deny,allow
Deny from all
Allow from Limit>
</Directory>
The first two directives in this Directory container are
AuthName and AuthType. AuthName provides the value for the
authentication realm—a value that is placed on
the WWW-Authenticate header sent
to the client. A realm is a group of server resources that share the
same authentication. In the example, the directory
/var/apache/htdocs/internal/accounting is the
only item in the Accounting realm. But it would be possible to have
other password-protected directories or documents in the Accounting
realm. If we did, a user that was authenticated for any resource in
the Accounting realm would be authenticated for all resources in
that realm.
The AuthType directive specifies the type of password authentication that will be used. This can be either Basic or Digest. When Basic is specified, a plain clear-text password is used for authentication. When Digest is specified, Message Digest 5 (MD5) is used for authentication. Digest is rarely used, partly because it is not completely implemented in all browsers, but more importantly because data that requires strong authentication is better protected using Secure Sockets Layer (SSL) security. SSL is covered later in Section 11.4.5.
In this example, access is granted if the user belongs to a
valid group and has a valid password. These groups and passwords
have nothing to do with the groups and passwords used by login. The groups and passwords used here
are specifically defined by you for use with the web server. The
files you create for this purpose are the ones pointed to by the
AuthUserFile and AuthGroupFile entries. Add passwords to the web
server password file with the htpasswd command that comes with the
Apache system; add groups to the group file by editing the file with
any text editor. The entries in the group file start with the group
name followed by a colon and a list of users that belong to the
group. For example:
hdqtrs: amanda pat craig kathy
The Require directive requires the user to enter the web
username and password. The example limits access to users who belong
to one of the groups hdqtrs,
rec, bill, or pay, and who also enter a valid password.
Alternatively, placing the keyword valid-user on the Require line instead of
a list of groups grants access to any user with a valid password and
ignores the group file.
Even if you do not use web server groups, specify the AuthGroupFile entry when using password authentication. If you don’t want to create a dummy group file, simply point the entry to /dev/null.
The Order, Deny, and Allow directives perform the same function in this example as they did in the previous one. Here we are adding password authentication to host authentication. That’s not required. If the Order, Deny, and Allow directives were not in the example, any system on the Internet would be allowed to access the documents if the user on that system had the correct username and password.
The standard authentication module, mod_auth, stores user authentication data in flat files that are searched sequentially. A sequential search of even a few hundred entries can be time consuming. Use an indexed database to improve performance if you have more than a few password entries.
Two modules, mod_auth_db, which uses Berkeley DB databases, and mod_auth_dbm, which uses Unix DBM databases, provide support for password databases. The basic Solaris configuration dynamically loads mod_auth_dbm, so we can use a password database on a Solaris system with very little effort.
The password database is used in much the same way as the sequential database. Using the authentication example shown previously, we can change to a password database simply by changing the AuthUserFile directive to an AuthDBMUserFile directive and the AuthGroupFile directive to an AuthDBMGroupFile directive. Here is an example:
<Directory "/var/apache/htdocs/internal/accounting">
AuthName "Accounting"
AuthType Basic
AuthDBMUserFile /etc/apache/passwords
AuthDBMGroupFile /etc/apache/groups
Require hdqtrs rec bill pay
Order deny,allow
Deny from all
Allow from Limit>
</Directory>
These two small changes are all that is needed in the
httpd.conf file. The biggest change when using
a password database is that passwords are no longer defined with the
htpassword command. Instead, the
dbmmanage command is used to
create password and group database entries. The syntax of the
dbmmanage command is:
dbmmanage filename command username passwordThe items on a dbmmanage
command line are largely self-explanatory.
filename is the name of the database
file. username and
password are just what you would expect
for a password database. command is a
keyword that defines the function of the dbmmanage command. The possible command keywords
are:
-
add Adds a username and password to the database. The password must already be encrypted because
dbmmanagedoes not encrypt the password for you when you use theaddkeyword. See theadduserkeyword.-
adduser Adds a username and password to the database. The password is provided in clear text and then encrypted by
dbmmanage.-
check Checks if the username and password match those in the database.
-
delete Removes a username and password from the database.
-
import Copies
username:passwordentries from stdin. The passwords must already be encrypted.-
update Changes the password for a username that is already in the database.
-
view Displays the contents of the database.
In the following example, the /etc/apache/passwords file is created and two new users are added to the database:
# dbmmanage /etc/apache/passwords adduser sara
New password:
Re-type new password:
User sara added with password encrypted to XsH4aRiQbEzp2
# dbmmanage /etc/apache/passwords adduser alana
New password:
Re-type new password:
User alana added with password encrypted to AslrgF/FPQvF6
# dbmmanage /etc/apache/passwords view
alana:AslrgF/FPQvF6
sara:XsH4aRiQbEzp2
Notice that dbmmanage
prompts for the password if it is not provided on the command
line.
All of the access control examples shown so far define access controls for a directory. It is also possible to define access control for all directories on a server or for individual documents. To apply access controls to every document provided by the server, simply place the access control directives outside a Directory container; the access controls here apply only to a single directory because they are located within a Directory container. To apply access controls to a single file or document, place the directives inside a Files or Document container.
The Solaris configuration provides an example of applying access controls to individual files. In order to prevent the .htaccess file from being downloaded by a curious client, the Solaris configuration contains the following Files container:
<Files ~ "^\.ht">
    Order allow,deny
    Deny from all
</Files>
The Order and Deny directives are somewhat different from previous examples. Here the Order directive tells Apache to process the Allow directive first and then the Deny directive. This enables the Deny directive to override anything done by the Allow directive. In this case there is no Allow directive, and the Deny directive denies all remote access to the .htaccess file.
In fact, this Deny directive applies to more than just the
.htaccess file. The tilde (~) on the Files line tells Apache to
interpret the filename as a regular expression. The regular
expression ^\.ht matches any
filename that begins with .ht.
This was done because users and administrators often start httpd configuration files with the string
.ht, e.g., a user password file
might be named .htpassword. Using a regular
expression as a filename on the Files line applies the access
controls to a wide range of possible files.
Use the Location directive to apply access controls at the document level. Where the Directory line has a directory name, the Location directive has a document name from a URL. The directives defined inside a Location container apply only to that document. In the following example, access controls are applied to the server-status document:
<Location /server-status>
SetHandler server-status
Order deny,allow
Deny from all
Allow from wrotethebook.com
</Location>
If the Apache server gets a request for www.wrotethebook.com/server-status, it applies these access controls. /server-status is the name of a document, not the name of a directory. In fact, this is a special document that shows the server status and is constructed by a special handler. The access controls make the server status available to everyone in our domain but deny it to all outsiders. The last section in this chapter shows how the server-status page is used to monitor a web server. But before we move on to that topic, we need to look at one final aspect of security—protecting the information the client sends to the server.
The security features described in the previous sections are all designed to protect information provided by the server. However, you are also responsible for protecting the security of your client’s data. If you want to run an electronic commerce business, you must use a secure server that protects your customers’ personal information, such as credit card numbers. Secure Apache servers use Secure Sockets Layer (SSL) to encrypt protected sessions.
SSL is both more powerful and more complex than the security features discussed so far. It is more powerful because it uses public key cryptography for strong authentication and to negotiate session encryption. When SSL is used, the exchange of data between the client and server is encrypted and protected.
SSL is also more complex because it uses public key cryptography. All encryption is complex, and public key encryption is particularly so. Chapter 12 describes how public key encryption works and, in particular, how the SSL protocol works. If you want this background information, read Chapter 12 before adding SSL to your Apache server.
The mod_ssl package adds SSL support to Apache. In turn, mod_ssl
depends on OpenSSL for encryption libraries, tools, and the underlying
SSL protocols. Many Linux systems and some Unix systems include
OpenSSL. Before installing mod_ssl, make sure OpenSSL is
installed on your system; if it isn’t, download the source code from http://www.openssl.org. Run the
config utility that comes with the
source code and then run make to
compile OpenSSL. Run make test and
make install to install it.
Once OpenSSL is installed, mod_ssl can be installed. Many Linux systems and some
Unix systems include mod_ssl as part of the basic Apache system. If
your system doesn’t, download the mod_ssl package from http://www.modssl.org. Recompile
Apache using the --with-ssl option
to incorporate the SSL extensions into Apache.[126]
The mod_ssl installation inserts various SSL configuration lines
into the sample Apache configuration, usually called
httpd.conf.default. These new lines are placed
inside IfDefine containers so that SSL support is an option that can
be invoked from the httpd command
line. Red Hat, which bundles mod_ssl into the basic system, provides a
good example of how this is done. Here are the IfDefine containers for
the mod_ssl LoadModule and AddModule directives from a Red Hat
system:
<IfDefine HAVE_SSL>
LoadModule ssl_module         modules/libssl.so
</IfDefine>
<IfDefine HAVE_SSL>
AddModule mod_ssl.c
</IfDefine>
The LoadModule and AddModule directives are used only if
HAVE_SSL is defined on the httpd
command line. The string “HAVE_SSL” is arbitrary; on another system,
the string might be “SSL”. All that matters is that the string matches
a value defined on the httpd
command line. For example:
# httpd -DHAVE_SSLThis command attempts to start an SSL Apache server on a Red Hat 7.2 system.
In addition to the containers for the LoadModule and AddModule directives, there is an IfDefine container that defines a special SSL server configuration. The container from the Red Hat configuration is shown here:
<IfDefine HAVE_SSL>
Listen 80
Listen 443
</IfDefine>
<IfDefine HAVE_SSL>
AddType application/x-x509-ca-cert .crt
AddType application/x-pkcs7-crl    .crl
</IfDefine>
<IfDefine HAVE_SSL>
<VirtualHost _default_:443>
ErrorLog logs/error_log
TransferLog logs/access_log
SSLEngine on
SSLCertificateFile /etc/httpd/conf/ssl.crt/server.crt
SSLCertificateKeyFile /etc/httpd/conf/ssl.key/server.key
<Files ~ "\.(cgi|shtml|phtml|php3?)$">
    SSLOptions +StdEnvVars
</Files>
<Directory "/var/www/cgi-bin">
    SSLOptions +StdEnvVars
</Directory>
SetEnvIf User-Agent ".*MSIE.*" \
         nokeepalive ssl-unclean-shutdown \
         downgrade-1.0 force-response-1.0
CustomLog logs/ssl_request_log \
          "%t %h %{SSL_PROTOCOL}x %{SSL_CIPHER}x '%r' %b"
</VirtualHost>
</IfDefine>
The two lines in the first IfDefine container tell the server to listen to port 443, as well as to the standard port 80. Port 443 is the port used by SSL. The two lines in the second IfDefine container map the file extensions .crt and .crl to specific MIME file types. The extensions .crt and .crl are both related to SSL certificates. More on certificates in a moment.
The bulk of the SSL server configuration is defined in a VirtualHost container. This virtual host configuration is invoked when a connection comes into the default server on port 443—the SSL port. A special log file is created to track SSL requests. ErrorLog, TransferLog, and CustomLog are directives we have seen before. Most of the other configuration directives are valid only when SSL is running:
- SSLEngine
Turns on SSL processing for this virtual host.
- SetEnvIf
Performs essentially the same function as the BrowserMatch directives described earlier. In this case, the SetEnvIf directive checks to see if the
User-Agent(the browser) is Microsoft Internet Explorer. If it is, thessl-unclean-shutdownoption lets Apache know that this browser will not properly shut down the connection and that keepalives should not be used with Internet Explorer.- SSLOptions
Sets special SSL protocol options. In the example, StdEnvVars are enabled for the /var/www/cgi-bin directory and for all CGI and SSI files. StdEnvVars are environment variables sent over the connection to the client. Retrieving these variables is time consuming for the server, so they are sent only when it is possible that the client could use them, as is the case when CGI scripts or SSI files are involved.
- SSLCertificateFile
Points to the file that contains the server’s public key.
- SSLCertificateKeyFile
Points to the file that contains the server’s private key.
Public key cryptography requires two encryption keys: a public key that is made available to all clients, and a private key that is kept secret. The public key is in a special format called a certificate . Before you can start SSL on your server, you must create these two keys.
OpenSSL provides the tools to create the public and private keys
required for SSL. The simplest of these is the Makefile found in the
ssl/certs directory,[127] which allows you to create certificates and keys with a
make command. Two different types
of arguments can be used with the make command to create an SSL certificate or
key. One type of argument uses the file extension to determine the
type of certificate or key created:
makename.keyCreates a private key and stores it in the file
name.key.makename.crtCreates a certificate containing a public key and stores it in the file
name.crt.makename.pemCreates a certificate and a key in the Privacy Enhanced Mail (PEM) format and stores it in the file
name.pem. In Chapter 12, thismakecommand is used to create the keys required for thestunnelprogram.makename.csrCreates a certificate signature request. A certificate can be digitally signed by a trusted agent, called a certificate authority (CA), who vouches for the authenticity of the public key contained in the certificate. More about this later in this section.
Keywords are the other type of argument that can be used with this Makefile. The keywords create certificates and keys that are intended solely for use with Apache:
makegenkeyCreates a private key for the Apache server. The key is stored in the file pointed to by the KEY variable in the Makefile.
makecertreqCreates a certificate signature request for the Apache server. The certificate signature request is stored in the file pointed to by the CSR variable in the Makefile.
maketestcertCreates a certificate for the Apache server. This certificate can be used to boot and test the SSL server. However, the certificate is not signed by a recognized CA and therefore is not acceptable for use on the Internet. The certificate is stored in the file pointed to by the CRT variable in the Makefile.
The /etc/httpd/conf directory on the Red Hat system has a link to the Makefile to make it easy to build the keys in the place where the httpd.conf file expects to find them. A look at the /etc/httpd/conf directory on a Red Hat system shows that the keys pointed to by SSLCertificateFile and SSLCertificateKeyFile already exist, even though you did not create them.
The Makefile uses the openssl
command to create the certificates and keys. The openssl command has a large and complex
syntax, so using the Makefile provides real benefit. However, you can
use the openssl command directly to
do things that are not available through the Makefile. For example, to
look at the contents of the certificate that Red Hat has placed in the
/etc/httpd/conf directory, enter the following
command:
# openssl x509 -noout -text -in ssl.crt/server.crt
Certificate:
    Data:
        Version: 3 (0x2)
        Serial Number: 0 (0x0)
        Signature Algorithm: md5WithRSAEncryption
        Issuer: C=--, ST=SomeState, L=SomeCity, O=SomeOrganization,
                OU=SomeOrganizationalUnit,
                CN=localhost.localdomain/Email=root@localhost.localdomain
        Validity
            Not Before: Jul 27 12:58:42 2001 GMT
            Not After : Jul 27 12:58:42 2002 GMT
        Subject: C=--, ST=SomeState, L=SomeCity, O=SomeOrganization,
                 OU=SomeOrganizationalUnit,
                 CN=localhost.localdomain/Email=root@localhost.localdomain
        Subject Public Key Info:
            Public Key Algorithm: rsaEncryption
            RSA Public Key: (1024 bit)
                Modulus (1024 bit):
                    00:a3:e7:ef:ba:71:2a:52:ff:d9:df:da:94:75:59:
                    07:f9:49:4b:1c:d0:67:b2:da:bd:7b:0b:64:63:93:
                    50:3d:a1:02:e3:05:3b:8e:e6:25:06:a3:d2:0f:75:
                    0a:85:71:66:d0:ce:f9:8b:b0:73:2f:fe:90:75:ad:
                    d6:28:77:b0:27:54:81:ce:3b:88:38:88:e7:eb:d6:
                    e9:a0:dd:26:79:aa:43:31:29:08:fe:f8:fa:90:d9:
                    90:ed:80:96:91:53:9d:88:a4:24:0a:d0:21:7d:5d:
                    53:9f:77:a1:2b:4f:62:26:13:57:7f:de:9b:40:33:
                    c3:9c:33:d4:25:1d:a3:e2:47
                Exponent: 65537 (0x10001)
        X509v3 extensions:
            X509v3 Subject Key Identifier:
                55:E9:ED:C1:BF:1A:D4:F8:C2:78:6E:7A:2C:D4:9C:AC:7B:CD:D2
            X509v3 Authority Key Identifier:
                keyid:55:E9:ED:C1:BF:1A:D4:6E:7A:2C:D4:DD:9C:AC:7B:CD:D2
                DirName:/C=-/ST=SomeState/L=SomeCity/O=SomeOrganization/
                       OU=SomeOrganizationalUnit/CN=localhost.localdomain/
                       Email=root@localhost.localdomain
                serial:00
            X509v3 Basic Constraints:
                CA:TRUE
    Signature Algorithm: md5WithRSAEncryption
        76:78:77:f0:a2:19:3b:39:5f:2a:bd:d0:42:da:85:6e:c2:0c:
        5e:80:40:9c:a8:65:da:bf:38:2b:f0:d6:aa:30:72:fb:d3:1d:
        ce:cd:19:22:fb:b3:cc:07:ce:cc:9b:b6:38:02:7a:21:72:7c:
        26:07:cc:c9:e0:36:4f:2f:23:c9:08:f7:d4:c1:57:2f:3e:5c:
        d5:74:70:c6:02:df:1a:62:72:97:74:0a:a6:db:e0:9d:c9:3d:
        8e:6b:18:b1:88:93:68:48:c3:a3:27:99:67:6f:f7:89:09:52:
        3a:a3:fb:20:52:b0:03:06:22:dd:2f:d2:46:4e:42:f2:1c:f0:
        f1:1a
As you can see, there is a lot of information in a certificate. But only a few pieces of it are needed to determine whether this is a valid certificate for our server:
IssuerThe Issuer is the distinguished name of the CA that issued and signed this certificate. A distinguished name is a name format designed to uniquely identify an organization. It’s clear in this certificate that the name of the Issuer is just an example, not a real organization.
SubjectThe Subject is the distinguished name of the organization to which this certificate was issued. In our case, it should be the name of our organization. Again, the Subject in this certificate is just an example.
ValidityThe Validity is the time frame in which this certificate is valid. Here, the certificate is valid for a year. Because the dates are valid, this certificate can be used to test SSL.
To test that the SSL server is indeed running, use a browser to
attach to the local server. However, instead of starting the URL with
http://, start it with https://. https connects to port 443, which is the SSL
port. The browser responds by warning you that the server has an
invalid certificate, as shown in Figure 11-4.
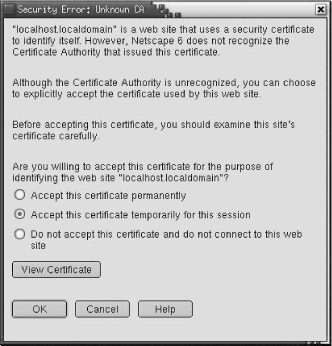
Clicking on View Certificate shows some of the same certificate information we just saw. You can accept the certificate for this session and connect to the “secure document.” In this case, the secure document is just a test page because we have not yet stored any real secure documents on the system.
The server is up and running, but it can’t be used by external
customers until we get a valid signed certificate. Use make certreq to create a certificate signature
request specific to your server. Here is an example:
# cd /etc/httpd/conf
# make certreq
umask 77 ; \
/usr/bin/openssl req -new -key /etc/httpd/conf/ssl.key/server.key -out /etc/http
d/conf/ssl.csr/server.csr
Using configuration from /usr/share/ssl/openssl.cnf
You are about to be asked to enter information that will be incorporated
into your certificate request.
What you are about to enter is what is called a Distinguished Name or a DN.
There are quite a few fields but you can leave some blank.
For some fields there will be a default value.
If you enter '.', the field will be left blank.
-----
Country Name (2 letter code) [AU]:US
State or Province Name (full name) [Some-State]:Maryland
Locality Name (eg, city) []:Gaithersburg
Organization Name (eg, company) [Internet Widgits Ltd]:WroteThebook.com
Organizational Unit Name (eg, section) []:Headquarters
Common Name (eg, your name or hostname)[]:crab.wrotethebook.com
Email Address []:alana@wrotethebook.com

Please enter the following 'extra' attributes
to be sent with your certificate request
A challenge password []:
An optional company name []:
The freshly created request can be examined using the openssl command. Notice that this request
has a valid Subject containing a distinguished name that identifies
our server. However, there is no Issuer. This request needs to be
signed by a recognized CA to become a useful certificate.
# openssl req -noout -text -in server.csr
Using configuration from /usr/share/ssl/openssl.cnf
Certificate Request:
    Data:
        Version: 0 (0x0)
        Subject: C=US, ST=Maryland, L=Gaithersburg, O=WroteThebook.com,
                 OU=Headquarters,
                 CN=crab.wrotethebook.com/Email=alana@wrotethebook.com
        Subject Public Key Info:
            Public Key Algorithm: rsaEncryption
            RSA Public Key: (1024 bit)
                Modulus (1024 bit):
                    00:a3:e7:ef:ba:71:2a:52:ff:d9:df:da:94:75:59:
                    07:f9:49:4b:1c:d0:67:b2:da:bd:7b:0b:64:63:93:
                    50:3d:a1:02:e3:05:3b:8e:e6:25:06:a3:d2:0f:75:
                    0a:85:71:66:d0:ce:f9:8b:b0:73:2f:fe:90:75:ad:
                    d6:28:77:b0:27:54:81:ce:3b:88:38:88:e7:eb:d6:
                    e9:a0:dd:26:79:aa:43:31:29:08:fe:f8:fa:90:d9:
                    90:ed:80:96:91:53:9d:88:a4:24:0a:d0:21:7d:5d:
                    53:9f:77:a1:2b:4f:62:26:13:57:7f:de:9b:40:33:
                    c3:9c:33:d4:25:1d:a3:e2:47
                Exponent: 65537 (0x10001)
        Attributes:
            a0:00
    Signature Algorithm: md5WithRSAEncryption
        3f:c2:34:c1:1f:21:d7:93:5b:c0:90:c5:c9:5d:10:cd:68:1c:
        7d:90:7c:6a:6a:99:2f:f8:51:51:69:9b:a4:6c:80:b9:02:91:
        f7:bd:29:5e:a6:4d:a7:fc:c2:e2:39:45:1d:6a:36:1f:91:93:
        77:5b:51:ad:59:e1:75:63:4e:84:7b:be:1d:ae:cb:52:1a:7c:
        90:e3:76:76:1e:52:fa:b9:86:ab:59:b7:17:08:68:26:e6:d4:
        ef:e6:17:30:b6:1c:95:c9:fc:bf:21:ec:63:81:be:47:09:c7:
        67:fc:73:66:98:26:5e:53:ed:41:c5:97:a5:55:1d:95:8f:0b:
        22:0b
CAs are commercial, for-profit businesses. Fees and forms, as well as the CSR, are required before you can get your certificate signed. Your web browser contains a list of recognized CAs. On a Netscape 6.1 browser, you can view this list in the Certificate Manager in the Preferences, as shown in Figure 11-5. All CAs have web sites that provide the details of the cost and the application process.
Although certificates signed by a recognized CA are the most
widely used, it is possible to create a self-signed certificate.
However, this has limited utility. As we saw in Figure 11-4, a certificate that is
not signed by a recognized CA must be manually accepted by the client.
Therefore, self-signed certificates can be used only if you have a
small client base. Use the openssl
command to sign the certificate yourself:
# openssl req -x509 -key ssl.key/server.key \
               > -in ssl.csr/server.csr -out ssl.crt/server.crt
Examining the newly created server.crt file
with openssl shows that the Issuer
and the Subject contain the same distinguished name. But this time,
the name is the valid name of our server.
Despite the enormous number of options found in the httpd.conf configuration file, configuration is not the biggest task you undertake when you run a web server. Configuration usually requires no more than adjusting a few options when the server is first installed; however, monitoring your server’s usage and performance and ensuring its reliability and security are daily tasks. The Apache server provides some tools to simplify these tasks.
Apache provides tools to monitor the status of the server, and logs that keep a history of how the system is used and how it performs over time. The earlier discussion of logging configuration touched on these issues. We even looked at a technique for observing log entries in real time.
A better way to monitor your server in real time is the
server-status monitor. This monitor must either be compiled in to
httpd or installed as a dynamically
loadable module. These two lines from the Solaris
httpd.conf configuration file install the
loadable module:
LoadModule status_module      modules/mod_status.so
AddModule mod_status.c
To get the maximum information from the server-status display, add the ExtendedStatus option to your httpd.conf file:
ExtendedStatus on
Enable the monitor in the httpd.conf file by inserting the Location /server-status container. The Solaris httpd.conf file has the Location /server-status container predefined, but it is commented out of the configuration. To enable the monitor, uncomment the lines and edit the Allow directive to specify the hosts that will be allowed to monitor the server. For example:
<Location /server-status>
SetHandler server-status
Order deny,allow
Deny from all
Allow from wrotethebook.com
</Location>
Once the monitor is installed and enabled, access it from your browser. For our sample system, we use the URL http://www.wrotethebook.com/server-status/?refresh=20. The refresh value is not required, but using it will cause the status display to update automatically. In this example, we are asking for a status update every 20 seconds. Figure 11-6 shows the status screen for our test server.
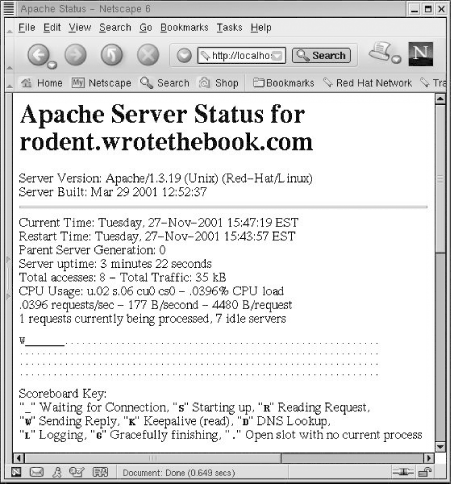
Monitoring tells you about the real-time status of your server. Logging provides information about how your server is used over time. Together, logging and monitoring can help you maintain a healthy, useful web service.
Web servers are an essential part of any organization’s network,
and the Apache web server is an excellent choice. It runs as the HTTP
daemon (httpd), which is configured
in the httpd.conf file.
The Apache software on Linux and Solaris systems comes preconfigured and ready to run. Review the configuration and adjust parameters such as ServerAdmin, ServerName, and DocumentRoot to make sure they are exactly what you want for your server.
Use the monitoring tools and log files to closely observe the usage and performance of your system. Keep tight control on Common Gateway Interface (CGI) scripts and Server Side Includes (SSI) to keep your server secure. Use SSL to secure the confidential data coming from your clients.
This chapter concludes our study of TCP/IP server configuration, our last configuration task. In the next chapter, we begin to look at the ongoing tasks that are part of running a network once it has been installed and configured. We begin that discussion with security.
[124] The DynaWeb (dwhttpd)
daemon, which is used to display the
AnswerBook, may also appear in the ps list on Solaris systems that run an
AnswerBook2 server.
[125] The http_core.c module is an integrated part of Apache. It is not installed with LoadModule and AddModule commands.
[126] Linux Apache Web Server Administration is an excellent reference on compiling Apache.
[127] ssl/certs is relative to the path where OpenSSL is installed on your system. On our Red Hat system, the full path is /usr/share/ssl/certs.