Table of Contents for
Electron in Action
 Electron in Action
Published by
Manning Publications, 2018
Electron in Action
Published by
Manning Publications, 2018
- Cover
- Electron in Action
- Copyright
- Electron in Action
- Brief Table of Contents
- Table of Contents
- Preface
- Acknowledgments
- About this book
- About the cover illustration
- Part 1. Getting started with Electron
- Chapter 1. Introducing Electron
- Chapter 2. Your first Electron application
- Part 2. Building cross-platform applications with Electron
- Chapter 3. Building a notes application
- Chapter 4. Using native file dialog boxes and facilitating interprocess communication
- Chapter 5. Working with multiple windows
- Chapter 6. Working with files
- Chapter 7. Building application and context menus
- Chapter 8. Further operating system integration and dynamically enabling menu items
- Chapter 9. Introducing the tray module
- Chapter 10. Building applications with the menubar library
- Chapter 11. Using transpilers and frameworks
- Chapter 12. Persisting user data and using native Node.js modules
- Chapter 13. Testing applications with Spectron
- Part 3. Deploying Electron applications
- Chapter 14. Building applications for deployment
- Chapter 15. Releasing and updating applications
- Chapter 16. Distributing your application through the Mac App Store
- Code from the end of chapter 6
- Index
- List of Figures
- List of Tables
- List of Listings
Chapter 10. Building applications with the menubar library
- Creating an application with the menubar library
- Sending HTTP requests with the request library
- Creating clickable notifications
- Adding secondary menus to tray instances
In the previous chapter, we created an application that lived in the menu bar on macOS or the system tray on Windows. Out of the box, Electron’s tray module allows you to set a menu to display when the user clicks the tray icon. This is the same type of menu used in the application and context menus that we built in Fire Sale. This menu also has the same limitations: it is limited to text, is hard to modify, and provides limited functionality.
Being able to build applications that live in the system tray or menu bar allows us to build entire classes of applications that we couldn’t build in the browser. It’s unfortunate that we have these restrictions, but—luckily—we can work around them. In this chapter, we explore a clever way to get around the limitations of the tray module using a third-party library conveniently called menubar.
menubar is an abstraction built on a set of core Electron modules that we’ve used previously in the book. A high-level explanation is that it creates an empty tray module. When the user clicks the icon, menubar shows a frameless, correctly positioned BrowserWindow instance beneath the icon, which creates the illusion that it’s attached to the icon. menubar also provides a cute cat icon by default.
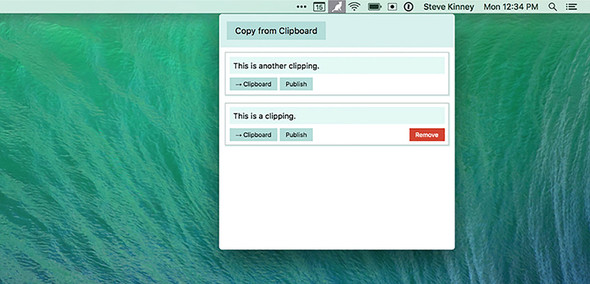
In this chapter, we’ll rebuild Clipmaster from the ground up into a completely new application. This time it has a much more pleasant UI, shown in figure 10.1, compared to its predecessor. We add the ability to remove a clipping from the list or publish it to the web using an example API so that it can be shared publicly. Finally, we add some interactivity to our notifications and global shortcuts to trigger the application’s functionality using predetermined keystrokes.
Figure 10.1. This is what the application will look like at the end of the chapter.
10.1. Starting an application with menubar
The menubar library provides a function that allows you to create new menu bar applications. It uses the app module to control the lifecycle of the application, an instance from the tray module to create the icon in the operating system’s menu bar or system tray, and a BrowserWindow instance for displaying the UI (as shown in figure 10.2). menubar uses another third-party library called electron-positioner to correctly position the BrowserWindow instance under the icon. It also provides methods for hiding and showing the window programmatically.
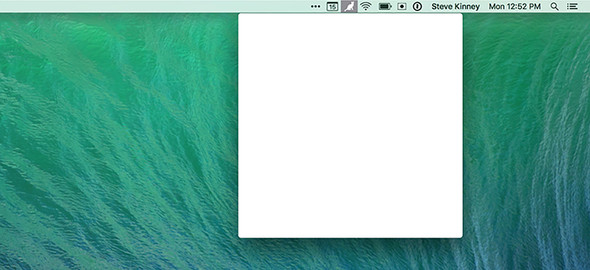
Figure 10.2. By default, menubar creates a browser window but does not load an HTML document into it.
A boilerplate for Clipmaster 9000 is available on Github (https://github.com/electron-in-action/clipmaster-9000). You can start on the master branch and code along or check out the completed-example branch to see the code in its state at the end of the chapter.
Listing 10.1. Getting started with menubar: ./app/main.js
const Menubar = require('menubar');

const menubar = Menubar();                 1

menubar.on('ready', () => {                2
  console.log('Application is ready.');
});
- 1 Instead of requiring the app module from Electron, we create an instance of menubar.
- 2 menubar wraps up several common Electron modules. It fires its ready event when the app module fires its ready event.
In listing 10.1, we don’t require the app module from Electron. menubar does that for us when we call the function and create the instance. You can also see that we’re listening for the ready event on menubar instead of app. menubar’s event is waiting on getting everything else set up, in addition to listening to the app’s ready event.
You can start the simple application using the npm start command. If all goes well, you should see a message in your terminal as well as a small cat in either your menu bar or system tray, depending on which platform the application is running on. If you click the icon, you see an empty browser window. menubar created a BrowserWindow instance on our behalf, but it did not load an HTML document into the window.
To get a UI in that window, we need to do a few things shown in the listing 10.2. First, we need to create an HTML document with some basic markup. Second, we need to define a CSS to style the UI. Third, we need the HTML document to load the code for our UI from renderer.js.
Listing 10.2. The markup for the UI: ./app/index.html
<!DOCTYPE html>
<html>
  <head>
    <meta charset="UTF-8">
    <meta name="viewport" content="width=device-width,initial-scale=1">
    <meta http-equiv="Content-Security-Policy"
          content="
            default-src 'self';
            script-src 'self' 'unsafe-inline';
            connect-src https://cliphub.glitch.com/*
          "
    >
    <!--
      Change the URL in the line above if you fork the back end server.
    -->
    <title>Clipmaster 9000</title>
    <link rel="stylesheet" href="style.css" type="text/css">
  </head>
  <body>
    <div class="container">
      <section class="controls">                                       1
        <button id="copy-from-clipboard">Copy from Clipboard</button>
      </section>

      <section class="content">
        <div id="clippings-list"></div>                                2
      </section>
    </div>
    <script>
      require('./renderer');                                           3
    </script>
  </body>
</html>
- 1 This element contains the Copy from Clipboard button, as seen in figure 10.1.
- 2 This element contains all the clippings that the user has saved using the application.
- 3 Requires the JavaScript for the renderer process.
I included the stylesheet in the repository, but let’s highlight some of the interesting bits next. I use one or two Electron-specific techniques in the CSS to give the application a more native feel; renderer.js starts out completely empty, but we add to it as the chapter goes on.
Listing 10.3. Styling for the UI: ./app/style.css
// ...Omitted for brevity...

body > div {
  height: 100%;
  overflow: scroll;
  -webkit-overflow-scrolling: touch;         1
}

.container {
  position: absolute;
  top: 0;
  bottom: 0;
  left: 0;
  right: 0;
  overflow: auto;
}

textarea, input, div, button { outline: none; }

// ...Omitted for brevity...

.clipping-text::-webkit-scrollbar {
  display: none;                            2
}

.clipping-controls {
  margin-top: 0.5em;
}

// ...Omitted for brevity...
- 1 To give Clipmaster 9000 the feel of a native application on macOS, we turn on momentum scrolling. You can read more about this on CSS Tricks (http://mng.bz/i82A).
- 2 We don’t want to show a scroll bar that might appear on top of the shadow of a clipping.
With these files in place, we now have the foundation for building our application. menubar does not create a window immediately. Instead, it creates a BrowserWindow instance the first time the user clicks the icon and triggers the window. This behavior comes back to bite us later in the chapter when we try to manipulate the DOM before it has been loaded, but let’s follow the happy path for now by listening for an event that is fired after the window has been created and subsequently loading the HTML in the newly created window.
Listing 10.4. Loading the HTML page after a window has been created: ./app/main.js
menubar.on('after-create-window', () => {                     1
  menubar.window.loadURL(`file://${__dirname}/index.html`);
});
- 1 The after-create-window event is fired after a window has been created. By default, menubar does not create a window when it first loads. It instead waits until the menu bar or tray icon is clicked and needs to show a window.
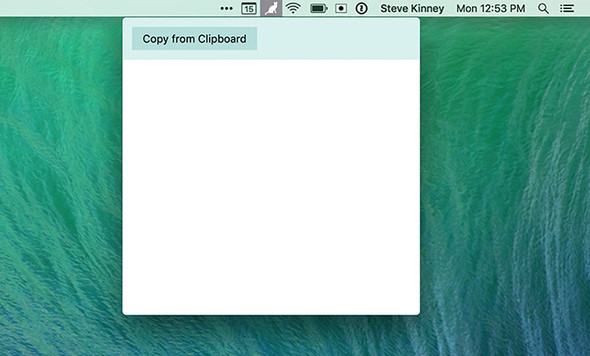
Your application at this stage should look like figure 10.3. At this point, the button should not work, because we have not written any JavaScript for the frontend.
Figure 10.3. The basic UI for Clipmaster 9000 is in place.
10.2. Adding clippings to the UI
We have a UI for our application, but it doesn’t do anything yet. Just like in chapter 9, we first want to allow the user to add clippings to the application. This is slightly more complicated than it was in the previous chapter because we must generate DOM nodes for the clipping. We need to add this new node to the node in our Markup that contains the list of clippings. Finally, we need to add an event listener to the button to call the two methods we just described. Let’s start by querying and caching two of the selectors that we use frequently as we move through the chapter.
Listing 10.5. Querying for and caching frequently used selectors: ./app/renderer.js
const clippingsList = document.getElementById('clippings-list');
const copyFromClipboardButton = document.getElementById(
  'copy-from-clipboard'
);
Creating the element is straightforward, with one important catch. In listing 10.6, we create an article element and add the .clippings-list-item class to it so that it’s styled appropriately. Next, we set its inner content. We query for the node in charge of displaying the text of the clipping and set its inner text accordingly. Finally, we return our new element so that it can be added to the DOM.
Listing 10.6. Creating an element for the UI based on the clipping’s text: ./app/renderer.js
const createClippingElement = (clippingText) => {
const clippingElement = document.createElement('article'); 1
clippingElement.classList.add('clippings-list-item');
clippingElement.innerHTML = ` 2
<div class="clipping-text" disabled="true"></div>
<div class="clipping-controls">
<button class="copy-clipping">→ Clipboard</button>
<button class="publish-clipping">Publish</button>
<button class="remove-clipping">Remove</button>
</div>
`;
clippingElement.querySelector('.clipping-text').innerText = clippingText;3
return clippingElement; 4
};
- 1 Creates a new element for the clipping
- 2 Sets the inner HTML of the new element
- 3 Finds the node where the clipping text should go, and sets its content to the text of the clipping
- 4 Returns the new element
You might be wondering why I didn’t use interpolation with the template literal when setting the inner HTML of the element. We’re not setting the content of the new element using innerHTML, because it does not escape the input and render it as HTML. If a user had copied HTML to the clipboard, it would render the Markup, which is not what we want. Instead we use innerText to set the content of that node, which escapes any HTML and renders it as the user might expect.
We can now take an arbitrary string of text and return the element needed for the UI. The next step is to get the text to feed this function, take the result, and add it to the page.
Listing 10.7. Reading from clipboard and adding a clipping to list: ./app/renderer.js
const { clipboard } = require('electron');                              1

const addClippingToList = () => {
  const clippingText = clipboard.readText();                            2
  const clippingElement = createClippingElement(clippingText);          3
  clippingsList.prepend(clippingElement);                               4
};

copyFromClipboardButton.addEventListener('click', addClippingToList);   5
- 1 Requires the clipboard module from Electron
- 2 Uses Electron’s clipboard module to read text from the clipboard
- 3 Creates a DOM node to display the clipping in the UI
- 4 Adds it to the top of the list of clippings in the UI
- 5 Triggers addClippingToList() whenever the user clicks the Copy from Clipboard button in the UI.
Reading from the system’s clipboard is as easy as requiring the clipboard module from Electron and calling its readText() method. With the clipping text, we create the element and then add it to the top of the list of clippings. Last, we add an event listener to the Copy from Clipboard button that triggers this entire process.
10.3. Working with clippings in the application
Users can now save clippings to Clipmaster 9000, but that is only half the battle. What if they want to write the contents of a clipping back to the clipboard? Technically, because this new version of the application has a UI, they could select the text and copy it again, but we can do better than that. In addition, Clipmaster 9000 will be an improvement over the old version by letting users remove clippings they no longer want to store and publish them on the web to share publicly if they desire.
10.3.1. Preventing memory leaks using event delegation
The most obvious approach to implementing the functionality described in the previous section would be to add an event listener to each button that calls the appropriate function. When creating a new element for each clipping using createClipping-Element(), we could add these event listeners.
The problem here is that if a user removes a clipping, we also need to remove these event listeners. Failing to do so would cause a memory leak, because the event listener and the DOM element would still reference each other. It’s much easier to take advantage of the fact that events bubble up the DOM.
If you click a button, the browser checks that element for any event listeners for a click event. Next it checks that element’s parent. It will continue this process until it gets to the top of the DOM tree. By adding an event listener to the clippingsList, we can catch an event that originated for a particular clipping. Because the list itself will never be removed from the DOM, we don’t need to worry about removing event listeners whenever a clipping is removed from the UI.
All event objects in the DOM come with a target property, which contains a reference to the element that triggered the event. We look at this to figure out which button was clicked on which clipping and then take the appropriate action.
Listing 10.8. Setting up an event listener for each clipping’s buttons: ./app/renderer.js
clippingsList.addEventListener('click', (event) => {                   1
  const hasClass = className =>
  event.target.classList.contains(className);                          2

  if (hasClass('remove-clipping')) console.log('Remove clipping');     3
  if (hasClass('copy-clipping')) console.log('Copy clipping');
  if (hasClass('publish-clipping')) console.log('Publish clipping');
});
- 1 Adds an event listener to the list of clippings. Click events from individual clippings bubble up the list.
- 2 Creates a helper function that determines whether the target element has a given class.
- 3 Right now, we’re going to determine what kind of button was clicked and log an appropriate message to the console. The functionality will be added as the chapter progresses.
We check the element for three different classes, so it makes sense to create a small helper method called hasClass() to aid in this process. Based on the class, we need to call different functions. We haven’t written those functions yet, so we’ll simply log to the console for now to confirm that everything works as it should.
10.3.2. Removing a clipping
To remove a clipping, we navigate up to its grandparent, which is the element for the entire clipping.
Listing 10.9. Removing a clipping from the DOM: ./app/renderer.js
const removeClipping = (target) => {
  target.parentNode.parentNode.remove();         1
};
- 1 Removes the entire clipping from the DOM. This effectively removes it from memory as well.
When we have a reference to the element for the clipping, removing it from the page is as simple as calling the element’s remove() method.
Listing 10.10. Configuring the event listener to remove clippings: ./app/renderer.js
clippingsList.addEventListener('click', (event) => {
  const hasClass = className => event.target.classList.contains(className);

  if (hasClass('remove-clipping')) removeClipping(event.target);      1
  if (hasClass('copy-clipping')) console.log('Copy clipping');
  if (hasClass('publish-clipping')) console.log('Publish clipping');
});
- 1 Replaces the log with the new function to remove the clipping.
Instead of logging to the console whenever the user clicks a clipping’s Remove button, we call removeClipping() and pass it a reference to the button. That works, but we can do a little bit better. Looking ahead, it’s safe to assume that we’ll need to get either a reference to the clipping element or its text. It makes sense to pull these out into their own functions.
Listing 10.11. Setting up helper methods for working with clippings: ./app/renderer.js
const getButtonParent = ({ target }) => {                               1
  return target.parentNode.parentNode;
};

const getClippingText = (clippingListItem) => {                         2
  return clippingListItem.querySelector('.clipping-text').innerText;
};
- 1 Creates an abstraction to navigate to the DOM node that contains the entire clipping.
- 2 Creates an abstraction for traversing the clipping and finding the text that was originally saved by the user.
getButtonParent() can navigate to the parent from any of the three buttons. Although simple, this function is useful in case we ever update the Markup. You don’t want to have to change the code for traversing up the DOM from a button to the clipping element three times. From the parent, we need to get the text of the clipping because we’re effectively using the DOM as our data store. Luckily, traversing down the DOM is easier than traversing up, and getClippingText() can take advantage of the querySelector() method. We can now use this method in our event listener.
Listing 10.12. Configuring the event listener to display the clipping’s text: ./app/renderer.js
clippingsList.addEventListener('click', (event) => {
  const hasClass = className =>
    event.target.classList.contains(className);

  const clippingListItem = getButtonParent(event);                     1

  if (hasClass('remove-clipping')) removeClipping(clippingListItem);   2
  if (hasClass('copy-clipping')) console.log('Copy clipping',
 getClippingText(clippingListItem));
  if (hasClass('publish-clipping')) console.log('Publish clipping',
 getClippingText(clippingListItem));;
});
getClippingText(clippingListItem));
if (hasClass('publish-clipping')) console.log('Publish clipping',
getClippingText(clippingListItem));;
});
- 1 Gets the containing DOM node at the very beginning instead of within each function
- 2 Passes the clipping element to removeClipping() instead of the event
In the previous listing, we immediately get a reference to the clipping element because we’ll need it in every case. Now that getting the clipping text is easy, let’s update our console logs to include the clipping text as well to verify that we’ve implemented this functionality correctly. removeClipping() can now get a lot simpler as well. It’s arguable that we don’t need a function for this at all, but it’s conceivable that we might want to add more functionality later. As a result, it makes sense to leave it for now.
Listing 10.13. Refactoring the removeClipping() function: ./app/renderer.js
const removeClipping = (target) => {
  target.remove();                       1
};
- 1 Refactors the removeClipping() function to use the element instead of the event’s target node.
10.3.3. Writing to the clipboard
Not only did we implement the ability to write to the clipboard in the previous chapter, we’ve already laid a lot of the groundwork in this chapter to make implementing this feature easy. The first thing that we need is a function that handles writing the text of the clipping to the clipboard.
Listing 10.14. Creating a function to write a clipping to the clipboard: ./app/renderer.js
const writeToClipboard = (clippingText) => {         1
  clipboard.writeText(clippingText);
};
- 1 Creates a function that takes care of writing text to the clipboard. This is simple now, but we add more to it later in the chapter.
We add more to this function later in the chapter, so it makes sense to keep it as a function instead of just adding inline in our event listener. The next step is to replace the console log in the event listener with this new function and pass the function the text of the clipping that was selected by the user.
Listing 10.15. Adding writeToClipboard() to the event listener: ./app/renderer.js
clippingsList.addEventListener('click', event => {
  const hasClass = className => event.target.classList.contains(className);

  const clippingListItem = getButtonParent(event);

  if (hasClass('remove-clipping')) removeClipping(clippingListItem);
  if (hasClass('copy-clipping'))
    writeToClipboard(getClippingText(clippingListItem));                   1
  if (hasClass('publish-clipping'))
    console.log('Publish Clipping', getClippingText(clippingListItem));
});
- 1 Sets the Write to Clipboard button to call our new functionality
10.4. Publishing clippings
We now have the core functionality that any self-respecting application that calls itself Clipmaster 9000 would need to do its job. It’s time to start going for extra credit. Let’s implement the ability to publish clippings to an example API, as shown in figure 10.4. We cannot do this in a browser for the same security reasons we discussed in chapter 2. In addition, we use a Node library that would not normally work in the browser to send our requests to the API.
Figure 10.4. A published clipping on the ClipHub service
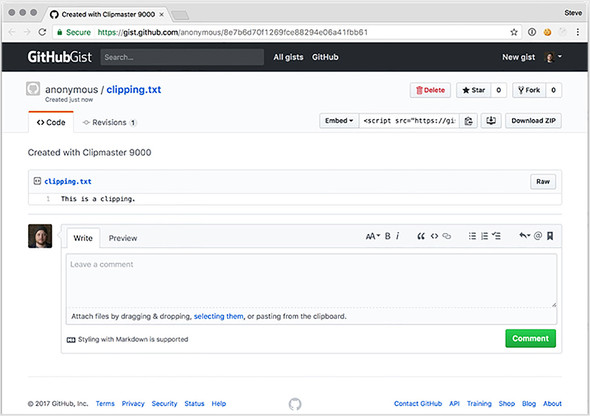
In the name of focus, we’ll take a few shortcuts. This is a deliberatively simple API—it stores the clippings in memory. All of the clippings will be cleared out periodically. The source code for the server can be found at https://glitch.com/~cliphub.
10.4.1. Setting up request
request is another popular, well-named library that makes it easy to perform HTTP requests to remote servers. request allows us to set defaults for every request that it makes. For this application, we send all our requests to the same API endpoint, so it makes sense to set that as a default. We will also create a custom user agent string that will differentiate Clipmaster from an ordinary browser.
In this section, we set up request to make requests to the ClipHub API, format our clippings so that the ClipHub API will accept those requests, and then set up our UI to make the requests.
Listing 10.16. Requiring and configuring default parameters for request: ./app/renderer.js
const request = require('request').defaults({      1
  url: 'https://cliphub.glitch.me/clippings',
  headers: { 'User-Agent': 'Clipmaster 9000' },    2
  json: true,                                      3
});
- 1 request allows you to set default parameters for every HTTP request
- 2 Normally, the browser sets the user agent string. Because we are using a library, we can set our own user agent.
- 3 When set to true, request will automatically parse and stringify JSON on our behalf.
Now we can format the text of a clipping for the API and send an HTTP request to the API. The next step is to tie these two functions together and show the user whether the request was successful, along with the URL of the clipping on ClipHub if it was successful.
Listing 10.17. Creating a function to publish a clipping to ClipHub’s API: ./app/renderer.js
const publishClipping = (clipping) => {
  request.post({ json: { clipping } }), (error, response, body) => {    1
    if (error) { return alert(JSON.parse(error).message); }             2

    const url = body.url;                                               3

    alert(url);                                                         4
    clipboard.writeText(url);                                           5
  });
};
- 1 Formats the clipping text and sends it via a POST request to the ClipHub API.
- 2 If there is an error for some reason, we display an alert to the user.
- 3 Finds the URL of the published clipping.
- 4 Displays it to the user via an alert.
- 5 Writes it to the clipboard.
request.post() sends a POST request to a URL. We set the default URL earlier, so there is no need to specify it now. request.post() takes two arguments: the data we want to send and a callback that is invoked when we hear back from the server. request passes three arguments to the callback: an error object in the event the request is not successful, the full HTTP response, and the body of the response. If the request was successful, error is null.
If the request is successful, we get the url property, which contains the URL for our new published clipping. For now, we use an alert to display the URL. We also write it to the clipboard so that the user can paste it into the address bar of their favorite web browser. With the code for this feature in place, the last thing to do is call it when the user clicks the Publish button on a clipping.
Listing 10.18. Adding publishClipping() to the event listener: ./app/renderer.js
clippingsList.addEventListener('click', (event) => {
  const hasClass = className => event.target.classList.contains(className);

     const clippingListItem = getButtonParent(event);

  if (hasClass('remove-clipping')) removeClipping(clippingListItem);
  if (hasClass('copy-clipping'))
     writeToClipboard(getClippingText(clippingListItem));
  if (hasClass('publish-clipping'))
     publishClipping(getClippingText(clippingListItem));     1
});
- 1 Correctly sets up the Publish Clipping button.
In this listing, we used a technique similar to writing the clipping’s text to the clipboard. The only difference is that we swap out writeToClipboard() in favor of publish-Clipping().
10.5. Displaying notifications and registering global shortcuts
We let the user know that something has happened in Clipmaster in various ways. We silently write to the clipboard without informing the user as to whether the action ended in success. When publishing we use an alert that locks up the application until the user dismisses it.
Later in this chapter, we implement global shortcuts that allow the user to trigger the application’s functionality without having it open. In this situation, having useful notifications is even more important. Displaying these notifications is simple because we do all the heavy lifting in the renderer process and don’t have to worry about IPC. With that in mind, we look at how to add event handlers to our notifications to add functionality that wasn’t present in the previous chapter.
Let’s start by tackling the alert that pops up whenever the user publishes a clipping. In its place, we display one of two notifications, shown in listing 10.19: that an error occurred with the message received from the server, or that the request was successful with the URL of the newly published clipping on ClipHub. If the request was successful, we add an event handler to the notification that opens ClipHub in their default browser when the user clicks the notification.
Listing 10.19. Setting up notifications when publishing a clipping: ./app/renderer.js
const { clipboard, shell } = require('electron');

// Code omitted for clarity...

const publishClipping = (clippingText) => {
  request.post({ json: { clipping } }), (error, response, body) => {
    if (error) {                                                      1
      return new Notification('Error Publishing Your Clipping', {
        body: JSON.parse(error).message
      });
    }

    const url = body.url;
    const notification = new Notification(                            2
      'Your Clipping Has Been Published',
      { body: `Click to open ${url} in your browser.` }
    );

    notification.onclick = () => { shell.openExternal(url); };        3

    clipboard.writeText(url);
  };
};
- 1 Creates a notification in the event there is an error
- 2 Creates a notification when the clipping is successfully published
- 3 If the user clicks the notification, takes them to the published clipping.
To open a URL in the user’s default browser, we need to pull in the shell module from Electron. We’ll set the onclick method of the notification to an anonymous function that is triggered when the user clicks the notification.
10.5.1. Registering global shortcuts
Asking the user to take their hand off the keyboard and navigate to a small icon in the menu bar or system tray isn’t always optimal. They’re likely typing when they want to create a clipping, and they want the convenience of having a key combination that they can press from anywhere in the operating system to trigger a command inside Clipmaster 9000.
If you remember from the previous chapter, we must register global shortcuts in the main process. In chapter 9, we implemented most of the application’s functionality in the main process, and we could call functions directly. In this chapter, the opposite is true, and we need to set up some IPC. In the following listing, let’s start by registering a shortcut to create a new clipping. We start by having it log to the console for now. In the next step, we implement its functionality.
Listing 10.20. Setting up a simple global shortcut: ./app/main.js
const { globalShortcut } = require('electron');                           1
const Menubar = require('menubar');

const menubar = Menubar();

menubar.on('ready', function() {
  console.log('Application is ready.');

  const createClipping = globalShortcut.register('CommandOrControl+!', ()
      => {
    console.log('This will eventually trigger creating a new clipping.');
  });                                                                     2

  if (!createClipping) {
    console.error('Registration failed', 'createClipping');
  }                                                                       3
});

menubar.on('after-create-window', () => {
  menubar.window.loadURL(`file://${__dirname}/index.html`);
});
- 1 Requires the globalShortcut module from Electron
- 2 Creates a global shortcut that eventually creates a new function
- 3 If registering the global shortcut fails, logs an error to the console
This is similar to what we did in the previous chapter. The important difference is that we’re storing all the clippings in the DOM in the renderer process. As a result, we need to communicate with the renderer process to create the clipping. In Fire Sale, we kept a reference to each window that we created. menubar created a browser window on our behalf and stored it in its window property. Let’s update our global shortcut to send a message to the renderer process whenever the user presses the keystroke to create a new shortcut. We can also register shortcuts for writing clippings back to the clipboard and publishing them to ClipHub.
Listing 10.21. Setting up global shortcuts with IPC: ./app/main.js
const createClipping = globalShortcut.register('CommandOrControl+!', () => {
  menubar.window.webContents.send('create-new-clipping');
});

const writeClipping = globalShortcut.register('CmdOrCtrl+Alt+@', () => {
  menubar.window.webContents.send('write-to-clipboard');
});

const publishClipping = globalShortcut.register('CmdOrCtrl+Alt+#', () => {
  menubar.window.webContents.send('publish-clipping');
});

if (!createClipping) {
  console.error('Registration failed', 'createClipping');
}

  if (!writeClipping) {
    console.error('Registration failed', 'writeClipping');
  }

  if (!publishClipping) {
    console.error('Registration failed', 'publishClipping');
  }
Each shortcut is sending a message on a different channel. In this case, we send no additional information to the renderer process because the process reads from the clipboard. The next step is to configure the renderer process to receive the messages sent from the main process. The user may not have the application open when they press the keystroke, so we add notifications where appropriate.
Listing 10.22. Setting up IPC listeners in the renderer process: ./app/renderer.js
const { clipboard, ipcRenderer, shell } = require('electron');   1

ipcRenderer.on('create-new-clipping', () => {
  addClippingToList();                                           2
  new Notification('Clipping Added', {                           3
    body: `${clipboard.readText()}`
  });
});

ipcRenderer.on('write-to-clipboard', () => {
  const clipping = clippingsList.firstChild;                     4
  writeToClipboard(getClippingText(clipping));                   5
});

ipcRenderer.on('publish-clipping', () => {
  const clipping = clippingsList.firstChild;
  publishClipping(getClippingText(clipping));                    6
});
- 1 Pulls in the ipcRenderer module from Electron
- 2 If an IPC message comes across on the create-new-clipping channel, calls the function that is called when a user clicks the Copy to Clipboard button.
- 3 After adding the clipping, displays a notification because the user does not have the UI open and may not know that it was added successfully.
- 4 Previously, we knew what clipping the user wanted based on the button they clicked. In this case, we don’t know, so we grab the first one on the list.
- 5 Writes that clipping to the clipboard.
- 6 The process of publishing the clipping is similar to writing it to the clipboard: Find the first one, and pass it to the function.
In chapter 9, we stored all the clippings in an array in the main process. In this chapter, we’re using the DOM as our temporary data store. If the user clicks the button to write to the clipboard or publish the clipping, we know which clipping, based on the button clicked. But how do we find the appropriate clipping when the user activates a global shortcut? In the previous listing, we traverse to the first child of the clippings list and call one of the functions we wrote earlier in the chapter with that element.
10.5.2. Solving for the edge case that occurs if the window has never been shown
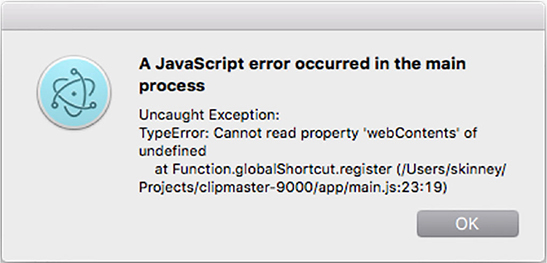
You might have noticed a bug when implementing the last feature. If you start your application and immediately press one of your new global shortcuts, you get an error, shown in figure 10.5, that reads “TypeError: Cannot read property ’webContents’ of undefined.” If you look at the previous listing, you’ll notice that we’re attempting to access the webContents property on menubar.window, which is apparently undefined. Click the cat icon to open the window and try the shortcut again. It should work this time.
Figure 10.5. If you try to use one of your global shortcuts before the window is opened for the first time, you see this error.
So why does it suddenly work? menubar lazily loads the window the first time it is needed. To prevent this error, we must tell menubar to immediately load the window when it starts up. We also want it to load our HTML page, which—in turn—loads renderer.js, which sets up our IPC listeners.
Listing 10.23. Preloading window and contents on start-up: ./app/main.js
const menubar = Menubar({
  preloadWindow: true,                         1
  index: `file://${__dirname}/index.html`,     2
});
- 1 Sets the preloadWindow option to true to load the UI, even if it has never been requested.
- 2 Specifies the HTML document that should be preloaded.
Previously, we were invoking the Menubar() function with no arguments. In listing 10.23, we modified the function call and passed in a configuration object. We preload the window before the first time the user clicks on the menu bar or tray icon and we load in our HTML page as soon as menubar loads the window.
10.6. Adding a secondary menu
In Fire Sale, I boasted that one of the great things about building applications in Electron is that we could use application and context menus to provide functionality without needing to find a place for it in the UI. In the previous chapter, we could have created additional submenus if necessary. But what about Clipmaster 9000? It turns out that the tray module allows us to display a secondary menu when the user right-clicks the icon. Let’s create a simple menu that allows users to quit the application. We accomplish this in three steps: create the menu using Menu.buildFromTemplate(), add an event handler for right-clicks on menubar.tray, and pop up the menu when the user right-clicks the icon.
Listing 10.24. Creating a secondary menu: ./app/main.js
const { globalShortcut,  Menu } = require('electron');    1

const secondaryMenu = Menu.buildFromTemplate([            2
  {
    label: 'Quit',
    click() { menubar.app.quit(); },                      3
    accelerator: 'CommandOrControl+Q'
  },
]);

menubar.on('ready', function () {
  console.log('Application is ready.');

  menubar.tray.on('right-click', () => {                  4
    menubar.tray.popUpContextMenu(secondaryMenu);         5
  });

  // Omitted for brevity...
});
- 1 Requires the menu module from Electron.
- 2 Builds a menu from a JavaScript object.
- 3 Gets a reference to the app module, and tells it to quit.
- 4 Listens for a right-click event on the menu bar or system tray icon.
- 5 Triggers a pop-up menu.
With this small change, we create an entire secondary interface to the application. This would be a great place for user preferences and other advanced options that don’t have a good place in the main UI of the application.
The first phase of Clipmaster 9000 is now complete. You can find the complete code in the appendix or on the completed-example branch of this repository (http://mng.bz/UE9).
Summary
- menubar is a third-party library that is a high-level abstraction around core Electron modules and another third-party library called electron-positioner.
- menubar creates a browser window and positions it directly below the menu bar icon (on macOS) or above the tray icon (on Windows).
- Event delegation is a technique that allows you to add an event listener to a parent node and wait for the event to bubble up rather than manually adding and removing listeners from child nodes to prevent memory leaks.
- request is a library for Node.js that allows you to make HTTP requests to external URLs.
- We can define Notifications’ onclick method to allow custom behavior when a user clicks a notification.
- menubar’s browser window instance can be preloaded when the application starts.
- A secondary menu can be added to the tray instance to provide additional functionality.