Table of Contents for
Angular: Up and Running
 Angular: Up and Running
Published by
O'Reilly Media, Inc., 2018
Angular: Up and Running
Published by
O'Reilly Media, Inc., 2018
- Cover
- nav
- Angular: Up and Running
- Angular: Up and Running
- Introduction
- 1. Introducing Angular
- 2. Hello Angular
- 3. Useful Built-In Angular Directives
- 4. Understanding and Using Angular Components
- 5. Testing Angular Components
- 6. Working with Template-Driven Forms
- 7. Working with Reactive Forms
- 8. Angular Services
- 9. Making HTTP Calls in Angular
- 10. Unit Testing Services
- 11. Routing in Angular
- 12. Productionizing an Angular App
- Index
- About the Author
- Colophon
Chapter 8. Angular Services
In the previous two chapters, we worked on creating form-based Angular applications. To this extent, we approached it in two ways: the traditional template-driven approach and then the reactive form-based approach. With both, we looked at the building blocks and then built live working forms with validation and proper messaging.
In this chapter, we will move beyond the UI for a bit, and start exploring Angular services, which are the workhorses of any application. We will take a step back, understand what Angular services are, and how to create one. Then we will dig into the Angular dependency injection system and understand how to use and leverage it, before going off and building our own Angular services.
What Are Angular Services?
We have mostly worked with Angular components so far. Components, to quickly recap, are responsible for deciding what data to display and how to render and display it in the UI. We bind our data from the components to our UI and bind our events from the UI to methods in the components to allow and handle user interactions. That is, components in Angular are our presentation layer, and should be involved in and focus on the presentation aspects of data.
But if components are our presentation layer, it begs the question of what should be responsible for the actual data fetching and common business logic in an Angular application. This is where Angular services come in. Angular services are that layer that is common across your application, that can be reused across various components. Generally, you would create and use Angular services when:
-
You need to retrieve data from or send data to your server. This may or may not involve any processing of the data while it is being transferred.
-
You need to encapsulate application logic that is not specific to any one component, or logic that can be reused across components.
-
You need to share data across components, especially across components that may or may not know about each other. Services by default are singletons across your application, which allows you to store state and access them across various components.
Another simple way to think about Angular services is that it is the layer to abstract the “how” away from the component, so that the component can just focus on the “what,” and let the service decide the how.
Creating Our Own Angular Service
Instead of talking in abstract, let’s dig into some actual code so that we can more fully understand the concept of services. What we will do is build on the example we have worked on so far, and extend it using Angular services. We will try to accomplish the following things in our stock market application:
-
Fetch the list of stocks to show from a service, instead of hardcoding it in the component.
-
When we create a stock, we will send it to the service.
-
When we create a stock, we want it to show up in our list of stocks.
To do this, if we want to continue using components, we would have to come up with a way for our CreateStockComponent to communicate with our StockItemComponent, and keep the data in sync between the two. This would mean our components would have to know each other, and where in the hierarchy they and all other components fit.
First, we will add a StockListComponent that fetches a list of stocks, and displays them using the StockItemComponent. This component will use the StockService that we will build to act as a layer behind both the components. It will be responsible for figuring out how and where to fetch the list of stocks from, and how to create a stock. In this chapter, we will continue with it being a list on the client, but we will see how to build it in a way that each component does not need to worry about the details. Later, when we learn how to work with an HTTP server, we will see how easy it is to switch once we have a service layer in between.
Digging into the Example
For this example, you can use the code from chapter6/template-driven/control-validity as the base to code from. We will modify the example to achieve what we have just outlined.
First, let’s tackle the easy stuff. The StockItemComponent class does not need any change, but we will change the template for it slightly so that it displays both an Add to Favorite and a Remove from Favorite button depending on the state of the stock. We can modify src/app/stock/stock-item/stock-item.component.html as follows:
<divclass="stock-container"><divclass="name">{{stock.name + ' (' + stock.code + ')'}}</div><divclass="exchange">{{stock.exchange}}</div><divclass="price"[class.positive]="stock.isPositiveChange()"[class.negative]="!stock.isPositiveChange()">$ {{stock.price}}</div><button(click)="onToggleFavorite($event)"*ngIf="!stock.favorite">Add to Favorite</button><button(click)="onToggleFavorite($event)"*ngIf="stock.favorite">Remove from Favorite</button></div>
We have just added a div to show the exchange of the stock, and a button to show Remove from Favorite if the stock is already favorited.
Next, let’s create the skeleton for the StockListComponent before we try creating and integrating our StockService. We can generate the skeleton by executing:
ng g component stock/stock-list
which we can then modify to our purpose. We will modify the src/app/stock/stock-list/stock-list.component.ts file as follows:
import{Component,OnInit}from'@angular/core';import{Stock}from'app/model/stock';@Component({selector:'app-stock-list',templateUrl:'./stock-list.component.html',styleUrls:['./stock-list.component.css']})exportclassStockListComponentimplementsOnInit{publicstocks:Stock[];constructor(){}ngOnInit() {this.stocks=[newStock('Test Stock Company','TSC',85,80,'NASDAQ'),newStock('Second Stock Company','SSC',10,20,'NSE'),newStock('Last Stock Company','LSC',876,765,'NYSE')];}onToggleFavorite(stock:Stock){console.log('Favorite for stock ',stock,' was triggered');stock.favorite=!stock.favorite;}}
There are a few things of note here, but nothing fundamentally new or path-breaking so far:
-
We have declared an array of stocks at the class level, and initialized it with some default values in the
ngOnInitblock. -
We have a function
onToggleFavoritethat logs the stock and toggles its favorite state.
Let’s now look at its corresponding template, in src/app/stock/stock-list/stock-list.component.html:
<app-stock-item*ngFor="let stock of stocks"[stock]="stock"(toggleFavorite)="onToggleFavorite($event)"></app-stock-item>
In the template, we simply loop over all the stocks and display an instance of the StockItemComponent for each one. We ask the StockItemComponent to trigger the onToggleFavorite whenever someone clicks the Add to Favorite or Remove from Favorite button within the stock item.
Tip
Since we generated the component using the Angular CLI, we can avoid the step of having to register the newly created component in the Angular module. Otherwise, there would be one more step here of adding the newly created component in the app.module.ts file in the declarations section.
The AppComponent can now be simplified further. The component class in src/app/app.component.ts can be modified to:
import{Component,OnInit}from'@angular/core';@Component({selector:'app-root',templateUrl:'./app.component.html',styleUrls:['./app.component.css']})exportclassAppComponentimplementsOnInit{title='Stock Market App';ngOnInit():void{}}
The corresponding template in src/app/app.component.html can be modified to:
<h1>{{title}}</h1><app-stock-list></app-stock-list><app-create-stock></app-create-stock>
Now finally, let’s look at what it takes to build a very simple and trivial StockService. We can again generate the base skeleton for the service using the Angular CLI as follows:
ng g service services/stock
This will generate two files, a skeleton stock-service.ts and a dummy test for it in stock-service.spec.ts. We will ignore the latter for now but will return to it in Chapter 10, as part of our discussion of unit testing of services. The generated skeleton in src/app/service/stock.service.ts should look something like this:
import{Injectable}from'@angular/core';@Injectable()exportclassStockService{constructor(){}}
The skeleton is literally just an empty shell class, with one decorator of note, which is Injectable. The Injectable decorator has no current value for us, but is a recommended decorator whenever you are working with services, as it is a hint to the Angular dependency injection system that the service you are working on might have other dependencies. With the Injectable decorator, Angular will take care of injecting them into our service.
We will leave the decorator untouched, keeping with the best practices. And pretty soon, as early as the next chapter, we will need it anyway.
Now, let’s get to the crux of the work, which is the data that the StockService is to provide. This is where services really shine. Components generally will defer and ask a service for data (or a section of the data). It is up to the service to decide how and where to fetch the data from, whether it is from a web service via HTTP calls, a local storage or cache, or even return mock data, as we will in just a bit. Later, if we want to change the source, we can do it in one place without touching any of the components, as long as our API signature remains the same.
Let’s define our StockService to continue returning mock data. We will edit the src/app/services/stock.service.ts file as follows:
import{Injectable}from'@angular/core';import{Stock}from'app/model/stock';@Injectable()exportclassStockService{privatestocks:Stock[];constructor(){this.stocks=[newStock('Test Stock Company','TSC',85,80,'NASDAQ'),newStock('Second Stock Company','SSC',10,20,'NSE'),newStock('Last Stock Company','LSC',876,765,'NYSE')];}getStocks():Stock[]{returnthis.stocks;}createStock(stock:Stock){letfoundStock=this.stocks.find(each=>each.code===stock.code);if(foundStock){returnfalse;}this.stocks.push(stock);returntrue;}toggleFavorite(stock:Stock){letfoundStock=this.stocks.find(each=>each.code===stock.code);foundStock.favorite=!foundStock.favorite;}}
While it seems like we have added a lot of code, if we dig into it, there is nothing that is Angular specific in the code we added. Most of the added code is business functionality that we have defined and enforced via the StockService. Let’s quickly walk through the major functionality we have introduced in the service:
-
We have moved our initialization of the mock list of stocks to the constructor of the
StockService, initializing it with some dummy values to provide an initial state for our UI when it is rendered. -
We have defined a very simple
getStocks()method that simply returns the current list of stocks. -
The
createStockmethod does little more than simply adding the stock to our list of stocks. It first checks if the stock already exists (using thecodeon the stock to check for uniqueness), exiting early if it does. If not found, it adds the passed-in stock to our list of stocks. -
Finally, we have a
toggleFavorite, which simply finds the passed-in stock in our array and then toggles the state of thefavoritekey on it.
Now that we have defined our service, let’s see what it takes to be able to use it in our components. Before we can start injecting it into our components, we need to define how this service will be provided and at what level. We can define this at the StockListComponent level, the AppComponent level, or the AppModule level. We will see what the difference is in a bit, but in the meantime, let’s define it at the module level.
Let’s edit the src/app/app.module.ts file to define the provider as follows:
/** Imports same as before, skipped for brevity **/import{StockService}from'app/services/stock.service';@NgModule({declarations:[AppComponent,StockItemComponent,CreateStockComponent,StockListComponent],imports:[BrowserModule,FormsModule,HttpModule],providers:[StockService],bootstrap:[AppComponent]})exportclassAppModule{}

Registering the provider for
StockService
We have just made a small addition to the NgModule decorator on the AppModule. We have registered an array of providers, in which the StockService is the one and only service right now. The providers array in the Angular module tells Angular to create a singleton instance of the service, and make it available for any class or component that asks for it. When we register it at the module level, it means that any component within the module that asks for the service will get the exact same instance injected into it.
Tip
We could have skipped the step of manually adding the service to the module by asking the Angular CLI to also perform this. The Angular CLI doesn’t know at which level the service is supposed to operate, so it skips the service registration. If we wanted it to register it at the app module level, we could have executed it as:
ng g service services/stock --module=app
This would have both generated the service and also registered the provider in the AppModule.
At this point, we are ready to start using the service, so first we will use it in the newly created StockListComponent. Let’s change the src/app/stock/stock-list/stock-list.component.ts file as follows:
import{Component,OnInit}from'@angular/core';import{StockService}from'app/services/stock.service';import{Stock}from'app/model/stock';@Component({selector:'app-stock-list',templateUrl:'./stock-list.component.html',styleUrls:['./stock-list.component.css']})exportclassStockListComponentimplementsOnInit{publicstocks:Stock[];constructor(privatestockService:StockService){}ngOnInit() {this.stocks=this.stockService.getStocks();}onToggleFavorite(stock:Stock){console.log('Favorite for stock ',stock,' was triggered');this.stockService.toggleFavorite(stock);}}
Inject the
StockServiceinto the component
Use the
StockServiceto get the list of stocks
Use the
StockServiceto toggle the favorite status on a stock
This is our first instance of injecting and using a service, so let’s walk through it step by step:
-
We can inject any service we want into our component simply by listing it in our constructor. In this case, we have declared a private instance of
StockServicewith the namestockService. The name itself doesn’t matter; Angular uses the type definition to figure out what service to inject. For all we care, we could even call the instance of the servicexyz(not that you should!), and it would still get injected correctly. -
We simply call the methods we want on our service through our instance (like
stockService.getStocks()orstockService.toggleFavorite()) at the correct time. We initialize our list of stocks, and pass through the toggle call to the service. Note that we need to access the service through an instance variable and cannot access it directly (that is, we need to callthis.stockService, and cannot directly usestockService).
While we don’t need to make any changes to the corresponding template, here is what the template for the StockListComponent looks like in case you don’t remember:
<app-stock-item*ngFor="let stock of stocks"[stock]="stock"(toggleFavorite)="onToggleFavorite($event)"></app-stock-item>
Tip
We just used one of TypeScript’s features in the preceding example to both declare a parameter as well as a property simultaneously. By adding the private or public keyword in front of a constructor argument, we can make it a member property of the class with the same name.
With this, we need to make no more changes in our template. If we run the application at this point, we should see it running with a list of three stocks displayed at the top.
Let’s continue with the minor changes to the CreateStockComponent to finish the service integration. First, we’ll add a simple message to the top of the CreateStockComponent template, to show a message to the user if the stock was created successfully or if there was any error in creation. We will edit src/app/stock/create-stock/create-stock.component.html as follows:
<h2>Create Stock Form</h2><div*ngIf="message">{{message}}</div><divclass="form-group"><!--Rest of the form omitted for brevity--><!--No change from the base code--></div><h4>Stock Name is {{stock | json}}</h4>
Display a message if it exists
The highlighted line is the only change in this file, which is simply adding a div that shows the message class variable if it has a value.
Now, we can change the component in src/app/stock/create-stock/create-stock.component.ts to integrate with the StockService:
import{Component,OnInit}from'@angular/core';import{Stock}from'app/model/stock';import{StockService}from'app/services/stock.service';@Component({selector:'app-create-stock',templateUrl:'./create-stock.component.html',styleUrls:['./create-stock.component.css']})exportclassCreateStockComponent{publicstock:Stock;publicconfirmed=false;publicmessage=null;publicexchanges=['NYSE','NASDAQ','OTHER'];constructor(privatestockService:StockService){this.stock=newStock('','',0,0,'NASDAQ');}setStockPrice(price){this.stock.price=price;this.stock.previousPrice=price;}createStock(stockForm){if(stockForm.valid){letcreated=this.stockService.createStock(this.stock);if(created){this.message='Successfully created stock with stock code: '+this.stock.code;this.stock=newStock('','',0,0,'NASDAQ');}else{this.message='Stock with stock code: '+this.stock.code+' already exists';}}else{console.error('Stock form is in an invalid state');}}}
Add a
messagefield to display success and error messagesInject
StockServiceinto the componentCall
stockService.createStockwhen the form is submitted
Deal with success and error scenarios while creating the stock
The CreateStockComponent has been changed slightly to integrate with the StockService as follows:
-
We created a
messagefield to show useful messages to the user on successful creation of stock as well as errors while creating it. -
We injected the
StockServiceand then called it when the form is submitted by the user. -
We used the return value of the
StockService.createStock()call to decide what message to show to the user in the UI.
While we are at it, we can remove some of the CSS that makes the form hard to read from src/app/stock/create-stock/create-stock.component.css, and just empty the file.
Now when we run this application, it should still look the same as before. The difference is that when you fill the create stock form and click Create, it should clear the form, and you should see the stock you just entered like in Figure 8-1.
Now of course, one of the first things you might ask is “How did adding the stock to the list of stocks in the service make it appear in the StockListComponent magically?” It is a very valid question, and the answer to that is JavaScript! We return the reference to the stock array in the getStocks() method, which is what the StockListComponent assigns to its member variable. Thus, any addition in the service automatically makes a change in the component that is holding on to the reference of the array.
This is still hacky in some sense, as we wouldn’t want to rely on having the same reference to update the values, but we will fix this shortly. Also, because we are using mock data that is instantiated within the service when it is initialized, you will lose any new stocks you have created when you refresh the page. This is because the service is reloaded and reinitialized when we refresh the page, as we don’t have a persistent store.
So just to recap, this is what we accomplished:
-
We created a
StockListComponentto display a list of stocks. -
We created a
StockServicethat acts as the layer behind all the components, providing APIs to fetch a list of stocks as well as to create new stocks. Currently, it is working off of mock data. -
We made slight updates to all the components to integrate with this service.
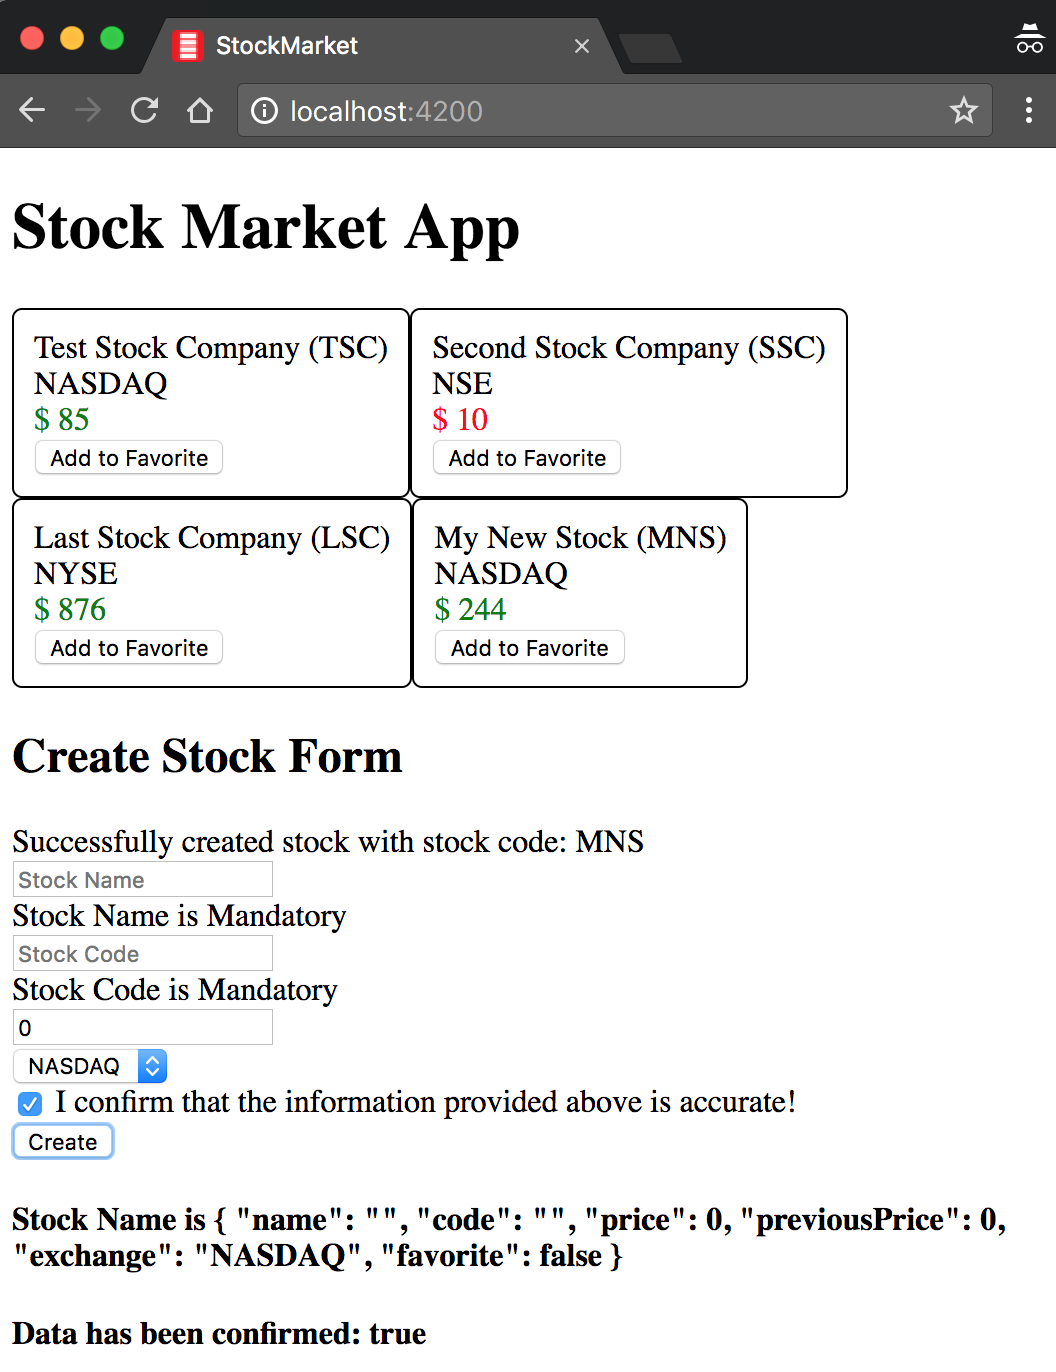
Figure 8-1. Angular service sharing data between components
We have dealt with a very basic and simple Angular service to show what an Angular service is, how it is created, and how it is hooked up and used within the context of an Angular application.
The completed version of this code is available in chapter8/simple-service in the GitHub repository.
An Introduction to Dependency Injection
Before we dive deeper into services and other related topics, let’s take a step back to understand dependency injection, especially in context to Angular.
Dependency injection started in static languages that are more common in server-side programming. In simple terms, dependency injection is the idea that any class or function should ask for its dependencies, rather than instantiating it themselves. Something else (usually called an injector) would be responsible for figuring out what is needed and how to instantiate it.
Dependency injection has huge benefits when we practice it in our applications, as it allows us to create modular, reusable pieces while allowing us to test components and modules easily. Let’s take a simple example to demonstrate how dependency injection can make your code more modular, easier to change, and testable:
classMyDummyService{getMyData() {lethttpService=newHttpService();returnhttpService.get('my/api');}}classMyDIService{constructor(privatehttpService:HttpService){}getMyData() {returnthis.httpService.get('my/api');}}
In this example, there is actually not much to differentiate between MyDummyService and MyDIService, except for the fact that one instantiates an HttpService before using it, while the other asks for an instance of it in the constructor. But this small change allows for many things, including:
-
It makes it more obvious what is necessary for each service to actually execute, rather than finding out at the time of execution.
-
In our example, instantiating the
HttpServicewas trivial, but it might not be in certain cases. In such a case, every user ofHttpServicewill need to know exactly how to create it and configure it, before using it. -
In our test, we might not want to make actual HTTP calls. There, we can replace and instantiate
MyDIServicewith a fakeHttpServicethat does not make real calls, while there is nothing we can do forMyDummyService.
There are many more advantages of dependency injection in general, and the official Angular documentation has a great article that covers this in depth if you want to read further on this.
Angular and Dependency Injection
In the previous section, we covered dependency injection in general. In this section, we will dig deeper into how Angular has set up its dependency injection system, and the major things developers should be aware of. We will not go into each and every detail in this section, but cover the general aspects we expect most developers to encounter in their day-to-day work.
We have seen Angular’s dependency injection at work already, with the very first service that we created. For very simple asks, it is enough to think about Angular’s dependency injection service as a very simple key-value store, with the ability of any component or class to ask for a key when they are getting initialized. In reality, it is much more complex than a simple key-value store. We will see how to leverage this dependency injection system in our unit tests in Chapter 10.
Every service that we create needs to be registered as a provider with an injector. Then any other class can ask for the service and the injector will be responsible for providing it. However, as briefly mentioned in the previous section, Angular doesn’t have just one injector—instead, it has a whole hierarchy of injectors.
At its root, at the application level, Angular has the root module and the root injector. When we created our service, and registered it in the providers section of the NgModule, the service was in fact registered with the root injector. This would mean that the service is a singleton for the entire application, and that any class or component in the application can ask for the service and would be handed the very same instance of the service.
Let’s now understand Angular’s hierarchical dependency injection system by taking our example and modifying it to make the dependency injection system apparent. We can use the base code from the previous section in case you are not coding along, which is available in chapter8/simple-service. We will continue from there.
Before we get into the code, let’s cover what exactly will we be trying to accomplish. We will:
-
Add a new service called
MessageService. This will be used to display messages at various points in the UI, and also as a mechanism to communicate across services. -
Introduce and use the
MessageServicein both theCreateStockComponentas well as theAppComponent.
First, let’s create the MessageService. This time, we will use the Angular CLI to create it completely for us, including registering it with its provider in the AppModule. Just execute:
ng g service services/message --module=app
Warning
Make sure you don’t miss the --module=app argument to the command. In case you do, just open the app.module.ts file and manually add the MessageService to the list of providers in the NgModule.
This will create a skeleton MessageService in the services folder, and register it with the providers section of the AppModule. Let’s now update the src/app/services/message.service.ts file as follows:
import{Injectable}from'@angular/core';@Injectable()exportclassMessageService{publicmessage:string=null;constructor(){}}
MessageService is nothing but a very simple container to hold a message string. It is publicly available, so any class or component can simply reach out and access or change it.
Now, let’s modify the AppComponent to use this service and display the current message in the UI. Modify the src/app/app.component.ts file as follows:
import{Component,OnInit}from'@angular/core';import{MessageService}from'app/services/message.service';@Component({selector:'app-root',templateUrl:'./app.component.html',styleUrls:['./app.component.css']})exportclassAppComponentimplementsOnInit{title='app works!';constructor(publicmessageService:MessageService){}ngOnInit():void{this.messageService.message='Hello Message Service!';}}
We simply injected our new MessageService into the AppComponent, and while initializing set it to some default value. Notice that we made the default access for the messageService public, so that we can use it from the template. Let’s now look at the template in src/app/app.component.html:
<h1>{{title}}</h1><h3>App level: {{messageService.message}}</h3><app-stock-list></app-stock-list><app-create-stock></app-create-stock>
We just added one line, which is an h3 element that shows the current value of the message variable in the MessageService that is injected into our AppComponent.
Next, we’ll modify the CreateStockComponent to use the same service. Modify the src/app/stock/create-stock/create-stock.component.ts file as follows:
import{Component,OnInit}from'@angular/core';import{Stock}from'app/model/stock';import{StockService}from'app/services/stock.service';import{MessageService}from'app/services/message.service';@Component({selector:'app-create-stock',templateUrl:'./create-stock.component.html',styleUrls:['./create-stock.component.css'],providers:[MessageService]})exportclassCreateStockComponent{publicstock:Stock;publicconfirmed=false;publicexchanges=['NYSE','NASDAQ','OTHER'];constructor(privatestockService:StockService,publicmessageService:MessageService){this.stock=newStock('','',0,0,'NASDAQ');}setStockPrice(price){this.stock.price=price;this.stock.previousPrice=price;}createStock(stockForm){if(stockForm.valid){letcreated=this.stockService.createStock(this.stock);if(created){this.messageService.message='Successfully created stock with stock code: '+this.stock.code;this.stock=newStock('','',0,0,'NASDAQ');}else{this.messageService.message='Stock with stock code: '+this.stock.code+' already exists';}}else{console.error('Stock form is in an invalid state');}}}
Inject
MessageServiceinto the constructorUse
MessageServicein both cases of creation
Most of the code remains unchanged from before. We just injected our new service into the class, and then used it instead using console.log. We set the message variable in the MessageService when the stock is created successfully or when there is an error.
Finally, we will use the MessageService in the template of the component here as well to display the same message. Let’s modify src/app/stock/create-stock/create-stock.component.html as follows:
<h2>Create Stock Form</h2><div>{{messageService.message}}</div><divclass="form-group"><form(ngSubmit)="createStock(stockForm)"#stockForm="ngForm"><divclass="stock-name"><inputtype="text"placeholder="Stock Name"requiredname="stockName"#stockName="ngModel"[(ngModel)]="stock.name"></div><!-- Remaining code as before, omitting for brevity -->
We have omitted most of the file, as the only change we did was add line 3, where we displayed the current value of messageService.message in the UI.
Now when we run this, we should see our application, but with two new lines. One is the second line, which is part of our AppComponent, and one within the CreateStockComponent, both of which are displaying the initial value of the message in the UI. If you now fill up the form and create a stock, you will notice that both the messages change simultaneously. Hence, we are assured that there is only one instance of the MessageService, which is being shared across both the components.
Now, let’s modify the CreateStockComponent slightly as follows:
import{Component,OnInit}from'@angular/core';import{Stock}from'app/model/stock';import{StockService}from'app/services/stock.service';import{MessageService}from'app/services/message.service';@Component({selector:'app-create-stock',templateUrl:'./create-stock.component.html',styleUrls:['./create-stock.component.css'],providers:[MessageService]})exportclassCreateStockComponent{publicstock:Stock;publicconfirmed=false;publicexchanges=['NYSE','NASDAQ','OTHER'];constructor(privatestockService:StockService,publicmessageService:MessageService){this.stock=newStock('','',0,0,'NASDAQ');this.messageService.message='Component Level: Hello Message Service';}setStockPrice(price){this.stock.price=price;this.stock.previousPrice=price;}createStock(stockForm){/* Code as before, no change *//* Omitted for brevity */}}
Adding
providersdeclaration forMessageServiceAdding an initial value to the
MessageServicein the component
We’ve made one addition to the @Component decorator for the CreateStockComponent class. We have added a providers declaration, and provided the MessageService at the component level. We also added an initial value to the MessageService in the constructor. We will not make any other changes. We will also leave the MessageService declared in the providers section of the main module.
Before we talk about what happens as a result of this, it is worth executing the application and seeing it yourself. Execute and note the following:
-
See the message in the
AppComponent, which is the default we had set. -
See the message in the
CreateStockComponent, which will be the value we set in the component in the constructor"Component Level: Hello Message Service". -
Now fill up the form and create a stock.
-
Note that the message is updated only in the
CreateStockComponent, but theAppComponentmessage does not change.
When you do all of this, you should see something like Figure 8-2.
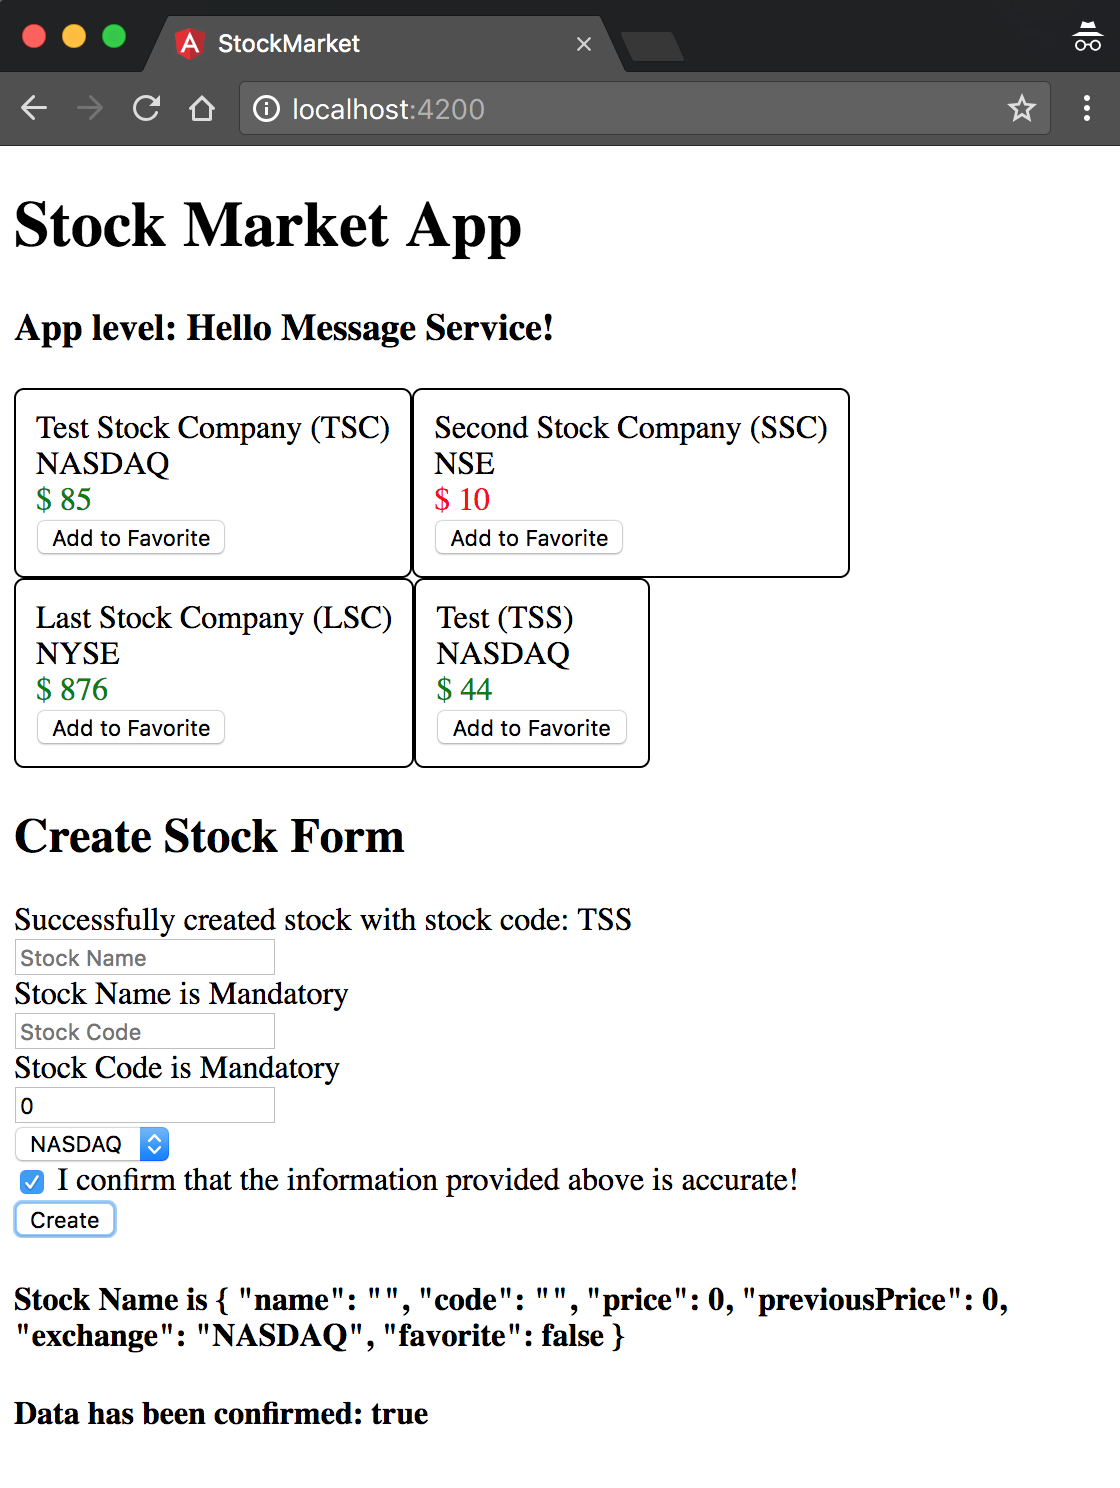
Figure 8-2. Angular application with services defined at component level
This is Angular’s hierarchical dependency injection at play. As mentioned before, Angular supports multiple dependency injectors within the same application. There is the root injector at the root AppModule level, which is where most services you create will be registered and made available. This makes the instance available across your entire application, and this was happening initially.
Then, when we made the change to add the providers at the CreateStockComponent level, we brought the injector at the component level into play. Angular will create a chain of injectors all the way down, depending on the need and declarations. And all child components will inherit that injector, which will take precedence over the root injector. When we registered our MessageService provider at the CreateStockComponent level, it created a child injector at that level, with its own instance of the MessageService. What we injected into the CreateStockComponent is in fact this new instance, which has nothing to do with the original root-level MessageService. So we, in fact, have two separate instances of MessageService with nothing in common.
Just like an Angular application is a tree of components, there is a parallel tree of injectors at play. For most components, these injectors might just be a reference or a proxy to the parent injector. But they may not, as we have just seen.
Whenever a component asks for a dependency, Angular will check the closest injector in the tree to see whether it can satisfy it. If it can (like in CreateStockComponent), it will provide it. If not, it will check with the parent injector, all the way to the root injector.
Now when will or can you use this? Usually, it won’t even matter and you will just register all your services at the root level. But there might be cases when you want to use this capability of the Angular injector, such as:
-
You want to scope services to only certain components and modules, to ensure that a change in the service doesn’t impact the entire application.
-
You might want different instances of a service in different components. This might be common where you might want to override things, or have different services for different instances, and the like.
-
You want to override a particular service with a more specific implementation for a section of your application. Maybe you want a cached version of your service for a certain section as opposed to the general pass-through implementation.
There is more detail in how we can instantiate a service and the various ways we can provide them. You can read up on all the details and ways in the official Angular docs.
The completed version of this code is available in chapter8/di-example in the GitHub repository.
RxJS and Observables: Moving to Asynchronous Operations
The last change we will make before we conclude this particular chapter on services is to work with asynchronous code. The data that we returned from our service in our example was hardcoded, mock data. We returned it as is, and displayed it immediately. But in a real-world application, that would not be the case, as most of the times we would be fetching the data from a server.
Handling responses and data from a server becomes slightly different from what we have done. We might make a call to fetch the list of stocks from the server. And then at some later point in time, after our server finishes processing the request, we would be provided with a list of stocks. Thus, the stocks would not be available immediately on demand, but at a later point in time, asynchronously.
In AngularJS, we used to handle these situations using promises. Promises were a better way to handle asynchronous behavior than callbacks, which was the traditional way, for multiple reasons. That said, there are a few drawbacks that Angular tries to do away with, by switching to using observables.
Observables are a ReactiveX concept that allows us to deal with streams which emit data. Any interested party can then be an observer on this stream, and perform operations and transformations on the events emitted by the stream.
There are a few differences between observables and promises, primarily:
-
Promises operate on a single asynchronous event, while observables allow us to deal with a stream of zero or more asynchronous events.
-
Unlike promises, observables can be canceled. That is, a promise’s success or error handler will eventually be called, while we can cancel a subscription and not process data if we don’t care about it.
-
Observables allow us to compose and create a chain of transformations easily. The operators it provides out of the box allow for some strong and powerful compositions, and operations like retry and replay make handling some common use cases trivial. All of this while being able to reuse our subscription code.
That said, promises are good for single event cases, and are still an option when you work with Angular. An observable can be converted into a promise and then handled in Angular. But it is recommended to use observables, as Angular provides a lot of out-of-the-box support for RxJS and its extensions within its framework.
Learning RxJS and Observables
We will touch upon the bare minimum of observables and RxJS features in this book, but this book itself is not intended to be a way to learn RxJS and reactive programming in general. There are excellent tutorials and books available, starting with the official documentation for ReactiveX.
Let’s now take our example and move it step by step to using observables and make it ready for our future use cases. You can use the base codebase from chapter8/simple-service if you have not been coding along.
First, we will modify our StockService to start returning an asynchronous observable to get us ready for the future when we start integrating with servers. Then we will modify our components to subscribe to these observables and deal with success and error cases.
Let’s change the src/app/services/stock.service.ts file as follows:
import{Injectable}from'@angular/core';import{Observable}from'rxjs/Observable';import{_throwasObservableThrow}from'rxjs/observable/throw';import{ofasObservableOf}from'rxjs/observable/of';import{Stock}from'app/model/stock';@Injectable()exportclassStockService{privatestocks:Stock[];constructor(){this.stocks=[newStock('Test Stock Company','TSC',85,80,'NASDAQ'),newStock('Second Stock Company','SSC',10,20,'NSE'),newStock('Last Stock Company','LSC',876,765,'NYSE')];}getStocks():Observable<Stock[]>{returnObservableOf(this.stocks);}createStock(stock:Stock):Observable<any>{letfoundStock=this.stocks.find(each=>each.code===stock.code);if(foundStock){returnObservableThrow({msg:'Stock with code '+stock.code+' already exists'});}this.stocks.push(stock);returnObservableOf({msg:'Stock with code '+stock.code+' successfully created'});;}toggleFavorite(stock:Stock):Observable<Stock>{letfoundStock=this.stocks.find(each=>each.code===stock.code);foundStock.favorite=!foundStock.favorite;returnObservableOf(foundStock);}}
Importing
ObservableImport core methods from the Observable API, like
throwandofChanging the return type of
getStocksto an observableReturning an observable for mock data

Throwing an exception to the observer
We completely overhauled the StockService, so let’s walk through the major changes one by one so we understand what changed and more importantly, why:
-
The first thing we do is import
Observablefrom the RxJS library. Note that we import operators and classes individually from the respective files, rather than import the entire RxJS library. -
We then make sure to import and add the operators we are planning to use from RxJS to ensure we have them available in our application. In this case, we are simply planning to use the
ofandthrowoperators on the coreObservableclass. -
We then change the return type of each of the methods in the service to return an observable instead of a synchronous value. This is to ensure a consistent API interface to the user of the service. Once we make this change, we can change the implementation underneath (say, changing from mock data to making a server call) without having to change each and every component.
-
For the time being, we convert our return value to an observable by using the
Observable.ofoperator. Theoftakes a value and returns an observable of that type which is triggered only once. -
In the
createStockmethod, we also change the functionality to throw an exception on the observable if the stock already exists.
Tip
Instead of importing each class and operator from RxJS manually, we also have the option to import the entire RxJS library and access the classes and operators through it, like so:
import { Rx } from 'rxjs/Rx';
We would then be able to access Rx.Observable and so on. But this comes with a downside, which is that Angular won’t be able to optimize your build, as it would not be able to understand which parts of RxJS are being used at the time of compilation. RxJS as a library is large, and most applications would only end up using bits and pieces of it.
Thus I would always recommend using individual imports as a general practice.
Now let’s change the components to integrate with the new asynchronous APIs in the service. First, we will change the StockListComponent, to read the list of stocks from the observable instead of reading the array directly. We will change the src/app/stock/stock-list/stock-list.component.ts file as follows:
/** Imports skipped for brevity **/exportclassStockListComponentimplementsOnInit{publicstocks:Stock[];constructor(privatestockService:StockService){}ngOnInit() {this.stockService.getStocks().subscribe(stocks=>{this.stocks=stocks;});}onToggleFavorite(stock:Stock){this.stockService.toggleFavorite(stock);}}
We have made one small change, which is to the ngOnInit block of the component. Instead of directly assigning the return value of the stockService.getStocks() call to the stocks array, we now instead subscribe to the observable that it returns. The observable gets triggered with the array of stocks once, at which point we assign the value to our local array. There is no change as such to the onToggleFavorite, though we should also subscribe to the observable it returns for proper handling.
Let’s also change the CreateStockComponent and see how the src/app/stock/create-stock/create-stock.component.ts file changes:
/** Imports skipped for brevity **/exportclassCreateStockComponent{/** No changes, skipping for brevity **/createStock(stockForm){if(stockForm.valid){this.stockService.createStock(this.stock).subscribe((result:any)=>{this.message=result.msg;this.stock=newStock('','',0,0,'NASDAQ');},(err)=>{this.message=err.msg;});}else{console.error('Stock form is in an invalid state');}}}
Again, most of our changes are focused on one method, the createStock. Instead of handling all the work immediately after triggering the stockService.createStock(), we now subscribe to the observable. In the previous case, we just handled the success case, but the subscribe method allows us to take two functions as arguments. The first argument is called in the case of a successful call, while the second is the error handler callback.
Both of our flows return an object with a msg key, so we handle it accordingly and update the message with the value returned.
At this point, we can now run our application to see it working. When you run it, you shouldn’t see any difference in the functionality, but all our stocks should be visible and you should be able to add stocks.
Let’s alter our code one final time to make it simpler and easier to read. In a lot of cases, we simply want to make a call to our server, and display the return value in our UI. We don’t need to process the data, make any transformations, or anything else. In those cases, Angular gives us a slight shortcut that we can use.
We’ll change the src/app/stock/stock-list/stock-list.component.ts file first:
/** Imports skipped for brevity **/exportclassStockListComponentimplementsOnInit{publicstocks$:Observable<Stock[]>;constructor(privatestockService:StockService){}ngOnInit() {this.stocks$=this.stockService.getStocks();}onToggleFavorite(stock:Stock){this.stockService.toggleFavorite(stock);}}
Storing the observable as a member variable
Calling and directly storing the observable
We have made two changes to our StockListComponent class:
-
Instead of having an array of
stocksas a member variable, we now have anObservable<Stock[]>as the member. That is, we are saving the observable that the API returns directly, instead of its underlying return value. -
In
ngOnInit, we simply save the observable returned by ourstockService.getStocks()call.
Given this, how do we display our array of stocks in the template? How do we handle this asynchronous behavior? Let’s look at what we can do in the template to take care of this:
<app-stock-item*ngFor="let stock of stocks$ | async"[stock]="stock"(toggleFavorite)="onToggleFavorite($event)"></app-stock-item>
We have made one tweak here, which is to use a Pipe in the ngFor expression. Angular provides a pipe called async, which allows us to bind to Observable. Angular would then be responsible for waiting for events to be emitted on the observable and displaying the resultant value directly. It saves us that one step of having to manually subscribe to the observable.
Again, this is useful in only a few situations where the data returned by an API call is something we can directly display. But it does save a few lines of code, leaving it to the framework to handle most of the boilerplate. Run your application to make sure that this still works, and you should see the same application running without any issues.
The completed version of this code is available in chapter8/observables in the GitHub repository.
Conclusion
In this chapter, we started understanding Angular services in more detail. We covered what Angular services are and some common uses for them, primarily:
-
Abstraction of the data-fetching aspects
-
Encapsulation of shared application logic
-
Sharing of data across components
We also discussed Angular’s dependency injection system and how its hierarchical dependency injection works with an example. Finally, we looked at how Observable works and how to integrate very simple observables into our application.
In the next chapter, we will dig into how to work with and make HTTP calls and deal with their responses. We will also cover some common use cases that we have when working with servers and how to build solutions for them.
Exercise
Take the finished exercise from Chapter 6 (available in chapter6/exercise/ecommerce). Try to accomplish the following:
-
Create a common service backing the
ProductListComponentand theCreateProductComponentcalledProductService. -
Make the components simple and move any logic into the service. Register the service correctly at the module level (either using the CLI or manually).
-
Start from the beginning with observables and make all the components deal with asynchronous APIs.
-
Use the
asyncpipe where possible instead of manually subscribing to the results.
All of this can be accomplished using concepts covered in this chapter. You can check out the finished solution in chapter8/exercise/ecommerce.