Table of Contents for
Learning PHP, MySQL & JavaScript, 5th Edition
 Learning PHP, MySQL & JavaScript, 5th Edition
Published by
O'Reilly Media, Inc., 2018
Learning PHP, MySQL & JavaScript, 5th Edition
Published by
O'Reilly Media, Inc., 2018
- Cover
- nav
- Learning PHP, MySQL & JavaScript
- Learning PHP, MySQL & JavaScript
- Dedication
- Preface
- 1. Introduction to Dynamic Web Content
- 2. Setting Up a Development Server
- 3. Introduction to PHP
- 4. Expressions and Control Flow in PHP
- 5. PHP Functions and Objects
- 6. PHP Arrays
- 7. Practical PHP
- 8. Introduction to MySQL
- 9. Mastering MySQL
- 10. Accessing MySQL Using PHP
- 11. Form Handling
- 12. Cookies, Sessions, and Authentication
- 13. Exploring JavaScript
- 14. Expressions and Control Flow in JavaScript
- 15. JavaScript Functions, Objects, and Arrays
- 16. JavaScript and PHP Validation and Error Handling
- 17. Using Asynchronous Communication
- 18. Introduction to CSS
- 19. Advanced CSS with CSS3
- 20. Accessing CSS from JavaScript
- 21. Introduction to jQuery
- 22. Introduction to jQuery Mobile
- 23. Introduction to HTML5
- 24. The HTML5 Canvas
- 25. HTML5 Audio and Video
- 26. Other HTML5 Features
- 27. Bringing It All Together
- A. Solutions to the Chapter Questions
- B. Online Resources
- C. MySQL’s FULLTEXT Stopwords
- D. MySQL Functions
- E. jQuery Selectors, Objects, and Methods
- Index
- About the Author
- Colophon
Chapter 2. Setting Up a Development Server
If you wish to develop internet applications but don’t have your own development server, you will have to upload every modification you make to a server somewhere else on the web before you can test it.
Even on a fast broadband connection, this can still represent a significant slowdown in development time. On a local computer, however, testing can be as easy as saving an update (usually just a matter of clicking once on an icon) and then hitting the Refresh button in your browser.
Another advantage of a development server is that you don’t have to worry about embarrassing errors or security problems while you’re writing and testing, whereas you need to be aware of what people may see or do with your application when it’s on a public website. It’s best to iron everything out while you’re still on a home or small office system, presumably protected by firewalls and other safeguards.
Once you have your own development server, you’ll wonder how you ever managed without one, and it’s easy to set one up. Just follow the steps in the following sections, using the appropriate instructions for a PC, a Mac, or a Linux system.
In this chapter, we cover just the server side of the web experience, as described in Chapter 1. But to test the results of your work—particularly when we start using JavaScript, CSS, and HTML5 later in this book—you should ideally have an instance of every major web browser running on some system convenient to you. Whenever possible, the list of browsers should include at least Microsoft Edge, Mozilla Firefox, Opera, Safari, and Google Chrome. If you plan to ensure that your sites look good on mobile devices too, you should try to arrange access to a wide range of iOS and Android devices.
What Is a WAMP, MAMP, or LAMP?
WAMP, MAMP, and LAMP are abbreviations for “Windows, Apache, MySQL, and PHP,” “Mac, Apache, MySQL, and PHP,” and “Linux, Apache, MySQL, and PHP.” These abbreviations each describe a fully functioning setup used for developing dynamic internet web pages.
WAMPs, MAMPs, and LAMPs come in the form of packages that bind the bundled programs together so that you don’t have to install and set them up separately. This means you can simply download and install a single program and follow a few easy prompts to get your web development server up and running fast, with minimal hassle.
During installation, several default settings are created for you. The security configurations of such an installation will not be as tight as on a production web server, because it is optimized for local use. For these reasons, you should never install such a setup as a production server.
However, for developing and testing websites and applications, one of these installations should be entirely sufficient.
Warning
If you choose not to go the WAMP/MAMP/LAMP route for building your own development system, you should know that downloading and integrating the various parts yourself can be very time-consuming and may require a lot of research in order to configure everything fully. But if you already have all the components installed and integrated with one another, they should work with the examples in this book.
Installing AMPPS on Windows
There are several available WAMP servers, each offering slightly different configurations. Of the various open source and free options, one of the best is AMPPS. You can download it by clicking the button on the website’s home page, shown in Figure 2-1.
I recommend that you always download the latest stable release (as I write this, it’s 3.8, which is about 128 MB in size). The various Windows, macOS, and Linux installers are listed on the download page.
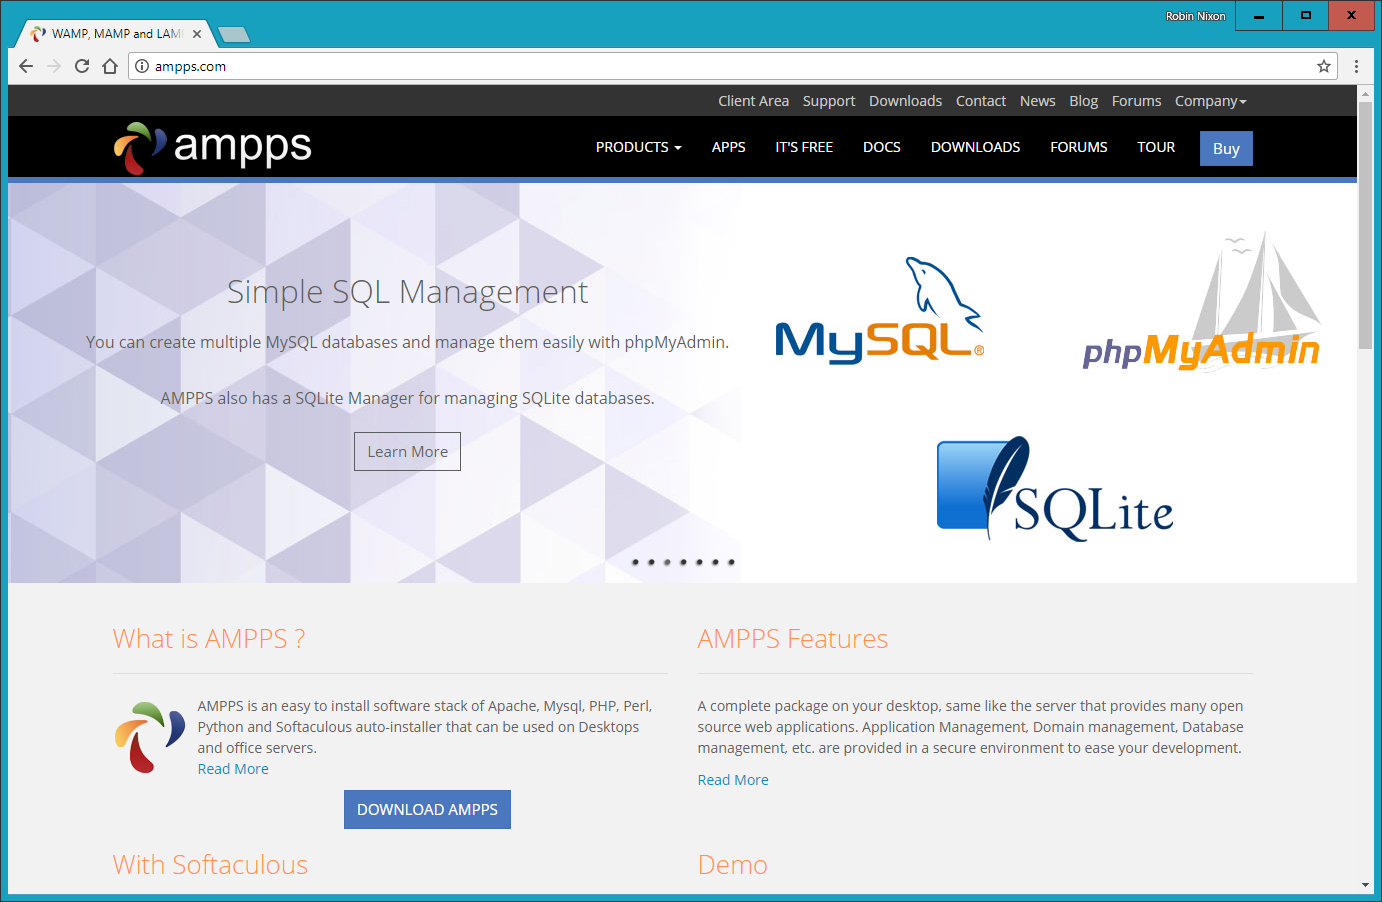
Figure 2-1. The AMPPS website
Note
During the lifetime of this edition, some of the screens and options shown in the following walk-through may change. If so, just use your common sense to proceed in as similar a manner as possible to the sequence of actions described.
Once you’ve downloaded the installer, run it to bring up the window shown in Figure 2-2. Before arriving at that window, though, if you use an antivirus program or have User Account Control activated on Windows, you may first be shown one or more advisory notices, and will have to click Yes and/or OK to continue with the installation.
Click Next, after which you must accept the agreement. Click Next once again, and then once more to move past the information screen. You will now need to confirm the installation location. This will probably be suggested as something like the following, depending on the letter of your main hard drive, but you can change this if you wish:
C:\Program Files (x86)\Ampps
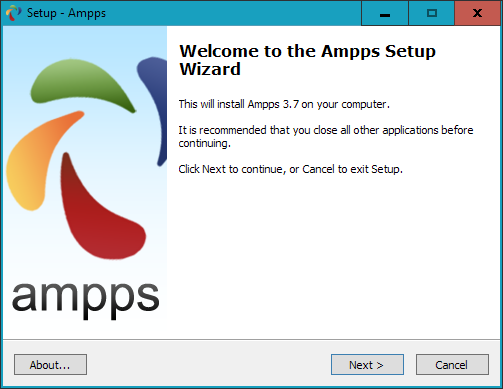
Figure 2-2. The opening window of the installer
Once you have decided where to install AMPPS, click Next, choose a Start menu folder name, and click Next again. You can choose which icons you wish to install, as shown in Figure 2-3. On the screen that follows, click the Install button to start the process.
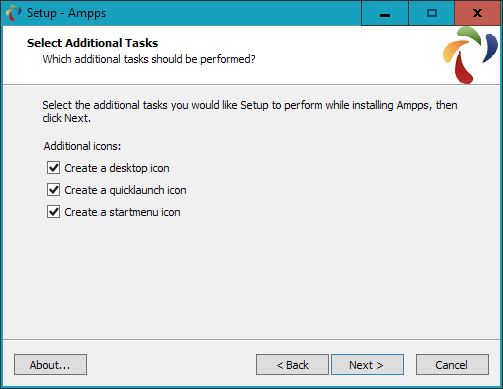
Figure 2-3. Choose which icons to install
Installation will take a few minutes, after which you should see the completion screen in Figure 2-4, and you can click Finish.

Figure 2-4. AMPPS is now installed
The final thing you must do is install C++ Redistributable Visual Studio, if you haven’t already. Visual Studio is an environment in which you’ll be doing development work. A window will pop up to prompt you, as shown in Figure 2-5. Click Yes to start the installation or No if you are certain you already have it.
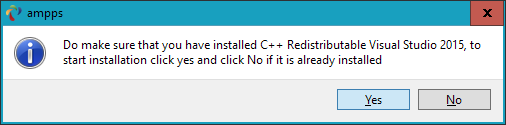
Figure 2-5. Install C++ Redistributable Visual Studio if you don’t already have it
If you choose to go ahead and install, you will have to agree to the terms and conditions in the pop-up window that appears, and then click Install. Installation of this should be fairly fast. Click Close to finish.
Once AMPPS is installed, the control window shown in Figure 2-6 should appear at the bottom right of your desktop. You can also call up this window using the AMPPS application shortcut in the Start menu or on the desktop, if you allowed these icons to be created.
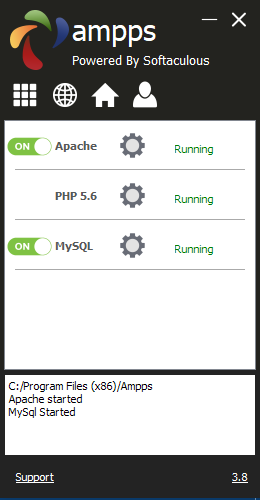
Figure 2-6. The AMPPS control window
Before proceeding, I recommend you acquaint yourself with the AMPPS documentation. Once you have digested this, should you still have an issue, there’s a Support link at the bottom of the control window that will take you to the AMPPS website, where you can open up a trouble ticket.
Note
You may notice that the default version of PHP in AMPPS is 5.6. In other sections of this book I detail some of the more important changes in PHP 7. If you wish to try them out for yourself, click the Options button (nine white boxes in a square) within the AMPPS control window, and then select Change PHP Version, whereupon a new menu will appear from which you can choose a version between 5.6 and 7.1.
Testing the Installation
The first thing to do at this point is verify that everything is working correctly. To do this, enter either of the following two URLs into the address bar of your browser:
localhost
127.0.0.1
This will call up an introductory screen, where you will have the opportunity to secure AMPPS by giving it a password (see Figure 2-7). I recommend you don’t check the box and just click the Submit button to proceed without setting a password.
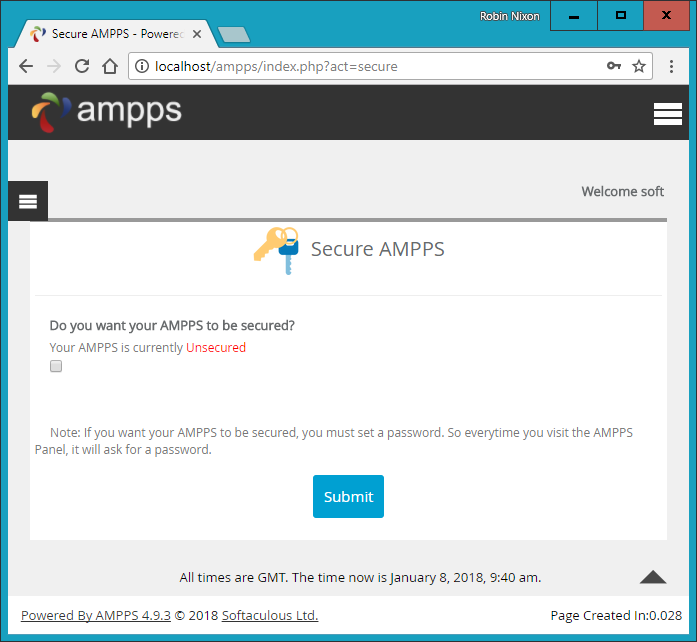
Figure 2-7. The initial security setup screen
Once this has been done you will be taken to the main control page at localhost/ampps/ (from now on I will assume you are accessing AMPPS through localhost rather than 127.0.0.1). From here you can configure and control all aspects of the AMPPS stack, so make a note of this for future reference, or perhaps set a bookmark in your browser.
Next, type the following to view the document root (described in the following section) of your new Apache web server:
localhost
This time, rather than seeing the initial screen about setting up security, you should see something similar to Figure 2-8.
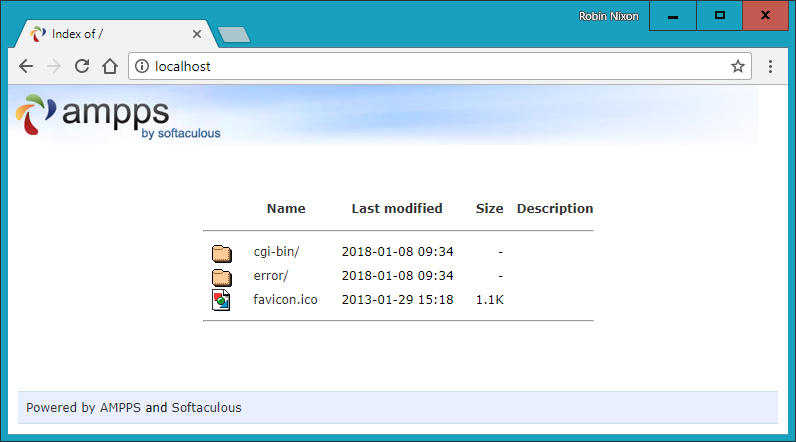
Figure 2-8. Viewing the document root
Accessing the Document Root (Windows)
The document root is the directory that contains the main web documents for a domain. This directory is the one that the server uses when a basic URL without a path is typed into a browser, such as http://yahoo.com or, for your local server, http://localhost.
By default AMPPS will use the following location as the document root:
C:\Program Files (x86)\Ampps\www
To ensure that you have everything correctly configured, you should now create the obligatory “Hello World” file. So, create a small HTML file along the following lines using Windows Notepad or any other program or text editor, but not a rich word processor such as Microsoft Word (unless you save as plain text):
<!DOCTYPE html>
<html lang="en">
  <head>
    <title>A quick test</title>
  </head>
  <body>
    Hello World!
  </body>
</html>
Once you have typed this, save the file into the document root directory, using the filename test.html. If you are using Notepad, make sure that the value in the “Save as type” box is changed from “Text Documents (*.txt)” to “All Files (*.*)”.
You can now call this page up in your browser by entering the following URL in its address bar (see Figure 2-9):
localhost/test.html
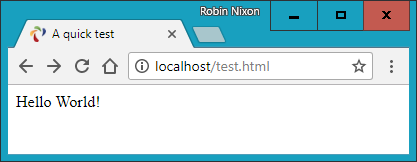
Figure 2-9. Your first web page
Note
Remember that serving a web page from the document root (or a subfolder) is different from loading one into a web browser from your computer’s filesystem. The former will ensure access to PHP, MySQL, and all the features of a web server, while the latter will simply load the file into the browser, which will do its best to display it but will be unable to process any PHP or other server instructions. So, you should generally run examples using the localhost preface from your browser’s address bar, unless you are certain that the file doesn’t rely on web server functionality.
Alternative WAMPs
When software is updated, it sometimes works differently from how you expect, and bugs can even be introduced. So, if you encounter difficulties that you cannot resolve in AMPPS, you may prefer to choose one of the other solutions available on the web.
You will still be able to make use of all the examples in this book, but you’ll have to follow the instructions supplied with each WAMP, which may not be as easy to follow as the preceding guide.
Here’s a selection of some of the best, in my opinion:
Updates to AMPPS
Over the life of this edition of the book, it is very likely that the developers of AMPPS will make improvements to the software, and therefore the installation screens and method of use may evolve over time, as may versions of Apache, PHP, or MySQL. So, please don’t assume something is wrong if the screens and operation look different. The AMPPS developers take every care to ensure it is easy to use, so just follow any prompts given, and refer to the documentation on the website.
Installing AMPPS on macOS
AMPPS is also available on macOS, and you can download it from the website, as shown previously in Figure 2-1 (as I write, the current version is 3.8 and its size is around 270 MB).
If your browser doesn’t open it automatically once it has downloaded, double-click the .dmg file, and then drag the AMPPS folder over to your Applications folder (see Figure 2-10).
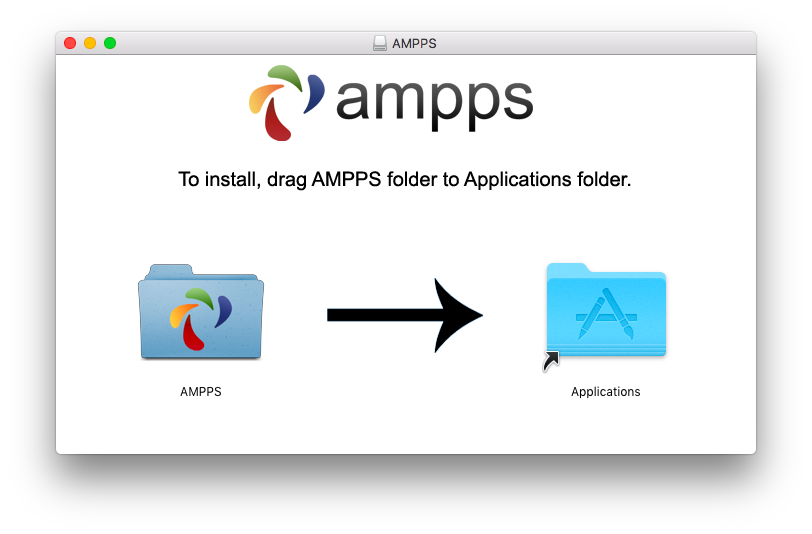
Figure 2-10. Drag the AMPPS folder to Applications
Now open your Applications folder in the usual manner, and double-click the AMPPS program. If your security settings prevent the file being opened, hold down the Control key and click the icon once. A new window will pop up asking if you are sure you wish to open it. Click Open to do so. When the app starts you may have to enter your macOS password to proceed.
Once AMPPS is up and running, a control window similar to the one shown in Figure 2-6 will appear at the bottom left of your desktop.
Note
You may notice that the default version of PHP in AMPPS is 5.6. In other sections of this book I detail some of the more important changes in PHP 7. If you wish to try them out for yourself, click the Options button (nine white boxes in a square) within the AMPPS control window, and then select Change PHP Version, whereupon a new menu will appear in which you can choose a version between 5.6 and 7.1.
Accessing the Document Root (macOS)
By default, AMPPS will use the following location as the document root:
/Applications/Ampps/www
To ensure that you have everything correctly configured, you should now create the obligatory “Hello World” file. So, create a small HTML file along the following lines using the TextEdit program or any other program or text editor, but not a rich word processor such as Microsoft Word (unless you save as plain text):
<html>
  <head>
    <title>A quick test</title>
  </head>
  <body>
    Hello World!
  </body>
</html>
Once you have typed this, save the file into the document root directory using the filename test.html.
You can now call this page up in your browser by entering the following URL in its address bar (to see a similar result to Figure 2-9):
localhost/test.html
Note
Remember that serving a web page from the document root (or a subfolder) is different from loading one into a web browser from your computer’s filesystem. The former will ensure access to PHP, MySQL, and all the features of a web server, while the latter will simply load the file into the browser, which will do its best to display it but will be unable to process any PHP or other server instructions. So, you should generally run examples using the localhost preface from your browser’s address bar, unless you are certain that the file doesn’t rely on web server functionality.
Installing a LAMP on Linux
This book is aimed mostly at PC and Mac users, but its contents will work equally well on a Linux computer. However, there are dozens of popular flavors of Linux, and each of them may require installing a LAMP in a slightly different way, so I can’t cover them all in this book.
That said, many Linux versions come preinstalled with a web server and MySQL, and the chances are that you may already be all set to go. To find out, try entering the following into a browser and see whether you get a default document root web page:
localhost
If this works, you probably have the Apache server installed and may well have MySQL up and running too; check with your system administrator to be sure.
If you don’t yet have a web server installed, however, there’s a version of AMPPS available that you can download from the website.
Installation is similar to the sequence shown in the preceding section. If you need further assistance on using the software, please refer to the documentation.
Working Remotely
If you have access to a web server already configured with PHP and MySQL, you can always use that for your web development. But unless you have a high-speed connection, it is not always your best option. Developing locally allows you to test modifications with little or no upload delay.
Accessing MySQL remotely may not be easy either. You should use the secure SSH protocol to log into your server to manually create databases and set permissions from the command line. Your web hosting company will advise you on how best to do this and provide you with any password it has set for your MySQL access (as well as, of course, for getting into the server in the first place). Unless you have no choice, I recommend you do not use the insecure Telnet protocol to remotely log into any server.
Logging In
I recommend that, at minimum, Windows users should install a program such as PuTTY, for Telnet and SSH access (remember that SSH is much more secure than Telnet).
On a Mac, you already have SSH available. Just select the Applications folder, followed by Utilities, and then launch Terminal. In the Terminal window, log in to a server using SSH as follows:
ssh mylogin@server.com
where server.com is the name of the server you wish to log into and mylogin is the username you will log in under. You will then be prompted for the correct password for that username and, if you enter it correctly, you will be logged in.
Using FTP
To transfer files to and from your web server, you will need an FTP program. If you go searching the web for a good one, you’ll find so many that it could take you quite a while to come across one with all the right features for you.
My preferred FTP program is the open source FileZilla, for Windows, Linux, and macOS 10.5 or newer (see Figure 2-11). Full instructions on how to use FileZilla are available on the wiki.
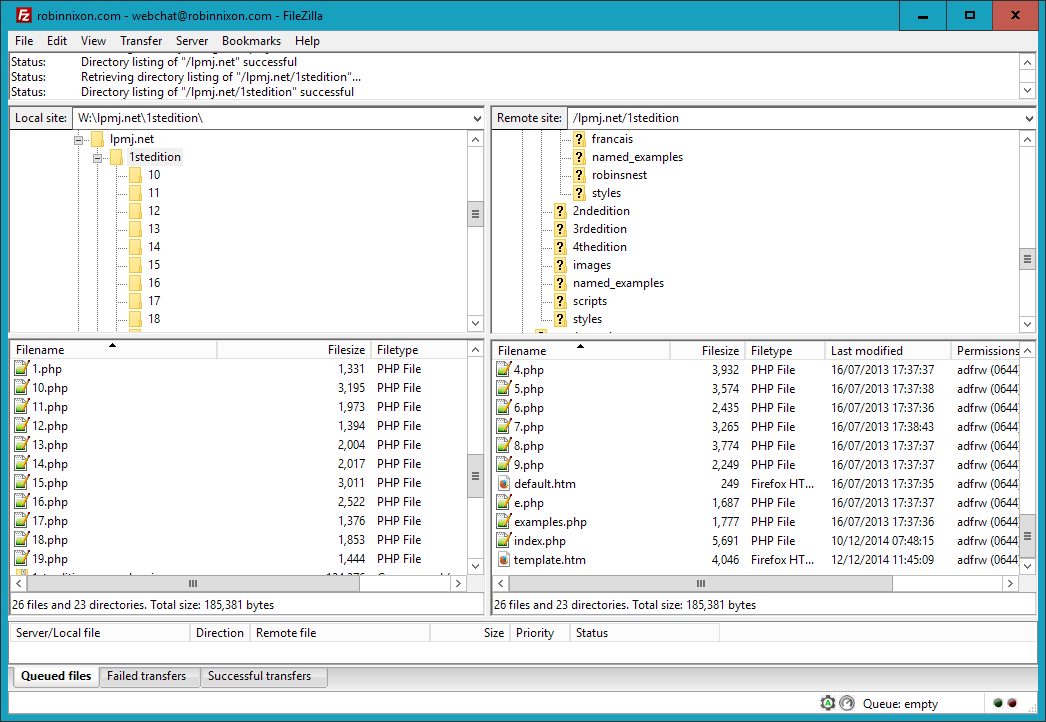
Figure 2-11. FileZilla is a full-featured FTP program
Of course, if you already have an FTP program, all the better—stick with what you know.
Using a Program Editor
Although a plain-text editor works for editing HTML, PHP, and JavaScript, there have been some tremendous improvements in dedicated program editors, which now incorporate very handy features such as colored syntax highlighting. Today’s program editors are smart and can show you where you have syntax errors before you even run a program. Once you’ve used a modern editor, you’ll wonder how you ever managed without one.
There are a number of good programs available, but I have settled on Editra (see Figure 2-12), because it’s free and available on macOS, Windows, and Linux/Unix, and it suits the way I program. You can download a copy by visiting Editra’s website and selecting the Download link at the top of the page, where you can also find a link to the documentation. Everyone has different programming styles and preferences, though, so if you don’t get on with it, there are plenty more program editors available to choose from—or you may wish to go directly for an integrated development environment (IDE), as described in the following section.
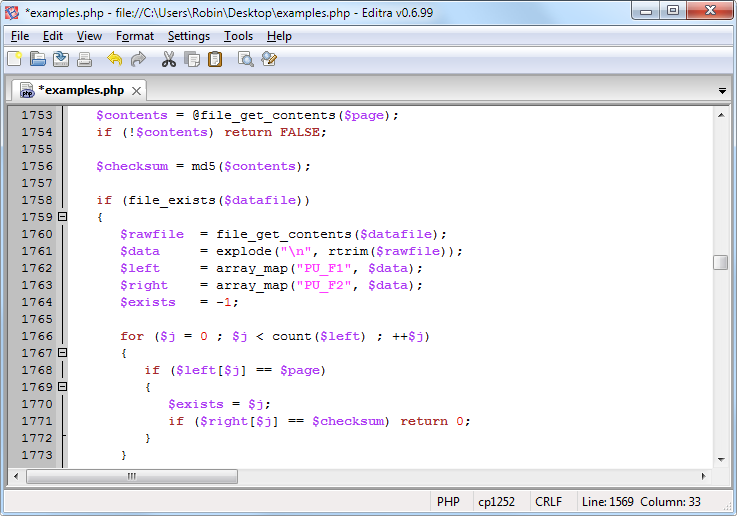
Figure 2-12. Program editors (like Editra, pictured here) are superior to plain-text editors
As you can see from Figure 2-12, Editra highlights the syntax appropriately, using colors to help clarify what’s going on. What’s more, you can place the cursor next to brackets or braces, and Editra will highlight the matching ones so that you can check whether you have too many or too few. In fact, Editra does a lot more in addition, which you will discover and enjoy as you use it.
Again, if you have a different preferred program editor, use that; it’s always a good idea to use programs you’re already familiar with.
Using an IDE
As good as dedicated program editors can be for your programming productivity, their utility pales into insignificance when compared to integrated development environments, which offer many additional features such as in-editor debugging and program testing, as well as function descriptions and much more.
Figure 2-13 shows the popular phpDesigner IDE with a PHP program loaded into the main frame, and the righthand Code Explorer listing the various classes, functions, and variables that it uses.
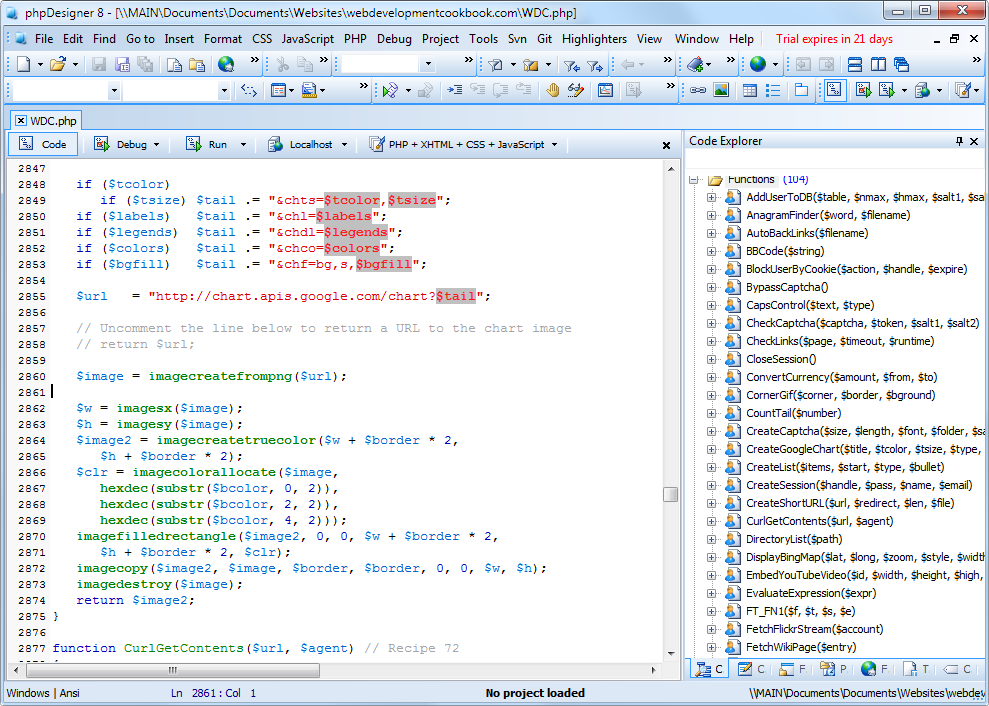
Figure 2-13. When you’re using an IDE such as phpDesigner, PHP development becomes much quicker and easier
When developing with an IDE, you can set breakpoints and then run all (or portions) of your code, which will stop at the breakpoints and provide you with information about the program’s current state.
As an aid to learning programming, the examples in this book can be entered into an IDE and run there and then, without the need to call up your web browser. There are several IDEs available for different platforms, most of which are commercial, but there are some free ones too. Table 2-1 lists some of the most popular PHP IDEs, along with their download URLs.
| IDE | Download URL | Cost | Win | Mac | Lin |
|---|---|---|---|---|---|
| Eclipse PDT | http://eclipse.org/pdt/downloads/ | Free | ✓ | ✓ | ✓ |
| Komodo IDE | http://activestate.com/Products/komodo_ide | $295 | ✓ | ✓ | ✓ |
| NetBeans | http://www.netbeans.org | Free | ✓ | ✓ | ✓ |
| phpDesigner | http://mpsoftware.dk | $39 | ✓ | ||
| PHPeclipse | https://sourceforge.net/projects/phpeclipse/ | Free | ✓ | ✓ | ✓ |
| PhpED | http://nusphere.com | $99 | ✓ | ✓ | |
| PHPEdit | https://phpedit.en.softonic.com | $117 | ✓ |
Choosing an IDE can be a very personal thing, so if you intend to use one, I advise you to download a couple or more to try them out first; they all either have trial versions or are free to use, so it won’t cost you anything.
You should take the time to install a program editor or IDE you are comfortable with now; you’ll then be ready to try out the examples in the coming chapters.
Armed with these tools, you are now ready to move on to Chapter 3, where we’ll start exploring PHP in further depth and find out how to get HTML and PHP to work together, as well as how the PHP language itself is structured. But before moving on, I suggest you test your new knowledge with the following questions.
Questions
What is the difference between a WAMP, a MAMP, and a LAMP?
What do the IP address 127.0.0.1 and the URL http://localhost have in common?
What is the purpose of an FTP program?
Name the main disadvantage of working on a remote web server.
Why is it better to use a program editor instead of a plain-text editor?
See “Chapter 2 Answers” in Appendix A for the answers to these questions.