In the previous chapter, you got your Pi or SoC device to boot, and then explored Lua from an interactive text console. That’s more than some first-year computer science students learn about how computers work, so consider yourself a success. There’s a lot more to learn, but first, it’s time to set up a development environment.
Establishing a Development Environment
Having a development environment means having all the tools you need to develop software, and having a place where you can do that development without affecting the rest of your system or letting the rest of your system affect your work.
Navigating the Desktop
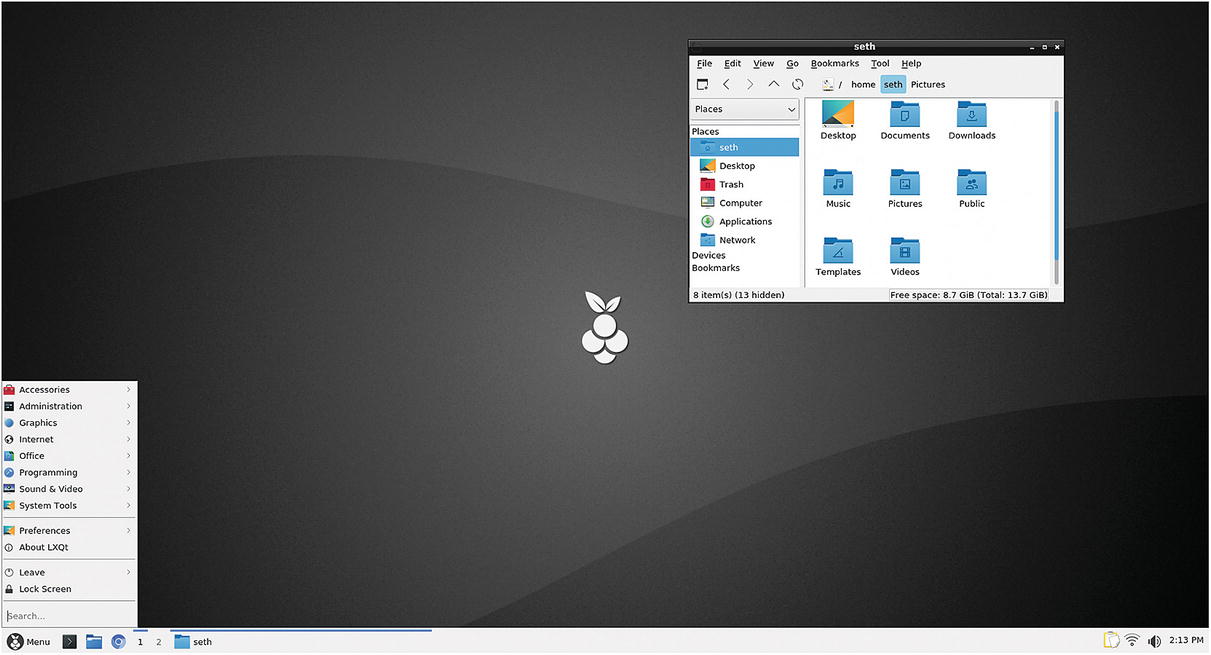
The LXQT desktop
Your basic applications
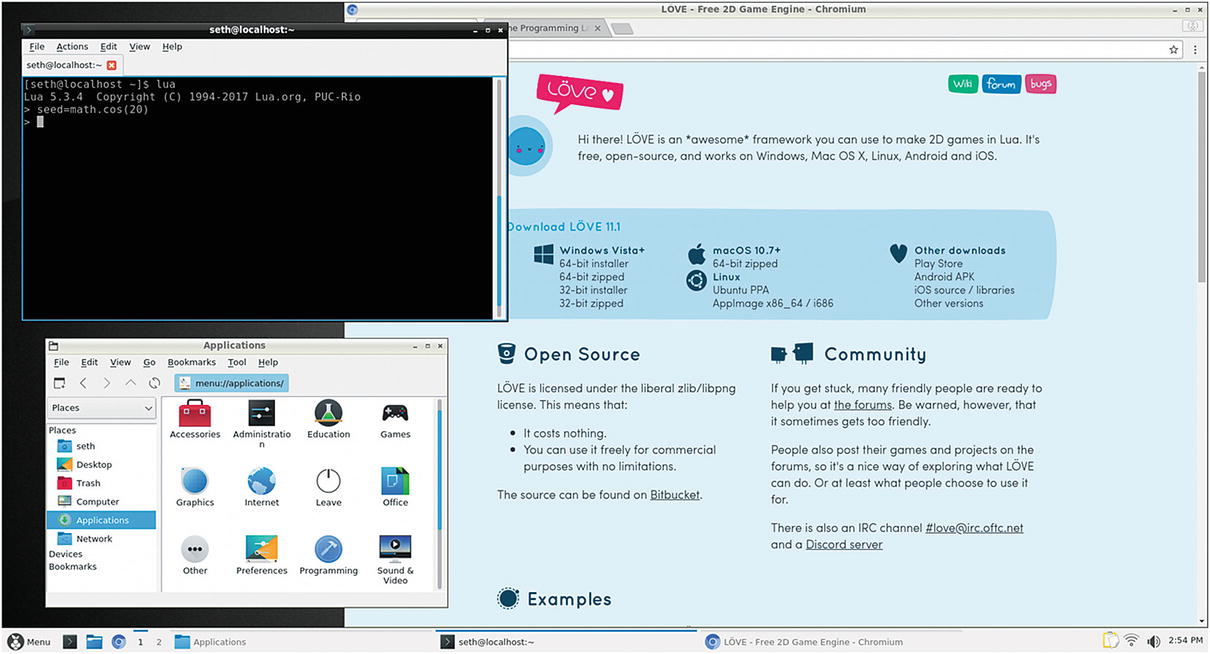
There are also some unique features developed by Linux that are slowly making their way to other platforms. For instance, in the lower-left corner, there are two boxes labeled 1 and 2. These represent virtual desktops. You can open a few applications while on desktop 1, and then switch to desktop 2 to open another application to avoid clutter. It can be useful to leave a Bash shell open on one desktop so you can run commands or test out Lua functions while your code editor is open on another desktop.
Installing Development Applications
Text editor. A person who codes needs an application to write code in. Most programmers use a special kind of text editor called an integrated development environment (IDE), which not only edits text but also knows enough about the language being used to add convenience features, such as word completion, syntax highlighting, and file management. Popular IDEs include Eclipse, Qt Creator, and NetBeans. This book uses Geany, a lightweight IDE.
Terminal. It’s helpful to have direct access to the platform you’re programming. A terminal gives you a shell prompt as an application inside your desktop. No more switching back to a text console with Ctrl+Alt+F3! There are many terminal emulators for Linux; this book uses QTerminal.
Git. Programming is all about iteration. You try something, test it, improve it, and then try it again. With so many iterations, it’s helpful to have a historical record of each attempt you make at solving a problem. Git is the basis for popular sites like GitLab and GitHub, so it’s a good version control system to learn. There are many interfaces to Git. This book uses a plain old terminal as well as git-cola.
Web browser. If you are going to refer to the Lua reference manual, you need a way to access the Internet. Fedberry provides the Chromium browser, the open source basis for Google’s Chrome.
Software catalog. To make it easy to find software, Fedberry provides the dnfdragora repository browser.
That’s not all you’ll need to complete this book, but it’s a good start for now.
If you prefer to work in graphical applications, click the application menu in the bottom left of the screen and select Administration ➤ dnfdragora.
In the dnfdragora window, set the search scope to All, All, and in names. The first time dnfdragora launches, it syncs with the application servers, so give it some time to pull an updated application list from the Internet. When it’s finished, the main panel is populated with a list of applications.

The dnfdragora application installer
Exploring Your Desktop
Launch the Chromium web browser, download a desktop wallpaper from the Internet, and set it as your desktop background.
Try to locate hidden files in your home directory. Don’t do anything with them, just learn how to view and hide them again.
Customize some of the settings of your desktop, like the position of the panel, or the fonts used in window titles, and so on.
Learn to use virtual desktops fluidly and also how to switch between active applications.
Getting comfortable with your workstation is important, and there’s no limit to the ways that Linux can be customized. Explore your new world, and when you’re feeling at home and ready to code, start the next section.
Creating a Graphical Game

Your very first graphical game in Lua
You may as well start off with proper organization, so create a folder (or directory in UNIX terminology) for your first Lua project.
You can do this two different ways. Maybe the most obvious way is just as you would on any computer you’re used to: click the file manager icon in the lower-left corner of the desktop panel to open a window to your home directory, and then right-click in the empty space of the window and choose Create New ➤ Folder. Name your new directory dice.
Remember that the $ is your shell prompt, so don’t type that. The tilde (~) character is shorthand meaning your home directory, and the slash (/) serves as a path delimiter between one directory (your home in this case) and another (in this case, dice).
Whatever way you choose, the end result is a new directory in your home, called dice. This is where the data files for this, your first game, must be stored.
Note
The & character tells your shell to launch an application and then returns you to your shell prompt. Sometimes when debugging, it’s useful to leave off the & so that you maintain a link with the running application and get to see any messages that it sends.
The Geany IDE is highly configurable, with many themes and plugins. You can spend time customizing it, but at the very least click the Tools menu and select Plugin Manager. In the Plugin Manager window, activate the File Browser extension to add a display of your files in the left panel.
Geany’s file browser preferences
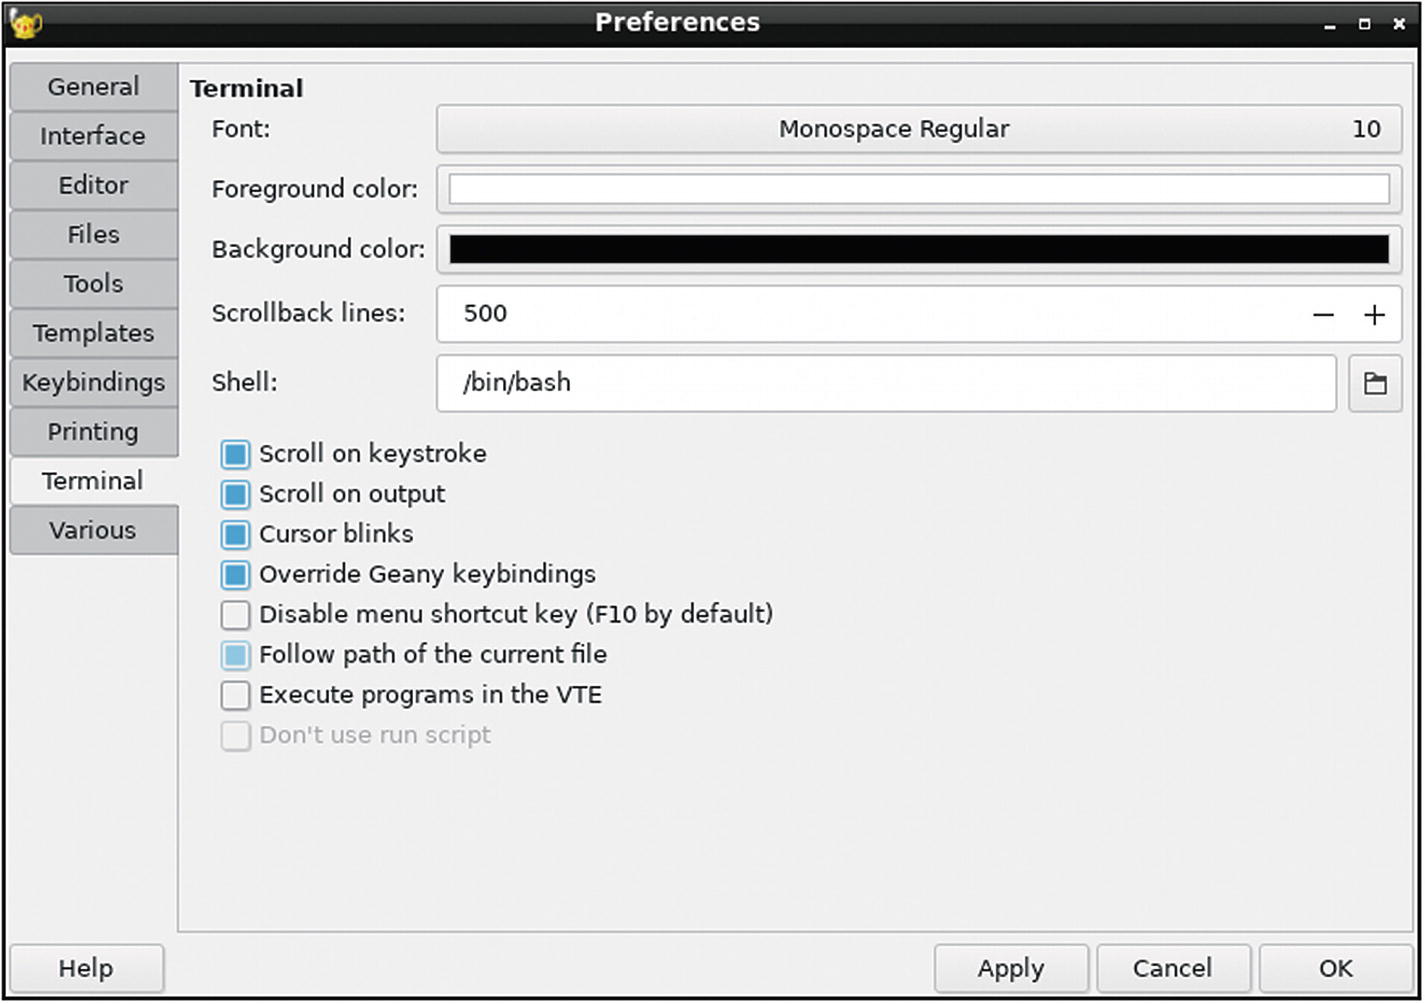
Geany’s terminal settings
With these features activated, both the file browser and the terminal synchronize their displays with whatever file you are editing at any moment. It won’t make much of a difference now, but once you’re working on complex projects, this makes it easy for you to run test commands in the correct location.
Load and Main Loop
Once you’ve configured Geany, coding can begin. Before coding dice rolls as you did in the first iteration of the game, there’s some setup to make this a graphical game. First, you need the libraries to let Lua produce graphics. There are a few different libraries that could be used for this, because there are several GUI frameworks that provide Lua hooks. However, you are specifically looking to make games, and conveniently there are game engines that can be controlled by Lua scripts. Just as Lua itself has built-in functions for common tasks, such as math.random , game engines have functions for common game tasks, such as a window that can go full-screen on demand, listeners for joystick and mouse input, physics, and so on.
The installer asks you for permission to install several libraries that LÖVE depends upon. Accept and wait for the install to finish, which returns you to the usual prompt ($).
Writing Lua Code with LÖVE
LÖVE is a set of libraries for Lua, so it isn’t an application you launch to write code. Instead, you use LÖVE functions in your code.
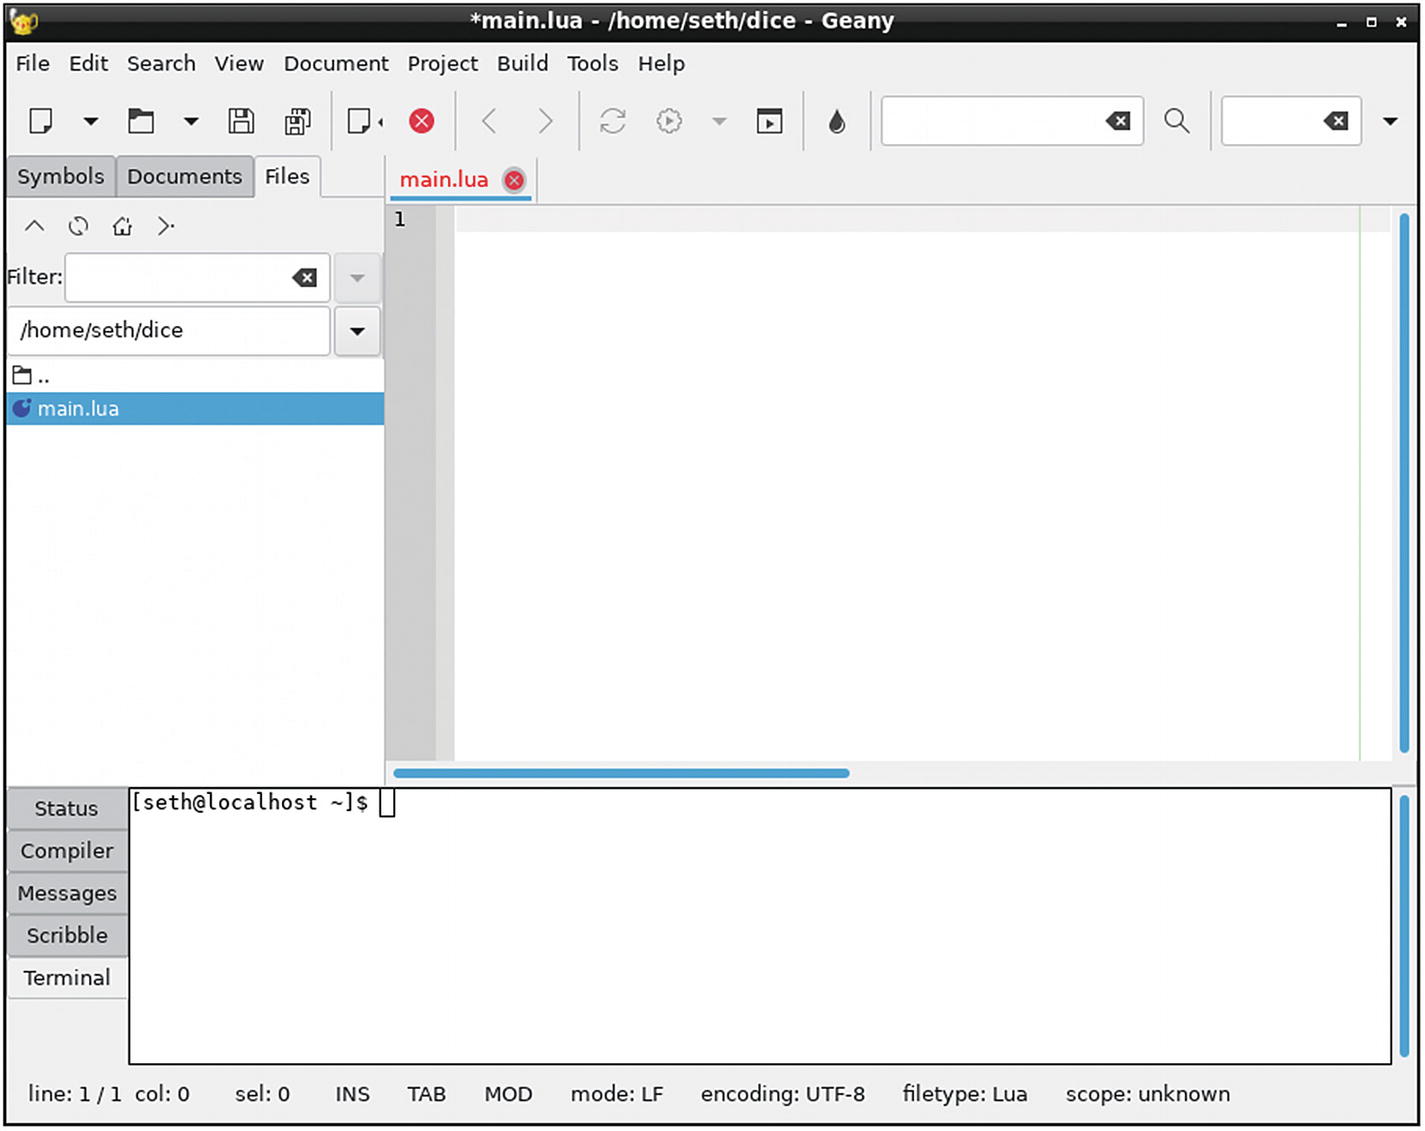
If Geany isn’t still running, launch it now. Go to the File menu and select New. This creates an empty untitled file in your workspace. Select File ➤ Save As to save this file as main.lua in your dice project directory.
Creating variables for the size of the window doesn’t do anything special. These are normal variables containing normal numbers. It’s how the game script uses these variables that actually sets the window size.
The LÖVE game engine is programmed to do just two things automatically when it’s launched: call the love.load() function once, and then call the love.draw() function until the user quits. So for LÖVE to do anything with your game, you need to create both of those functions. LÖVE doesn’t care what’s in those functions; in fact, it expects you to fill that in yourself. In other words, it’s in these functions that the actual game code goes.
You’ve already used functions in Lua, but this time you are creating your own. A function in programming is a block of self-contained code that optionally accepts input and optionally renders data as output. You’ll also hear them called methods or even algorithms , but it’s all the same concept: you’re writing instructions for a computer, and by wrapping those instructions in a named function, you allow your program to use and reuse those instructions as often and whenever needed.
Spawning a window for your game is a one-time task. When the user launches your game, the window’s attributes—like the size, title, and background color—only need to happen once. After those attributes are set, LÖVE can move on to the rest of the code. This means, of course, that window setup should happen in the love.load() function .
It’s customary to indent code blocks to signify a kind of lineage. For instance, everything is indented after function love.load() to demonstrate that the lines of code are inside that function. The word end is not indented, and closes the function. In some programming languages, like Python, this is required, but in Lua, it’s entirely optional. Lua doesn’t use indentation to determine programming logic; it’s just a visual convention for programmers.
Most of the names of the functions are pretty descriptive, so you can probably surmise what they do. love.window.setMode sets the width and height of the window by using the variables view_w for width and view_h for height.
The love.window.setTitle function sets the title in the window’s title bar. love.graphics.setBackgroundColor sets the background of the window to the RGB value 0,0,0 (black).
It’s not much to look at, but you can launch your game as is. To see what you’ve created so far, first save your file. If you don’t remember to save before previewing your game, you won’t see your changes, so get used to saving often.
The cd command stands for change directory. The ~ symbol is shorthand for your home directory.
An empty window appears. Notice that its title is DiCE.
Close the window once your excitement has subsided. For this second iteration of the dice game, don’t worry about how the game looks, just focus on the code. Making the game look good happens in the next iteration.
Game Code
You know from the previous version of the dice game that there are three events that must happen for the game to work. The computer must roll die, the player must roll die, and then the values of the roll must be revealed.
In the previous version of the game, it was up to the user to compare the rolls and to determine who had won. This time, let Lua compare the values and determine the winner. To do that, you must use two of the most common logic tools in programming: math operators and an if/then statement.
An if/then conditional statement does exactly what an if/then statement does when you use one in everyday speech. If one thing is true, then do one thing; otherwise, do something else. In this example, the if/then statement hinges upon whether or not the contents of the player variable is greater than the contents of the computer variable. It would be equally effective if it depended upon computer being less than player.
From the LÖVE library, the code uses the graphics.setColor function to set the foreground color and the graphics.printf to print text on the screen. Just as the standard Lua print function requires a parameter—specifically what to print, the love.graphics.printf function requires several parameters: what to print, when to wrap text to the next line, the location along the X and Y axes, and text justification. These parameters must be given in the order specified by the function’s documentation, located at love2d.org/wiki/love.graphics.printf.
The game window opens, but it’s still just a blank window. This makes it seem like your game doesn’t work, but if you look at the terminal, assuming you launched the game in Geany, then you see that Lua did print a winner to your standard output. So the underlying game logic is sound.
The problem, in fact, is that your game’s text was written to the screen but only persisted for a millisecond or so. The love.load() function is only called once per launch, but a screen is refreshed constantly and at a rate much faster than your eye can detect. To generate graphics that are refreshed for as long as the game is running, use the love.draw() function .
This time, the winner is printed to the graphical game screen. The message also prints infinitely in your terminal, which provides you with some insight about why the text remains visible in the game window. The message isn’t just being written once, but several times as your screen refreshes.
Graphics
There are a few problems with the game in its current state. First, it isn’t very interactive. A player isn’t likely to feel that they’re rolling the die, virtual or otherwise, because the game just launches and declares a winner. In a related issue, there’s no way to roll again except by closing the game and launching it again. And finally, the game isn’t much to look at. It has no graphics, the font it uses is boring, and there’s nothing that visually suggests that this humble application is a game.
To incorporate graphics and an attractive font, you must have graphics and a font to not only use but that you’re permitted to ship with your game when you distribute it. You probably aren’t going to distribute this first dice game that you make, but it’s a good habit to get familiar with the three kinds of assets that you can use in your games: original, Creative Commons, and commissioned. The latter is art that you have someone else make for you, with the express permission granted for you to use the artwork in your game. Creative Commons is the same, in principle; someone else makes art, posts it to the Internet along with some level of permission for you to reuse it (usually you are required, at least, to give them credit for their work, which seems only fair). Failing those resources, you can just make your own artwork.
For the sake of brevity, take a look at OpenClipArt.org, a website full of Creative Commons artwork. You can search for dice and find several results, but to roll dice and show the result, you need one image per side of dice. To simplify the effort, this example uses six-sided dice instead of twenty. To make the game look a little more high-tech than it actually is, this example eschews traditional dice and instead uses a two-dimensional design. Traditional dice would be very familiar, but the results would be immediately obvious. Since there’s not that much going on in this game, using a non-traditional representation of a dice roll forces an unsuspecting user to solve a little puzzle to figure out why the player or the computer wins with each roll. In other words, the game adds a game to the game. If you don’t care for something so esoteric, use any graphic you like, as long as you name your image files to match those used in the example code in this book.
Fonts
Fonts have the same requirements as graphics. To use them in your game, you have to send the font file along with your game, and to do that legally, you must respect the license of whatever font you choose. You might not think about it often, but the default fonts on Windows and Apple computers are mostly owned by Microsoft, Apple, Adobe, or other companies. You’re allowed to use them, but not necessarily to redistribute or sell them. Luckily, there are plenty of free and open source fonts available online.
Fonts don’t often use a Creative Commons license, but have their own special Open Font License or GNU General Public License, or similar. There are several good sites offering fonts. This example uses the boldly futuristic font Orbitron from TheLeagueOfMoveableType.com. It is a good source of openly licensed fonts but does not have so many options as to be overwhelming.
Create two new directories in your dice folder: one called font and the other called img. To create a new directory, right-click your dice folder and select New ➤ Folder.
Download the dice graphics as PNG files and also download the font. Place the dice graphic files in the img directory and the font TTF and LICENSE files in the font directory.
Tables
In the current iteration of the game, the computer and player variables contain one piece of information each. The new iteration, like probably any game you create from this point, is more complex. One attribute per “object” in your program is not enough. For instance, the player in your game must contain a number representing its dice roll as well as a graphic that shows your user what that roll was. That’s at least two data for one variable. Surely, that’s not possible!
The font size is set to 72 points. That will be important later.
Game and GUI Logic
When you were running your dice game from the Lua shell, everything was instantaneous. Applications with graphical user interfaces, by nature, tend to sit idly until the user tells it to do something. Currently, your GUI dice game launches, rolls the dice, and announces a winner. You need to slow it down so that it waits for the user before taking action.
Common conventions for making a GUI application do something are buttons and menus. Both of these are usually triggered by a mouse click. Why not make the dice game wait to roll die until the user clicks the mouse? The act of clicking the game screen helps the user feel that they have more involvement with the game, and also makes the game something that can be played several times without having to be closed and the reopened.
You already know that the main loop of a LÖVE game is the love.draw function , so that’s the part of your code that you need to control. The first task is to force love.draw to wait for input before displaying any change. A common trick for such control is to create a variable and then force the main loop to wait for that variable to change before taking action.
Erase whatever you have in the love.draw function, replacing it with a conditional statement that checks whether start is true or not. If it is not true, then the game commences. If true, it draws the neutral die graphic.
There’s quite a bit of math involved in positioning the graphics. You originally set the game window sizes in the global variables cw (canvas width) and ch (canvas height), so you know the area you have to work with.
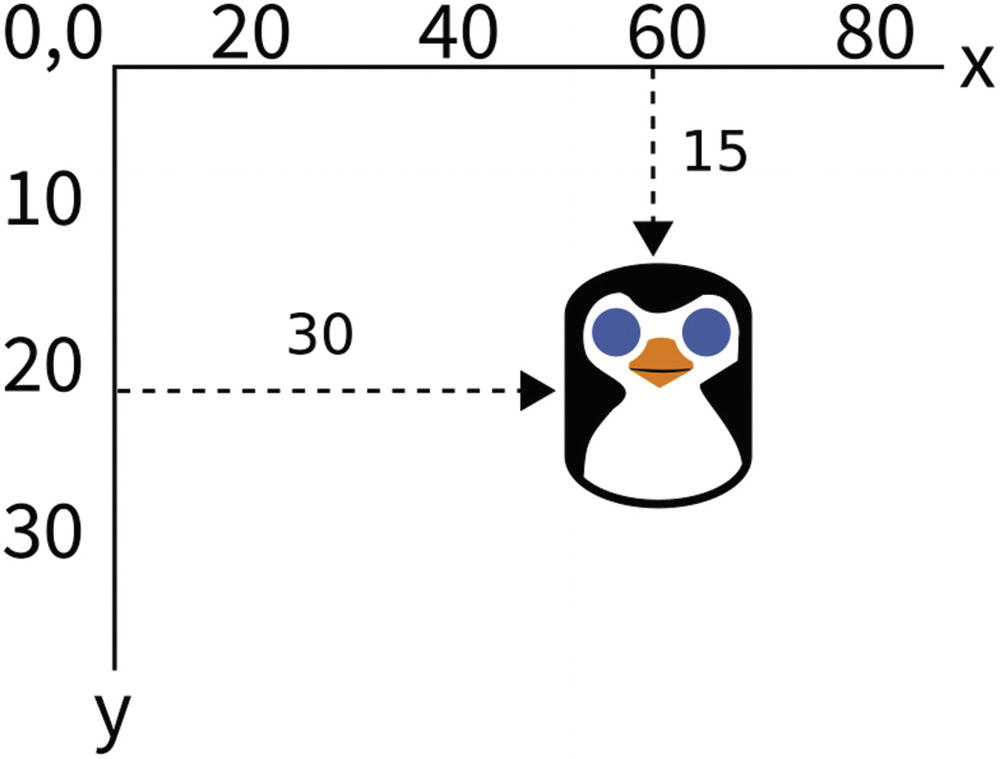
Screen coordinates
Technically, you could start the first dice display at 0, but so that it’s not crowded against the left window edge, the example code indents it by 33 pixels. The same holds true for the distance from the top edge, which is indented by 30 pixels. The offset of the dice are set to 0, and the scale is set to 0.2, because the source graphics are larger than the screen.
Save and then launch the game. At the very least, it shows you the neutral positions of the die. Not terribly exciting, but it’s a good start.
Mouse Click
One of the nice things about using a game engine is that there’s a lot of code already written for you. Listening and processing mouse events is a perfect example of that. Imagine having to write the code to monitor the system for mouse clicks, especially given that different operating systems and platforms send mouse click events differently. LÖVE takes care of all of that for you.
Interestingly, it’s technically not the mouse click that you want, but the mouse release. If you set your game to start its main loop when a mouse is clicked, then it might get very confused if a user clicks and holds the button down for 10 seconds before releasing. A release, on the other hand, only happens once. To start the game when the mouse button is released, set the start variable to false.
And add dice rolls to the love.mousereleased function, storing the result in the appropriate human or computer table. After the rolls happen, change the graphic in the img variable of each player to the corresponding dice image.
To tell LÖVE which image to use, you must construct the full image name using the number contained in the roll variable. You join strings together in Lua with two dots; for example, if the comp.roll variable contains 3, then 'img/comp-die'..comp.roll..'.png' translates to img/comp-die3.png.
Winner and Loser
With all the important variables set depending on how the dice roll, the main loop has relatively little to do in terms of logic. However, the main loop is still important to keep the graphics going, so now it’s time to make sure that the interface responds appropriately to input.
You’ve already set the main loop to appear dormant until it receives input from the user, but it should also react once a mouse button is released. Specifically, it should look at the variables of the players to determine who has won the roll and announce the winner.
Insert another conditional statement in the main loop that checks for a winner. Announce the winner by printing a message to the screen using the love.graphics.printf function. To help differentiate between the human user and the computer, this example changes the foreground color to either green or red when writing the font to screen, and then back to white for general-purpose drawing.
Note
If you fail to reset the color to white, your other graphic elements may be rendered incorrectly.
You can choose whatever color you prefer. If you don’t think in RGB colors, use a color picker online. Traditionally, RGB values use 0 as empty and 255 as full, but LÖVE uses 0 as black and 1 as white, with all shades in between being a decimal value. You can convert from a 0–255 value to a decimal value by dividing by 255. For example, a color picker value of (188,54,0) is (188/255,54/255,0/255) or (0.73,0.21,0).
Try your game now. It responds to your click, changes the dice graphics, and announces a winner. What more could a user possibly want?
Well, since there’s no visual cue for the user that the game is waiting for a mouse click and hasn’t just crashed, it would be better user interface (UI) design to provide guidance for a new user. This can be implemented as an alternative to the start condition. If start is true, then that means the user has just started the game and has not yet clicked the mouse button (if the button had been clicked, the screen would display the winner and start would be set to false).
Packaging
You now have a fully functional dice-rolling game. It’s simple, but it’s only about 50 lines of code and demonstrates many important principles of game logic, UI design, and programming fundamentals.
It’s programmed in LÖVE, so any of your friends or family can play it as long as they install LÖVE on their platform. However, if you send them a folder of code, images, and fonts, they won’t know what to do with it. It’s time to package your game for distribution.
Open a desktop window to your dice folder and double-click dice.love. Your game launches just like any normal application would. You can send this file to anyone you want to, and as long as they install LÖVE, they can play your game.
Homework
The love.mousereleased function accepts three parameters from your operating system: the X and Y coordinates on which the mouse was clicked and the button that was released.
The game doesn’t account for a tie game. There are at least two ways to deal with a tie; try changing the code to acknowledge when the player and computer roll the same result.
Create a version of the game that only responds to a left-click (button 1).
Add a cheat to the game such that the computer automatically wins if the right mouse button (button 2) is released, and the player automatically wins if the middle button (button 3) is released.
If you are feeling particularly brave, try this advanced exercise: change which dice display represents the player depending on which side of the screen the player clicks to roll.