
Real video games have sound effects. Everyone knows that. So if you deliver a game to someone without sound, they immediately notice that it’s missing the audio. This chapter introduces the most important love.audio functions and integrates sound into Battlejack.
Finding Audio
As with any game asset, the first problem with adding sound effects to your game is that you need sound effects. Of course, open culture on the Internet has a few potential solutions, and so does your Raspberry Pi, if you’re up for some manual labor.
The website freesound.org is a treasure trove of sound effects. Search for terms like level up, power up, ambient music, game, and so on, to rummage through thousands of professional sound effects that are free to use. The licensing of each sound can differ, so look at the requirements set by the creator; some require attribution, some forbid using their work in commercial products, and others require nothing.
There are other websites loaded with sounds, but you don't have to limit yourself to reusing other people’s work. You can create your own high-quality sounds on your Raspberry Pi with Linux Multimedia Studio, better known as LMMS.
LMMS
LMMS is a music production suite available for free on your Raspberry Pi. Whether or not you call yourself a musician, LMMS makes it easy to lay down a beat, synthesize new sounds, sample, loop, distort, enhance, and mix. LMMS comes with ready-to-use instruments, presets, and samples, making it one of the easiest music applications on any platform to get started on.
It takes a while for the full package to install, since there are so many synths and effects bundled with it, so be patient. Once installed, launch LMMS from the application menu.
Whatever you make in LMMS ends up in the Song Editor window. This is where you sequence, or schedule, sounds. If you are using LMMS to create sound effects, then everything you sequence should happen immediately in the left-most block. If you are using LMMS to make background music for your game, then the sounds happen gradually, over several blocks from left to right.
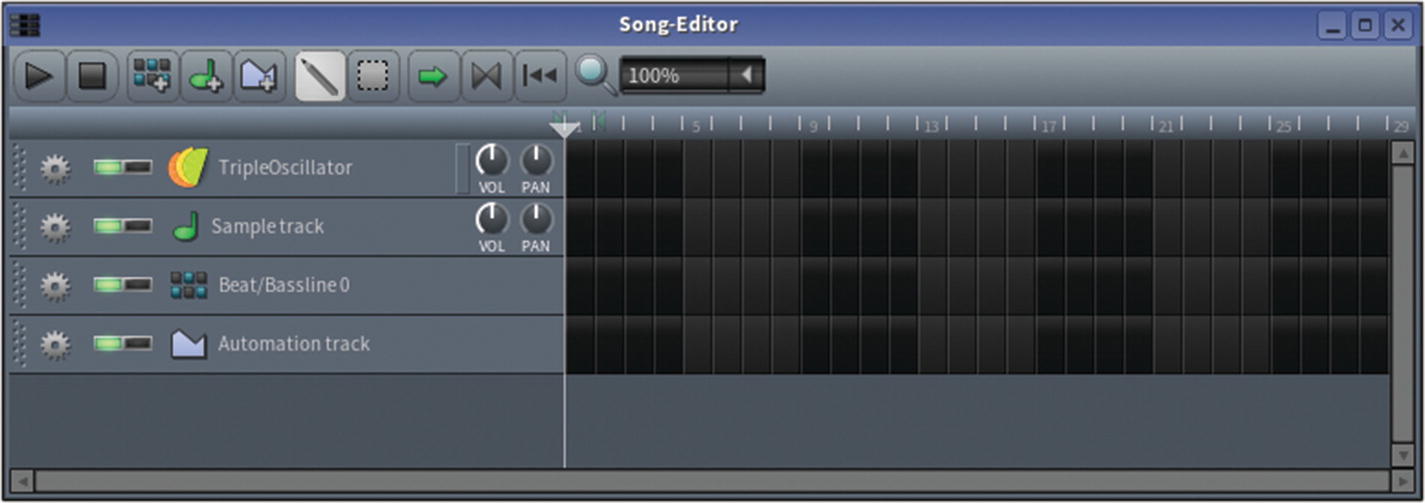
The Song Editor window
On the far left of the LMMS window are vertical tabs. When clicked, each tab opens a panel. Click the star icon tab for a Presets panel (see Figure 11-2) containing sounds and synthesizers that you can use to create your sound effects and music bed. More can be found in the musical note tab.
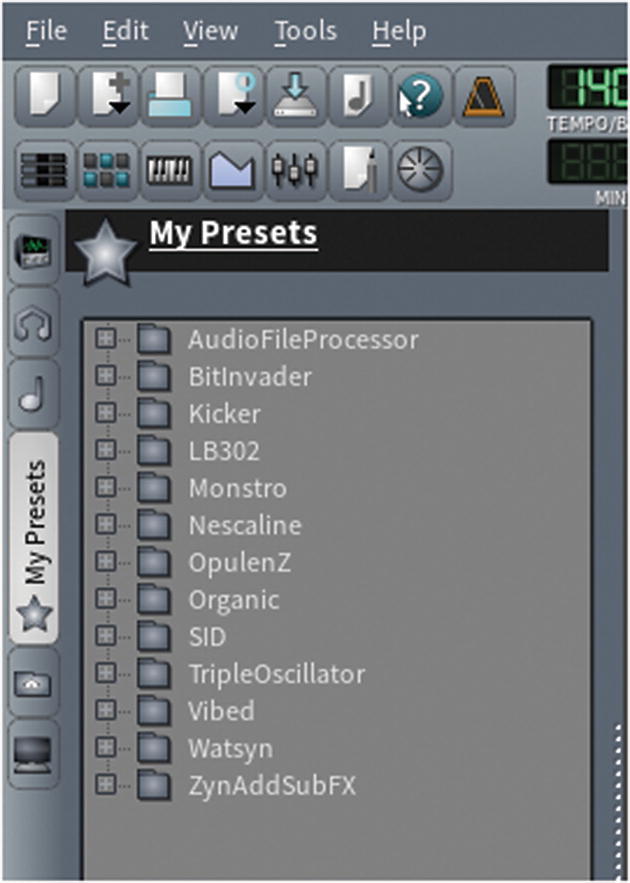
LMMS preset panel
Building a Sound Effect
Once you find a sound that you like, drag the sound into the left panel of the Song editor. This creates a new track in the Song editor, which is the one that you work in to create your sound effect.
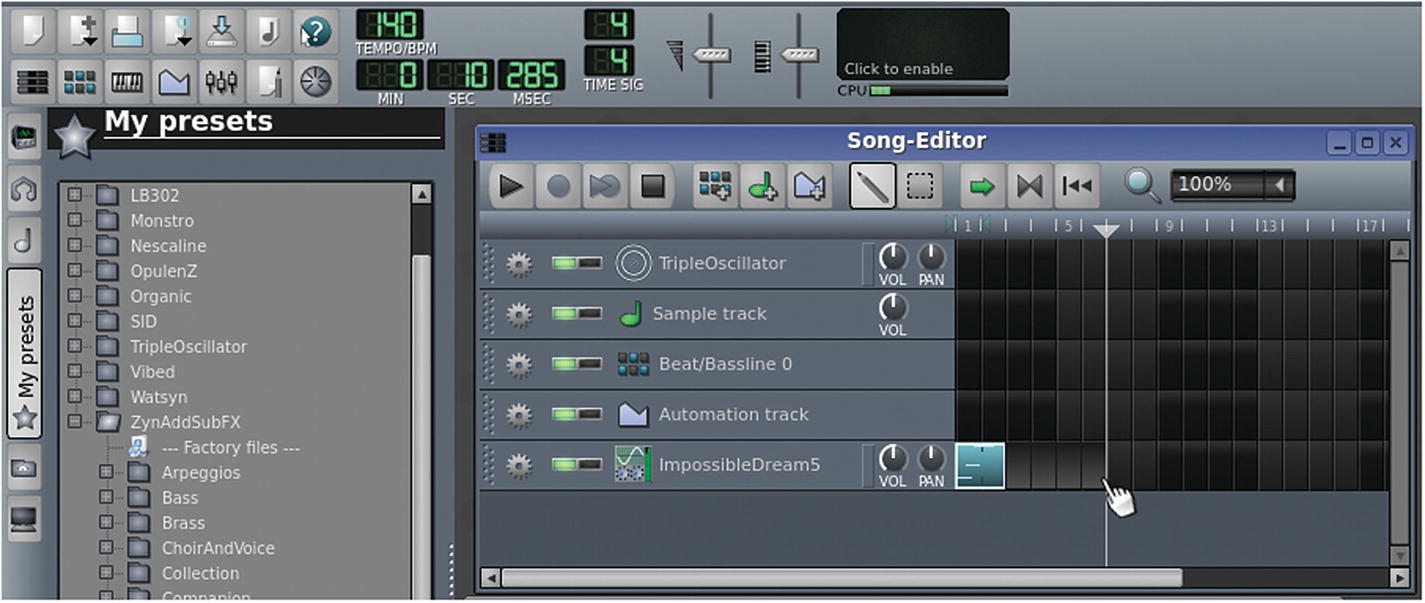
This example uses Presets ➤ ZynAddSubFX ➤ Fantasy ➤ 0037-ImpossibleDream5.xlz.
In the Song editor, double-click the first black square in the ImpossibleDream5 track. This opens the Piano Roll editor (see Figure 11-3). As the name implies, this is the digital equivalent to the rolls used in old-fashioned player pianos. Notes are entered into the matrix of the roll so that they are triggered automatically as your song plays.
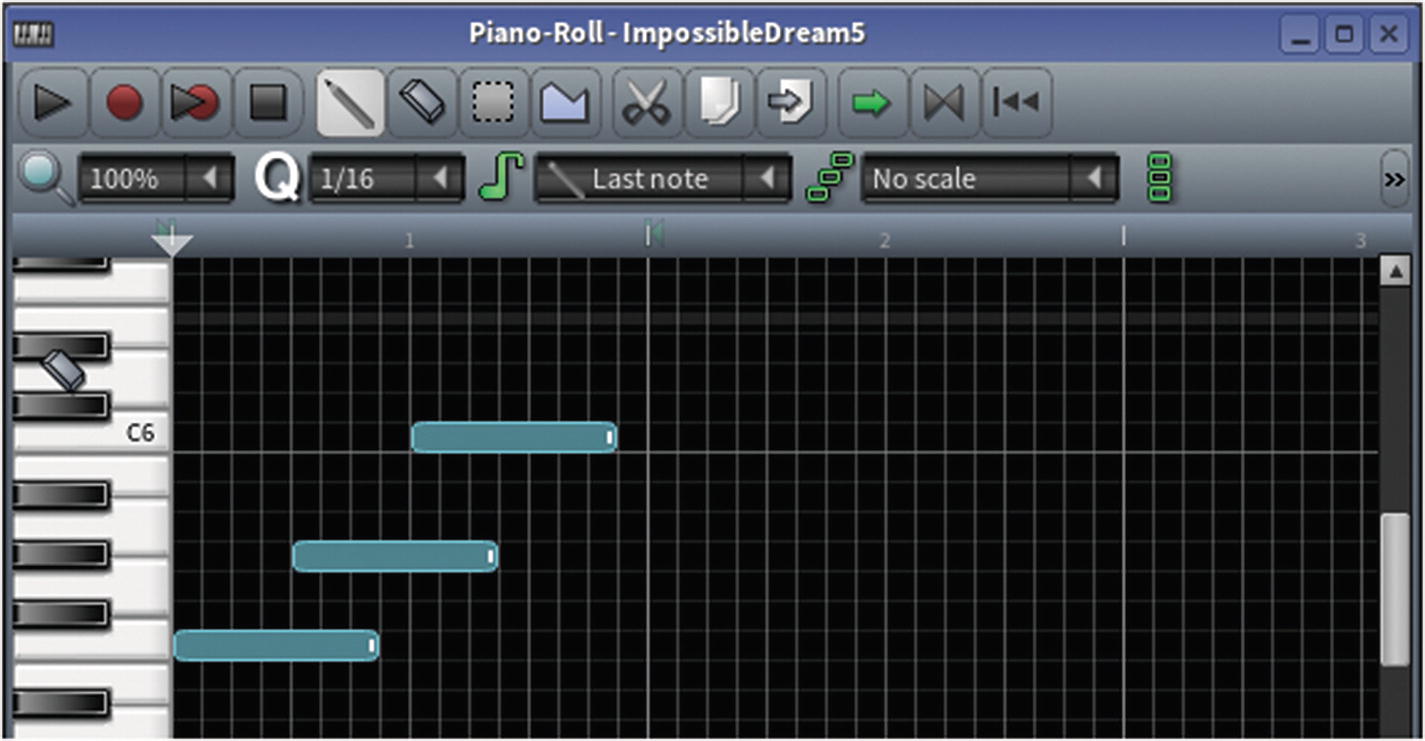
Piano Roll (or matrix) editor
The important buttons in the Piano Roll editor are the pencil and the eraser. The pencil enters new notes into the matrix, while the eraser removes them. You can hear (but not enter) notes by pressing the keys of the keyboard along the left side of the window.
If you’re unfamiliar with making music, don’t be afraid to experiment. Discover the wonders of a well-constructed arpeggio, or the raw thrill of a power chord. There’s no wrong way to design sound effects. If something sounds good to you, then use it.
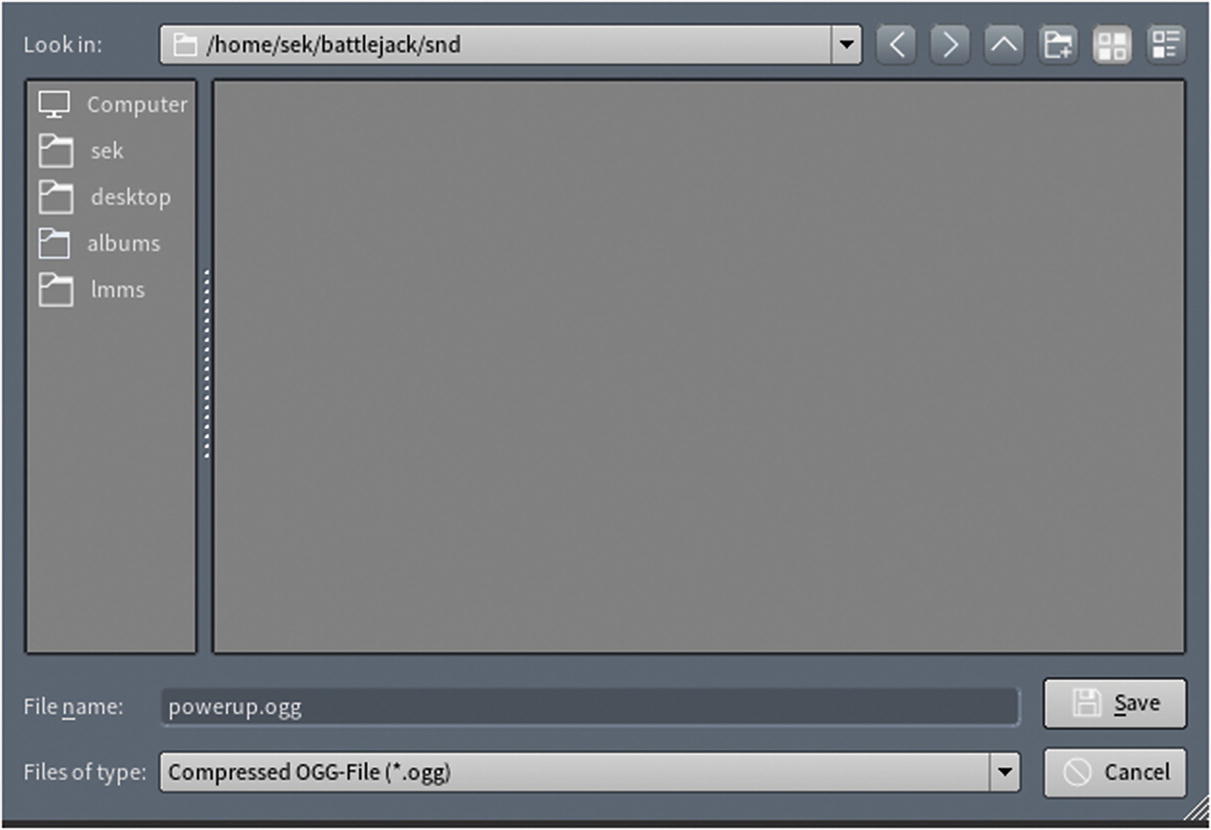
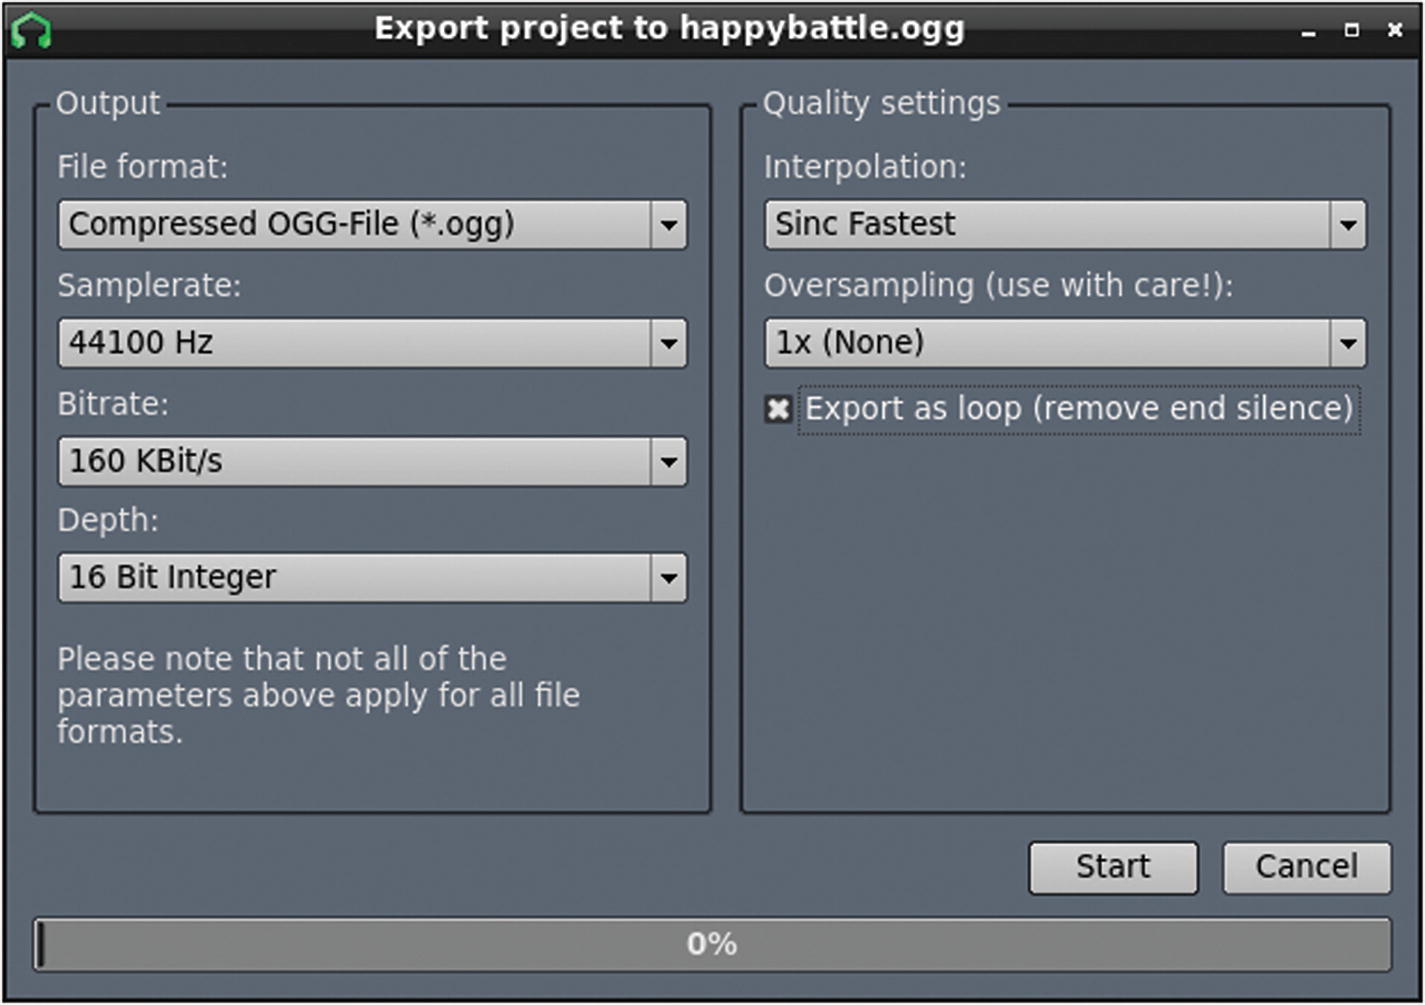
When you’re happy with your first sound effect, go to the File menu and select Export.
Export window
In the Export project window that appears, keep the default settings and click the Start button.
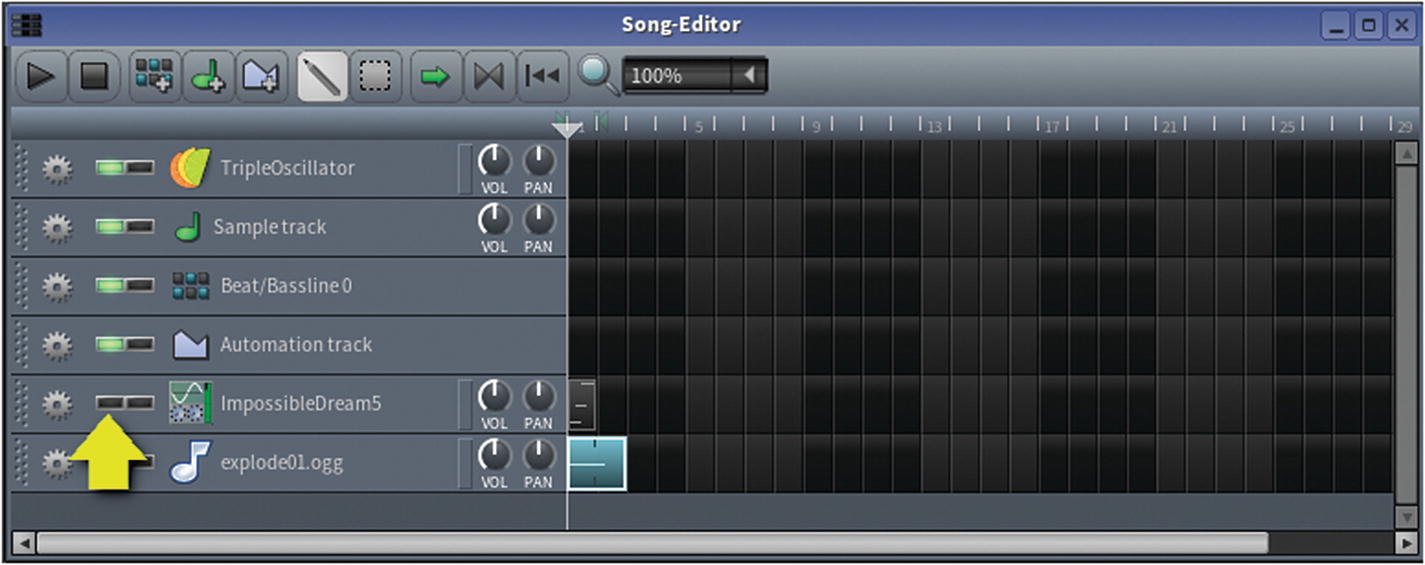
Muting a track
As you work, be sure to save your LMMS project. By default, you are prompted to save into a lmms folder in your home directory. This is acceptable, since you won’t be distributing the LMMS project along with your game. The sound effect exports, however, must always be saved into the snd folder in your Battlejack project directory.
Listening to Your Effects
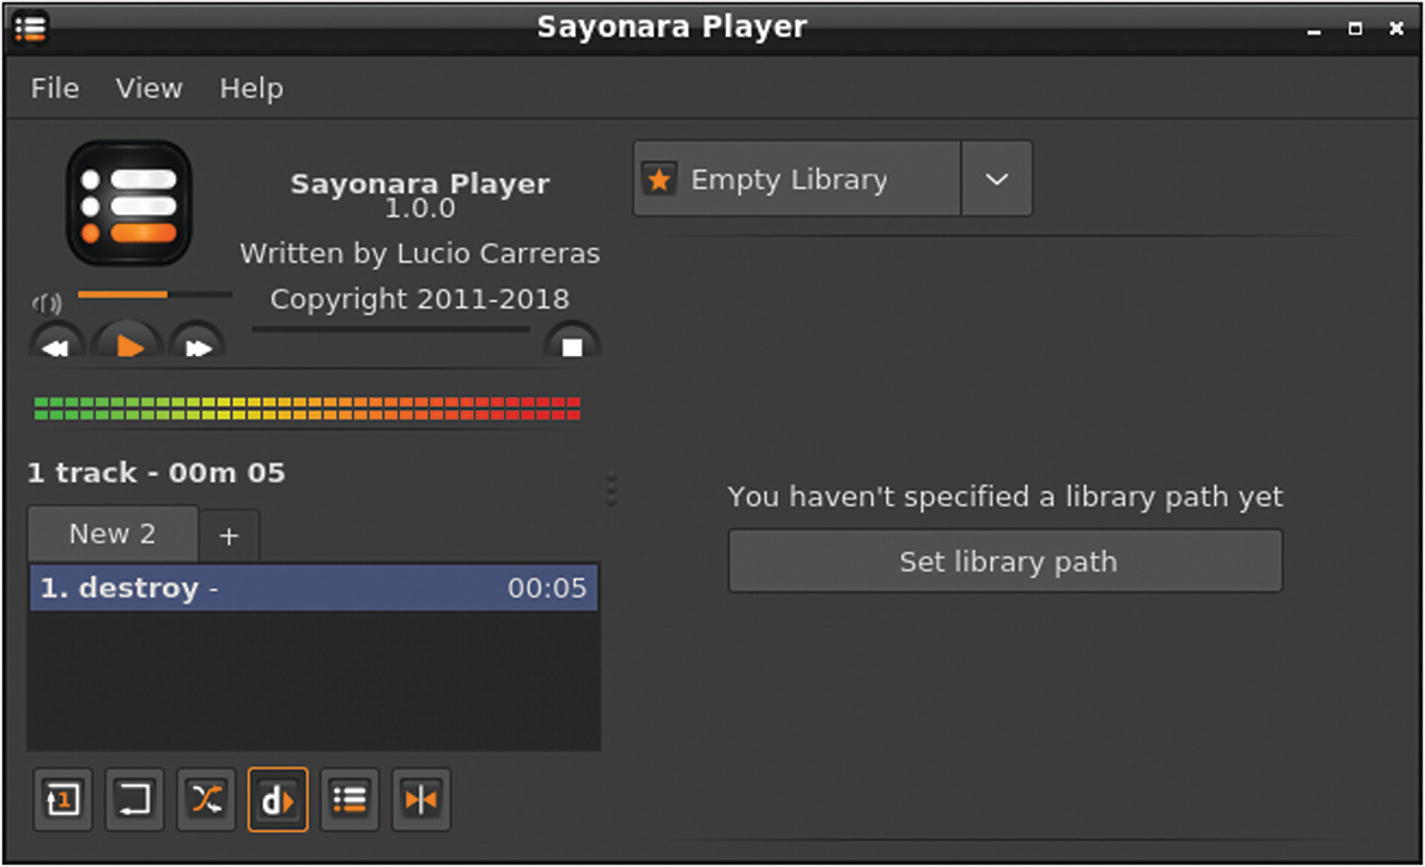
Sayonara player
Adjusting Export Length
Depending on your aesthetic, some sounds that you use may have a long “tail,” meaning that they echo for a few seconds after the notes themselves have ended. The synth preset ImpossibleDream5 is an example of such an effect, and if you listen to the file in Sayonara, you can hear that the file ends before the sounds fade.
To fix this, return to LMMS. Mute any of the tracks that you don’t need, and unmute the one that you do. Play the track and watch the timer in the top left of the LMMS window while listening for the sound to fade. It doesn’t need to fade out completely, especially if you intend to play background music during the game. When the sound is mostly faded, take a mental note of how many seconds have elapsed.
Stop playback and move the playhead in the Song editor to the position, in seconds, when the sound faded. With a sound clip using ImpossibleDream5 notes that last about 2.5 seconds, you might position the playhead at 10 seconds.
Creating a buffer at the end of a track
Export the track again and play it in Sayonara for quality assurance.
Creating Music
Making music for your game is basically the same process as making sound effects, only longer. There’s plenty of Creative Commons and royalty-free music online, so you don’t have to compose your own game music. However, creating your own music for your game can be fun and rewarding.
Since Battlejack is just a battle card game, the music doesn’t need to be much more than a background soundscape, without too much activity or complexity to distract the player from the actual game. In fact, regardless of what kind of game you are composing for, the music you use must be capable of looping, since you can never predict just how long it will be needed.
Unlike most simple sound effects, music composition will probably require more than one track in your Song editor. The sample code included with this book includes two LMMS project files so that you can see how tracks and sound clips in a song fit together.
Exporting
LMMS can’t guarantee that your music will loop seamlessly; designing seamless loop points is an art all its own, but you can experiment with ways to disguise loops that don’t work, or you can just incorporate a fade-out and fade-in so that the loop, while noticeable, is at least innocuous.
Sound Code
To add sounds to your game, you must create a variable for each sound file that you want to play, classifying it as either a static file for sound effects or a stream for background music. You use this variable to trigger the sound as needed.
The if statement establishes whether the message screen is displayed to announce a powerup or because a black card was drawn. If a black card was drawn, nothing is done for now, but if a powerup has been earned, then the powerup sound effect plays. Of course, if you have a sound effect for a traitor card, then you can trigger that sound in the else clause.
Background music is established in main.lua. It’s up to you whether you create separate music for the menu screen and the game, but in this example, the same music plays behind the music and the game.
For sound files greater than a few seconds, set the file type to stream so that the entire file isn’t loaded into memory.
Since the background music is meant to loop, the variable is also set to loop with the :setLooping(true) LÖVE function.
Go through the code of your game and add background music and sound effects for important events.
If you try to play your game, you may notice that all of your audio is badly distorted. This is a known issue and is easy to fix. You will fix it in the next section.
Fixing the Raspberry Pi Sound Settings
LÖVE uses a technology called OpenAL to play sound. OpenAL is a powerful audio driver providing head-related transfer function (HRTF), more commonly known as 3D audio. For this reason, it’s very popular for gaming. As you know, the Raspberry Pi is a low-powered computer, and not exactly known as a “gaming rig.” So when you attempt to play high-powered, specialized OpenAL audio through a mini-computer designed for everyday computer tasks, you experience distortion.
Note
This audio issue is specific to OpenAL on a Raspberry Pi or other low-powered computers. If you’re using something more powerful than a Pi, then you do not need to complete this section unless you’re experiencing distorted audio in LÖVE.
Save the file and close Geany.
Try playing the game now and you will find that all of your audio problems are solved.
This is good practice, since you can’t possibly predict what platform any given user will use to play your game.
Homework
Allow the background music to be silenced, leaving only sound effects.
Allow all sound in the game to be muted.