Building Your Online Store With WordPress and WooCommerce: Learn to Leverage the Critical Role E-commerce Plays in Today’s Competitive Marketplace by Lisa SimsPublished by
Apress, 2018
In Chapter 5, you learned about e-commerce themes, their benefits, and how they can help your business create an attractive online storefront. You also reviewed the features that you should consider before selecting a theme. Not all themes are created equal, and not all themes serve the same purpose. It is good practice to choose a theme from a category that closely matches your business’s industry. Since we will be using WooCommerce to create your online store, we look at the Storefront theme, which is the default theme for WooCommerce and how it can help set up your online store and extend its features with its popular extensions.
Now it’s time for the rubber to hit the road and begin creating your online store with WooCommerce. Most people are ready to dive right in and start adding products or services, but organization is key for long-term growth and success. Depending on the number of products your company plans to sell, it is always a good idea to start off by creating categories.
Product or Service Categories
Let’s face it. Whether shopping in-store or online, many consumers do not want to aimlessly search for what they want or need. Why? They are inpatient and in a hurry. Upon arriving at a brick and mortar or online store, many already know what they need to purchase but just need to locate it and pay for it. If you picture yourself in your favorite brick and mortar store, what are some things that help you quickly locate the items that you need? A helpful and friendly sales associate? Familiarity with the store’s layout? Stores such as Walmart or Target have good signage at the beginning of each aisle to help customers find or come close to finding what they need. In a 2014 article on managingissues.com, it addressed why women prefer shopping at Lowe’s over its competitor, Home Depot. The reasoning is simple: cleanliness and organization. According to the article, Home Depot stores can be described in the following way.
The Home Depot is a bit messy. Tradesmen are walking about in work clothes and there are folk[sic] trucks in the isles filled with pallets that look like they can topple over onto a passerby at a moment’s notice. The experience can be a tad intimidating for someone who is unfamiliar with such a masculine’ environment.
Lowes, on the other hand, is bright and shiny. Floors are freshly-waxed, a member of staff greets customers at the entrance and directs them to the products they are most interested in finding. It is a welcoming experience, one that many women may prefer when compared to THD.1
Besides selecting an attractive e-commerce theme, adding descriptive categories is another way to provide a welcoming customer experience. With WooCommerce installed, you can either run the Setup Wizard or Skip setup. For our purposes, we will walk through the Setup Wizard.
Setup Wizard
The WooCommerce Setup Wizard allows you to configure basic settings through a guided screen by a screen walk-through of five setup components:
Page Setup
Store location
Shipping
Payments
Themes
This section can also be completed within the WordPress Dashboard. Let’s look at these settings.
Page Setup
WooCommerce requires several essential pages:
Shop – The shop page will display your products.
Cart – The cart page will be where the customers go to view their cart and begin checkout.
Checkout – The checkout page will be where the customers go to pay for their items.
My account – Registered customers will be able to manage their account details and view past orders on this page.
Some of these pages might be duplicated if moving from another shopping cart, so it is a good idea to remove any previous shopping cart pages that might exist to avoid a potential conflict. For a first-time WooCommerce installation, these pages will not exist and will automatically be created. These pages can be managed from the admin dashboard on the pages screen.
Store Setup
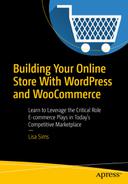
The Store setup screen allows you to provide basic information about your store such as where your store is based along with whether physical, digital, or a combination of both will be sold (Figure 6-1). If unsure about what types of products will be sold and to save time in the future, it would probably be good to select the option for both physical and digital products. If you plan on selling products or services in person, don’t forget to select the checkbox. If you would like to help improve WooCommerce, you can also select the checkbox to allow user tracking. You can always change this information in the WordPress Dashboard under WooCommerce ➤ Settings ➤ General Tab. Once everything is completed, click on the Let’s Go button.
Figure 6-1
Store setup in WooCommerce Setup Wizard
Payment
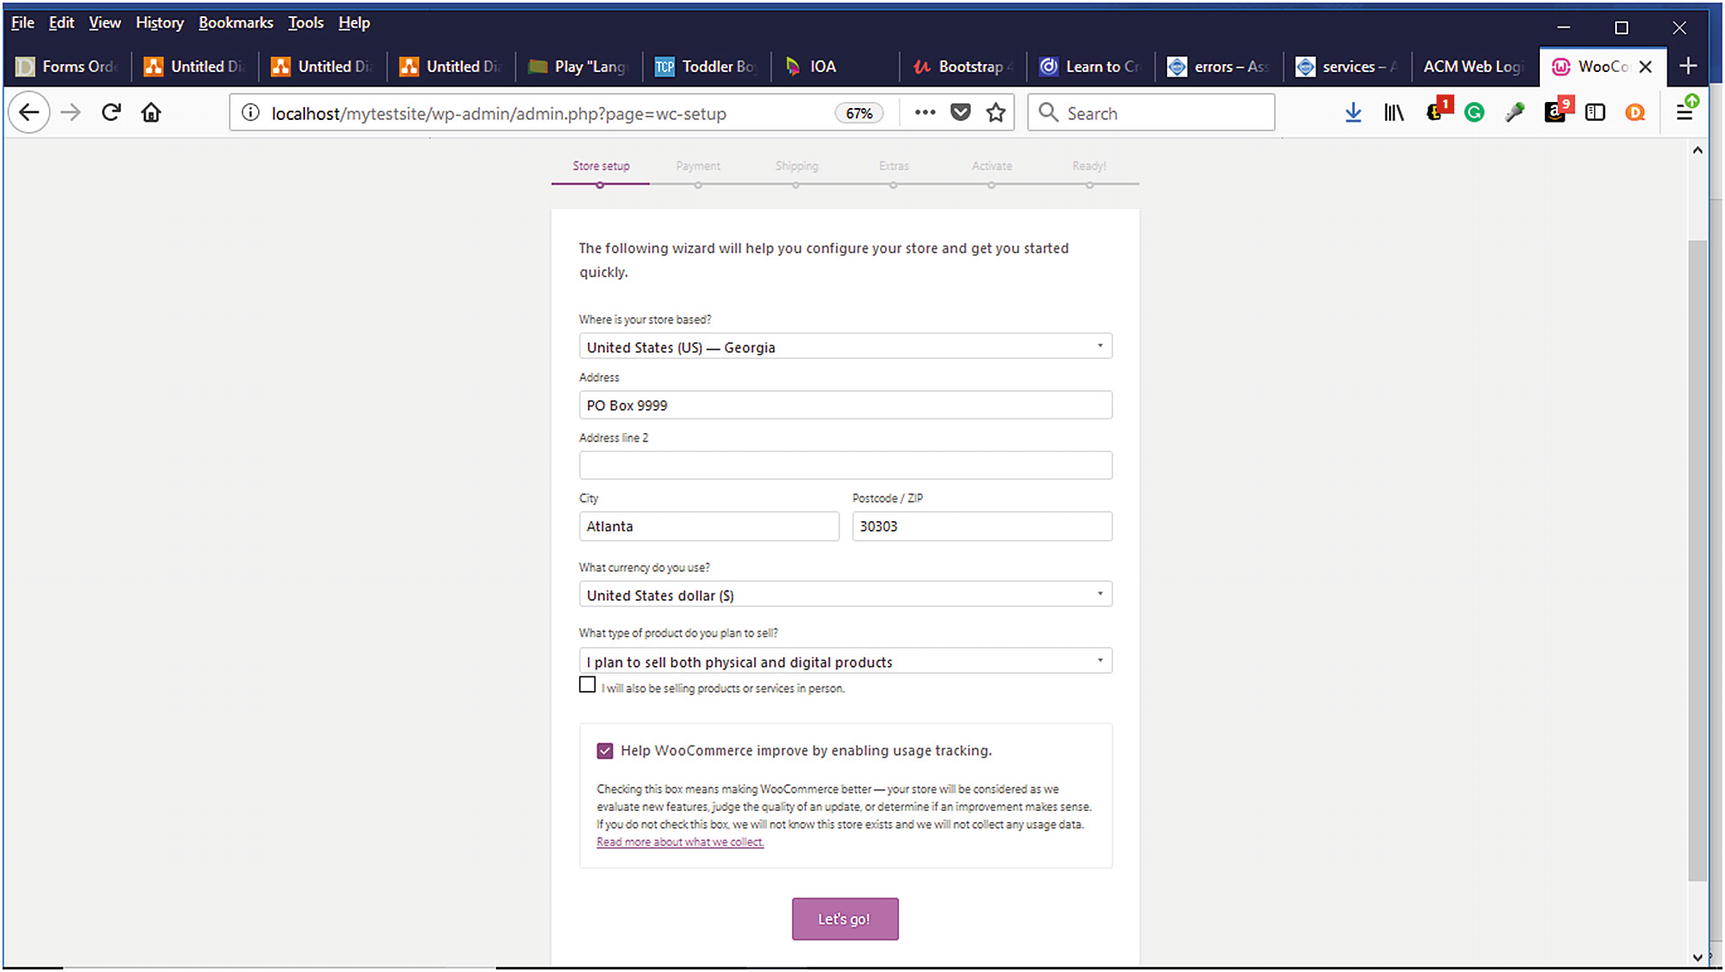
The next step in the Setup Wizard is to setup your online store’s payment options (Figure 6-2). WooCommerce allows Stripe, PayPal, and others that can be added later. WooCommerce also allows other payment options such as:
Offline payments
Check payments
Bank transfer payment
Cash on delivery
Figure 6-2
Configuring payment options in WooCommerce
In the WooCommerce Settings Checkout Tab, the various checkout methods are available to be configured. If you choose to use another payment gateway in addition to PayPal, you will need an SSL Certificate. What is an SSL Certificate? According to networksolutions.com, an SSL Certificate (Secure Sockets Layer), “also called a Digital Certificate, creates a secure link between a website and a visitor's browser. By ensuring that all data passed between the two remains private and secure, SSL encryption prevents hackers from stealing private information such as credit card numbers, names and addresses.”2 Online shoppers expect to see “https” in their address bar or a lock in the status bar indicating that their transaction will be secure. With so many data breaches occurring in the news, shoppers are concerned about the security of their financial information. SSL certificates are available for free (unless you prefer the green bar) from certificate authorities such as Let’s Encrypt SSL or COMODO AutoSSL, which are equally recognized by Google, banks, and others. They can also be purchased from your web hosting provider or other providers such as namecheap.com, networksolutions.com, and others.
Shipping
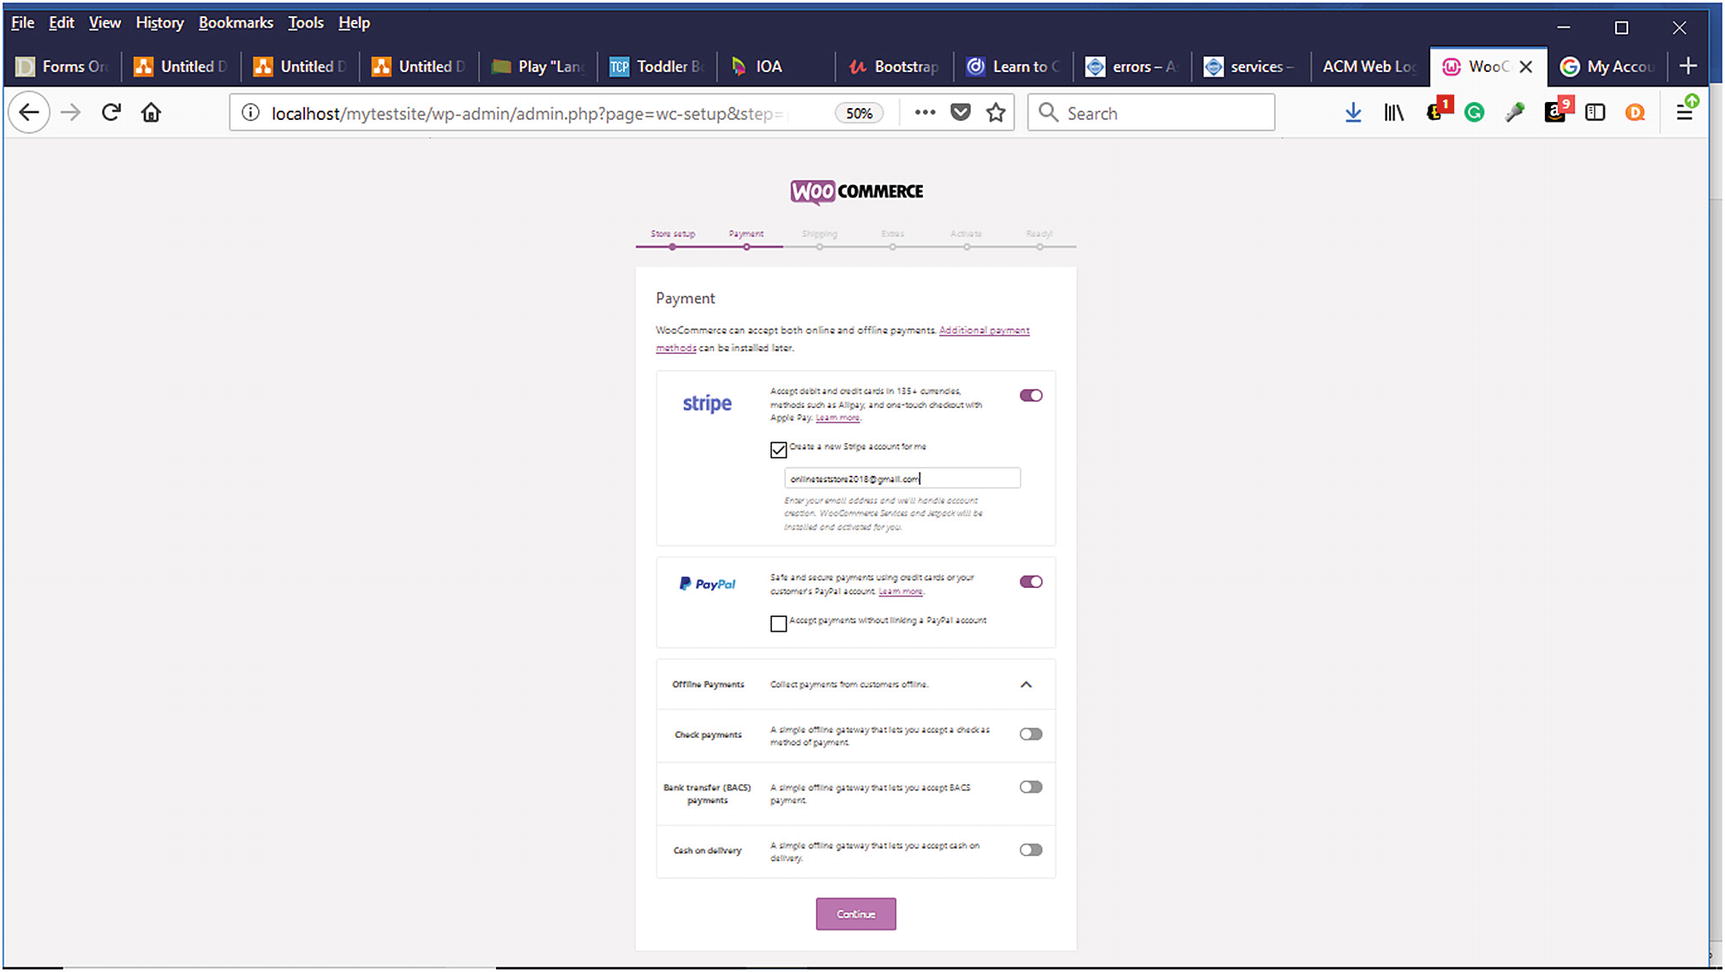
On the shipping tab (Figure 6-3), you can configure your shipping rates. You can choose from Live Rates, Flat Rates, and Free Shipping. If you are unsure of what these will be, you can accept the default and modify them later. Once your shipping has been selected, click Continue.
Figure 6-3
Shipping tab of the WooCommerce Setup Wizard
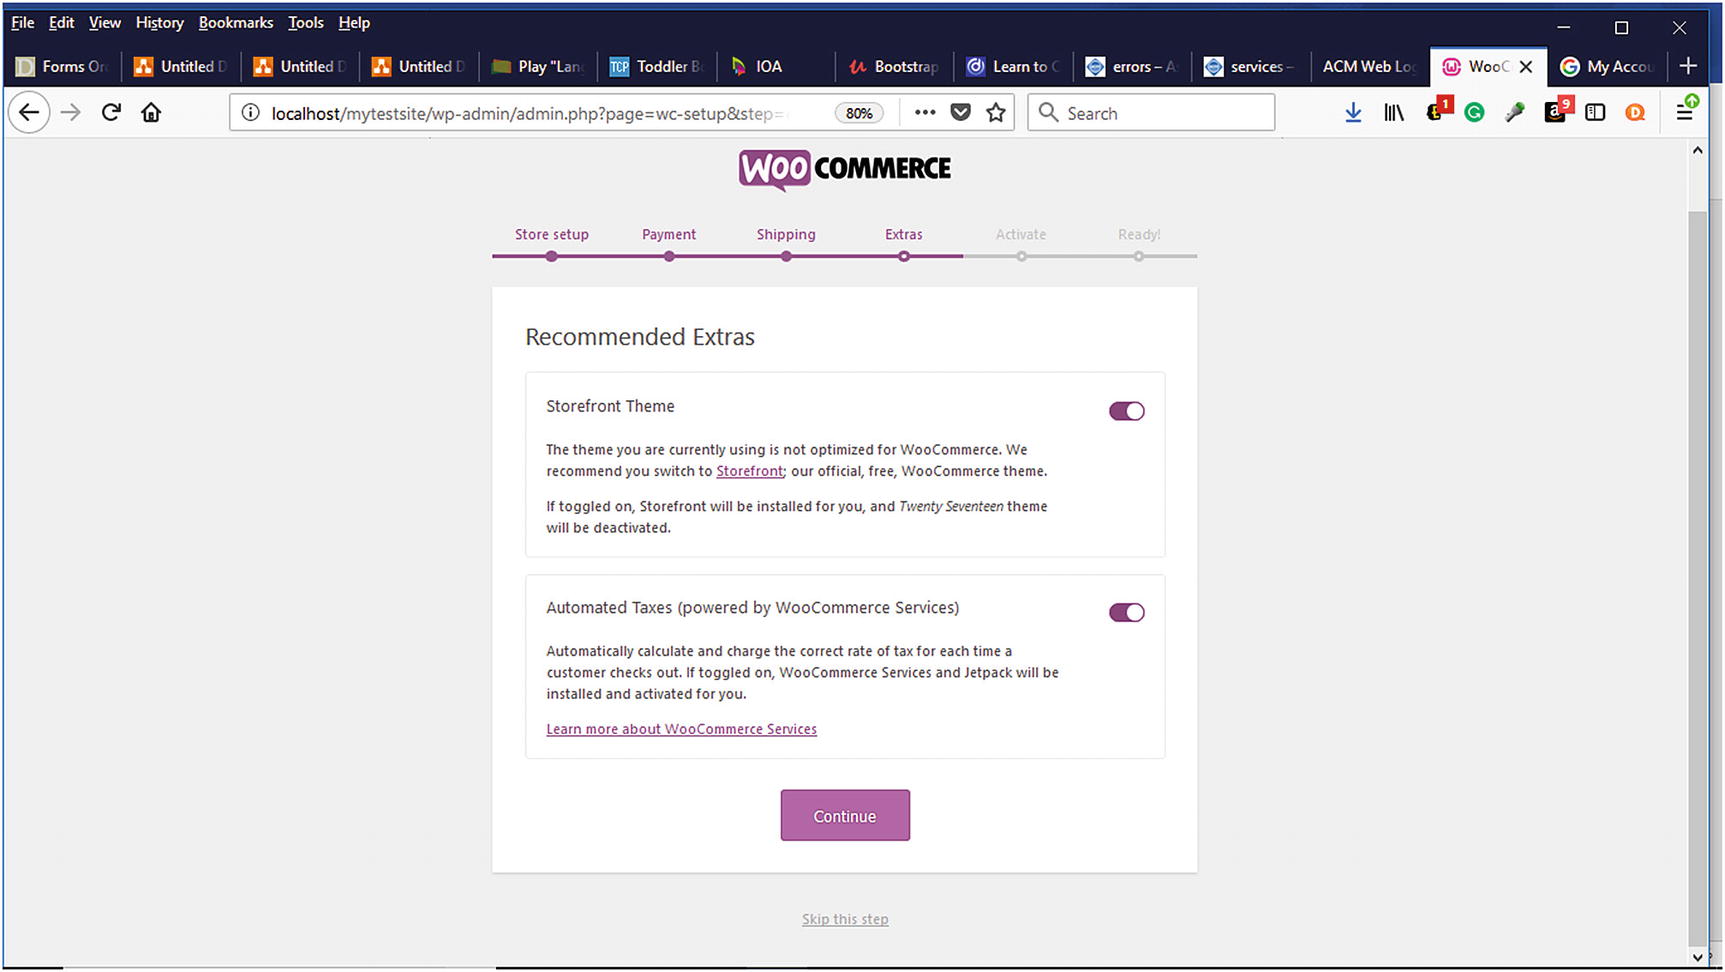
Recommended Extras
If you have installed the Storefront Theme as your default theme, it will be indicated here, and you can choose to install it (Figure 6-4). You can also choose the option for automating taxes so that you do not have to worry about it.
Figure 6-4
Installing recommended extras in Setup Wizard
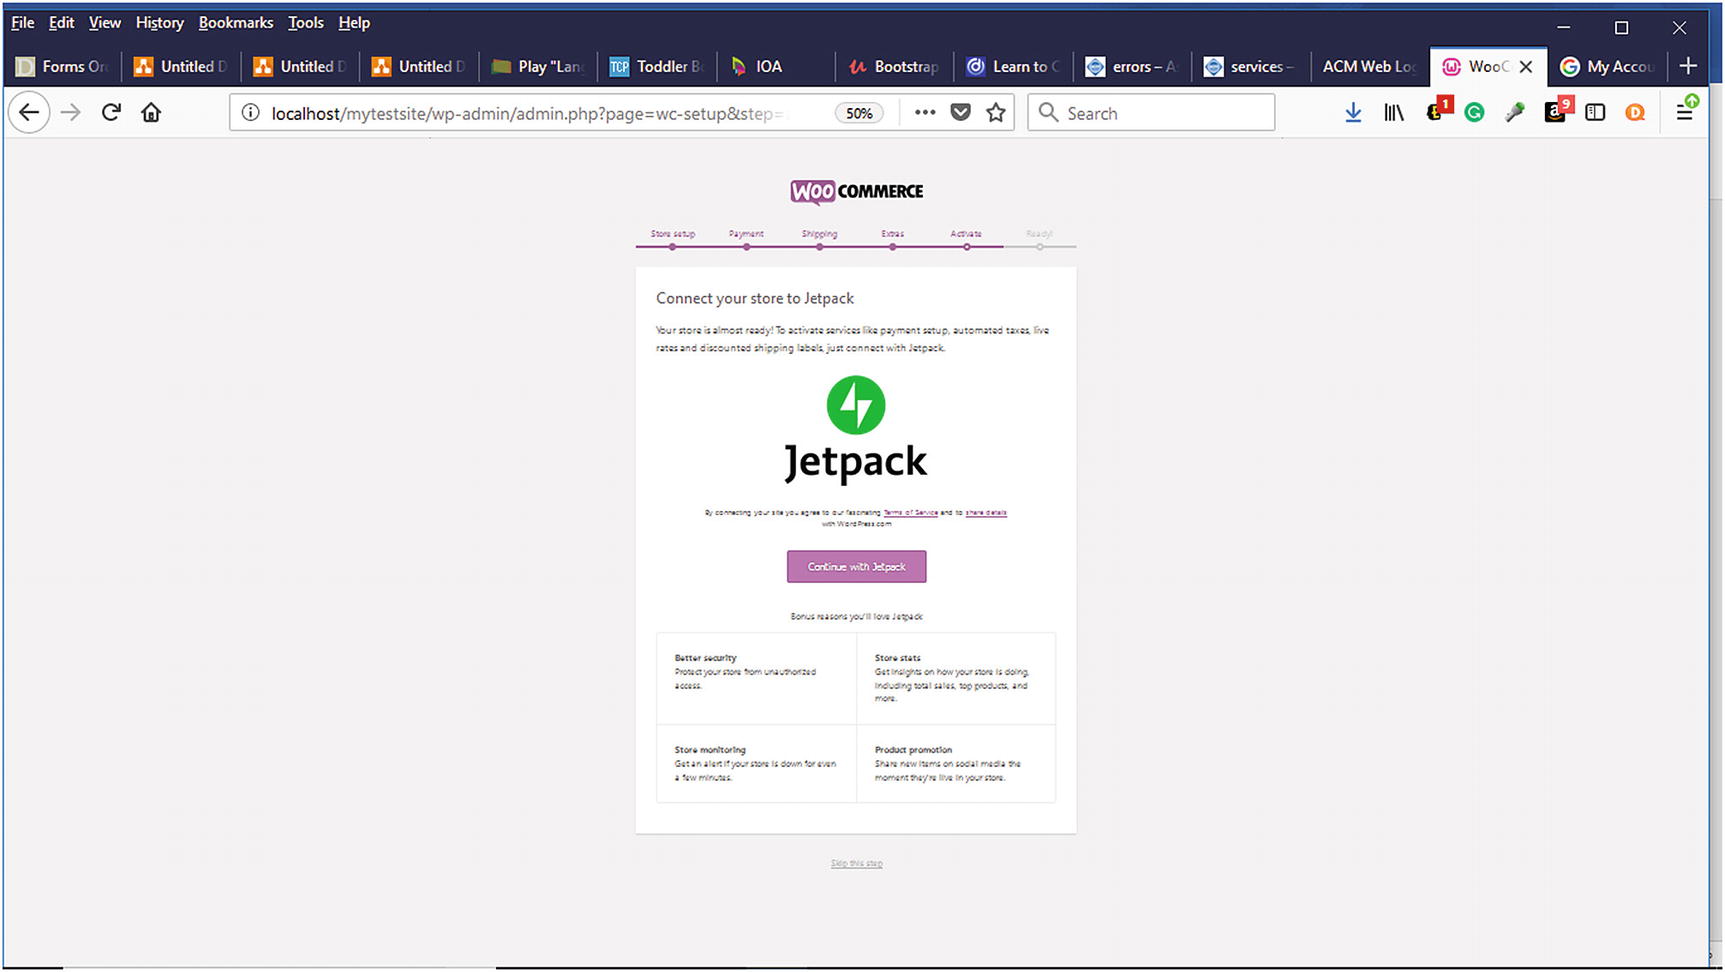
Activate
On the Activate tab, you can choose to connect the JetPack plugin, which provides extra benefits to help with your online store (Figure 6-5). You can always skip this step and install it later. If you want to take advantage of automated tax calculations, live shipping rates, and product ratings, you will need to connect the JetPack. Once you have decided, click Continue.
Figure 6-5
Activate tab of Setup Wizard
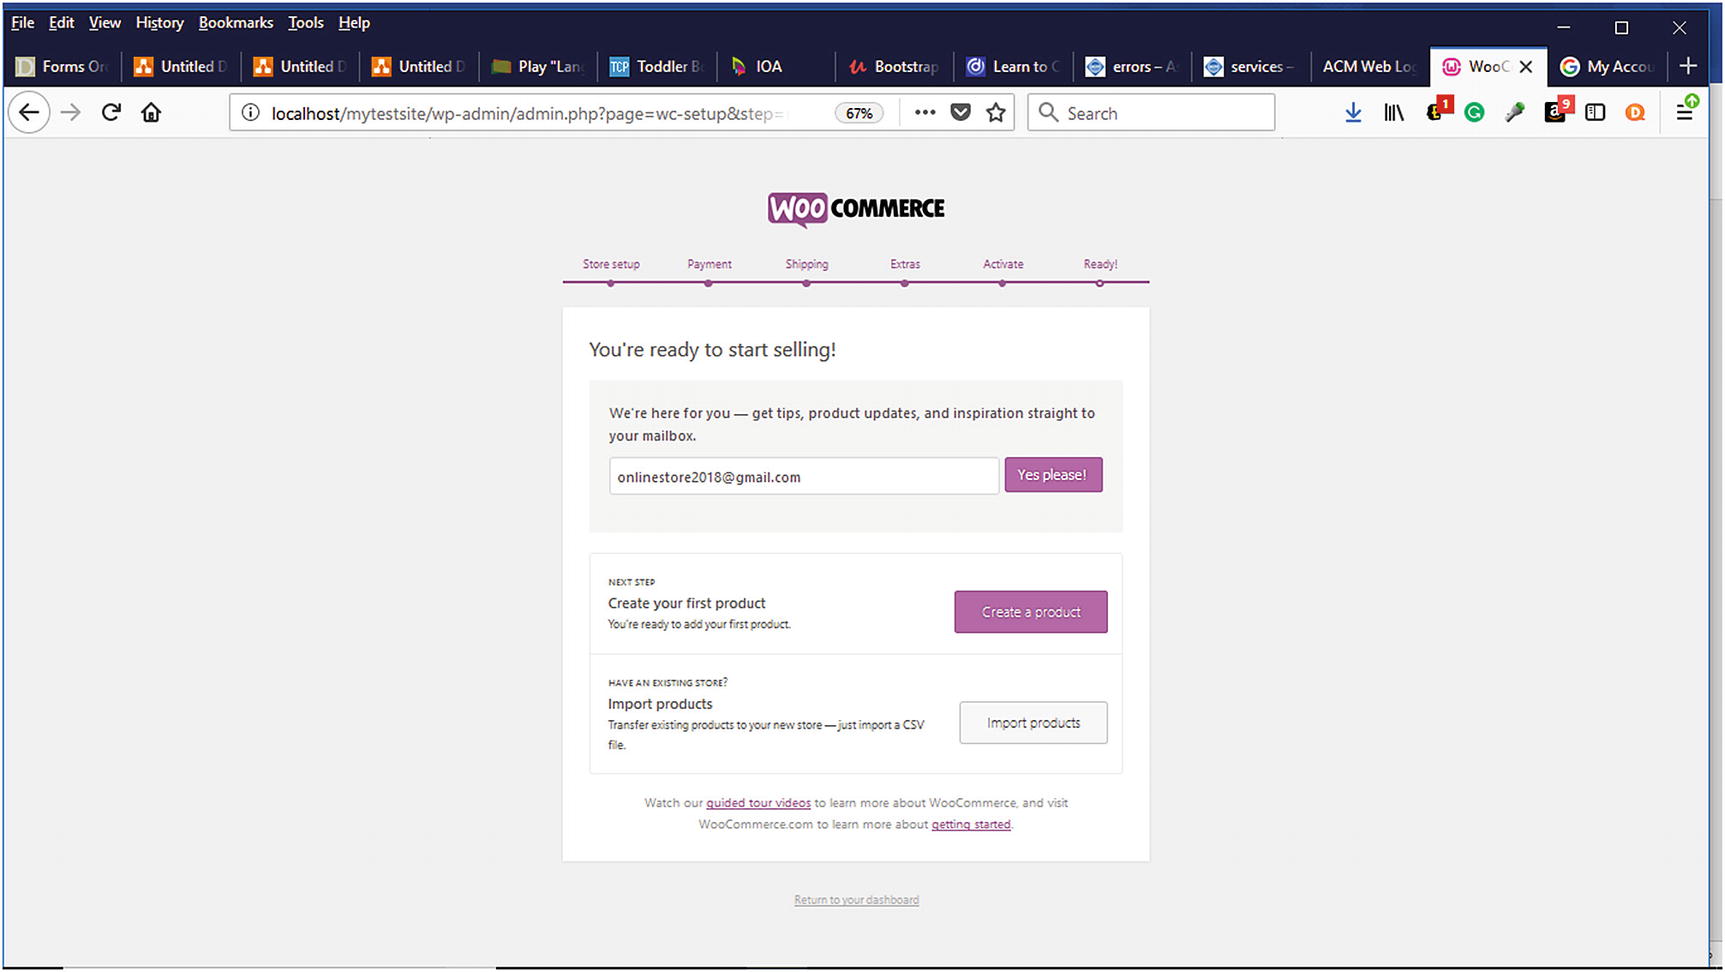
Ready
The Ready Tab allows you to sign up for WooCommerce email updates (Figure 6-6). You can also watch guided videos of WooCommerce and visit the WooCommerce website to find more information about getting started. The next step is to either create products or import products from an existing store via a CSV file. We will discuss how to import products from an existing CSV file later in the chapter. For now, click on the Create Products button to continue setting up your store.
Figure 6-6
Ready tab of the Setup Wizard
After successfully completing the WooCommerce Setup Wizard, it is time to start creating your store.
Creating Your Store
In the WordPress Dashboard, WooCommerce presents an option to create a homepage based on the Storefront theme as well as add example products. Adding example products is a good way to learn tips and tricks for adding your products. These example products can always be deleted before your store launches. You can either leave the checkboxes selected and click the Let’s Go button or begin adding products. Each method will be demonstrated. The Let’s go option will be explored first.
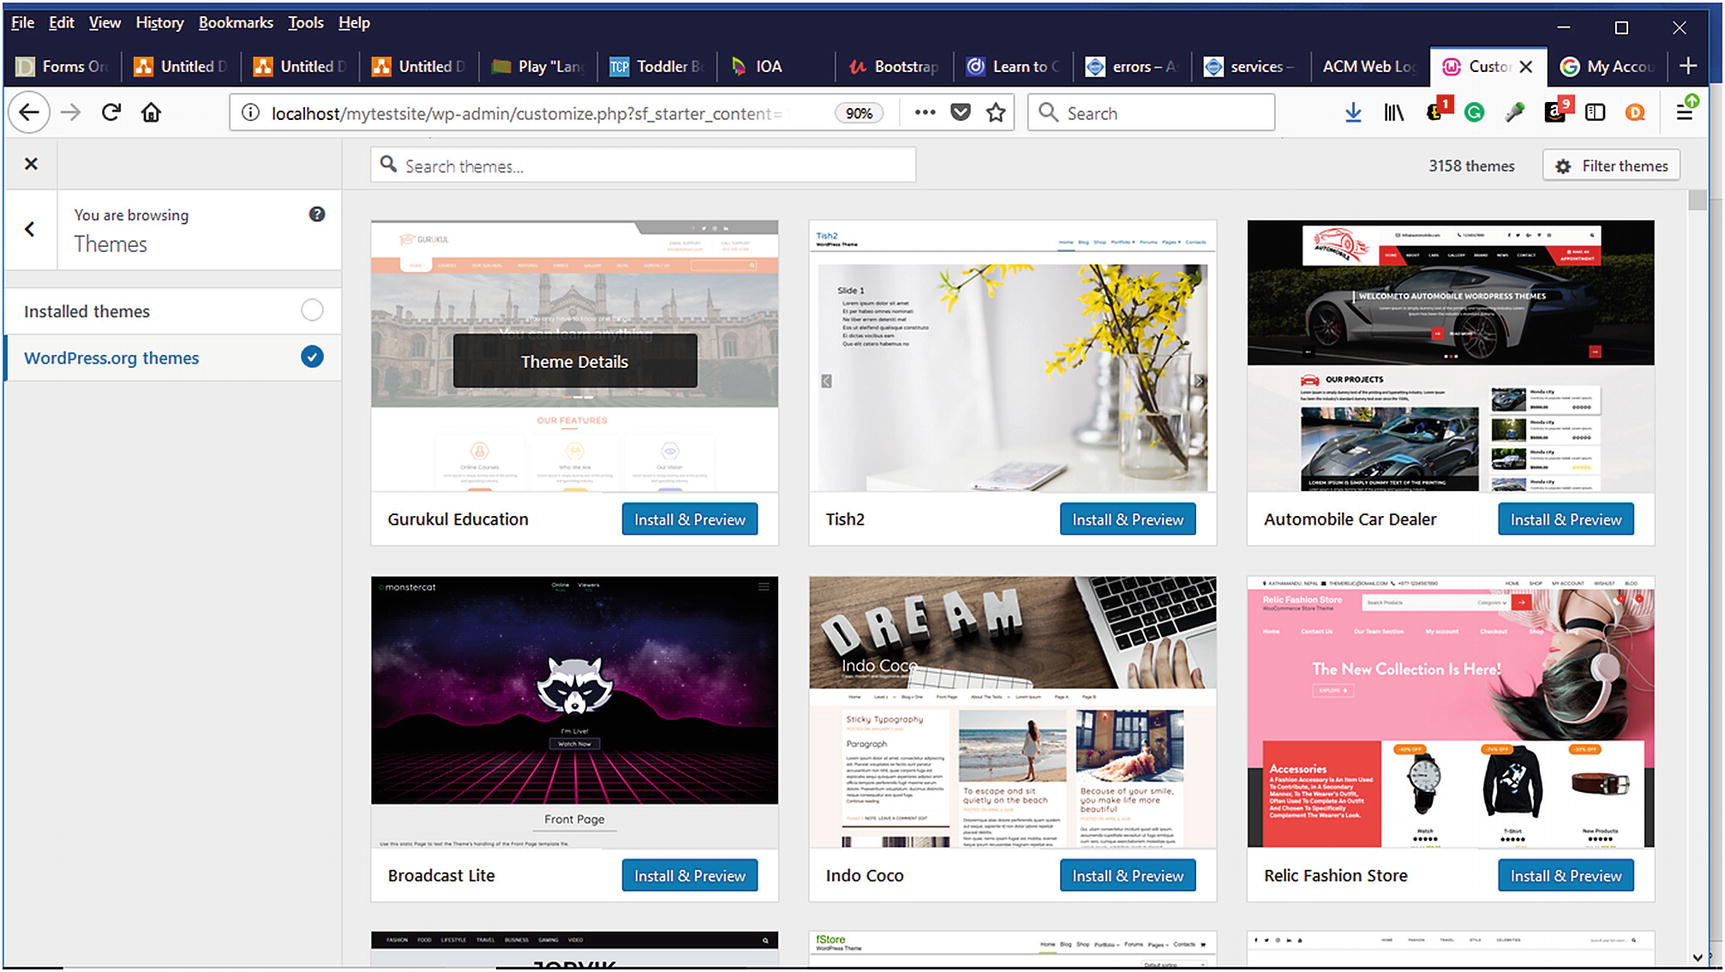
After clicking the Let’s Go button, you can begin customizing your store. The Customizer tool will walk you through each of the store options on the left (Figure 6-7). If you choose to skip the Customizer, you can always access it from the WordPress Dashboard by clicking WooCommerce ➤ Settings. As you can see (Figure 6-8), the Active theme is the Storefront Theme. To change to another installed theme or choose from one of the WordPress themes, click the Change button.
Figure 6-7
The Customizer tool to help set up your online store
Figure 6-8
The WordPress themes that can be installed
Site Identity
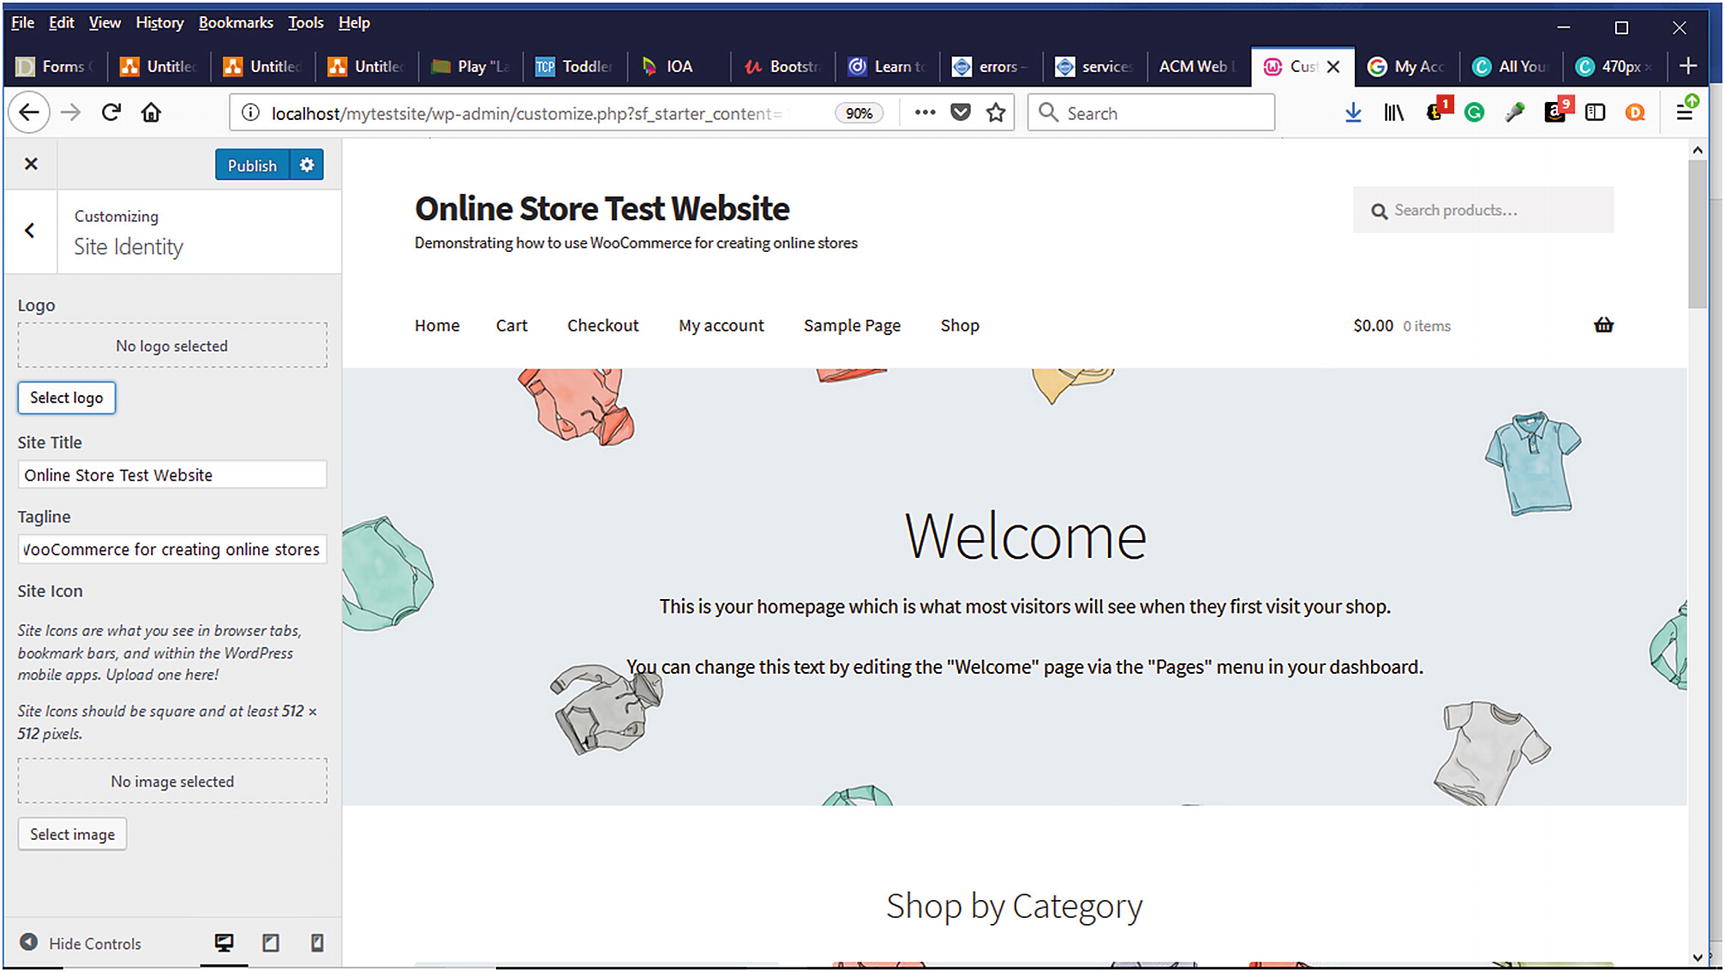
Establishing your store’s identity or brand is a crucial first step when creating your online store (Figure 6-9). When potential customers visit your store for the first time, you want them to immediately know who you are and begin to recognize your logo. If you don’t have a logo, you can use free tools such as Canva.com or the free open source graphics program, GIMP, to create a logo. You can also hire a freelancer on Fiverr.com to create a logo starting at $5. WordPress recommends logo dimensions of 470 by 110 pixels. For the Site Title, use the name of your store. To give visitors a good idea of what your store is about, it is a good idea to provide a short descriptive tagline that will appear underneath the Site Title. It is also a good idea to provide a site icon for your store to help reinforce your store’s identity and brand.
Figure 6-9
Configuring the Site Identity information for an online store
Header
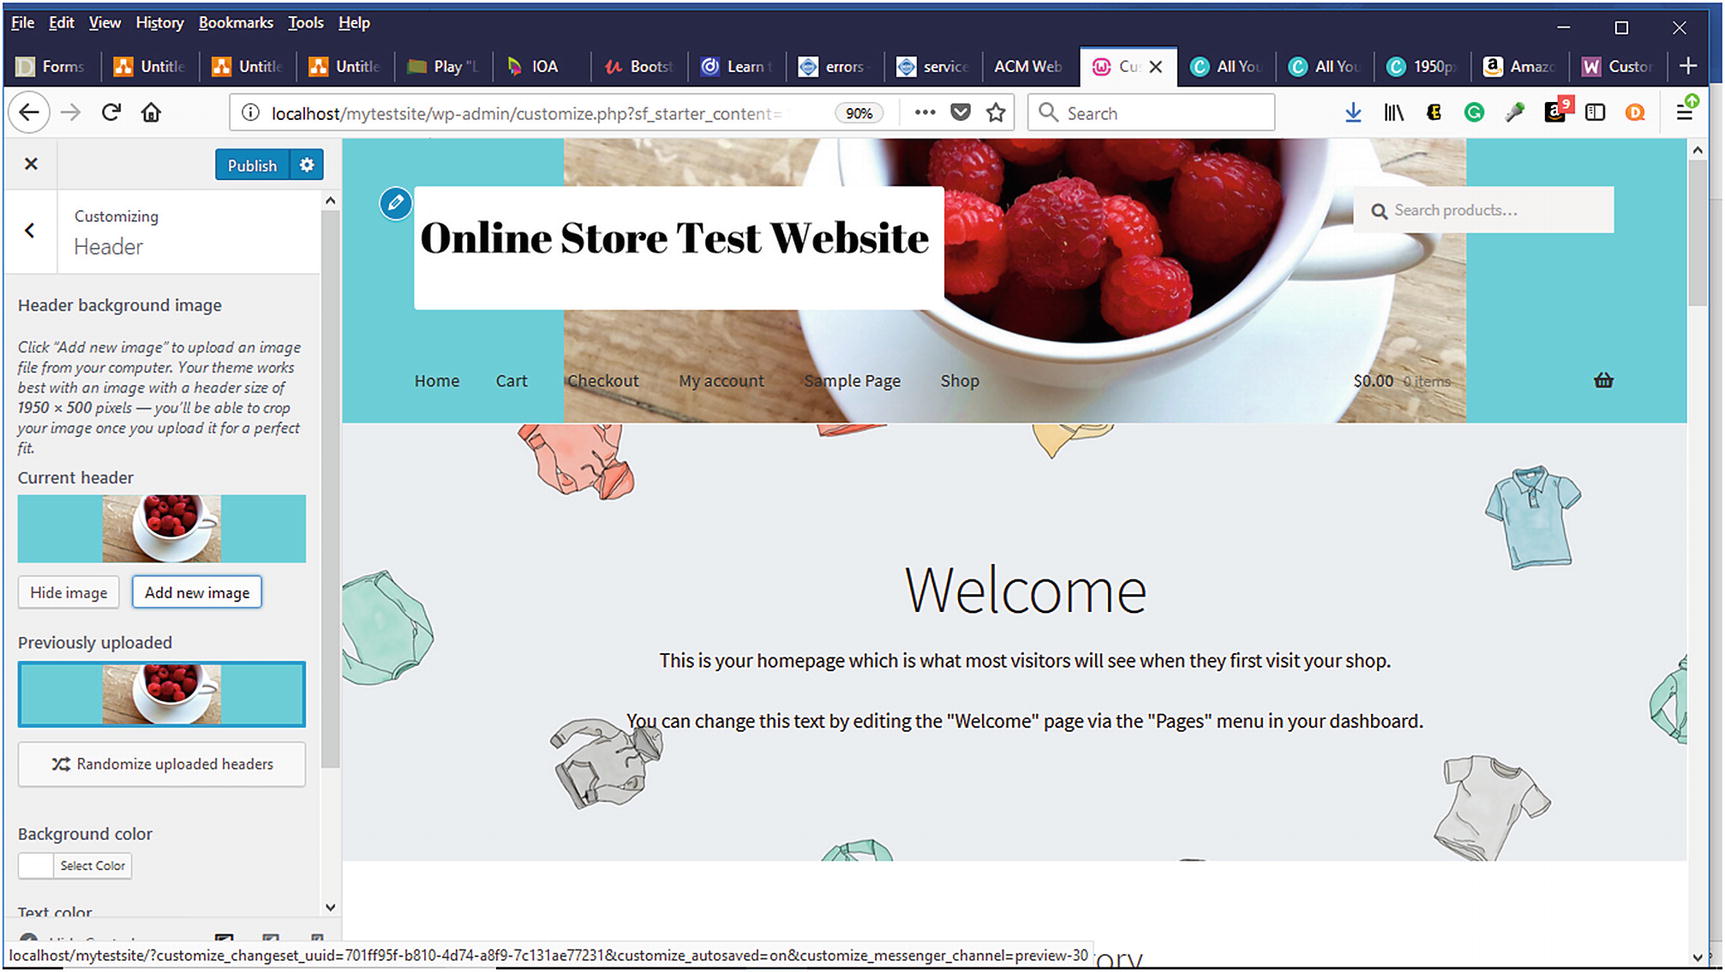
The header background image can also help to reinforce your brand to visitors and create a good first impression. The Storefront theme recommends a background image size of 1950 by 500 pixels (Figure 6-10). Once the header image is uploaded, you can either crop it or not. If you choose not to use a header image, you can choose a header background color instead along with changing the text and link color. You want to make sure that your color selections are pleasing to the eye and complement each other nicely.
Figure 6-10
Customizing the WooCommerce header
Footer
As it is appropriately named, the footer appears at the foot or bottom of the page. It contains the copyright and the “Built With Storefront & WooCommerce” information at the bottom of the page. The background and text color can also be customized.
Background
Like with the header image, you can also include a background image along with the background color. Pay careful attention to your color selections so that they don’t distract from your products and the brand of your store.
Typography, Buttons
In these sections, the only attribute that can be customized is their colors.
Layout
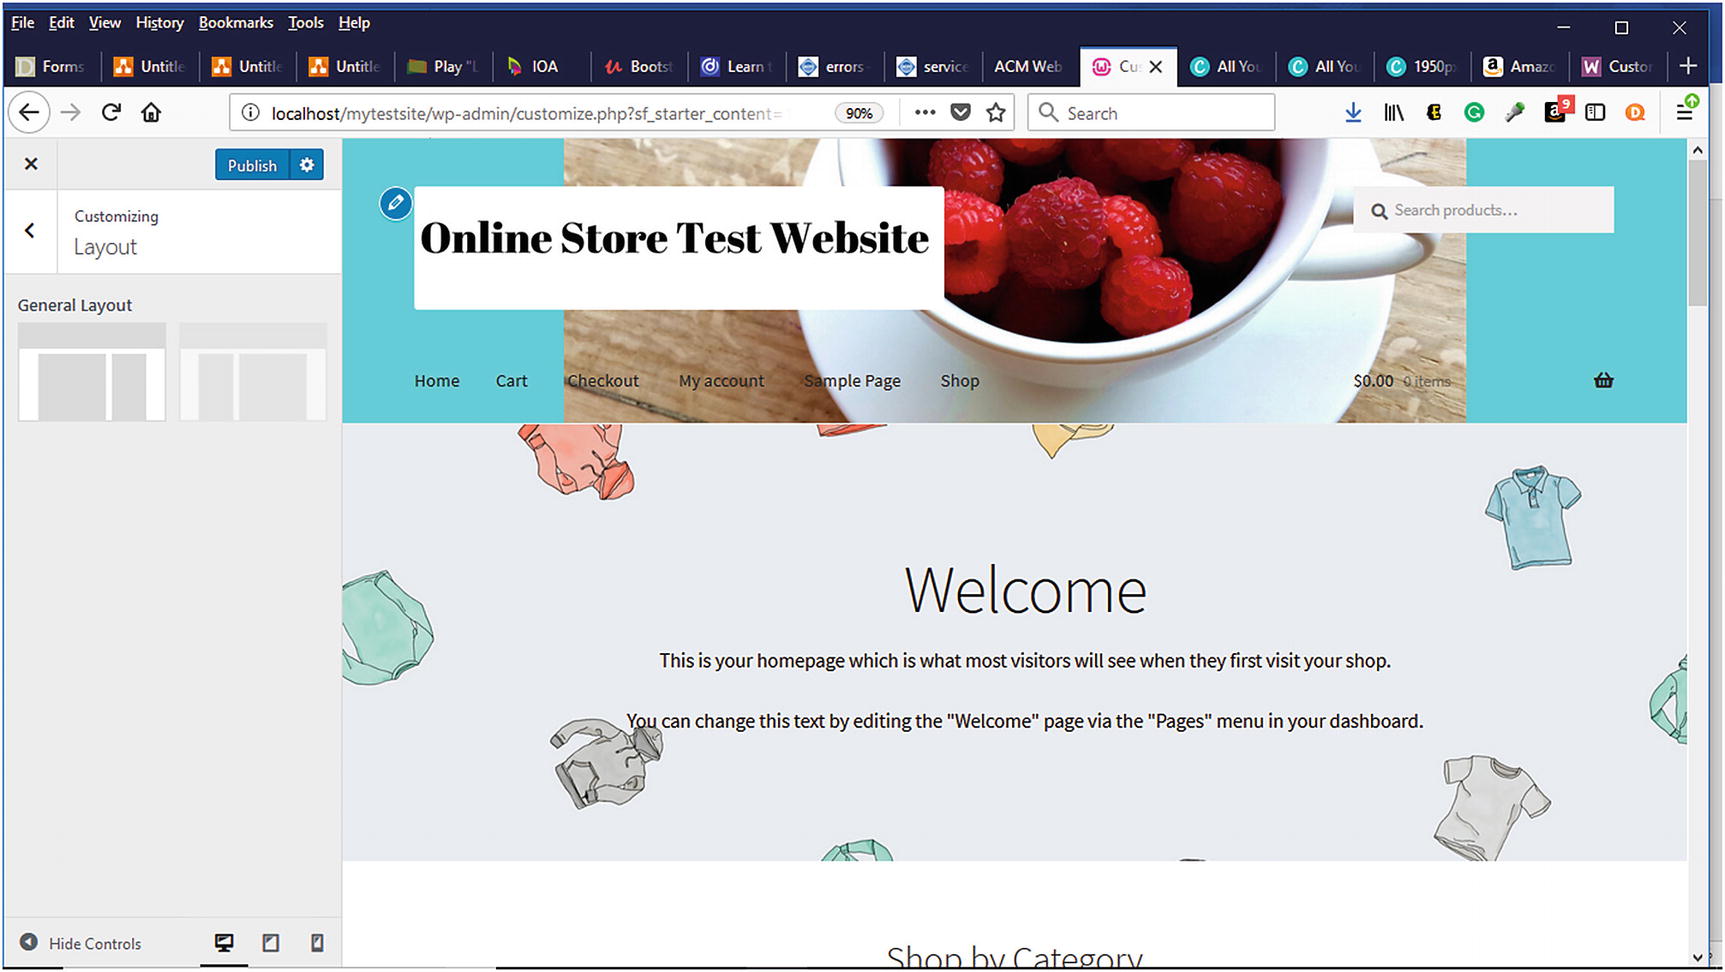
Within this section, you can select from one of the two available general layouts: right and left (Figure 6-11).
Figure 6-11
Selecting the general layout of your store
Product Page
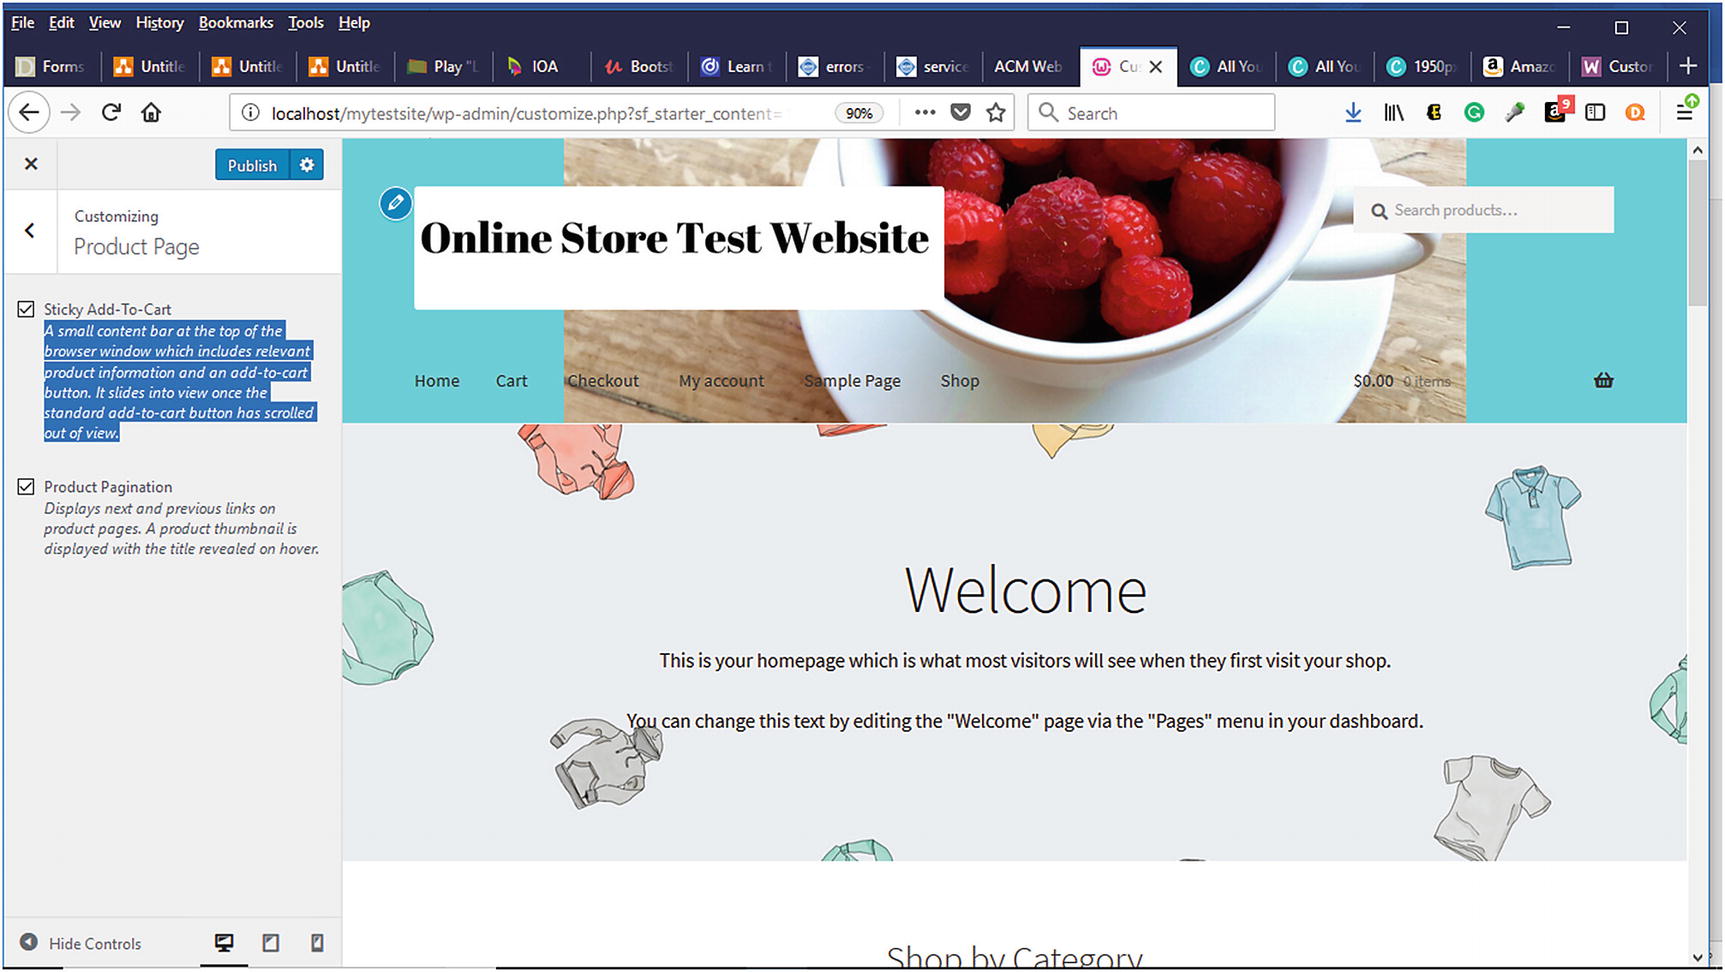
On the Product Page, the Sticky-Add-To-Cart and Product Pagination options are selected by default (Figure 6-12). According to the WooCommerce website, a Sticky Add-To-Cart display a small content bar at the top of the browser window that includes relevant product information and an add-to-cart button. It slides into view once the standard add-to-cart button has scrolled out of view. Potential customers and customers need to be able to always add items to their cart.
Product pagination allows for previous and next buttons to be displayed when there are many products available instead of having visitors continuously scrolling. It is a good practice to keep these selected. If you feel that you will not need them, you can always deselect them later.
For downloadable products, additional settings can be configured from the WooCommerce Settings page by selecting Products ➤ Downloadable Products (Figure 6-13).
Figure 6-12
Settings for downloadable products in WooCommerce Setting Page
Figure 6-13
Product Page in WooCommerce
Menus
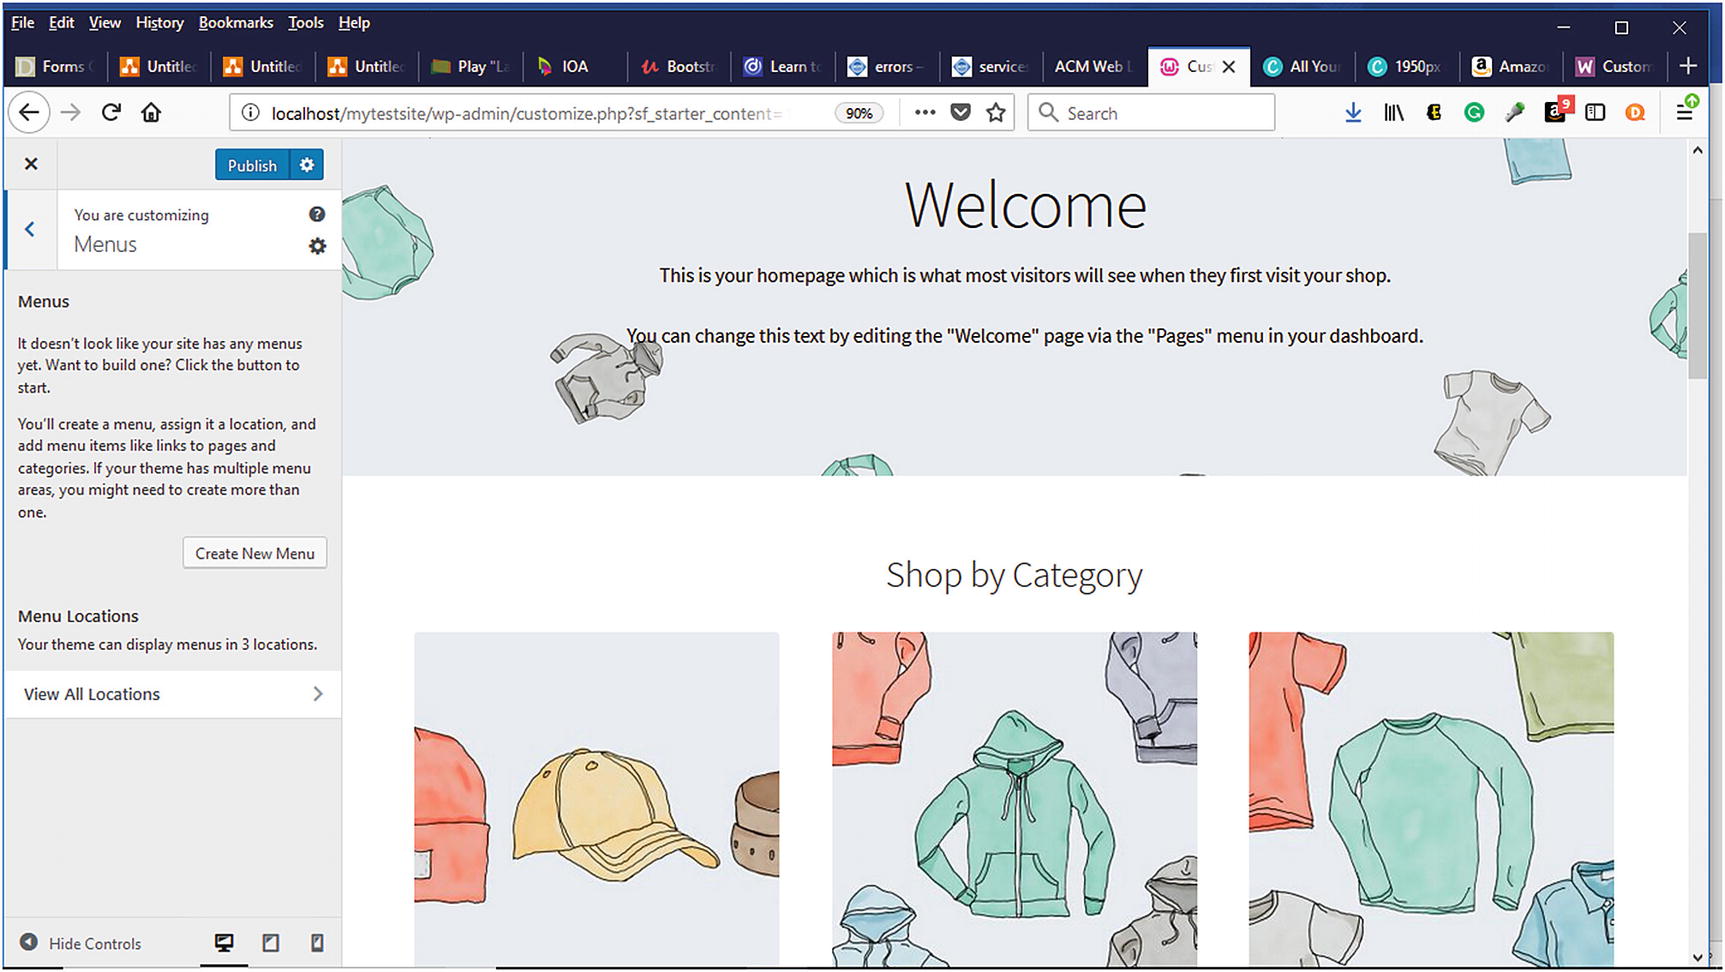
Menus are a great way to allow visitors to navigate your store. Since most visitors are already familiar with using menus to navigate online stores, they will not have much of a learning curve. To create a new menu, click on the create menu button (Figure 6-14).
Figure 6-14
Menu option within WooCommerce
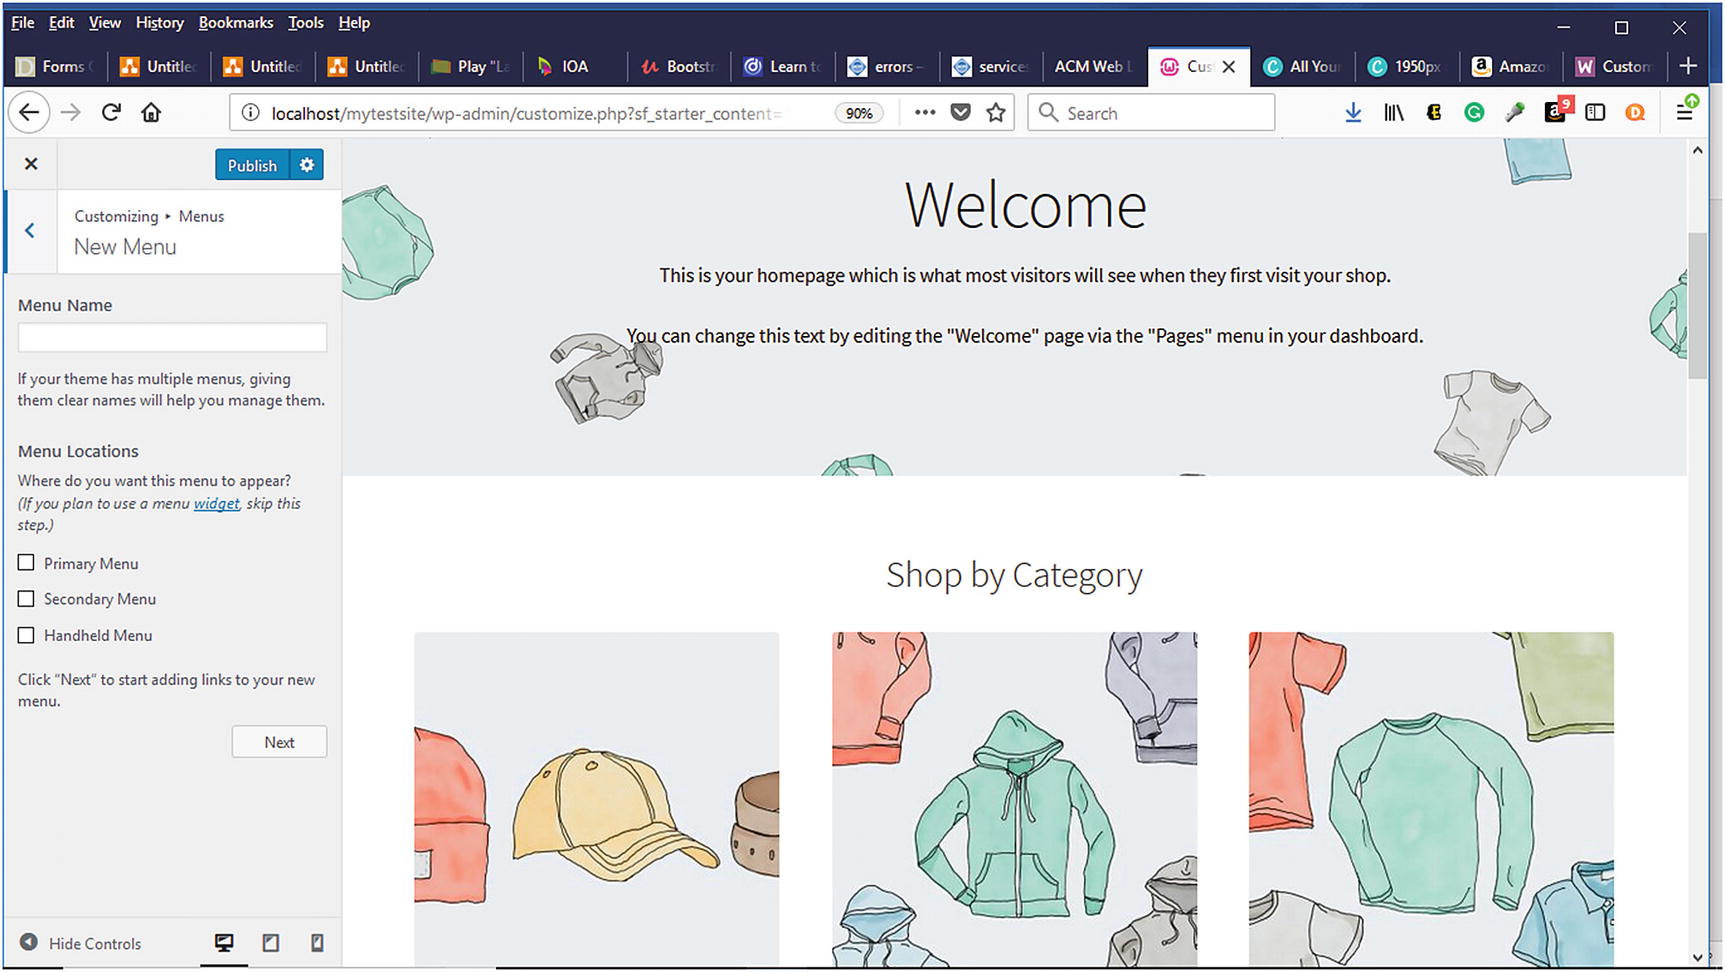
When creating menus, it is a good practice to give them descriptive names so that visitors can easily navigate them, and the manager of the store can easily modify them (Figure 6-15). Menu locations can also be specified.
Figure 6-15
New menu location in WooCommerce
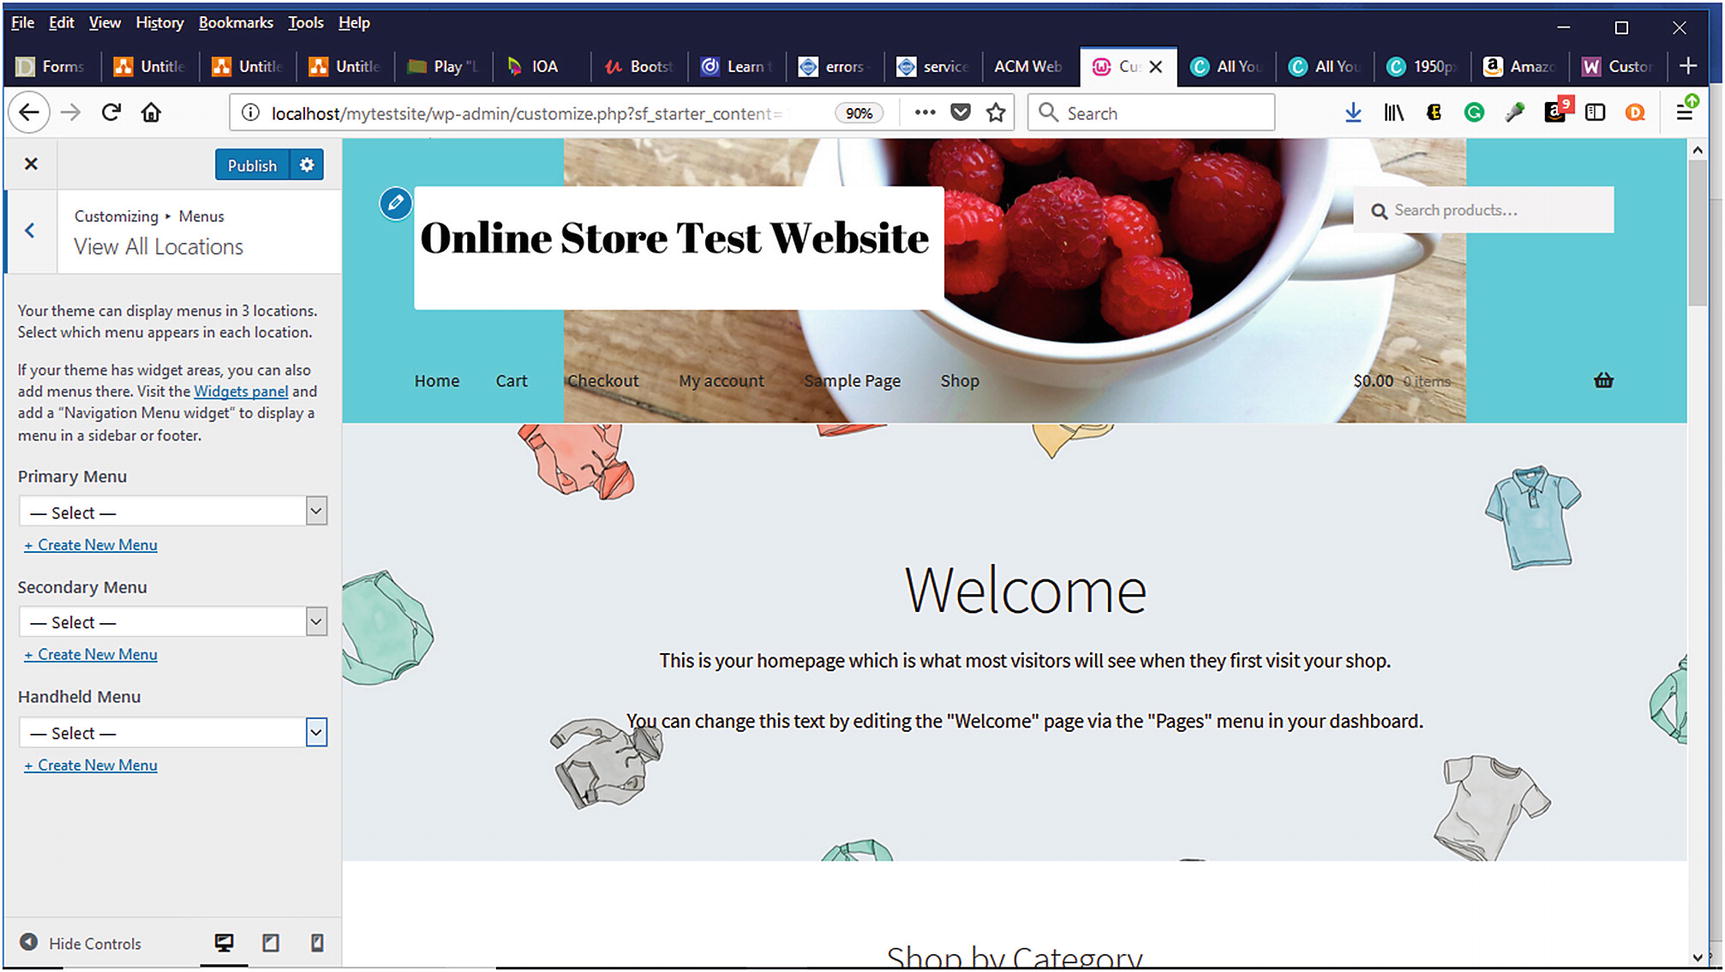
The Storefront theme can display menus in three locations (Figure 6-16):
Primary menu
Secondary menu
Handheld menu
Figure 6-16
Menu View All Locations in WooCommerce
Widgets
As previously discussed in Chapter 3, widgets easily add functionality to an online store without requiring any coding knowledge. Certain widgets can be installed in the header and footer sections (Figure 6-17). Some of these widgets will be explored later in the chapter. There are four locations on the footer along with the one below the header and on the sidebar where widgets can be installed. What types of widgets can be installed? According to the WooCommerce website, these are the default widgets that can be installed:
Active Product Filters – Display a list of active filters.
Filter Products by Attribute – Display a list of attributes to filter products in your store.
Filter Products by Price – Display a slider to filter products in your store by price.
Filter Products by Rating – Display a list of star ratings to filter products in your store.
Product Categories – A list or drop-down of product categories.
Products – A list of your store’s products.
Products by Rating – A list of your store’s top-rated products.
Product Search – A search form for your store.
Product Tag Cloud – A cloud of your most used product tags.
Recent Product Reviews – Display a list of recent reviews from your store.
Recent Viewed Products – Display a list of a customer’s recently viewed products.
Figure 6-17
Adding widgets in WooCommerce
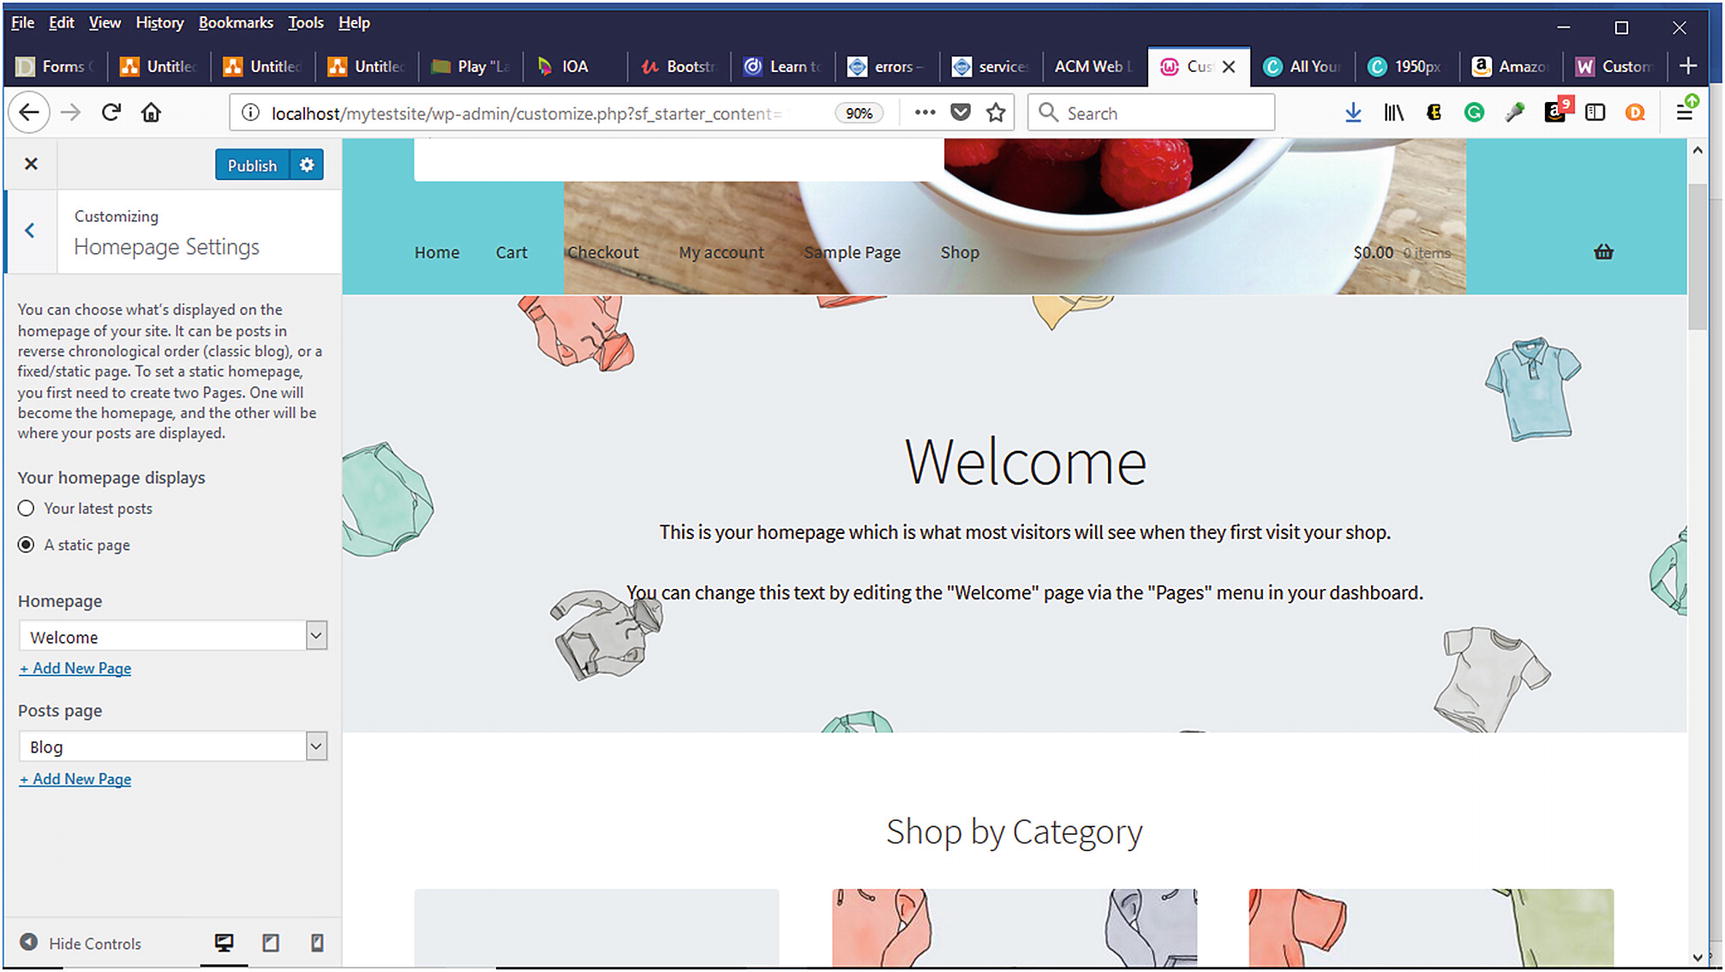
Homepage Settings
First impressions are lasting impressions. Sometimes, you do not get a second chance to make a good first impression. Determining what visitors see upon arriving at your online store’s homepage is vital. It can result in increased click-throughs of your store or an increased abandoned rate from visitors leaving the store. The homepage can be configured to display a static page or your recent blog posts (Figure 6-18).
Figure 6-18
Homepage settings in the WooCommerce Customizer
Store Notice
WooCommerce makes it easy to manage your online store. You can enable a custom store notice message to be displayed to visitors by selecting a checkbox (Figure 6-19). Examples of information that could be displayed include downtime for support, addition of new products, and more.
Figure 6-19
Add store notices in WooCommerce
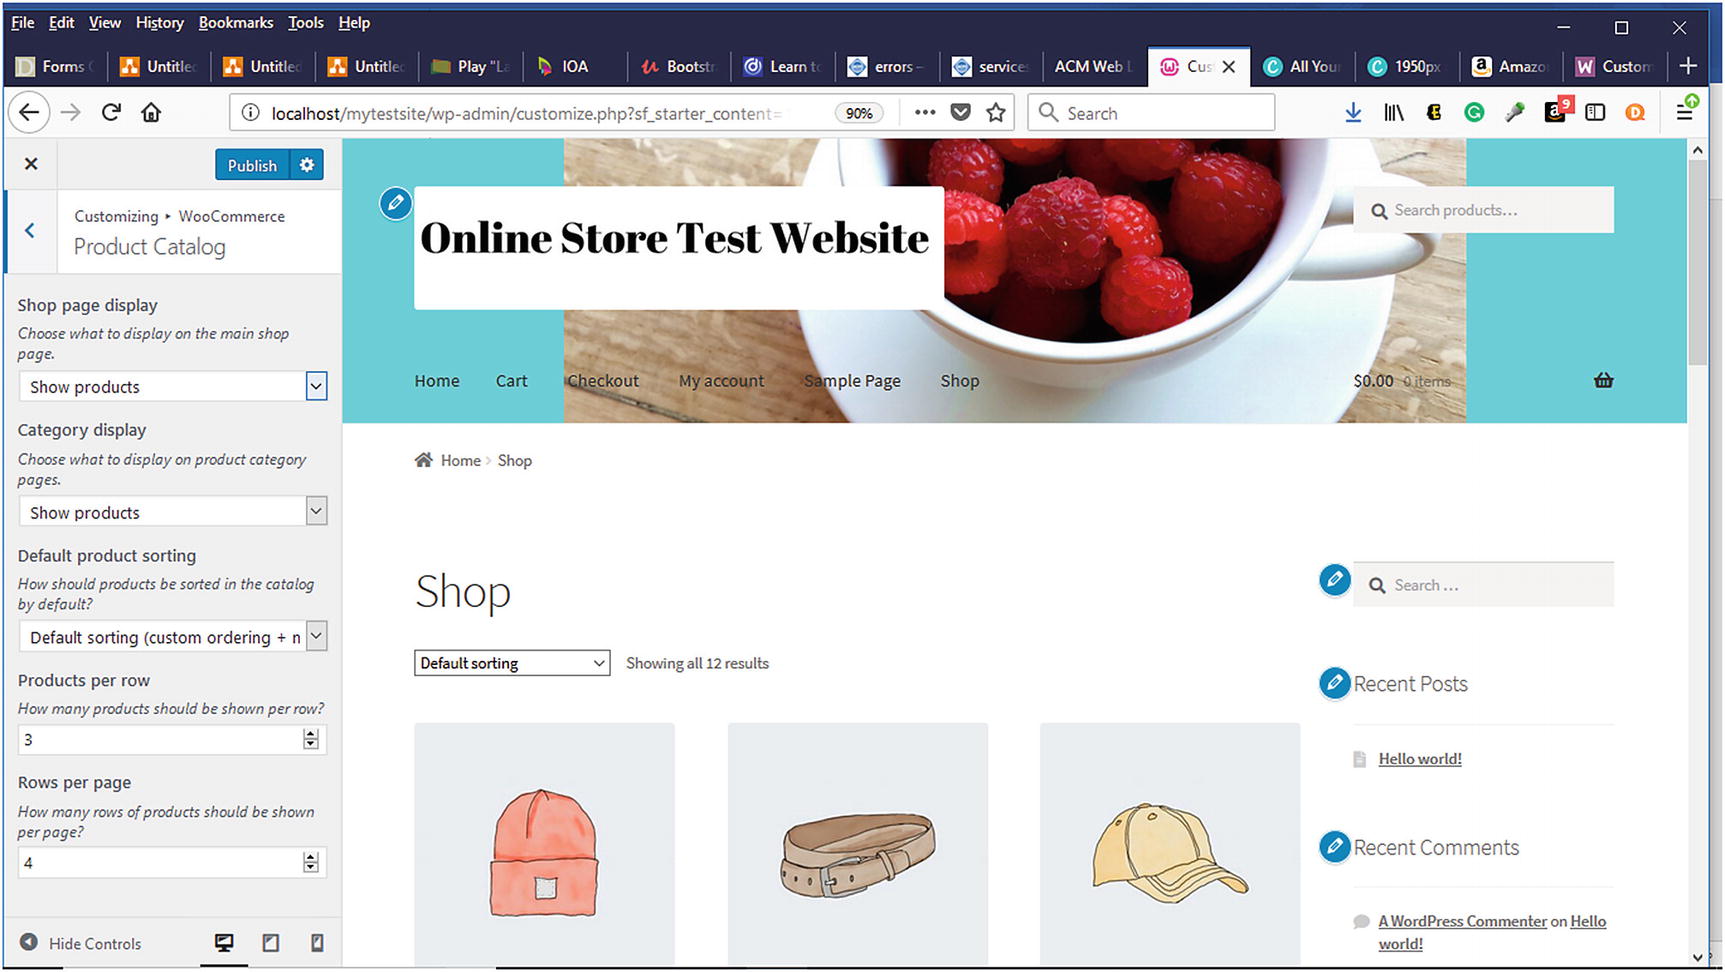
Product Catalog
The product catalog section gives you complete control over how your online store will look (Figure 6-20). You can customize the shop page and category display, default product sorting, products per row, and row per page.
Figure 6-20
Product catalog in WooCommerce
WooCommerce
Product images allow potential customers to see your products or services and make decisions as to whether they want to learn more. Thumbnails are smaller images of your products or services displayed to users before they click on the product or service to see the bigger image and more information. Within the Product Images section, thumbnail cropping options can be selected to determine how thumbnail images will be cropped (Figure 6-21).
Figure 6-21
Thumbnail cropping options in the Product Images
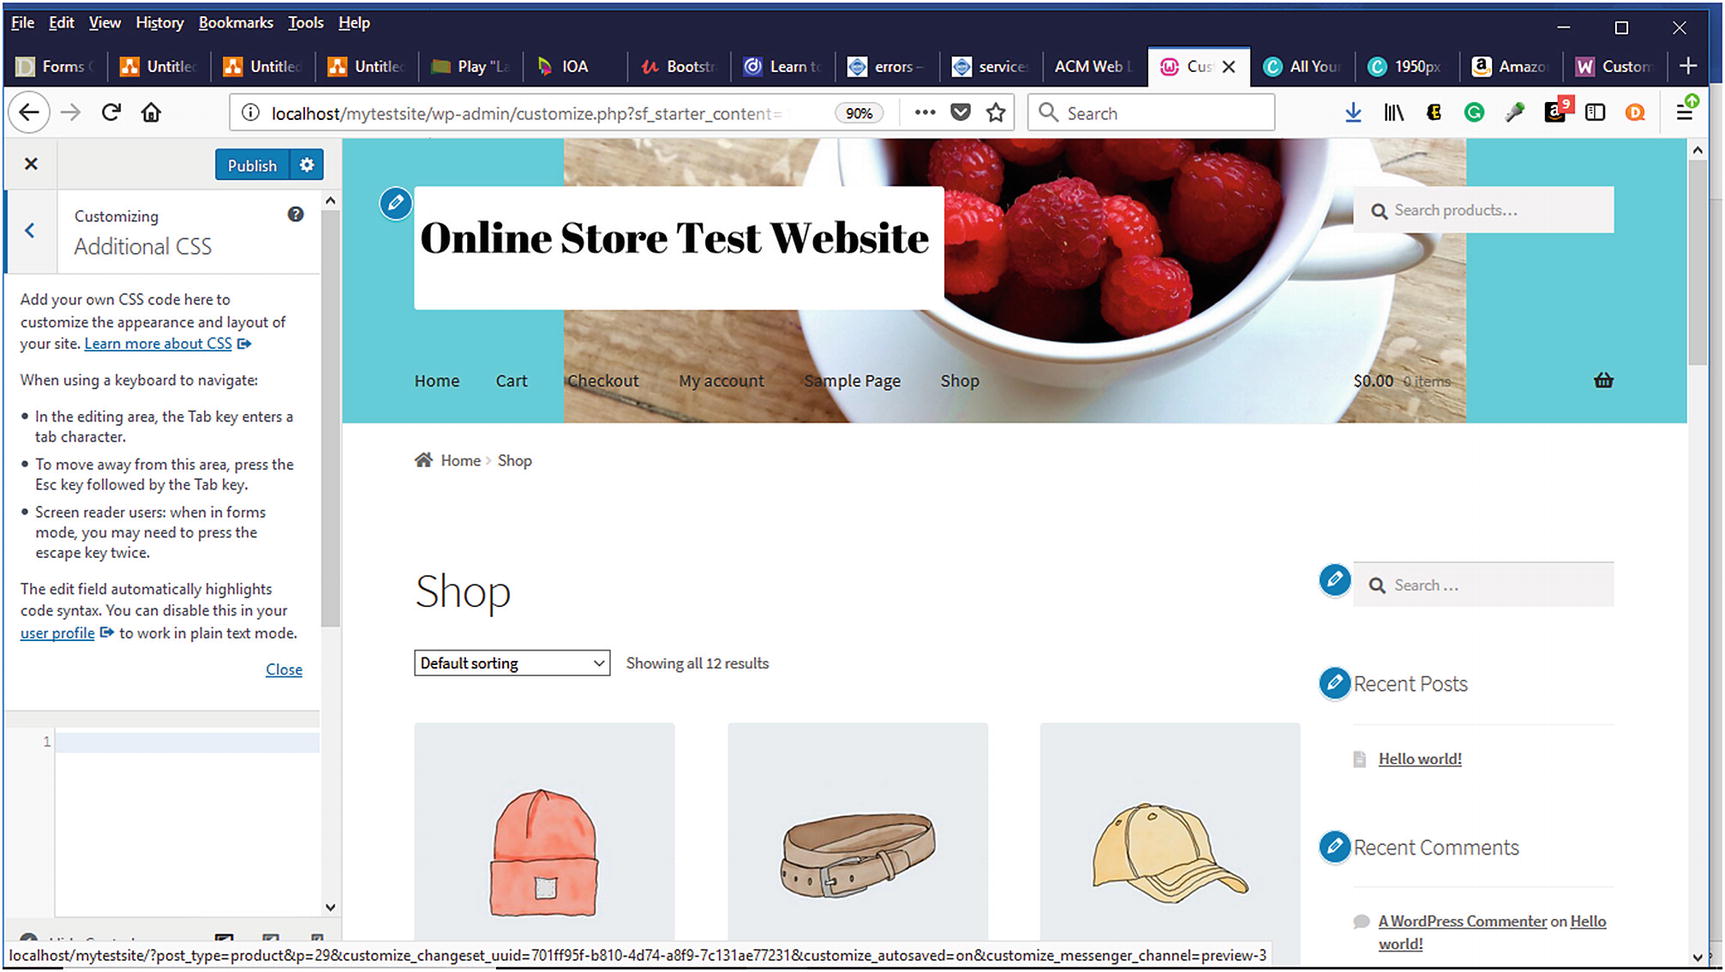
Additional CSS
If you have your own cascading style sheet (CSS) that you would like to use, WooCommerce allows you to add it in the Additional CSS section (Figure 6-22). You can also learn more about CSS.
Figure 6-22
Additional CSS in WooCommerce
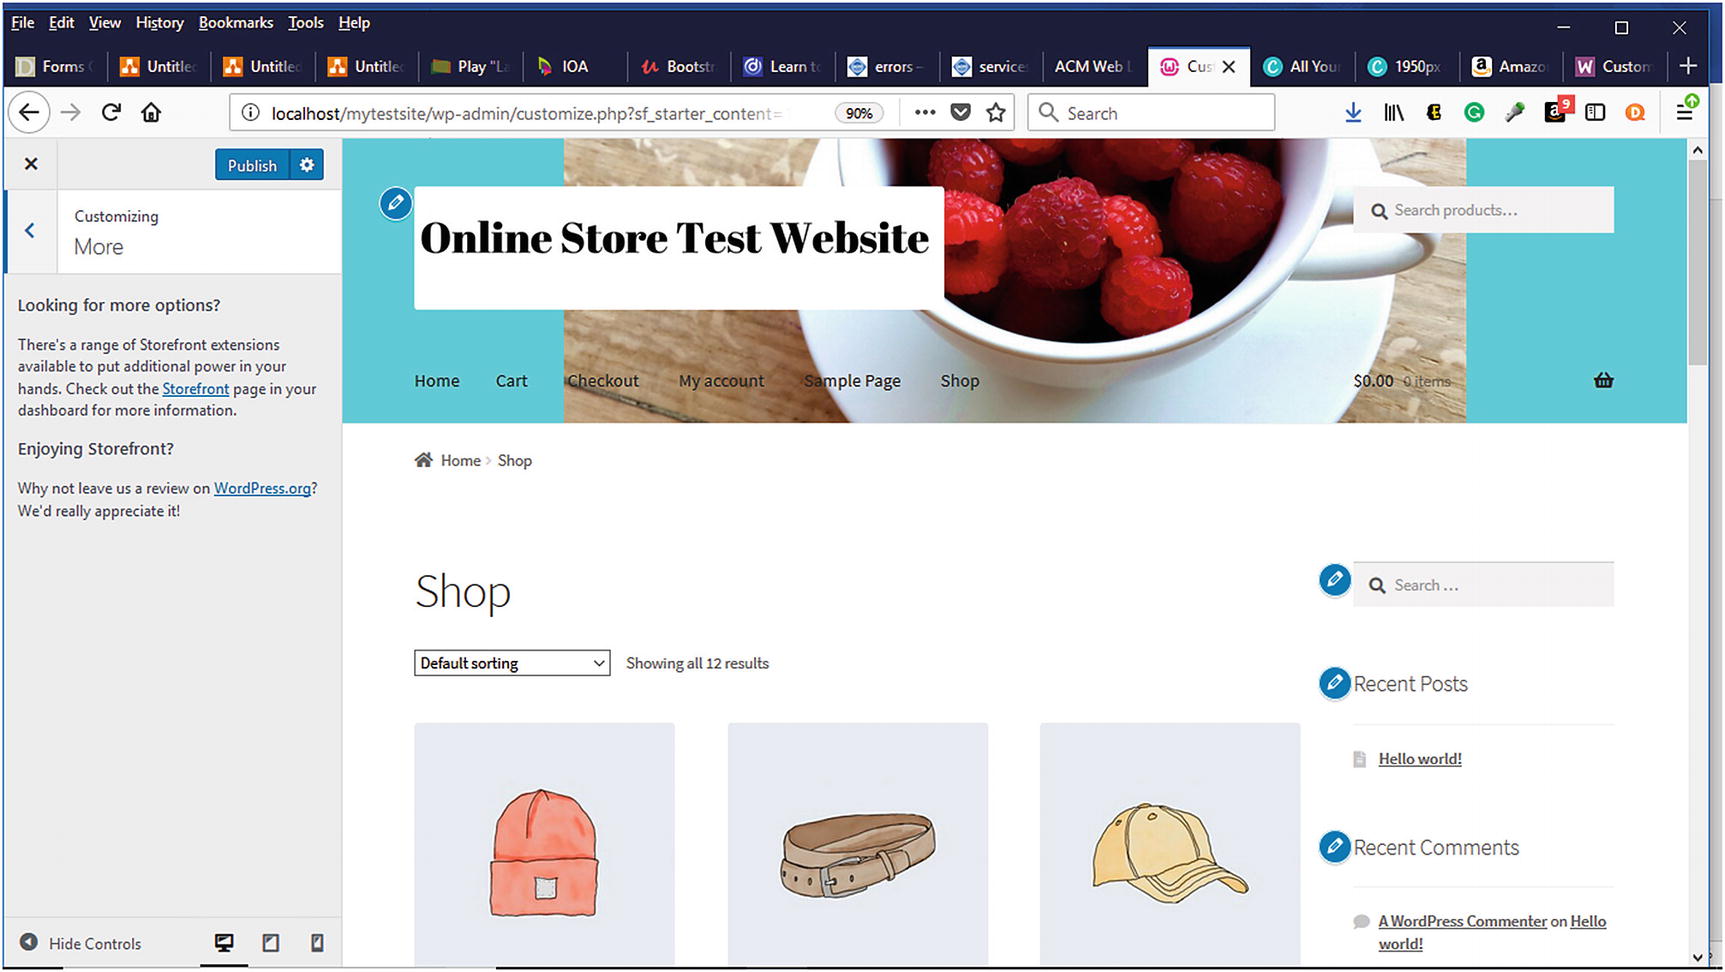
More
WooCommerce makes it easy to learn more about available Storefront extensions to enhance your online store (Figure 6-23). Within the WordPress Dashboard, visit the Storefront page for more information.
Figure 6-23
More Options in the Customizer
WooCommerce Settings
Now that we’ve gone through the Customizer, let’s look at the WooCommerce Settings page where you will spend most of your time configuring your store.
General Tab
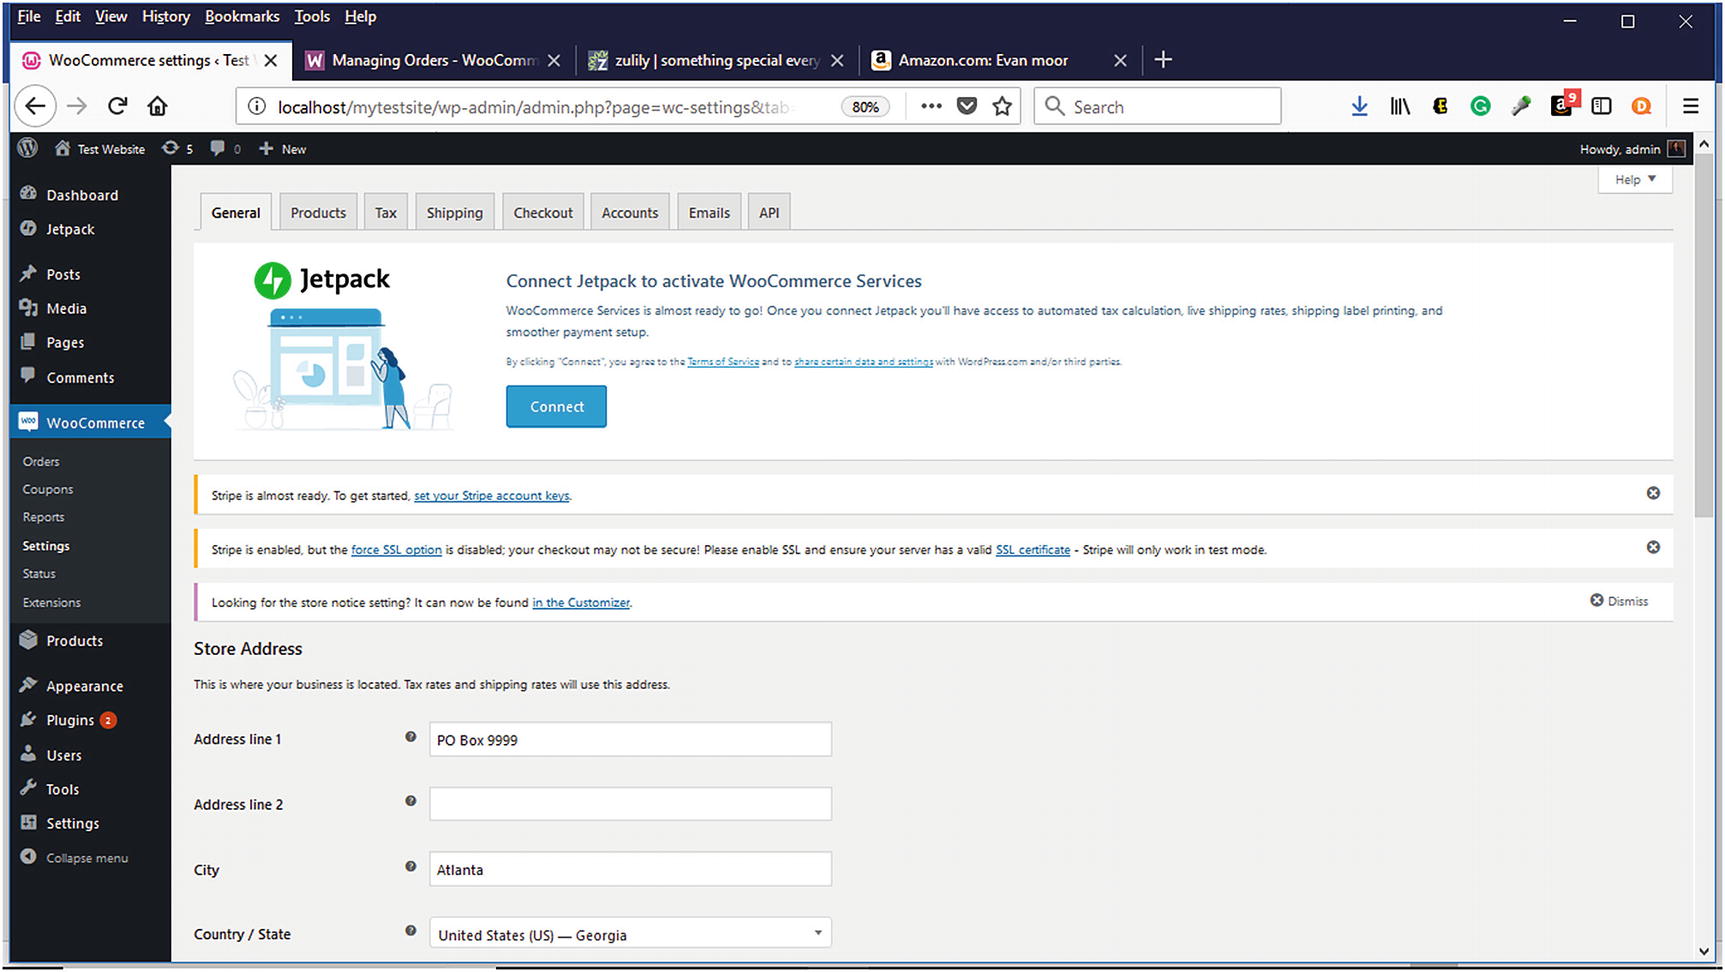
If you used the initial WooCommerce Setup Wizard, you completed this step in the Store Setup tab. If you skipped the Setup Wizard or need to change any information, you can do so on the General Tab (Figure 6-24). The General Tab contains store-specific information such as the address, selling and shipping locations, and tax and currency information.
Figure 6-24
General tab in WooCommerce Settings
Products
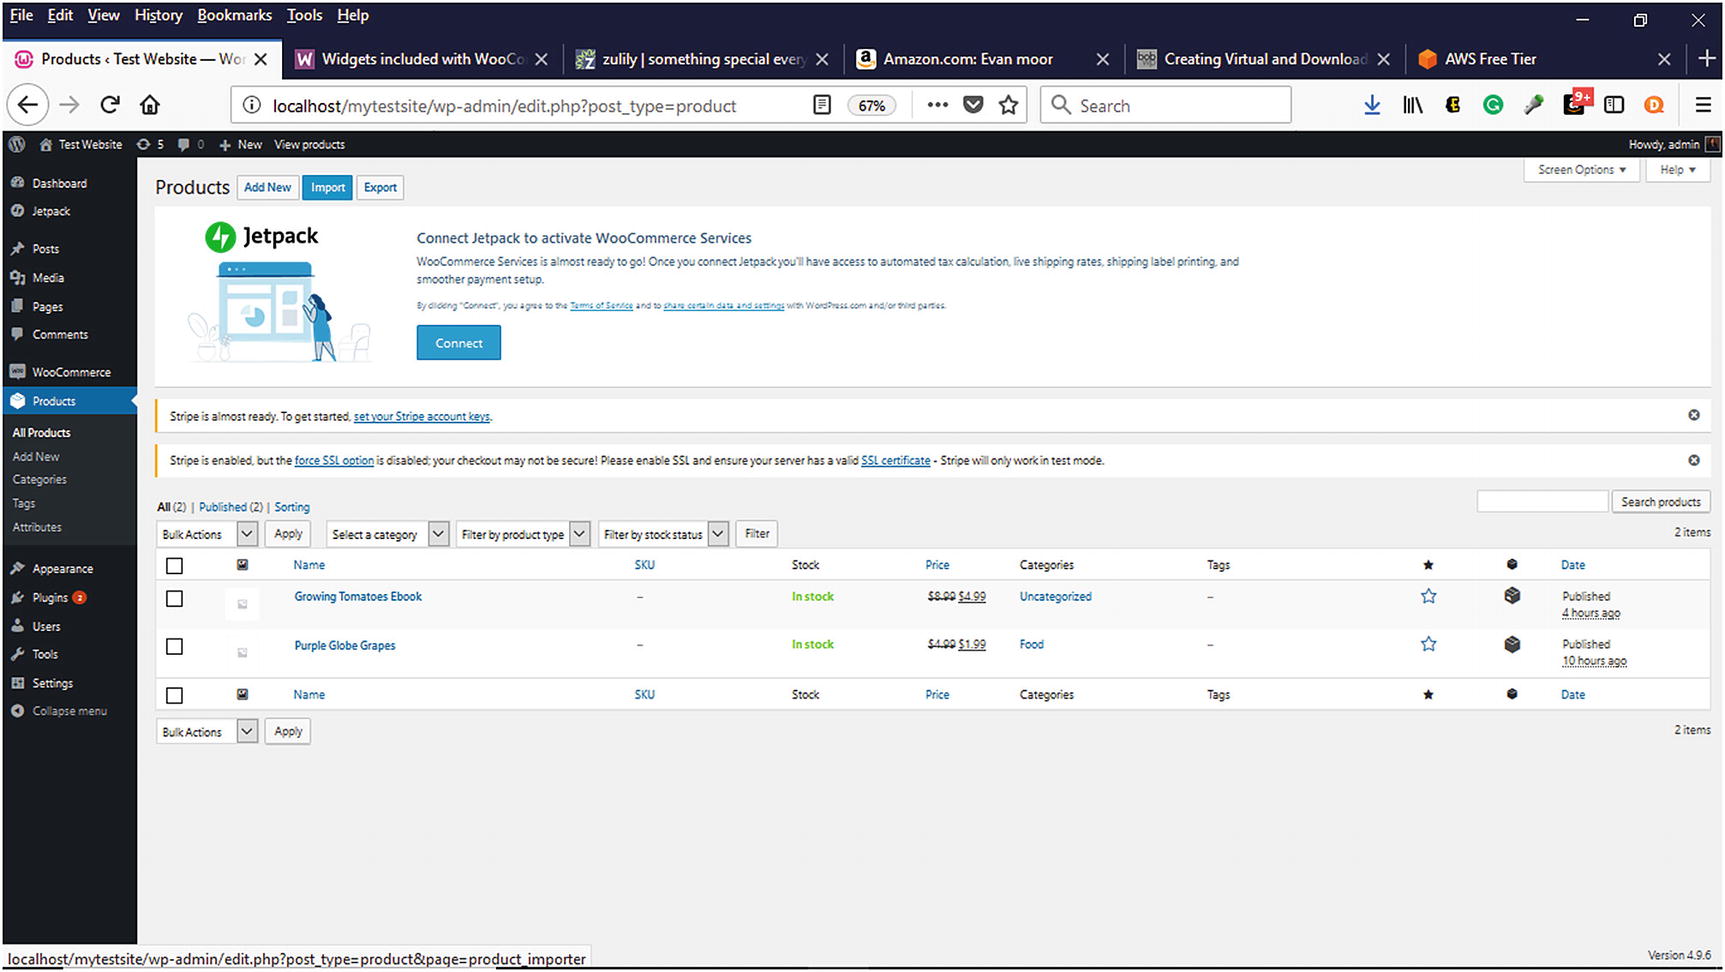
The Products menu (Figure 6-25) within the WordPress Dashboard is where products are added or modified.
Figure 6-25
Products menu within WordPress Dashboard
Physical Products
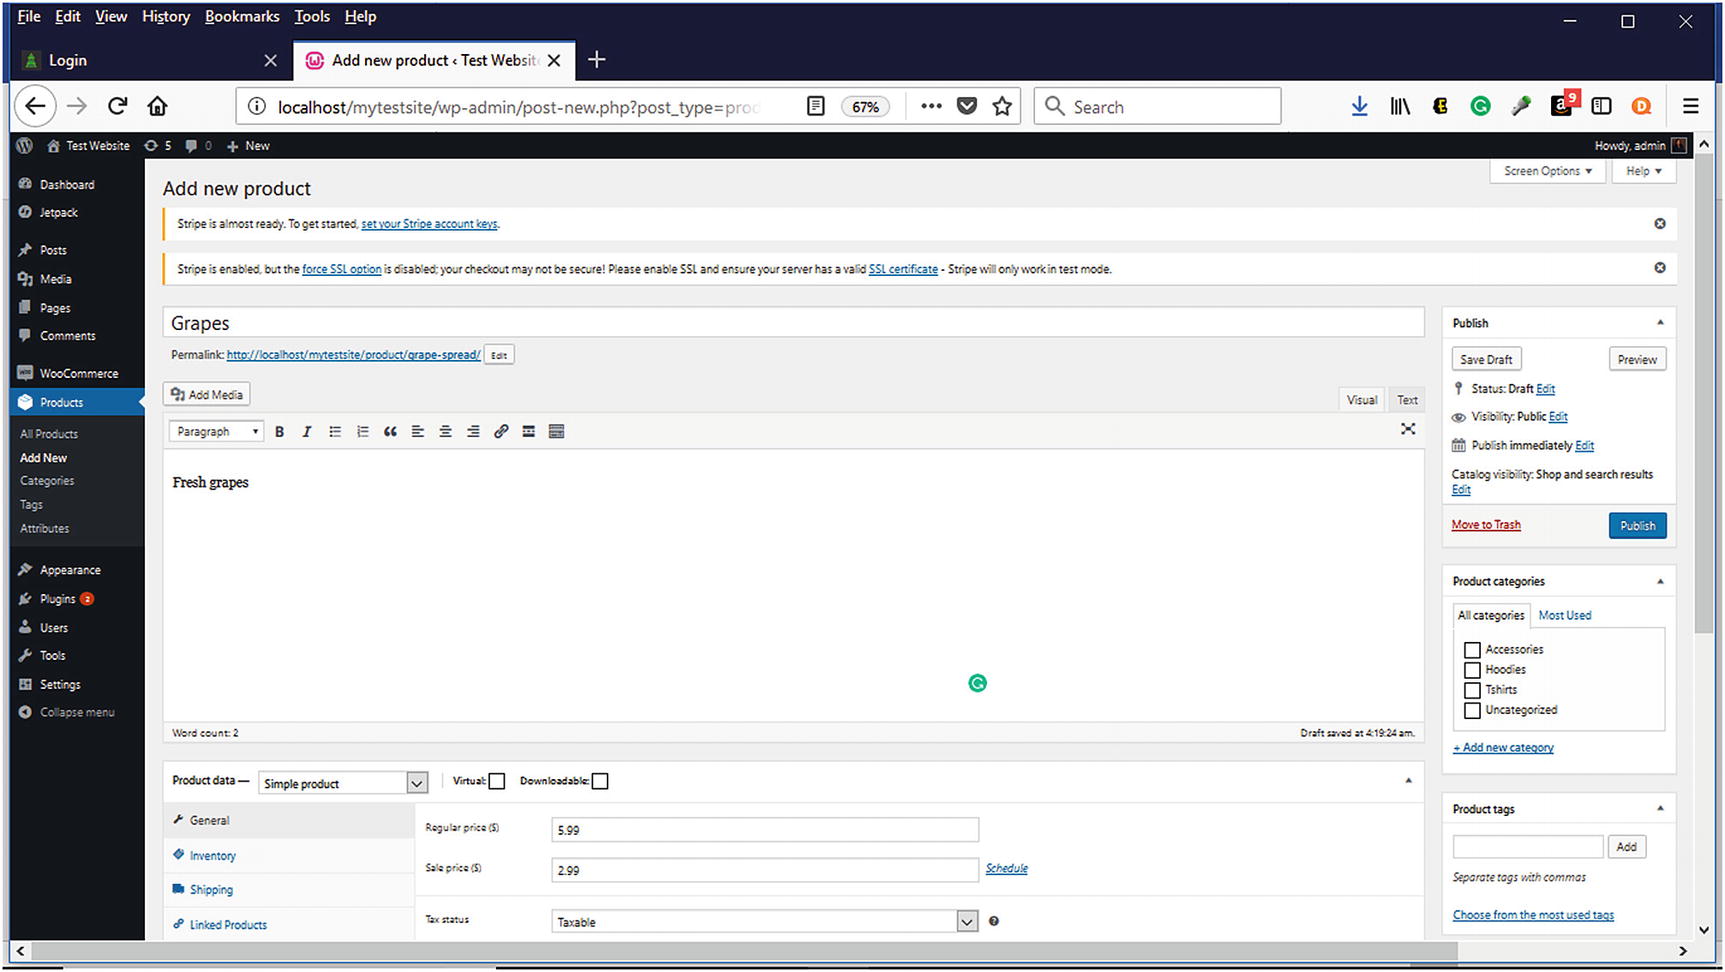
To add your product, click either on the Add New button at the top of the Products Page or click on the Add New link under the Products Panel (Figure 6-26). For your product or service, you would enter a descriptive product name along with the pricing information. WooCommerce allows you to enter a retail price and a sale price. You can also schedule the sale price duration. Once your product is created, you can either add it to an existing category or create a new one. If you decide to create a new category, you can add it to an existing Parent category such as adding socks to a shoes parent category. You can also add a product image as well as product tags. It is a good practice to provide descriptive tags for your products to help people locate your products. Likewise, it is also good to include descriptive keywords when you are naming your images. Providing good quality images can also help potential customers make informed decisions as to whether to purchase your products. Make sure that you use a good high-quality resolution camera along with good lighting when taking product pictures or hire a good photographer.
Figure 6-26
Add New Product Page
Virtual Products
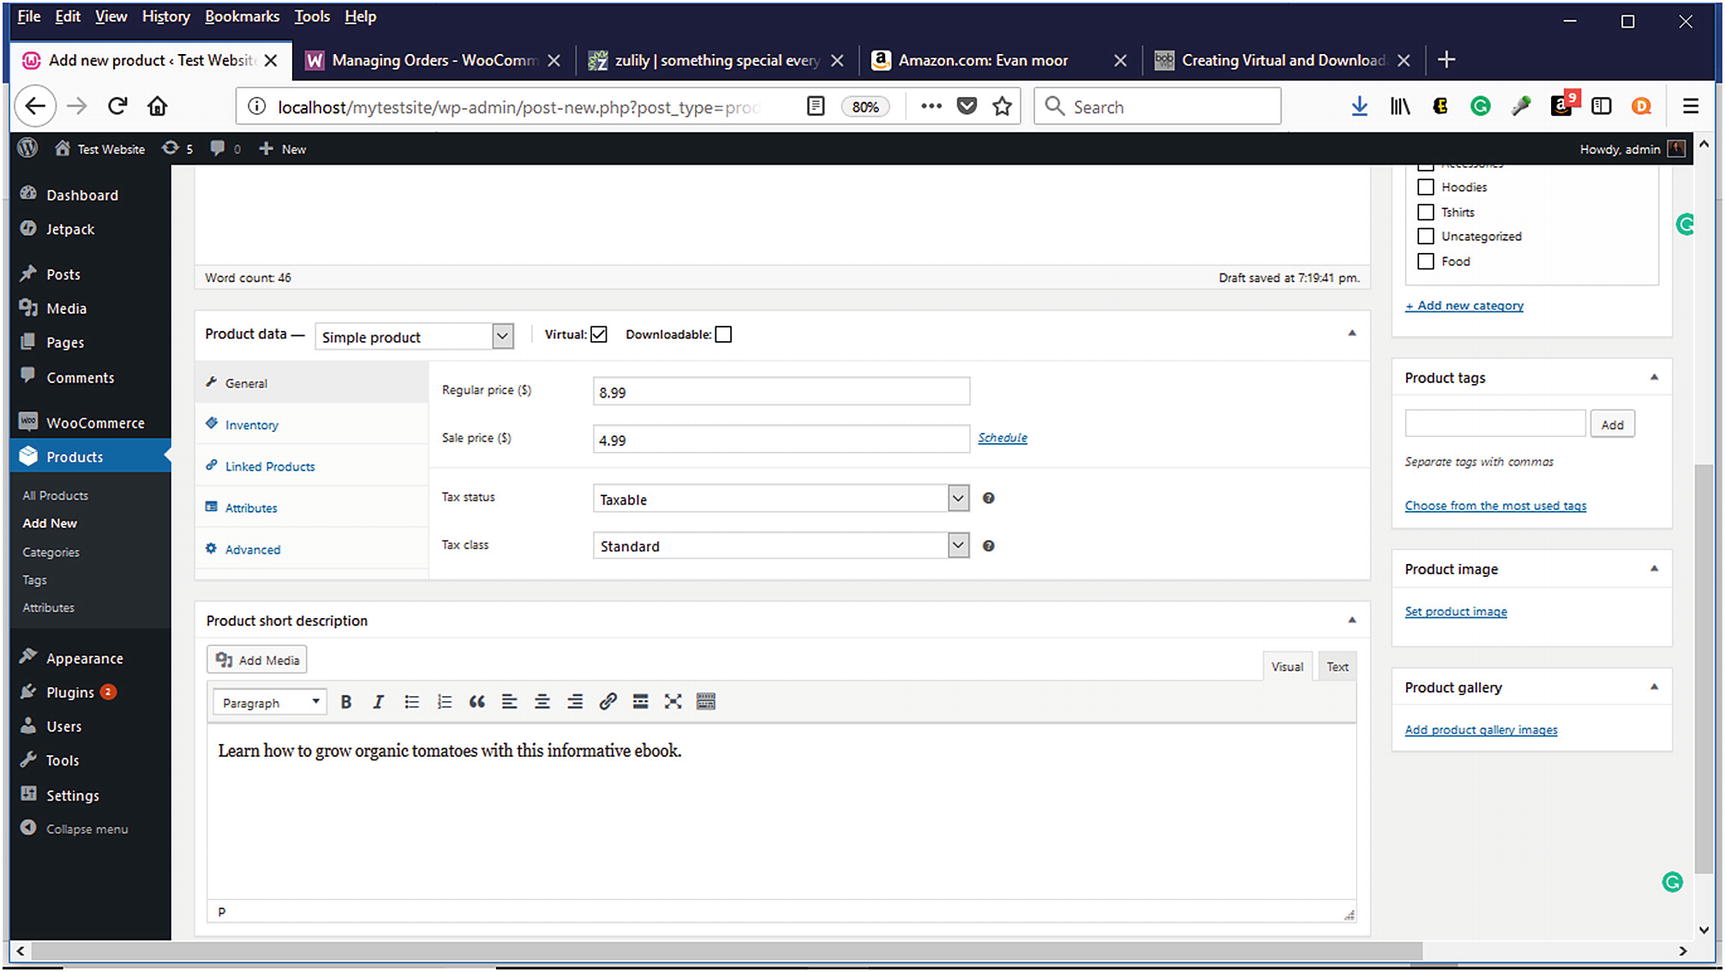
Virtual products are products that are downloaded rather than shipped. They are intangible. Virtual products consist of e-books, PDF documents, music, services, and more. When adding these products on the Add New Product page (Figure 6-27), clicking the virtual checkbox indicates that they are virtual products and no shipping is involved. When the virtual checkbox is selected, the shipping option is not available.
Figure 6-27
Virtual products in WooCommerce
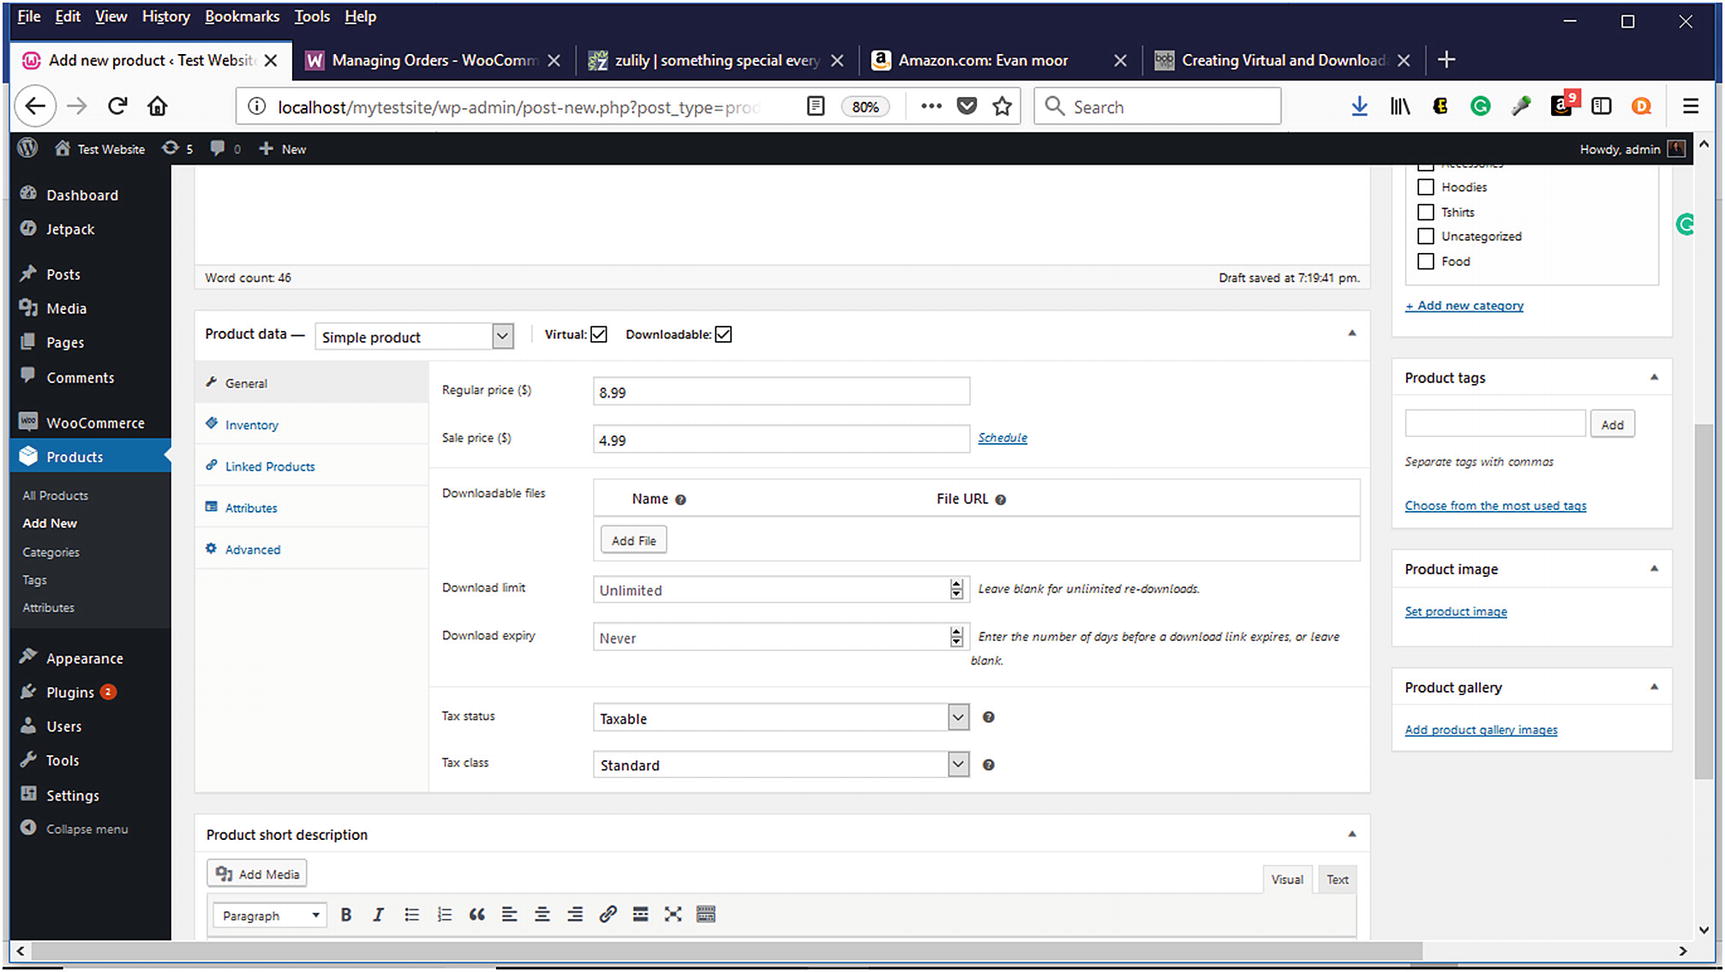
Downloadable Products
Downloadable products are a form of virtual products that have a file available for download after a completed purchase. These products would include e-books, music, PDF documents, and more. The shipping option is still not available. The downloadable and virtual checkboxes must be clicked to display the other downloadable information that needs to be completed such as downloadable files, download limit, and the download expiration (Figure 6-28). It is a good practice to give your downloadable products descriptive names so that customers have an idea of what they are downloading. Likewise, consider using a cloud-based storage such as Amazon’s S3 for storing your files. Depending on the number of downloadable files you have, you could qualify for an Amazon S3 free-tier account (expires 12 months after sign-up), which includes 5GB of storage, 20,000 Get Requests, and 2,000 Put Requests. For more information, visit https://aws.amazon.com.
Figure 6-28
Downloadable product page in WooComerce
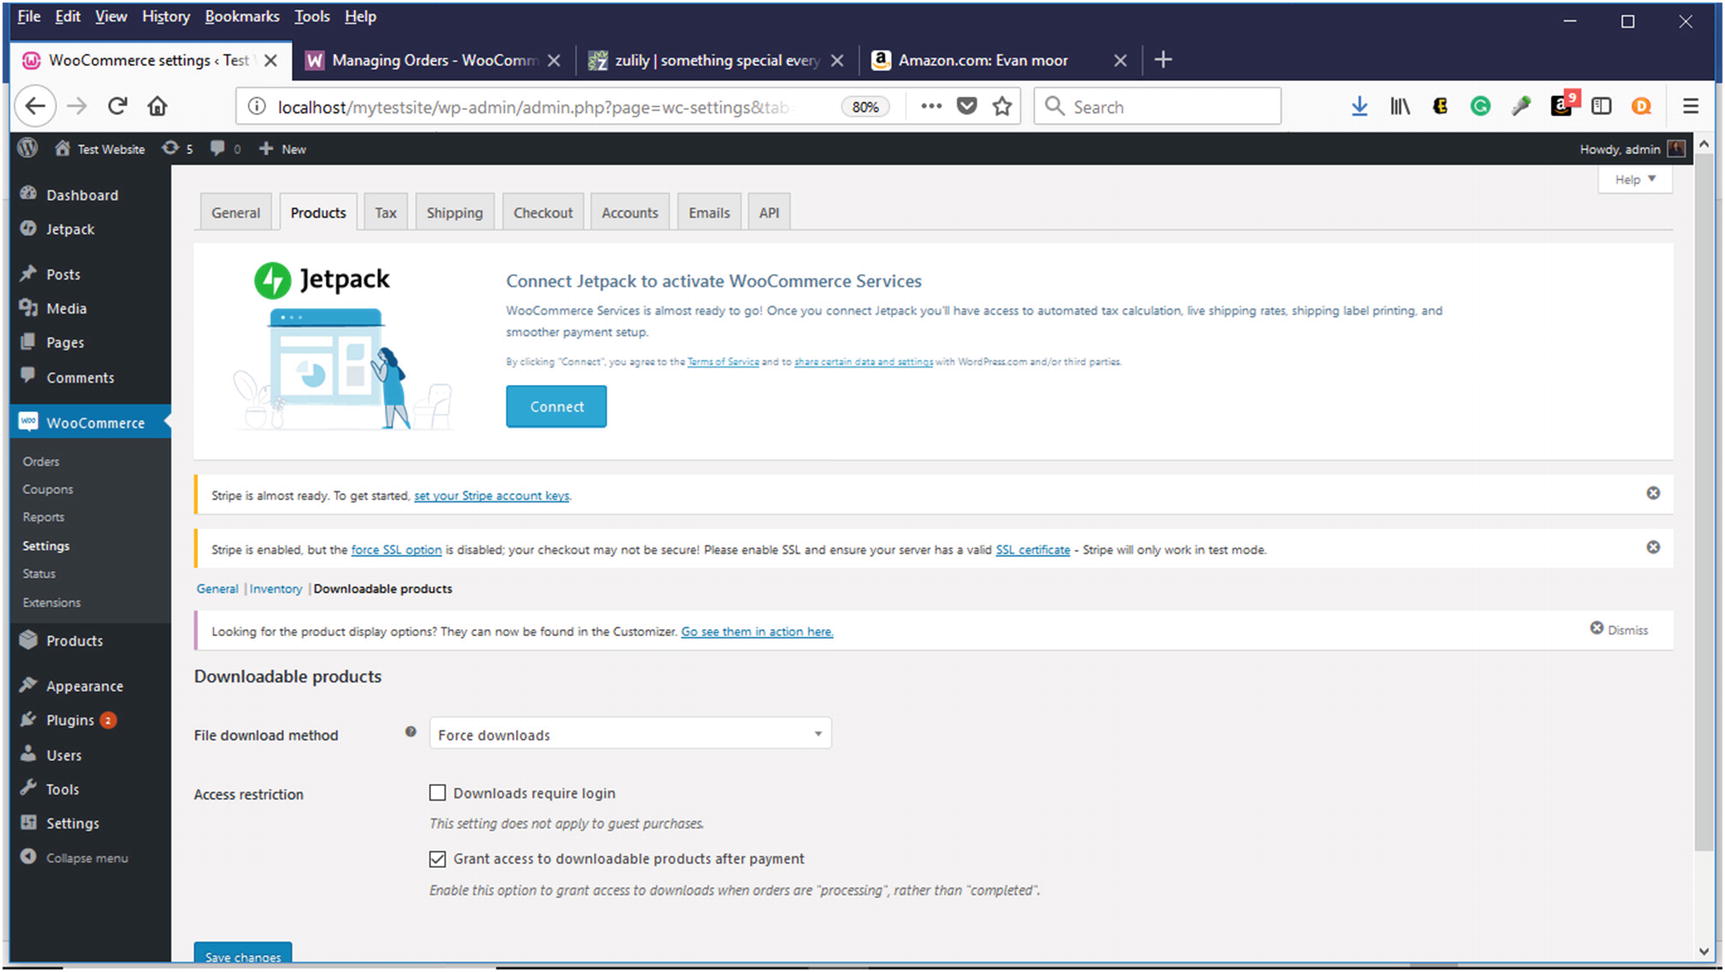
Once your downloadable products have been added, you can specify their download method and set their access restrictions on the downloadable products area of the Products Tab in WooCommerce Settings (Figure 6-29).
Figure 6-29
Downloadable products section on Products Tab in WooCommerce Settings
If you have a large inventory of products, it can be time consuming to add them individually using the Add New function. WooCommerce provides the ability to import a CSV file with product information into your store, which is much faster than entering them one by one. There is a wizard that guides you through the import process. A sample CSV file format for products is available on the WooCommerce documentation website.
Inventory
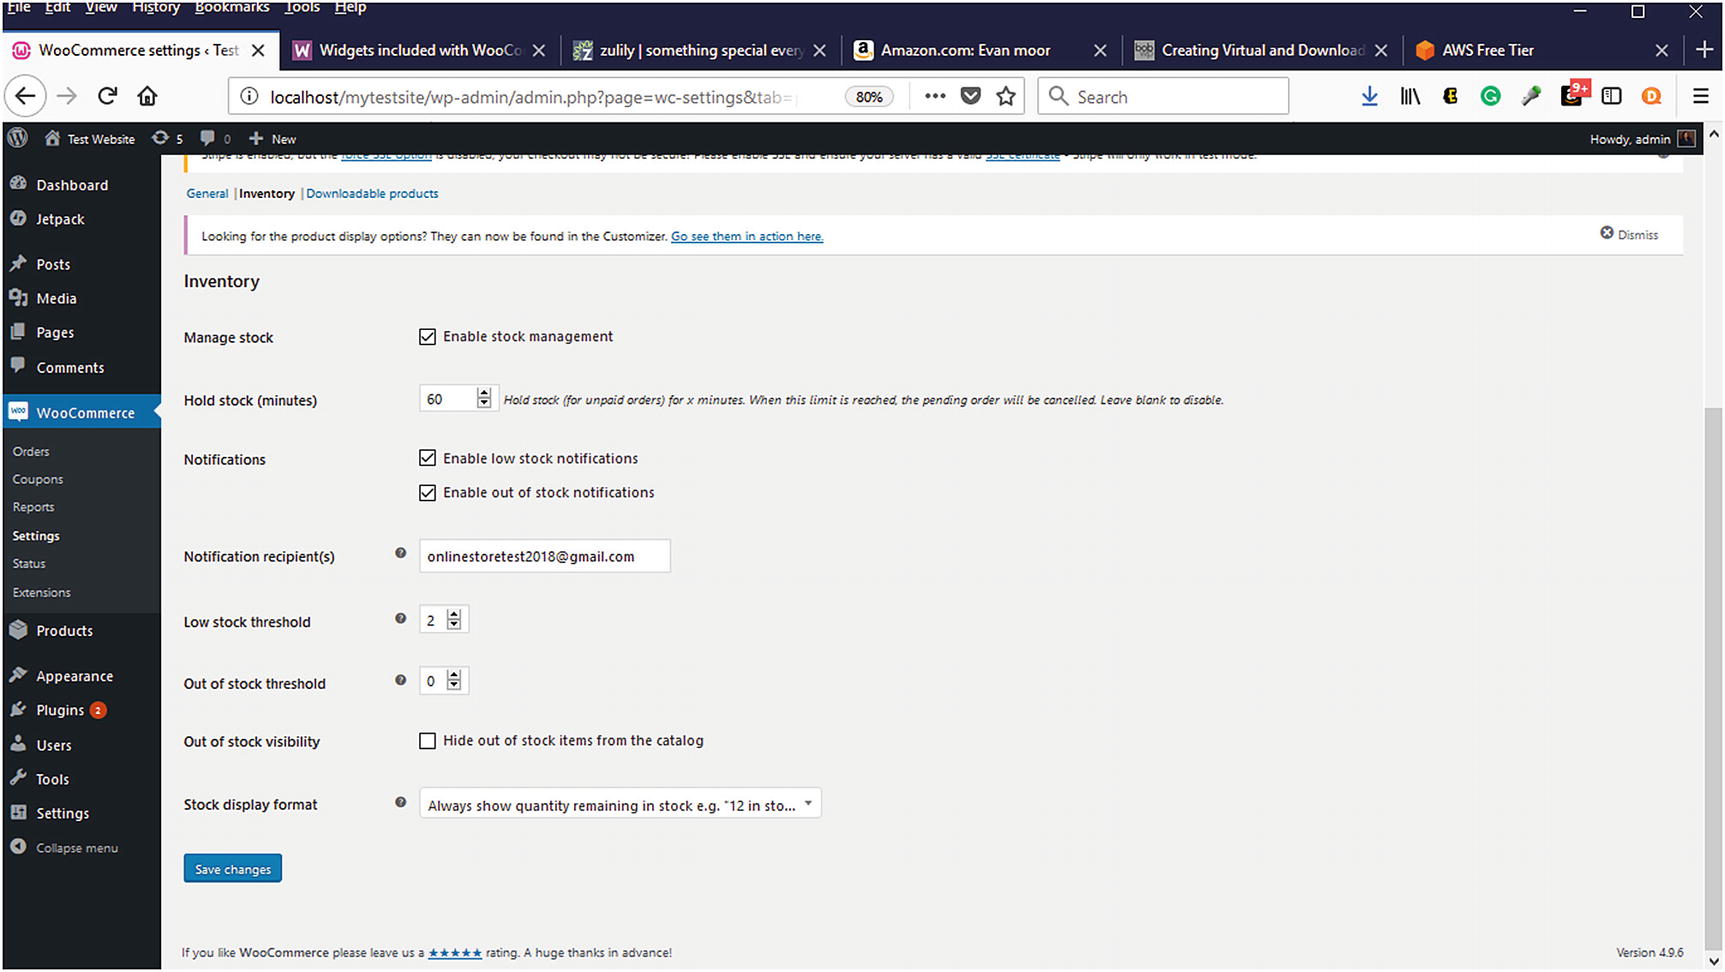
WooCommerce makes it easy to manage your store’s inventory. The last thing you want is to have a customer ready to buy products, but they are out of stock. Clicking on the inventory link will allow you to add a product SKU, manage stock, set stock status, or indicate whether a product can be sold individually. Indicating that you want to manage stock will make stock quantity and allow backorder options available. If you are unclear of what an option means, you can click on the question mark beside the option. More advanced inventory settings can be configured in the WooCommerce Settings (Figure 6-30).
Figure 6-30
Inventory settings in WooCommerce Settings section
Shipping
As you are adding your products, you can also configure shipping information. In this section, you would enter your products’ weights and dimensions. Once you connect to JetPack, you can take advantage of the live rate settings. In development mode, this information is not available.
Linked Products
By choosing the linked products option, you can either upsell or cross-sell your products.
Categories
Product categories are similar to the aisle signage in grocery stores or retail stores. They help customers find what they are looking for easily and quickly. The same applies to online stores. When creating categories, it is a good practice to make them as descriptive and logical as possible. Visitors do not want to guess what a particular category contains. They want to be able to read a category’s name and have a good idea of what products make up the category. Providing a good description that contains keywords that visitors search for is also a good idea. WooCommerce also allows a thumbnail image to be added to make categories easy to identify (Figure 6-31).
Figure 6-31
Product categories for WooCommerce
Product Tags
When creating your products, product tags are extremely important. Product tags allow you to create user-friendly URLs that can contain keywords about your products (Figure 6-32). This helps your products to be discovered in various search engines such as Google or Bing. Most people will find your store via search engines, so why not add descriptive keyword tags to your products? Not sure what keywords or phrases people are using to search for your products? Google Keyword Planner is an excellent free resource that will help you find the search terms that people are using.
Figure 6-32
Product Tags Panel in WooCommerce
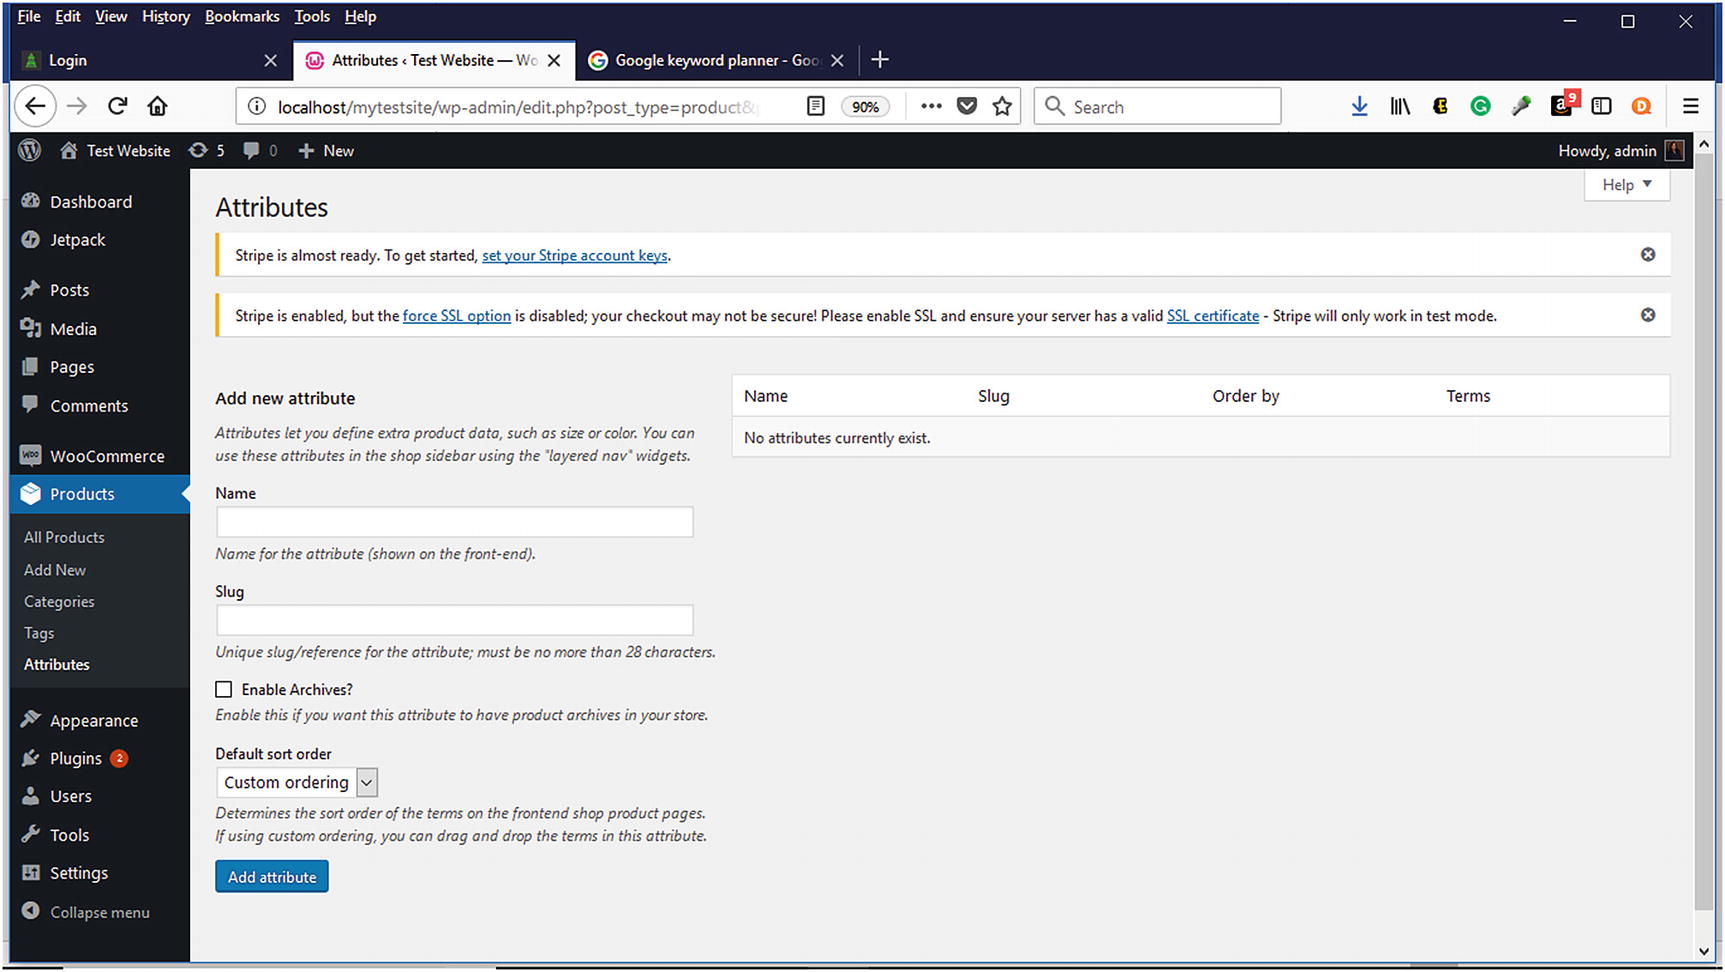
Attributes
Depending on the type of products, additional information might be needed to help customers complete their selections (Figure 6-33). For example, when purchasing clothing such as shirts or pants, customers must be able to select the color and size. WooCommerce’s attributes panel is where this information would be specified. You can also set the default sorting order for these attributes, which is helpful for items such as sizes and colors.
Figure 6-33
Product Attributes Panel in WooCommerce
Orders
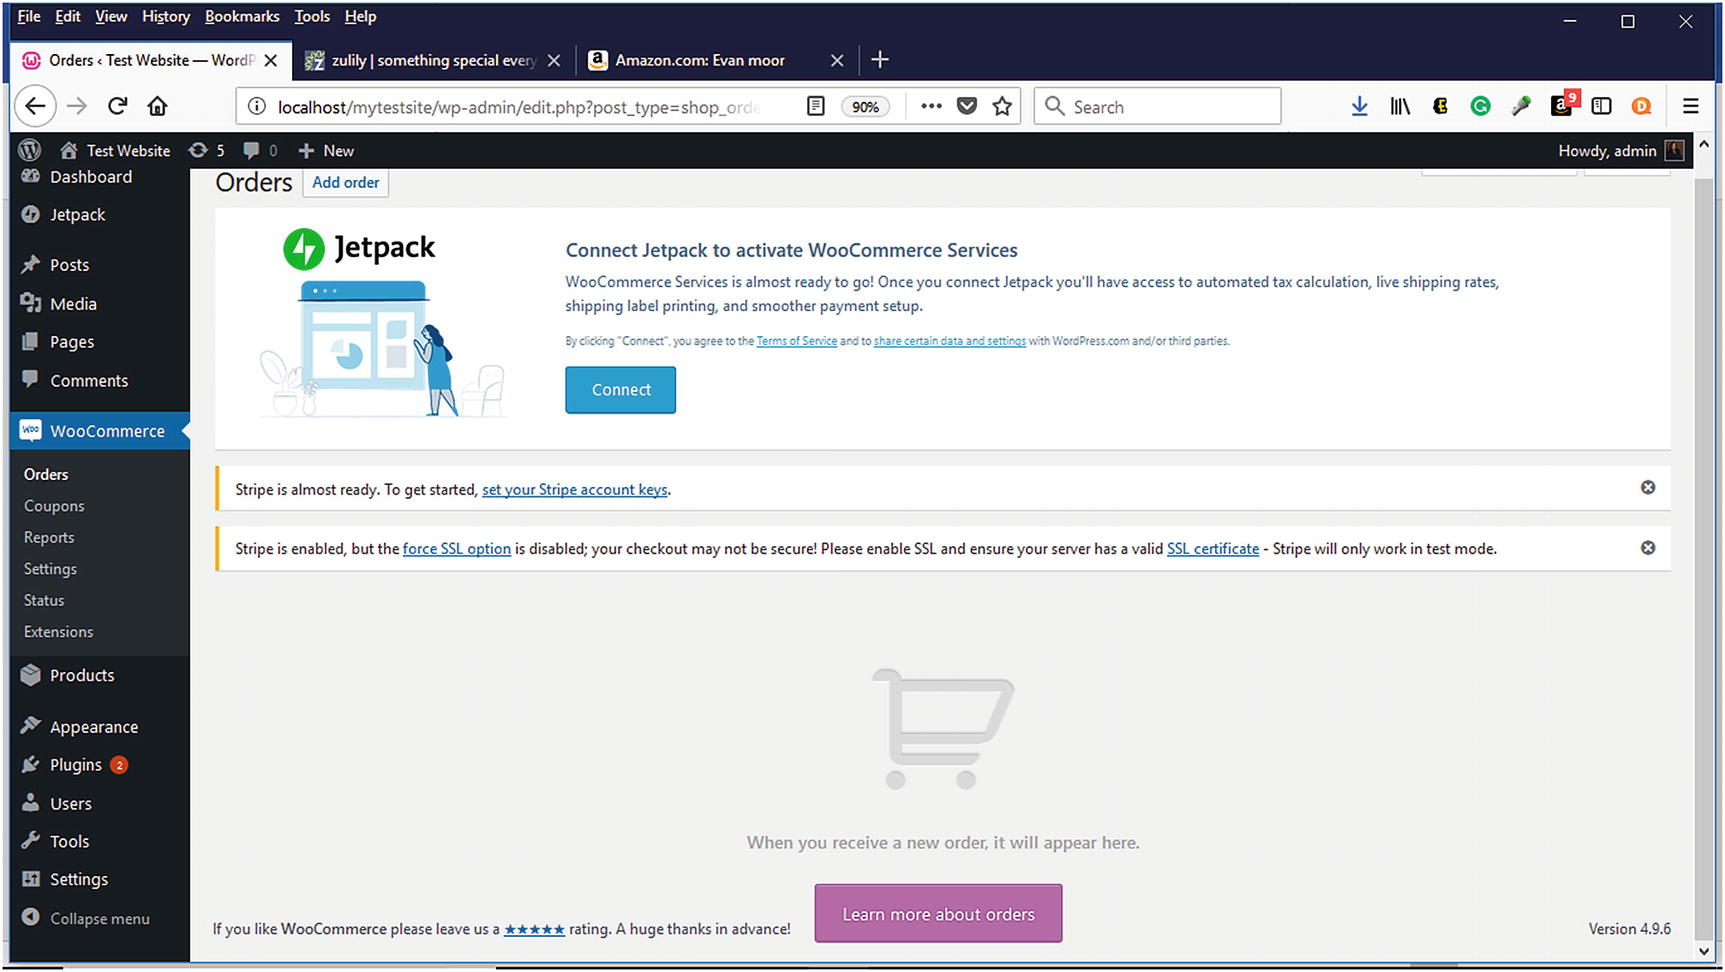
To view orders that you receive, Select WooCoomerce ➤ Orders (Figure 6-34). All orders will appear within the area with the shopping cart. Since no orders have been placed, this page initially appears empty. WooCommerce offers more information on orders by clicking on the Learn more about orders button. We will discuss order management in Chapters 9 and 10.
Figure 6-34
Orders page of WooCommerce
Summary
Setting up an online store with WooCommerce is not as daunting of a task as some might think. With its various Setup Wizards and Customizer Wizard serving as guides along the way, an online store can be set up quickly. By planning what products will be sold as well as their categories, visitors can experience a good first shopping experience that can turn them into repeat customers. In the next chapter, we’ll explore securing your online store.