Table of Contents for
Test-Driven Development with Python, 2nd Edition
 Test-Driven Development with Python, 2nd Edition
Published by
O'Reilly Media, Inc., 2017
Test-Driven Development with Python, 2nd Edition
Published by
O'Reilly Media, Inc., 2017
- Cover
- nav
- Praise for Test-Driven Development with Python
- Test-Driven Development with Python
- Test-Driven Development with Python
- Preface
- Prerequisites and Assumptions
- Companion Video
- Acknowledgments
- I. The Basics of TDD and Django
- 1. Getting Django Set Up Using a Functional Test
- 2. Extending Our Functional Test Using the unittest Module
- 3. Testing a Simple Home Page with Unit Tests
- 4. What Are We Doing with All These Tests? (And, Refactoring)
- 5. Saving User Input: Testing the Database
- 6. Improving Functional Tests: Ensuring Isolation and Removing Voodoo Sleeps
- 7. Working Incrementally
- II. Web Development Sine Qua Nons
- 8. Prettification: Layout and Styling, and What to Test About It
- 9. Testing Deployment Using a Staging Site
- 10. Getting to a Production-Ready Deployment
- 11. Automating Deployment with Fabric
- 12. Splitting Our Tests into Multiple Files, and a Generic Wait Helper
- 13. Validation at the Database Layer
- 14. A Simple Form
- 15. More Advanced Forms
- 16. Dipping Our Toes, Very Tentatively, into JavaScript
- 17. Deploying Our New Code
- III. More Advanced Topics in Testing
- 18. User Authentication, Spiking, and De-Spiking
- 19. Using Mocks to Test External Dependencies or Reduce Duplication
- 20. Test Fixtures and a Decorator for Explicit Waits
- 21. Server-Side Debugging
- 22. Finishing “My Lists”: Outside-In TDD
- 23. Test Isolation, and “Listening to Your Tests”
- 24. Continuous Integration (CI)
- 25. The Token Social Bit, the Page Pattern, and an Exercise for the Reader
- 26. Fast Tests, Slow Tests, and Hot Lava
- Obey the Testing Goat!
- A. PythonAnywhere
- B. Django Class-Based Views
- C. Provisioning with Ansible
- D. Testing Database Migrations
- E. Behaviour-Driven Development (BDD)
- F. Building a REST API: JSON, Ajax, and Mocking with JavaScript
- G. Django-Rest-Framework
- H. Cheat Sheet
- I. What to Do Next
- J. Source Code Examples
- Bibliography
- Index
- About the Author
- Colophon
Chapter 10. Getting to a Production-Ready Deployment
Our deployment is working fine but it’s not production-ready. Let’s try to get it there, using the tests to guide us.
In a way we’re applying the Red-Green-Refactor cycle to our server deployment. Our hacky deployment got us to Green, and now we’re going to Refactor, working incrementally (just as we would while coding), trying to move from working state to working state, and using the FTs to detect any regressions.
What We Need to Do
What’s wrong with our hacky deployment? A few things: first, we need to host our app on the “normal” port 80 so that people can access it using a regular URL.
Perhaps more importantly, we shouldn’t use the Django dev server for production; it’s not designed for real-life workloads. Instead, we’ll use the popular combination of the Nginx web server and the Gunicorn Python/WSGI server.
Several settings in settings.py are currently
unacceptable too. DEBUG=True, is strongly recommended against for production,
and we’ll want to fix ALLOWED_HOSTS, and set a unique SECRET_KEY too.
Finally, we don’t want to have to SSH in to our server to actually start the site. Instead, we’ll write a Systemd config file so that it starts up automatically whenever the server (re)boots.
Let’s go through and see if we can fix each of these things one by one.
Switching to Nginx
Installation
We’ll need a real web server, and all the cool kids are using Nginx these days, so we will too. Having fought with Apache for many years, I can tell you it’s a blessed relief in terms of the readability of its config files, if nothing else!
Installing Nginx on my server was a matter of doing an apt install, and I could
then see the default Nginx “Hello World” screen:
elspeth@server:$ sudo apt install nginx
elspeth@server:$ sudo systemctl start nginx
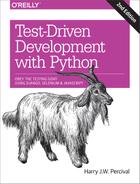
Now you should be able to go to the normal port-80 URL address of your server, and see the “Welcome to nginx” page at this point, as in Figure 10-1.
Tip
If you don’t see it, it may be because your firewall does not open port 80 to the world. On AWS, for example, you may need to configure the “security group” for your server to open port 80.

Figure 10-1. Nginx—it works!
The FT Now Fails, But Show Nginx Is Running
We can also confirm that if we run the FT without specifying port 8000, we see them fail again—one of them in particular should now mention Nginx:
$ STAGING_SERVER=superlists-staging.ottg.eu python manage.py test functional_tests
[...]
selenium.common.exceptions.NoSuchElementException: Message: Unable to locate
element: [id="id_new_item"]
[...]
AssertionError: 'To-Do' not found in 'Welcome to nginx!'
Next we’ll configure the Nginx web server to talk to Django
Simple Nginx Configuration
We create an Nginx config file to tell it to send requests for our staging site along to Django. A minimal config looks like this:
server: /etc/nginx/sites-available/superlists-staging.ottg.eu
server{listen80;server_namesuperlists-staging.ottg.eu;location/{proxy_passhttp://localhost:8000;}}
This config says it will only listen for our staging domain, and will “proxy” all requests to the local port 8000 where it expects to find Django waiting to respond.
I saved this to a file called superlists-staging.ottg.eu inside the /etc/nginx/sites-available folder.
Note
Not sure how to edit a file on the server? There’s always vi, which I’ll
keep encouraging you to learn a bit of, but perhaps today is already too
full of new things. Try the relatively beginner-friendly
nano
instead. Note you’ll also need to use sudo because the file is in a
system folder.
We then add it to the enabled sites for the server by creating a symlink to it:
# reset our env var (if necessary)
elspeth@server:$ export SITENAME=superlists-staging.ottg.eu

elspeth@server:$ cd /etc/nginx/sites-enabled/
elspeth@server:$ sudo ln -s /etc/nginx/sites-available/$SITENAME $SITENAME

# check our symlink has worked:
elspeth@server:$ readlink -f $SITENAME
/etc/nginx/sites-available/superlists-staging.ottg.eu
That’s the Debian/Ubuntu preferred way of saving Nginx configurations—the real config file in sites-available, and a symlink in sites-enabled; the idea is that it makes it easier to switch sites on or off.
We also may as well remove the default “Welcome to nginx” config, to avoid any confusion:
elspeth@server:$ sudo rm /etc/nginx/sites-enabled/default
And now to test it. First we reload nginx and restart our server:
elspeth@server:$ sudo systemctl reload nginx
elspeth@server:$ cd ~/sites/$SITENAME
elspeth@server:$ ./virtualenv/bin/python manage.py runserver 8000
Tip
If
you ever find that Nginx isn’t behaving as expected, try the command
sudo nginx -t, which does a config test and will warn you of any
problems in your configuration files.
And now we can try our FTs without the port 8000:
$ STAGING_SERVER=superlists-staging.ottg.eu ./manage.py test functional_tests --failfast
[...]

...
 ---------------------------------------------------------------------
Ran 3 tests in 10.718s

OK
Hooray! Back to a working state.
Note
I also had to edit /etc/nginx/nginx.conf and uncomment a line saying
server_names_hash_bucket_size 64; to get my long domain name to work.
You may not have this problem; Nginx will warn you when you do a reload
if it has any trouble with its config files.
Switching to Gunicorn
Do you know why the Django mascot is a pony? The story is that Django comes with so many things you want: an ORM, all sorts of middleware, the admin site… “What else do you want, a pony?” Well, Gunicorn stands for “Green Unicorn”, which I guess is what you’d want next if you already had a pony…
elspeth@server:$ ./virtualenv/bin/pip install gunicorn
Gunicorn will need to know a path to a WSGI server, which is usually
a function called application. Django provides one in superlists/wsgi.py:
elspeth@server:$ ./virtualenv/bin/gunicorn superlists.wsgi:application
2013-05-27 16:22:01 [10592] [INFO] Starting gunicorn 0.19.7.1
2013-05-27 16:22:01 [10592] [INFO] Listening at: http://127.0.0.1:8000 (10592)
[...]
But if we run the functional tests, once again you’ll see that they are warning us of a problem. The test for adding list items passes happily, but the test for layout + styling fails. Good job, tests!
$ STAGING_SERVER=superlists-staging.ottg.eu python manage.py test functional_tests
[...]
AssertionError: 106.5 != 512 within 10 delta
FAILED (failures=1)
And indeed, if you take a look at the site, you’ll find the CSS is all broken, as in Figure 10-2.
The reason that the CSS is broken is that although the Django dev server will serve static files magically for you, Gunicorn doesn’t. Now is the time to tell Nginx to do it instead.
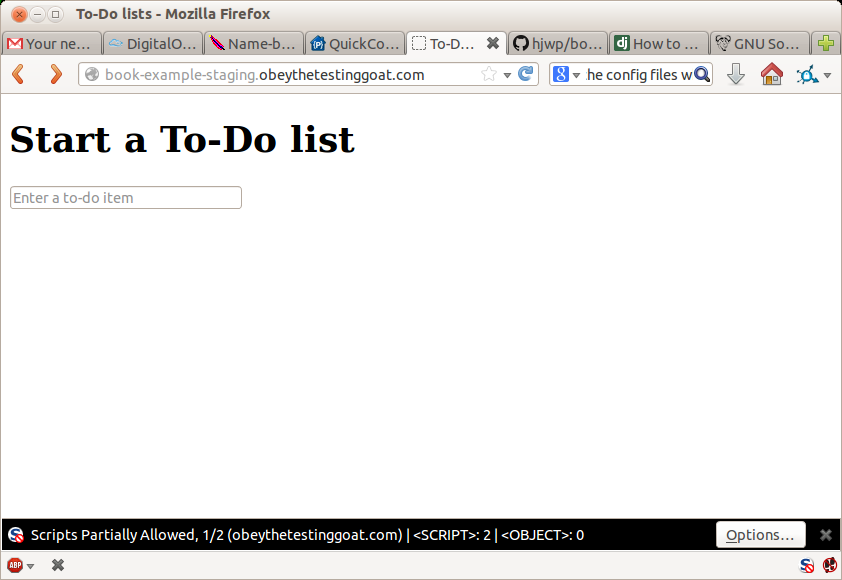
Figure 10-2. Broken CSS
One step forward, one step backward, but once again we’ve identified the problem nice and early. Moving on!
Tip
At this point if you see a “502 - Bad Gateway”, it’s probably because you forgot to restart Gunicorn.
Getting Nginx to Serve Static Files
First
we run collectstatic to copy all the static files to a folder where
Nginx can find them:
elspeth@server:$ ./virtualenv/bin/python manage.py collectstatic --noinput
[...]
15 static files copied to '/home/elspeth/sites/superlists-staging.ottg.eu/static'
elspeth@server:$ ls static/
base.css  bootstrap
Now we tell Nginx to start serving those static files for us, by
adding a second location directive to the config:
server: /etc/nginx/sites-available/superlists-staging.ottg.eu
server{listen80;server_namesuperlists-staging.ottg.eu;location/static{alias/home/elspeth/sites/superlists-staging.ottg.eu/static;}location/{proxy_passhttp://localhost:8000;}}
Reload Nginx and restart Gunicorn…
elspeth@server:$ sudo systemctl reload nginx
elspeth@server:$ ./virtualenv/bin/gunicorn superlists.wsgi:application
And if you take another manual look at your site, things should look much healthier. Let’s rerun our FTs:
$ STAGING_SERVER=superlists-staging.ottg.eu python manage.py test functional_tests
[...]

...
 ---------------------------------------------------------------------
Ran 3 tests in 10.718s

OK
Phew.
Switching to Using Unix Sockets
When we want to serve both staging and live, we can’t have both servers trying to use port 8000. We could decide to allocate different ports, but that’s a bit arbitrary, and it would be dangerously easy to get it wrong and start the staging server on the live port, or vice versa.
A better solution is to use Unix domain sockets—they’re like files on disk, but can be used by Nginx and Gunicorn to talk to each other. We’ll put our sockets in /tmp. Let’s change the proxy settings in Nginx:
server: /etc/nginx/sites-available/superlists-staging.ottg.eu
server{listen80;server_namesuperlists-staging.ottg.eu;location/static{alias/home/elspeth/sites/superlists-staging.ottg.eu/static;}location/{proxy_passhttp://unix:/tmp/superlists-staging.ottg.eu.socket;}}
Now we restart Gunicorn, but this time telling it to listen on a socket instead of on the default port:
elspeth@server:$ sudo systemctl reload nginx
elspeth@server:$ ./virtualenv/bin/gunicorn --bind \
    unix:/tmp/superlists-staging.ottg.eu.socket superlists.wsgi:application
And again, we rerun the functional test again, to make sure things still pass:
$ STAGING_SERVER=superlists-staging.ottg.eu python manage.py test functional_tests
[...]
OK
Hooray, a change that went without a hitch for once! Moving on.
Using Environment Variables to Adjust Settings for Production
We know there are several things in settings.py that we want to change for production:
-
ALLOWED_HOSTSis currently set to “*” which isn’t secure. We want it to be set to only match the site we’re supposed to be serving (superlists-staging.ottg.eu). -
DEBUGmode is all very well for hacking about on your own server, but leaving those pages full of tracebacks available to the world isn’t secure. -
SECRET_KEYis used by Django uses for some of its crypto—things like cookies and CSRF protection. It’s good practice to make sure the secret key on the server is different from the one in your source code repo, because that code might be visible to strangers. We’ll want to generate a new, random one but then keep it the same for the foreseeable future (find out more in the Django docs).
Development, staging and live sites always have some differences in their configuration. Environment variables are a good place to store those different settings. See “the 12-factor app”.1
Here’s one way to make it work:
superlists/settings.py (ch08l004)
if'DJANGO_DEBUG_FALSE'inos.environ:DEBUG=FalseSECRET_KEY=os.environ['DJANGO_SECRET_KEY']ALLOWED_HOSTS=[os.environ['SITENAME']]else:DEBUG=TrueSECRET_KEY='insecure-key-for-dev'ALLOWED_HOSTS=[]

We say we’ll use an environment variable called
DJANGO_DEBUG_FALSEto switch debug mode off, and in effect require production settings (it doesn’t matter what we set it to, just that it’s there).
And now we say that, if debug mode is off, we require the
SECRET_KEYandALLOWED_HOSTSto be set by two more environment variables (one of which can be the$SITENAMEvariable we’ve been using at the command-line so far).
Otherwise we fall-back to the insecure, debug mode settings that are useful for Dev.
There are other ways you might set up the logic, making various variables optional, but I think this gives us a little bit of protection against accidentally forgetting to set one. The end result is that you don’t need to set any of them for dev, but production needs all three, and it will error if any are missing.
Tip
Better to fail hard than allow a typo in an environment variable name to leave you running with insecure settings.
Let’s do our usual dance of committing locally, and pushing to GitHub:
$ git commit -am "use env vars for prod settings DEBUG, ALLOWED_HOSTS, SECRET_KEY"
$ git push
Then pull it down on the server, export a couple of environment variables, and restart Gunicorn:
elspeth@server:$ git pull
elspeth@server:$ export DJANGO_DEBUG_FALSE=y DJANGO_SECRET_KEY=abc123
# we'll set the secret to something more secure later!
elspeth@server:$ ./virtualenv/bin/gunicorn --bind \
    unix:/tmp/superlists-staging.ottg.eu.socket superlists.wsgi:application
And use a test run to reassure ourselves that things still work…
$ STAGING_SERVER=superlists-staging.ottg.eu ./manage.py test functional_tests --failfast
[...]
AssertionError: 'To-Do' not found in ''
Oops. Let’s take a look manually: Figure 10-3.
Figure 10-3. An ugly 400 error
Essential Googling the Error Message
Something’s gone wrong. But once again, by running our FTs frequently, we’re able to identify the problem early, before we’ve changed too many things. In this case the only thing we’ve changed is settings.py. We’ve changed three settings—which one might be at fault?
Let’s use the tried and tested “Googling the error message” technique (Figure 10-4).

Figure 10-4. An indispensable publication (source: https://news.ycombinator.com/item?id=11459601)
The very first link in my search results for
Django 400 Bad Request suggests that a 400 error is usually to do with ALLOWED_HOSTS. In the
last chapter we had a nice Django Debug page saying “DisallowedHost error”
(Figure 9-2), but now because we have DEBUG=False, we
just get the minimal, unfriendly 400 page.
But what’s wrong with ALLOWED_HOSTS? After double-checking it for typos, we
might do a little more Googling with some relevant keywords:
Django
ALLOWED_HOSTS Nginx. Once again, the
first result
gives us the clue we need.
Fixing ALLOWED_HOSTS with Nginx: passing on the Host header
The problem turns out to be that, by default, Nginx strips out the Host
headers from requests it forwards, and it makes it “look like” they came
from localhost after all. We can tell it to forward on the original host
header by adding the proxy_set_header directive:
server: /etc/nginx/sites-available/superlists-staging.ottg.eu
server{listen80;server_namesuperlists-staging.ottg.eu;location/static{alias/home/elspeth/sites/superlists-staging.ottg.eu/static;}location/{proxy_passhttp://unix:/tmp/superlists-staging.ottg.eu.socket;proxy_set_headerHost$host;}}
Reload Nginx once more:
elspeth@server:$ sudo systemctl reload nginx
And then we try our FTs again:
$ STAGING_SERVER=superlists-staging.ottg.eu python manage.py test functional_tests
[...]
OK
Phew. Back to working again.
Using a .env File to Store Our Environment Variables
Another little refactor. Setting environment variables manually in various shells is a pain, and it’d be nice to have them all available in a single place. The Python world (and other people out there too) seems to be standardising around using the convention of a file called .env in the project root.
First we add it .env to our .gitignore—this file is going to be used for secrets, and we don’t ever want them ending up on GitHub:
$ echo .env >> .gitignore
$ git commit -am"gitignore .env file"
$ git push
Next let’s save our environment on the server:
elspeth@server:$ pwd
/home/elspeth/sites/superlists-staging.ottg.eu
elspeth@server:$ echo DJANGO_DEBUG_FALSE=y >> .env
elspeth@server:$ echo SITENAME=$SITENAME >>.env
Note
The way I’ve used the environment files in settings.py means that the .env file is not required on your own machine, only in staging/production.
Generating a secure SECRET_KEY
While we’re at it we’ll also generate a more secure secret key using a little Python one-liner.
elspeth@server:$ echo DJANGO_SECRET_KEY=$(
python3.6 -c"import random; print(''.join(random.SystemRandom().
choices('abcdefghijklmnopqrstuvwxyz0123456789', k=50)))"
) >> .env
elspeth@server:$ cat .env
DJANGO_DEBUG_FALSE=y
SITENAME=superlists-staging.ottg.eu
DJANGO_SECRET_KEY=[...]
Now let’s check our env file works, and restart gunicorn:
elspeth@server:$ unset DJANGO_SECRET_KEY DJANGO_DEBUG_FALSE SITENAME
elspeth@server:$ echo $DJANGO_DEBUG_FALSE-none
-none
elspeth@server:$ set -a; source .env; set +a
elspeth@server:$ echo $DJANGO_DEBUG_FALSE-none
y-none
elspeth@server:$ ./virtualenv/bin/gunicorn --bind \
    unix:/tmp/$SITENAME.socket superlists.wsgi:application
And we rerun our FTs to check that they agree, everything still works:
$ STAGING_SERVER=superlists-staging.ottg.eu python manage.py test functional_tests
[...]
OK
Excellent! That went without a hitch :)
Tip
I’ve shown the use of a .env file and manually extracting environment variables in settings.py, but there are some plugins that do this stuff for you that are definitely worth investigating. Look into django-environ, django-dotenv, and Pipenv.
Using Systemd to Make Sure Gunicorn Starts on Boot
Our final step is to make sure that the server starts up Gunicorn automatically on boot, and reloads it automatically if it crashes. On Ubuntu, the way to do this is using Systemd.
Here’s what a Systemd config file looks like
server: /etc/systemd/system/gunicorn-superlists-staging.ottg.eu.service
[Unit]Description=Gunicornserverforsuperlists-staging.ottg.eu[Service]Restart=on-failureUser=elspethWorkingDirectory=/home/elspeth/sites/superlists-staging.ottg.euEnvironmentFile=/home/elspeth/sites/superlists-staging.ottg.eu/.envExecStart=/home/elspeth/sites/superlists-staging.ottg.eu/virtualenv/bin/gunicorn\--bindunix:/tmp/superlists-staging.ottg.eu.socket\superlists.wsgi:application[Install]WantedBy=multi-user.target
Systemd is joyously simple to configure (especially if you’ve ever had the
dubious pleasure of writing an init.d script), and is fairly
self-explanatory.
Restart=on-failurewill restart the process automatically if it crashes.User=elspethmakes the process run as the “elspeth” user.WorkingDirectorysets the current working directory.
EnvironmentFilepoints Systemd towards our .env file and tells it to load environment variables from there.
ExecStartis the actual process to execute. I’m using the\line continuation characters to split the full command over multiple lines, for readability, but it could all go on one line.
WantedByin the[Install]section is what tells Systemd we want this service to start on boot.
Systemd scripts live in /etc/systemd/system, and their names must end in .service.
Now we tell Systemd to start Gunicorn with the systemctl command:
# this command is necessary to tell Systemd to load our new config file
elspeth@server:$ sudo systemctl daemon-reload
# this command tells Systemd to always load our service on boot
elspeth@server:$ sudo systemctl enable gunicorn-superlists-staging.ottg.eu
# this command actually starts our service
elspeth@server:$ sudo systemctl start gunicorn-superlists-staging.ottg.eu
(You should find the systemctl command responds to tab completion, including
of the service name, by the way.)
Now we can rerun the FTs to see that everything still works. You can even test that the site comes back up if you reboot the server!
$ STAGING_SERVER=superlists-staging.ottg.eu python manage.py test functional_tests
[...]
OK
Saving Our Changes: Adding Gunicorn to Our requirements.txt
Back in the local copy of your repo, we should add Gunicorn to the list of packages we need in our virtualenvs:
$ pip install gunicorn
$ pip freeze | grep gunicorn >> requirements.txt
$ git commit -am "Add gunicorn to virtualenv requirements"
$ git push
Note
On
Windows, at the time of writing, Gunicorn would pip install quite
happily, but it wouldn’t actually work if you tried to use it. Thankfully
we only ever run it on the server, so that’s not a problem. And, Windows
support is
being discussed…
Thinking About Automating
Let’s recap our provisioning and deployment procedures:
- Provisioning
-
-
Assume we have a user account and home folder
-
add-apt-repository ppa:deadsnakes/ppa && apt update -
apt install nginx git python3.6 python3.6-venv -
Add Nginx config for virtual host
-
Add Systemd job for Gunicorn (including unique
SECRET_KEY)
-
- Deployment
-
-
Create directory in ~/sites
-
Pull down source code
-
Start virtualenv in virtualenv
-
pip install -r requirements.txt -
manage.py migratefor database -
collectstaticfor static files -
Restart Gunicorn job
-
Run FTs to check everything works
-
Assuming we’re not ready to entirely automate our provisioning process, how should we save the results of our investigation so far? I would say that the Nginx and Systemd config files should probably be saved somewhere, in a way that makes it easy to reuse them later. Let’s save them in a new subfolder in our repo.
Saving Templates for Our Provisioning Config Files
First, we create the subfolder:
$ mkdir deploy_tools
Here’s a generic template for our Nginx config:
deploy_tools/nginx.template.conf
server{listen80;server_nameDOMAIN;location/static{alias/home/elspeth/sites/DOMAIN/static;}location/{proxy_passhttp://unix:/tmp/DOMAIN.socket;proxy_set_headerHost$host;}}
And here’s one for the Gunicorn Sytemd service:
deploy_tools/gunicorn-systemd.template.service
[Unit]Description=Gunicorn serverforDOMAIN[Service]Restart=on-failureUser=elspethWorkingDirectory=/home/elspeth/sites/DOMAINEnvironmentFile=/home/elspeth/sites/DOMAIN/.envExecStart=/home/elspeth/sites/DOMAIN/virtualenv/bin/gunicorn\--bind unix:/tmp/DOMAIN.socket\superlists.wsgi:application[Install]WantedBy=multi-user.target
Now it’s easy for us to use those two files to generate
a new site, by doing a find and replace on DOMAIN.
For the rest, just keeping a few notes is OK. Why not keep them in a file in the repo too?
deploy_tools/provisioning_notes.md
Provisioning a new site=======================## Required packages:*nginx*Python 3.6*virtualenv + pip*Git eg, on Ubuntu: sudo add-apt-repository ppa:deadsnakes/ppa sudo apt update sudo apt install nginx git python36 python3.6-venv ## Nginx Virtual Host config*see nginx.template.conf*replace DOMAIN with, e.g., staging.my-domain.com ## Systemd service*see gunicorn-systemd.template.service*replace DOMAIN with, e.g., staging.my-domain.com ## Folder structure: Assume we have a user account at /home/username /home/username └── sites ├── DOMAIN1 │ ├── .env │ ├── db.sqlite3 │ ├── manage.py etc │ ├── static │ └── virtualenv └── DOMAIN2 ├── .env ├── db.sqlite3 ├── etc
We can do a commit for those:
$ git add deploy_tools
$ git status # see three new files
$ git commit -m "Notes and template config files for provisioning"
Our source tree will now look something like this:
.
├── deploy_tools
│   ├── gunicorn-systemd.template.service
│   ├── nginx.template.conf
│   └── provisioning_notes.md
├── functional_tests
│   ├── [...]
├── lists
│   ├── __init__.py
│   ├── models.py
│   ├── [...]
│   ├── static
│   │   ├── base.css
│   │   └── bootstrap
│   │       ├── [...]
│   ├── templates
│   │   ├── base.html
│   │   ├── [...]
│   ├── tests.py
│   ├── urls.py
│   └── views.py
├── manage.py
├── requirements.txt
├── static
│   ├── [...]
├── superlists
│   ├── [...]
└── virtualenv
    ├── [...]
Saving Our Progress
Being able to run our FTs against a staging server can be very reassuring. But, in most cases, you don’t want to run your FTs against your “real” server. In order to “save our work”, and reassure ourselves that the production server will work just as well as the real server, we need to make our deployment process repeatable.
Automation is the answer, and it’s the topic of the next chapter.
1 Another common way of handling this is to have different versions of settings.py for dev and prod. That can work fine too, but it can get confusing to manage. Environment variables also have the advantage of working for non-Django stuff too…