Table of Contents for
Foundations for Analytics with Python
 Foundations for Analytics with Python
Published by
O'Reilly Media, Inc., 2016
Foundations for Analytics with Python
Published by
O'Reilly Media, Inc., 2016
- Cover
- nav
- Foundations for Analyticswith Python
- Dedication
- Foundations for Analytics with Python
- Preface
- 1. Python Basics
- 2. Comma-Separated Values (CSV) Files
- 3. Excel Files
- 4. Databases
- 5. Applications
- 6. Figures and Plots
- 7. Descriptive Statistics and Modeling
- 8. Scheduling Scripts to Run Automatically
- 9. Where to Go from Here
- A. Download Instructions
- B. Answers to Exercises
- Bibliography
- Index
- About the Author
- Colophon
Chapter 8. Scheduling Scripts to Run Automatically
We’ve covered a lot of ground up to this point in the book. After reviewing Python basics, we processed text files, CSV files, Excel files, and data in databases, and applied our new knowledge to three common business analysis applications. In these examples, we’ve run the scripts manually on the command line. For example:
python my_python_script.py input_file.txt output_file.csv
This method of running scripts is common and completely acceptable, but what happens when you plan to run a script on a regular basis? Without another method of running the script, you have to be available and remember to run the script manually on the command line. As you can imagine, this method isn’t optimal for scripts that should be run on a regular basis. In this situation, we need another method to regularly schedule scripts to run.
Both Windows and macOS have programs for running scripts and other executable files on a regular basis. Microsoft calls its program Task Scheduler; the program that does this on Unix and macOS is called cron (you may have heard of crontab files or cron jobs). This book has focused on running scripts on Windows, so the next section will demonstrate how to schedule a Python script to run regularly on Windows with Task Scheduler. At the same time, it is useful to know how to schedule cron jobs on macOS or Unix, so we will also demonstrate how to use cron to schedule a Python script to run regularly on those operating systems.
Task Scheduler (Windows)
To demonstrate how to schedule a Python script to run regularly on Windows with Task Scheduler, we need to choose a Python script. For simplicity, let’s use the script we created in the final application in Chapter 5, 3parse_text_file.py. In that application, we used the script to parse a MySQL error log file. The application actually works well in this case because an error log file is one type of file that usually needs to be analyzed on a regular basis. For example, you may analyze a database error log file on a daily, weekly, or monthly basis to understand the frequency of specific errors to focus maintenance and correction efforts. Finally, while this example demonstrates how to schedule a Python script to run regularly, remember that you can use Task Scheduler to schedule other types of scripts and executable files too.
To begin, ensure the two files we created in the last application in Chapter 5 (i.e., 3parse_text_file.py and mysql_server_error_log.txt) are saved on your Desktop. If you save the two files on your Desktop, then the file paths in the following instructions and screenshots will be easy to understand. Of course, you can save the files in different locations and change the file paths in Task Scheduler to point to where you’ve saved the files on your computer.
To open Task Scheduler, click the Start button, navigate to Control Panel→System and Security→Administrative Tools, and then double-click Task Scheduler (see Figure 8-1). If you’re prompted for an administrator password or confirmation, type the password or provide confirmation.
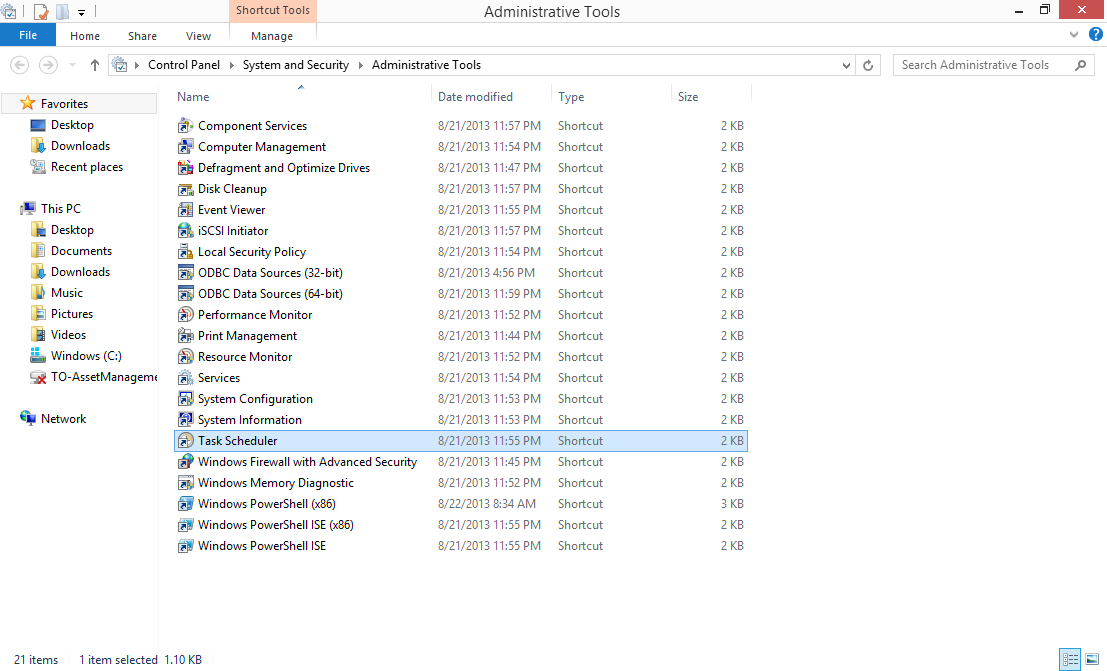
Figure 8-1. The Task Scheduler application highlighted in the Administrative Tools window pane
Note the file path at the top of the screen: Control Panel→System and Security→Administrative Tools. In the list of administrative tools, Task Scheduler is highlighted in a blue rectangle.
Task Scheduler will open after you double-click it. When Task Scheduler opens, you will see the screen shown in Figure 8-2.
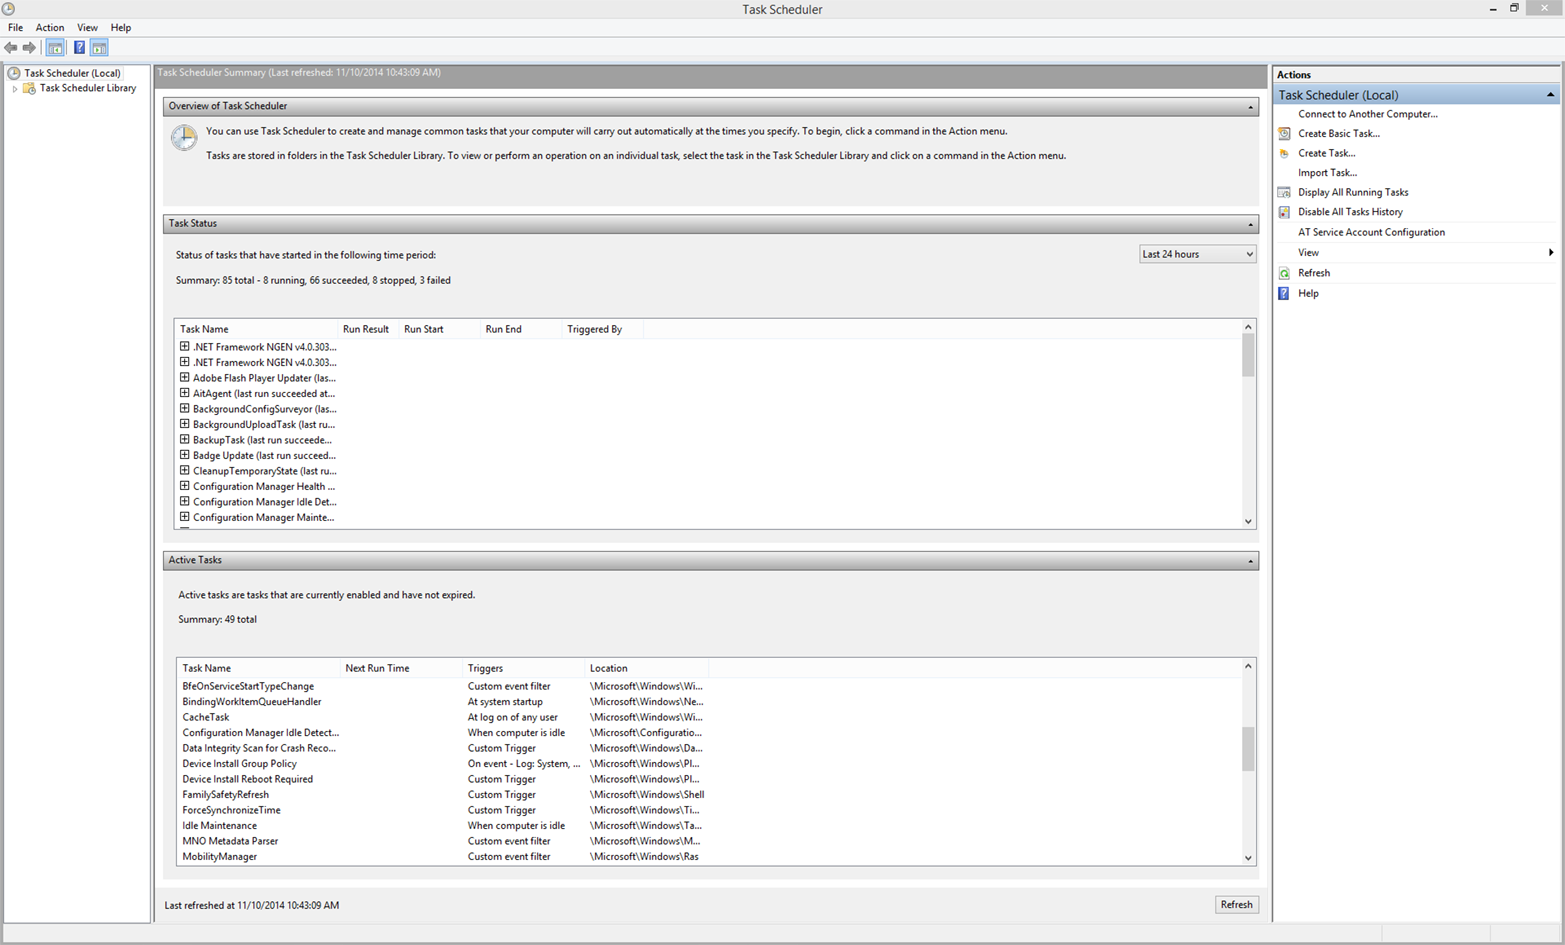
Figure 8-2. The initial interface when you open the Task Scheduler application
Notice the list of available actions in the upper-right corner (e.g., Connect to Another Computer, Create Basic Task, etc.). These actions are also available under the Action menu in the upper-left corner.
To schedule a task, click the Action menu in the upper-left corner, and then click Create Basic Task (alternatively, double-click Create Basic Task in the upper-right corner). In either case, the Create Basic Task Wizard opens.
Name and describe your task by filling in the Name and Description fields in the wizard home screen (see Figure 8-3). Because we’re creating a task to run a Python script to parse an error log file on a regular basis, we’ll name the task “Parse Error Log File” and give it this description: “This task schedules a Python script, 3parse_text_file.py, to parse an error log file on a monthly basis.” Once you’ve filled in the Name and Description fields, click Next.

Figure 8-3. The Create a Basic Task interface you use to name and describe a task you plan to schedule
When you click Next, the task wizard will transition to the Trigger tab (see Figure 8-4). On the Trigger tab, you select when you want the task to start. Because we’ve decided we want our script to run on a monthly basis, let’s select the Monthly radio button. Once you’ve selected the Monthly radio button, click Next.
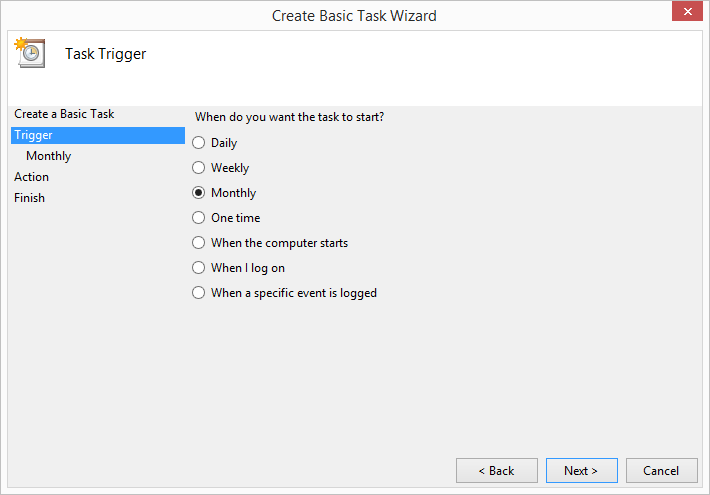
Figure 8-4. The Task Trigger interface you use to specify when you want the task to start
When you click Next, the task wizard will transition to the Monthly tab (see Figure 8-5). On the Monthly tab, you specify when you want the task to start. Because we’ve decided we want our script to run on a monthly basis, let’s select the last day of the current month and 9:00 AM as the start date. Check the “Synchronize across time zones” box, and select all months in the year (the “January, February, March...” option) and the “Last” day of each month. Once you’ve made these selections, click Next.
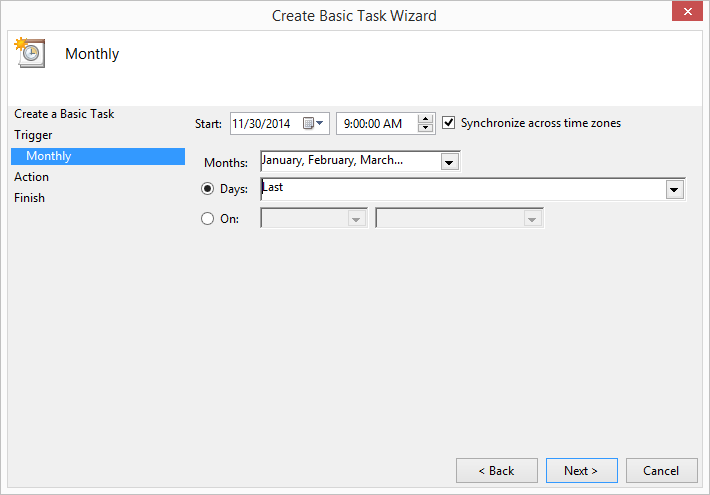
Figure 8-5. The Monthly interface you use to specify when you want the task to run
When you click Next, the task wizard will transition to the Action tab (see Figure 8-6). On the Action tab, you select the action you want the task to perform. Because we’ve decided we want our task to run a Python script, let’s select the “Start a program” radio button. Once you’ve selected the “Start a program” radio button, click Next.

Figure 8-6. The Action interface you use to specify the action you want the task to perform
When you click Next, the task wizard will transition to the Start a Program tab (see Figure 8-7). On the Start a Program tab, you specify the program/script you want the task to start. Use the Browse button to locate the 3parse_text_file.py script on your Desktop. In addition, our script takes two command-line arguments, the name of the input file, mysql_server_error_log.txt, and the name of the output file, mysql_errors_count.csv. Supply these two arguments in the “Add arguments (optional)” box. Once you’ve entered the path to the Python script and the names of the input and output files, click Next.
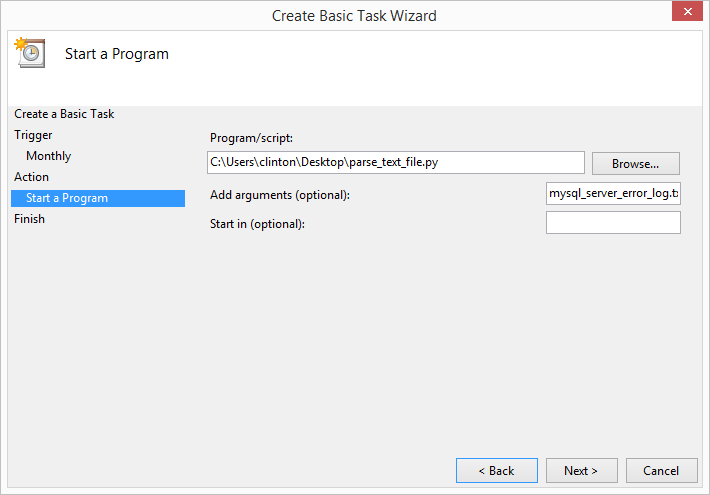
Figure 8-7. The Start a Program interface you use to specify the program or script the task will run, as well as any additional command-line arguments the program or script needs
When you click Next, the task wizard will transition to the Finish tab (see Figure 8-8). The Finish tab summarizes all of the information you’ve entered into the task wizard so you can check that the information is correct before scheduling the task. Review the information in the Name, Description, Trigger, and Action fields to ensure that it is correct. Once you’ve verified that everything looks good, go ahead and click Finish.
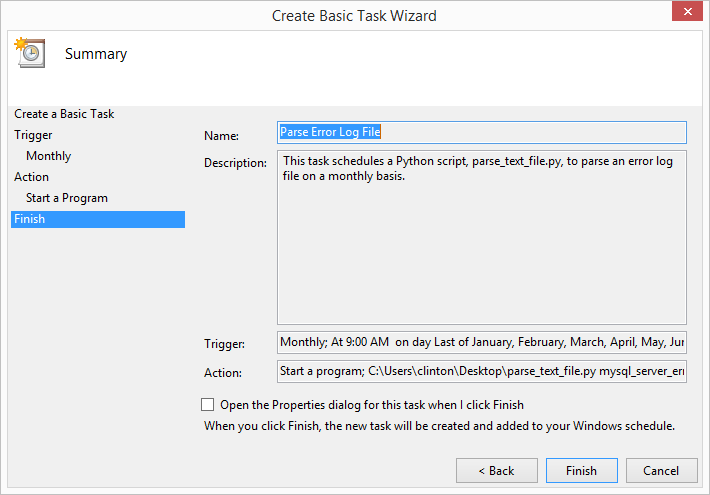
Figure 8-8. The Summary interface that displays all of the information you entered so you can confirm the task is set up to perform the actions you want it to carry out
When you click Finish, the task wizard will add your task to the Task Scheduler Library and return to the Task Scheduler main screen (see Figure 8-9). To view your newly scheduled task, click on Task Scheduler Library in the upper-left corner of the main screen. When you click on Task Scheduler Library, you’ll see your new task listed, possibly among other tasks, in the upper center pane. If you click on the name of your new task in the upper center pane, you’ll then see summary tabs of information about your task (e.g., General, Triggers, Actions, etc.) in the lower center pane. Finally, if you want to edit or delete your task, click on your task in the upper center pane and then click Properties or Delete, respectively, in the upper-right corner of the main screen.
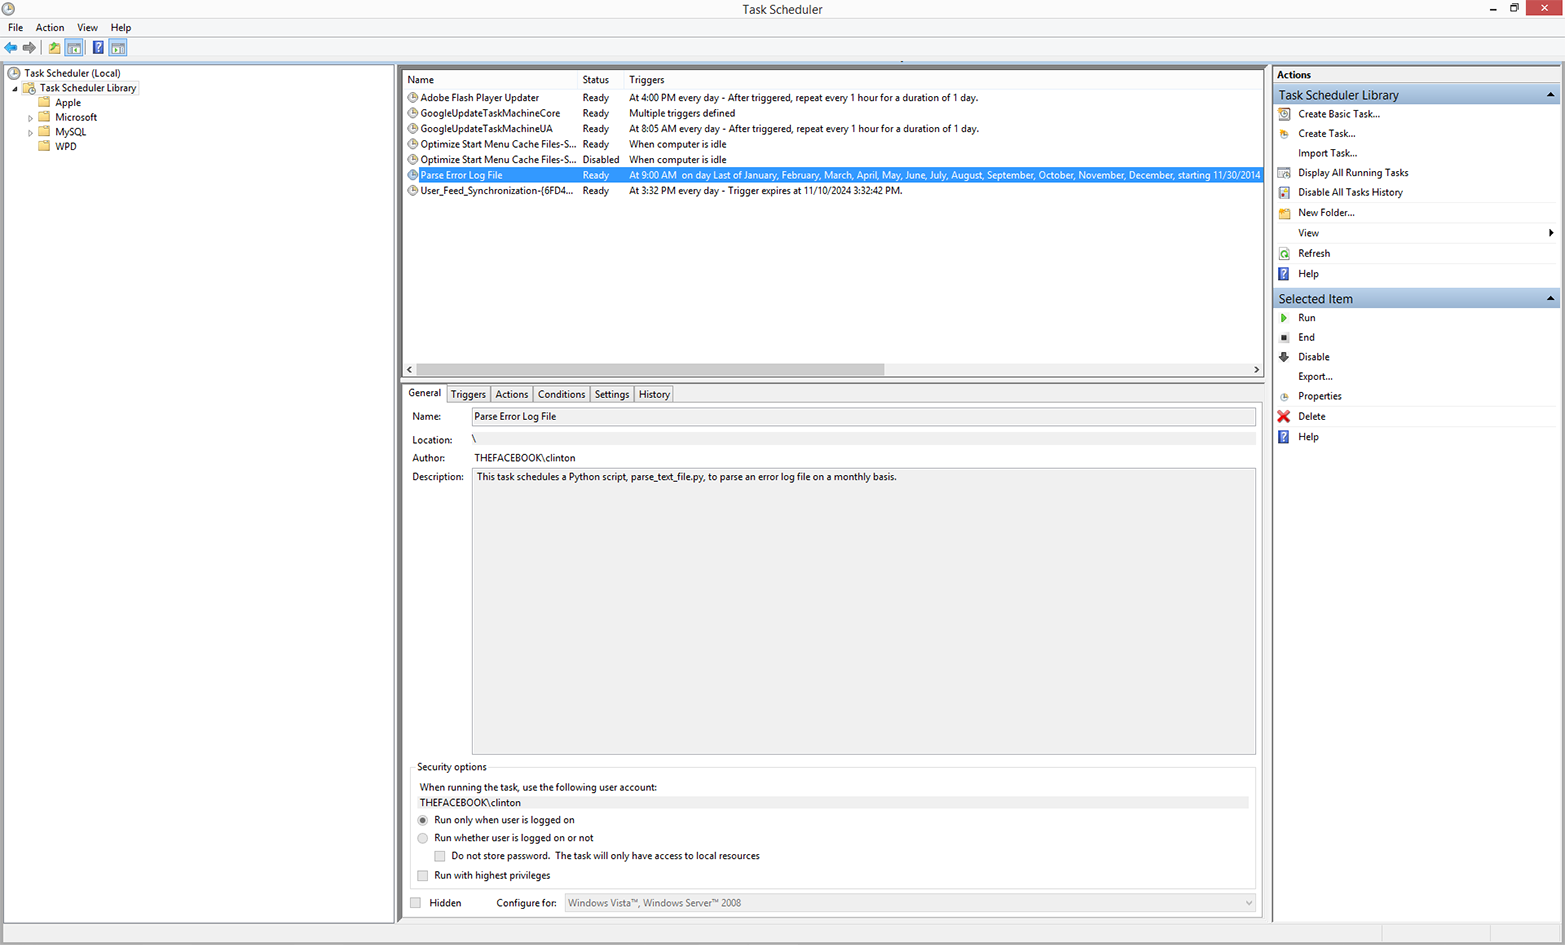
Figure 8-9. The Task Scheduler Library interface you can use to create, view, edit, and delete your scheduled tasks
By scheduling Python scripts and other executable files to run on a regular basis automatically, you mitigate the possibility of forgetting to run a script manually. In addition, you can scale more effectively with automated scripts than by running scripts manually—i.e., as your business processes increasingly rely on scripts for data processing and analysis, it becomes progressively more difficult to run the scripts manually.
The cron Utility (macOS and Unix)
As you’ve seen, Windows provides the Task Scheduler program as a way to schedule scripts and other executable programs to run automatically on a regular basis. On macOS and Unix, the analogous program is called cron.
The cron program relies on a crontab file and cron jobs to know when to run particular executable programs. A crontab file is a plain-text file you create to list all of the executable files you want to schedule to run automatically along with the details about when each of the files should be run. A cron job is a single line item in the crontab file that specifies an executable file to be run (e.g., 3parse_text_file.py) and when to run the file (e.g., monthly).
The specific syntax for a cron job listing in the crontab file can be intimidating at first. The first five positions in the line specify the frequency with which to run the executable file. The positions from left to right are minute (0–59), hour (0–23), day of month (1–31), month (1–12), and day of week (0–6, where Sunday is 0). The final position in the line specifies the executable file that should be run with the specified frequency.
There are a few ways to specify valid values in the first five positions. If you want the executable file to be run for all of the values in a position, then you specify an asterisk (*) in the position. For example, if you want the file to be run every day of the month, then you place an asterisk in position three. Alternatively, if you want the file to be run at a specific time, then you specify particular values in the first two positions. For example, if you want the file to be run at 3:10 PM, then you place 10 in the first position and 15 in the second position (i.e., 12:00 PM + 3 hours = 15).
A good way to understand how to specify cron jobs is to view several examples. The following examples illustrate three possible cron job listings in a crontab file:
1015***/Users/clinton/Desktop/analyze_orders.py06,12,18**1-5/Users/clinton/Desktop/update_database.py3020**6/Users/clinton/Desktop/delete_temp_files.sh
The first row specifies that analyze_orders.py should be run every day of every month at 3:10 PM. The second row specifies that update_database.py should be run every weekday (Monday–Friday) of every month at 6:00 AM, 12:00 PM, and 6:00 PM. The third row specifies that delete_temp_files.sh (a Bash script) should be run every Saturday of every month at 8:30 PM.
These three examples illustrate some common cron job listings; however, you may need to run a script with a different frequency. For example, you may need to run a script on the first Monday of every month. When you know how frequently you need to run a script, but you’re unsure of how to specify it in the cron job listing, search for the specific syntax on the Internet (someone else has already discovered the solution for you). For example, a quick search for “cron job first Monday of month” shows that the following syntax will run the specified Python script, every_first_monday.py, on every first Monday of the month at 11:00 AM:
00111-7**["$(date '+\%a')"="Mon"]&&\/Users/clinton/every_first_monday.py
Crontab File: One-Time Set-up
Now that we understand crontab files and cron jobs conceptually, let’s create a crontab file and specify a cron job to run our Python file, 3parse_text_file.py, on a regular basis.
Ensuring that you have a crontab file is basically a one-time setup. After you create a crontab file, you don’t need to recreate it again in the future. You can simply add, modify, or remove cron jobs in your existing crontab file to reflect the set of executable files you want to be run automatically on a regular basis.
To create a new, empty crontab file, open a Terminal window and use the following command:
touch crontab_file.txt
To load the crontab file (i.e., to get the operating system to load it and execute its instructions on its schedule), type the following on the command line and hit Enter:
crontab crontab_file.txt
Finally, remove crontab_file.txt from where you created it. To do so, simply type the following on the command line and hit Enter:
rm crontab_file.txt
That’s it—that’s all there is to creating an empty crontab file. We’ve completed our one-time setup. The screenshot in Figure 8-10 shows the three one-time setup commands, as well as the crontab -e command, which is for editing the crontab file.
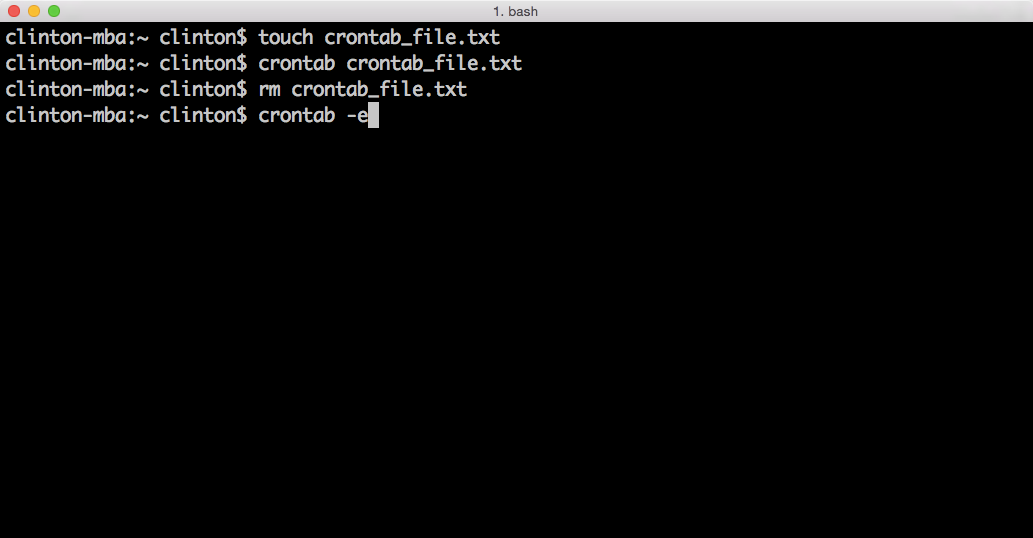
Figure 8-10. This figure displays three commands you can use in a Terminal window to set up an empty crontab file. The fourth command, crontab -e, will open the newly-created crontab file for editing.
Adding Cron Jobs to the Crontab File
Now let’s add a cron job to the crontab file. To open a crontab file for editing, type the following and then hit Enter:
crontab -e
When you type crontab -e, your crontab file will open in a Unix-based text editor like Nano, vi/Vim, or Emacs. If your file opens in Nano or Emacs, you can immediately type the cron job command on the current line, hit Enter to move the cursor down to the next empty line, and then use the appropriate key sequence (described momentarily) to save your changes and exit out of the file.
On the other hand, if your file opens in vi/Vim, then you’ve entered an editor that has two modes of operation: a command mode and an insert mode. The file will open in command mode, meaning the next set of keys you type are commands that act on the file rather than enter text into the file. To switch from command mode to insert mode (which will allow you to add text into the file), type i. Once in insert mode, you can type the cron job command on the current line, hit Enter to move the cursor down to the next empty line, and then use the appropriate key sequence to save your changes and exit out of the file.
With the crontab file open, type the following command on the current line and then hit Enter to move the cursor down to the next empty line (see Figure 8-11):
00 09 28-31 * * [ "$(date -v+1d '+\%d')" = "01" ] &&\
/Users/clinton/Desktop/3parse_text_file.py
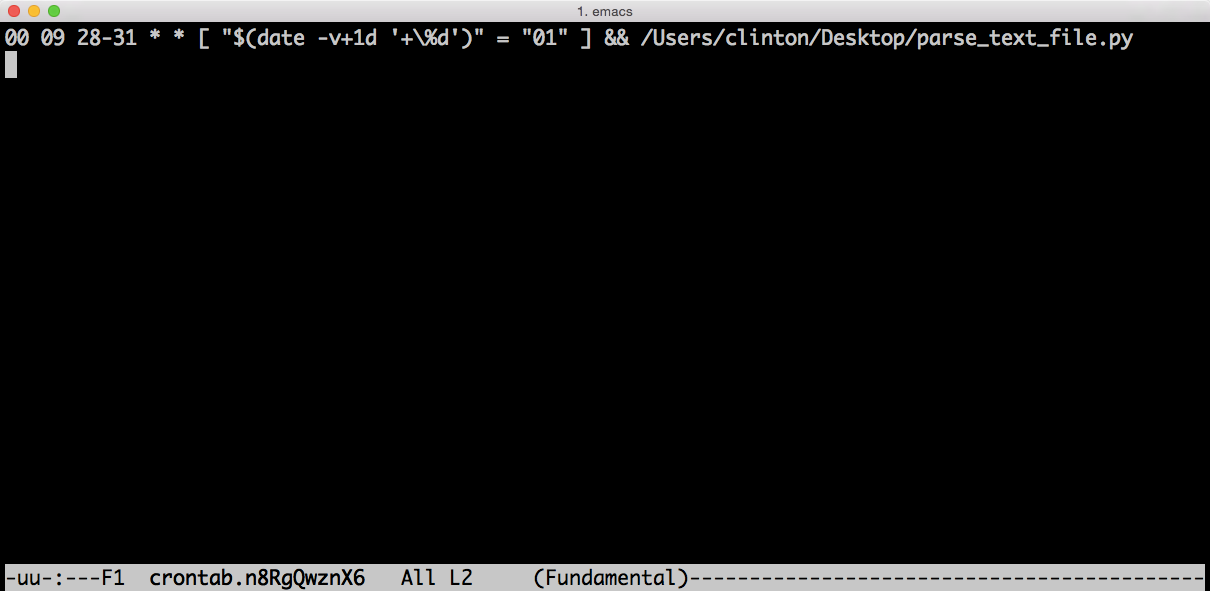
Figure 8-11. The command to enter in the crontab file to run the 3parse_text_file.py script at 9:00 AM on the last day of every month.
The command is consistent with the parameters we specified in Task Scheduler on Windows to run the script at 9:00 AM on the last day of every month. The first five positions on the lefthand side indicate that this job should run at 9:00 AM on the 28th, 29th, 30th, or 31st day of the month, depending on whether the next statement in square brackets is also true. The statement in square brackets tests whether adding one day to the current date results in the day of the month being 01 (i.e., the first day of the next month). This statement ensures that the script runs on the last day of the month, regardless of whether that day is the 28th in February, the 30th in June, or the 31st in October. The cron program checks the frequency parameters and the statement, and if the statement is true the cron job executes 3parse_text_file.py. This happens at 9:00 AM on the last day of every month.
Note that the cursor (denoted by the vertical white rectangle) is on the next empty line after the command you entered. Your crontab file can list many cron jobs, one on each line, but you must hit Enter after your last cron job listing so that the cursor ends up on the last empty line in the file.
Now that you’ve entered the cron job command in your crontab file, it’s time to save your changes to the file and exit out of the file. Depending on which editor you’re using, type one of the following command sequences to save your changes and exit out of the crontab file:
-
Nano: Ctrl+o, Ctrl+x
-
vi/Vim
:,w,q -
Emacs Ctrl+x, Ctrl+s, Ctrl+x, Ctrl+c
Now that you’ve saved your changes and exited out of the crontab file, let’s view the contents of the crontab file to see that the new cron job has been saved in the file. To view the contents of the crontab file, type the following command and then hit Enter (see Figure 8-12):
crontab -l
When you hit Enter, you’ll see the contents of your crontab file printed to the screen. As the screenshot shows, the crontab file contains our cron job command to run the 3parse_text_file.py script at 9:00 AM on the last day of every month.
To edit or delete a cron job, type crontab -e to open the crontab file. If you want to edit a cron job, simply make changes to the cron job command on the specific row you want to change. If you want to delete a cron job, simply delete the row that contains the cron job command you want to delete. In either case, make sure the cursor ends up on the last, empty row in the file. Then use the appropriate key sequence, depending on your text editor, to save your changes and exit out of the crontab file.
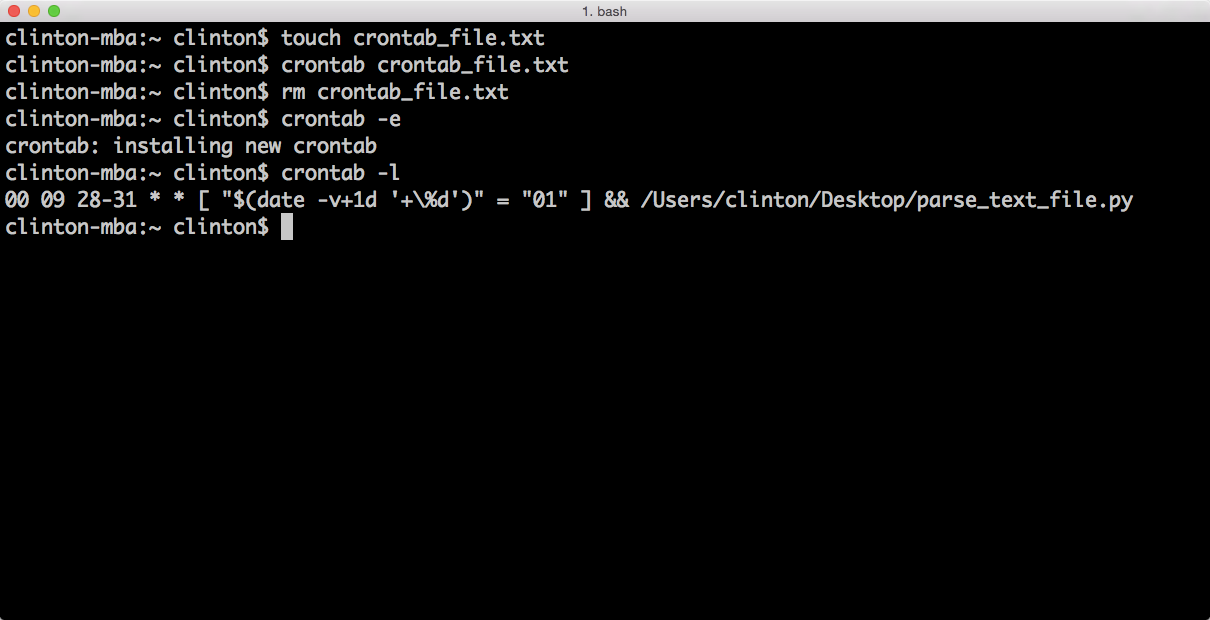
Figure 8-12. Displaying the crontab file’s contents in the Terminal window with crontab -l
Even if you’re a regular Windows user, it’s important to know how to schedule cron jobs. You may be asked to schedule one at some point, and it’s useful to know how to implement automation on different operating systems.
This chapter has been shorter than the others, but it’s an important, complementary addition to the book, as the information here enables you to automate the running of scripts that you need to run on a regular basis. The other chapters gave you tools and techniques for scaling data processing and analysis, and this chapter enhanced that knowledge by enabling you to both scale and automate. By automating the running of scripts that need to be run on a regular basis, you mitigate the possibility of forgetting to run a script and you free your time to work on other important tasks.