Table of Contents for
Arch Linux Environment Setup How-to
 Arch Linux Environment Setup How-to
Published by
Packt Publishing, 2012
Arch Linux Environment Setup How-to
Published by
Packt Publishing, 2012
- Cover
- Table of Contents
- Arch Linux Environment Setup How-to
- Arch Linux Environment Setup How-to
- Credits
- About the Author
- About the Reviewers
- www.PacktPub.com
- Preface
- The Arch Way
- Bleeding edge
- What this book covers
- What you need for this book
- Who this book is for
- Conventions
- Reader feedback
- Customer support
- 1. Arch Linux Environment Setup How-to
- Installing Arch Linux using the Archboot ISO (Should know)
- Configuring your system (Should know)
- Installing and removing packages (Must know)
- Booting and managing services with systemd (Should know)
- Booting and managing services using initscripts (Should know)
- Configuring GUI using Xorg (Should know)
In this recipe we will learn how to configure GUI using Xorg. When we want to use our system as a desktop system, we will need Xorg one way or the other. These days Xorg is the de facto standard for displaying and using graphical interfaces on Linux-based systems. Also for most single-screen setups, you don't need to configure anything. Multi-screen setups and setups with proprietary drivers are the exceptions to this rule. Some distributions provide you with tools to install the correct video driver; Arch Linux does not. So, eventually we will need to find out which driver to install. In relation to the keyboard, mouse, and a lot of other input devices, Xorg can find them mostly automatically. In some cases the input devices need an additional Xorg driver installed.
The following list describes the main tasks that we will perform in this recipe:
- Installing Xorg: We'll install the basic required packages to be able to use the Xorg graphics system.
- Changing keyboard layout: For most people changing the keyboard layout is not needed, as most use QWERTY. But for some parts of the world where other layouts are being used, this might come in handy.
- Installing input drivers: When we have some special input hardware with us, we might need to install extra input drivers. These days everything should be detected automatically, but sometimes in order to meet the specific requirements of your input hardware we need to install input drivers. For example, laptop users might need to install the Synaptics driver for their touchpad.
- Installing video drivers: First we need to find out which graphics we have installed in our system and what will be the best driver to use for them.
- Using the proprietary NVIDIA drivers: The proprietary NVIDIA drivers are easy to install on Arch Linux, as they can be found in the official repositories. There is an article in the Arch Linux wiki (https://wiki.archlinux.org/index.php/NVIDIA) that covers all the bits and pieces.
- Using the proprietary AMD drivers: The reference for using the AMD (ATI) Catalyst drivers with Arch Linux is the following wiki page:
https://wiki.archlinux.org/index.php/ATI_Catalyst
On this page we find a whole bunch of information needed to get the Catalyst drivers working nicely on your hardware.
- Install xorg-server:
pacman -S xorg-server
Let's change the keyboard layout now:
- Run the
setxkbmapcommand followed by the desired keyboard layout:setxkbmap be - Install the input driver:
pacman -S xf86-input-synaptics
Let's list the steps required to install video drivers:
- Find the graphics card used in your system.
- Search if there is a driver available:
pacman -Ss xf86-video - Install the driver:
pacman -S xf86-video-driver
Let's list the steps required to use the proprietary NVIDIA drivers:
- Install nvidia and nvidia-utils:
pacman -S nvidia nvidia-utils - Create the configuration file
/etc/X11/xorg.conf.d/20-nvidia.conf. - Restart and see if the driver is being used.
Let's list the steps required to use the proprietary AMD drivers:
- Install catalyst and catalyst-utils by running the following command:
pacman -S catalyst-dkms catalyst-utils - Add the
nomodesetparameter to the kernel command line to make sure that the open source drivers will not kick in:APPEND initrd=/initramfs-linux.img root=/dev/sda3rootfstype=btrfs ro vga=773 nomodeset - Add a default configuration file
/etc/X11/xorg.conf.d/20-catalyst.confso that Xorg knows it has to use the proprietary driver.Section "Device" Identifier "aticard" Driver "fglrx" EndSection
Pacman will download and install the xorg-server package and its minimally needed dependencies.
The setxkbmap command will change the selected keyboard layout. For example, we had a US layout by default, and after running setxkbmap be it will be the Belgian AZERTY layout.
The specific drivers get installed to your system by pacman, which will provide Xorg with the means to understand the input from a touchpad and handle it correctly.
The NVIDIA driver should be automatically detected by Xorg, but to be sure you can add a file to /etc/X11/xorg.conf.d/, such as /etc/X11/xorg.conf.d/20-nvidia.conf:
Section "Device"
  Identifier  "NVIDIAcard"
  Driver      "nvidia"
EndSection
You could when needed have a default configuration created by issuing the following command:
nvidia-xconfig
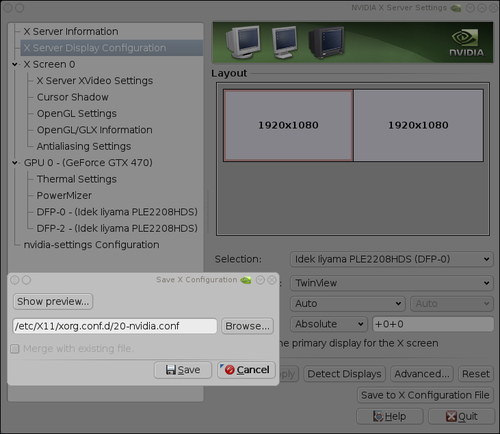
When having two connected screens, you can also autogenerate a twinview default configuration:
nvidia-xconfig –twinview
When we are using the AMD proprietary drivers, setting the nomodeset parameter makes sure that the built-in kernel drivers don't start to conflict with the proprietary driver. The Xorg configuration file will make sure that Xorg will start without errors. Although not entirely necessary, we make sure that Xorg uses the driver and serves us well.
We can opt to use our graphical environment directly, which will imply the installation of xorg-xinit, or we could use our Xorg environment with a display manager. A display manager is a graphical login screen so we can use Xorg all the way.
In order to start Xorg directly from the terminal, we first need to install the xorg-xinit package to facilitate this:
pacman -S xorg-xinit
Then the startx command will get us into the X server. When using this directly without configuration, X will not start as we will have some missing applications requested by the default configuration. So let's go forward and install:
pacman -S xorg-twm xorg-xclock xterm
For our own convenience it's best to install a window manager (WM) or a desktop environment. For a complete list of window managers go to https://wiki.archlinux.org/index.php/Window_manager. And for a full list of desktop environments go to https://wiki.archlinux.org/index.php/Desktop_Environment.
In this section we'll install Xfce (https://wiki.archlinux.org/index.php/Xfce):
pacman -S xfce
Pacman will ask if we want to install all the packages from the Xfce group. We say yes as this is most convenient.
As Xfce is installed now, we can issue startxfce4 from a started Xorg session or modify our ~/.xinitrc. In the .xinitrc file we can uncomment the line # exec startxfce4 and save the file. When logged in, we can now issue startx and enjoy the Xfce desktop environment.
For desktop users this is the common usage as they need a graphical login screen and continue from there to the desired desktop environment or window manager. There are several display managers available in Arch Linux. In this section we'll only describe LXDM, which is a fairly simple display manager. For a list of other display managers available for Arch Linux you can read https://wiki.archlinux.org/index.php/Display_Manager.
To install LXDM we issue pacman with the following command:
pacman -S lxdm
When using initscripts, we can add LXDM at the end of our DAEMONS array. When we are using systemd, we can issue systemctl enable lxdm.service to enable the startup of LXDM on boot. When we have rebooted, the LXDM display manager shows up and we can select, for example, Xfce Session from the Desktop Session drop-down list.
As we want our keyboard and mouse automatically configured every time our computer starts, we can set the keyboard layout in a configuration file, so we don't have to run setxkbmap every time we come into Xorg. We already have xf86-input-evdev installed, so we can put our keyboard settings in the same file 10-evdev.conf, such as /etc/X11/xorg.conf.d/10-evdev.conf (only the keyboard section):
Section "InputClass"
    Identifier "evdev keyboard catchall"
    MatchIsKeyboard "on"
    MatchDevicePath "/dev/input/event*"
    Driver "evdev"
    Option "XkbModel" "pc105"
    Option "XkbLayout" "be"
EndSection
The highlighted parts are added and do the following:
XkbModel: What keyboard model are we using? In our example,pc105.XkbLayout: What keyboard layout are we using? In our example,be(Belgian AZERTY).
We can find all the possible models, layouts, and options in /usr/share/X11/xkb/rules/evdev.lst.
By default we have limited support for our graphics card. To enhance our Xorg experience, we must find what graphics card we have, and what drivers to install for them. With matching drivers for our hardware, we will get far better performance than before.
The easiest way to find which drivers to install is by using the application lspci:
lspci | grep VGA
Example output:
01:05.0 VGA compatible controller: Advanced Micro Devices [AMD] neeATI RS880M [Mobility Radeon HD 4200 Series]
Now we already know that we have an ATI card. In some cases we will need the driver used by the kernel to determine what Xorg driver to use exactly. In this example we already know it will be xf86-video-ati.
Now we can install the driver we need for our specific system. In this example it will be xf86-video-ati, but it can be any of the drivers available (replace ati with what you need in the following example).
pacman -S xf86-video-ati
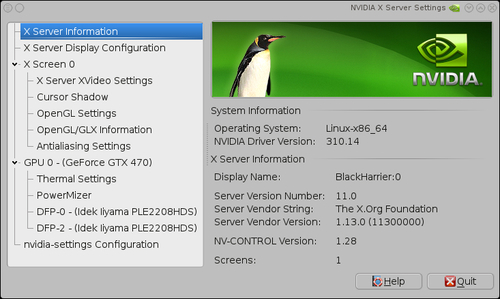
NVIDIA does not really want us to struggle with the configuration of our graphics card. So they have provided us with a nice GUI to create a fine-tuned configuration.
The simplest way to configure your NVIDIA infrastructure is by configuring everything with nvidia-settings. You can issue this application as root so that you can write the global configuration file.
Using the GUI you also can store a configuration file. Do so by entering /etc/X11/xorg.conf.d/20-nvidia.conf:
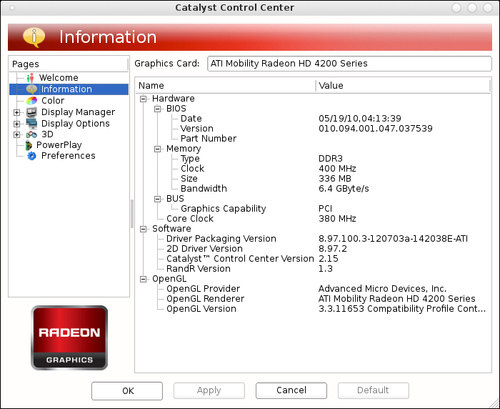
AMD also provides us with some helpful tools to make the configuration very easy. Let's discuss them now.
If you want to do some extended configuration, you can start a new configuration file by running:
aticonfig --initial
This will create a new configuration file, /etc/X11/xorg.conf.