First, we will start with creating the virtual machine to host our Ubuntu installation:
- Open VirtualBox and choose Machine | New in the menu toolbar.
- For reference, we have circled the Machine entry in the menu toolbar given in the following screenshot. Choose a name for the virtual machine (this can be a different name than the server name, but we like to keep it the same for simplicity), set the Type to Linux, and Version to Ubuntu (64-bit). Click Next:

- On this screen, we determine memory settings. For most servers, 1024 MB of RAM is a great start (and is recommended by VirtualBox for virtual machines as well). If you have beefy hardware, this can be set to 2048 MB, but 1024 MB should be fine. Make your selection and press Next:

- Once again, the recommended values by VirtualBox are perfect for our needs. Press Create to start the creation of the virtual hard disk:
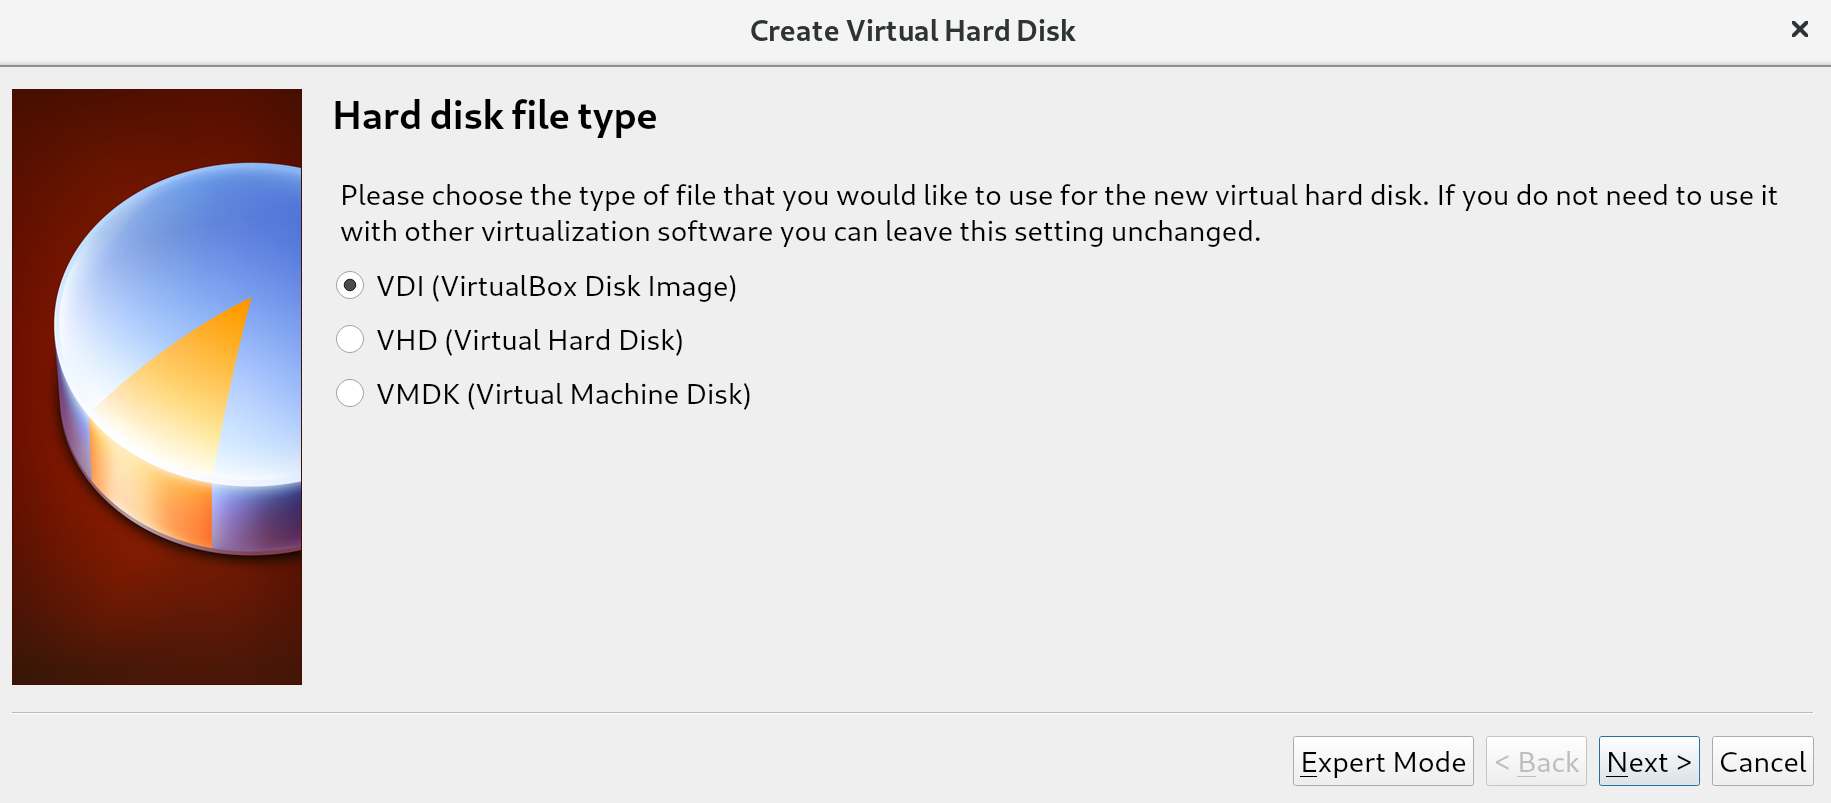
- Virtual hard disks can be many different types. VirtualBox defaults to its own format, VDI, as opposed to VMDK, which is the format used by VMware (another popular virtualization provider). The last option is VHD (Virtual Hard Disk), which is a more generic format usable by multiple virtualization providers. Since we'll be using VirtualBox exclusively in this book, keep the selection on VDI (VirtualBox Disk Image) and press Next:
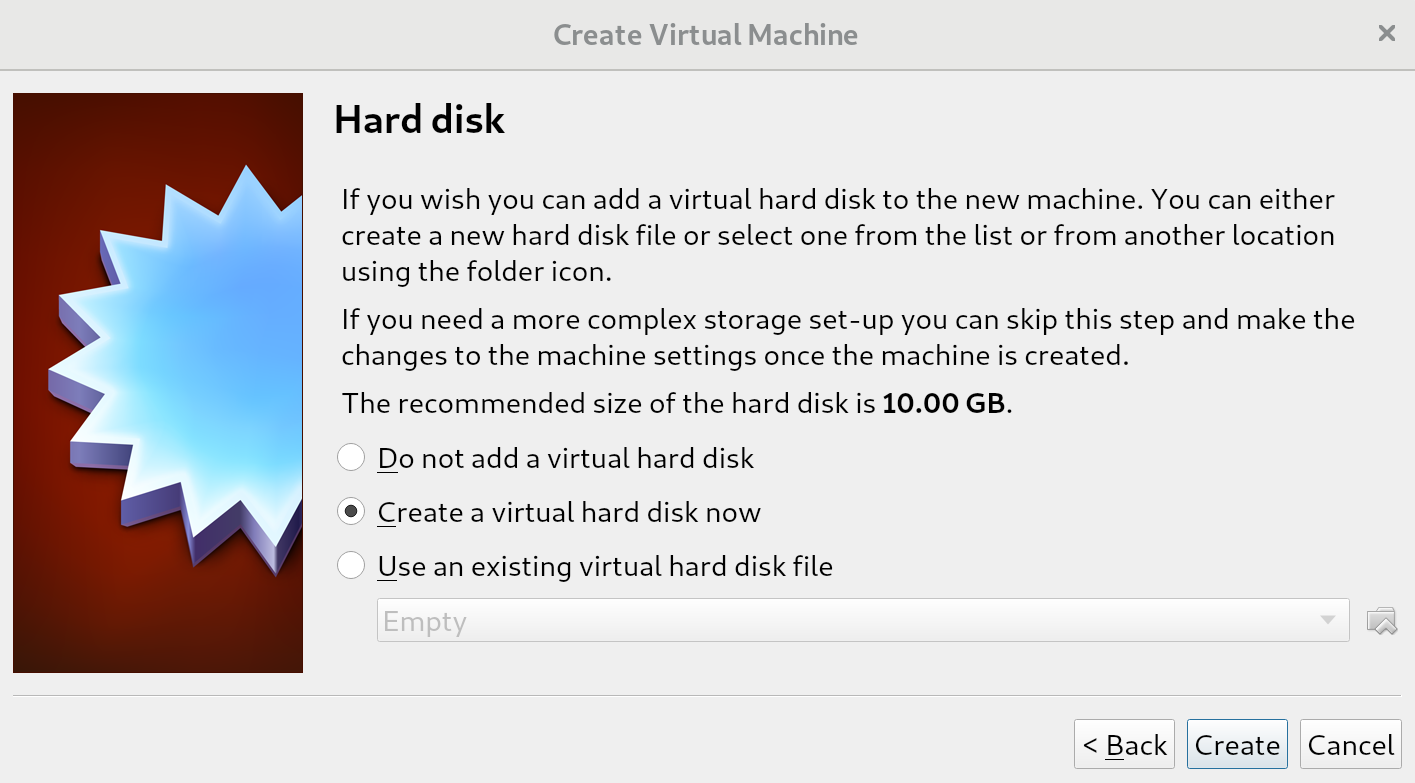
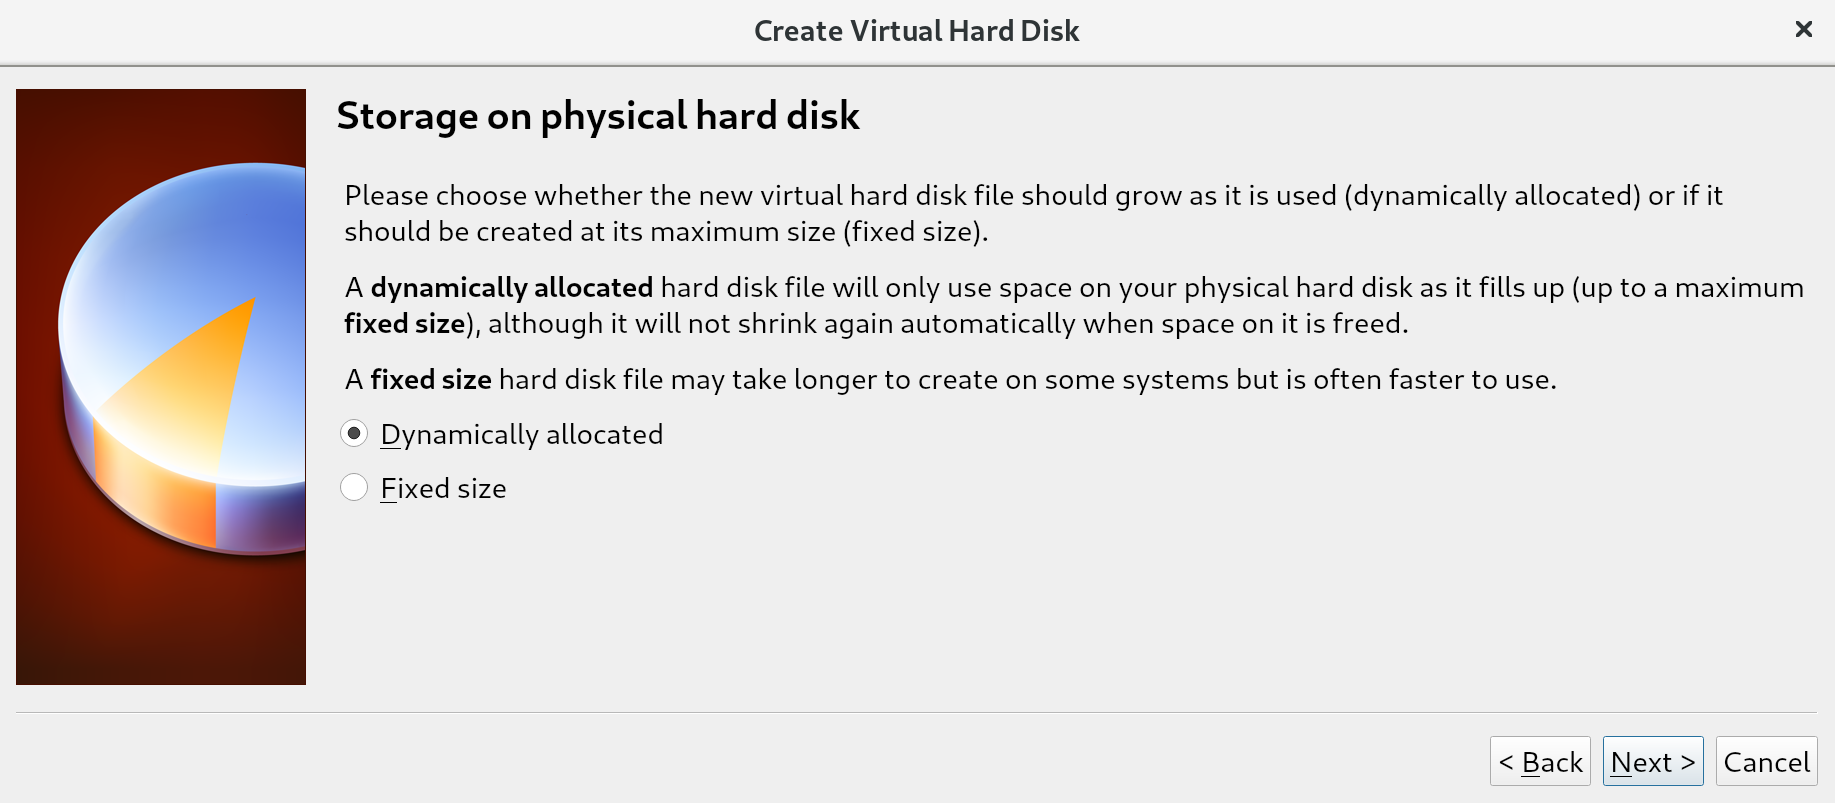
- We have two options on this screen: we can allocate the full virtual hard disk on the physical hard disk right away, or we can use dynamic allocation, which does not reserve the full size of the virtual disk, but only what is used.
The difference between these options is often most relevant in situations where many virtual machines are running on a single host. Creating a total of disks larger than what is physically available, but assuming not all disks will be fully used, allows us to place more virtual machines on a single machine. This is called overprovisioning, and will only work if not all disks are filled up (because we can never have more virtual disk space than we have physical disk space). For us, this distinction does not matter since we'll be running a single virtual machine; we keep the default of Dynamically allocated and go to the next screen:
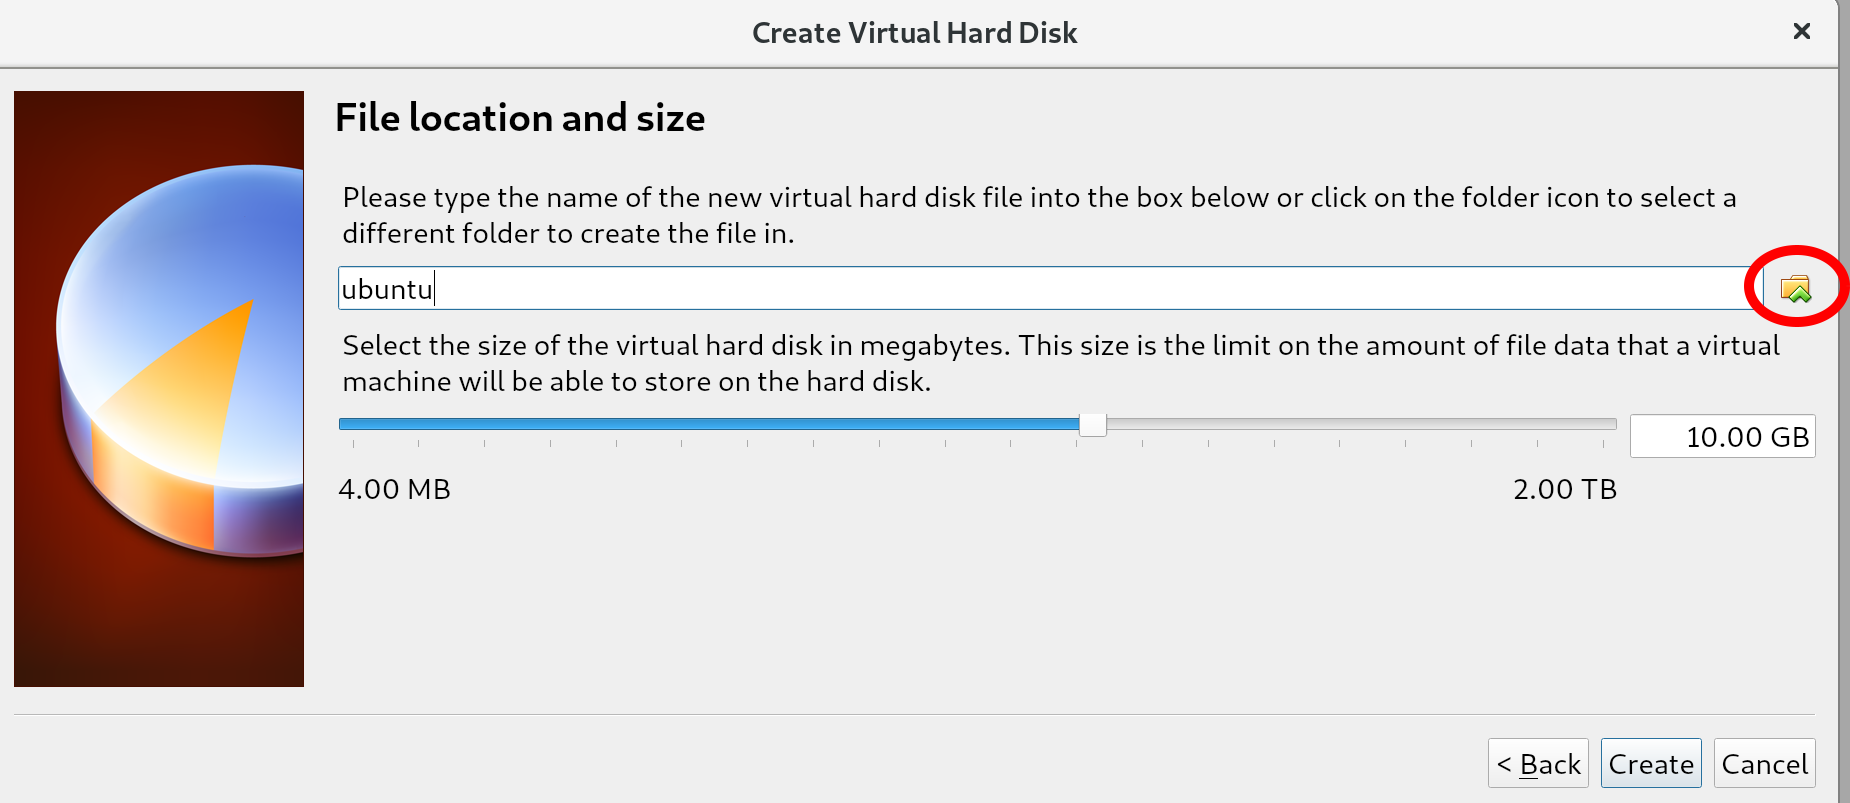
- On this screen, we can do three things: name the virtual disk file, select the location, and specify the size. If you care about the location (it defaults to somewhere in your home/user directory), you can press the circled icon in the following screenshot. For the name, we like to keep it the same as the virtual machine name. Lastly, a size of 10 GB is sufficient for the exercises in this book. After you've set up the three values, press Create. Congratulations, you've just created your first virtual machine, as demonstrated in following screenshot:
- However, before we can start the installation of Ubuntu on our virtual machine, we need to do two more things: point the virtual machine to the installation ISO, and set up the networking. Select the newly created virtual machine and click Settings. Navigate to the Storage section:
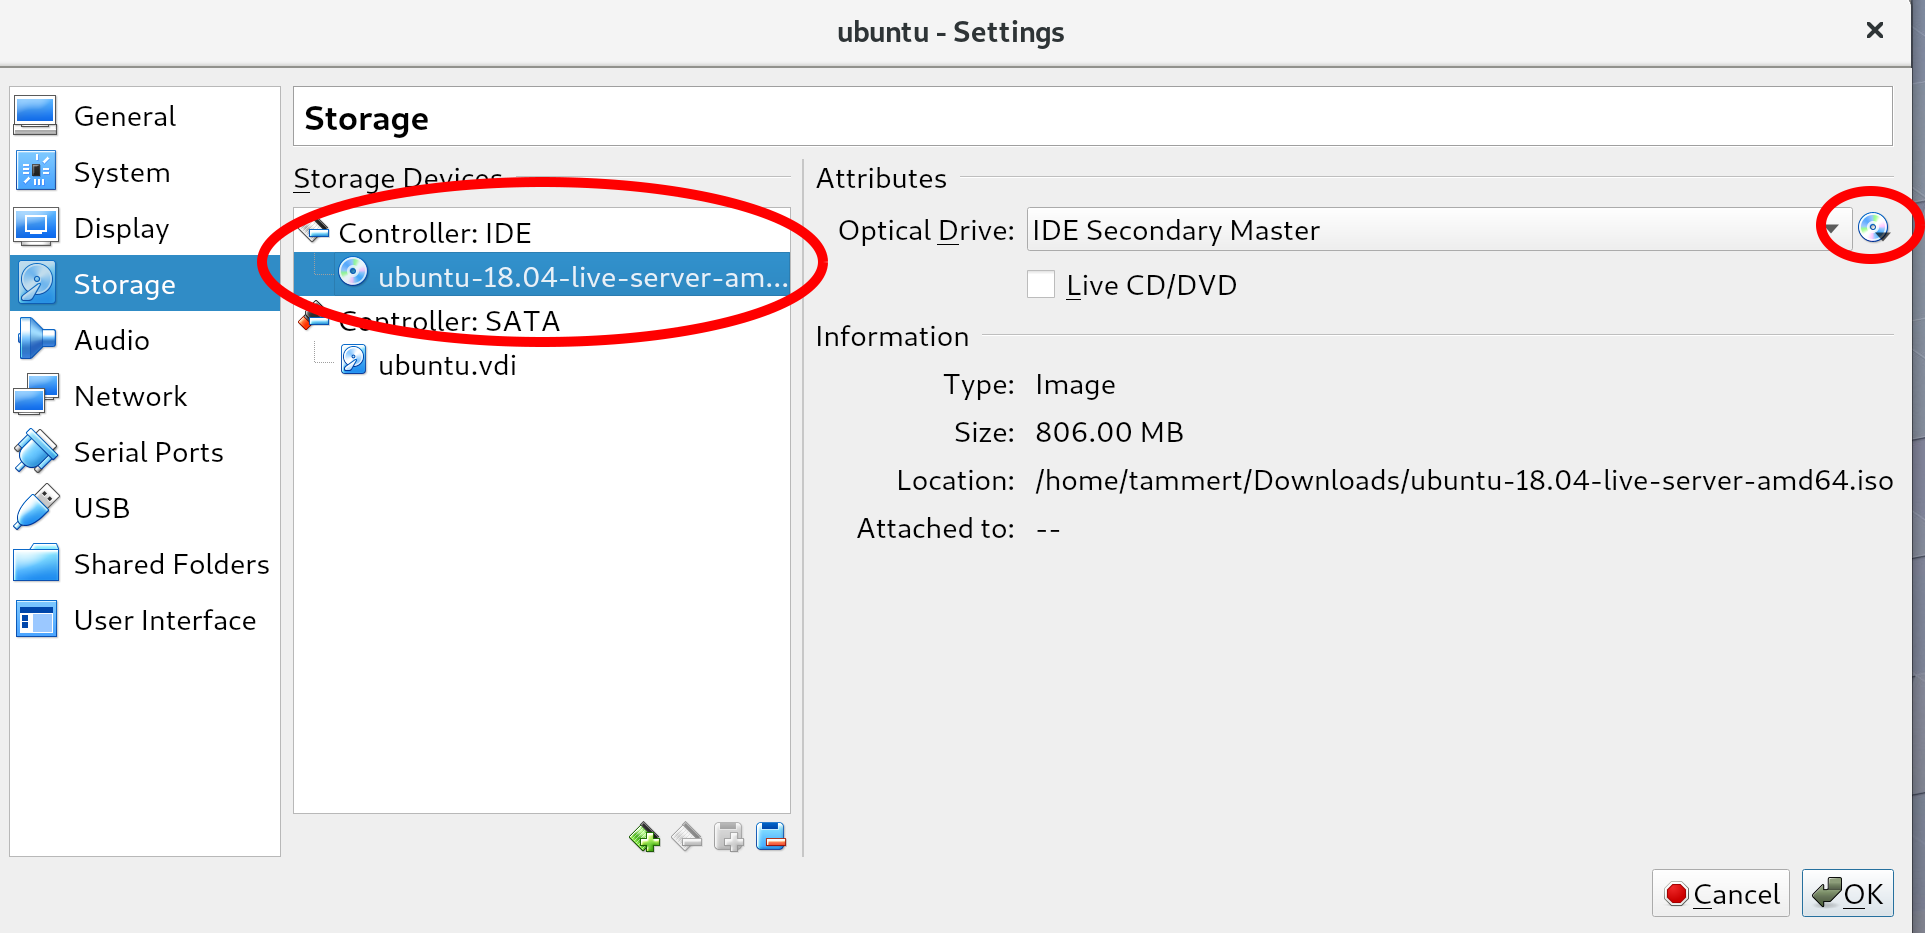
You should see a disk icon with the word Empty (in the location circled on the left in the preceding screenshot). Select it and mount an ISO file by clicking the select disk icon (circled on the right), choose virtual optical disk file, and then select the Ubuntu ISO that you downloaded earlier. If you do this correctly, your screen should resemble the preceding screenshot: you no longer see the word Empty next to the disk icon and the Information section should be filled in.
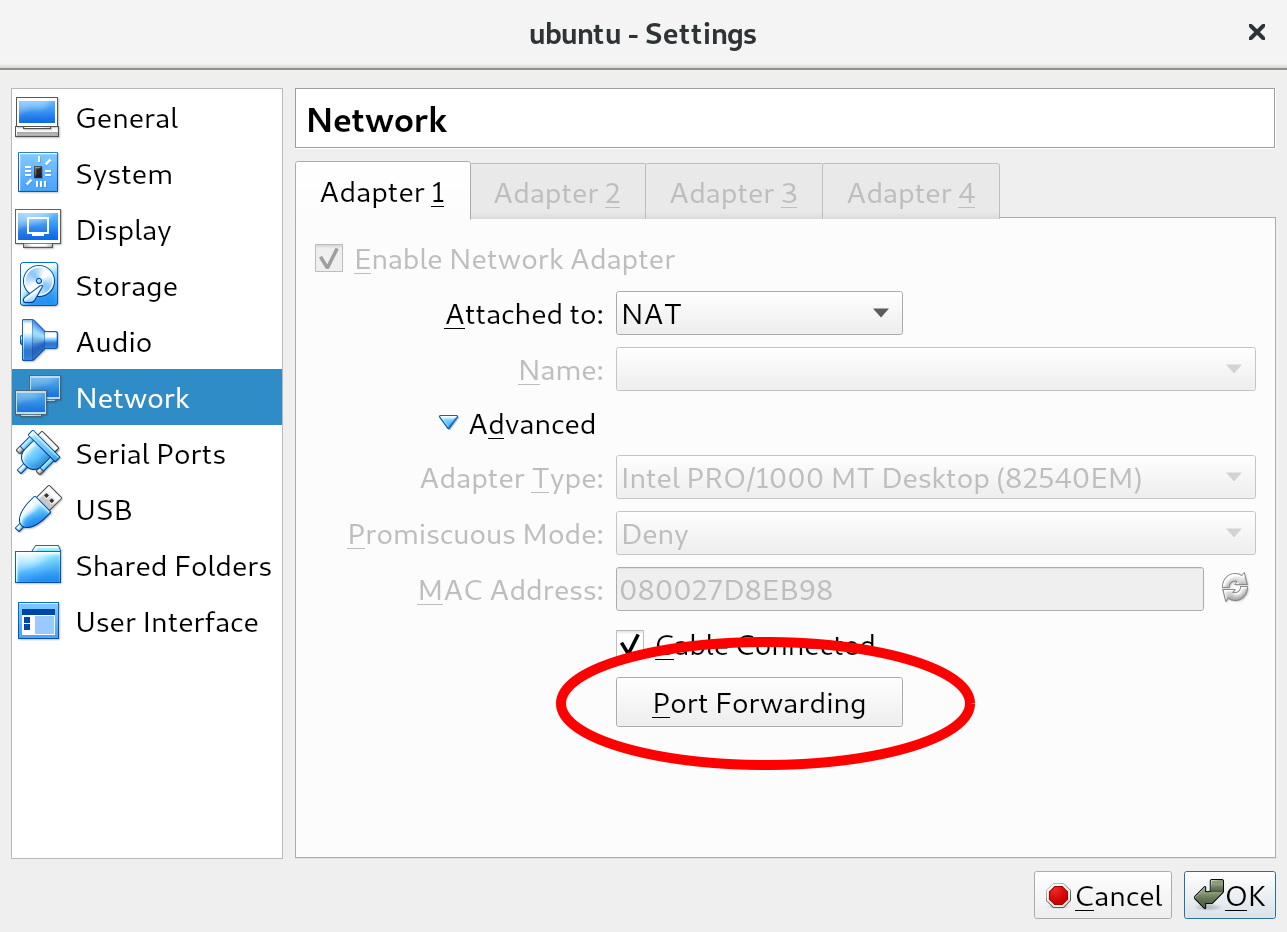
- Once you have verified this, go to the Network section.
- The configuration should default to the NAT type. If not, set it to NAT now. NAT stands for Network Address Translation. In this mode, the host machine acts as a router for the virtual machines. Finally, we're going to set up some port forwarding so we can use SSH tooling later on. Click on the Port Forwarding button:
- Set up the SSH rule just as we have done. This means that port 22 on the guest (which is the virtual machine) is exposed as port 2222 on the host (which is, surprise, the host machine). We've chosen port 2222 for two reasons: ports lower than 1024 require root/administrator permissions, which we might not have. Secondly, there is a chance an SSH process is already listening on the host machine, which would mean VirtualBox would not be able to use that port:

With this step, we've finished setting up the virtual machine!