Table of Contents for
Practical Forensic Imaging
 Practical Forensic Imaging
Published by
No Starch Press, 2016
Practical Forensic Imaging
Published by
No Starch Press, 2016
- Practical Forensic Imaging
- Practical Forensic Imaging
- Practical Forensic Imaging
- Practical Forensic Imaging
- Practical Forensic Imaging
- Practical Forensic Imaging
- Practical Forensic Imaging
- Practical Forensic Imaging
- Practical Forensic Imaging
- Practical Forensic Imaging
- Practical Forensic Imaging
- Practical Forensic Imaging
- Practical Forensic Imaging
- Practical Forensic Imaging
- Practical Forensic Imaging
- Practical Forensic Imaging
- Practical Forensic Imaging
- Practical Forensic Imaging
- Practical Forensic Imaging
- Practical Forensic Imaging
- Practical Forensic Imaging
- Practical Forensic Imaging
- Practical Forensic Imaging
- Practical Forensic Imaging
- Practical Forensic Imaging
7
FORENSIC IMAGE MANAGEMENT
This chapter covers various aspects of managing forensic image files after acquisition. Disk images are enormous compared to typical files on a disk, and moving, copying, and converting large image files can be cumbersome and time-consuming. You’ll learn a number of techniques for managing large image files to help overcome various challenges. These techniques include compressing and splitting images for easier handling, securing images with encryption, and converting images between formats. In addition, I describe procedures for read-only mounting of an image for safe local browsing and demonstrate forensic cloning (or disk duplication). I also discuss the secure, reliable storage and network transfer of large image files. The chapter ends with a description of secure wiping and disposal of images and files. I’ll begin with the topic of managing image compression.
Manage Image Compression
Raw disk images are always the same size as the total number of sectors they contain. The number of files or amount of data on the drive is irrelevant and does not affect the size of an uncompressed raw image. With the current widespread use of multiterabyte disks, maneuvering images within time and disk capacity constraints can be a challenge. Even simply copying an image can take many hours to complete. You can reduce this problem somewhat by keeping images compressed.
Compressing images in a forensic context involves sector-by-sector compression of the entire drive (as opposed to compressing each file on the disk). Disks with many gigabytes or terabytes of space that have never been written to over the life of the drive will compress better, because much of the drive still consists of untouched sectors filled with zeros. Well-used disks won’t compress as well if most sectors on the drive have been allocated over the lifetime of the drive and still contain residual data. Disk images with large numbers of audio and video files will compress poorly as well, because these files are already compressed with their own algorithms.
It’s important to choose the most appropriate and efficient compression tool and technique. Some tools might have file size limitations, either for the original source file or the compressed destination file. Other tools may be inefficient or use temporary files during compression, causing memory exhaustion or creating disk space issues. To solve some of these problems when you’re performing compression activity, you can use piping and redirection.
One of the most useful features of working with a compressed forensic image is the ability to use forensic tools against it without having to uncompress the entire image. But this is problematic with some compression tools, because they’re not able to seek within a compressed file. Seeking allows a program to randomly access any point in a file. Forensic formats are designed to allow analysis programs on-the-fly, random access to compressed images. The popular forensic formats all support image compression, which usually occurs during acquisition, although not all tools compress by default.
Standard Linux Compression Tools
Commonly used compression tools in the open source world today are zip, gzip, and bzip (version 1 or 2). The examples in this section use gzip, but you can use other compression tools as well. To attempt better compression at the expense of time and CPU cycles, you can adjust the level of compression.
Given enough disk space, you can simply compress a disk image file in place, like this:
$ gzip image.raw
This command creates the file image.raw.gz and deletes the original file on completion. Enough space needs to be available for the compressed and uncompressed files to coexist during the compression process. The same applies for uncompressing files using gunzip.
You can also compress images on the fly during acquisition using piping and redirection. For example:
# dcfldd if=/dev/sde | gzip > image.raw.gz
Here the input file is a raw disk device. Not specifying an output file for dcfldd sends the image data stream to stdout, which is piped into gzip, which is finally redirected into a compressed file.
The compressed file can be uncompressed to a raw image file, where you can use forensic tools to directly operate on it. Alternatively, you can pipe an uncompressed stream into some programs using stdout and stdin. For example:
$ zcat image.raw.gz | sha256sum
1b52ab6c1ff8f292ca88404acfc9f576ff9db3c1bbeb73e50697a4f3bbf42dd0 -
Here zcat uncompresses the image and pipes it into a program to produce a sha256 cryptographic hash. It’s worth noting that the gzip file format contains additional metadata, such as a creation timestamp, original filename, and other information. The hash of a gzip container (image.raw.gz) will be different each time it’s created, even though the hash of the compressed file inside will be the same.
EnCase EWF Compressed Format
The ewfacquire tool provides flags to control compression during the acquisition process. For example:
# ewfacquire -c bzip2:best -f encase7-v2 /dev/sdj
ewfacquire 20150126
...
EWF file format: EnCase 7 (.Ex01)
Compression method: bzip2
Compression level: best
...
MD5 hash calculated over data: 9749f1561dacd9ae85ac0e08f4e4272e
ewfacquire: SUCCESS
In this example, the -c flag can specify a compression algorithm together with a compression level. Here, the algorithm was bzip2 configured with the best possible compression level. Because only EWFv2 formats support bzip2, the format version encase7-v2 was specified as a parameter. Note that ewftools needs to be compiled with bzip2 support.1
FTK SMART Compressed Format
The command line ftkimager tool supports compressed images during acquisition, as the following example shows:
# ftkimager --compress 9 --s01 /dev/sdj image
AccessData FTK Imager v3.1.1 CLI (Aug 24 2012)
Copyright 2006-2012 AccessData Corp., 384 South 400 West, Lindon, UT 84042
All rights reserved.
Creating image...
Image creation complete.
Here the --s01 flag specifies the creation of a SMART ew-compressed image, and the --compress flag sets the highest compression level. You can use the --help flag to get more information about compression options for ftkimager.
AFFlib Built-In Compression
Although AFFv3 has been deprecated (http://forensicswiki.org/wiki/AFF) and the use of aimage is discouraged (http://forensicswiki.org/wiki/Aimage), aimage’s use of AFFv3 compression is mentioned here for illustration purposes.
The following example demonstrates imaging a disk using aimage and specifying the LZMA compression algorithm (rather than the zlib default):
# aimage --lzma_compress --compression=9 /dev/sdj image.aff
im->outfile=image.aff
image.aff****************************** IMAGING REPORT ******************************
Input: /dev/sdj
Model: Nano S/N: 07A40C03C895171A
Output file: image.aff
Bytes read: 2,003,828,736
Bytes written: 628,991,770
raw image md5: 9749 F156 1DAC D9AE 85AC 0E08 F4E4 272E
raw image sha1: 9871 0FB5 531E F390 2ED0 47A7 5BE4 747E 6BC1 BDB0
raw image sha256: 85B7 6D38 D60A 91F6 A0B6 9F65 B2C5 3BD9 F7E7 D944 639C 6F40 B3C4
0B06 83D8 A7E5
Free space remaining on capture drive: 527,524 MB
The Sleuth Kit forensics software provides integrated support for AFFlib compressed images. AFFv4 introduces the aff4imager tool, which adds additional features. This can be fournd at https://github.com/google/aff4/.
SquashFS Compressed Evidence Containers
Recall that using SquashFS as a forensic evidence container was described in Chapter 6. When you’re creating a SquashFS file, you can tune several compression parameters. Three compression algorithms (gzip, lzo, xz) are available, various metadata from SquashFS can be compressed (inode table, extended attributes), and other tweaks can be made as well. See the squashfs(1) manual page for more information.
In this example, a raw image file was converted to a compressed SquashFS file:
# mksquashfs image.raw image.sfs -comp lzo -noI
Parallel mksquashfs: Using 8 processors
Creating 4.0 filesystem on image.sfs, block size 131072.
...
Exportable Squashfs 4.0 filesystem, lzo compressed, data block size 131072
compressed data, uncompressed metadata, compressed fragments, compressed
xattrs
duplicates are removed
Filesystem size 615435.77 Kbytes (601.01 Mbytes)
31.45% of uncompressed filesystem size (1956923.96 Kbytes)
Inode table size 61232 bytes (59.80 Kbytes)
100.00% of uncompressed inode table size (61232 bytes)
Directory table size 31 bytes (0.03 Kbytes)
100.00% of uncompressed directory table size (31 bytes)
...
Here, the -comp flag sets the compression algorithm to lzo (gzip is the default), and the -noI flag prevents compression of the inodes (of the SquashFS container, not the evidence image).
The sfsimage shell script manages the creation of SquashFS forensic evidence containers with a few added forensic features.
The use of compression is fundamental when you’re working with large forensic images. However, even compressed images can still be very large to manage. There is another method that makes this process easier: you can split forensic images into multiple smaller pieces.
Manage Split Images
Managing acquired disk images can be problematic due to their large file sizes. Breaking an image into smaller, easier-to-handle pieces can help solve this problem. Consider the following examples in which a split image can be beneficial:
• Network transfers over unstable connections can be done with multiple smaller downloads using split images.
• A large image might exceed the maximum file size for a software tool. Splitting the image offers a workaround.
• Storage media, such as tapes, CDs, or DVDs, have a fixed maximum capacity. Split images allow you to use a set of these media.
• Some filesystems (notably FAT) have a relatively small maximum file size.
The most common use of split images in digital forensics is for the transfer and storage of evidence. Historically, this has been done by burning the image to a set of CDs or DVDs.
The GNU split Command
Standard Unix and Linux systems have the split tool for breaking a large file into several smaller files. The following example uses the split command to break an existing image into DVD-sized chunks:
$ split -d -b 4G image.raw image.raw.
$ ls
image.raw.00 image.raw.01 image.raw.02 image.raw.03 image.raw.04
...
The -d flag specifies that a numeric extension should be added to image.raw. (note the trailing dot); the -b flag specifies the size of the chunks made from the image.raw file.
Using a combination of piping between several tools, you can combine compressing and splitting during acquisition to save time and space. Here’s an example of a single command acquiring an image with dd, compressing it with gzip, and splitting it into CD-sized chunks:
# dd if=/dev/sdb | gzip | split -d -b 640m - image.raw.gz.
The split command’s input file is -, which specifies stdin, and it splits the compressed byte stream into pieces. It’s important to note that the parts are not individually gzipped and cannot be individually uncompressed. The split parts must be reassembled before they can be uncompressed.
Split Images During Acquisition
You can split an imaged hard disk into parts during the acquisition process rather than in a separate step at a later date. Before acquiring a large disk, consider whether you might need a split image in the future and what fragment size would make the most sense. Starting with the right split image could save you time and disk space during an investigation.
Split images are common in digital forensics and therefore are well supported by forensic acquisition and analysis tools. Typically, flags can set the fragment size and customize the extension of a split image.
The dcfldd tool provides built-in splitting functionality. For example, if you’ll later transfer an image to a third party via a set of 16GB USB sticks, you can use dcfldd to acquire an image using the split=16G flag before the output file:
# dcfldd if=/dev/sdc split=16G of=image.raw
# ls
image.raw.000 image.raw.001 image.raw.002 image.raw.003 image.raw.004
...
The default extension is a three-digit number appended to the output filename.
Using the dc3dd tool, you can split images during acquisition by specifying the output size with ofsz=. The file extensions are numerical, as shown here:
# dc3dd if=/dev/sdh ofsz=640M ofs=image.raw.000
# ls -l
total 7733284
-rw-r----- 1 root root 671088640 Jan 14 10:59 image.raw.000
-rw-r----- 1 root root 671088640 Jan 14 10:59 image.raw.001
-rw-r----- 1 root root 671088640 Jan 14 10:59 image.raw.002
...
-rw-r----- 1 root root 671088640 Jan 14 11:00 image.raw.009
-rw-r----- 1 root root 671088640 Jan 14 11:00 image.raw.010
-rw-r----- 1 root root 536870912 Jan 14 11:00 image.raw.011
Be sure the file extension has enough zeros, or else dc3dd will fail to complete and generate an error message, such as [!!] file extensions exhausted for image.raw.0. The last file in the set will usually be smaller than the others (unless the image size is perfectly divisible by the split file size).
EnCase tools typically default to splitting images during acquisition. You can acquire a disk to a split EnCase image using ewfacquire by specifying a maximum segment file size using the -S flag:
# ewfacquire -S 2G /dev/sdc
...
# ls
image.E01 image.E02 image.E03 image.E04 image.E05 image.E06
...
The commercial EnCase forensic suite can then use these images directly.
The ftkimager tool provides the --frag flag to save an image into parts during acquisition, as shown in this example:
# ftkimager /dev/sdk image --frag 20GB --s01
AccessData FTK Imager v3.1.1 CLI (Aug 24 2012)
Copyright 2006-2012 AccessData Corp., 384 South 400 West, Lindon, UT 84042
All rights reserved.
...
# ls -l
total 53771524
-rw-r----- 1 holmes root 2147442006 Jul 2 08:01 image.s01
-rw-r----- 1 holmes root 1038 Jul 2 08:43 image.s01.txt
-rw-r----- 1 holmes root 2147412323 Jul 2 08:01 image.s02
-rw-r----- 1 holmes root 2147423595 Jul 2 08:02 image.s03
-rw-r----- 1 holmes root 2147420805 Jul 2 08:02 image.s04
...
Here the disk is acquired with a maximum fragment size set at 20GB, and the format is a SMART compressed image. Notice the addition of the *.txt file containing the metadata. Unlike some forensic formats, this is not embedded into FTK split files created by ftkimager.
Access a Set of Split Image Files
Forensic tools, such as Sleuth Kit, provide support for operating directly on a set of split images without needing to reassemble them first. To list the supported images in Sleuth Kit, use the -i list flag with any Sleuth Kit image-processing tool:
$ mmls -i list
Supported image format types:
raw (Single raw file (dd))
aff (Advanced Forensic Format)
afd (AFF Multiple File)
afm (AFF with external metadata)
afflib (All AFFLIB image formats (including beta ones))
ewf (Expert Witness format (encase))
split (Split raw files)
In this example, there is support for split raw images (including Unix split files), split AFF images, and split EnCase files (though this is not explicitly stated, split EnCase files are supported). Some of these image format types might need to be explicitly included when compiling the Sleuth Kit software.
In the following example, an EWF image is split into 54 pieces. Running the img_stat command on the first file provides information about the complete set of files:
$ img_stat image.E01
IMAGE FILE INFORMATION
--------------------------------------------
Image Type: ewf
Size of data in bytes: 121332826112
MD5 hash of data: ce85c1dffc2807a205f49355f4f5a029
Using various tools, you can operate on split images directly. Most Sleuth Kit commands will work with a set of split raw files when you specify the first file of the split image type.
Recent versions of Sleuth Kit will automatically check for sets of split files:
$ mmls image.raw.000
Earlier versions of Sleuth Kit may require that you specify a split image type:
$ fls -o 63 -i split image.000 image.001 image.002
To check whether a set of split files is recognized, the img_stat command will show the total bytes recognized, and for raw types, the byte offset ranges for each piece:
$ img_stat image.raw.000
IMAGE FILE INFORMATION
--------------------------------------------
Image Type: raw
Size in bytes: 2003828736
--------------------------------------------
Split Information:
image.raw.000 (0 to 16777215)
image.raw.001 (16777216 to 33554431)
image.raw.002 (33554432 to 50331647)
image.raw.003 (50331648 to 67108863)
image.raw.004 (67108864 to 83886079)
...
An alternative method for determining whether split files are supported is to run the command or tool with strace -e open and see if it opens each of the split file pieces.
Splitting files and working with a set of split files are useful, but sometimes you need to reassemble them into a single image. This is shown in the next section.
Reassemble a Split Image
Reassembling split forensic formats is generally not needed, because tools that are compatible with a particular forensic format (EWF, SMART, or AFF) should support split files.
Because no header or meta information is contained in a raw image, reassembly is simply a matter of concatenating the set of image fragments into a single image. Doing this carefully should be a two-step process, as shown here:
$ ls -1 image.raw.*
image.raw.000
image.raw.001
image.raw.002
image.raw.003
...
$ cat image.raw.* > image.raw
The ls -1 flag will list the files recognized by the shell-globbing pattern. Be sure to confirm that this is a complete and ordered list before using it to concatenate the files into a single image. If split pieces are missing or the file order is wrong, the assembled parts will not create the correct forensic image.
If you’ve received a stack of DVDs, each containing a fragment of a compressed raw image, you can reassemble them as follows:
$ cat /dvd/image.raw.gz.00 > image.raw.gz
$ cat /dvd/image.raw.gz.01 >> image.raw.gz
$ cat /dvd/image.raw.gz.02 >> image.raw.gz
$ cat /dvd/image.raw.gz.03 >> image.raw.gz
...
Here, DVDs are repeatedly inserted and mounted on /dvd, and split parts are added until the image file is restored. Note that > in the initial cat command creates the image file, and >> in the subsequent commands appends the data (not overwriting it). After all parts have been appended to the destination file, the cryptographic hash of the uncompressed image should match the one taken during acquisition.
You can also uncompress and assemble a set of split files from a compressed image by piping all the split files into zcat and redirecting the output to a file:
# cat image.raw.gz.* | zcat > image.raw
A useful method provided by AFFlib allows for the virtual reassembly of a set of fragments using a FUSE filesystem. The affuse tool can present a set of split files as a fully assembled raw image file, as follows:
# ls
image.raw.000 image.raw.011 image.raw.022 image.raw.033 image.raw.044
image.raw.001 image.raw.012 image.raw.023 image.raw.034 image.raw.045
...
#
# affuse image.raw.000 /mnt
# ls -l /mnt
total 0
-r--r--r-- 1 root root 8011120640 1970-01-01 01:00 image.raw.000.raw
Here, a directory full of raw files is represented as a single disk image file and is found in the /mnt virtual filesystem. You can directly operate on this raw file using forensic tools.
Verify the Integrity of a Forensic Image
Verifying the cryptographic hash of an image is fundamental to performing digital forensics, and it’s the basis of preserving digital evidence. This section provides examples of verifying an image’s cryptographic hashes and signatures.
Verifying the preservation of evidence involves confirming that a current cryptographic hash of an image is identical to a hash taken at an earlier point in time. You can use hashing to verify a successful operation on a disk or image (acquisition, conversion, transfer, backup, and so on). You can also use it to verify that a disk or image file has not been tampered with over a longer period of time (months or even years).
The requirements for hashing (procedures and algorithms) depend on the legal jurisdiction where they are used and on the organizational policies governing a forensic lab. Thus, no hashing recommendations are provided here.
Verify the Hash Taken During Acquisition
After acquiring a disk, if you need to validate the acquisition hash, it’s a simple (but possibly time-consuming) task of piping the contents of the disk into a cryptographic hashing program. Using a different program to validate a disk’s hash provides an independent verification at the tool level. For example:
# img_stat image.E01
IMAGE FILE INFORMATION
--------------------------------------------
Image Type: ewf
Size of data in bytes: 2003828736
MD5 hash of data: 9749f1561dacd9ae85ac0e08f4e4272e
# dd if=/dev/sdj | md5sum
3913728+0 records in
3913728+0 records out
9749f1561dacd9ae85ac0e08f4e4272e -
2003828736 bytes (2.0 GB) copied, 126.639 s, 15.8 MB/s
Here, the img_stat output indicates the MD5 acquisition hash recorded by an EnCase imaging tool. A second tool, regular dd, is then used to recalculate the hash from the raw disk device. In this example, the two MD5 hashes match, confirming that the evidence integrity has been preserved.
Recalculate the Hash of a Forensic Image
Each of the forensic formats and the dd-based forensic tools can record or log a hash value of a disk image. To validate the recorded hash, you can recalculate the disk image’s hash. In the following example, the hash was recorded during acquisition with dc3dd and stored in the hashlog.txt. The hash can be verified as follows:
# grep "(md5)" hashlog.txt
5dfe68597f8ad9f20600a453101f2c57 (md5)
# md5sum image.raw
5dfe68597f8ad9f20600a453101f2c57 image.raw
The hashes match, confirming that the evidence file and the hash log are consistent and thus indicating that the evidence integrity has been preserved.
The following example validates the image stored in the metadata of the EnCase format. In this example, a dedicated tool, ewfverify, is used to validate the hash:
# ewfverify image.Ex01
ewfverify 20160424
Verify started at: May 14, 2016 14:47:32
This could take a while.
...
MD5 hash stored in file: 5dfe68597f8ad9f20600a453101f2c57
MD5 hash calculated over data: 5dfe68597f8ad9f20600a453101f2c57
ewfverify: SUCCESS
Here, the recalculated hash matches, confirming the consistency of the EWF image file. This tool will automatically validate the hash of a set of split files in the EnCase forensic format.
The affinfo tool performs similar validity checking for AFF files. In this example, the SHA1 hash is validated:
$ affinfo -S image.aff
image.aff is a AFF file
...
Validating SHA1 hash codes.
computed sha1: 9871 0FB5 531E F390 2ED0 47A7 5BE4 747E 6BC1 BDB0
stored sha1: 9871 0FB5 531E F390 2ED0 47A7 5BE4 747E 6BC1 BDB0 MATCH
This output confirms that the hash of the image contained inside the AFF file is the same as the hash recorded in the AFF metadata.
Cryptographic Hashes of Split Raw Images
Calculating the cryptographic hash of a set of raw split files is straightforward, and you can do this by piping the concatenated parts into a hashing program. This example calculates the sha256 hash of a set of split raw files:
$ cat image.raw.* | sha256sum
12ef4b26e01eb306d732a314753fd86de099b02105ba534d1b365a232c2fd36a -
This example assumes the filenames of the parts can be sorted in the correct order (can be verified in this example with ls -1 image.raw.*). The cat command is necessary here, as it is concatenating (assembling) all of the pieces before they are piped into sha256sum.
You can verify the cryptographic hash of an image that has been compressed and split into pieces by forming a command pipeline of several programs. In the following example, cat assembles the image and pipes it into zcat for uncompression. The output of zcat is sent to the hashing program, which produces a hash value upon completion:
$ cat image.raw.gz.* | zcat | md5sum
9749f1561dacd9ae85ac0e08f4e4272e -
Here, the cat command is necessary because it is concatenating all the split pieces before passing to zcat. Using zcat image.raw.gz.* will fail because it will try to uncompress each piece rather than the assembled image.
In the Unix community, useless use of cat (UUOC) describes using the cat command to send a file to command when < could be used instead. Traditional Unix communities have given out UUOC awards to encourage more efficient use of shell command redirection. However, the examples in this section do need cat because they perform a concatenation function.
Identify Mismatched Hash Windows
As disks age, or as they are transported and handled, there’s a risk of damage, possibly introducing bad sectors. If an original evidence disk produces unreadable sector errors since it was first imaged, the cryptographic checksum for the disk will fail to match. Hash windows become valuable in this case, because you can use them to identify more precisely which part of the disk failed to match. More important, hash windows can show which areas of a disk are still preserved, even though the hash for the entire disk has failed to match.
The specified size of a hash window determines how often a new hash is written during the acquisition of a disk or when you’re verifying disk hash windows. When you’re comparing two lists of hashes for verification, both lists must use the same size of hash window. To find the mismatching areas, you can compare the two hash logs using the Unix diff tool.
In the following example, a disk was imaged with dcfldd and a hash log with a 10M hash window size was saved. A subsequent verification failed to match the MD5 for the entire disk and provided a new hash log, also with a 10M hash window size:
$ diff hash1.log hash2.log
3c3
< 20971520 - 31457280: b587779d76eac5711e92334922f5649e
---
> 20971520 - 31457280: cf6453e4453210a3fd8383ff8ad1511d
193c193
< Total (md5): 9749f1561dacd9ae85ac0e08f4e4272e
---
> Total (md5): fde1aa944dd8027c7b874a400a56dde1
This output reveals mismatched hashes for the full image and also for the range of bytes between 20971520 and 31457280. Dividing by the 512-byte sector size identifies the sector range between 40960 and 61440 where the hash mismatch occurred. The hashes on the rest of the disk are still good; only the sectors with mismatched hashes have not been forensically preserved. Content (blocks, files, portions of files, and so on) residing on a hash-mismatched sector range can be excluded from the presented evidence at a later stage. If two cryptographic hashes of a full image are a match, you can assume that all the hash windows also match.
The cryptographic hashes of forensic images preserve the integrity of collected evidence. However, the hash values themselves are not protected against malicious or accidental modification. Confirming the integrity of the calculated hashes can be preserved using cryptographic signing and time-stamping. Confirming the validity of signatures and timestamps is shown in the next section.
Verify Signature and Timestamp
The previous chapter demonstrated the use of GnuPG to sign a disk’s hashes. You can verify the signature without having the signing private key. The original person who signed the evidence is not needed; only their public key is needed. This example verifies the gpg signature of the person who signed the acquired disk image:
$ gpg < hash.log.asc
dc3dd 7.2.641 started at 2016-05-07 17:23:49 +0200
compiled options:
command line: dc3dd if=/dev/sda hof=image.raw ofs=image.000 ofsz=1G hlog=hash.log
hash=md5
input results for device `/dev/sda':
5dfe68597f8ad9f20600a453101f2c57 (md5)
...
dc3dd completed at 2016-05-07 17:25:40 +0200
gpg: Signature made Sat 07 May 2016 17:29:44 CEST using RSA key ID CF87856B
gpg: Good signature from "Sherlock Holmes <holmes@digitalforensics.ch>"
Here, the contents of the signed message (the acquisition output and hash) are displayed together with a gpg message indicating that the signature is valid.
For S/MIME signed messages, a similar command will validate (or invalidate) the signature from a PEM file and looks like this:
$ gpgsm --verify image.log.pem
gpgsm: Signature made 2016-01-25 19:49:42 using certificate ID 0xFFFFFFFFABCD1234
...
gpgsm: Good signature from "/CN=holmes@digitalforensics.ch/EMail=holmes@
digitalforensics.ch"
gpgsm: aka "holmes@digitalforensics.ch"
Chapter 6 discussed using timestamping services to generate RFC-3161 timestamps from a timestamp authority. Validating a timestamp is similar to validating a signature with S/MIME and requires the correct chain of certificate authority (CA) certificates to be installed for verification to be successful. This example verifies the previous timestamp created with FreeTSA (http://freetsa.org/).
If the timestamping service’s CA certificate is not installed on your system, it can be manually fetched. The TSA certificate should have been returned as part of the timestamp when the request was made (because of the -cert flag). For this example, the CA cert is fetched from FreeTSA as follows:
$ curl http://freetsa.org/files/cacert.pem > cacert.pem
Assuming CA and TSA certificates are available to OpenSSL and valid, you can validate the timestamp as follows:
$ openssl ts -verify -in hash.log.tsr -queryfile hash.log.tsq -CAfile cacert.pem
Verification: OK
The openssl ts command is used to verify the timestamp. The timestamp query (tsq) and timestamp reponse (tsr) are provided, and in this example, the file containing the timestamp server’s CA certificate is specified. The third-party timestamp is valid (Verification: OK), indicating that the file (and the forensic acquisition hashes it contains) has not been modified since the specified time. If a particular timestamp authority is expected to be used permanently, you can add the CA certificates to the OS’s trusted CA store.
AFFlib also has provisions for signing and validating signatures for acquired images using X.509 certificates.
This section did not discuss the web-of-trust or the public key infrastructure (PKI) needed to trust the keys being used to sign images and verify timestamps. The examples assume this trust is already established.
Convert Between Image Formats
Converting between forensic image formats can be advantageous for various reasons. If a lab has new software or infrastructure and the current format is unsupported or less efficient, converting to another format could be an option. If you’ll be transferring an image to a third party, they might have a preferred image format. If you are receiving an image from a third party, you might want to convert it to your preferred format. This section provides examples of converting between formats on the command line. Conversion from a few source formats is shown, including EnCase, FTK, AFF, and raw images. In addition, the examples demonstrate converting various formats into SquashFS evidence containers.
When you’re converting between image formats, it’s preferable to use pipes and redirection. Avoid tools that use temporary files. During the conversion process, two copies of an image might coexist (one or both might be compressed). To prepare for the conversion process, do some capacity planning.
After conversion, check the hash values from the original image and the destination to ensure a match.
Convert from Raw Images
Converting a raw image to another format is usually straightforward, because you can use regular disk-imaging functionality. Instead of a raw device name, the filename of the raw image is used.
The following examples show a raw image file being converted into EnCase and FTK formats. The first example uses ewfacquire to convert image.raw to EnCase Expert Witness format:
$ ewfacquire image.raw -t image -f encase7
ewfacquire 20160424
Storage media information:
Type: RAW image
Media size: 7.9 GB (7918845952 bytes)
Bytes per sector: 512
Acquiry parameters required, please provide the necessary input
Case number: 42
Description: The case of the missing red stapler
Evidence number: 1
Examiner name: S. Holmes
Notes: This red USB stick was found at the scene
...
Acquiry completed at: May 14, 2016 15:03:40
Written: 7.3 GiB (7918846140 bytes) in 54 second(s) with 139 MiB/s
(146645298 bytes/second)
MD5 hash calculated over data: 5dfe68597f8ad9f20600a453101f2c57
ewfacquire: SUCCESS
Here, the specified source file is the raw image; -t is the base name of the EnCase target *.e01 files. EnCase version 7 was specified, and when the command is executed, a series of questions is asked. Because the raw file has no case metadata, you need to enter it manually.
Converting from a raw image to FTK SMART is similar: you specify the raw image as a source and manually add the case metadata. Using ftkimage, you specify the case metadata on the command line, as shown in this example:
$ ftkimager image.raw image --s01 --case-number 1 --evidence-number 1 --description
"The case of the missing red stapler" --examiner "S. Holmes" --notes "This USB
stick was found at the scene"
AccessData FTK Imager v3.1.1 CLI (Aug 24 2012)
Copyright 2006-2012 AccessData Corp., 384 South 400 West, Lindon, UT 84042
All rights reserved.
Creating image...
Image creation complete.
The --s01 flag specifies that a SMART compressed image will be created. The base filename is specified simply as image, and appropriate file extensions will be automatically added.
Converting an image to a SquashFS forensic evidence container is also just a simple command if you use the sfsimage script, like this:
$ sfsimage -i image.raw image.sfs
Started: 2016-05-14T15:14:13
Sfsimage version: Sfsimage Version 0.8
Sfsimage command: /usr/bin/sfsimage -i image.raw
Current working directory: /exam
Forensic evidence source: if=/exam/image.raw
Destination squashfs container: image.sfs
Image filename inside container: image.raw
Aquisition command: sudo dc3dd if=/exam/image.raw log=errorlog.txt hlog=hashlog.txt
hash=md5 2>/dev/null | pv -s 7918845952
7.38GiB 0:00:22 [ 339MiB/s] [=================================>] 100%
Completed: 2016-05-14T15:14:37
Here, the raw image file was specified together with the destination SquashFS container filename. The sfsimage script builds the required SquashFS pseudo device and adds the log and hash information as regular text files. You can append additional case metadata to the evidence container manually (with sfsimage -a).
You can’t directly access a gzip compressed raw image using typical forensic tools because of the inability to seek (randomly access any block within the file) within a gzip file. It’s best to convert such files into compressed formats that are seekable. Then you can operate on them directly using forensic analysis tools. In this example, a gzipped raw image file is converted into a SquashFS compressed file using sfsimage:
$ zcat image.raw.gz | sfsimage -i - image.sfs
Started: 2016-05-14T15:20:39
Sfsimage version: Sfsimage Version 0.8
Sfsimage command: /usr/bin/sfsimage -i -
Current working directory: /exam
Forensic evidence source:
Destination squashfs container: image.sfs
Image filename inside container: image.raw
Aquisition command: sudo dc3dd log=errorlog.txt hlog=hashlog.txt hash=md5
2>/dev/null | pv -s 0
7.38GiB 0:00:38 [ 195MiB/s] [ <=> ]
Completed: 2016-05-14T15:21:18
The original file remains in raw form, but it’s now inside a compressed filesystem. You can mount the resulting *.sfs file to access the raw image, as shown here:
$ sfsimage -m image.sfs
image.sfs.d mount created
$ ls image.sfs.d/
errorlog.txt hashlog.txt image.raw sfsimagelog.txt
You can convert a raw image file into an AFF file by using a simple affconvert command:
$ affconvert image.raw
convert image.raw --> image.aff
Converting page 119 of 119
md5: 9749f1561dacd9ae85ac0e08f4e4272e
sha1: 98710fb5531ef3902ed047a75be4747e6bc1bdb0
bytes converted: 2003828736
Total pages: 120 (117 compressed)
Conversion finished.
Then you can add the case metadata with a separate tool, such as affsegment. The affconvert tool provides sensible defaults for compression, and the resulting file has the *.aff extension with the basename of the raw file.
The following and final example shows the conversion of a raw image inside a SquashFS forensic evidence container to an AFF file using the affconvert command:
# affconvert -Oaff image.sfs.d/image.raw
convert image.sfs.d/image.raw --> aff/image.aff
Converting page 953 of 953
md5: d469842a3233cc4e7d4e77fd81e21035
sha1: 9ad205b1c7889d0e4ccc9185efce2c4b9a1a8ec6
bytes converted: 16001269760
Total pages: 954 (954 compressed)
Conversion finished.
Because SquashFS is read-only, you need to tell affconvert to write the output file to a different directory that is writable.
Convert from EnCase/E01 Format
The libewf package contains the ewfexport tool for converting EnCase EWF (*.E0*) files to other formats. This includes the ability to read one or more files and pipe them into other programs.
NOTE
There is a bug in some older versions of ewfexport that appends the line ewfexport: SUCCESS to the end of an image after an export to stdout. This added string will cause a mismatch in the image MD5 hashes. The string is a fixed length of 19 bytes, so you can suppress it by piping it through tail -c 19.
Manual Creation of a SquashFS Container
Throughout the book, you’ve seen examples of the sfsimage shell script. But it’s useful to see one example of creating a SquashFS file without the script. This next example will make it easier to understand how sfsimage works internally.
The following EnCase acquisition contains 54 *.E0 files that will be assembled into a single raw image and placed into a SquashFS evidence container:
# ls
image.E01 image.E10 image.E19 image.E28 image.E37 image.E46
image.E02 image.E11 image.E20 image.E29 image.E38 image.E47
image.E03 image.E12 image.E21 image.E30 image.E39 image.E48
image.E04 image.E13 image.E22 image.E31 image.E40 image.E49
image.E05 image.E14 image.E23 image.E32 image.E41 image.E50
image.E06 image.E15 image.E24 image.E33 image.E42 image.E51
image.E07 image.E16 image.E25 image.E34 image.E43 image.E52
image.E08 image.E17 image.E26 image.E35 image.E44 image.E53
image.E09 image.E18 image.E27 image.E36 image.E45 image.E54
To begin, you need a mksquashfs pseudo definition file to define the commands that will create files inside the SquashFS container. The pseudo definition file contains the target filename, file type, permissions, ownership, and command to be executed. The output of that command will become the contents of the defined filename inside the SquashFS filesystem.
In the following example, a file named pseudo_files.txt has been created that contains two definitions. The first extracts the EnCase metadata with ewfinfo and places it into image.txt (this metadata would otherwise be lost). The second definition exports a raw image from the *.E0 files into image.raw:
# cat pseudo_files.txt
image.txt f 444 root root ewfinfo image.E01
image.raw f 444 root root ewfexport -u -t - image.E01
The ewfexport flag -u allows the conversion to execute unattended (otherwise it prompts the user with questions). The -t flag specifies the target, which in this example is stdout or the dash -.
With this definition file, you can create the compressed filesystem containing the generated files as follows:
# mksquashfs pseudo_files.txt image.sfs -pf pseudo_files.txt
Parallel mksquashfs: Using 12 processors
Creating 4.0 filesystem on image.sfs, block size 131072.
ewfexport 20160424
Export started at: May 12, 2016 19:09:42
This could take a while.
...
Export completed at: May 12, 2016 19:28:56
Written: 113 GiB (121332826112 bytes) in 19 minute(s) and 14 second(s) with
100 MiB/s (105141097 bytes/second)
MD5 hash calculated over data: 083e2131d0a59a9e3b59d48dbc451591
ewfexport: SUCCESS
...
Filesystem size 62068754.40 Kbytes (60614.02 Mbytes)
52.38% of uncompressed filesystem size (118492706.13 Kbytes)
...
The resulting SquashFS filesystem image.sfs will contain three files: the raw image file image.raw, image.txt containing the metadata, and the pseudo_files.txt file containing the definitions with the executed commands. The mksquashfs(1) manual page has more information about the flags and options for creating SquashFS file systems.
You can view the contents of a SquashFS file with the unsquashfs command as follows:
# unsquashfs -lls image.sfs
...
-r--r--r-- root/root 121332826112 2016-05-12 19:09 squashfs-root/image.raw
-r--r--r-- root/root 770 2016-05-12 19:09 squashfs-root/image.txt
-rw-r----- root/root 98 2016-05-12 16:58 squashfs-root/
pseudo_files.txt
The final step is to verify the preservation of evidence by comparing MD5 hash values. The ewfinfo command provides the MD5 hash calculated during the original EnCase acquisition. A second MD5 checksum can be calculated with md5sum on the newly converted raw image inside the SquashFS container. To do this, you need to mount the SquashFS filesystem first. The following example shows each of these steps:
# ewfinfo image.E01
ewfinfo 20160424
...
Digest hash information
MD5: 083e2131d0a59a9e3b59d48dbc451591
# mkdir image.sfs.d; mount image.sfs image.sfs.d
# md5sum image.sfs.d/image.raw
083e2131d0a59a9e3b59d48dbc451591 image.sfs.d/image.raw
The result shows that the two MD5 hashes match, indicating a successfully preserved evidence conversion from EnCase to a raw image inside a SquashFS container. A third matching MD5 hash can be seen in the ewfexport output that was calculated during the conversion process. The ewfexport tool can also convert, or export, to other EnCase formats.
When the mounted SquashFS filesystem image.sfs.d is no longer needed, it can be unmounted with umount image.sfs.d. The sfsimage script manages these steps for you.
Convert Files from EnCase to FTK
The ftkimager tool can convert from EnCase to FTK. In this example, a set of EnCase *.e01 files are converted to SMART ew-compressed files with the same name but with the *.s01 extension:
# ftkimager image.E01 image --s01
AccessData FTK Imager v3.1.1 CLI (Aug 24 2012)
Copyright 2006-2012 AccessData Corp., 384 South 400 West, Lindon, UT 84042
All rights reserved.
Creating image...
Image creation complete.
Hashes are checked and added to the new FTK file. The original case metadata is not added to the newly converted files. Instead, it’s extracted from the original format and saved as a separate file with the same name but with a *.txt extension (image.s01.txt in this example).
Convert from FTK Format
The command line ftkimager tool converts between EnCase and FTK formats, and it allows you to use stdin and stdout for conversion with raw image files.
In the following example, a set of compressed FTK SMART *.s01 files are converted to the EnCase EWF *E01 format:
# ftkimager image.s01 image --e01
AccessData FTK Imager v3.1.1 CLI (Aug 24 2012)
Copyright 2006-2012 AccessData Corp., 384 South 400 West, Lindon, UT 84042
All rights reserved.
Creating image...
Image creation complete.
The case metadata is not transferred to the new format but is automatically saved to a separate file (image.E01.txt).
The ftkimager can convert SMART *.s01 files to stdout, where you can redirect them to raw image files or pipe them into other programs. In the following example, a set of FTK SMART files are converted into a SquashFS forensic evidence container using ftkimager output piped into sfsimage:
# ftkimager sandisk.s01 - | sfsimage -i - sandisk.sfs
Started: 2016-05-12T19:59:13
Sfsimage version: Sfsimage Version 0.8
Sfsimage command: /usr/bin/sfsimage -i -
Current working directory: /exam
Forensic evidence source:
Destination squashfs container: sandisk.sfs
Image filename inside container: image.raw
Aquisition command: sudo dc3dd log=errorlog.txt hlog=hashlog.txt hash=md5
2>/dev/null | pv -s 0
AccessData FTK Imager v3.1.1 CLI (Aug 24 2012)
Copyright 2006-2012 AccessData Corp., 384 South 400 West, Lindon, UT 84042
All rights reserved.
14.5GiB 0:01:37 [ 151MiB/s] [ <=> ]
Completed: 2016-05-12T20:00:51
# sfsimage -a sandisk.s01.txt sandisk.sfs
Appending to existing 4.0 filesystem on sandisk.sfs, block size 131072
When you’re converting from an FTK format into a raw disk image, the case metadata is not transferred. You need to manually save the case metadata, which is usually found in a separate text file. You can add this to the SquashFS container as shown in the previous example with the sfsimage -a command.
After performing a format conversion of any kind, you should verify the hash value separately on the destination format to ensure the evidence integrity has been preserved.
Convert from AFF Format
The affconvert tool can convert AFF images to a raw image (and from a raw image to the AFF format). The affconvert tool does not use stdin or stdout; instead, it reads or creates stand-alone files. The following simple example shows converting an AFF file to a raw image:
$ affconvert -r image.aff
convert image.aff --> image.raw
Converting page 96 of 96
bytes converted: 1625702400
Conversion finished.
To convert a raw image to an AFF format, simply use affconvert image.raw, and the corresponding image.aff file will be created.
To use piping and redirection with AFF files, you can use the affcat tool. The previous example can be also be done with affcat and redirected to a file (without any status or completion information, which is useful for scripts) as follows:
$ affcat image.aff > image.raw
To convert an AFF image to EnCase or FTK, the affcat tool can pipe an image via stdout or stdin into the appropriate tool, creating a new image in the desired format. For example, you can convert from AFF to a compressed FTK SMART image like this:
$ affcat image.aff | ftkimager - image --s01
AccessData FTK Imager v3.1.1 CLI (Aug 24 2012)
Copyright 2006-2012 AccessData Corp., 384 South 400 West, Lindon, UT 84042
All rights reserved.
Creating image...
Image creation complete.
Here, the - represents the stdin file descriptor receiving the raw image data, image is the base filename, and the final flag --s01 specifies the compressed format.
Similarly, you can convert to various EnCase formats using efwacquirestream. For example:
$ affcat image.aff | ewfacquirestream -C 42 -E 1 -e "S. Holmes" -D "Data theft
case" image
ewfacquirestream 20160424
Using the following acquiry parameters:
Image path and filename: image.E01
Case number: 42
Description: Data theft case
Evidence number: 1
Examiner name: S. Holmes
...
Acquiry completed at: May 14, 2016 15:41:42
Written: 1.8 GiB (2003934492 bytes) in 10 second(s) with 191 MiB/s (200393449
bytes/second)
MD5 hash calculated over data: 9749f1561dacd9ae85ac0e08f4e4272e
ewfacquirestream: SUCCESS
In the previous AFF conversion examples, the case metadata (case name, examiner name, acquisition times, hashes, and so on) is not preserved in the conversion from AFF to other formats. But you can export this information using affinfo and then add or save it manually to the destination format. Depending on the tool, you can also include metadata as command line flags as seen in the previous example with -C 42 -E 1 -e "S. Holmes" -D "Data theft case".
This final example demonstrates converting an AFF file to a compressed SquashFS forensic evidence container using sfsimage:
$ affcat image.aff | sfsimage -i - image.sfs
Started: 2016-05-14T15:47:19
Sfsimage version: Sfsimage Version 0.8
Sfsimage command: /usr/bin/sfsimage -i -
Current working directory: /exam
Forensic evidence source:
Destination squashfs container: image.sfs
Image filename inside container: image.raw
Aquisition command: sudo dc3dd log=errorlog.txt hlog=hashlog.txt hash=md5
2>/dev/null | pv -s 0
1.87GiB 0:00:06 [ 276MiB/s] [ <=> ]
Completed: 2016-05-14T15:47:26
You can extract the metadata from AFF files using affinfo and then add it to the SquashFS forensic evidence container as follows:
$ affinfo image.aff > affinfo.txt
$ sfsimage -a affinfo.txt image.sfs
Appending to existing 4.0 filesystem on image.sfs, block size 131072
Once the image is converted, compare the hash values of the original image and the destination to ensure a match.
Secure an Image with Encryption
An important but often neglected component of digital forensics is information security. You should consider the information you acquire and extract during an investigation as sensitive and adequately protect its security.
The loss of data confidentiality may have undesired consequences. For example, it may violate organizational policy requirements, jeopardize legal and regulatory compliance, raise victim privacy issues, and do damage to the reputation of the investigating organization. Failing to adequately protect acquired evidence could result in damage to any of the parties involved, including the investigators and their employer, the victim, the defendant, and other participating parties. Leaked information could also interfere with or compromise an ongoing investigation.
This section focuses on methods for ensuring that information is protected, in particular, maintaining security during data transfer and storage (both long- and short-term storage). Adding security to images increases the complexity and the time needed to encrypt and then later decrypt the images, but the examples you’ll see here attempt to keep this process as simple and efficient as possible. Basic symmetric encryption is used instead of more complex PKI or web-of-trust systems.
In addition to the methods shown in this section, the ZIP archive format could be used for encryption. Newer versions with the ZIP64 extensions support file sizes larger than 4GB. ZIP has the advantage of high compatability with other platforms such as Windows.
GPG Encryption
Using symmetric encryption, you can easily encrypt disk images for protection during network transfer or storage. GNU Privacy Guard (GPG) encryption provides a free implementation of the OpenPGP standard defined by RFC-4880. It’s an alternative to the traditional PGP encryption created by PhilZimmerman in the early 1990s.
It’s useful to start the agent when you’re using GPG. (The agent is started automatically when using gpg2.) This is typically done at login with the following command:
$ eval $(gpg-agent --daemon)
For all the examples that follow, the -v flag is used to increase verbosity. This makes the output more useful for documentation purposes (both in this book and for creating formal forensic reports describing the steps taken).
Using GPG to encrypt an existing image is very simple, as shown here:
$ gpg -cv image.raw
gpg: using cipher AES
gpg: writing to `image.raw.gpg'
Enter passphrase:
A passphrase is requested, and the image is encrypted with the default symmetric encryption algorithm, creating a new file with the extension .gpg. The size of the image is smaller because GPG compresses as it encrypts. This can be seen here:
$ ls -lh
total 1.2G
-r--r----- 1 holmes holmes 1.9G May 14 15:56 image.raw
-rw-r----- 1 holmes holmes 603M May 14 15:57 image.raw.gpg
The previous example showed encrypting a file in place. But you can also encrypt on the fly during acquisition:
$ sudo dcfldd if=/dev/sde | gpg -cv > image.raw.gpg
Enter passphrase:
gpg: using cipher AES
gpg: writing to stdout
241664 blocks (7552Mb) written.
241664+0 records in
241664+0 records out
Here, dcfldd acquires the attached disk via /dev/sde and pipes it directly into the GPG program. The encrypted output of GPG is then redirected to a file. The sudo command escalates privileges to root in order to read the raw device.
Decrypting a GPG-encrypted image is just as simple as encrypting one. The only differences are the use of the decryption flag and the requirement to specify an output file (by default, it outputs to stdout). In the following example, a GPG-encrypted image file is decrypted to a regular (unprotected) file:
$ gpg -dv -o image.raw image.raw.gpg
gpg: AES encrypted data
Enter passphrase:
gpg: encrypted with 1 passphrase
gpg: original file name='image.raw'
This example demonstrates symmetric encryption without signing. You can also use GPG public and private keys to encrypt, decrypt, and sign images. The integrity is verified by comparing the hash of the GPG-encrypted image with the hash of the raw image file, as follows:
$ gpg -dv image.raw.gpg | md5sum
gpg: AES encrypted data
Enter passphrase:
gpg: encrypted with 1 passphrase
gpg: original file name='image.raw'
5dfe68597f8ad9f20600a453101f2c57 -
md5sum image.raw
5dfe68597f8ad9f20600a453101f2c57 image.raw
When you’re decrypting an image, you need to do some capacity planning. After decryption, two copies of the image will exist (one or both will be compressed).
A GPG-encrypted file is not seekable, so you cannot operate on its contents directly with forensic analysis tools.
OpenSSL Encryption
Other cryptographic systems can also provide security for disk images. The OpenSSL toolkit (http://www.openssl.org/) provides a number of algorithms you can use to encrypt files. For example, to password encrypt an image with 256-bit AES using cipher block chaining mode, use this command:
# openssl enc -aes-256-cbc -in image.raw -out image.raw.aes
enter aes-256-cbc encryption password:
Verifying - enter aes-256-cbc encryption password:
OpenSSL is flexible regarding cipher types and modes, providing dozens of choices. Also supported are piping and redirection, and you can easily perform encryption during acquisition, for example:
# dcfldd if=/dev/sdg | openssl enc -aes-256-cbc > image.raw.aes
enter aes-256-cbc encryption password:
Verifying - enter aes-256-cbc encryption password:
241664 blocks (7552Mb) written.
241664+0 records in
241664+0 records out
Decrypting an OpenSSL-encrypted file is also relatively straightforward, provided you know the encryption algorithm, as shown here:
# openssl enc -d -aes-256-cbc -in image.raw.aes -out image.raw
enter aes-256-cbc decryption password:
The addition of the -d flag signifies this is a decryption operation (enc specifies that symmetric ciphers are being used). Because OpenSSL doesn’t provide an automatic method to detect which symmetric encryption was used, it’s important to document how the file was encrypted.
Unless specifically compiled with zlib, OpenSSL doesn’t compress files. To add compression on the fly during an acquisition, add gzip to the pipeline, like this:
# dcfldd if=/dev/sdg | gzip | openssl enc -aes-256-cbc > image.raw.gz.aes
enter aes-256-cbc encryption password:
Verifying - enter aes-256-cbc encryption password:
241664 blocks (7552Mb) written.
241664+0 records in
241664+0 records out
To verify the cryptographic hash of the image, you can run a similar command pipe, as follows:
$ openssl enc -d -aes-256-cbc < image.raw.gz.aes | gunzip | md5sum
enter aes-256-cbc decryption password:
4f9f576113d981ad420bbc9c251bea0c -
Here, the decryption command takes the compressed and encrypted file as input and pipes the decrypted output to gunzip, which outputs the raw image to the hashing program.
Some implementations of ZIP also support built-in encryption and can be used to secure images and other evidence files.
Forensic Format Built-In Encryption
GPG and OpenSSL are well-known tools for performing various encryption tasks, providing compatibility and interoperability with other tools. However, they’re not designed for digital forensics, and encrypted image files cannot be used directly by standard forensic tools (they must be decrypted first). Some versions of the popular forensic formats discussed throughout this book support randomly accessible encrypted images.
The ftkimager program can protect image files using a password or a certificate. An example of encrypting with a password (monkey99) during acquisition is shown here:
# ftkimager --outpass monkey99 --e01 /dev/sdg image
AccessData FTK Imager v3.1.1 CLI (Aug 24 2012)
Copyright 2006-2012 AccessData Corp., 384 South 400 West, Lindon, UT 84042
All rights reserved.
Creating image...
Image creation complete.
NOTE
Including a password in command parameters is generally bad practice. The password is visible in the shell history, and anyone can view the password in the process table.
Attempting to access an encrypted image without a password, or with the incorrect password, will generate the following error messages:
** Source is encrypted; please provide credentials for decryption.
** AD Decryption setup failed.
Operating on an encrypted image requires including the password on the command line, as follows:
# ftkimager --inpass monkey99 image.E01 - > image.raw
AccessData FTK Imager v3.1.1 CLI (Aug 24 2012)
Copyright 2006-2012 AccessData Corp., 384 South 400 West, Lindon, UT 84042
All rights reserved.
Some versions of the EWF format support encryption, and as of this writing, libewf support was at various stages of development. Refer to the latest source code for current encrypted-format support.
The AFFlibsuite allows you to directly access encrypted images via the Advanced Forensics Format (AFF) library. From the start, AFFlib was developed with information security in mind. It has a number of encryption possibilities for protecting forensic images, including password-based (symmetric) and certificate-based (X.509) encryption. You can add the protection to an existing acquired image using the affcrypto tool. Here is an example:
# affcrypto -e -N monkey99 image.aff
image.aff: 967 segments; 0 signed; 967 encrypted; 0 pages;
0 encrypted pages
Recent versions of dd_rescue implement a plugin interface and (at the time of this writing) had plugins for LZO compression, cryptographic hashing, and symmetric encryption (AES). The following example shows imaging a disk (/dev/sdc) and saving the output in encrypted form using the AES plugin:
# dd_rescue -L crypt=enc:passfd=0:pbkdf2 /dev/sdc samsung.raw.aes
dd_rescue: (info): Using softbs=128.0kiB, hardbs=4.0kiB
dd_rescue: (input): crypt(0): Enter passphrase:
dd_rescue: (warning): some plugins don't handle sparse, enabled -A/--nosparse!
dd_rescue: (info): expect to copy 156290904.0kiB from /dev/sdc
dd_rescue: (info): crypt(0): Derived salt from samsung.raw.aes=00000025433d6000
dd_rescue: (info): crypt(0): Generate KEY and IV from same passwd/salt
dd_rescue: (info): ipos: 156286976.0k, opos: 156286976.0k, xferd: 156286976.0k
errs: 0, errxfer: 0.0k, succxfer: 156286976.0k
+curr.rate: 38650kB/s, avg.rate: 56830kB/s, avg.load: 14.9%
>----------------------------------------.< 99% ETA: 0:00:00
dd_rescue: (info): read /dev/sdc (156290904.0kiB): EOF
dd_rescue: (info): Summary for /dev/sdc -> samsung.raw.aes
dd_rescue: (info): ipos: 156290904.0k, opos: 156290904.0k, xferd: 156290904.0k
errs: 0, errxfer: 0.0k, succxfer: 156290904.0k
+curr.rate: 29345kB/s, avg.rate: 56775kB/s, avg.load: 14.9%
>-----------------------------------------< 100% TOT: 0:45:53
If examiners in a forensics lab expect high volumes of encryption, signing, and timestamping of images and evidence, it’s worth investing the use of a PKI. This could be an in-house PKI system or an external commercial PKI provider.
General Purpose Disk Encryption
The examples in the previous sections focused on protecting individual files or file containers. An alternative is to protect the entire drive where the image files reside. You can do this with filesystem encryption, in hardware, in user space, or in the kernel. You’ll see several examples in this section.
There are high-capacity secure external drives on the market that can be used to safely transport image files, such as Lenovo’s ThinkPad Secure Hard Drives, one of which is shown in Figure 7-1. These drives are OS independent and encrypt drive contents with a pin entered in a physical keypad on the device.
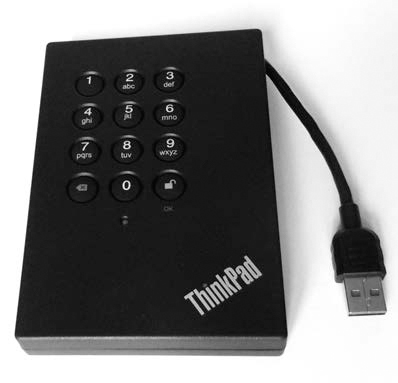
Figure 7-1: ThinkPad Secure Hard Drive
TrueCrypt was once the most popular free and cross-platform filesystem software available. But in May 2014, an unexpected and unexplained announcement from the developers recommended people find alternatives to TrueCrypt because development was stopped. A number of forks and compatible projects resulted, several of which are listed here:
• VeraCrypt: https://veracrypt.codeplex.com/
• tc-play: https://github.com/bwalex/tc-play/
• CipherShed: https://ciphershed.org/
• zuluCrypt: http://mhogomchungu.github.io/zuluCrypt/ (not an implementation of TrueCrypt but a TrueCrypt manager worth mentioning)
The rest of the examples in this section use VeraCrypt. As of this writing, VeraCrypt was under active development and gaining in popularity as an alternative to TrueCrypt.
The following example encrypts an empty external drive in its entirety. You can then use the encrypted container for secure transfer or storage of evidence data. The veracrypt tool asks a number of questions regarding the setup of the encrypted container. Note that in this example, /dev/sda is an examiner’s drive, not a subject drive.
# veracrypt -c /dev/sda
Volume type:
1) Normal
2) Hidden
Select [1]:
Encryption Algorithm:
1) AES
2) Serpent
3) Twofish
4) AES(Twofish)
5) AES(Twofish(Serpent))
6) Serpent(AES)
7) Serpent(Twofish(AES))
8) Twofish(Serpent)
Select [1]:
Hash algorithm:
1) SHA-512
2) Whirlpool
3) SHA-256
Select [1]:
Filesystem:
1) None
2) FAT
3) Linux Ext2
4) Linux Ext3
5) Linux Ext4
6) NTFS
Select [2]: 5
Enter password:
Re-enter password:
Enter PIM:
Enter keyfile path [none]:
Please type at least 320 randomly chosen characters and then press Enter:
The VeraCrypt volume has been successfully created.
The drive has now been initialized as a VeraCrypt container (this can take a long time, depending on the speed of the PC and the size of the drive). To mount a VeraCrypt volume, you use a simple command that includes the source device and the mount point:
# veracrypt /dev/sda /mnt
Enter password for /dev/sda:
Enter PIM for /dev/sda:
Enter keyfile [none]:
Protect hidden volume (if any)? (y=Yes/n=No) [No]:
# veracrypt -l
1: /dev/sda /dev/mapper/veracrypt1 /mnt
Safely removing the device requires “dismounting” the VeraCrypt volume and is also done using a simple command that specifies the mount point:
# veracrypt --dismount /mnt
At this point, you can physically detach the drive from the system. The encrypted drive in this example is an entire raw device, but it’s also possible to use a VeraCrypt container file. The mount point in this example is /mnt, but it can be anywhere in the filesystem.
There are other full-disk encryption systems that can be used to secure forensic image files and other data. You can use self-encrypting drives (SEDs), discussed in detail in “Identify and Unlock Opal Self-Encrypting Drives” on page 128, with the sedutil-cli command to create an encrypted drive for storage and transport. Filesystem encryption, such as Linux LUKS and dm-crypt, offers similar levels of protection. Although these encryption systems will secure evidence data on a drive, they might not be interoperable with other OSes (Windows or OS X, for example).
Disk Cloning and Duplication
In some situations, a clone or duplicate copy of a disk is preferred to an image file. Each duplicate is an exact sector-by-sector copy of the original disk. A newly cloned disk will have a cryptographic checksum that matches the original. A cloned disk can be useful for several reasons:
• To use analysis tools and methods that require writing to disk
• To boot a PC with the disk clone
• To reconstruct RAID arrays using proprietary controllers
Cloning disks is a straightforward process; it is basically acquisition in reverse. Be sure to exercise caution during the duplication process, because you could destroy data if the wrong device is mistakenly used as the destination.
Prepare a Clone Disk
The size (number of sectors) of the destination, or clone, disk must be equal to or larger than the original disk. Because cloning involves a sector-by-sector copy, the destination disk must have the capacity to hold all sectors of the original disk. In some cases, having a larger destination disk is not a problem, because the PC and OS will be limited to what was defined in the partition table and ignore the rest of the disk. In other cases, duplicating the exact number of sectors of the disk is important, as software and tools may have certain sector number expectations. Some examples include the analysis of GPT partitions (where a backup is stored at the end of a disk) and RAID systems, and the analysis of certain strains of malware that partly reside in the final sectors of the disk.
Securely wiping (with zeroed sectors) the destination disk before cloning is critical to remove traces of previous data and reduce the risk of contaminating the clone.
Use HPA to Replicate Sector Size
The HPA can be used to simulate the same number of sectors on the cloned disk as on the original.2 Setting the HPA on a cloned disk is beneficial if there is an expectation of the exact same number of sectors as the original. This is especially important when you’re reconstructing a RAID system with a proprietary controller or duplicating a disk with data expected in the final sectors of the disk.
NOTE
You should know the exact sector count of the original drive (this was determined when the drive was attached to the examination host) before setting the HPA with the hdparm tool.
In this example, the HPA on a 500GB disk is set to duplicate a 120GB drive. The original disk reports 234441648 512-byte sectors, which you can use to set the maximum visible sectors on the clone drive. Use the following commands:
# hdparm -N /dev/sdk
/dev/sdk:
max sectors = 976773168/976773168, HPA is disabled
# hdparm --yes-i-know-what-i-am-doing -N p234441648 /dev/sdk
/dev/sdk:
setting max visible sectors to 234441648 (permanent)
max sectors = 234441648/976773168, HPA is enabled
# hdparm -I /dev/sdk
...
LBA user addressable sectors: 234441648
...
device size with M = 1000*1000: 120034 MBytes (120 GB)
...
The first hdparm -N command shows the initial state with 500GB of accessible sectors and a disabled HPA. The second hdparm command requires the --yes-i-know-what-i-am-doing flag to configure dangerous settings, such as changing the sector size. The -N p234441648 specifies the number of sectors. It is prefixed with the letter p so the change is permanent across drive restarts. The final hdparm command checks whether the drive is now reporting the new sector size, which is now the same as that of the clone (120GB).
Write an Image File to a Clone Disk
To write an image to a new disk, use the same tools as when you acquire a disk but in reverse.
You can create a disk clone directly from the original suspect disk or from a previously acquired image file using the standard dd utilities. This example shows writing a raw image file to a clone disk using dc3dd:
# dc3dd if=image.raw of=/dev/sdk log=clone.log
dc3dd 7.2.641 started at 2016-01-16 01:41:44 +0100
compiled options:
command line: dc3dd if=image.raw of=/dev/sdk log=clone.log
sector size: 512 bytes (assumed)
120034123776 bytes ( 112 G ) copied ( 100% ), 663 s, 173 M/s
input results for file `image.raw':
234441648 sectors in
output results for device `/dev/sdk':
234441648 sectors out
dc3dd completed at 2016-01-16 01:52:48 +0100
Now you can verify the cryptographic hash against the original. If the sector count of the original and clone disks don’t match, either an error is generated (if the clone doesn’t have enough sectors to complete the duplication activity) or the hash values won’t match.
You can write a set of split images, compressed images, or encrypted images back to a clone disk without creating a regular image file first.
You can also use non-raw formats, such as AFF, EnCase EWF, or FTK SMART, to create clone disks. If a particular forensic tool cannot write an image back to a device, it might be able to pipe a raw image into a dd program, which can.
Image Transfer and Storage
Managing the transfer and long-term storage of forensic images safely and successfully requires some thought and planning. Often, situations occur in which you need to transfer an image to another party, such as another department within a large organization, an independent third-party forensics firm, or a law enforcement agency.
Several factors influence how transfers are completed, primarily the size of the data and the security of that data. In addition, depending on the organization, you might have to consider legal and regulatory requirements, as well as organizational policy requirements. For example, a global bank might not be able to transfer some disk images across national borders due to banking regulations prohibiting the transfer of client data outside the country.
Storing images for the long term also requires some thought and plan-ning. If an image will be reopened several years later, different staff, tools, and infrastructure could be in place. It is important to document what has been stored and maintain backward compatibility with the software used in the past.
Write to Removable Media
In the past, a stack of CDs or DVDs were used in the transfer of acquired drive images. With compression and splitting, using these media was a cheap and feasible transfer method. Today, 4TB and 6TB disks are common, and 10TB disks are already on the consumer market. Optical discs are no longer a practical transfer medium for today’s larger image sizes, even with compression. However, for completeness, several examples are shown here.
The following simple example shows burning a SquashFS file to CDROM. The mkisofs command is a symlink to genisoimage and is used to create the filesystem to be burned to a disk with the wodim tool.
# mkisofs -r -J maxtor-2gb-L905T60S.sfs | wodim dev=/dev/cdrom -
...
Starting to write CD/DVD at speed 48.0 in real TAO mode for single session.
...
97.45% done, estimate finish Sat Jan 16 02:36:16 2016
98.88% done, estimate finish Sat Jan 16 02:36:15 2016
...
348929 extents written (681 MB)
Track 01: Total bytes read/written: 714606592/714606592 (348929 sectors).
Here is a simple example of burning an image to a DVD. The growisofs tool began as a frontend to genisoimage and developed into a generalpurpose DVD and Blu-ray burning tool.
# growisofs -Z /dev/dvd -R -J ibm-4gb-J30J30K5215.sfs
Executing 'genisoimage -R -J ibm-4gb-J30J30K5215.sfs | builtin_dd of=/dev/dvd
obs=32k seek=0'
...
99.58% done, estimate finish Sat Jan 16 02:30:07 2016
99.98% done, estimate finish Sat Jan 16 02:30:07 2016
1240225 extents written (2422 MB)
...
The following example shows burning an image to a Blu-ray disc using the growisofs command:
# growisofs -allow-limited-size -Z /dev/dvd -R -J atlas-18gb.sfs
Executing 'genisoimage -allow-limited-size -R -J atlas-18gb.sfs | builtin_dd
of=/dev/dvd obs=32k seek=0'
...
This size can only be represented in the UDF filesystem.
...
/dev/dvd: pre-formatting blank BD-R for 24.8GB...
...
99.79% done, estimate finish Sat Jan 16 02:20:10 2016
99.98% done, estimate finish Sat Jan 16 02:20:10 2016
2525420 extents written (4932 MB)
...
Burning large images to optical discs under Linux can be quirky. Depending on the drive and the media used, unexpected or inconsistent behavior might be observed. Be sure to test the compatibility of drives and media before using them in a production environment.
Inexpensive Disks for Storage and Transfer
Creating a stack of optical discs from a set of split and compressed images requires a systematic process that can be time-consuming and error prone. The maximum capacity of Blu-ray discs is currently 100GB (BD-R XL). The cost per gigabyte of Blu-ray discs is more than the cost per gigabyte for cheap hard disks.
When you factor in human effort, risk of error, time required to burn data to optical discs, and cost per gigabtye, simply buying and using cheap hard disks becomes an attractive possibility for offline storage and transfer of forensic images.
Perform Large Network Transfers
Some of the issues concerning acquiring images via a network were already discussed in Chapter 6.
Large network transfers of acquired images may take long periods of time to complete and might saturate a corporate internal network or internet link. Dropped connections and timeouts might also occur during such long network transfers.
Transferring large forensic images between hosts on a network is not nearly as fast as transferring them between disks on a local machine. To put network bandwidth speeds into perspective, it helpful to compare them to common disk speeds. Table 7-1 compares two fast drive interfaces to two fast network interfaces.
Table 7-1: Transfer Speeds of Common Interfaces
Interface |
Speed |
NVME |
4000MB/s |
SATA III |
600MB/s |
Gigibit Ethernet |
125MB/s |
Fast Ethernet |
12.5MB/s |
For a more detailed comparison of different bandwidths, see the Wikipedia page at https://en.wikipedia.org/wiki/List_of_device_bit_rates.
Depending on the network bandwidth and the image size, the physical delivery of a storage container with the acquired subject image(s) could be faster than a network transfer.
But in some situations, secure network data transfer is necessary. Ensuring security during a transfer may have certain side effects, such as increased complexity or performance penalties. For network data transfer over untrusted or unknown networks, you can use several standard secure protocols, including SSL/TLS, ssh/sftp, or IPSEC.
The following simple example shows the transfer of a forensic image file using scp (secure copy) from the OpenSSH software package:
$ scp image.raw server1.company.com:/data/image.raw
image.raw 11% 1955MB 37.8MB/s 06:51 ETA
...
Here, an image file (image.raw) is copied over an insecure network to a specific data directory on a remote server. Using scp has several advantages, including strong encryption algorithms, built-in compression, real-time progress status, estimated completion time, and strong authentication possibilities. Most important for forensic investigators, scp allows for very large file sizes (assuming the software binary was compiled with 64-bit large file size support) and is easily capable of transferring large disk images.
If an image file is already encrypted, the underlying security might be less of a concern, and you can use traditional file transfer protocols, such as File Transfer Protocol (FTP) or Windows Server Message Block (SMB). However, when you’re using insecure and weakly authenticated protocols to transfer encrypted files, you should confirm the file integrity by verifying the cryptographic hash after the transfer is complete.
Secure Wiping and Data Disposal
Whenever you discard or reuse a disk, or you no longer need temporary files, take diligent steps to properly erase the contents. Several command line wiping and secure deletion methods are available for this purpose.
Dispose of Individual Files
In some situations, you’ll need to securely erase individual files but not the entire disk. For example, you might need to dispose of temporary acquired images on the acquisition host. In this scenario, using a file shredder/wiper is sensible because it reduces the risk of destroying other data on the examiner’s workstation.
The standard Linux coreutils package includes the shred tool, which attempts to securely delete files, as shown here:
$ shred -v confidential-case-notes.txt
shred: confidential-case-notes.txt: pass 1/3 (random)...
shred: confidential-case-notes.txt: pass 2/3 (random)...
shred: confidential-case-notes.txt: pass 3/3 (random)...
A software package called the secure_deletion toolkit provides a suite of tools that attempts to erase swap, cache, memory, inodes, and files. In particular, srm will wipe an individual file. Another command line tool called wipe also will erase files.
Wiping individual files is a complex process and depends on many variables related to the OS and filesystem used. There are no guarantees that all fragments of a wiped or shredded file have been completely destroyed.
Secure Wipe a Storage Device
Wiping entire physical drives involves writing zeros or random bytes to every user-accessible sector on the drive. This does not guarantee that all hidden or user-inaccessible areas of a physical drive are wiped. Sectors protected by an HPA or DCO (which can be removed), remapped bad sectors, overprovisioned areas of flash drives, and inaccessible system areas of a drive are not user accessible and therefore cannot be wiped with normal Linux tools. In spite of this, wiping all user-accessible sectors still provides a reasonable level of assurance, so this is a diligent method of data disposal for reusing drives within a lab.
Depending on a particular organization’s risk appetite and policies, data disposal might require one or more of the following:
• No wiping at all, just common reformatting
• Wiping all visible sectors with one pass of zeros
• Wiping all visible sectors with multiple passes of random data
• Physically degaussing drives
• Physically shredding drives
The disposal method required is a risk-based decision that depends on the sensitivity of the data on the drive, who might have an interest in recovering the data, cost and effort for recovery, and other factors.
This first example uses dc3dd to write zeros to each visible sector on the disk. The dc3dd tool has built-in wiping functionality, and you can use it as follows:
# dc3dd wipe=/dev/sdi
dc3dd 7.2.641 started at 2016-01-16 00:03:16 +0100
compiled options:
command line: dc3dd wipe=/dev/sdi
device size: 29305206 sectors (probed), 120,034,123,776 bytes
sector size: 4096 bytes (probed)
120034123776 bytes ( 112 G ) copied ( 100% ), 3619 s, 32 M/s
input results for pattern `00':
29305206 sectors in
output results for device `/dev/sdi':
29305206 sectors out
dc3dd completed at 2016-01-16 01:03:35 +0100
You could also complete this task using dd with /dev/zero as the input file, but dc3dd is faster.
To confirm the disk has been wiped with zeros, you can use dd to read the disk into a hexdump program:
# dd if=/dev/sda | hd
If the entire disk is full of zeros, the hexdump (hd) tool will display one line of zeros followed by an asterisk (*), indicating a repeated pattern across the entire disk.
0000000 000000 000000 000000 000000 000000 000000 000000 000000
*
If the result shows only zeros, the user-accessible sectors of the drive have been successfully wiped.
The following example uses the nwipe tool, a fork of Darik’s Boot and Nuke (dban) tool. The nwipe tool can specify different wiping standards, randomicity, and number of rounds, and it will provide a log file of the activity. The Canadian RCMP TSSIT OPS-II wipe version is shown here:3
# nwipe --autonuke --nogui --method=ops2 /dev/sdj
[2016/01/15 23:14:56] nwipe: notice: Opened entropy source '/dev/urandom'.
[2016/01/15 23:14:56] nwipe: info: Device '/dev/sdj' has sector size 512.
[2016/01/15 23:14:56] nwipe: warning: Changing '/dev/sdj' block size from 4096 to
512.
[2016/01/15 23:14:56] nwipe: info: Device '/dev/sdj' is size 160041885696.
[2016/01/15 23:14:56] nwipe: notice: Invoking method 'RCMP TSSIT OPS-II' on device
'/dev/sdj'.
[2016/01/15 23:14:56] nwipe: notice: Starting round 1 of 1 on device '/dev/sdj'.
[2016/01/15 23:14:56] nwipe: notice: Starting pass 1 of 8, round 1 of 1, on device
'/dev/sdj'.
[2016/01/15 23:57:00] nwipe: notice: 160041885696 bytes written to device
'/dev/sdj'.
[2016/01/15 23:57:00] nwipe: notice: Finished pass 1 of 8, round 1 of 1, on device
'/dev/sdj'.
...
When you’re wiping drives, ensure the DCO and HPA have been removed. With NVME drives, make sure each individual namespace has been wiped (most consumer NVME drives have only a single namespace).
Issue ATA Security Erase Unit Commands
The ATA standard specifies a security erase command that you can issue directly to a drive to wipe a disk. The ATA SECURITY ERASE UNIT command will write zeros to all user accessible sectors of the disk. The EXTENDED SECURITY ERASE command will write a predefined pattern (defined by the drive manufacturer) instead of zeros.
Running hdparm displays the capabilities and status of security on the drive. Also provided is the estimated time needed to securely erase the drive, as shown here:
# hdparm -I /dev/sdh
...
device size with M = 1000*1000: 500107 MBytes (500 GB)
...
Security:
Master password revision code = 7
supported
enabled
not locked
not frozen
not expired: security count
supported: enhanced erase
Security level high
60min for SECURITY ERASE UNIT. 60min for ENHANCED SECURITY ERASE UNIT.
Some drives will reject the erase command if you don’t explicitly set a password first. In the following example, a Western Digital drive was used, and the password was first set to dummy before the --security-erase command was accepted:
# hdparm --security-erase dummy /dev/sdh
security_password="dummy"
/dev/sdh:
Issuing SECURITY_ERASE command, password="dummy", user=user
The drive has now been securely wiped and can be reused. If a drive requires setting a password, don’t forget to disable the password after the security erase has completed.
Destroy Encrypted Disk Keys
You can securely destroy encrypted disks and filesystems by destroying all known copies of the encryption key. If the key was generated on a secure device such as a smartcard, a TPM, or an Opal drive, then only one copy of the key will exist. If a drive or filesystem was provisioned in an enterprise environment, there might be backup or escrow copies of the key for recovery purposes.
Key-wiping procedures for OS-based encrypted drives, such as Microsoft BitLocker, Apple FileVault, Linux LUKS/dm-crypt, or TrueCrypt variants, require detailed knowledge of where the keys are stored. Keys might be password/passphrase protected and stored in a file or in a certain block on the drive. They might also be stored in a key file elsewhere. If it’s not possible to locate and securely destroy all copies of a private key, the alternative is to wipe the disk with the full drive-wiping method described in a previous section.
Typically, secure external USB thumb drives have a factory reset function for lost passwords. This can be used to destroy the key and hence the contents of the drive. For example, you can reset the Corsair Padlock2 thumb drive by holding down both the KEY and 0/1 buttons for three seconds, followed by entering 911 to reset the key and destroy the drive contents. On iStorage datashur drives, hold down both the KEY and 2 buttons for three seconds and then enter 999 to reset the key.
Destroying the contents of Opal SED drives is also instantaneous and simply involves destroying the encryption key on the drive by entering the Physical Security ID (PSID). The PSID usually has a QR code on the physical cover of the drive that you can scan instead of typing it in by hand. You cannot get the PSID by querying the drive with ATA commands; it’s only visible on the cover of the physical drive.
The sedutil-cli command has a special option for irrevocably resetting the drive key using the PSID:
# time sedutil-cli --yesIreallywanttoERASEALLmydatausingthePSID
3HTEWZB0TVOLH2MZU8F7LCFD28U7GJPG /dev/sdi
- 22:21:13.738 INFO: revertTper completed successfully
real 0m0.541s
user 0m0.000s
sys 0m0.000s
The encryption key in the drive is now reset, and the data is effectively destroyed. The disk is factory reset, unlocked, and can be reused. The time needed to destroy the data on this 120GB drive was half a second.
Closing Thoughts
In this chapter, you learned a variety of techniques for managing forensic images, including the use of compression with common Linux tools and built-in compression with forensic formats. You saw more examples of the SquashFS compressed filesystem and the sfsimage script for managing forensic evidence containers. I demonstrated splitting and reassembling images, duplicating drives, and converting between image formats. You also learned how to verify hashes, signatures, and timestamps and how to protect images with encryption during network transfer and storage. Finally, I showed the secure disposal of forensic image files and drives.