Table of Contents for
Testable JavaScript
 Testable JavaScript
Published by
O'Reilly Media, Inc., 2013
Testable JavaScript
Published by
O'Reilly Media, Inc., 2013
Chapter 2. Complexity
Complex: bad. Simple: good. We touched on this already, and it’s still true. We can measure complexity with some accuracy via static analysis. Measures such as JSLint, cyclomatic complexity, lines of code, and fan-in and fan-out are important. However, nothing measures complexity as accurately as showing your code to a coworker or colleague.
Code can be complex for a number of reasons, from the serious “this is a hairy algorithm” to the mundane “a JavaScript newbie wrote it and it’s nasty,” and everything in between. Analyzing the complexity of static code is a great starting point toward creating testable JavaScript.
Maintainable JavaScript is clear, consistent, and standards-based. Testable JavaScript is loosely coupled, short, and isolatable. The magic happens when your code is both maintainable and testable. Since you will spend about 50% of your time testing and debugging your code, which is significantly more time than you will spend coding it, you might as well make code maintenance as easy on yourself and others as possible.
Complexity is the bane of every software project. While some complexity is unavoidable, in many cases complexity can be avoided. Being able to recognize which parts of your application are complex, and understanding why, will allow you to reduce its overall complexity. As always, recognizing the problem is the first step toward fixing it.
It is also important to note that the algorithms your code relies on may be complex as well. In fact, typically these complex algorithms are what make your code unique and useful. If your core algorithms were not complex, someone probably would have already created your application. However, unavoidable (in fact, beneficial) algorithm complexity is no excuse for writing complicated code. Although the details, and perhaps the code, surrounding your algorithm may be complex, of course there is a lot more to your application than some core algorithms.
Code Size
As code size grows, code complexity increases and the number of people who understand the entire system shrinks. As the number of modules increases, integration testing becomes increasingly difficult and the number of module interaction permutations grows. It is not surprising, therefore, that the number-one indicator of bugs/bug potential is code size. The more code you have, the greater the chance it will have bugs in it. The total amount of code necessary for your project may not change, but the number of statements in a method can. The amount of code in each file is also changeable. Large methods are difficult to test and maintain, so make more small ones. In an ideal world, functions have no side effects and their return value(s) (if any) are completely dependent on their parameters. Code rarely gets to live in that world, but it is something to keep in mind while writing code, along with “how am I going to test this thing?”
One method that can keep functions minimally sized is command query separation. Commands are functions that do something; queries are functions that return something. In this world, commands are setters and queries are getters. Commands are tested using mocks and queries are tested using stubs (more on this in Chapter 4). Keeping these worlds separate, along with enhancing testability, can provide great scalability returns by ensuring that reads are separated from writes. Here is an example of command query separation using Node.js:
function configure(values) {
    var fs = require('fs')
        , config = { docRoot: '/somewhere' }
        , key
        , stat
    ;

    for (key in values) {
        config[key] = values[key];
    }

    try {
        stat = fs.statSync(config.docRoot);
        if (!stat.isDirectory()) {
            throw new Error('Is not valid');
        }
    } catch(e) {
        console.log("** " + config.docRoot +
          " does not exist or is not a directory!! **");
        return;
    }

    // ... check other values ...
    return config;
}
Let’s take a quick look at some test code for this function. In Chapter 4 we will discuss the syntax of these tests in greater detail, so for now we’ll just look at the flow:
describe("configure tests", function() {
    it("undef if docRoot does not exist", function() {
        expect(configure({ docRoot: '/xxx' })).toBeUndefined();
    });

    it("not undef if docRoot does exist", function() {
        expect(configure({ docRoot: '/tmp' })).not.toBeUndefined();
    });

    it("adds values to config hash", function() {
        var config = configure({ docRoot: '/tmp', zany: 'crazy' });
        expect(config).not.toBeUndefined();
        expect(config.zany).toEqual('crazy');
        expect(config.docRoot).toEqual('/tmp');
    });

    it("verifies value1 good...", function() {
    });

    it("verifies value1 bad...", function() {
    });

    // ... many more validation tests with multiple expects...
});
This function is doing too much. After setting default configuration
values, it goes on to check the validity of those values; in fact, the
function under test goes on to check five more values. The method is large
and each check is completely independent of the previous checks. Further,
all of the validation logic for each value is wrapped up in this single
function and it is impossible to validate a value in isolation. Testing
this beast requires many tests for each possible value for each
configuration value. Similarly, this function requires many unit tests,
with all of the validation tests wrapped up inside the unit tests for the
basic working of the function itself. Of course, over time more and more
configuration values will be added, so this is only going to get
increasingly ugly. Also, swallowing the thrown error in the try/catch
block renders the try/catch block useless. Finally, the return value
is confusing: either it is undefined if any value did not validate, or it
is the entire valid hash. And let’s not forget the side effects of the
console.log statements—but we will get
to that later.
Breaking this function into several pieces is the solution. Here is one approach:
function configure(values) {
    var config = { docRoot: '/somewhere' }
        , key
    ;

    for (key in values) {
        config[key] = values[key];
    }

    return config;
}

function validateDocRoot(config) {
    var fs = require('fs')
        , stat
    ;

    stat = fs.statSync(config.docRoot);
    if (!stat.isDirectory()) {
        throw new Error('Is not valid');
    }
}

function validateSomethingElse(config) { ... }
Here, we split up the setting of the values (query, a return value) with a set of validation functions (commands, no return; possible errors thrown). Breaking this function into two smaller functions makes our unit tests more focused and more flexible.
We can now write separate, isolatable unit tests for each validation function instead of having them all within the larger “configure” unit tests:
describe("validate value1", function() {
    it("accepts the correct value", function() {
        // some expects
    });

    it("rejects the incorrect value", function() {
        // some expects
    });
});
This is a great step toward testability, as the validation functions can now be tested in isolation without being wrapped up and hidden within the more general “configure” tests. However, separating setters from the validation now makes it possible to avoid validation entirely. While it may be desirable to do this, usually it is not. Here is where command query separation can break down—we do not want the side effect of setting the value without validating it simultaneously. Although separate validation functions are a good thing for testing, we need to ensure that they are called.
The next iteration might look like this:
function configure(values) {
    var config = { docRoot: '/somewhere' };
    for (var key in values) {
        config[key] = values[key];
    }

    validateDocRoot(config);
    validateSomethingElse(config);
    ...

    return config;
}
This new configuration function will either return a valid config object or throw an error. All of the
validation functions can be tested separately from the configure function itself.
The last bit of niceness would be to link each key in the config object to its validator function and keep
the entire hash in one central location:
var fields {
    docRoot: { validator: validateDocRoot, default: '/somewhere' }
    , somethingElse: { validator: validateSomethingElse }
};

function configure(values) {
    var config = {};
    for (var key in fields) {
        if (typeof values[key] !== 'undefined') {
            fields[key].validator(values[key]);
            config[key] = values[key];
        } else {
            config[key] = fields[key].default;
        }
    }

    return config;
}
This is a great compromise. The validator functions are available separately for easier testing, they will all get called when new values are set, and all data regarding the keys is stored in one central location.
As an aside, there still is a problem. What is to stop someone from trying the following?
config.docRoot = '/does/not/exist';
Our validator function will not run, and now all bets are off. For
objects, there is a great solution: use the new ECMAScript 5 Object
methods. They allow object property creation with built-in validators,
getters, setters, and more, and all are very testable:
var obj = { realRoot : '/somewhere' };
Object.defineProperty(obj, 'docRoot',
    {
        enumerable: true
        , set: function(value) {
            validateDocRoot(value); this.realRoot = value; }
    }
);
Now the following:
config.docRoot = '/does/not/exist';
will run the set function, which
calls the validate function, which will
throw an exception if that path does not exist, so there is no escaping
the validation.
But this is weird. This assignment statement might now throw an
exception and will need to be wrapped in a try/catch
block. Even if you get rid of the throw, what do you now set config.docRoot to if validation fails?
Regardless of what you set it to, the outcome will be unexpected. And
unexpected outcomes spell trouble. Plus, the weirdness of the internal and
external names of docRoot versus
realRoot is confusing.
A better solution is to use private properties with public getters and setters. This keeps the properties private but everything else public, including the validator, for testability:
var Obj = (function() {
    return function() {
        var docRoot = '/somewhere';
        this.validateDocRoot = function(val) {
            // validation logic - throw Error if not OK
        };
        this.setDocRoot = function(val) {
            this.validateDocRoot(val);
            docRoot = val;
        };
        this.getDocRoot = function() {
            return docRoot;
        };
    };
}());
Now access to the docRoot
property is only possible through our API, which forces validation on
writes. Use it like so:
var myObject = new Obj();
try {
    myObject.setDocRoot('/somewhere/else');
} catch(e) {
    // something wrong with my new doc root
    // old value of docRoot still there
}
// all is OK
console.log(myObject.getDocRoot());
The setter is now wrapped in a try/catch
block, which is more expected than wrapping an assignment in a try/catch
block, so it looks sane.
But there is one more issue we can address—what about this?
var myObject = new Obj();
myObject.docRoot = '/somewhere/wrong';

// and then later...
var dR = myObject.docRoot;
Gah! Of course, none of the methods in the API will know about or
use this spurious docRoot field created
erroneously by the user. Fortunately, there is a very easy fix:
var Obj = (function() {
    return function() {
        var docRoot = '/somewhere';
        this.validateDocRoot = function(val) {
            // validation logic - throw Exception if not OK
        };
        this.setDocRoot = function(val) {
            this.validateDocRoot(val);
            docRoot = val;
        };
        this.getDocRoot = function() {
            return docRoot;
        };
        Object.preventExtensions(this)
    };
}());
Using Object.preventExensions
will throw a TypeError if anyone tries
to add a property to the object. The result: no more spurious properties.
This is very handy for all of your objects, especially if
you access properties directly. The interpreter will now catch any
mistyped/added property names by throwing a TypeError.
This code also nicely encapsulates command query separation with a
setter/getter/validator, all separate and each testable in isolation. The
validation functions could be made private, but to what end? It is best to
keep them public, not only so that they can be tested more easily, but
also because production code might want to verify whether a value is a
legitimate docRoot value or not without
having to explicitly set it on the object.
Here is the very clean test code—short, sweet, isolatable, and semantic:
describe("validate docRoot", function() {
    var config = new Obj();

    it("throw if docRoot does not exist", function() {
        expect(config.validateDocRoot.bind(config, '/xxx')).toThrow();
    });

    it("not throw if docRoot does exist", function() {
        expect(config.validateDocRoot.bind(config, '/tmp')).not.toThrow();
    });
});
Command query separation is not the only game in town and is not always feasible, but it is often a good starting point. Code size can be managed in a number of different ways, although breaking up code along command query lines plays to one of JavaScript’s great strengths: eventing. We will see how to use this to our advantage later in this chapter.
JSLint
While JSLint does not measure complexity directly, it does force you to know what your code is doing. This decreases complexity and ensures that you do not use any overly complicated or error-prone constructs. Simply put, it is a measure of code sanity. With inspiration from the original “lint” for C, JSLint analyzes code for bad style, syntax, and semantics. It detects the bad parts[3] of your code.
Refactoring bad code and replacing it with good code is the essence of testable JavaScript. Here is an example:
function sum(a, b) {
    return
        a+b;
}
That example was simple enough. Let’s run it through JSLint:
Error:
    Problem at line 2 character 5: Missing 'use strict' statement.
return
    Problem at line 2 character 11: Expected ';' and instead saw 'a'.
return
    Problem at line 3 character 8: Unreachable 'a' after 'return'.
a+b;
    Problem at line 3 character 8: Expected 'a' at column 5,
not column 8.
a+b;
    Problem at line 3 character 9: Missing space between 'a' and '+'.
a+b;
    Problem at line 3 character 10: Missing space between '+' and 'b'.
a+b;
    Problem at line 3 character 10: Expected an assignment or
function call and instead saw an expression.
a+b;
Wow! Four lines of mostly nothing code generated seven JSLint
errors! What is wrong? Besides a missing use
strict statement, the biggest problem is the carriage return
character after the return. Due to
semicolon insertion, JavaScript will return undefined from this function. JSLint has caught
this error, and is complaining about other whitespace issues in this
function.
Not only is whitespace relevant for readability, but in this case it also causes an error that is very hard to track down. Use whitespace sanely, as JSLint requires; you cannot test what you cannot read and understand. Code readability is the fundamental step toward testable code. Programs are written for other programmers to maintain, enhance, and test. It is critically important that your code is readable. JSLint provides a good measure of readability (and sanity).
Here is the corrected code:
function sum(a, b) {
    return a + b;
}
Let’s look at one more seemingly innocuous snippet:
for (var i = 0; i < a.length; i++)
    a[i] = i*i;
This time JSLint cannot even parse the entire chunk, and only gets this far:
Error:
    Problem at line 1 character 6: Move 'var' declarations to the top
of the function.
for (var i = 0; i < a.length; i++)
    Problem at line 1 character 6: Stopping. (33% scanned).
The first issue is the var
declaration in the for loop. JavaScript
variables are all either global- or function-scoped. Declaring a variable
in a for loop does
not declare that variable for only the for loop. The variable is available inside the
function that contains the for loop. By
using this construct, you have just created a variable named i that is available anywhere throughout the
enclosing function. This is what JSLint is telling us about moving the
declaration to the top of the function. By writing the code this way, you
are confusing yourself and, even worse, the next programmer who maintains
this code.
While this is not mission-critical, you should get out of the habit of declaring variables anywhere other than at the beginning of a function. JavaScript variables are function-scoped, so be proud that you understand this key differentiator between JavaScript and other common languages! Move the declaration to the top of the enclosing function, where it makes sense.
OK, after we’ve moved the declaration up, JSLint now says the following:
Error:
    Problem at line 2 character 28: Unexpected '++'.
for (i = 0; i < a.length; i++)
    Problem at line 3 character 5: Expected exactly one space between
 ')' and 'a'.
a[i] = i*i;
    Problem at line 3 character 5: Expected '{' and instead saw 'a'.
a[i] = i*i;
    Problem at line 3 character 13: Missing space between 'i' and '*'.
a[i] = i*i;
    Problem at line 3 character 14: Missing space between '*' and 'i'.
a[i] = i*i;
JSLint is displeased with ++. The
prefix and postfix ++ and -- operators can be confusing. This may be their
least problematic form of usage and represents a very common programming
idiom, so perhaps JSLint is being a bit harsh here, but these operators are a holdover from C/C++ pointer arithmetic and
are unnecessary in JavaScript, so be wary of them. In cases when these
operators can cause confusion, be explicit about their use; otherwise, you
are probably OK. The Big Picture is that you must ensure that your code is
readable and understandable by others, so as usual, do not get too cute or
optimize prematurely.
JSLint also wants braces around all loops, so put braces around all your loops. Not only will the one line in your loop probably expand to more than one line in the future and trip someone up in the process, but also some static analysis tools (e.g., minifiers, code coverage generators, other static analysis tools, etc.) can get confused without braces around loops. Do everyone (including yourself) a favor, include them. The extra two bytes of “cost” this will incur are far outweighed by the readability of the resultant code.
Here is the JSLint-approved version of the preceding code:
for (i = 0; i < a.length; i = i + 1) {
    a[i] = i * i;
}
What is especially troubling about the original code is that there are no bugs in it! It will compile and run just fine, and will do what it was intended to do. But programs are written for other programmers, and the latent confusion and poor readability of the original code will become a liability as the codebase grows and the code is maintained by people other than the original author (or is maintained by the original author six months after he wrote it, when the intent is no longer fresh in his mind).
Rather than going through all of JSLint’s settings and exhortations, I’ll direct you to the JSLint website, where you can read about JSLint and its capabilities. Another good source of information is Crockford’s JavaScript: The Good Parts, which provides details on “good” versus “bad” JavaScript syntactic constructs. JSLint and Crockford’s book are great first steps toward testable JavaScript. JSLint can be a bit prescriptive for some; if you have a good reason to feel very strongly against what JSLint proposes and can articulate those feelings clearly to members of your group, check out JSHint, a fork of JSLint that is more flexible and forgiving than JSLint. JSLint can also read configuration settings in comments at the top of your JavaScript files, so feel free to tweak those. I recommend using a standard set of JSLint configuration options throughout your application.
As a quick aside, there is a larger problem here that JSLint cannot
resolve: use of a for loop is not
idiomatic JavaScript. Using the tools provided by the language clears up
just about all the issues JSLint had with the original loop:
a.forEach(function (val, index) {
    a[index] = index * index;
});
Use of the forEach method ensures
that the array value and index are scoped properly to just the function callback. Equally important is the fact
that this construct shows future maintainers of your code that you know
what you are doing and are comfortable with idiomatic JavaScript.
Although this immediately fixes all the issues we had with the
original code, at the time of this writing the forEach method unfortunately is not available
natively in all browsers—but not to worry! Adding it is simple; do not try
to write it yourself, but rather utilize Mozilla’s standards-based implementation. The
definition of the algorithm is here. It is important to note that the
callback function receives three arguments: the value, the current index,
and the object itself, not just the array element. While you can write a
barebones version of forEach in fewer
lines, do not be tempted to do this; use the standards-based version. You
can easily add this snippet of code to the top of your JavaScript to
ensure that forEach is available in
every context. Not surprisingly, IE 8 and earlier do not have native
forEach support. If you are sure your
code will not run in those environments or if you are writing server-side
JavaScript, you are good to go.
Unfortunately, adding this snippet of code will increase the size of the code that must be downloaded and parsed. However, after minification it compresses down to 467 bytes and will only be fully executed once on IE 8 and earlier.
This seems to be a good compromise, as the standard forEach method has a function-scoped index variable, so no attempted variable
declaration in the initializer is even possible. Plus, we don’t have to
deal with the ++ post-conditional, and
the braces are right there for you. Using the “good” features of
JavaScript and programming idiomatically always leads to cleaner and more
testable code.
In Chapter 8 we will integrate JSLint into our build to keep a close eye on our code.
Cyclomatic Complexity
Cyclomatic complexity is a measure of the number of independent paths through your code. Put another way, it is the minimum number of unit tests you will need to write to exercise all of your code. Let’s look at an example:
function sum(a, b) {
    if (typeof(a) !== typeof(b)) {
        throw new Error("Cannot sum different types!");
    } else {
        return a + b;
    }
}
This method has a cyclomatic complexity of 2. This means you will need to write two unit tests to test each branch and get 100% code coverage.
Note
In the preceding code, I used the !== operator even though typeof is guaranteed to return a string. While
not strictly necessary, in this case using !== and ===
is a good habit, and you should use them everywhere. The JSLint website
and Crockford’s JavaScript: The Good Parts provide
more details. Using strict equality will help you to more quickly
uncover bugs in your code.
Generating the cyclomatic complexity of your code is simple using a command-line tool such as jsmeter. However, determining what is optimal in terms of cyclomatic complexity is not so simple. For instance, in his paper “A Complexity Measure”, Thomas J. McCabe postulated that no method should have a cyclomatic complexity value greater than 10. Meanwhile, a study that you can read about states that cyclomatic complexity and bug probability will not correlate until cyclomatic complexity reaches a value of 25 or more. So why try to keep the cyclomatic complexity value less than 10? Ten is not a magic number, but rather a reasonable one, so while the correlation between code and bugs may not begin until cyclomatic complexity reaches 25, for general sanity and maintainability purposes keeping this number lower is a good idea. To be clear, code with a cyclomatic complexity value of 25 is very complex. Regardless of the number of bugs in that code currently, editing a method with that much complexity is almost assured to cause a bug. Table 2-1 shows how Aivosto.com measures “bad fix” probabilities as cyclomatic complexity increases.
Cyclomatic complexity | Bad fix probability |
1–10 | 5% |
20–30 | 20% |
> 50 | 40% |
Approaching 100 | 60% |
An interesting tidbit is apparent from this table: when fixing relatively simple code there is a 5% chance you will introduce a new bug. That is significant! The “bad fix” probability increases fourfold as cyclomatic complexity gets above 20. I have never seen a function with cyclomatic complexity reaching 50, let alone 100. If you see cyclomatic complexity approaching either of those numbers, you should scream and run for the hills.
Also, the number of unit tests necessary to test such a beast is prohibitive. As McCabe notes in the aforementioned paper, functions with complexities greater than 16 were also the least reliable.
Reading someone else’s code is the most reliable indicator of code quality and correctness (more on that later). The reader must keep track of what all the branches are doing while going over the code. Now, many scientists have conducted studies on short-term memory; the most famous of these postulates that humans have a working memory of “7 plus or minus 2” items (a.k.a. Miller’s Law),[4] although more recent research suggests the number is lower. However, for a professional programmer reading code, that cyclomatic complexity value can be higher for shorter periods of time, but it doesn’t have to be. Exactly what battle are you fighting to keep your code more complex? Keep it simple!
Large cyclomatic complexity values are usually due to a lot of
if/then/else
statements (or switch statements without
breaks for each case, but you are not using those as
they are not one of the “good parts,” right?). The simplest refactoring fix, then, is to break the method into smaller
methods or to use a lookup table. Here is an example of the former:
function doSomething(a) {
    if (a === 'x') {
        doX();
    } else if (a === 'y') {
        doY();
    } else {
        doZ();
    }
}
This can be refactored using a lookup table:
function doSomething(a) {
    var lookup = { x: doX, y: doY }, def = doZ;
    lookup[a] ? lookup[a]() : def();
}
Note that by refactoring the conditional into a lookup table we have not decreased the number of unit tests that are necessary. For methods with a high cyclomatic complexity value, decomposing them into multiple smaller methods is preferable. Instead of a lot of unit tests for a single function, now you will have a lot of unit tests for a lot of smaller functions, which is significantly more maintainable.
Adding cyclomatic complexity checks as a precommit hook or a step in your build process is easy. Just be sure that you actually look at the output and act on it accordingly! For a preexisting project, break down the most complex methods and objects first, but not before writing unit tests! Certainly, the number-one rule of refactoring is “do no harm,” and you cannot be sure you are obeying this rule unless you have tests to verify the “before” and “after” versions of your code.
jscheckstyle is a very handy tool for computing the cyclomatic complexity of each of your functions and methods. In Chapter 8 we will integrate jscheckstyle with the Jenkins tool to flag code that may be overly complex and ripe for refactoring, but let’s sneak a quick peek at it now.
The following code will install the jscheckstyle package:
% sudo npm install jscheckstyle -gNow let’s run it against any JavaScript source file:
findresult-lm:~ trostler$ jscheckstyle firefox.js
The "sys" module is now called "util". It should have a similar
interface.
jscheckstyle results - firefox.js


┏━━━━━━━━━━━━━━━┳━━━━━━━━━━━┳━━━━┳┓
┃ Line   ┃ Function           ┃ Length ┃ Args ┃ Complex...
┣━━━━━━━━━━━━━━━╋━━━━━━━━━━━╋━━━━╋┫
┃ 8      ┃ doSeleniumStuff    ┃ 20     ┃ 0    ┃ 1
┣━━━━━━━━━━━━━━━╋━━━━━━━━━━━╋━━━━╋┫
┃ 26     ┃ anonymous          ┃ 1      ┃ 0    ┃ 1
┣━━━━━━━━━━━━━━━━╋━━━━━━━━━━╋━━━━╋┫
┃ 31     ┃ startCapture       ┃ 17     ┃ 1    ┃ 1
┣━━━━━━━━━━━━━━━━╋━━━━━━━━━━╋━━━━╋┫
┃ 39     ┃ anonymous          ┃ 6      ┃ 1    ┃ 1
┣━━━━━━━━━━━━━━━╋━━━━━━━━━━━╋━━━━╋┫
┃ 40     ┃ anonymous          ┃ 4      ┃ 1    ┃ 1
┣━━━━━━━━━━━━━━━╋━━━━━━━━━━━╋━━━━╋┫
┃ 44     ┃ anonymous          ┃ 3      ┃ 1    ┃ 1
┣━━━━━━━━━━━━━━━╋━━━━━━━━━━━╋━━━━╋┫
┃ 49     ┃ doWS               ┃ 40     ┃ 2    ┃ 2
┣━━━━━━━━━━━━━━━╋━━━━━━━━━━━╋━━━━╋┫
┃ 62     ┃ ws.onerror         ┃ 4      ┃ 1    ┃ 1
┣━━━━━━━━━━━━━━━╋━━━━━━━━━━━╋━━━━╋┫
┃ 67     ┃ ws.onopen          ┃ 4      ┃ 1    ┃ 1
┣━━━━━━━━━━━━━━━╋━━━━━━━━━━━╋━━━━╋┫
┃ 72     ┃ ws.onmessage       ┃ 6      ┃ 1    ┃ 2
┣━━━━━━━━━━━━━━━╋━━━━━━━━━━━╋━━━━╋┫
┃ 79     ┃ ws.onclose         ┃ 9      ┃ 1    ┃ 1
┗━━━━━━━━━━━━━━━━━━━━━━━━━━━┻━━━━╋┛
This outputs a list of all the functions present in the file, the number of lines in each function, the number of arguments for each function, and the cyclomatic complexity of each function. Note that the number of lines includes any blank lines and comments, so this measure is more relative than the other values, which are absolute.
Also note that in this output the bulk of these functions are contained
within other functions—in fact, there are only three top-level functions
in this file. The anonymous function on
line 26 is within the doSeleniumStuff
function. There are three anonymous
functions within the startCapture
function, and the doWS function
contains the four ws.* functions. This
tool unfortunately does not clearly capture the hierarchy of functions
within a file, so beware of it.
jscheckstyle can also output JSON and HTML using the —json and
—html command-line options.
A utility such as jscheckstyle provides you with an at-a-glance view of your underlying source code. While there are no absolutes when it comes to coding practice and style, cyclomatic complexity has been proven to be a valid measure of code complexity, and you would do well to understand its implications.
Reuse
The best way to reduce code size is to decrease the amount of code you write. The theory is that using third-party (either external or internal) code that is production-ready and maintained by someone else takes a good chunk of responsibility away from you. Almost everyone uses third-party code, open source or not, in their programs. Jeffrey Poulin, while at Loral Federal Systems, estimated that up to 85% of code in a program is not application-specific; only 15% of the code in a program makes it unique. In his 1995 paper “Domain Analysis and Engineering: How Domain-Specific Frameworks Increase Software Reuse”, he says the following:
A typical application will consist of up to 20% general-purpose domain-independent software and up to another 65% of domain-dependent reusable software built specifically for that application domain. The remainder of the application will consist of custom software written exclusively for the application and having relatively little utility elsewhere.
He illustrates the three classes of software—application-specific, domain-specific, and domain-independent—as shown in Figure 2-1.
For JavaScript, the domain-independent code is the client-side framework such as YUI, or Node.js on the server side. The domain-specific software consists of other third-party modules you use in your application. You write the application-specific code.
Client-side JavaScript runs on many platforms (OS + browser combinations), and it would be insane for any web application to attempt to account for this. Using a good JavaScript framework is an absolute must in almost every circumstance. Frameworks such as YUI, Closure, and jQuery handle the bulk of the generic boilerplate code that makes application-specific code runnable across many platforms. Framework-provided façades give your code a consistent interface across browsers. Frameworks provide utilities, plug-ins, and add-ons that greatly reduce the size of your code. On the server side, Node.js uses the Node Package Manager tool (a.k.a. npm) to utilize modules uploaded to the npm registry (http://bit.ly/XUdvlF) in order to handle a large number of generic tasks.
Using event handling, a very basic and extremely important part of writing JavaScript, as an example, one can quickly see the dangers of not reusing code. While events are key to client-side JavaScript due to browser UIs, Node.js also makes extensive use of events and event callbacks. Yet there is nothing in the JavaScript language specification itself for handling events. These decisions were left up to the browser manufacturers, who were (and are) actively competing against one another. Not surprisingly, this led to fragmentation, until the World Wide Web Consortium (W3C) stepped in and attempted to standardize client-side JavaScript events. Having to handle event registration and handler discrepancies in each browser is painful and very error-prone. Using a JavaScript framework solves these browser incompatibility problems for free. There are varying levels of support for the ECMAScript5 standard across browsers (especially Internet Explorer before version 9), so your favorite new language feature may not be present in a significant percentage of run-time environments. Do not get stuck supporting only one particular browser when you can support almost any modern browser, again for free, using a third-party framework.
Node.js also has a growing number of third-party modules that you can use via npm. A quick look at the npm registry shows the large number of modules available. Of course, the quality of the modules varies, but if nothing else, you can see how others have solved a problem similar to (if not the same as) yours to get you started.
Beyond basic JavaScript frameworks, there are a very large number of components available for use. It is your duty to use available prior art before attempting to roll your own code. Concentrate on the 15% that makes your application unique, and “offshore” the grunt work to well-established third-party libraries.
Equally important as reusing other people’s code is reusing your own code. In the Fan-In section we will discuss how you can discover code of yours that is not being reused properly (we will continue that discussion in Chapter 8, when we cover the dupfind tool). The general rule of thumb is that if you find that you are writing a chunk of code twice, it is time to pull the code into its own function. Whatever “extra” time you spend making the code sharable will pay dividends in the future. If the same chunk of code is required in two places, it will only be a matter of time before it is required in three places, and so on. Be vigilant about duplicated code. Do not let it slide “this one time.” As always, an ounce of prevention is worth a pound of cure, especially when debugging software.
Fan-Out
Fan-out is a measure of the number of modules or objects your function directly or indirectly depends on. Fan-out (and fan-in) were first studied in 1981 by Sallie Henry and Dennis Kafura, who wrote about them in “Software Structure Metrics Based on Information Flow,” published in IEEE Transactions on Software Engineering. They postulated that 50% to 75% of the cost of software is due to maintenance, and they wanted to measure, as early as the design phase as possible, the complexity of software to be written. Building on previous work that demonstrated that greater complexity led to lower-quality software, they figured that if complexity could be measured and controlled while (or even before) the software was being built, everyone would win. They were familiar with McCabe’s work on measuring cyclomatic complexity and its relationship to software quality (published in 1976 and referenced earlier in this chapter) and other lexical analysis techniques, but they were convinced that they could get a better complexity measurement by measuring the underlying structure of the code instead of just counting tokens.
So, using information theory and analyzing flows between functions and modules, they cooked up a formula for a complexity measurement:
(fan_in * fan_out)2
They then calculated this value (and some variants) using the Unix OS and found a 98% correlation between it and “software changes” (i.e., bug fixes). To wit: the more complex a function or module measured by their formula, the more likely there were to be bugs in that function or module.
So, what the heck are fan-in and fan-out? Here is their definition of fan-out:
The fan-out of procedure A is the number of local flows from procedure A plus the number of data structures which procedure A updates.
In this definition, a local flow for A is counted as (using other methods B and C):
| 1 if A calls B |
| 2 if B calls A and A returns a value to B, which B subsequently utilizes |
| 3 if C calls both A and B, passing an output value from A to B |
So, adding all of those flows for function A, plus the number of global structures (external to A) that A updates, produces the fan-out for function A. Fan-in is defined similarly, as we will see shortly.
Calculating this value and the corresponding value for fan-in for all of your functions, multiplying those two numbers together, and squaring the result will give you another number that measures the complexity of a function.
Using this measure, Henry and Kafura note three problems inherent in highly complex code. First, high fan-in and fan-out numbers may indicate a function that is trying to do too much and should be broken up. Second, high fan-in and fan-out numbers can identify “stress points” in the system; maintaining these functions will be difficult as they touch many other parts of the system. And third, they cite inadequate refinement, which means the function needs to be refactored, because it is too big and is trying to do too much, or there is a missing layer of abstraction that is causing this function to have high fan-in and fan-out.
Building on function complexity measures, Henry and Kafura note that one can generate module complexity values, and from there one can measure the coupling between the modules themselves. Applying the lessons from the function level, one can determine which modules have high complexity and should be refactored or perhaps demonstrate that another layer of abstraction is necessary. They also found that typically the vast majority of a module’s complexity is due to a small number of functions (three!), regardless of the module’s size. So beware of the one “mongo” function that does way too much, while most of the other functions do very little!
Henry and Kafura also looked at function length (using lines of code) and found that only 28% of functions containing fewer than 20 lines of code had an error, whereas 78% of functions with more than 20 lines of code had errors. Keep it short and small, people!
Intuitively, it makes sense that functions with large fan-out are more problematic. JavaScript makes it very easy to declare and use global variables, but standards-based JavaScript tells us to not use the global space and instead to namespace everything locally. This helps to reduce fan-out by taking away part of the fan-out definition (“the number of data structures A updates”), but we still must account for our functions’ local flows.
You can inspect this easily by seeing how many foreign objects your
function requires. The following example uses YUI’s asynchronous require
mechanism to pull in the myModule chunk
of JavaScript code. A detailed discussion of this is available here; the main point to understand here
is that we are telling YUI about a dependency of our code, which YUI will
fetch for us. It will then execute our callback when the dependency has
been loaded:
YUI.use('myModule', function(Y) {
    var myModule = function() {
        this.a = new Y.A();
        this.b = new Y.B();
        this.c = new Y.C();
    };
    Y.MyModule = myModule;
}, { requires: [ 'a', 'b', 'c' ] });
The fan-out for the myModule
constructor is 3 (in this case, the objects are not even being used; they
are just being created and stored for future methods, but they are still
required here, so they count against the constructor’s fan-out). And this
is without the constructor being instantiated and used yet. Three is not a
bad number, but again that number will grow when an outside object
instantiates myModule and uses any
return value from any local myModule
method it calls. Fan-out is a measure of what you need to keep track of in
your head as you edit this method. It is a count of the external methods
and objects this method manipulates.
Regardless of whether we are counting local flows, Miller’s Law argues that trying to remember and track more than seven things is increasingly difficult. Later reanalysis has brought that number down to four.[5] The point is that there is no specific number that is a danger indicator, but when fan-out is greater than 7 (or even 4) it is time to look at what is going on and possibly refactor. Excessive fan-out belies other issues, namely tight coupling, which we will also investigate in this chapter.
High fan-out can be problematic for even more reasons: the code is more complex, making it harder to understand and therefore test; each direct dependent must be mocked or stubbed out during testing, creating testing complexity; and fan-out is indicative of tight coupling, which makes functions and modules overly brittle.
A strategy to tame fan-out without eventing involves creating an object that encapsulates some of the fanned-out modules, leaving the original function with the single dependency on that new module. This obviously makes more sense as the fan-out of the original function increases, especially if the newly factored-out module can be reused by other functions as well.
Consider the following code, which has a fan-out of at least 8:
YUI.use('myModule', function(Y) {
    var myModule = function() {
        this.a = new Y.A();
        this.b = new Y.B();
        this.c = new Y.C();
        this.d = new Y.D();
        this.e = new Y.E();
        this.f = new Y.F();
        this.g = new Y.G();
        this.h = new Y.H();
    };
    Y.MyModule = myModule;
}, { requires: [ 'a', 'b', 'c', 'd', 'e', 'f', 'g', 'h' ] });
Testing this thing is going to be problematic; it needs to be refactored. The idea is to pull out a subset of related modules into another module:
YUI.use('mySubModule', function(Y) {
    var mySubModule = function() {
        this.a = new Y.A();
        this.b = new Y.B();
        this.c = new Y.C();
        this.d = new Y.D();
    };
    mySubModule.prototype.getA = function() { return this.a; };
    mySubModule.prototype.getB = function() { return this.b; };
    mySubModule.prototype.getC = function() { return this.c; };
    mySubModule.prototype.getD = function() { return this.d; };
    Y.MySubModule = mySubModule;
}, { requires: [ 'a', 'b', 'c', 'd'] });

YUI.use('myModule', function(Y) {
    var myModule = function() {
        var sub = new Y.MySubModule();
        this.a = sub.getA();
        this.b = sub.getB();
        this.c = sub.getC();
        this.d = sub.getD();
        this.e = new Y.E();
        this.f = new Y.F();
        this.g = new Y.G();
        this.h = new Y.H();
    };
    Y.MyModule = myModule;
}, { requires: [ 'mySubModule', 'e', 'f', 'g', 'h' ] });
Here we have created a level of indirection between MyModule and modules a, b,
c, and d and reduced the fan-out by three, but has this
helped? Strangely, it has, a little. Even this brain-dead refactoring has
made our testing burden for MyModule
lighter. The total number of tests did increase a little because now
MySubModule must also be tested, but
the point is not to decrease the total amount of overall testing, but
instead to make it easier to test each module or function.
Clearly, this unsophisticated refactoring of MyModule to reduce its fan-out is not ideal. The
modules or objects that are refactored should in some way be related, and
the submodule they are refactored to should provide a more intelligent
interface to the underlying objects than just returning them whole cloth.
Using the façade pattern is really what is expected, wherein the
factored-out submodules are presented to the original module with a
simpler and more unified interface. Again, the total number of tests will
increase, but each piece will be easier to test in isolation. Here is a
quick example:
function makeChickenDinner(ingredients) {
    var chicken = new ChickenBreast()
        , oven  = new ConventionalOven()
        , mixer = new Mixer()
        , dish  = mixer.mix(chicken, ingredients)

    return oven.bake(dish, new FDegrees(350), new Timer("50 minutes"));
}

var dinner = makeChickenDinner(ingredients);
This function fans out like crazy. It creates
five external objects and calls two methods on two different objects. This
function is tightly coupled to five objects. Testing
it is difficult, as you will need to stub in all the objects and the
queries being made to them. Mocking the mixer’s mix method and the oven’s bake method will be difficult, as both return
values as well. Let’s see what a unit test for this function might look
like:
describe("test make dinner", function() {

    // Mocks
    Food = function(obj) {};
    Food.prototype.attr = {};
    MixedFood = function(args) {
        var obj = Object.create(Food.prototype);
        obj.attr.isMixed = true; return obj;
    };
    CookedFood = function(dish) {
        var obj = Object.create(Food.prototype);
        obj.attr.isCooked = true; return obj;
    };
    FDegrees = function(temp) { this.temp = temp };
    Meal = function(dish) { this.dish = dish };
    Timer = function(timeSpec) { this.timeSpec = timeSpec; };
    ChickenBreast = function() {
        var obj = Object.create(Food.prototype);
        obj.attr.isChicken = true; return obj;
    };
    ConventionalOven = function() {
        this.bake = function(dish, degrees, timer) {
            return new CookedFood(dish, degrees, timer);
      };
    };
    Mixer = function() {
        this.mix = function(chicken, ingredients) {
            return new MixedFood(chicken, ingredients);
      };
    };
    Ingredients = function(ings) { this.ings = ings; };
    // end Mocks

    it("cooked dinner", function() {
        this.addMatchers({
            toBeYummy: function(expected) {
                return this.actual.attr.isCooked
                && this.actual.attr.isMixed;
            }
        });

        var ingredients = new Ingredients('parsley', 'salt')
            , dinner = makeChickenDinner(ingredients)
        ;
        expect(dinner).toBeYummy();
    });
});
Wow, that is a lot of code! And what are we actually testing here?
We had to mock out all referenced objects and their referenced objects,
plus create a new Ingredients object to
execute the makeChickenDinner method,
which then instantiates and utilizes our mocked-up object hierarchies.
Mocking and replacing all of those other objects is a lot of work to just
unit-test a single method. The whole thing is problematic. Let’s refactor
it and make it testable.
This function requires five objects—ChickenBreast, ConventionalOven, Mixer, FDegrees, and Timer—and five is near the upper limit of
fan-out that is comfortable. Not only is the fan-out high, but also the
coupling is very tight for all of those objects. Coupling and fan-out
usually go hand in hand, but not always. We can reduce coupling via
injection or eventing, and we can reduce fan-out by using façades that
encompass multiple objects. We will investigate coupling more fully later
in this chapter.
The first façade that we can create involves the oven. Creating an oven, setting its temperature, and setting its timer are ripe for abstraction. Then we inject the façade to reduce the coupling, which leaves us with this:
function Cooker(oven) {
    this.oven = oven;
}
Cooker.prototype.bake = function(dish, deg, timer) {
    return this.oven.bake(dish, deg, timer);
};
Cooker.prototype.degrees_f = function(deg) {
    return new FDegrees(deg);
};
Cooker.prototype.timer = function(time) {
    return new Timer(time);
};

function makeChickenDinner(ingredients, cooker) {
    var chicken = new ChickenBreast()
        , mixer = new Mixer()
        , dish  = mixer.mix(chicken, ingredients)

    return cooker.bake(dish
      , cooker.degrees_f(350)
      , cooker.timer("50 minutes")
    );
}

var cooker = new Cooker(new ConventionalOven())
    , dinner = makeChickenDinner(ingredients, cooker);
makeChickenDinner now has two
tightly coupled dependencies, ChickenBreast and Mixer, and an injected façade to handle the
cooking chores. The façade does not expose the entire API of the oven,
degrees, or timer, just enough to get the job done. We have really just
spread the dependencies around more evenly, making each function easier to
test and less tightly coupled, with less fan-out.
Here is the new test code for our refactored method:
describe("test make dinner refactored", function() {

    // Mocks
    Food = function() {};
    Food.prototype.attr = {};
    MixedFood = function(args) {
        var obj = Object.create(Food.prototype);
        obj.attr.isMixed = true;
        return obj;
    };
    CookedFood = function(dish) {
        var obj = Object.create(Food.prototype);
        obj.attr.isCooked = true;
        return obj;
    };
    ChickenBreast = function() {
        var obj = Object.create(Food.prototype);
        obj.attr.isChicken = true;
        return obj;
    };
    Meal = function(dish) { this.dish = dish };
    Mixer = function() {
        this.mix = function(chicken, ingredients) {
        return new MixedFood(chicken, ingredients);
    };
  };
    Ingredients = function(ings) { this.ings = ings; };
    // end Mocks

    it("cooked dinner", function() {
            this.addMatchers({
                toBeYummy: function(expected) {
                return this.actual.attr.isCooked
                    && this.actual.attr.isMixed;
            }
        });

        var ingredients = new Ingredients('parsley', 'salt')
            , MockedCooker = function() {};

        // Local (to this test) mocked Cooker object that can actually
        //  do testing!
        MockedCooker.prototype = {
            bake: function(food, deg, timer) {
                expect(food.attr.isMixed).toBeTruthy();
                food.attr.isCooked = true;
                return food
                }
            , degrees_f: function(temp) { expect(temp).toEqual(350); }
            , timer: function(time) {
                expect(time).toEqual('50 minutes');
            }
        };

        var cooker = new MockedCooker()
            , dinner = makeChickenDinner(ingredients, cooker)
        ;

        expect(dinner).toBeYummy();
    });
});
This new test code got rid of several generically mocked-out objects
and replaced them with a local mock that is specific to this test and can
actually do some real testing using expects within the mock itself.
This is now much easier to test as the Cooker object does very little. We can go
further and inject FDegrees and
Timer instead of being tightly coupled
to them. And of course, we can also inject or create another façade for
Chicken and maybe Mixer—you get the idea. Here’s the ultimate
injected method:
function makeChickenDinner(ingredients, cooker, chicken, mixer) {
    var dish  = mixer.mix(chicken, ingredients);
    return cooker.bake(dish
      , cooker.degrees_f(350)
      , cooker.timer('50 minutes')
    );
}
Here are the dependencies we injected (we will discuss dependency injection fully in just a bit) and the corresponding code to test them:
describe("test make dinner injected", function() {
    it("cooked dinner", function() {
        this.addMatchers({
            toBeYummy: function(expected) {
                return this.actual.attr.isCooked
                    && this.actual.attr.isMixed;
            }
        });

        var ingredients = ['parsley', 'salt']
            , chicken = {}
            , mixer = {
                mix: function(chick, ings) {
                    expect(ingredients).toBe(ings);
                    expect(chicken).toBe(chick);
                    return { attr: { isMixed: true } };
                }
            }
            , MockedCooker = function() {}
        ;

        MockedCooker.prototype = {
            bake: function(food, deg, timer) {
               expect(food.attr.isMixed).toBeTruthy();
               food.attr.isCooked = true;
               return food
                }
            , degrees_f: function(temp) { expect(temp).toEqual(350); }
            , timer: function(time) {
                expect(time).toEqual('50 minutes');
            }
        };

        var cooker = new MockedCooker()
            , dinner = makeChickenDinner(ingredients, cooker
                         , chicken, mixer)
        ;

        expect(dinner).toBeYummy();
    });
});
All of the generic mocks are gone and the test code has full control over the mocks passed in, allowing much more extensive testing and flexibility.
When injecting and creating façades, it can become a game to see how far back you can pull object instantiation. As you head down that road, you run directly into the ultimate decoupling of event-based architectures (the subject of the next chapter).
Some may argue that abstracting functionality away behind façades makes code more complex, but that is not true. What we have done here is created smaller, bite-sized pieces of code that are significantly more testable and maintainable than the original example.
Fan-In
Most of what we discussed about fan-out also applies to fan-in, but not everything. It turns out that a large fan-in can be a very good thing. Think about common elements of an application: logging, utility routines, authentication and authorization checks, and so on. It is good for those functions to be called by all the other modules in the application. You do not want to have multiple logging functions being called by various pieces of code—they should all be calling the same logging function. That is code reuse, and it is a very good thing.
Fan-in can be a good measure of the reuse of common functions in code, and the more the merrier. In fact, if a common function has very low fan-in, you should ensure that there is no duplicated code somewhere else, which hinders code reuse.
In some cases, though, high fan-in is a bad thing. Uncommon and nonutility functions should have low fan-in. High(er) levels of code abstraction should also have low fan-in (ideally, a fan-in of 0 or 1). These high-level pieces of code are not meant to be used by lots of other pieces of code; typically they are meant to be used by just one other piece, usually to get them started once and that is it.
Here is the “official” fan-in definition:
The fan-in of procedure A is the number of local flows into procedure A plus the number of data structures from which procedure A retrieves information.
You get the idea: watch out for a piece of code that has large fan-in and large fan-out, as this is not desirable due to the high complexity and high amount of coupling that result.
Fan-in helps you identify code reuse (or not). Code reuse is good; scattered logging and debugging functions across your code are bad. Learn to centralize shared functions (and modules) and use them!
Coupling
While fan-out counts the number of dependent modules and objects required for a module or function, coupling is concerned with how those modules are put together. Submodules may reduce the absolute fan-out count, but they do not reduce the amount of coupling between the original module and the original dependent. The original module still requires the dependent; it is just being delivered via indirection instead of explicitly.
Some metrics try to capture coupling in a single number. These metrics are based on the six levels of coupling defined by Norman Fenton and Shari Lawrence Pfleeger in Software Metrics: A Rigorous & Practical Approach, 2nd Edition (Course Technology) way back in 1996. Each level is given a score—the higher the score, the tighter the coupling. We will discuss the six levels (from tightest to loosest) in the following subsections.
Content Coupling
Content coupling, the tightest form of coupling, involves actually calling
methods or functions on the external object or directly changing its
state by editing a property of the external object. Any one of the
following examples is a type of content coupling with the external
object O:
O.property = 'blah'; // Changing O's state directly

// Changing O's internals
O.method = function() { /* something else */ };

// Changing all Os!
O.prototype.method = function() { /* switcheroo */ };
All of these statements content-couple this object to O. This kind of coupling scores a 5.
Common Coupling
Slightly lower on the coupling spectrum is common coupling. Your object is commonly coupled to another object if both objects share a global variable:
var Global = 'global';
Function A() { Global = 'A'; };
Function B() { Global = 'B'; };
Here objects A and B are commonly coupled. This scores a
4.
Control Coupling
Next up is control coupling, a slightly looser form of coupling than common
coupling. This type of coupling controls how the external object acts
based on a flag or parameter setting. For example, creating a singleton
abstract factory at the beginning of your code and passing in an
env flag telling it how to act is a
form of control coupling:
var absFactory = new AbstractFactory({ env: 'TEST' });This scores a big fat 3.
Stamp Coupling
Stamp coupling is passing a record to an external object that only uses part of the record, like so:
// This object is stamp coupled to O
O.makeBread( { type: wheat, size: 99, name: 'foo' } );

// Elsewhere within the definition of O:
O.prototype.makeBread = function(args) {
    return new Bread(args.type, args.size);
}
Here we pass a record to the makeBread function, but that function only
uses two of the three properties within the record. This is stamp
coupling. Stamp coupling scores a 2.
Data Coupling
The loosest coupling of them all is data coupling. This type of coupling occurs when objects pass messages to one another, with no transfer of control to the external object. We will investigate this much further in Chapter 3. Data coupling scores a measly 1.
No Coupling
The last form of coupling (and my personal favorite), with absolutely zero coupling whatsoever between two objects, is the famed “no coupling.” No coupling scores a perfect 0.
Instantiation
While not formally a part of the coupling jargon, the act of instantiating a
nonsingleton global object is also a very tight form of coupling, closer
to content coupling than common coupling. Using new or Object.create creates a one-way, tightly coupled relationship between the
objects. What the creator does with that object determines whether the
relationship goes both ways.
Instantiating an object makes your code responsible for that object’s life cycle. Specifically, it has just been created by your code, and your code must now also be responsible for destroying it. While it may fall out of scope when the enclosing function ends or closes, any resources and dependencies the object requires can still be using memory—or even be executing. Instantiating an object foists responsibilities on the creator of which you must be aware. Certainly, the fewer objects your code instantiates, the clearer your conscience will be. Minimizing object instantiations minimizes code complexity; this is a nice target to aim for. If you find that you are creating a lot of objects, it is time to step back and rethink your architecture.
Coupling Metrics
The point of naming and scoring each type of coupling, besides giving us all a common frame of reference, is to generate metrics based on coupling found in functions, objects, and modules. An early metric calculates the coupling between two modules or objects by simply adding up the number of interconnections between the modules or objects and throwing in the maximum coupling score.[6] Other metrics try to measure the coupling inherent in a single module.[7] A matrix has also been created between all modules in an application to view the overall coupling between each of them.[8]
The point here is that a number or set of numbers can be derived to determine how tightly or loosely coupled a system or set of modules is. This implies that someone “above” the system is trying to determine its state. For our purposes, we are the programmers looking at this stuff every day. Once we know what to look for, we can find it and refactor if necessary. Again, code inspections and code reviews are an excellent way to find code coupling, instead of relying on a tool to root out coupling metrics.
Coupling in the Real World
Let’s look at some examples of coupling in JavaScript. The best way to understand loose coupling is to take a look at tight coupling:
function setTable() {
    var cloth = new TableCloth()
        , dishes = new Dishes();
    this.placeTableCloth(cloth);
    this.placeDishes(dishes);
}
This helper method, presumably belonging to a Table class, is trying to set the table nicely.
However, this method is tightly coupled to both the
TableCloth and Dishes objects. Creating new objects within
methods creates a tight coupling.
This method is not isolatable due to the tight coupling—when I’m
ready to test it I also need the TableCloth and Dishes objects. Unit tests really want to test
the setTable method in isolation from
external dependencies, but this code makes that difficult.
As we saw in the cooking example earlier, globally mocking out the
TableCloth and Dishes objects is painful. This makes testing
more difficult, although it is certainly possible given JavaScript’s
dynamic nature. Mocks and/or stubs can be dynamically injected to handle
this, as we will see later. However, maintenance-wise this situation is
less than ideal.
We can borrow some ideas from our statically typed language friends and use injection to loosen the coupling, like so:
function setTable(cloth, dishes) {
    this.placeTableCloth(cloth);
    this.placeDishes(dishes);
}
Now testing becomes much simpler, as our test code can just pass in mocks or stubs directly to the method. Our method is now much easier to isolate, and therefore much easier to test.
However, in some instances this approach will just push the problem farther up the stack. Something, somewhere is going to have to instantiate the objects we need. Won’t those methods now be tightly coupled?
In general, we want to instantiate objects as high as possible in the call stack. Here is how this method would be called in an application:
function dinnerParty(guests) {
    var table = new Table()
        , invitations = new Invitations()
        , ingredients = new Ingredients()
        , chef = new Chef()
        , staff = new Staff()
        , cloth = new FancyTableClothWithFringes()
        , dishes = new ChinaWithBlueBorders()
        , dinner;

        invitations.invite(guests);
        table.setTable(cloth, dishes);
        dinner = chef.cook(ingredients);
        staff.serve(dinner);
}
This issue here, of course, is what if we wanted to have a more casual dinner party and use a paper tablecloth and paper plates?
Ideally, all our main objects would be created up front at the top of our application, but this is not always possible. So, we can borrow another pattern from our statically typed brethren: factories.
Factories allow us to instantiate objects lower in the call stack
but still remain loosely coupled. Instead of an explicit dependency on an
actual object, we now only have a dependency on a Factory. The Factory has dependencies on the objects it
creates; however, for testing we introduce a Factory that creates mocked or stubbed objects,
not the real ones. This leads us to the end of this line of thinking:
abstract factories.
Let’s start with just a regular Factory:
var TableClothFactory = {
    getTableCloth: function(color) {
        return Object.create(TableCloth,
              { color: { value: color }});
    }
};
I have parameterized the tablecloth’s color in our Factory—the parameter list to get a new instance
mirrors the constructor’s parameter list. Using this Factory is straightforward:
var tc = TableClothFactory.getTableCloth('purple');For testing, we do not want an actual TableCloth object. We are trying to test our
code in isolation. We really just want a mock or a stub instead:
var TableClothTestFactory = {
    getTableCloth: function(color) {
        return Y.Mock(); // Or whatever you want
    };
Here I’m using YUI’s excellent mocking framework. We will
investigate this deeper in Chapter 4. The code
looks almost exactly the same to get a mocked version of a TableCloth object:
var tc = TableClothTestFactory.getTableCloth('purple');If only there were some
way to reconcile these two factories so that our code always
does the right thing... Of course, there is: all we need to do is create a
factory to generate the appropriate TableCloth factory, and then we’ll really have
something!
var AbstractTableClothFactory = {
    getFactory: function(kind) {
        if (kind !== 'TEST') {
            return TableClothFactory;
        } else {
            return TableClothTestFactory;
        }
    }
};
All we did here was parameterize a Factory so that it returns an actual Factory that in turn returns the kind of
TableCloth object requested. This
monster is called an abstract factory.
For testing, we just want a mocked object; otherwise, we want the real
deal. Here is how we use it in a test:
var tcFactory = AbstractTableClothFactory.getFactory('TEST')
    , tc = tcFactory.getTableCloth('purple');
        // We just got a Mock'ed object!
Now we have a way to instantiate objects without being tightly coupled to them. We have moved from very tight content coupling to much looser control coupling (that’s two less on the coupling scale; woo!). Testing now becomes much simpler, as we can create versions of factories that return mocked versions of objects instead of the “real” ones, which enables us to test just our code, without having to worry about all of our code’s dependencies.
Testing Coupled Code
It is interesting to note the type and amount of testing required to test the various levels of coupled code. Not too surprisingly, the more tightly coupled the code is, the more resources are required to test it. Let’s go through the levels.
Content-coupled code is difficult to test because unit testing wants to test code in isolation, but by definition content-coupled code is tightly coupled with at least one other object external to it. You need the entire set of unit-testing tricks here to try to test this code; typically you must use both mocked objects and stubs to replicate the environment within which this code expects to run. Due to the tight coupling, integration testing is also necessary to ensure that the objects work together correctly.
Commonly coupled code is easier to unit-test as the shared global variable can be easily mocked or stubbed out and examined to ensure that the object under test is reading, writing, and responding to that variable correctly.
Control-coupled code requires mocking out the controlled external object and verifying it is controlled correctly, which is easy enough to accomplish using a mock object.
Stamp-coupled code is easily unit-tested by mocking out the external object and verifying the passed parameter was correct.
Data-coupled code and noncoupled code are very easily tested through unit testing. Very little or nothing needs to be mocked or stubbed out, and the method can be tested directly.
Dependency Injection
We touched on injection only briefly earlier, so let’s take a closer look at it now. Dependencies make code complex. They make building more difficult, testing more difficult, and debugging more difficult; pretty much everything you would like to be simpler, dependencies make harder. Managing your code’s dependencies becomes an increasingly larger time sink as your application grows.
Injection and mocking are loosely related. Injection deals with constructing and injecting objects into your code, and mocking is replacing objects or method calls with canned dummy versions for testing. You could (and should!) use an injector to insert mocked versions of objects into your code for testing. But you should not use a mocking framework in production code!
Factoring out dependencies or manually injecting them into constructors or method calls helps to reduce code complexity, but it also adds some overhead: if an object’s dependencies are to be injected, another object is now responsible for correctly constructing that object. Haven’t we just pushed the problem back another layer? Yes, we have! The buck must stop somewhere, and that place is typically at the beginning of your application or test. Maps of object construction are dynamically defined up front, and this allows any object to be easily swapped out for another. Whether for testing or for upgrading an object, this is a very nice property to have.
A dependency injector can construct and inject fully formed objects into our code for us. Of course, an injector must be told how to actually construct these objects, and later, when you actually want an instance of that object, the injector will hand you one. There is no “magic” (well, perhaps a little); the injector can only construct objects you specify. Injectors get fancy by providing lots of different ways to describe exactly how your objects are constructed, but do not get lost in the weeds: you tell the injector how to construct an object (or have the injector pass control to your code to construct an object).
There is one more bit that injectors handle along with object construction: scope. Scope informs the injector whether to create a new instance or reuse an existing one. You tell the injector what scope each object should have, and when your code asks for an object of that type the injector will do the right thing (either create a new instance or reuse an existing one).
In Java this is all accomplished by subclasses and interfaces—the
dependent needs an instance of an interface or superclass, and the
injector supplies a concrete instantiation of an implementing class or
specific subclass. These types can be (mostly) checked at compile time,
and injectors can guard against passing in null objects. While JavaScript
does have the instanceof operator, it
has neither type checking nor the notion of implementing an interface
type. So, can we use dependency injection in JavaScript? Of course!
We know that instantiating dependent objects in constructors (or elsewhere within an object) tightly couples the dependency, which makes testing more difficult—so let the injector do it.
Let’s take a brief look at knit, a Google Guice-like injector for JavaScript. We know this code is “bad”:
var SpaceShuttle = function() {
    this.mainEngine = new SpaceShuttleMainEngine();
    this.boosterEngine1 = new SpaceShuttleSolidRocketBooster();
    this.boosterEngine2 = new SpaceShuttleSolidRocketBooster();
    this.arm = new ShuttleRemoteManipulatorSystem();
};
With all of those objects being instantiated within the constructor,
how can we test a SpaceShuttle without
its real engines and arm? The first step is to make this constructor
injectable:
var SpaceShuttle = function(mainEngine, b1, b2, arm) {
    this.mainEngine = mainEngine;
    this.boosterEngine1 = b1;
    this.boosterEngine2 = b2;
    this.arm = arm;
};
Now we can use knit to define how we want our
objects constructed:
knit = require('knit');
knit.config(function (bind) {
    bind('MainEngine').to(SpaceShuttleMainEngine).is("construtor");
    bind('BoosterEngine1').to(SpaceShuttleSolidRocketBooster)
      .is("constructor");
    bind('BoosterEngine2').to(SpaceShuttleSolidRocketBooster)
      .is("constructor");
    bind('Arm').to(ShuttleRemoteManipulatorSystem).is("constructor");
    bind('ShuttleDiscovery').to(SpaceShuttle).is("constructor");
    bind('ShuttleEndeavor').to(SpaceShuttle).is("constructor");
    bind('Pad').to(new LaunchPad()).is("singleton");
});
Here, the SpaceShuttleMainEngine,
SpaceShuttleSolidRocketBooster, and
ShuttleRemoteManipulatorSystem objects
are defined elsewhere, like so:
var SpaceShuttleMainEngine = function() {
    ...
};
Now whenever a MainEngine is
requested, knit will fill it in:
var SpaceShuttle = function(MainEngine
    , BoosterEngine1
    , BoosterEngine2
    , Arm) {
    this.mainEngine = MainEngine;
    ...
}
So the entire SpaceShuttle object
with all of its dependencies is available within the knit.inject method:
knit.inject(function(ShuttleDiscovery, ShuttleEndeavor, Pad) {
    ShuttleDiscovery.blastOff(Pad);
    ShuttleEndeavor.blastOff(Pad);
});
knit has recursively figured out all of SpaceShuttle’s dependencies and constructed
SpaceShuttle objects for us. Specifying
Pad as a singleton ensures that any
request for a Pad object will always
return that one instantiation.
Suppose as time passes, Mexico creates an even more awesome ShuttleRemoteManipulatorSystem than Canada’s.
Switching to use that arm instead is trivial:
bind('Arm').to(MexicanShuttleRemoteManipulatorSystem).is("constructor");Now all objects that require an Arm will get Mexico’s version instead of
Canada’s without changing any other code.
Besides swapping out objects easily for newer or different versions, an injector framework can also inject mock or test objects into your application by changing the bindings.
Testing a SpaceShuttle blastoff
without actually blasting it off is a nice option that an injector allows
easily by simply changing the bindings.
The AngularJS framework also makes heavy use of dependency injection via regular expressions. Besides easing testing, controllers and other pieces of functionality can specify which objects they need to do their work (by function parameter lists) and the correct objects will be injected.
Dependency injection really shines the larger an application grows, and since all nontrivial applications will grow, utilizing dependency injection from the beginning gives your code a great head start.
Comments
Testable JavaScript has a comment block before every function or method that will be unit-tested. How else could you (or anyone else) possibly know what and how to test? While maintaining code, seeing comment blocks before functions (especially public functions) keeps the maintainer informed. You may think that having tests is more important and perhaps replaces the need for correct comments, but I disagree. Writing effective comments and keeping them up to date is an integral part of a developer’s job. Reading code is a more straightforward way to understand it, as opposed to relying on (or reading) the tests for it. While comments for methods are the most important, any comments referencing hard-to-understand code from programmer to programmer are invaluable. It is important that your comments explain both why and how the method exists and what exactly it does. Further, by taking advantage of structured comments, you can easily transform all of your hard work into readable HTML for all to browse.
Comments and tests should not be an either-or proposition. You are a professional programmer, so you can write tests and maintain comment blocks for, at minimum, all public methods. You should only use comments within methods to explain something that is not clear from the surrounding context. If you comment within a function, it is extremely important that you keep those comments up to date! It is far more preferable to have no comments in your code than to have incorrect comments.
YUIDoc
YUIDoc is a Node.js package available via npm. Installation is easy:
% npm -g install yuidocjsThe yuidoc executable is now
available to transform all of your beloved comments into pretty HTML. In
this section, I will discuss version 0.3.28, the latest version
available at the time of this writing.
YUIDoc comments follow the Javadoc convention of starting with
/** and ending with */. In fact, you can run YUIDoc on any
language whose block comment tokens are /* and */.
YUIDoc provides seven primary tags. Each comment block must contain one and only one of these primary tags; the exhaustive list of tags is available here.
Ideally, you should be able to write unit tests using only the function or method YUIDoc.
Generating YUIDoc from the yuidoc command-line
tool is simple. YUIDoc, however, wants to work with directories, so
unlike with JSDoc (discussed next), you are not able to generate one
JavaScript file’s worth of documentation. But unless you are debugging
the YUIDoc in your code, that is rarely done anyway.
A typical command line looks like this:
% yuidoc -o yuidoc -c src/yuidoc.json srcwhere yuidoc is the name of the
output directory where all the HTML will go and src is the root of your JavaScript files to
recurse over to generate the documentation. The yuidoc.doc configuration file can just be an
empty JSON object for our purposes:
% cat src/yuidoc.json
{}
Here is a JavaScript file with YUIDoc notation:
/**
 * Provides some mathematical functions
 *
 * @class Math
 **/

/**
 * This function accepts two operands, 'a' and 'b' and returns
 * their sum (or concatenation if they are strings)
 *
 * @method sum
 * @param {Number or String} a first operand
 * @param {Number or String} b second operand
 * @return {Number or String} The 'summed' value
 */
exports.sum = function(a, b) { return a + b };

/**
 * This function accepts two operands, 'a' and 'b' and returns
 * their product
 *
 * @method product
 * @param {Number} a first operand
 * @param {Number} b second operand
 * @return {Number} The product
 */
exports.mult = function(a, b) { return a * b };
Running this JavaScript through YUIDoc generates a page similar to Figure 2-2.
This looks just like the API documentation for YUI3. I think YUIDoc generates nicer templates (with searching!) and its tag library is more JavaScript-friendly than that of JSDoc. Of course, feel free to play with both and decide which one works best for your project.
JSDoc
Similar to YUIDoc is JSDoc. It utilizes a similar but larger set of tags.
Google’s Closure Compiler leverages JSDoc tags when minifying, optimizing, and compiling your code, which is nice as you can kill two birds with one stone.
JSDoc is a little goofy to get set up. It is a Java program that
relies on the locations of its JAR file and a set of template files.
After downloading and unzipping the package, it is easiest to set two
environment variables, JSDOCDIR and
JSDOCTEMPLATEDIR. JSDOCDIR is set to be the directory where
jsrun.jar exists, which is in the
jsdoc-toolkit directory after the
bundle has been unzipped. For starters—and maybe forever, unless you
want to create your own HTML templates for JSDoc to use—JSDOCTEMPLATEDIR should point to $JSDOCDIR/templates/jsdoc to use the default
templates provided by JSDoc.
Once you have set those two environment variables, you can use the jsrun.sh shell script provided by the distribution, located in $JSDOCDIR. So, your command line to JSDoc a file looks like this:
% /bin/sh $JSDOCDIR/jsrun.sh -d=<output dir> <JavaScript file>This will generate a set of HTML files and place them into
<output dir>. In this JSDoc-friendly
JavaScript file, note the subtle differences between the JSDoc tags and
the YUIDoc tags shown earlier:
/**
 * This function accepts two operands, 'a' and 'b' and returns
 * their sum (or concatenation if they are strings)
 *
 * @name sum
 * @function
 * @param {Number or String} a first operand
 * @param {Number or String} b second operand
 * @returns {Number or String} The 'summed' value
 */
exports.sum = function(a, b) { return a + b };

/**
 * This function accepts two operands, 'a' and 'b' and returns
 * their product
 *
 * @name product
 * @function
 * @param {Number} a first operand
 * @param {Number} b second operand
 * @returns {Number} The product
 */
exports.mult = function(a, b) { return a * b };
When run through JSDoc, like so:
/bin/sh $JSDOCDIR/jsrun.sh -d=jsdoc mySum.jsthe code will output several HTML files into the jsdoc directory. The most interesting of the HTML looks like Figure 2-3.
It’s very cute, but the tags are the HTML output and are not as zesty as in YUIDoc. Your mileage will vary.
Docco/Rocco
According to the product website, “Docco is a quick-and-dirty, hundred-line-long, literate-programming-style documentation generator”—quite a mouthful indeed. Docco is the parent of a family of programs that all do the same thing: pull out Markdown-styled comments from your source code and HTML-ize the comments in the left column matched with the syntax-highlighted code in the right column. This is best understood with an example; for instance, the Docco website is generated by Docco.
Rocco is a Docco clone written in Ruby that, strangely enough, does a smarter job of formatting JavaScript code than Docco (which is written in CoffeeScript). The Rocco website is (surprisingly) generated by Rocco.
The biggest hurdle to using Rocco is installing Ruby to run it if Ruby is not already available. The next dependency is Pygments, a syntax highlighting utility written in Python. Rocco will attempt to use the Pygments web service if it is not installed locally, but it is doubtful that you’ll want your code shipped across the wire to be syntax-highlighted using the Pygments web service. Pygments depends on Python, so once Python is installed Pygments can be installed like so:
% sudo easy_install PygmentsRocco also needs a Markdown parser; take rdiscount for a spin:
% sudo gem install rdiscountFinally, install Rocco:
% sudo gem install roccoNow simply run Rocco on your code:
% rocco myJavascript.jsBy default, a file of the same name but with an .html extension will be created in the
current directory (you can change this with the -o option to specify another directory where
the HTML file should be saved).
All comments are stripped from the source and placed on the left side of the resultant web page, lined up with the code it relates to on the right side of the generated HTML.
So, this basic JavaScript:
/**
 * This function accepts two operands, 'a' and 'b' and returns their
 * sum (or concatenation if they are strings)
 */
exports.sum = function(a, b) { return a + b };

/**
 * This function accepts two operands, 'a' and 'b' and
 * returns their product
 */
exports.mult = function(a, b) { return a * b };
generates the HTML page shown in Figure 2-4.
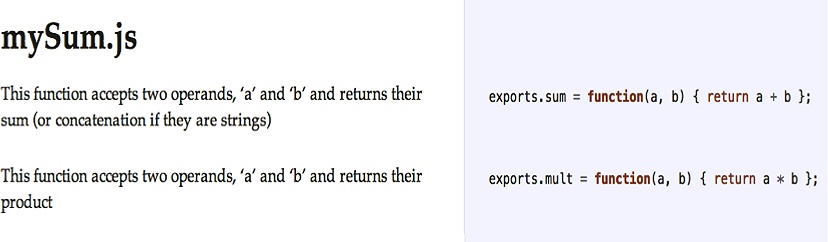
Pretty snazzy! Beyond YUIDoc or JSDoc, Rocco and friends provide a different view of your code.
The Human Test
In the end, the most relevant test of complexity is your coworker. Show her your code. What is her reaction? Can she understand it? Follow it? Comprehend what it does and why? This informal code review process is a great gateway to a more formal review. Formalized software inspections, studied by Fagan, have been shown to find 60% to 90% of all program defects. That is an incredible percentage. The Fagan inspection process is a very formalized, repeatable, data-collecting code review process that I will not discuss in detail here; however, it’s worth mentioning that no other method even comes close to finding such a large percentage of bugs. When you are really ready to get serious about finding bugs, Fagan inspections are as serious as it gets.
Back in not-quite-so-serious-ville, informal code reviews or walkthroughs are also excellent tools to gauge complexity, maintainability, and testability. In six months you probably will not be looking at the same chunk of code you are looking at now, but someone else will be. Even if you are, you will likely not remember what you did and why you did it.
This is where well-commented code comes to the fore. Up until now we have discussed what makes code complex and how to reduce that complexity. But there is no such thing as zero complexity. Writing software is hard. Writing good software is even harder. Douglas Crockford believes that writing software is the most complicated thing humans do. You can help to simplify your code by commenting it heavily.
An Enerjy study found that two of the three leading metrics for “fault-prone” code are based on comments, namely comment blocks at the beginning of functions. Missing and incorrect comment blocks before functions are the leading indicators of fault-prone code.
Comments (correct comments!) require a full understanding of the code. More comments require more understanding. How difficult is it to have a full understanding of a given function? When you’re writing a function for the first time is clearly the time when you’re most likely to have a full understanding of what the function is doing. That is the time to comment the code. Try commenting the function even before you start writing it, as you would write a test before writing a function using test-driven development (TDD). Going forward, any changes also should be commented. Even if you never see this code again, someone else will—and there will likely be bugs in your code that she will have to fix.
Comments also make code more testable. They are signposts of what and how to test. Comments force you to understand your code. They act as a mini self-review of your code. This is especially important when it is unclear what the range of expected return values for a function may be, and what those values may mean. Commented function blocks before function definitions must make clear exactly what the function expects in its parameter list and what is returned, as well as what the return values mean. Ideally, such a function has no side effects, but if it does they must be explicitly stated in the comment block. This demonstrates that you realize this function has side effects, and what exactly those side effects are.
Interestingly, if statements
without braces are also a leading indicator of fault-prone-ness in source
code, so remember to always use braces!
Complexity really boils down to the difficulty someone else will have reading your code. Twenty minutes is the upper bound of typical adult concentration. If it takes a coworker more than 20 minutes to understand, in general, the gist of your code—not the entire application, but just a method or object abstracted from the whole—something is wrong. The onus is on you to make your code understandable. Some complexity is unavoidable; rarely is a lot of complexity unavoidable.
Code size works the same way. Your code size will grow over time. Minimizing code size and maximizing understandability does not mean limiting the amount of code in your application. It does mean limiting the amount of code in each function, module, and file. You can still have lots of functions, modules, and files; that’s OK. As long as their individual sizes are reasonable and they are understandable, complexity is kept at a minimum.
Therefore, it is imperative that you understand the code you are writing. You can demonstrate your understanding by providing comments, especially when you know you are breaking a “rule.” If you cannot explain in comments why you are doing what you are doing, certainly no one else will understand it either. When someone else begins to maintain your code, bad bugs may crop up, and it’s likely that it will be scrapped and rewritten by the new maintainer. What a waste! Write it right the first time!
Recap
Code complexity comes in many shapes and sizes. Most complexity can be measured; however, the most important measurements cannot. Static code analysis will make large strides in cleaning up your code and make it more testable. Using well-understood patterns from static languages and standards-based JavaScript will help keep your code testable, and therefore maintainable.
Dependencies play a large role in code complexity. They must be constructed, destroyed, understood, and maintained. Instantiating dependencies is a dangerous business. If the process can be offloaded to an injector, all the better.
Writing good documentation in code comments is also crucial for making complex code more approachable. Generating YUIDoc, JSDoc, or Rocco-style documentation automatically with each build will greatly ease code complexity. Of course, writing comments initially is barely half the battle. Keeping the comments up to date is equally if not more important.
However, there is no substitute for Fagan inspections and code reviews in terms of finding bugs and ensuring that your code is not overly complex.
There are no magic bullets reducing the complexity of your code. The first step is to understand and realize where the complexity lies. There are many industry-standard books about modeling and refactoring code and the various patterns that can be used to factor and refactor your code—however, there are two “bibles” in the field: Refactoring: Improving the Design of Existing Code, by Martin Fowler (Addison-Wesley), and Code Complete: A Practical Handbook of Software Construction, by Steve McConnell (Microsoft Press). All of the dirty details are available in these two books, and therefore, both are very highly recommended. It is rarely possible to completely eliminate complexity, but it can be minimized, and in cases where it cannot, there must be robust and correct comments explaining in clear terms exactly what is going on. Of course, having tests for that code is also especially important.
[3] Douglas Crockford defines and explains these bad parts in JavaScript: The Good Parts (O’Reilly).
[4] Miller, G.A. 1956. “The Magical Number Seven, Plus or Minus Two: Some Limits on Our Capacity for Processing Information.” Psychological Review 63(2): pp. 81–97.
[5] Cowan, Nelson. 2001. “The Magical Number 4 in Short-Term Memory: A Reconsideration of Mental Storage Capacity.” Behavioral and Brain Sciences 24(1): pp. 87–114; discussion, pp. 114–185.
[6] Fenton, Norman, and Austin Melton. 1990. “Deriving Structurally Based Software Measures.” Journal of Systems and Software 12(3): pp. 177–187.
[7] Dhama, Harpal. 1995. “Quantitative Models of Cohesion and Coupling in Software.” Journal of Systems and Software 29(1): pp. 65–74.
[8] Alghamdi, Jarallah. 2007. “Measuring Software Coupling.” Proceedings of the 6th WSEAS International Conference on Software Engineering, Parallel and Distributed Systems, Corfu Island, Greece, February 16–19, 2007. Available online.