Table of Contents for
Learning React Native, 2nd Edition
 Learning React Native, 2nd Edition
Published by
O'Reilly Media, Inc., 2017
Learning React Native, 2nd Edition
Published by
O'Reilly Media, Inc., 2017
- nav
- Cover
- Learning React Native
- Learning React Native
- Preface
- 1. What Is React Native?
- 2. Working with React Native
- 3. Building Your First Application
- 4. Components for Mobile
- 5. Styles
- 6. Platform APIs
- 7. Modules and Native Code
- 8. Platform-Specific Code
- 9. Debugging and Developer Tools
- 10. Navigation and Structure in Larger Applications
- 11. State Management in Larger Applications
- Conclusion
- A. Modern JavaScript Syntax
- B. Deploying Your Application
- C. Working with Expo Applications
- Index
- About the Author
- Colophon
Chapter 7. Modules and Native Code
Project with Native Code Required
The examples in this section apply only to projects created with react-native-init and ejected projects created with create-react-native-app. For more information, see Appendix C.
In Chapter 6, we looked at some of the APIs that React Native exposes for interacting with the host platform. Because support for those APIs is built into React Native, they’re quite easy to use. What happens when we want to use an API that isn’t supported by React Native?
In this chapter, we’ll look at how to install modules written by members of the React Native community using npm. We’ll also take a closer look at one such module, react-native-video, and learn how the RCTBridgeModule can allow you to add JavaScript interfaces to existing Objective-C APIs. We’ll also look at importing pure JavaScript libraries into your project, and how to manage dependencies.
Though we will be looking at some Objective-C and Java code this chapter, don’t be alarmed! We’ll be taking it slowly. A full introduction to mobile development for iOS and Android is beyond the scope of this book, but we’ll walk through some examples together.
Installing JavaScript Libraries with npm
Before we discuss how native modules work, first we should cover how to install external dependencies in general. React Native uses npm to manage dependencies. npm is the package manager for Node.js, but the npm registry includes packages for all sorts of JavaScript projects, not just Node. npm uses a file called package.json to store metadata about your project, including the list of dependencies.
Let’s start by creating a fresh project:
react-nativeinitDepends
After creating a new project, your package.json will look something like Example 7-1.
Example 7-1. Depends/package.json
{"name":"Depends","version":"0.0.1","private":true,"scripts":{"start":"node node_modules/react-native/local-cli/cli.js start","test":"jest"},"dependencies":{"react":"16.0.0-alpha.12","react-native":"0.45.1"},"devDependencies":{"babel-jest":"20.0.3","babel-preset-react-native":"2.0.0","jest":"20.0.4","react-test-renderer":"16.0.0-alpha.12"},"jest":{"preset":"react-native"}}
Note that for now, the only top-level dependencies in your project are react and react-native. Let’s add another dependency!
The lodash library provides a number of helpful utility functions, like a shuffle function for arrays. We install it with the --save flag to indicate that it should be added to our list of dependencies:
npminstall--savelodash
Now your dependencies in package.json should be updated:
"dependencies":{"lodash":"^4.17.4","react":"16.0.0-alpha.12","react-native":"0.45.1"}
If you want to use lodash in your React Native application, you can now import it by name:
import_from"lodash";
Let’s use lodash to print a random number:
import_from"lodash";console.warn("Random number: "+_.random(0,5));
It works! But what about other modules? Can you include arbitrary packages by using npm install?
The answer is yes, with some caveats. Any methods that touch the DOM, for instance, will fail. Integrating with existing packages may require some finagling because many packages make assumptions about the environment they’ll be running in. But in general, you can take advantage of arbitrary JavaScript packages and use npm to manage your dependencies just like you would on any other JavaScript project.
Installing Third-Party Components with Native Code
Now that we’ve seen what it’s like to add an outside JavaScript library, let’s add a React Native component using npm. For this section, we are going to be using react-native-video as our primary example. It’s part of the GitHub project react-native-community, a collection of high-quality React Native modules.
The react-native-video component is listed in the npm registry. We can add it to our project with npm install:
npminstallreact-native-video--save
If we were working with traditional web development, we would be done! react-native-video would now be available to our project. However, this module requires changes to our underlying iOS and Android projects, so there’s one more step:
react-nativelink
What does react-native link do? It makes modifications to the underlying iOS and Android projects. For iOS, this might entail edits to AppDelegate.m and the Xcode project file. For Android, this might include changes to MainApplication.java, settings.gradle, and build.gradle. Typically a module will specify this requirement in its installation instructions.
Note that react-native link will work only with projects generated via react-native init or applications created with create-react-native-app that have since been ejected. Migrating from a create-react-native-app project to a full React Native project is discussed in “Ejecting from Expo”.
If you are not working with an autogenerated application, you’ll need to manually update your project files according to the instructions provided by the module authors.
Now that we have installed the react-native-video module, let’s test it out. You’ll need any MP4 video file for this step. I used a public-domain video from Flickr.
MP4 assets work just like images in React Native, so you can load the video file like so:
letwarblerVideo=require("./warbler.mp4");
Using the Video Component
We can require the <Video> component from our JavaScript code:
importVideofrom"react-native-video"
Then use the component just as you normally would. Here, I’ve set a few of the optional props:
<Videosource={require("./warbler.mp4")}// Can be a URL or a local file.rate={1.0}// 0 is paused, 1 is normal.volume={1.0}// 0 is muted, 1 is normal.muted={false}// Mutes the audio entirely.paused={false}// Pauses playback entirely.resizeMode="cover"// Fill the whole screen at aspect ratio.repeat={true}// Repeat forever.style={styles.backgroundVideo}/>
Ta-da! We have a working video component! It should work on both Android and iOS.
As you can see, including third-party modules with native code is a straightforward process. Many such components are listed in the npm registry and often use the prefix react-native-. Take a look around and see what the community has built!
Objective-C Native Modules
Now that we’ve taken a look at how to install and use a module that includes native code, let’s dive into how it works under the hood. We’ll start with the Objective-C side of things.
Writing an Objective-C Native Module for iOS
Now that we’re using the react-native-video module, let’s look at how modules like these work under the hood.
The react-native-video component is what React refers to as a native module. The React Native documentation defines a native module as “an Objective-C class that implements the RCTBridgeModule protocol.” (RCT is an abbreviation for ReaCT.)
Writing Objective-C code is not part of the standard development process with React Native, so don’t worry—this is not necessary stuff! But having basic reading knowledge of what’s going on will be helpful even if you don’t plan on implementing your own native modules (yet).
If you have never worked with Objective-C before, much of the syntax you’ll encounter may seem confusing. That’s okay! We’ll take things slowly. Let’s start by building a basic “Hello, World” module.
Objective-C classes usually have a header file that ends in .h, which contains the interface for a class. The actual implementation goes in a .m file. Let’s start by writing our HelloWorld.h file, shown in Example 7-2.
Example 7-2. HelloWorld.h
#import <React/RCTBridgeModule.h>@interfaceHelloWorld:NSObject<RCTBridgeModule>@end
What does this file do? On the first line, we import the RCTBridgeModule header. (Note that the # symbol does not denote a comment, but rather an import statement.) Then on the next line, we declare that the HelloWorld class subclasses NSObject and implements the RCTBridgeModule interface, and end the interface declaration with @end.
For historical reasons, many basic types in Objective-C are prefixed with NS (NSString, NSObject, etc.).
Now let’s move on to the implementation (Example 7-3).
Example 7-3. HelloWorld.m
#import "HelloWorld.h"#import <React/RCTLog.h>@implementationHelloWorldRCT_EXPORT_MODULE();RCT_EXPORT_METHOD(greeting:(NSString*)name){RCTLogInfo(@"Saluton, %@",name);}@end
In a .m file, you’ll want to import the corresponding .h file, as we do here on the first line. I’ve also imported RCTLog.h, so that we can log things to the console using RCTLogInfo. When importing other classes in Objective-C, you’ll almost always want to import the header file, not the .m file.
The @implementation and @end lines indicate that the contents between them are the implementation of the HelloWorld class.
The remaining lines do the work of making this a React Native module. With RCT_EXPORT_MODULE(), we invoke a special React Native macro that makes this class accessible to the React Native bridge. Similarly, our method definition for greeting:name is prefixed with a macro, RCT_EXPORT_METHOD, which exports the method and thus will expose it to our JavaScript code.
Note that Objective-C methods are named with a somewhat odd syntax. Each parameter’s name is included in the method name. It is React Native convention that the JavaScript function name is the Objective-C name up until the first colon, so greeting:name becomes greeting in JavaScript. You may use the macro RCT_REMAP_METHOD to remap this naming if you like.
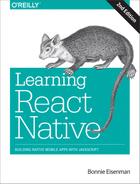
Now, you might note that these files don’t exist in your Xcode project (Figure 7-1).
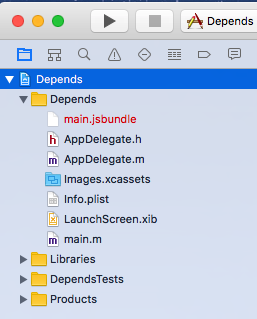
Figure 7-1. Xcode project, before importing our new files
We need to add them to our project in order to include them in our application’s build. You can do this by selecting File → Add Files to “Depends” (Figure 7-2).
Figure 7-2. The Add Files menu option in Xcode
Select both HelloWorld.m and HelloWorld.h to add to your project (Figure 7-3).

Figure 7-3. Importing HelloWorld.m and HelloWorld.h to our project
Now you should see both files in your Xcode project (Figure 7-4).

Figure 7-4. The updated Xcode project’s file tree
Now that our HelloWorld files are imported, we can use the HelloWorld module from our JavaScript code (Example 7-4).
Example 7-4. Using the HelloWorld module from our JavaScript code
import{NativeModules}from"react-native";NativeModules.HelloWorld.greeting("Bonnie");
The output should appear in the console (Figure 7-5), both in Xcode and in the Chrome developer tools, if you choose to enable them.

Figure 7-5. Console output, as viewed through the Xcode interface
Note that the syntax for importing native modules is a bit verbose. A common approach is to wrap your native module in a JavaScript module (Example 7-5).
Example 7-5. HelloWorld.js: a JavaScript wrapper for the HelloWorld native module
import{NativeModules}from"react-native";exportdefaultNativeModules.HelloWorld;
Then, requiring it becomes much more straightforward:
importHelloWorldfrom"./HelloWorld";
The HelloWorld.js JavaScript file is also a good opportunity to add any JavaScript-side functionality to your module.
Phew. Objective-C can feel verbose, and we have to keep track of a couple of different files. But congratulations: you’ve written a “Hello, World” for your Objective-C module!
To review, an Objective-C module must do the following in order to be available in React Native:
-
Import the
RCTBridgeModuleheader -
Declare that your module implements the
RCTBridgeModuleinterface -
Call the
RCT_EXPORT_MODULE()macro -
Have at least one method that is exported using the
RCT_EXPORT_METHODmacro
Native modules can then make use of any API provided by the iOS SDK. (Note that the API you provide to React Native must be asynchronous.) Apple provides extensive documentation for the iOS SDK, and there are many resources available from third parties as well. Note that your developer licenses will come in handy here—it’s often difficult to access the SDK documentation without one.
Now that we’ve written our own basic “Hello, World,” let’s take a deeper look at how react-native-video is implemented.
Exploring react-native-video for iOS
Just like our HelloWorld module, RCTVideo is a native module, and it implements the RCTBridgeModule protocol. You can see the full code for RCTVideo in the react-native-video GitHub repository. We’ll be looking at version 1.0.0.
react-native-video is basically a wrapper around the AVPlayer API provided by the iOS SDK. Let’s take a closer look at how it works, beginning with the JavaScript entry points Video.ios.js.
We can see that it provides a thin wrapper around the native component, RCTVideo, performing some props normalization and a bit of extra rendering logic. The native component is imported at the end:
constRCTVideo=requireNativeComponent('RCTVideo',Video,{nativeOnly:{src:true,seek:true,fullscreen:true,},});
As we saw in our HelloWorld example, that means that somewhere the iOS implementation of the RCTVideo component must be exported from Objective-C. Let’s look at ios/RCTVideo.h:
// RCTVideo.h#import<React/RCTView.h>#import<AVFoundation/AVFoundation.h>#import"AVKit/AVKit.h"#import"UIView+FindUIViewController.h"#import"RCTVideoPlayerViewController.h"#import"RCTVideoPlayerViewControllerDelegate.h"@classRCTEventDispatcher;@interfaceRCTVideo:UIView<RCTVideoPlayerViewControllerDelegate>@property(nonatomic,copy)RCTBubblingEventBlockonVideoLoadStart;// ...// ...more properties omitted here...// ...-(instancetype)initWithEventDispatcher:(RCTEventDispatcher*)eventDispatcherNS_DESIGNATED_INITIALIZER;-(AVPlayerViewController*)createPlayerViewController:(AVPlayer*)playerwithPlayerItem:(AVPlayerItem*)playerItem;@end
This time, instead of subclassing NSObject, RCTVideo subclasses UIView. That makes sense because it’s rendering a view component.
If we look at the implementation file, RCTVideo.m, there’s a lot going on. At the top are instance variables, keeping track of things like volume, playback rate, and the AVPlayer itself:
-(AVPlayerViewController*)createPlayerViewController:(AVPlayer*)playerwithPlayerItem:(AVPlayerItem*)playerItem{RCTVideoPlayerViewController*playerLayer=[[RCTVideoPlayerViewControlleralloc]init];playerLayer.showsPlaybackControls=NO;playerLayer.rctDelegate=self;playerLayer.view.frame=self.bounds;playerLayer.player=_player;playerLayer.view.frame=self.bounds;returnplayerLayer;}
There are also various methods for things like calculating the duration of the video, loading in the video and setting it as the source, and more. Feel free to step through these methods and figure out what role they play.
The other piece of the puzzle is the RCTVideoManager. To create a native UI component, as opposed to just a module, we also need a view manager. As the name implies, while the view actually handles rendering logic and similar tasks, the view manager deals with other stuff (event handling, property exports, etc.). At a minimum, the view manager class needs to:
-
Subclass
RCTViewManager -
Use the
RCT_EXPORT_MODULE()macro -
Implement the
-(UIView *)viewmethod
The view method should return a UIView instance. In this case, we can see that it instantiates and returns an RCTVideo:
-(UIView*)view{return[[RCTVideoalloc]initWithEventDispatcher:self.bridge.eventDispatcher];}
The RCTVideoManager also exports a number of properties and constants:
#import "RCTVideoManager.h"#import "RCTVideo.h"#import <React/RCTBridge.h>#import <AVFoundation/AVFoundation.h>@implementationRCTVideoManagerRCT_EXPORT_MODULE();@synthesizebridge=_bridge;-(UIView*)view{return[[RCTVideoalloc]initWithEventDispatcher:self.bridge.eventDispatcher];}-(dispatch_queue_t)methodQueue{returndispatch_get_main_queue();}RCT_EXPORT_VIEW_PROPERTY(src,NSDictionary);RCT_EXPORT_VIEW_PROPERTY(resizeMode,NSString);RCT_EXPORT_VIEW_PROPERTY(repeat,BOOL);RCT_EXPORT_VIEW_PROPERTY(paused,BOOL);RCT_EXPORT_VIEW_PROPERTY(muted,BOOL);RCT_EXPORT_VIEW_PROPERTY(controls,BOOL);RCT_EXPORT_VIEW_PROPERTY(volume,float);RCT_EXPORT_VIEW_PROPERTY(playInBackground,BOOL);RCT_EXPORT_VIEW_PROPERTY(playWhenInactive,BOOL);RCT_EXPORT_VIEW_PROPERTY(rate,float);/* ... more RCT_EXPORT_VIEW_PROPERTY calls omitted here... */-(NSDictionary*)constantsToExport{return@{@"ScaleNone":AVLayerVideoGravityResizeAspect,@"ScaleToFill":AVLayerVideoGravityResize,@"ScaleAspectFit":AVLayerVideoGravityResizeAspect,@"ScaleAspectFill":AVLayerVideoGravityResizeAspectFill};}@end
Together, RCTVideo and RCTVideoManager comprise the RCTVideo native UI component, which we can use freely from within our application. As you can see, writing native modules that make use of the iOS SDK is a nontrivial endeavor, though not an insurmountable one. This is definitely one area where previous iOS development experience will serve you well. A full explanation of iOS development is beyond the scale of this book, but by looking at others’ native modules—even if you don’t have much Objective-C experience—you should be able to start experimenting with your own attempts at native module development.
Java Native Modules
Native modules for Android behave similarly to native modules for iOS. You can find more information about Android native modules in the docs.
Just as with iOS, if you install a module for Android that includes native code, you’ll want to run react-native link after adding the module to your application’s package.json file.
Writing a Java Native Module for Android
In order to better understand how Java native modules work, we’ll write our own. Just like with Objective-C, we’ll start with a simpe “Hello, World” module.
We’ll begin by making a directory for our HelloWorld package. It should be a sibling to MainActivity.java. Android projects have a pretty deep nesting structure! Note that the directory structure may vary between different versions of Android and React Native. The key is that your new directory needs to be in the same directory as MainActivity.java.
mkdir android/app/src/main/java/com/depends/helloworld
Now we’ll add a HelloWorldModule.java file to that directory, as shown in Example 7-6.
Example 7-6. helloworld/HelloWorldModule.java
packagecom.depends.helloworld;importandroid.util.Log;importcom.facebook.react.bridge.ReactContextBaseJavaModule;importcom.facebook.react.bridge.ReactApplicationContext;importcom.facebook.react.bridge.ReactMethod;publicclassHelloWorldModuleextendsReactContextBaseJavaModule{publicHelloWorldModule(ReactApplicationContextreactContext){super(reactContext);}@OverridepublicStringgetName(){return"HelloWorld";}@ReactMethodpublicvoidgreeting(Stringmessage){Log.e("HelloWorldModule","Saluton, "+message);}}
There’s quite a bit of boilerplate here. Let’s take this piece by piece.
First, we begin with a package statement:
packagecom.depends.helloworld;
This is based on the file’s location in the directory.
Next, we import several React Native–specific files, as well as android.util.Log. Any module you write should import the same React Native files.
Then we declare our HelloWorldModule class. It’s public, meaning that external files can use it; and it extends the ReactContextBaseJavaModule, meaning that it inherits methods from ReactContextBaseJavaModule:
publicclassHelloWorldModuleextendsReactContextBaseJavaModule{...}
There are three methods implemented here: HelloWorldModule, getName, and greeting.
In Java, a method with the same name as the class is called the constructor. The HelloWorldModule method is thus a bit of boilerplate; we invoke the ReactContextBaseJavaModule constructor with a call to super(reactContext) and don’t do anything else.
getName determines which name we’ll use later on to access this module from our JavaScript code, so make sure it’s correct! In this case, we name it “HelloWorld.” Note that we add an @Override decorator here. You’ll want to implement getName for any other modules you write.
Finally, greeting is our own method, which we want to be available in our JavaScript code. We add a @ReactMethod decorator so that React Native knows this method should be exposed. To log something when greeting is called, we call Log.e like so:
Log.e("HelloWorldModule","Hello, "+name);
The Log object in Android provides different levels of logging. The three most commonly used are INFO, WARN, and ERROR, and are invoked with Log.i, Log.w, and Log.e, respectively. Each of these methods takes in two parameters: the “tag” for your log, and the message. It’s standard practice to use the class name for the tag. View the Android documentation for more details.
We also need to create a package file to wrap this module (Example 7-7) so that we can include it in our build. It should also be a sibling to HelloWorldModule.java.
Example 7-7. helloworld/HelloWorldPackage.java
packagecom.depends.helloworld;importcom.facebook.react.ReactPackage;importcom.facebook.react.bridge.JavaScriptModule;importcom.facebook.react.bridge.NativeModule;importcom.facebook.react.bridge.ReactApplicationContext;importcom.facebook.react.uimanager.ViewManager;importjava.util.ArrayList;importjava.util.Collections;importjava.util.List;publicclassHelloWorldPackageimplementsReactPackage{@OverridepublicList<NativeModule>createNativeModules(ReactApplicationContextreactContext){List<NativeModule>modules=newArrayList<>();modules.add(newHelloWorldModule(reactContext));returnmodules;}@OverridepublicList<ViewManager>createViewManagers(ReactApplicationContextreactContext){returnCollections.emptyList();}}
This file is mostly boilerplate. We don’t need to import HelloWorld because it’s part of the same package (com.depends.helloworld) as this file. There are two methods that we need to implement: createNativeModules and createViewManagers. React Native uses these methods to determine what modules it should export.
Our native module doesn’t deal with native views or UI elements so createViewManagers returns an empty list, whereas createNativeModules returns a list containing an instance of HelloWorld.
Finally, we need to add the package in MainApplication.java. Import the package file:
importcom.depends.helloworld.HelloWorldPackage;
Then add HelloWorldPackage to getPackages():
protectedList<ReactPackage>getPackages(){returnArrays.<ReactPackage>asList(newMainReactPackage(),newReactVideoPackage(),newHelloWorldPackage());}
Just like with Objective-C modules, our Java module will be available via the React.NativeModules object. We can now invoke our greeting() method from anywhere within our app, like so:
import{NativeModules}from"react-native";NativeModules.HelloWorld.greeting("Bonnie");
Let’s filter the logs and look for our message. Run the following from your project’s root:
adb logcat
You will need to restart the application in order to see the log message output.
react-native run-android
Figure 7-6 shows the output you should see in your shell.

Figure 7-6. Output from logcat
Now that we’ve written our “Hello, World” example from Java, let’s look at the implementation of react-native-video for Android.
Exploring react-native-video for Java
react-native-video for Android is basically a wrapper around the MediaPlayer API. It consists mainly of three files:
-
ReactVideoView.java
-
ReactVideoPackage.java
-
ReactVideoViewManager.java
The ReactVideoPackage.java file, shown in Example 7-8, looks very similar to our HelloWorldPackage.java file.
Example 7-8. ReactVideoPackage.java
packagecom.brentvatne.react;importandroid.app.Activity;importcom.facebook.react.ReactPackage;importcom.facebook.react.bridge.JavaScriptModule;importcom.facebook.react.bridge.NativeModule;importcom.facebook.react.bridge.ReactApplicationContext;importcom.facebook.react.uimanager.ViewManager;importjava.util.Arrays;importjava.util.Collections;importjava.util.List;publicclassReactVideoPackageimplementsReactPackage{@OverridepublicList<NativeModule>createNativeModules(ReactApplicationContextreactContext){returnCollections.emptyList();}@OverridepublicList<ViewManager>createViewManagers(ReactApplicationContextreactContext){returnArrays.<ViewManager>asList(newReactVideoViewManager());}}
The main difference is that ReactVideoPackage returns ReactVideoViewManager from createViewManagers, while our HelloWorldPackage returned HelloWorld from createNativeModules. What’s the difference?
For Android, any natively rendering views are created and controlled by a ViewManager (or, more specifically, a class that extends ViewManager). Because ReactVideoView is a UI component, we need to return a ViewManager. The React Native documentation on native Android UI components has some more information on the difference between exposing a native module (i.e., nonrendering Java code) and a UI component.
Let’s look at ReactVideoViewManager.java next. It’s a relatively long file; you can view the full source in the react-native-linear-gradient GitHub repo. Example 7-9 shows an abbreviated version.
Example 7-9. ReactVideoViewManager.java, abbreviated
publicclassReactVideoViewManagerextendsSimpleViewManager<ReactVideoView>{publicstaticfinalStringREACT_CLASS="RCTVideo";publicstaticfinalStringPROP_VOLUME="volume";publicstaticfinalStringPROP_SEEK="seek";/** more props skipped here ... **/@OverridepublicStringgetName(){returnREACT_CLASS;}@OverrideprotectedReactVideoViewcreateViewInstance(ThemedReactContextthemedReactContext){returnnewReactVideoView(themedReactContext);}@OverridepublicvoidonDropViewInstance(ReactVideoViewview){super.onDropViewInstance(view);view.cleanupMediaPlayerResources();}/** more methods skipped here ... **/@ReactProp(name=PROP_VOLUME,defaultFloat=1.0f)publicvoidsetVolume(finalReactVideoViewvideoView,finalfloatvolume){videoView.setVolumeModifier(volume);}@ReactProp(name=PROP_SEEK)publicvoidsetSeek(finalReactVideoViewvideoView,finalfloatseek){videoView.seekTo(Math.round(seek*1000.0f));}}
There are a few things we should pay attention to here.
The first is the implementation of getName. Note that, just as in our HelloWorld example, we need to implement getName in order to be able to refer to this component from our JavaScript code.
The next is the setVolume method and the use of the @ReactProp decorator. Here we declare that the <Video> component will take a prop named volume (as that’s the value of PROP_VOLUME) and setVolume will be invoked when that prop changes. In setVolume, we check to see that the underlying view exists; if it does, we pass the colors along so that it can update. There are many methods in the implementation of ReactVideoViewManager that follow this pattern.
Finally, in createViewInstance, ReactVideoViewManager handles actually creating the view with the correct context.
In order to effectively write native Android components, you’ll want an understanding of how Android handles views in general, but looking at other React Native components is a good place to start.
Cross-Platform Native Modules
Is it possible to write a cross-platform native module?
The answer is yes; you just have to implement your module separately for each platform, and provide a unified JavaScript interface. This can be a good way to handle platform-specific optimizations while still maximizing code reuse.
Creating a cross-platform native module doesn’t require much extra configuration. Once you have implemented iOS and Android versions separately, just create a folder containing index.ios.js and index.android.js files. Each version should import the appropriate native module. Then you can import that folder, and React Native will pick up the platform-appropriate version.
React Native won’t enforce a consistent API between the iOS and Android versions, so that responsibility falls on you. If you want the iOS and Android versions to have slightly different APIs, that’s fine, too.
Summary
So, when is it appropriate to use native Objective-C or Java code? When is it a good idea to include third-party modules and libraries? In general, there are three main use cases for native modules: taking advantage of existing Objective-C or Java code; writing high-performance, multithreaded code for tasks such as graphics processing; and exposing APIs not yet included in React Native.
For any existing mobile projects built in Objective-C or Java, writing a native module can be a great way to reuse existing code in React Native applications. While hybrid applications are a bit beyond the scope of this book, they’re definitely a feasible approach, and you can use native modules to share functionality between JavaScript, Objective-C, and Java.
Similarly, for use cases where performance is critical or for specialized tasks, it often makes sense to work in the native language of the platform you’re developing for. In these cases, you can do the heavy lifting in Objective-C or Java and then pass the result back to your JavaScript application.
Finally, there will inevitably be platform APIs you’ll want to use that aren’t yet supported by React Native. In these cases, you have two options. One is to turn to the community and hope that someone else has already solved your problem. The other is to solve the issue yourself, and hopefully contribute your solution back to the community! Being able to write your own native modules means that you don’t need to rely on React Native core in order to take advantage of your host platform.
Even if you’ve never developed for iOS or Android before, if you’re planning on developing with React Native, it’s a good idea to try to gain a reading knowledge of Objective-C and/or Java. If you hit a wall when working with React Native, being able to try to dig your way around it is a really invaluable asset. Don’t be afraid to try!
The React Native community, as well as the broader JavaScript ecosystem, will be valuable resources as you develop your own React Native applications. Build on the work of others, and reach out if you need help.