Table of Contents for
How to Wow: Photoshop for the Web
 How to Wow: Photoshop for the Web
Published by
Peachpit Press, 2004
How to Wow: Photoshop for the Web
Published by
Peachpit Press, 2004
Putting Photoshop and ImageReady to Work for You


Do you ever feel like a slave to your computer? Then it's time you focused on getting your computer to work for you. Automating repetitive tasks, like resizing photographs, can increase your productivity, standardize your output, and generally brighten your day. Automation also helps you accomplish more complex tasks, like working with data sets, that may have seemed too daunting to take on from scratch.
In this chapter we explore ways that Photoshop and ImageReady can help you automate your Web graphics workflow. These techniques are not only useful. Some of them, like building actions and droplets, encourage you to look under the hood of your favorite graphics programs to understand how they work. This kind of deep understanding is bound to make you a better, more knowledgeable Photoshop user.
We start out this chapter with a good look at Photoshop's actions and batch processing features (in Batch Processing Photo Thumbnails). This lesson runs from the practical (making small versions of photos for use on the Web) to the artistic (automatically sepia-toning and building professional-looking frames around your thumbnails). Once you understand the principles of constructing actions and running them on multiple images, you'll be able to record your own timesaving actions.

If you think Photoshop's actions are useful, you'll be amazed at what ImageReady can do with conditional actions (in Preparing Photos for the Web with Conditional Actions.) You'll see how easy it is to have ImageReady resize images only if they meet a built-in condition. You'll also get the program to automatically distinguish between text graphics and photographs, optimizing the fomer as GIFs and the latter as JPEGs.
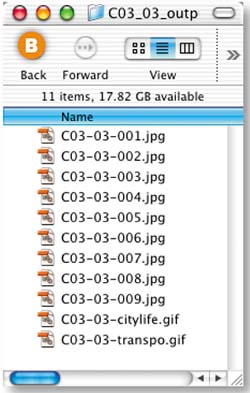
The project Making Multiple Web Graphics covers two automatic features. You'll use Photoshop's Crop and Straighten Photos command to break a single file into individual graphics. Then you'll optimize those graphics automatically with a droplet you'll put together in ImageReady.
This chapter includes two projects devoted to creating multiple web page layouts (Designing Multiple Web Pages in a Single File, and Outputting Multiple Linked Web Pages). The first focuses on using layer comps and slice sets to efficiently produce multiple pages for a Web site. The second covers a hidden export feature that automatically links pages that contain the special Selected rollover state, allowing you to create a complete Web-ready site in ImageReady.
This chapter ends with a bang. You'll learn how to create a collection of data-driven Flash Web banners in ImageReady (in Creating Dynamic Flash Web Banners). These banners are generated automatically from data sets and text replacement variables. It all sounds very scientific, but it's a lot easier than it may seem at first glance. This is a great way to produce a series of matching Web banners—one for each page in your site.
Get ready to dig into a very meaty chapter. You'll increase your productivity and your creativity by putting Photoshop and ImageReady to work for you. And just think. Once you get this automation thing down, you can set up your computer to do your bidding, and take off for the beach.
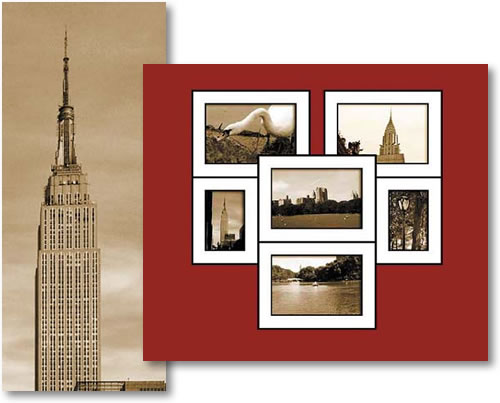
If you have a life away from your computer, you'll love actions. They will seriously reduce the time you spend in front of your screen. Here you'll create an action in Photoshop to make a sepiatoned, framed, thumbnail-sized photo. You'll use that action to batch process a group of photos, creating small images that look great on a Web page.
Open a Photo in Photoshop
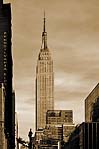
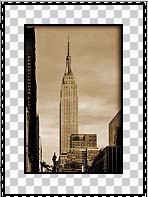
Small copies of photographs come in handy as links to larger images in an online portfolio or as a way to display a large collection of photographs on the Web. You can imagine what a chore it would be to reduce multiple photos to thumbnail size, add a toning effect, sharpen, add a frame, and optimize each image in Web format if you had to make all those changes to one photo at a time.
Fortunately, you only have to do the work once, recording your steps as an action. Then you can play the action on a batch of photos, letting Photoshop do the bulk of the work for you. Start by opening one photograph in Photoshop. You'll start with a TIFF format image.
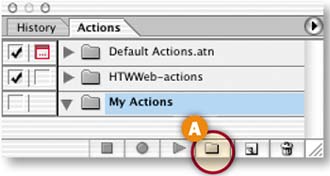
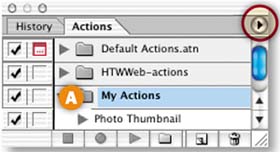
Open the Actions palette (Window>Actions). You'll see the default action set that ships with Photoshop. You should also see the HTWWeb-Actions set. If you don't, take a minute to install the HTW Presets following the instructions in the Introduction. You'll create a new action set to hold the action you're about to make.
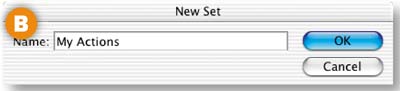
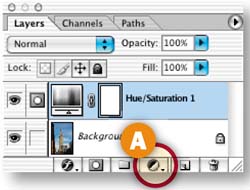
Click the Create New Set icon at the bottom of the Actions palette A. In the New Set dialog box that opens, name the set My Actions and click OK B.
Create a New Action
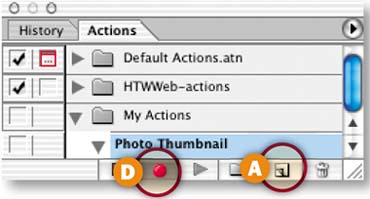
Click the Create New Action icon at the bottom of the Actions palette A. In the New Action dialog box that opens, name the action Photo Thumbnail and choose My Actions from the Set menu B to put the action in that set.
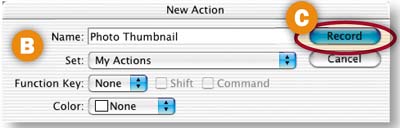
Click Record in the New Action palette C. Most everything you do while the red button D is active in the Actions palette is recorded as part of the Photo Thumbnail action, so try not to make mistakes. As you add steps, they will appear beneath the Photo Thumbnail action in the Actions palette.
Sepia Tone the Photo
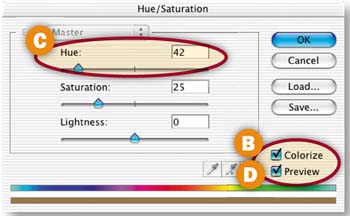
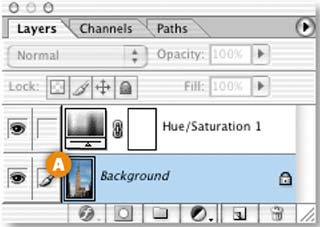
Your Photo Thumbnail action will contain a series of commands. The first command colorizes a photo with a sepia tone. Click the Create New Adjustment Layer icon at the bottom of the Layers palette A and choose Hue/Saturation from the pop-up menu. In the Hue/Saturation dialog box, check the Colorize checkbox B. Then move the Hue slider to 42 C. Leave Preview checked D to see a live preview of the sepiatoned image in the document window. Click OK. You'll see the Make Adjustment Layer command in the Actions palette.
Now you'll add another command to this action to reduce the image to thumbnail size. Choose File>Automate>Fit Image. In the Fit Image dialog box, set Width to 250 pixels and Height to 150 pixels A and click OK.
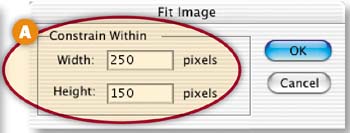
Fit Image is a useful way to resize when you're creating an action to run on images of different sizes or orientations. All the photos to which this action is applied will be resized so that they are proportional and don't exceed either 250 pixels wide or 150 pixels high.
Sharpen
Reducing the size of an image often makes the image look soft. So the next step in this ongoing action is to sharpen the resized image.
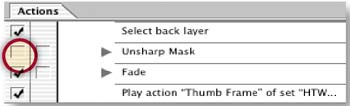
First, it's important to select the layer at the bottom of the layer stack A by pressing Shift-Option/Alt-[, because you want to run the Unsharp Mask filter on the layer that contains image content, not on the adjustment layer. Use this shortcut so the action will work regardless of the name of the content layer.
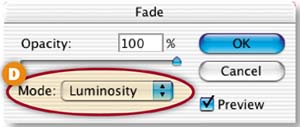
Choose Filter>Sharpen>Unsharp Mask. In the Unsharp Mask dialog box, choose the following settings, which are typical of settings for small, low-resolution Web images: Amount: 100, Radius: 0.5 pixels, Threshold: 3 B. Check Preview C to preview the effect in the toned image.
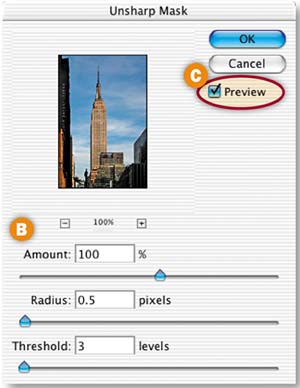
Now choose Edit>Fade Unsharp Mask. (If you do something else first, this command will be unavailable.) In the Fade Unsharp Mask dialog box choose Luminosity from the Blending Mode pop-up menu D. This step reduces the chance that sharpening will change the color of any photos during batch processing.
We've created another action for you that automatically draws a professional-looking frame around a small image. In this step you'll nest that Thumb Frame action inside the Photo Thumbnail action you're building. Nesting actions gets extra mileage out of an action that also can stand on its own.
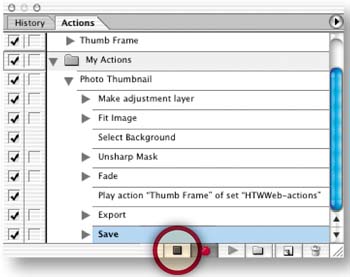
With your Photo Thumbnail action still recording, click the arrow on the HTWWeb-actions action set to open that action set A. Select the Thumb Frame action in that set B; then click the Play Action button at the bottom of the Actions palette C. You'll see a frame being created around your photo, and a step labeled Play action 'Thumb Frame' of 'HTWWeb-actions' is added to your Photo Thumbnail action.

Save for Web
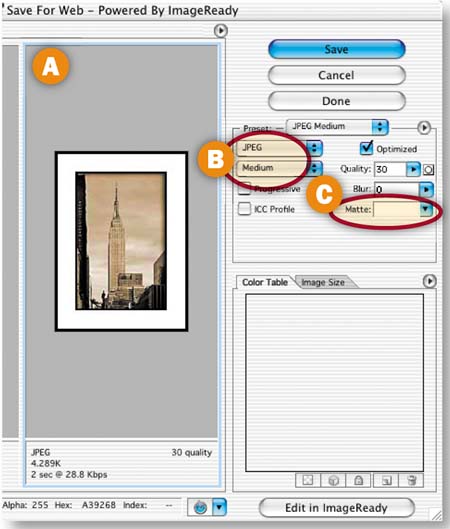
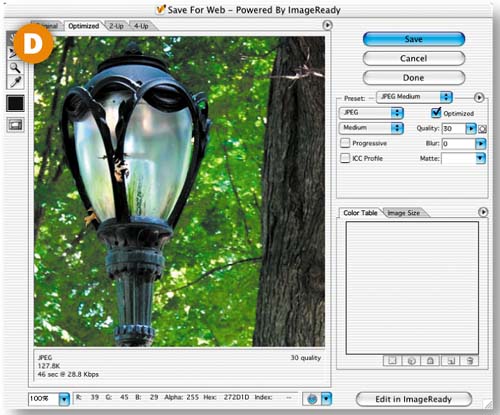
To complete your Photo Thumbnail action you'll optimize and save a copy of the file as a Web-ready JPEG. Choose File>Save for Web. In the Save for Web dialog box, click on the 2-up tab and select the right pane A. Set Format to JPEG and Quality to Medium B. Leave Matte set to white C. Leave the other settings at their defaults. Click Save. In the Save Optimized As dialog box that opens, leave Format/Save as Type set to Images Only, make a destination folder, and click Save. This saves a copy of one thumbnail-sized photo with sepia toning, sharpening, and a frame in JPEG format, ready to be added to a Web page.
Stop the Recording
Click on the Stop button at the bottom of the Actions palette to stop the Photo Thumbnail action recording. Then close the TIFF (the image with the transparent frame) without saving.
Test the Action on a Single File
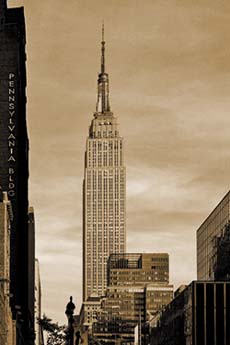
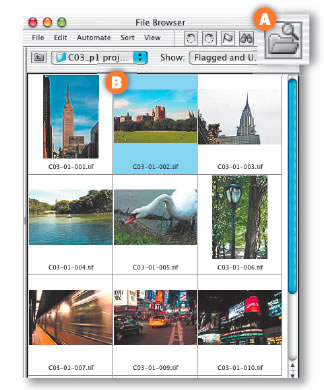
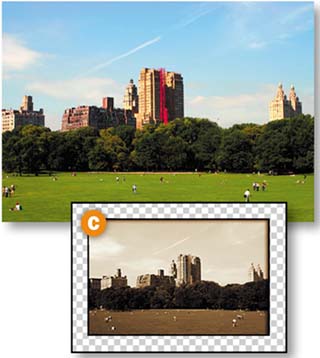
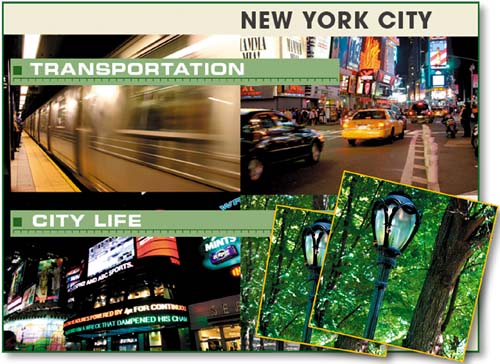
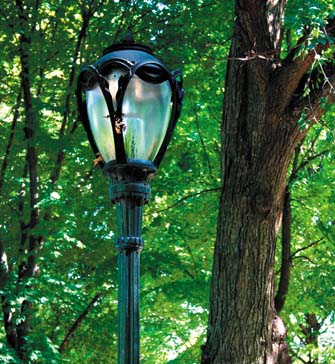
Open the File Browser by clicking the File Browser icon in the Options bar A or choosing File>Browse. In the File Browser, navigate to the Chapter 3 Project 1 project files. Double-click on one of the images of Central Park to open it B. Select the Photo Thumbnail action, and click the Play button at the bottom of the Actions palette.
The action plays on the selected image, saving a JPEG to the destination you recorded in the action and leaving a TIFF with a transparent frame on your desktop C. Close the TIFF without saving. Open the JPEG to check it. If the action works, pat yourself on the back and skip the next step.
Troubleshoot the Action
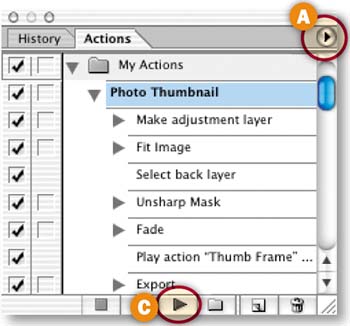
If your action doesn't run as expected, troubleshoot one step at a time. Click the arrow at the side of the Actions palette A and choose Playback Options. In the Playback Options palette, click Pause For, type in 5 seconds, and click OK B. Open an image. Select the Photo Thumbnail action and click the Play button at the bottom of the Actions palette C to move slowly through the steps.
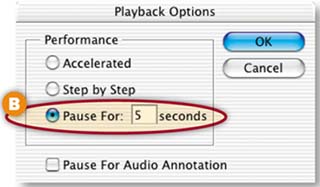
When you find the step with the problem, try double-clicking the step to open its command and fix what's wrong. (For example, if you saved to the wrong folder, double-click the Export step to reopen the Save for Web dialog box D, click Save, and change the destination folder in the Save Optimized As dialog box.) Or drag the step to the Trash icon at the bottom of the Actions palette to delete it, select the step just above the former step, and re-record the deleted step. If all else fails, drag the entire action to the trash and re-record, keeping in mind that a file must be open before you begin recording this action.
With the My Actions set selected A, click the side arrow on the Actions palette and choose Save Actions to save the set with your Photo Thumbnail action. The set will now be available to load from the Actions palette side menu.
Batch Process
Now you reap your reward for building the action. In the File Browser, Command/Ctrl-click the remaining four images of Central Park to select them, leaving the night shots deselected. Choose File>Automate>Batch from the file menu at the top of the File Browser—not to be confused with the File menu in the main menu bar.
Choose the following settings in the Batch dialog box:
Set: My Actions
Action: Photo Thumbnail
Source: File Browser (The action will run on the selected files in the File Browser.)
Override Action “Open” Commands: Unchecked (see Insight)
Include All Subfolders: Unchecked.
Suppress Color Profile Warnings: Checked (to avoid a warning if a file's color profile differs from your working space)
Destination: None (because the action contains the destination for the JPEGs)

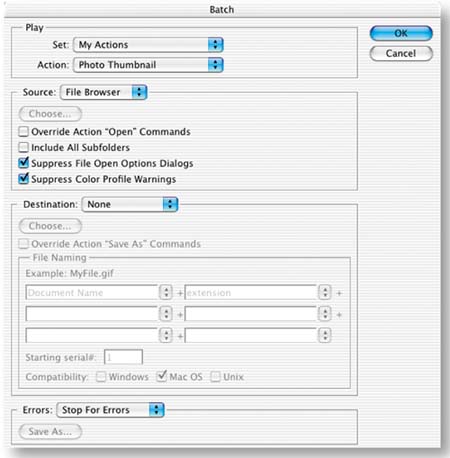
Now click OK and kick back to let Photoshop apply your Thumbnail Photo action to each of the selected images. When it's done, close the TIFFs without saving and open the JPEGs from your destination folder to admire them.
You can bring these thumbnail photos into a site-building program like GoLive or Dreamweaver for inclusion in a Web site.

Actions have lots of wrinkles. Here are some tips that will keep you on track as you create and apply actions. If you're serious about working with actions, take a look at some of the action exchanges on the Web, like the Adobe Studio Exchange (http://share.studio.adobe.com) or Actionfx.com.

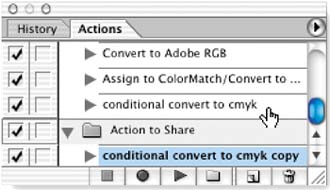
You can share your best actions with friends by saving them. Unfortunately, you can't save just one action from Photoshop, but you can save an action set. So if you want to share a single action, make a new action set in the Actions palette by clicking the palette's side arrow and choosing New Set. With the original action set open, Option/Alt-drag a copy of the action to the new action set. Select the new action set, click the Actions palette's side arrow, and choose Save Actions. Save the file with an .atn extension to a location other than the Photoshop default location (which is Presets>Photoshop Actions), and transfer the .atn file to a friend.
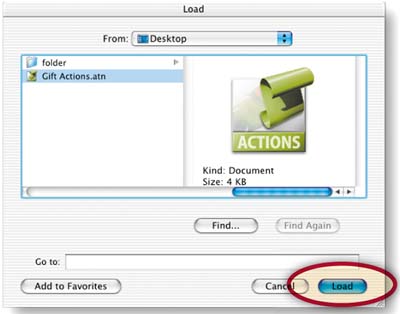
If you're the recipient of an action file, it's easy to load it into your Actions palette. Just click the Actions palette's side arrow and choose Load Actions from the side menu. Navigate to the .atn file you want to add and click Load. A new action set will appear in your Actions palette. Click the arrow to the left of the new action set to access its contents. The new action set will be saved automatically when you exit Photoshop. If you want the action to appear in the Actions palette's side menu the next time you open Photoshop, save it to the Presets>Photoshop Actions folder inside the Photoshop application folder by choosing Save Actions from the Actions palette's side menu.
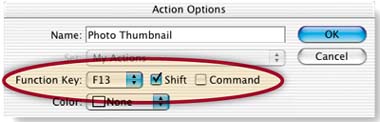
To streamline the playback process, you can assign one of the function keys on your keyboard to an action. Then just click that function key and the action will play, even if the Actions palette is closed. You can assign a function key when you create an action in the New Action dialog box. Or assign a function key later by selecting the existing action in the Actions palette, clicking the palette's side arrow, and choosing Action Options. When you assign a function key to an action, choose from any of the F keys on your keyboard. If most of those are being used for other commands, add a check mark next to the Shift or Command/Ctrl modifier in the New Action or Action Options dialog box to expand the available choices. If you forget which function key you've assigned to an action, select that action and choose Action Options. By the way, on Windows you can't assign the F1 key because it's reserved. Function keys are most handy when you're viewing your actions in Button Mode (described on the next page), because the function key appears right on the face of an action's button.
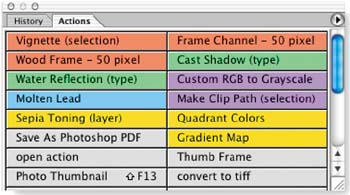
Button Mode offers a simplified view of your actions. Each action appears as a big push button, complete with any colors and function keys that you've assigned to the action. Action sets and steps are invisible in Button Mode, making the landscape simpler to negotiate. Switch into Button Mode by clicking the Actions palette's side arrow and choosing Button Mode. Feel free to stretch the button bar across the bottom or side of your screen by clicking on its bottom-right corner and dragging. Keep in mind that although you can play actions from Button Mode, you can't create or edit actions in that view. For those purposes, you'll toggle back to the list view of the Actions palette, by choosing Button Mode again from the Actions palette's side menu.
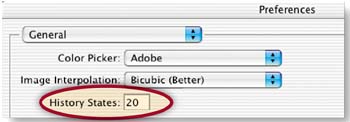
One of the challenges of creating actions is that you can only undo the last step you made. Fortunately, Photoshop's History palette records most of your steps. To return to a previous step you recorded in an action, you can select that step in the History palette. But keep in mind that actions often contain lots of steps, and the History palette is set to record only 20 steps by default. To increase that number, go to Photoshop/Edit>Preferences>General and type a higher number into the History States field.
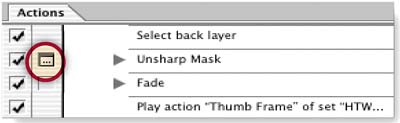
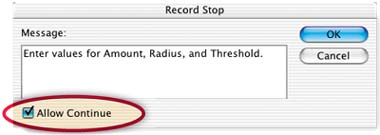
If an action includes a command that has a dialog box, like the Unsharp Mask filter you worked with in the preceding project, you can program the action to pause at that step and open the command's dialog box so that the user can enter values of her choice. Otherwise dialog boxes do not appear in actions, and commands are applied with default values. To pause an action at a step for user input, click in the Modal Control column just to the left of the step to display a dialog box icon. Click there again if you want to remove this icon. You can also add a message to users explaining what the user should do on a particular step by clicking the side arrow on the Actions palette and choosing Insert Stop. Type your message in the Record Stop dialog box that opens. Add a check mark to the Allow Continue box to offer users the option of continuing to play the action.
If there's a particular step you want to skip when you play an action on a file, just click in the far left column of the step to delete the check mark before running the action.
We can't emphasize enough that the beauty of actions is their ability to run automatically on a collection of files. You can batch process a folder of files with an action from Photoshop's File menu (File>Automate>Batch). Alternatively, you can batch process a collection of files displayed in the File Browser by choosing File>Automate>Batch from the File Browser's menu bar.![]()

This project uses two timesaving automation techniques. Break a file into individual graphics with -Photoshop's Crop and Straighten Photos command. Then optimize those graphics all at once as Web-ready GIFs using an ImageReady droplet.
Prepare a Single Image
Open a file in Photoshop that has several graphics on a single layer. In the steps that follow you'll automatically separate these graphics into individual files and optimize them all as GIFs.
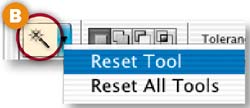
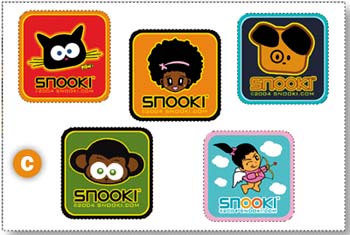
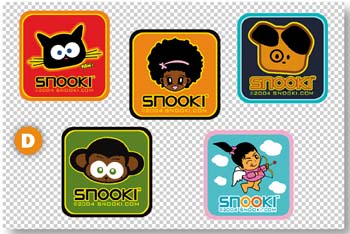
Start by changing the single Background layer into a regular layer so you can make some of its pixels transparent. Double-click the Background layer A, and click OK in the New Layer dialog box to convert this layer to a regular layer. Select the Magic Wand tool in the toolbox. Control/right-click the tool icon at the far left of the Options bar and choose Reset Tool B to return the tool to its default settings. Click on the white background to select everything except the graphics C, and press Command/Ctrl-X to delete the selected area. The checkerboard represents transparency D. Press Command/Ctrl-D to deselect.

Next you'll separate the graphics in this image into individual files. You could do this with the slice tool. But there's a faster way. You'll use Photoshop's Crop and Straighten Photos command, which was designed to allow photos to be scanned together and then quickly separated and straightened. This feature works just as well on graphics like these that were created in a drawing program on a single layer. Choose File>Automate>Crop and Straighten Photos from Photoshop's menu bar. Wait just a second, and you'll have five separate images, each closely cropped to one of the graphics.
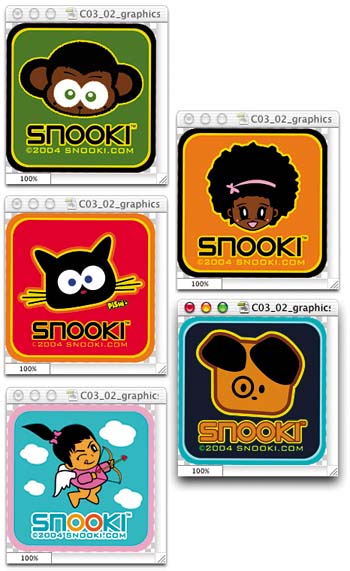
Close the original image without saving. Save each of the individual graphics into one destination folder. Leave Format/Save as Type set to TIFF, and click OK in the TIFF Options dialog box to accept its defaults. Close all but one of the individual images, which you'll use to create an optimization droplet.
Jump to ImageReady
With one of the individual graphics open, click the Edit in ImageReady button at the bottom of the Photoshop toolbox. That image opens in ImageReady, ready for further editing there.

Set Up an Optimizing Workspace
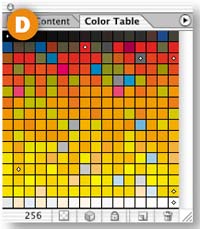
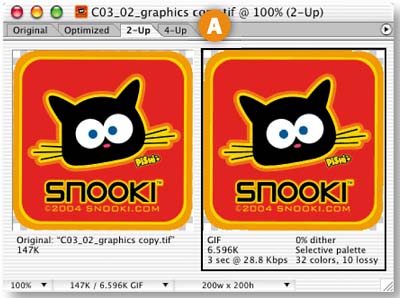
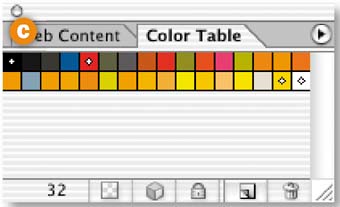
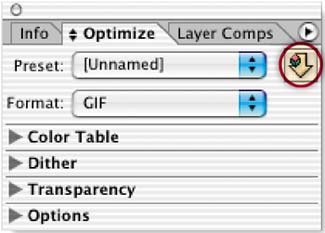
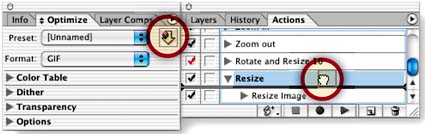
In ImageReady, click the 2-Up tab in the document window to see and compare the original graphic and a preview of the optimized graphic A. Open the Optimize palette (Window>Optimize). Click the double-pointed arrow on the Optimize tab to see all the palette's settings B. Click the Color Table icon on the Optimize palette C to open the Color Table palette D.
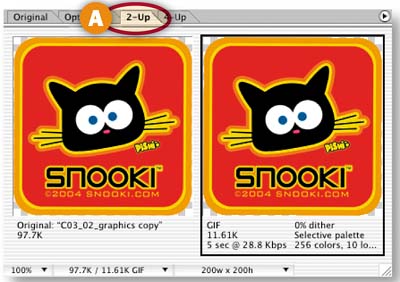
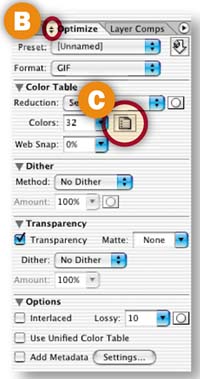
Click in the preview pane of the document window A and choose the following settings in the Optimize palette B. (For further explanation of these settings see GIF Optimization Settings in Ch. 1.)
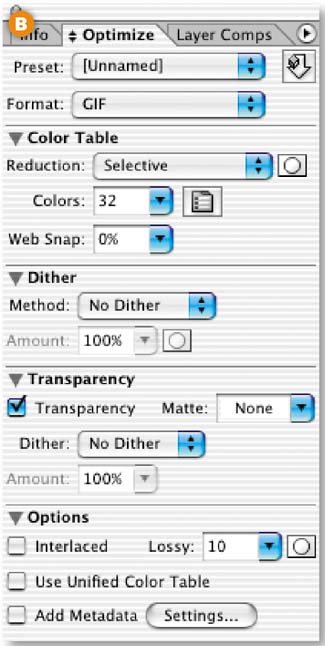
Format: GIF
Reduction: Selective
Colors: 32 (This setting has the most impact on file size and appearance. These colors are visible in the Color Table palette C)
Dither Method: No Dither
Transparency: Checked (to maintain the transparent background pixels)
Matte: None (This creates a hard-edged graphic with no halo; but if you know the color of the page background on which you plan to place these graphics, choose that color)
Lossy: 10 (to further reduce file size)
Add Metadata: Unchecked (to avoid inflating file size)
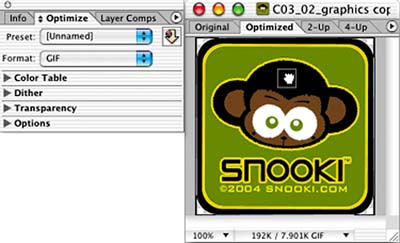
The resulting GIF looks like the original image and is small in file size.
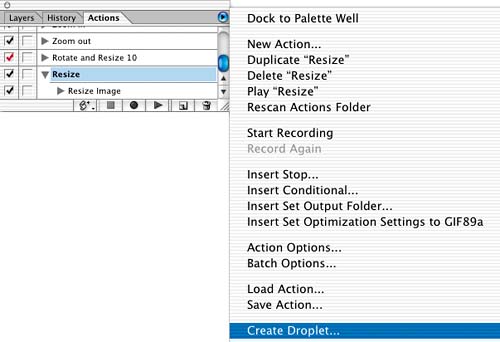
Create a Droplet
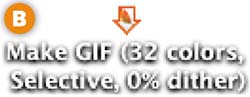
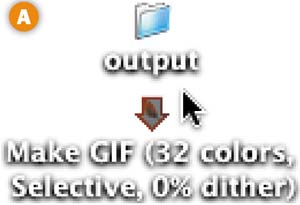
Creating a droplet is as easy as clicking the Droplet icon on the Optimize palette A and dragging to your desktop. The droplet appears on your desktop automatically named with the optimization settings B.
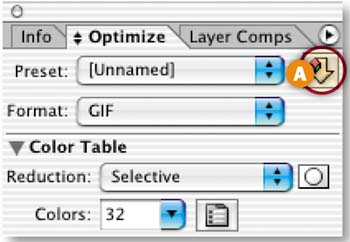
Alternatively, if you want the chance to choose the name or location of the droplet, click the side arrow on the Optimize palette and choose Create Droplet. In the Save Optimized Settings as Droplet dialog box, give the droplet a name and location, and click OK. Close the graphic without saving.
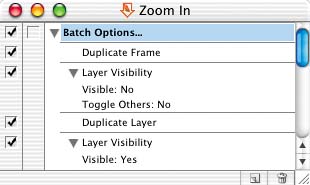
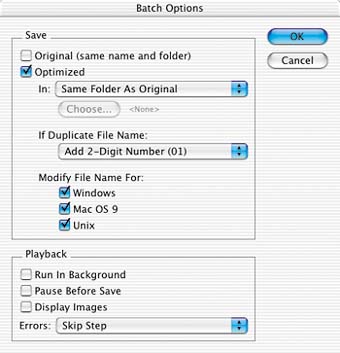
The droplet will save the optimized GIFs to the same folder as the original individual TIFF files by default. To save the optimized GIFs to a separate folder, double-click the droplet to open a droplet window A. In the droplet window, double-click Batch Options to open the Batch Options dialog box. In the Batch Options dialog box, leave Optimized checked, click the In button, and choose Specific Folder B. Then click the Choose button and navigate to a separate folder in which you want to save each of the optimized GIFs C.

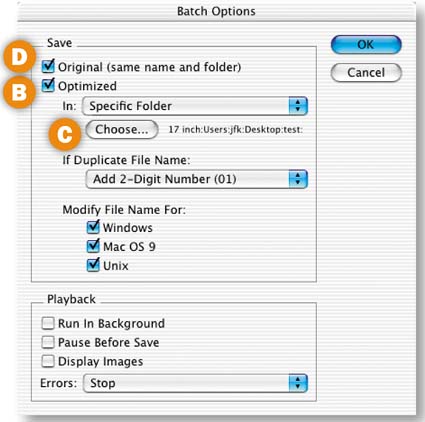
It's a good idea to also save a copy of the original individual graphics, containing the optimization settings you added. If you need to make a change to the files in the future, these will be the files to use. ImageReady will save a copy of each as a PSD file in the same folder as the original TIFFs if you check Original (same name and folder) in the Batch Options dialog box) D. Click OK to close the Batch Options dialog box. Then close the droplet window and click Save at the prompt to save your batch processing changes along with the droplet.
Apply the Droplet
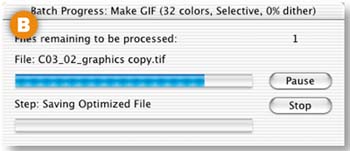
Now you'll use the droplet to automatically optimize all the individual graphics you created earlier. Click and drag the folder that contains those graphics on top of the droplet on your desktop A. You can see the progress of the files as they process in the Batch Progress window B.
View the Results
Open the folder to which you saved the GIFs on your hard drive. You'll see five optimized GIFs ready to be brought into a Web-building program for inclusion on a Web page.

Droplets are mini-applications you can create from ImageReady or Photoshop and apply to a single file or use to batch process a collection of files. Here are some tips for understanding and using droplets.

The simplest droplet is one created from the Optimize palette in ImageReady. This kind of droplet contains only optimization settings and is used to optimize one or more files by applying the same optimization settings, as you did in the second project in this chapter, Making Multiple Web Graphics.
To create a droplet from ImageReady's Optimize palette, drag the droplet icon from that palette onto your desktop. Alternatively, click the droplet icon in the Optimize palette and choose a droplet name and location, or click the side arrow on the Optimize palette and choose Create Droplet.
The other kind of droplet is one created from an action in either Photoshop or ImageReady. This kind of droplet can contain any action you create in the corresponding program. It is used to batch process multiple files with that action. In ImageReady, a droplet is the only way to batch process an action. In Photoshop, you can batch process an action either by dragging a folder of files onto a droplet or by using the Automate>Batch Process command from the File menu at the top of the screen or from the File menu in the File Browser, as you did in the first project in this chapter, Batch Processing Photo Thumbnails.
To create a droplet from an action in ImageReady, click the side arrow on ImageReady's Actions palette and choose Create Droplet. To create a droplet from an action in Photoshop, choose File>Automate>Create Droplet and specify the action set and action in the Create Droplet dialog box that opens.
When you create an action in ImageReady, you can specify optimization settings to be applied along with the other steps in the action by choosing optimization settings in the Optimize palette and then dragging the droplet icon from the Optimize palette into the action in the Actions palette. Set Optimization To [the format you chose in the Optimize palette] will appear as a step in the action, just above the selected step. Note that you cannot drag a droplet from your hard drive into the Actions palette.
Droplets can be used across Windows and Macintosh platforms. To use a Photoshop droplet created in Windows on a Mac, drag the droplet onto the Photoshop icon in your OS X dock (or drag an ImageReady droplet onto the ImageReady icon in your dock).
To use a droplet created on a Mac in Windows, change the extension on the droplet file name to .exe, because it is an executable mini-program.

In ImageReady, a droplet containing optimization settings can be applied to optimize an entire image, or alternatively to optimize selected slices in an image. To apply an optimization droplet to a slice, choose settings in ImageReady's Optimize palette, and then drag the Droplet icon from the Optimize palette onto the slice in the document window. You cannot drag a droplet from your hard drive onto a slice.
In ImageReady you can edit a droplet directly. Double-click an ImageReady droplet to open the droplet window. That window contains a list of all the steps in the action. In the droplet window, you can delete a step by dragging it to the Trash icon at the bottom of the window, or you can click and drag steps to rearrange them. In Photoshop you edit the underlying action and create a new droplet.
In ImageReady, you can set options for how a droplet will be applied to a batch of files by double-clicking the droplet to open the droplet window, and then double-clicking Batch Options at the top of the droplet window. This opens the Batch Options dialog box. In that dialog box you can choose whether to save original files in addition to optimized files, and where to save the optimized files. You can specify how to name any duplicate files to avoid overwriting files, and you can instruct ImageReady to create file names that are appropriate for various operating systems. Among the Playback settings are options to display images while they are being processed and to pause before saving each image. In Photoshop, batch processing options are located in the Create Droplet dialog box and are the same as the batch options covered in the Batch Processing Photo Thumbnails project earlier in this chapter. ![]()
Kick your actions up a notch by adding conditions. This action uses conditional logic to automatically resize photographs to a uniform height and to optimize photos and related text graphics in different formats for display on the Web.
Open a Photo and a Text Graphic
You can make actions more useful by including logic that triggers a step only if a certain condition is met. In this project you'll create an action that identifies photos that are taller than a certain size and resizes them so you have a uniform collection of vertical and horizontal photos to display on a Web page. The action also distinguishes between photographs and related text graphics (like Web page headers or photo captions), and optimizes the former as JPEGs and the latter as GIFs.
Start by opening a vertical photo and a related text graphic in ImageReady. You'll use these files to set up the action. Later you'll apply the action to a batch of photos using a droplet. Conditional logic is an ImageReady-only feature, so this project takes place in ImageReady.

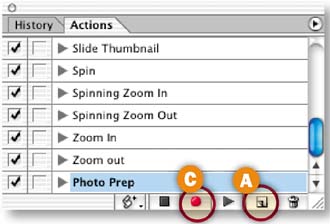
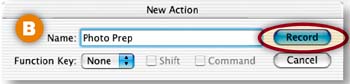
Select the photo, and open the Actions palette (Window>Actions). Click the Create New Action icon at the bottom of the ImageReady Actions palette A. In the New Action dialog box, name the action Photo Prep and click Record B. The red button at the bottom of the Actions palette means the action is recording C.
Choose Resizing Options
The first step you'll record comes with a built-in condition. This step tells ImageReady to resize every image on which the action is run to a height of 300 pixels, but only if the image is taller than 300 pixels to begin with.
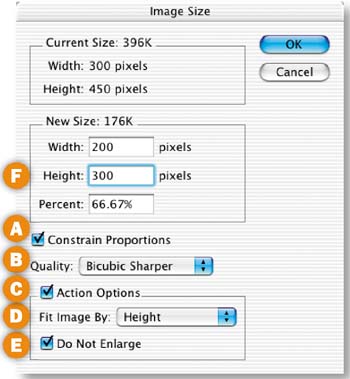
Choose Image>Image size to open the Image Size dialog box, and set the options in the dialog box in this order.
Constrain Proportions: Checked A. (to maintain the proportionality of the resized photos)
Quality: Bicubic Sharper B. (see sidebar)
Action Options: Checked C. (to turn on the following options that are designed for batch processing)
Fit Image By: Height D. (to make the reduced photographs the same height. The width of each resized photo will vary based on the proportions of the original.)
Do Not Enlarge: Checked E. (to ensure that no image will be upsampled, which protects the quality of your photos.)
Height: 300 pixels F. (to set the height to which each image taller than 300 pixels will be resized. Width changes automatically and will be different than the 200 pixels you see here for photos that are different proportions than this one.)
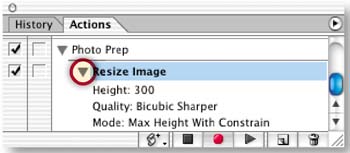
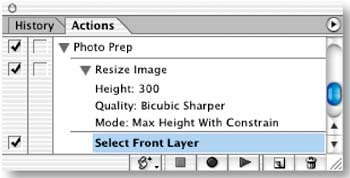
Click OK to close the Image Size dialog box and resize the open photograph to a height of 300 pixels. There's now a Resize Image step in the Photo Prep action. Click the arrow to the left of the step to see its parameters.
Select the Top Layer
Now you'll begin building steps that optimize text graphics as GIFs and photographs as JPEGs. You'll add a command to make sure the action selects the top layer of every file, because the text graphics on which you'll be running this action contain type on their top layers and pixel-based graphics on their other layers.
Click on the open text graphic. Press Shift+Option/Alt-] (the right bracket key on your keyboard). This is the shortcut for selecting the top layer in a file. You'll see a new step in the action labeled Select Front Layer.
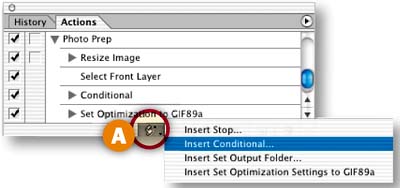
Insert a Conditional Statement
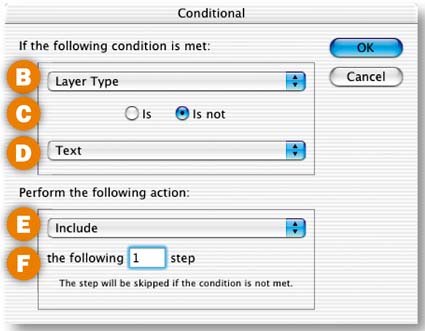
In this step you'll insert a conditional statement to ensure that your text graphics are optimized as GIFs. Click the Insert Step icon at the bottom of the Actions palette A and choose Insert Conditional from the pop-up menu. In the Conditional dialog box, choose the following settings and then click OK:
Choose Layer Type from the top pop-up menu B;
Choose the button labeled is C;
Choose Text from the second pop-up menu D;
Choose Include from the third pop-up menu E.
Type 1 in the field at the bottom of the dialog box F.

Choose GIF Optimization Settings
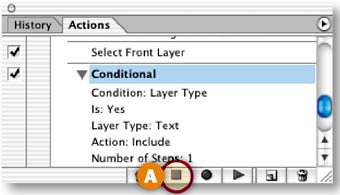
Click the Stop button at the bottom of the Actions palette A to stop recording the action. Otherwise, every change you make to the optimization settings will be recorded as a separate step in the action, which is unnecessary.
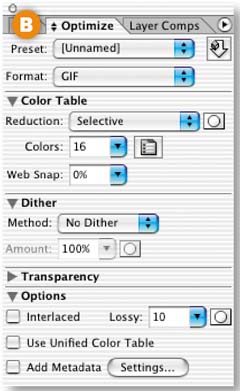
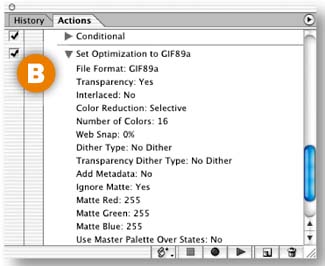
Click the Optimized tab in the document window, and open the Optimize palette (Window>Optimize). Choose the following optimization settings for this image in the Optimize palette—Format: GIF, Reduction: Selective, Colors: 16, Dither: No Dither, Lossy: 10; Add Metadata, unchecked B. Leave the other settings at their defaults.
Insert a GIF Optimization Step
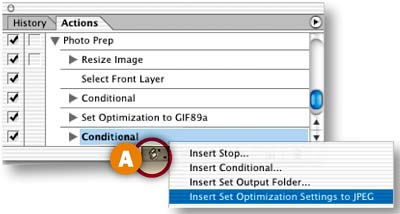
With record still off, click the Insert Step button at the bottom of the Actions palette A and choose Insert Set Optimization Settings to GIF89A (a fancy name for GIF). This adds a step to the action that contains the GIF optimization settings you chose in the last step B.
Add Another Condition
Now you'll insert a conditional statement that ensures your photographs will be optimized as JPEGs. Leave record off. (It doesn't have to be on when you use the Insert Step commands). Click the Insert Step icon A and choose Insert Conditional from the pop-up menu. In the Conditional dialog box, choose the following settings and click OK:
Choose Layer Type from the top pop-up menu B;
Choose the button labeled is not C;
Choose Text from the second pop-up menu D;
Choose Include from the third pop-up menu E.
Type 1 in the field at the bottom of the dialog box F.
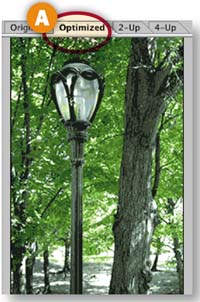
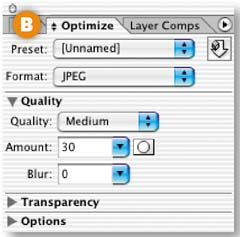
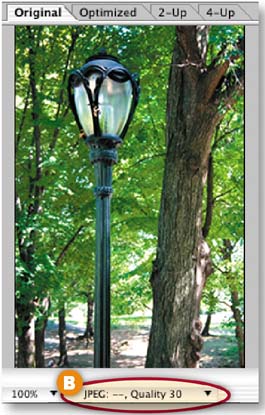
Click on the Optimized tab in the document window of the open photograph A. With record still off, choose the following optimization settings in the Optimize palette B —Format: JPEG, Quality: Medium. Leave the other settings at their defaults.
Insert a JPEG Optimization Step
With record still off, click the Insert Step button at the bottom of the Actions palette A and choose Insert Set Optimization Settings to JPEG. This adds a step to the action that contains the JPEG optimization settings you chose in the last step B.
Test the Action on Individual Files
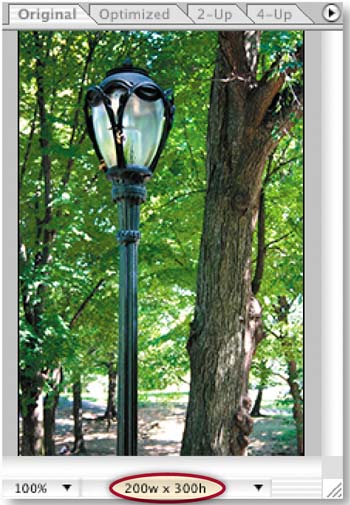
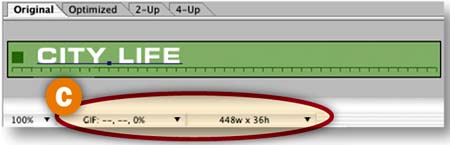
Choose File>Revert to return the open photograph to its original, larger state. Click the Play button on the bottom of the Actions palette A. The photograph should become smaller. Click the Information box at the bottom of the photograph's document window and choose Optimized Information. The Information box should indicate that the image is now a JPEG B. Repeat this step on the open text graphic. The text graphic should stay the same size (because it was shorter than 300 pixels to start with) and become a GIF C. If all went as expected, move to the next step.
If the action doesn't work as expected, troubleshoot by selecting each step in the action one-by-one, clicking the side arrow on the Actions palette D, and choosing Play [name of step]. If you find a faulty step, double-click it to try to open its command, where you can fix the settings. Or drag the step to the Trash icon in the Actions palette and re-record. If all else fails, start all over.
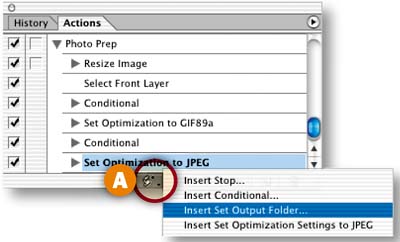
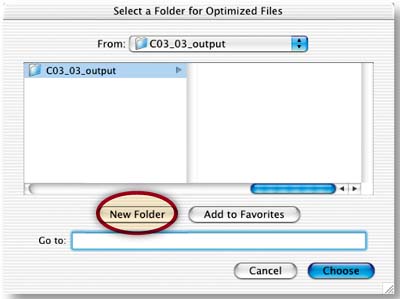
Click the Insert Step icon at the bottom of the Actions palette and choose Insert Set Output Folder A. In the dialog box that opens, click New Folder to make an output folder for the files generated by this action and click Choose. Be aware that if you move your output folder, the action won't be able to find it. In that case, create a new output folder as explained in the tip.
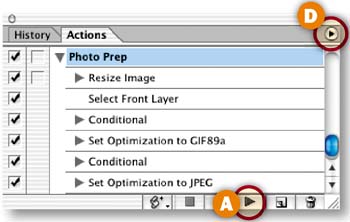
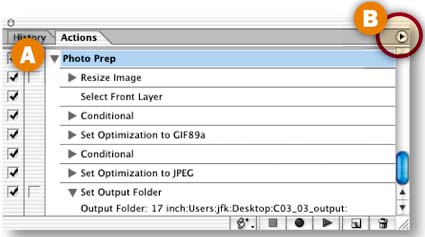
Create a Droplet
The real advantage of recording a conditional action is that you can use it to process a whole folder of images. Select the Photo Prep action in the Actions palette A. Click the palette's side arrow B and choose Create Droplet. Navigate to your desktop and click Save. The named droplet icon C will appear on your desktop.

Process a Folder of Photographs
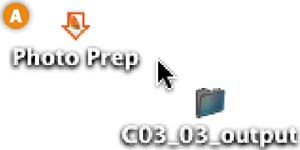
Now comes the best part! Drag the C03_03_images project files folder onto the Photo Prep droplet on your desktop A. Then sit back while ImageReady runs the action on all the files in the folder. Check the results by opening your output folder B. It will be filled with vertical and horizontal photographs optimized as JPEGs and resized to 300 pixels high, along with the two text graphics files optimized as GIFs. These files are all ready to be brought into a Web site–building program. Try running this droplet on your own images to save processing time.
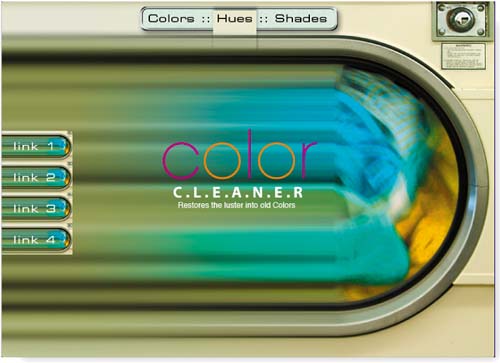
Here's an efficient way to design a whole site full of pages in a single file. Use layer comps to create multiple page designs in one file. Then save time by using slice sets to slice pages that are similar.
Open the Layer Comps Palette
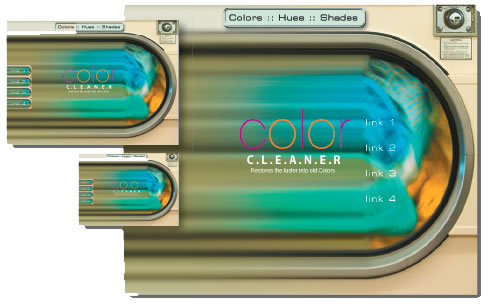
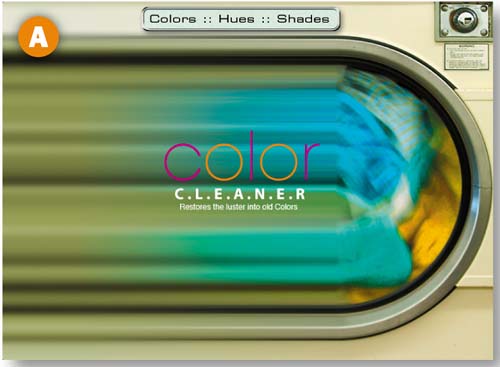
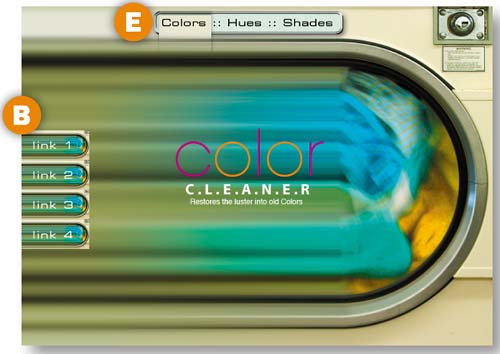
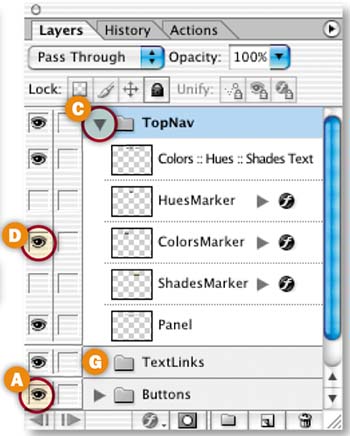
Before you start, take a look at the sidebar on this page to learn how you'll use layer comps in this project. Begin in ImageReady with a basic Web page design A. Notice that there are some additional layers in the Layers palette that don't have an Eye icon to their left. These layers are currently not visible in the document window. They'll be used later in the project as you create content for the individual pages in this Web site and record the state of each page as a separate layer comp.
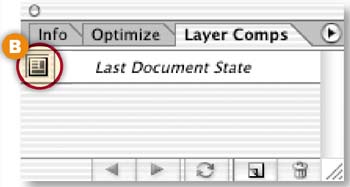
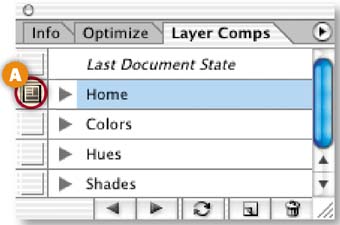
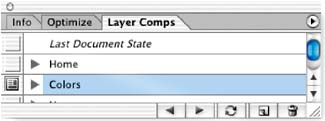
Open ImageReady's Layer Comps palette by choosing Window>Layer Comps. The Last Document State at the top of the palette is a snapshot of the most recent state of the layers in the image. You can return to that state at any time by clicking in the Apply Layer Comp field to the left of the Last Document State B.
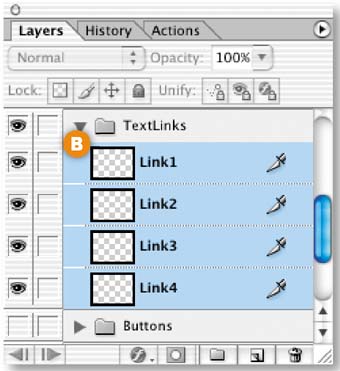
The home page of the site you're creating will include the artwork that's currently visible in the document window, plus some text links. Click the Eye icon to the left of the TextLinks layer set in the Layers palette A to make the text links visible B.
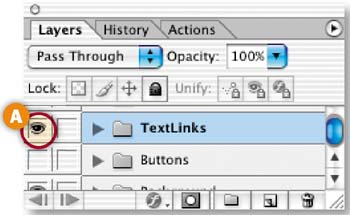
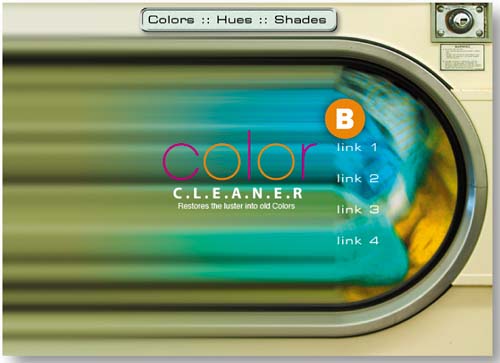
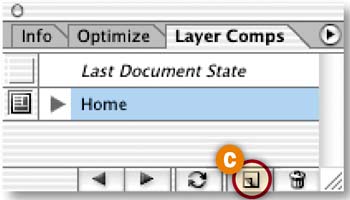
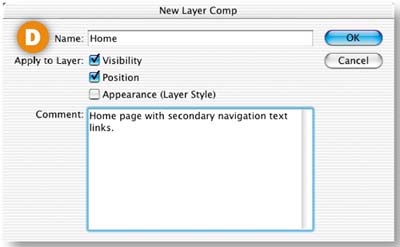
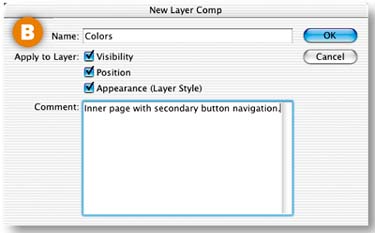
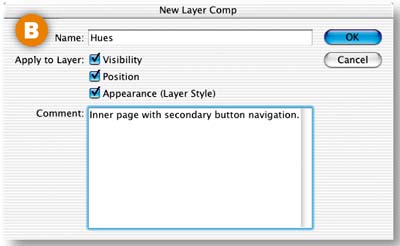
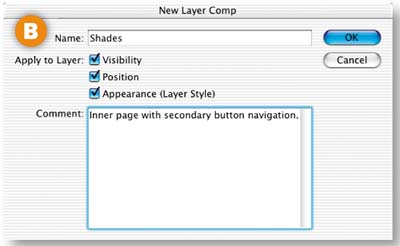
Now you'll make a layer comp that is a snapshot of this home page design. Click the Create New Layer Comp button at the bottom of the Layer Comps palette C. In the New Layer Comp dialog box that opens D, name this layer comp Home. Check Visibility and Position— the two properties of this layer that you want the program to keep track of. You can type some notes into the Comment field about this layer comp if you wish. Click OK to create the Home layer comp in the Layer Comps palette.
Design the Colors Page
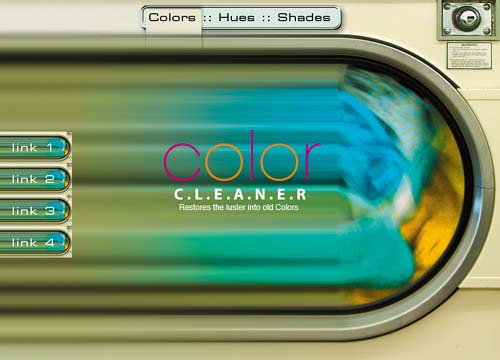
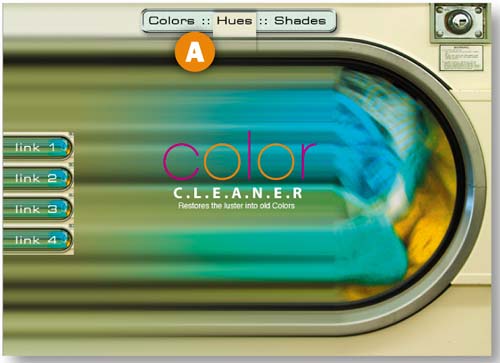
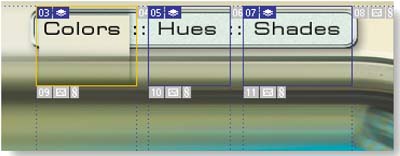
This site has three inner pages—the colors page, the hues page, and the shades page. In this step you'll design the colors page by changing the visibility and position of some of the layers.
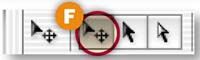
Click in the Visibility field of the Buttons layer set in the Layers palette A to display an Eye icon. A set of navigation buttons appears on the left side of the image B. Next, click the arrow to the left of the TopNav layer set C to open that layer set, and click in the Visibility field of the ColorsMarker layer to add an Eye icon there D. A marker appears on the Colors link in the navigation bar at the top of the image E. Finally, select the Move tool in the toolbox and click the Move tool icon in the Options bar F. Select the TextLinks layer set in the Layers palette G. Hold down the Shift key to constrain vertical movement, and drag the text links to the left until they are on top of the buttons B.
Now you'll make a second layer comp-—a snapshot of layer visibility, position, and appearance in the colors page you just designed.
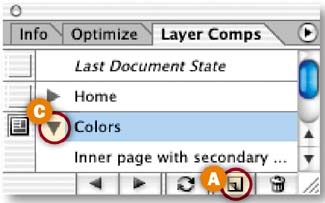
Click the Create New Layer Comp button at the bottom of the Layer Comps palette A. In the New Layer Comp dialog box B, name this layer comp Colors. Check Visibility, Position, and Appearance. (Appearance includes layer styles, layer blending modes, and layer opacity.) You can type notes into the Comment field if you wish. Then click OK. You'll see a new Colors layer comp in the Layer Comps palette. If you click the arrow to the left of the layer comp C you'll see the comments you entered in the New Layer Comp dialog box.
Design the Hues Page
The hues page is another inner page of this site. It is similar in structure and content to the colors page. The only difference is that the Hues marker is visible and the Colors marker is not visible on the hues page A.
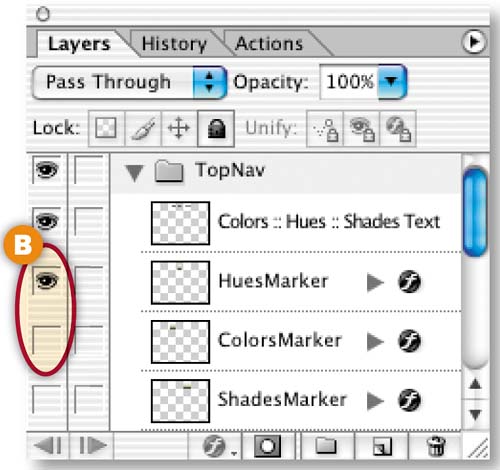
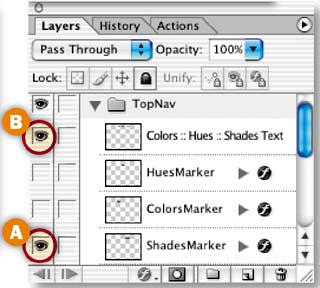
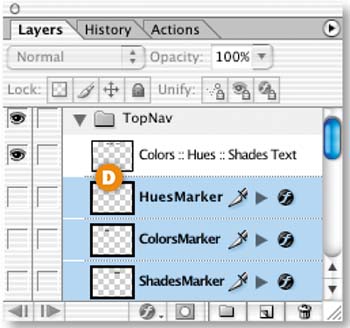
To set up the hues page, click in the Visibility field of the HuesMarker layer in the Layers palette to add an Eye icon there. Then click in the Visibility field of the ColorsMarker layer to turn off that Eye icon B.
Create the Hues Page Layer Comp
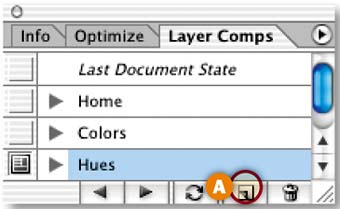
Now you'll make a layer comp of the hues page you designed in the last step. Click the Create New Layer Comp button at the bottom of the Layer Comps palette A. In the New Layer Comp dialog box B, name this layer comp Hues. Check Visibility, Position, and Appearance, and add a comment if you wish. Click OK to create the Hues layer comp in the Layer Comps palette.
Now you'll design the final page—the shades page, which is another inner page with the same structure as the colors and hues pages. In the Layers palette, click in the Visibility field of the ShadesMarker layer to add an Eye icon there A. Then click in the Visibility field of the HuesMarker layer to turn off its Eye icon B. There's now a marker on the Shades link in the navigation bar at the top of the image C.

Create the Shades Layer Comp
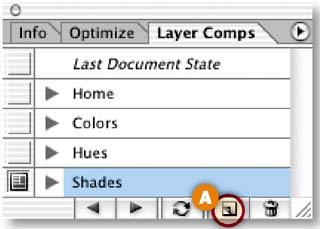
To create a layer comp for the shades page, click the Create New Layer Comp button at the bottom of the Layer Comps palette A. In the New Layer Comp dialog box B, name this layer comp Shades. Check Visibility, Position, and Appearance, and add a comment if you wish. Click OK to create the Shades layer comp in the Layer Comps palette.
View the Layer Comps
View each of the layer comps by clicking in the Apply Layer Comp field to the left of each layer comp A. Alternatively, click the Previous and Next icons at the bottom of the Layer Comps palette to cycle through the layer comps B. (This is a good way to quickly show a client all of your page designs in a single file.)

If one of the designs does not look as expected, click on its layer comp in the Layer Comps palette to select that layer comp C. Edit the image. Then click the Update Layer Comp icon at the bottom of the Layer Comps palette D. When you're satisfied, choose File>Save As to save the image with all of its layer comps.
Slice the Home Page Layer Comp
Now you'll begin slicing up the image, so that each of the navigation graphics (the text links, markers, and buttons) can be saved as a separate GIF or JPEG. This will allow you to assign a separate URL link to each navigation graphic in a Web site–building program like Dreamweaver or GoLive. You'll start by slicing the home page, which has different navigation graphics than the other three pages.
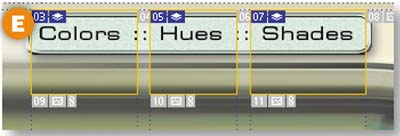
Click in the Apply Layer Comp field to the left of the Home layer comp A to display that layer comp in the document window. In the Layers palette, click the arrow to the left of the TextLinks layer set to open that layer set. Click on the Link1 layer; then hold down the Shift key and click on the Link4 layer to select all the text link layers B. Choose Layer>New Layer Based Slices from the menu bar at the top of the screen to create a separate slice around each of the text links C.
Now select the HuesMarker layer in the Layers palette. Hold down the Shift key and click on the ShadesMarker layer. This selects the three marker layers D. Choose Layer>New Layer Based Slices from the menu bar to create slices around each of the navigation markers in the top navigation bar E.
Create Slice Set 1
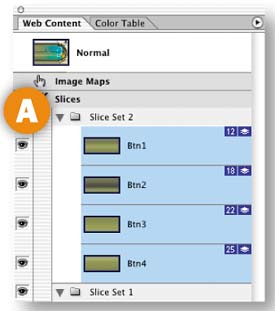
Open the Web Content palette (Window>Web Content), where you'll see all of the slices you just made. Click on the top slice in the palette; then hold the Shift key and click on the bottom slice to select all the slices. Click the Create New Slice Set button at the bottom of the Web Content palette A. This creates Slice Set 1 B which contains all of the slices indented beneath it.

Now you'll slice the buttons that appear only on the inner pages. Click in the Apply Layer Comp field to the left of the Colors layer comp A. In the Layers palette, open the Buttons layer set. Shift-click to select the four button layers B. Choose Layer>New Layer Based Slices from the menu bar at the top of the screen to create four button slices C.

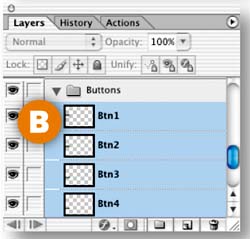
Make Another Slice Set
In the Web Content palette, Shift-click to select all the button slices. Click the Create New Slice Set icon at the bottom of the Web Content palette to create Slice Set 2 A, which contains only the button slices. You don't have to slice any of the other pages you've designed!
Save Each Page
We've already optimized for you, so you can go ahead and save each layer comp using the relevant slice sets. You'll start by saving the Colors layer comp. Make sure both slice sets display an Eye icon in the Web Content palette A, B. Click the Apply Layer Comp icon on the Colors layer comp. Choose File/Save Optimized As. Then set Format/Save As Type to HTML and Images. Make a new folder for the colors page output, and click Save. Repeat this step for the Hues and the Shades layer comps, making a separate output folder for each.
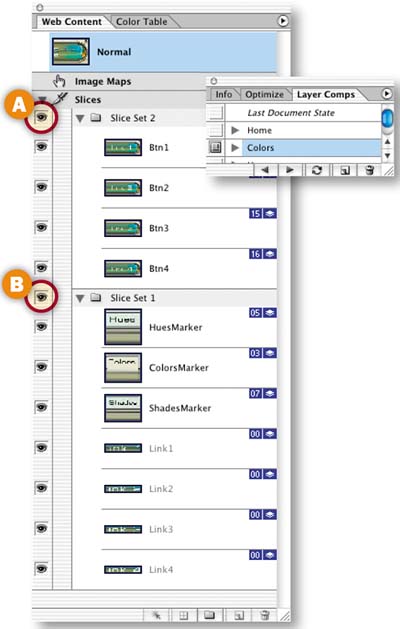
Turn off the Eye icon on Slice Set 2 C (because the home page doesn't need the button slices) and repeat this step on the Home layer comp. Choose File>Save to resave the PSD file with its slice sets.
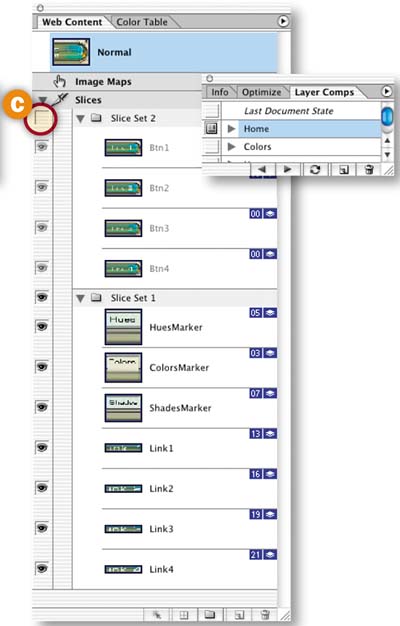
In the output folders on your hard drive you'll find an HTML file for each page and a folder of images generated by only the slices that relate to that page. Open each HTML page in a Web browser to admire your work.
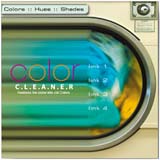
The last project, Designing Multiple Pages in a Single File, explained how to produce multiple Web pages using layer comps and slice sets. But the pages ImageReady generates from layer comps are not automatically linked together. If you want to link the resulting pages to one another you have to do some advance planning, as we explain here.
In order to create links between the HTML pages generated by the layer comps you made in the last project you have to know two things in advance—the name of each HTML file and where it will be saved. This will allow you to create relative links between the files. (To review relative links take a look at Image Map Navigation in Chapter 1).
First let's talk about file names. In the last project you saved each HTML file with its default file name. If you look in your output folders you'll see that ImageReady named each HTML file with the same name, C03_04_cleaner.html, which it took from the name of the PSD source file. If you're going to link the pages together, each page will have to have a unique name. You can take care of that by typing a unique name into the Name field of the Save Optimized As dialog box when you save each file. But you'll have to know the names you're going to give each file in advance so you can create links before saving. Let's say you'll name the files hues.html, colors.html, shades.html, and home.html.

Now let's plan where you're going to save each file. Assume you'll save each HTML page into a separate folder, each of which is located in the same folder/directory on your hard drive, and that those folders will be named hues folder, colors folder, shades0 folder, and home folder.
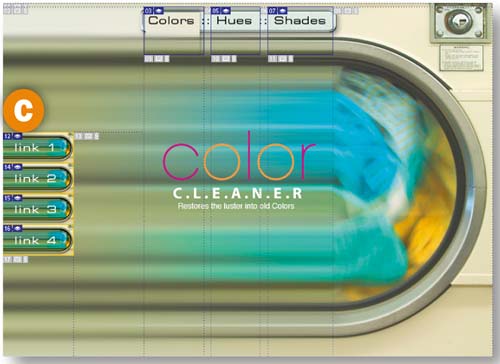
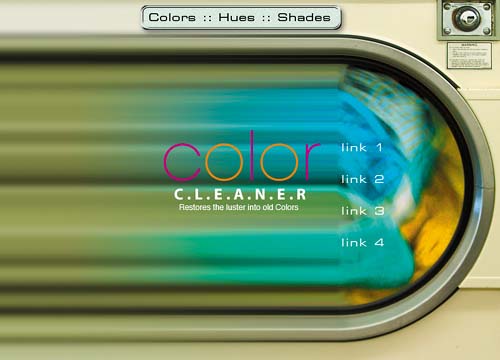
Now you have the information you need to create the links. Click in the Apply Layer Comp field to the left of the Colors layer comp. In the Web Content palette, select the ColorsMarker slice in Slice Set 1. Choose Window>Slice to open the Slice palette. In the URL field of the Slice palette, type ../colors/colors.html. This means go up one level, look for the colors folder, and then go down one level to find the file colors.html. Repeat this on the HuesMarker slice (../hues/hues.html) and on the ShadesMarker slice (../shades/shades.html). If you want to link back to the home page, you'll have to add an extra slice to the image (perhaps around the silver button at the top right of the image), and type ../home/home.html in the URL field for that slice. Now save each layer comp as an HTML file as you did in the last project, but give each file its unique name and save it to the planned folder. ![]()
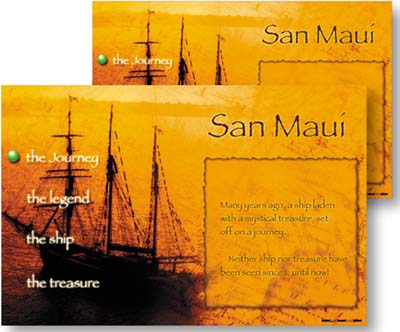
Take advantage of a hidden output feature in ImageReady that allows you to generate multiple page layouts that are automatically linked together, complete with rollovers, and ready to put on line.

Open a Layered File in ImageReady
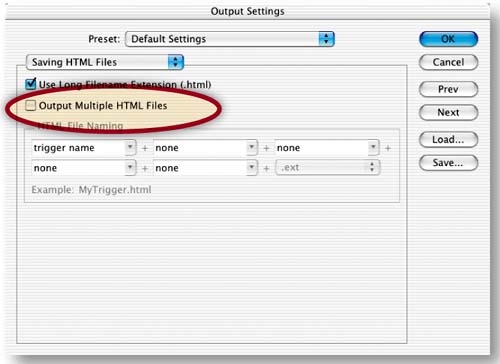
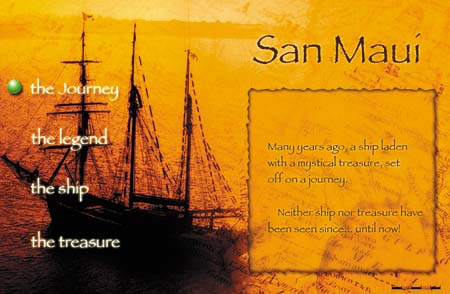
Buried deep in ImageReady's Output Settings is a little-known checkbox labeled Output Multiple HTML Files. This feature works in conjunction with the Selected rollover state to create multiple linked files with rollover navigation. In this project you'll use these features to make four pages for a Web site in a single file. Each page has rollover buttons programmed with the Selected state and remote rollovers that change the content of the page. If you want to learn more about making remote rollovers, review Pointers and Remote Rollovers in Chapter 1. If you're eager to see what we have in store for you here, dig right in.
We made this file in Photoshop, including lots of layers with the artwork for four Web pages. Open the file in ImageReady. Choose View>Show>Layer Edges if you want to turn off the distracting blue box that identifies the boundaries of a selected layer's contents.
Change the Slice-Naming Default
You'll be using lots of slices in this project, so take a minute to make the automatic slice names shorter and more meaningful. Choose File>Output Settings>Slices. In the Default Slice Naming area of the Output Settings dialog box A, click the arrow on the first menu and choose layer name or slice no. Click the arrow on the second menu and choose none. Click the arrow on the third menu and choose none. Click OK.

Slice the Markers
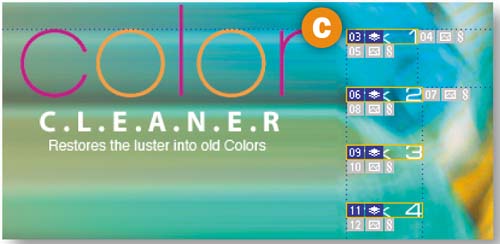
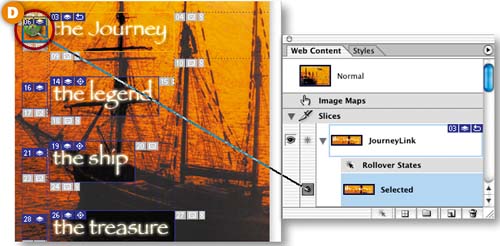
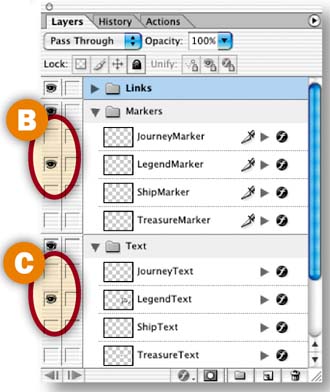
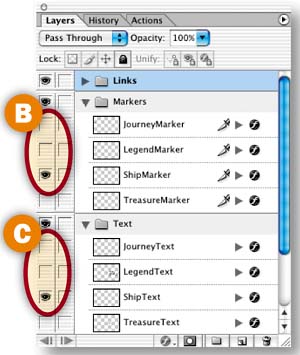
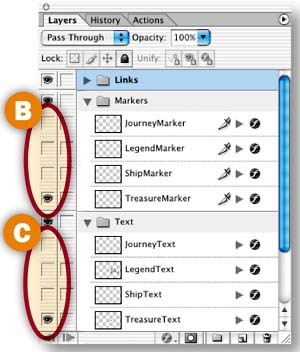
First, you'll slice the navigation markers that will tell your audience which page they're viewing. In the Layers palette, click the arrow to the left of the Markers layer set to open that layer set. Click in the Visibility field of each of the layers in the set A to make all the markers visible in the document window. Select all the marker layers by clicking on the JourneyMarker layer, holding down the Shift key, and clicking on the TreasureMarker layer B. Now choose Layer>New Layer Based Slices from the menu bar at the top of the page. This makes a slice around each marker C.
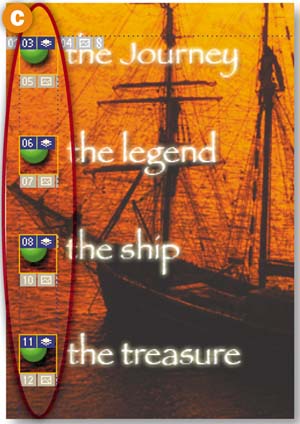
Slice the Page Text
Now you'll add one big slice around the area that will contain different text on each page. This area must be sliced because it will be a target of the remote rollovers you'll be creating. In the Layers palette, click the arrow to the left of the Text layer set to open that layer set. Click in the Visibility field of each layer in that layer set A to make all the text layers visible, one on top of the other. Select the Slice tool in the toolbox and draw a slice that's big enough to encompass all of the text B.

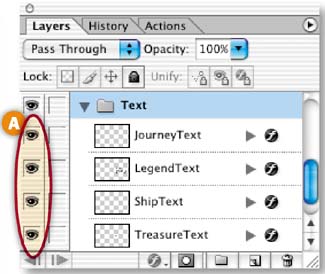
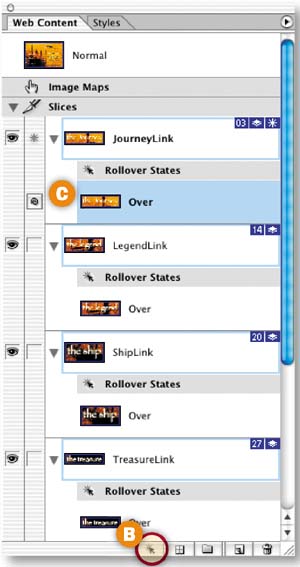
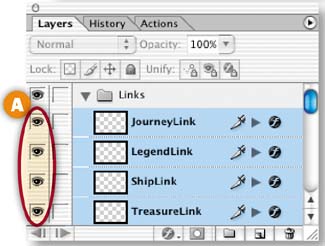
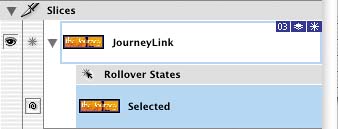
Now you'll add a slice and add a rollover state to each of the text links—all in one step. In the Layers palette, click the arrow to the left of the Links layer set to open that layer set. Click on the JourneyLink layer, hold down the Shift key, and click on the TreasureLink layer to select all the layers in the layer set A. Open the Web Content palette (Window>Web Content), and click on the Create Layer-Based Rollover icon at the bottom of the Web Content palette B. The Web Content palette now lists each of the text link slices with an Over state indented beneath it C. You'll change each of the Over states to a Selected state later in this project.
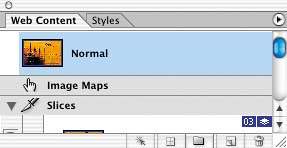
Set Up the Normal State
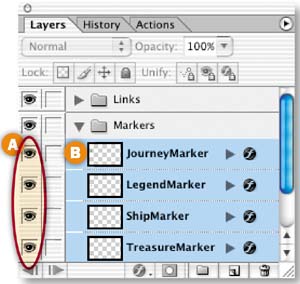
Now that you've finished slicing, you'll set up the Normal state of the document—the way it will look when it first loads in a viewer's Web browser. In the Layers palette, click in the Visibility fields A, B of each of the following layers to turn off the Eye icons and make those layers invisible in the Normal state:
LegendMarker
ShipMarker
TreasureMarker
LegendText
ShipText
TreasureText


Now you'll change the Over state of each text link slice to a Selected state. Double-click on the Over state of the JourneyLink slice in the Web Content palette A. In the Rollover State Options dialog box that opens, choose Selected B. Then check Use as Default Selected State C, so that the journey link is in the Selected state when the site loads in a viewer's Web browser.

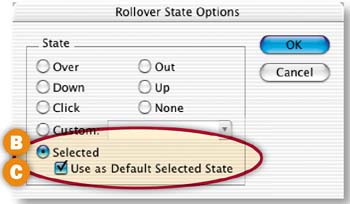
Repeat this step on each of the other text link slices—the LegendLink slice, the ShipLink slice, and the TreasureLink slice—except that for these three slices be sure to uncheck Use as Default Selected State in the Rollover State Options dialog box.
Complete the Journey Page
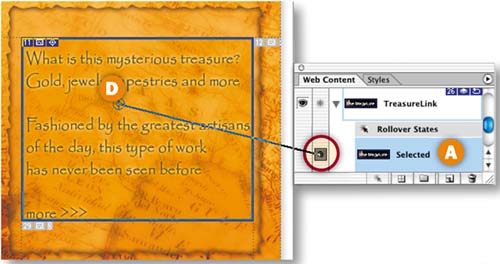
Each of the four pages in the site you're building will appear on the Selected state of one of the four text links. In the following steps you'll construct each page by changing its appearance on the Selected state of the corresponding text link. There are no changes to be made to the appearance of the journey page, which loads first into a viewer's browser. However, there is one small, but important technical change to be made to the Selected state of the JourneyLink slice.
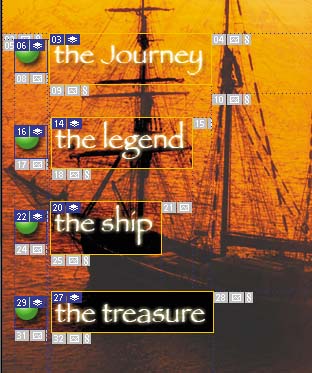
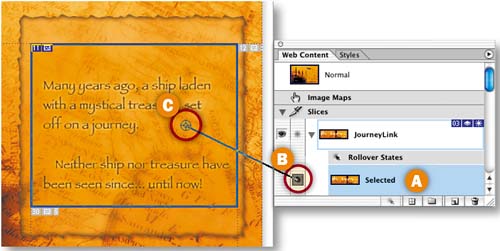
Click on the Selected state of the JourneyLink slice in the Web Content palette A. Then click on the spiral icon to the left of that Selected state B and drag to the slice around the remote text in the image C. Do this again, dragging to the slice around the journey marker in the image D. This step is necessary to make the remote changes work when a viewer is on another page in the site and clicks on the journey link.
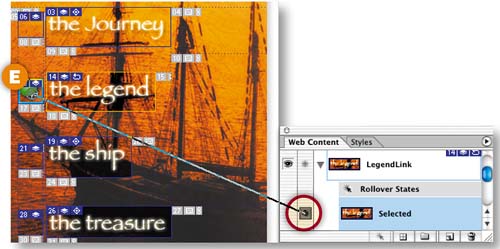
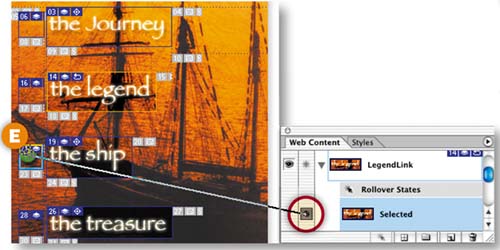
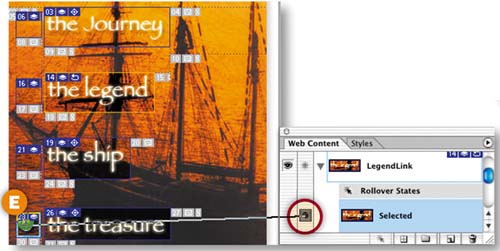
Now you'll change the appearance of the legend page. Click on the Selected state of the LegendLink slice in the Web Content palette A. In the Layers palette, click in the Visibility field of the JourneyMarker layer to turn off its Eye icon. Click in the Visibility field of the LegendMarker layer to add an Eye icon B.

In addition, click in the Visibility field of the JourneyText layer to turn off its Eye icon and click in the Visibility field of the LegendText layer to add an Eye icon there C. Then, in the Web Content palette, click on the spiral icon to the left of the Selected state of the LegendLink slice and drag to the remote text slice in the image D. Do this again, dragging to the slice around the Legend marker in the image E. In the image, a marker appears to the left of the legend text link and text about the legend appears in the remote slice.
Create the Ship Page
Next you'll change the appearance of the ship page. Click on the Selected state of the ShipLink slice in the Web Content palette A. In the Layers palette, click in the Visibility field of the JourneyMarker layer to turn off its Eye icon and click in the Visibility field of the ShipMarker layer to add an Eye icon B.
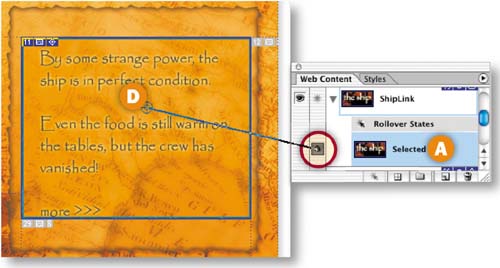
Then click in the Visibility field of the JourneyText layer to turn off its Eye icon and click in the Visibility field of the ShipText layer to add an Eye icon C. In the Web Content palette, click on the spiral icon to the left of the Selected state of the ShipLink slice and drag to the remote text slice in the image D. Repeat this, dragging to the slice around the ship marker in the image E. In the image, a marker appears to the left of the ship text link and text about the ship appears in the remote slice.
Now you'll change the appearance of the treasure page on the selected state of the TreasureLink slice. Click on the Selected state of the TreasureLink slice in the Web Content palette A. In the Layers palette, click in the Visibility field of the JourneyMarker layer to turn off its Eye icon and click in the Visibility field of the TreasureMarker layer to add an Eye icon B.
Then click in the Visibility field of the JourneyText layer to turn off its Eye icon and click in the Visibility field of the TreasureText layer to add an Eye icon there C. In the Web Content palette, click on the spiral icon to the left of the Selected state of the TreasureLink slice and drag to the remote text slice in the image D. Do this again, dragging to the slice around the treasure marker E. In the document window, a marker appears to the left of the treasure text link and text about the treasure appears in the remote slice. You're now finished creating the pages. Click the Preview in Browser button in the toolbox and try out each text link in the browser.
Save Multiple Linked Pages
This is the secret to saving multiple pages with automatically created links. Choose File>Output Settings>Saving HTML Files. In the Output Settings dialog box, check Output Multiple HTML Files A and click OK.
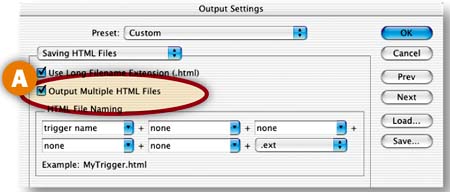

We optimized the image for you. So just choose File>Save Optimized As. In the Save Optimized As dialog box B, set Format/Save As Type to HTML and Images, create a new folder, and click Save. Click OK at the file name warning. The output folder on your hard drive contains four HTML pages and a folder of images. You have a whole site of linked pages ready to upload to a Web server!
In this advanced project you'll automatically create variations on a Flash Web banner using data sets and dynamic text variables. You can use the resulting Web banners to spice up individual pages in a Web site.
Create a Fly-In Animation
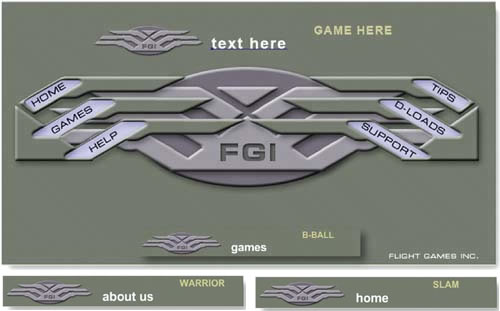
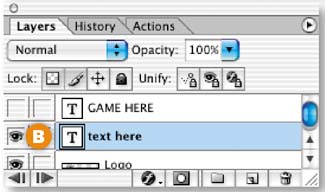
Get started by making a simple tweened animation in ImageReady. We'll walk you through the process, but if you have any questions about animations review Chapter 2, Animation. Choose Window>Animation to open the Animation palette. Click the Duplicate Animation Frame icon at the bottom of the Animation palette A to create Frame 2. In the Layers palette, select the text here layer B. Select the Move tool in the toolbox, and press the right arrow key on your keyboard several times to move the text to the right until it is outside the document window and no longer visible in the image C.

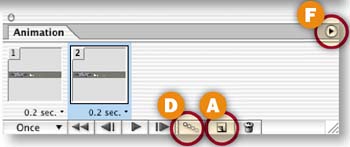

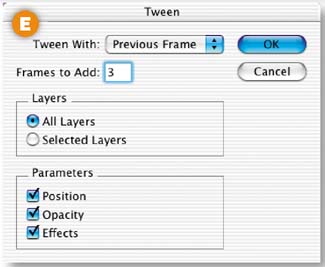
With Frame 2 selected, click the Tween icon at the bottom of the Animation palette D. In the Tween dialog box E, choose Tween With: Previous Frame, and Frames to Add: 3. Leave all three Parameters checked and click OK. Click the side arrow on the Animation palette F and choose Reverse Frames.
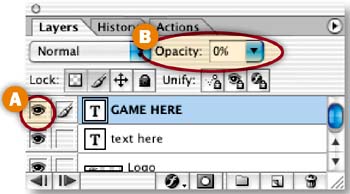
Select Frame 5 in the Animation palette. In the Layers palette, select the GAME HERE layer and click in the Visibility field to the left of the GAME HERE layer to add an Eye icon A, making the words GAME HERE visible in the image. Change the Opacity field at the top of the Layers palette to 0% B. Click the Duplicate Animation Frame icon at the bottom of the Animation palette C to create Frame 6. With Frame 6 selected, change the Opacity field in the Layers palette back to 100%. Then click the Tween icon D. Leave the options in the Tween dialog box as you set them in the previous step and click OK. You now have nine frames in the animation.


Click the Play button at the bottom of the Animation palette E to see the words text here fly in from the right, followed by the words GAME HERE fading into view. Select Frame 9 in the Animation palette so all of the elements are visible in the document window.
Define Text Variables
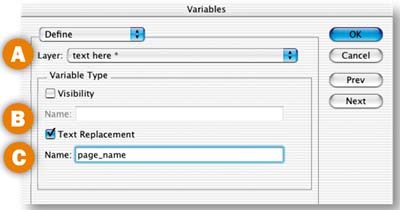
Now things get really interesting. You'll define two variables, one for each of the text layers. Choose Image>Variables>Define. In the Variables dialog box, choose text here from the Layer menu A to define the source of the first variable. Check Text Replacement to establish that this is a text variable B. Type page name as the name of this variable, being careful not to include spaces or unusual characters in the variable name C. Don't click OK yet.
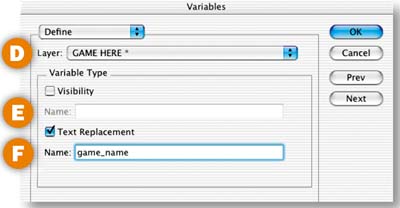
To define the second variable, choose GAME HERE from the Layer menu D in the Variables dialog box, check Text Replacement E, and type game_name as the name of this variable F.
Create the Home Banner Data Set
In the next two steps you'll create a set of data that will be used to replace the words text here and GAME HERE on one of the Web banners you're creating—a banner for a home page.
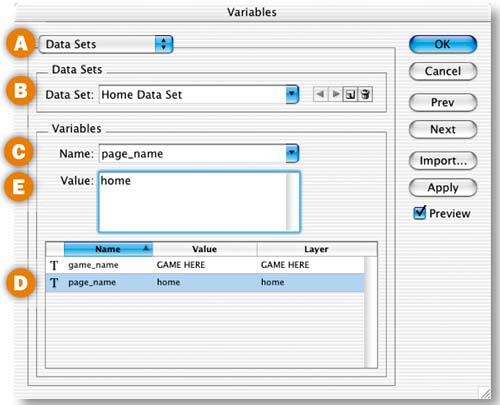
First you'll create the data for the page_name variable (the data that will replace the words text here on the home Web banner). Choose Data Sets from the menu at the top of the Variables dialog box A. Set the fields in the Data Sets panel of the Variables dialog box as follows:
Type Home Data Set in the Data Set field B. This names the set of data that will be used for the home Web banner. This data set will have two variables—the page_name variable and the game_name variable.
Choose page_name from the Name menu C. This is the name of the variable you're working on. You'll see this variable highlighted in the variables list at the bottom of the dialog box D.
In the Value field, type home E. This is the text that will appear in place of the words text here on the home Web banner.
Add to the Home Banner Data Set
Now you'll create the data for the game_name variable (the data that will replace the words GAME HERE on the home Web banner). Choose game_name from the Name menu A. You'll see this variable highlighted in the variables list at the bottom of the dialog box B. In the Value field type SLAM—the name of a fictitious game C. This is the text that will appear in place of the words GAME HERE on your home Web banner. Leave this dialog box open for the next steps.

Create the Links Banner Data Set
Now you'll make another data set that will replace the page_name and game_name variables on another Web banner—a banner for a links page. In the Variables dialog box, make a new data set by clicking the New Data Set icon A. Then set the rest of the fields as follows to create data for the page_name variable in this data set:
Type Links Data Set in the Data Set field to name this new data set B.
Choose page_name from the Name menu C.
Type links in the Value field. This is the text that will appear in place of the words text here on the links Web banner D.

Now choose game_name from the Name menu E to create data for the second variable in this data set. In the Value field type KINGPIN—the name of another game F. This is the text that will appear in place of the words GAME HERE on your links Web banner.
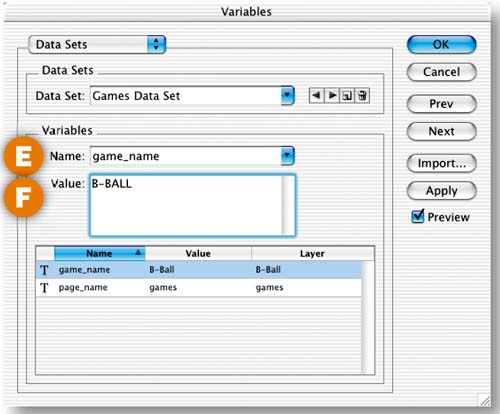
Create the Games Data Set
Now make a third data set for another Web banner, this one for a games page. There's nothing new here, so relax. Make a new data set by clicking the New Data Set icon in the Variables dialog box A. Set the rest of the fields as follows to create data for the page_name variable in this data set:
Type Games Data Set in the Data Set field B.
Choose page_name from the Name menu C.
Type games in the Value field D.
Now choose game_name from the Name menu E.
And in the Value field type B-BALL, the name of another game F.
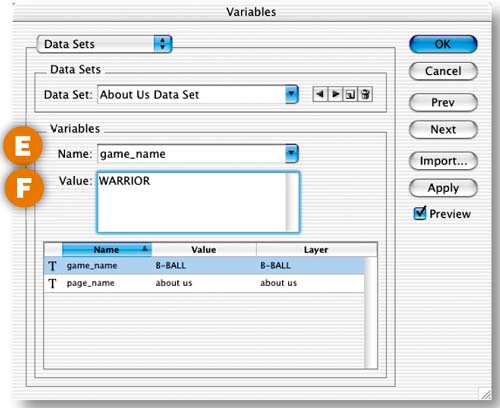
Now you'll make the last data set, this one for a Web banner to use on an about us page. This step is just like the last two steps. Are you starting to get the picture?
Make a new data set by clicking the New Data Set icon in the Variables dialog box A. Set the rest of the fields as follows to create data for the page_name variable in this data set:
Type About Us Data Set in the Data Set field B.
Choose page_name from the Name menu C.
Type about us in the Value field D.
Now choose game_name from the Name menu E.
And in the Value field type WARRIOR, the name of another game F.
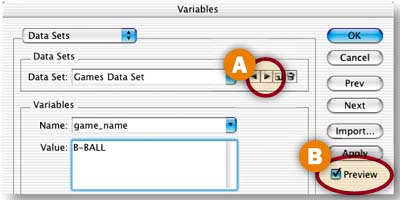
Preview the Web Banners
Click the forward arrow in the Variables dialog box A to cycle through the data sets you created. Leave Preview checked B to see a live preview of each of the data sets. If you notice any errors, correct them by editing the fields in the Variables dialog box. When you're satisfied, click OK. Choose File>Save to save the PSD file with its data sets.


Export the Banners as a Flash File
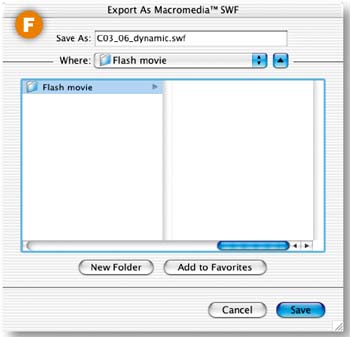
Each of the four data sets you've made will generate a separate Web banner. You can export them all together as a Flash movie (SWF format). This allows you to check that all the banners export correctly and gives you a quick reference file. Choose File>Export>Macro-media®Flash© SWF. This opens the Macromedia Flash (SWF) Export dialog box, where you'll set export options in the next step.
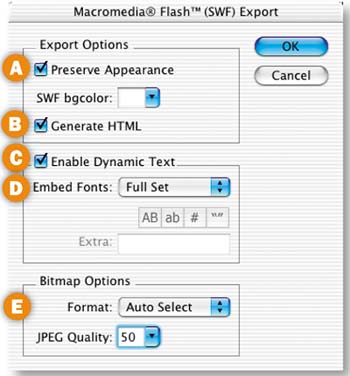
In the Macromedia Flash (SWF) Export dialog box, set the following options:
Check Preserve Appearance A. This ensures that the text retains its appearance.
Check Generate HTML B. This creates an HTML file to display the SWF in a Web browser.
Check Enable Dynamic Text C. This is necessary to make your dynamic text variables work.
Choose Full Set from the Embed Fonts menu D. This embeds a full set of fonts in your Flash movie.
Under Bitmap Options, leave Format set to Auto Select, and set JPEG Quality to 50 E. This controls how the logo and background are optimized.
Click OK to open the Export as Macromedia© SWF dialog box F. Create a new output folder, and click OK. Open the resulting HTML file in a Web browser to view all four of your Web banners in a Flash movie G.

Export Individual Flash Banners
You can also export the Web banners generated by your data sets as individual Flash movies so that you can add each of them to a different page in a Web site. Choose File>Export>Data Sets as Files. Click Choose to choose an output folder A. Leave Data Set set to All Data Sets B. Choose Macromedia®Flash© (.swf) from the Save As menu C. Leave the SWF settings as they were in the last step. Otherwise you'd click Set D to open the SWF Export dialog box. Click OK. You'll find four SWF files on your hard drive, each one a separate Web banner ready to be added to individual pages in a site-building program.


The last project, Creating Dynamic Flash Web Banners, covered how to create data sets in ImageReady's Variables dialog box for use with variables in a PSD file. Another way to make data sets for that purpose is to enter data into an external spreadsheet and then import data sets from the spreadsheet into ImageReady. This is the easier way to go if you're working with preexisting data sets, or if you have lots of data or variables.

Let's take a look at how to make an external data set instead of the data set we created in ImageReady in the last project, Creating Dynamic Flash Web Banners. We'll use Microsoft Excel here, but you can use any spreadsheet editor that saves files in tab-delimited text format.
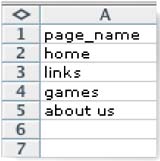
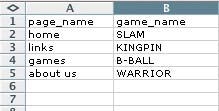
In the first row of the spreadsheet, type the names of the two variables that will change in each version of your Web banners: page_name and game_name. Don't use spaces or unusual text characters.
In the page_name column enter each of the text values that will replace the words text here in the Web banners you plan to make: home, links, games, and about us, in that order. In the game_name column enter the text value of each game that will replace the words GAME HERE in your Web banners: SLAM, KINGPIN, B-BALL, and WARRIOR, in that order. Each row of the spreadsheet now contains a data set made up of the two values that appear together in a Web banner. Save the spreadsheet in a tab-delimited format. In Excel, choose Format: Text (tab delimited) in the Save dialog box.
To import your external data sets, choose Image>Variables to open the Variables dialog box A. In that dialog box, choose Define from the top menu. To define the first variable, choose text here from the Layer menu, check Text Replacement, and type page_name in the Name field. Then choose GAME HERE from the Layer menu, check Text Replacement, and type game_nameM in the Name field.
![Import a Data Set]](graphics/03inf219.jpg)
Choose Data Sets from the top menu. Click the Import button B. In the Import Variable Data Sets dialog box C, check Use First Column for Data Set Names, and Replace Existing Data Sets. Click the Choose button and navigate to your spreadsheet file. Click OK. Click the forward arrow in the Variables dialog box to view each of your data sets in action. ![]()
![Import a Data Set]](graphics/03inf220.jpg)
![Import a Data Set]](graphics/03inf214.jpg)