Table of Contents for
How to Wow: Photoshop for the Web
 How to Wow: Photoshop for the Web
Published by
Peachpit Press, 2004
How to Wow: Photoshop for the Web
Published by
Peachpit Press, 2004
Moving Things Along with Unusual, Exciting Animation Projects for the Web


Sex Sells, and So Does Motion, as advertisers well know. That's why everywhere you turn on the Web there's an animated banner, logo, or text message dancing as fast as it can to catch your attention. Like it or not, you have to admit that animated Web graphics are scene stealers. So it's worth your while to learn all you can about Web animation. It's the pulse of today's Web and it's sure to remain a core feature of the Web in the future.
In this chapter we offer you fresh ideas and techniques for making effective, tasteful animations for the Web, each of which has a special Wow factor. Some of these projects begin in Photoshop, but all end up in ImageReady. That's because currently all the animation capabilities of Adobe's graphics duo are concentrated in ImageReady. You can go to Photoshop to make the artwork for animations, but you'll rely on ImageReady to make your animations go.
These Aren't Your Father's GIFs
Most of the animations we'll make together are animated GIFs. You may be surprised at how much you can do with animation in this format. These projects help you understand how to design and optimize GIF animations that run smoothly and are small enough to be of real use on the Web.

We take you places you may not have known you could go with animated GIFs. In the Rollover-Triggered Animation project, you'll learn how to use rollovers in conjunction with multiple animations to make an interactive mood changer. (Roll here and she smiles. Roll there and she's very angry.) You'll continue in that vein with the Image Map-Triggered Animation project, where you learn when and how to use an image map rather than a slice to trigger a remote animation.
It's All Very Moving
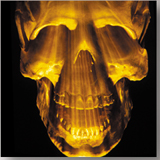
Colin thinks the moving x-ray you'll make in the Layer Mask Animation project is one of the coolest animated projects he's designed in ImageReady. You'll get under the model's skin, revealing his skull with your layer mask x-ray technique.
Jan is partial to the realistic animated scene you'll build in the project called Bringing a Picture to Life. It's an unusual example of the use of subtle, small animations to enhance a design. Don't miss the first project, Radar Screen Animation, which shows you how to build a realistic radar screen from scratch, complete with an animating gradient and radar blips.
Try Animating a Layer Style or Animating Warped Text—projects that are quick and easy with stunning results. And of course all you photographers will want to know how to create an Animated Slide Show of photo thumbnails complete with cross-dissolves.
Flashy Format
Animated GIFs aren't all you learn about here. In this chapter you'll find a whole project devoted to creating a Vector-Based Flash Movie. That's right, you can now export animations from ImageReady in SWF format.
So get ready to dig into an entertaining and useful chapter. Once you've digested our recipes, you'll be ready to go out and whip up a batch of tasty animations on your own.
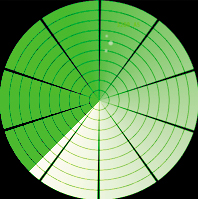

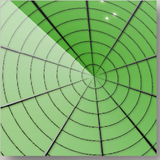
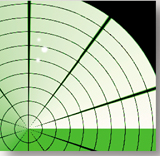
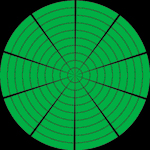
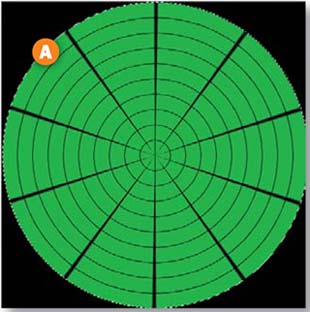
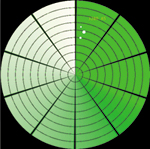
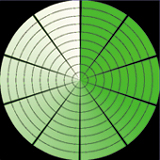
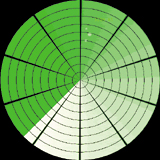
This animation may look complex, but it's so simple you can build it from scratch. Varying the angle of a gradient layer style on each frame makes the screen appear to rotate. Add some radar blips and you have a realistic radar screen.
Make a Pattern Image
Build the layered artwork for this animation in Photoshop. The graphics are easy to make from scratch, so there is no start file on the CD-ROM for this project.
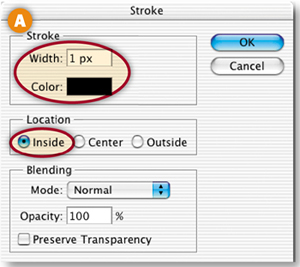
First, make a custom pattern you'll use to create the segmented circles. In Photoshop, choose File>New and create a 50x50 pixel RGB document with Background Contents set to Transparent. Zoom in (Command/Ctrl-+). Choose Select>Select All. Choose Edit>Stroke, and in the Stroke dialog box A set Width to 1 px, Color to Black, and Location to Inside, and click OK.
Define the Image as a Pattern
With the selection still active, choose Edit>Define Pattern to create a repeating pattern you'll apply to your radar screen image. Name the pattern 50px Grid, and click OK. Close the pattern image without saving.
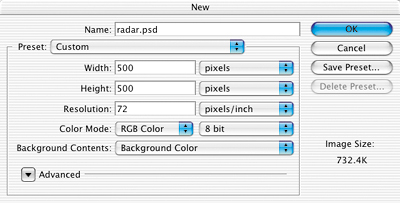
Click the Background Color box in the toolbox and in the Color Picker uncheck Only Web Colors and choose green (R: 83, G: 149:, B:61). Create a new 500x500 pixel RGB file with Background Contents set to Background Color. Resolution can be left at its default since this file is measured in pixels. (See “Starting a New File for the Web” in Chapter 1.)

Fill with the Pattern
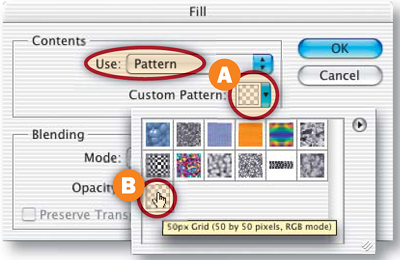
Click the Create New Layer icon at the bottom of the Layers palette and name the new layer Grid. With the Grid layer selected, choose Edit>Fill. In the Fill dialog box, choose Pattern from the Use menu. Click in the Custom Pattern field A to open the active pattern set. Select the 50px Grid pattern B, and click OK to fill the layer with a repeating grid.
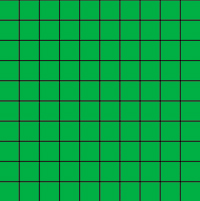
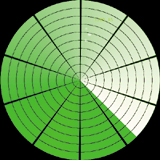
Change Squares to Circles
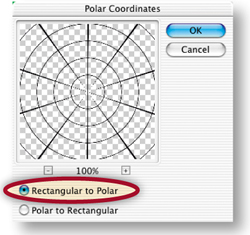
It's easy to change the squares into a circular pattern. With the Grid layer selected, choose Filter>Distort>Polar Coordinates. Choose Rectangular to Polar and click OK. The circular grid of a radar screen is created automatically!
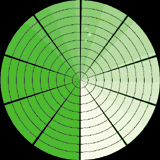
Create a White Screen
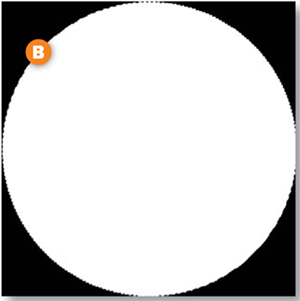
With the Grid layer selected, click the Create New Layer icon in the Layers palette and name the layer Screen. Select the Elliptical Marquee tool from behind the Rectangular Marquee. Hold the Option/Alt key (to draw from the center) and the Shift key (to constrain the selection to a circle), click in the center of the circular grid, and drag out a selection to the edge of the circular grid A. Choose Edit>Fill, choose White from the Use menu in the Fill dialog box, and click OK to fill the circle with white B. Choose Select>Deselect.
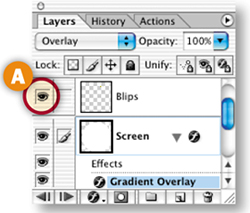
Apply a Gradient to the Screen
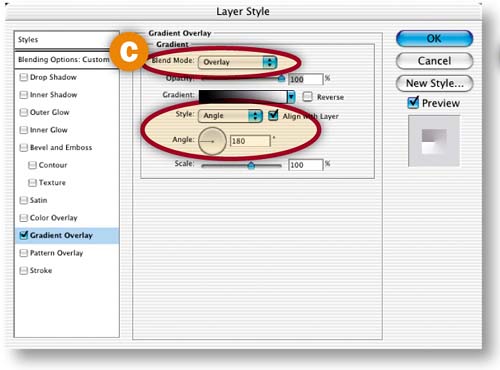
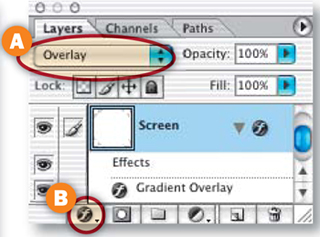
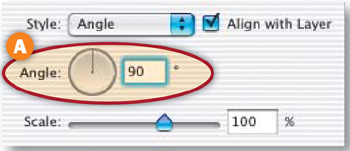
With the Screen layer selected, choose Overlay from the Blending Mode pop-up menu at the top of the Layers palette A. Click the f icon at the bottom of the Layers palette B and choose the Gradient Overlay layer style. In the Layer Style dialog box C, set the following options for the Gradient Overlay layer style—Blend Mode: Overlay, Style: Angle, and Angle: 180°. Click OK to apply the layer style to the Screen layer.
Add Radar Blips
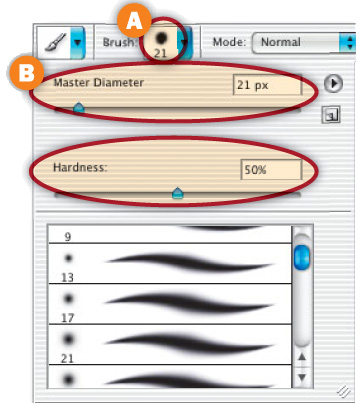
Create a new layer above the Screen layer and name it Blips. Press D and then X on your keyboard to set the Foreground color to white. Select the Brush tool. In the Options bar, click the brush sample A to open the Brush pop-up palette (not to be confused with the Brushes palette). Choose a 21–pixel Soft Round Brush, and set the Hardness slider to 50%. Click in the image to paint a blip. Reduce the Master Diameter slider B slightly and paint a few smaller blips.
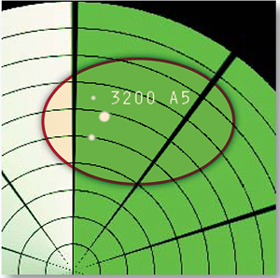
Add Radar Coordinates
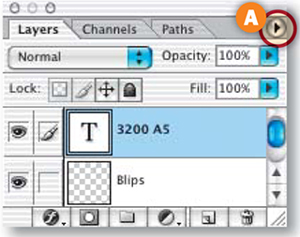
Select the Type tool, and choose a font and small font size in the Options bar. Type some official-looking coordinates (3200 A5) for your blips. With the type layer selected, click the side menu arrow on the Layers palette A and choose Merge Down to merge the type layer into the Blips layer.
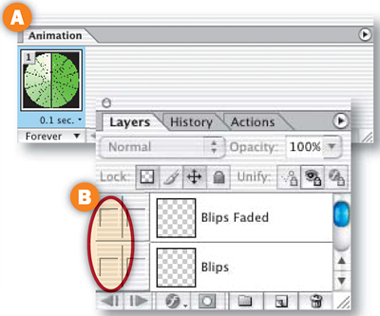
Fade the Blips
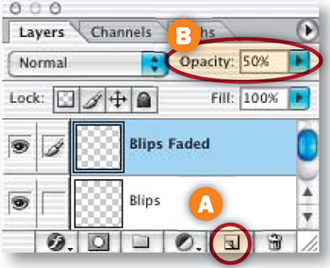
Click and drag the Blips layer to the Create New Layer icon at the bottom of the Layers palette to duplicate it A. Rename the Blips Copy layer to Blips Faded. With the Blips Faded layer selected, press 5 on your keyboard to lower the layer's opacity to 50% B. You've completed all the artwork for the animation!
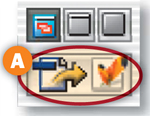
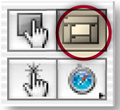
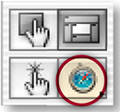
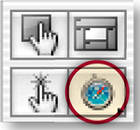
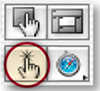
Choose File>Save As in Photoshop to save the radar image. Click the Edit in ImageReady button at the bottom of the Photoshop toolbox A to open the file in ImageReady, where you'll animate your artwork. Animation is always done in ImageReady, because Photoshop does not have animation features.
Set Up Frame 1
The first frame of the animation is automatically displayed in ImageReady's Animation palette (Window>Animation) A. Set up the artwork for this frame by hiding some layers and displaying others. In the Layers palette, click in the Visibility fields of the Blips layer and the Blips Faded layer to turn off those Eye icons B. Leave the Eye icons on all the other layers turned on throughout the animation.
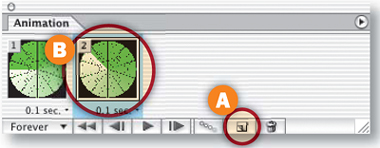
Add Frame 2.
Click the Duplicate Animation Frame button at the bottom of the Animation palette A to generate Frame 2 B. Each time you create a new frame this way, the content of the new frame (2) is a copy of the content of the preceding frame (1). In the next step you'll change the content of Frame 2.
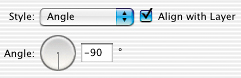
Change the Gradient on Frame 2.
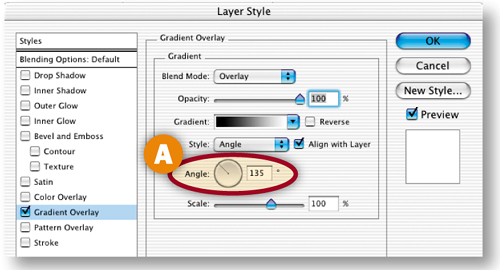
On Frame 2 vary the angle of the radar screen's gradient so a light begins to move around the circle. Make sure Frame 2 is selected in the Animation palette. In the Layers palette, double-click the Gradient Overlay effect on the Screen layer to open the Layer Styles dialog box. In the Layer Styles dialog box, change the Gradient Overlay Angle field to 135° A and click OK.
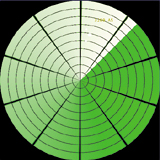
With Frame 2 selected in the Animation palette, click the Duplicate Animation Frame button to create Frame 3. With Frame 3 selected, double-click the Screen layer's Gradient Overlay effect and set the Gradient Overlay Angle field to 90° A.
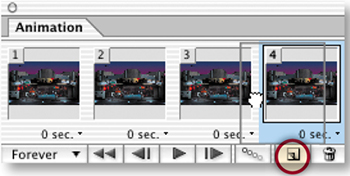
Add Frame 4
With Frame 3 selected in the Animation palette, click the Duplicate Animation Frame button to make Frame 4. With Frame 4 selected, double-click the Screen layer's Gradient Overlay effect and set the Angle field to 45°.
Make Blips Visible on Frame 4.
Add another artwork change to Frame 4-. With Frame 4 selected in the Animation palette, click in the Visibility field of the Blips layer in the Layers palette to turn on that Eye icon A. This makes radar blips appear on the screen as the bright part of the gradient moves over them.
Add Frame 5
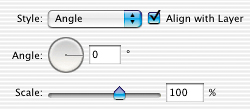
With Frame 4 selected in the Animation palette, click the Duplicate Animation Frame button to make Frame 5. Double-click the Screen layer's Gradient Overlay effect and set the Angle field to 0°.

Add Frame 6.
With Frame 5 selected in the Animation palette, click the Duplicate Animation Frame button to make Frame 6. With Frame 6 selected, double-click the Screen layer's Gradient Overlay effect and set the Angle field to –45°. Click in the Visibility field of the Blips layer in the Layers palette to turn that Eye icon off. Click in the Visibility field of the Blips Faded layer to turn that Eye icon on. This makes the blips begin to fade as the bright part of the gradient moves past them.
With Frame 6 selected, duplicate the frame and set Frame 7's Gradient Overlay layer style Angle to –90°. Leave the Blips layer off and the Blips Faded layer on, as they were in the preceding frame.
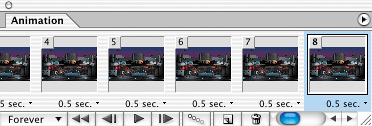
Add Frame 8.
With Frame 7 selected, duplicate the frame and set Frame 8's Gradient Overlay Angle field to –135°. Leave the Blips layer off and the Blips Faded layer on. You've finished building the animation!

Set the Animation Timing.
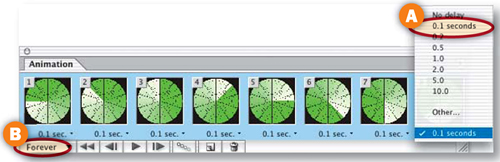
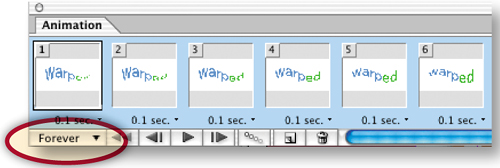
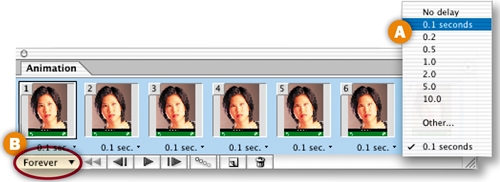
Now slow the animation down from the default setting. Click on the Animation palette side menu and choose Select All Frames. Click on the frame delay setting under any frame and choose 0.1 sec A. Leave the Loop setting to Forever so the animation will play continuously B.
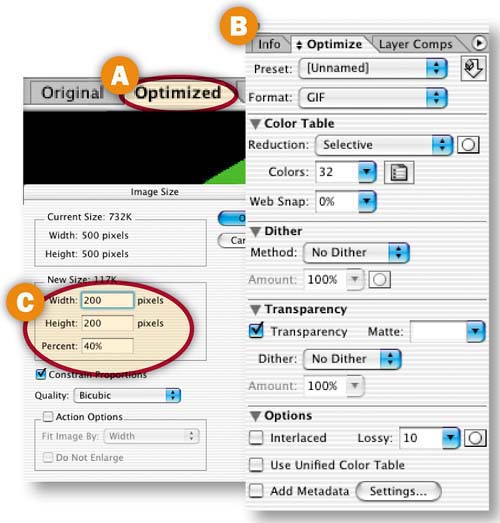
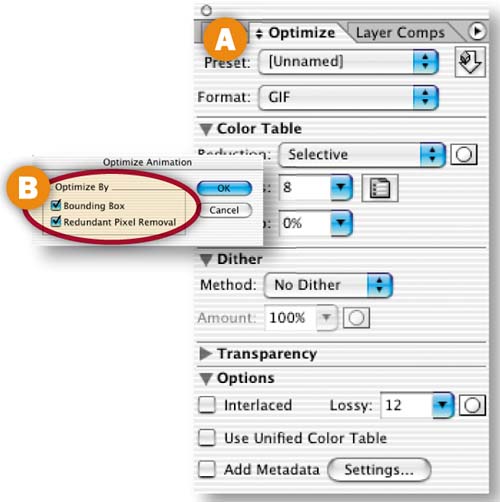
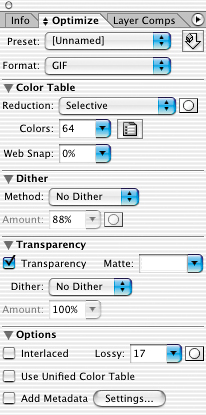
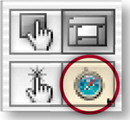
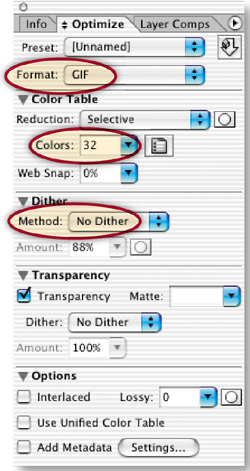
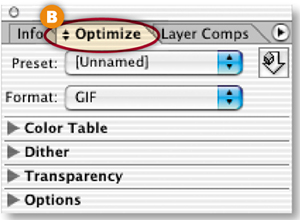
Optimize and Preview.
Optimization settings apply to all frames in an animation. Click on the Optimized tab in the image A. In the Optimize palette (Window>Optimize) choose—Format: GIF, Reduction: Selective, Colors: 32, Web-Snap: 0%, Dither Method: No Dither, Transparency: Checked, Lossy: 10, Interlaced: Unchecked, Add Metatdata: Unchecked B. The file size is still quite large. Reduce it by choosing Image>Image Size, and reducing Width and Height to 200 pixels in the Image Size window C. Click the Preview in Browser button in the toolbox to preview.
Save
Choose File>Save Optimized As. Leave Format/Save as Type set to Images Only A and click Save. There's no need to save an HTML file because animated GIFs function on their own. Choose File>Save to resave the PSD file. And you're done!


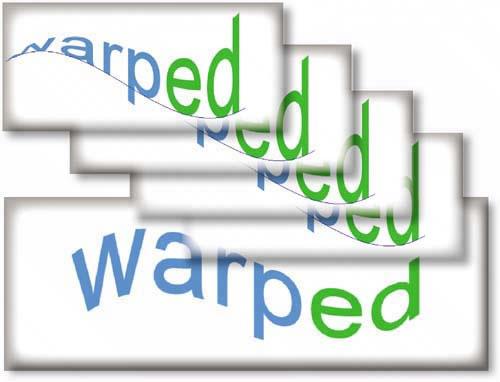
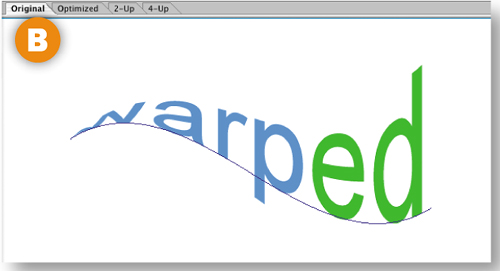
Use the Text Warp feature to add twists and turns to text as you create animation frames in ImageReady. Learn the technique here, and then try it on text of your own to animate a text-based logo or Web banner.
Create a New File in ImageReady
This text-based animation is easy to make from scratch. You'll create some text and give it a twist by applying the Flag style in the Warp Text dialog box. Then you'll create animation frames and make a simple adjustment to the perspective of the warped text on each frame. Finally, you'll copy, paste, and reverse some of the frames to make the text appear to twist back and forth. The Warp Text feature is available in both Photoshop and ImageReady. For this project you'll work in ImageReady, so you can manipulate the warp effect as you create animation frames.
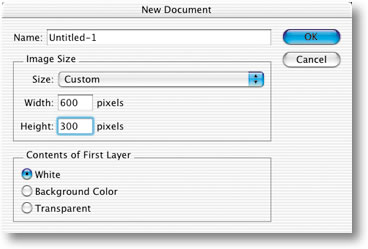
Start by making a new file in ImageReady by choosing File>New. Set Width to 600 pixels and Height to 300 pixels. Choose white as Contents of First Layer. Click OK to open a new image.
Set Foreground/Background Colors
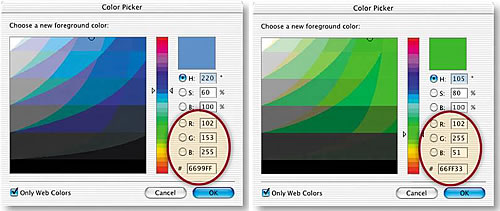
Set the Foreground and Background color boxes in the toolbox to the colors you'll use for your text. First click the Foreground Color box to open the Color Picker. In the Color Picker, choose bright blue (R:102, G:153, B:255 or hexadecimal #6699FF). Then click the Background Color box and choose bright green (R:102, G:255, B:51 or hexadecimal # 665533). (Web designers often specify colors by hexadecimal number, because that's the way colors are described in HTML code.)
Add Text
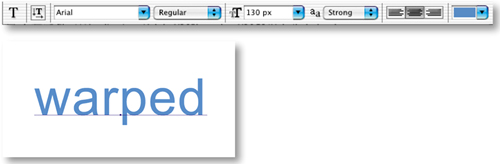
Select the Type tool in the toolbox. Set the following type options in the Options bar:
Font Family: Arial
Font Style: Regular
Font Size: 130 px (typed into the Font Size field)
Anti-aliasing: Strong
Color: Foreground Color.
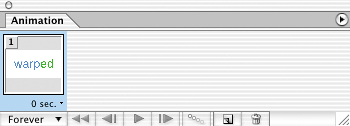
Then click in the image and type the word warped.
Recolor Part of the Text
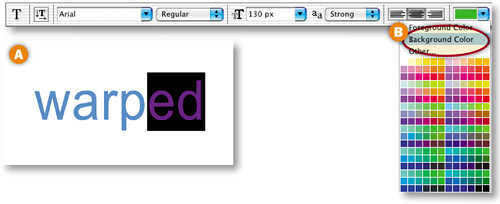
Select the last two letters of the word warped by clicking and dragging over them with the Type tool A. Press Command/Ctrl-H on your keyboard to make the highlight invisible so you can see the selected letters. In the Options bar, choose Background Color from the Color menu B. Then select another tool in the toolbox to commit the change to the type layer. Don't be confused by the question mark in the Color field in the Options bar. It means that you have more than one color on this type layer.
Make sure the warped type layer is selected in ImageReady's Layers palette. Select the Move tool in the toolbox. In the Options bar, click the Align Layer Vertical Centers icon A and the Align Layer Horizontal Centers B icon to center the text in the image.


Open the Animation Palette
Now you'll start creating the animation. Select the Original tab in the document window. (If the Optimized, 2-Up, or 4-Up tab is selected while you're making an animation, you'll have to wait each time you add a frame for ImageReady to try to optimize that frame.) If you don't see the Animation palette, choose Window>Animation to open it. Frame 1 of the animation is automatically displayed in the Animation palette.
Open the Warp Text Dialog Box
You'll start by bending the text on Frame 1. Check that the warped layer is still highlighted in the Layers palette. Select the Type tool, and click the Warp icon on the Options bar to open the Warp Text dialog box.

Set Text Warp Options for Frame 1
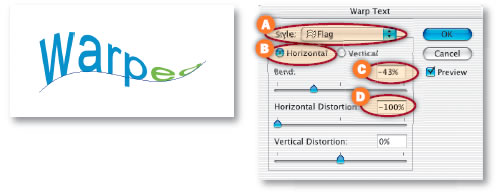
In the Warp Text dialog box, choose the Flag style from the Style menu A. Leave the Horizontal button selected to establish the horizontal orientation of the warp B. Move the Bend slider to –43% to set the amount and direction of the distortion C. Drag the Horizontal Distortion slider to –100% to apply perspective to the warp D. In the following steps, you'll change this Horizontal Distortion slider on each frame to create an animating twist. Click OK.
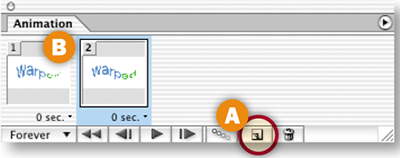
Click the Duplicate Animation Frame button in the Animation palette A to create Frame 2 B. Frame 2 is currently an exact copy of Frame 1. You'll change its content in the next step.
Change the Warp on Frame 2
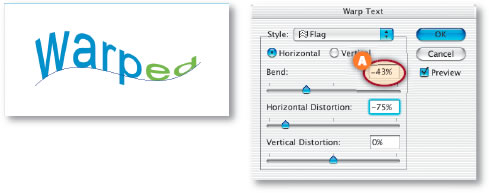
Check that Frame 2 is selected in the Animation palette, the warped type layer is active in the Layers palette, and the Type tool is selected in the toolbox. Click the Warp icon in the Options bar to reopen the Warp Text dialog box. In the Warp Text dialog box, drag the Horizontal Distortion slider to –75% A. Leave the other settings as they are, and click OK. Leave this frame selected in preparation for another new frame.
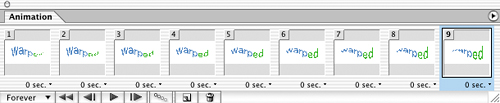
Add and Warp Frames 3 through 9
Repeat Step 10 seven more times until you have a total of nine frames. Each time, make sure the last frame is selected in the Animation palette, duplicate that frame, then change the distortion of the new frame by increasing the Horizontal Distortion field of the Warp Text dialog box by 25%. Here's a summary of the value that should be in the Horizontal Distortion field on each frame:
Frame 1: –100%
Frame 2: –75%
Frame 3: –50%
Frame 4: –25%
Frame 5: 0%
Frame 6: 25%
Frame 7: 50%
Frame 8: 75%
Frame 9: 100%
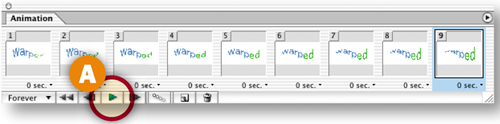
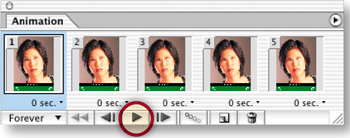
Preview what you've made so far by clicking the Play arrow at the bottom of the Animation palette A. The animation plays in ImageReady's document window. Click the Stop button that replaces the Play arrow to pause the animation. We recommend doing this from time to time as you build an animation to check that the animation works as expected.
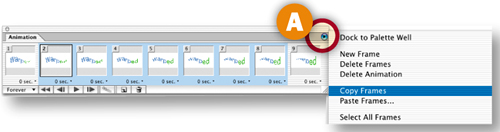
Copy Frames 2 through 8
Click on Frame 2 in the Animation palette, hold the Shift key, and then click on Frame 8 to select Frames 2 through 8. Click the side arrow on the Animation palette and choose Copy Frames A.
Paste the Copied Frames
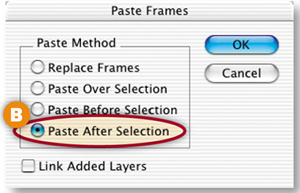
Select Frame 9 in the Animation palette. Click the side arrow and choose Paste Frames A. In the Paste Frames dialog box choose Paste After Selection B and click OK. You now have a total of 16 frames in the Animation palette. The frames you just copied and pasted are Frames 10 through 16. Leave those frames selected.
Reverse the Copied Frames
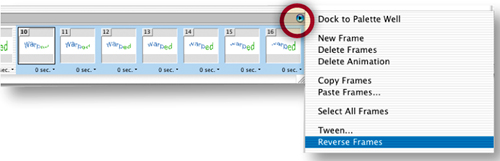
With Frames 10 through 16 selected, click the side arrow on the Animation palette and choose Reverse Frames. This reverses the order of the copied frames, so your animation twists back and forth.
Preview the Animation
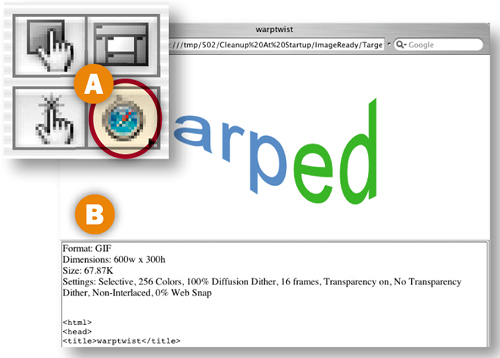
Preview in your default Web browser by clicking the Preview in Browser button in the toolbox A. The browser preview includes information about the file and HTML code that won't be saved with the final animation B. The frames probably play faster in your browser than they do in ImageReady's preview.
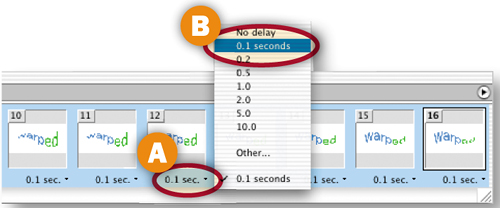
Back in ImageReady, select all frames in the animation. Click the time caption A under any frame and choose 0.1 seconds B from the pop-up menu. This slows the animation, setting the same display time for each frame. The time delay is only an approximation of how long each frame will appear in a viewer's browser window. You can't predict exactly how fast an animation will play in all browsers because that depends in part on the speed of each computer's processor.
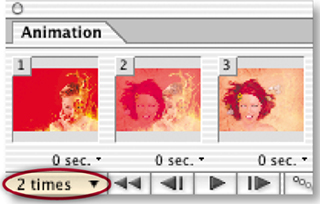
Set the Number of Repetitions
Leave the Looping option set to its default of Forever. This will cause the animation to repeat itself in a viewer's browser until the viewer moves to another Web page. Be aware that a repeating animation can distract viewers' attention from other elements on a page, so use this feature with discretion.
Optimize the Animation
Click the Optimized tab and choose GIF optimization settings in ImageReady's Optimize palette A. (See GIF Optimization Settings in Chapter 1.) You cannot optimize an animation as a JPEG or PNG because those formats do not support animation. The settings you choose here apply to all the frames of the animation. Click the side arrow on the Animation palette and choose Optimize Animation. Make sure Bounding Box and Redundant Pixel Removal are checked B to maximize file savings, and click OK.
Save
Choose File>Save Optimized As, set Format/Save as Type to Images only A, and click Save. ImageReady saves a single GIF file containing the whole animation. Choose File>Save As to save the source image.

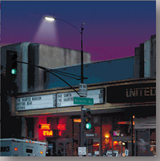
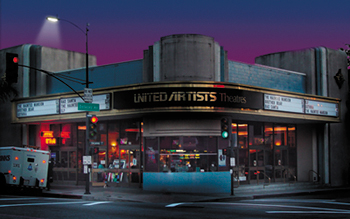
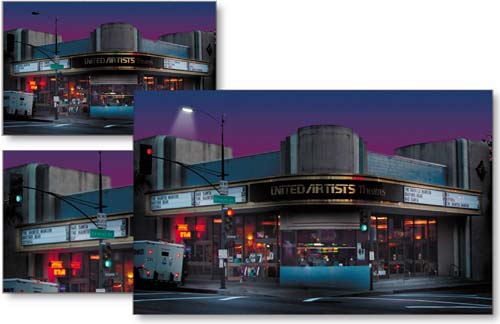
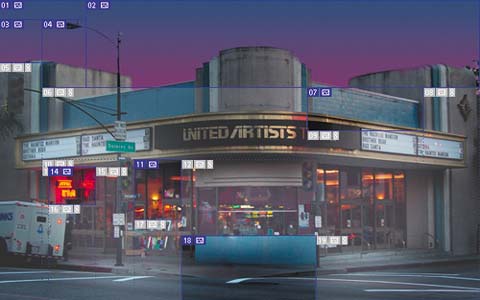
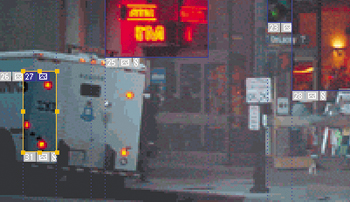
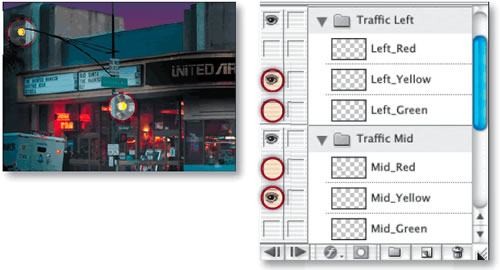
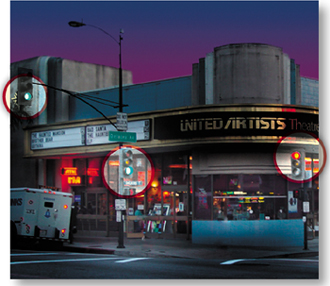
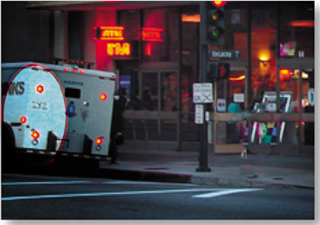
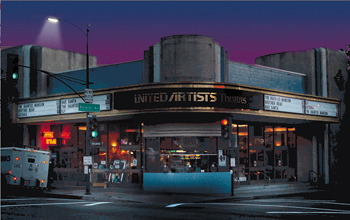
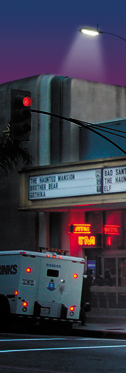
Add life to a scene by creating multiple animations of traffic signals and lights. This project is done in ImageReady.
Deconstruct the Layers
Let's face it—Web animations can be distracting, if not downright overwhelming. But when applied subtly, as in this project, animation can add a realistic touch that makes an otherwise static scene come alive on the Web. You'll create several animations in sliced areas of this photograph in the steps that follow. You'll make traffic lights change and parking lights blink on and off. These realistic animations are created by turning layer visibility on and off from frame to frame.
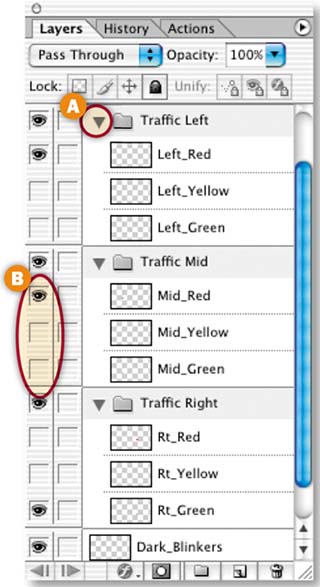
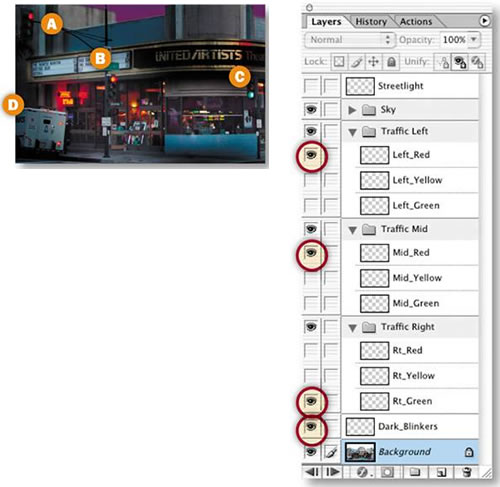
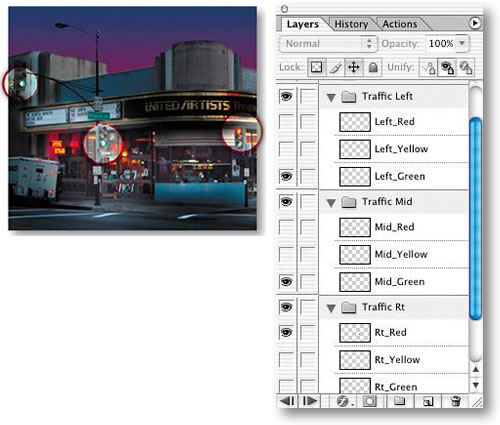
Take a minute to familiarize yourself with the contents of the layers in this file before you start animating. In the Layers palette, click the arrow to the left of each of the three Traffic layer sets, opening them so you can see the layers they contain A. Option/Alt-click in the Visibility field to the left of any layer B to see only the artwork on that layer. Option/Alt-click again to see all the layered artwork that was originally visible.
We already made and optimized some slices in this image, so that you can concentrate on creating the animations. The user slices we made have blue numbers. The auto slices ImageReady added are ghosted and have gray numbers. If you don't see these slices, click the Slice Visibility toggle near the bottom of the toolbox. If the ghosted auto slices are obscuring your view, choose ImageReady/Edit>Preferences>Slices and lower the percentage of color adjustment in the Auto Slices field.
Slice the Traffic Lights
In this project you'll be creating several independent animations in a large image. You'll slice the areas where the animations will occur to separate them from the rest of the image. ImageReady will generate a separate animated GIF file from each slice that contains animation frames.
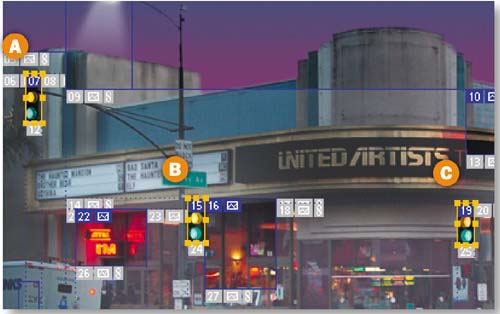
Start by adding slices around the traffic lights so that you can animate those areas. Select the Slice tool in the toolbox, zoom in, and draw a slice around all three lights in the traffic signal on the left A, another around the lights in the middle traffic signal B, and one more slice around the lights in the traffic signal on the right C. You can make the red, yellow, and green traffic light layers visible temporarily to make it easier to see where to slice. Turn those layers off when you're done slicing.
Slice the Truck Blinkers
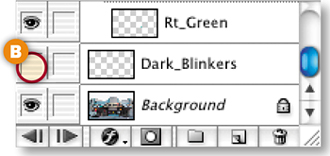
Draw another slice with the Slice tool around the darkened blinkers on the left side of the truck to prepare that area for animation. You can make the Dark_Blinkers layer visible temporarily to help position your slice. Turn that layer off when you're done slicing.
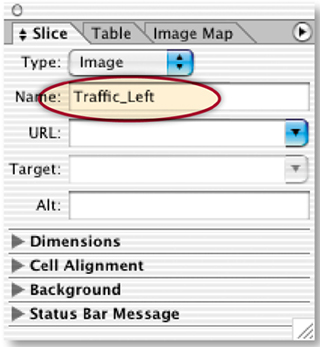
ImageReady assigns a default name to each slice. The GIFs produced from the slices will inherit those names. To ensure that you can recognize your animated GIFs among the many image files that will be generated, give each of your animation slices a meaningful name. Choose Window>Slice to open the Slice palette. Select the Slice Select tool in the toolbox and click on the slice you drew around the traffic signal on the left. Type Traffic_Left in the Name field of the Slice palette. Repeat this for the other three slices you just created, naming them Traffic_Mid, Traffic_Rt, and Blinkers respectively. Don't use spaces or special characters in slice names.
Set Up Frame 1
Choose Window>Animation to open the Animation palette. Frame 1 of the animation is displayed in that palette. Go to the Layers palette and click in the Visibility field of the following layers, turning on their Eye icons, to make the artwork on these layers visible on Frame 1 of the animation. All the other traffic light layers should be off.
Left_Red (This turns the traffic light on the left to red A.)
Mid_Red (This turns the traffic light in the middle to red B.)
Rt_Green (This turns the traffic light on the right to green C.)
Dark_Blinkers (Don't be confused by the on/off terminology here. When this layer is on, the blinkers on the left side of the truck look dark D.)
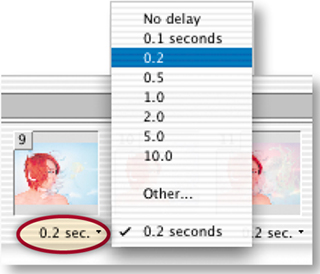
Add a Time Delay
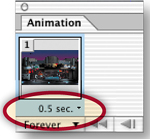
Click the Time Delay menu under Frame 1 and choose 0.5 seconds to set the approximate timing of Frame 1 and all subsequent frames.
The next three frames are copies of Frame 1. Click the Duplicate Animation Frame button at the bottom of the Animation palette three times. Or hold down the Option/Alt key on your keyboard while clicking and dragging Frame 1 to the right and repeat twice more so you have a total of four frames.
Create Frame 5
On Frame 5, the traffic light on the right changes to yellow. Create Frame 5 by selecting Frame 4 and clicking the Duplicate Animation Frame button at the bottom of the Animation palette. Now change the artwork on Frame 5 by going to the Layers palette, turning on the Rt_Yellow layer, and turning off the Rt_Green layer.

Add Frames 6 through 8
The next three frames are copies of Frame 5. With Frame 5 selected, click the Duplicate Animation Frame button three times. You should have a total of eight frames.
Create Frame 9
On Frame 9, the traffic light on the left changes to green, the traffic light in the middle changes to green, and the traffic light on the right changes to red. Create Frame 9 by selecting Frame 8 and clicking the Duplicate Animation Frame button. Change the artwork on Frame 9 by doing the following in the Layers palette:
Turn off the Left_Red layer
Turn on the Left_Green layer
Turn off the Mid_Red layer
Turn on the Mid_Green layer
Turn off the Rt_Yellow layer
Turn on the Rt_Red layer
The next 17 frames are copies of Frame 9. With Frame 9 selected, click the Duplicate Animation Frame button 17 times. You have a total of 26 frames.
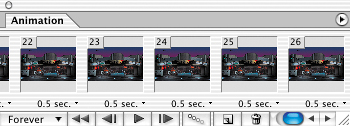
Create Frame 27
You're almost done. On Frame 27, the traffic light on the left changes to yellow, and the middle traffic light changes to yellow. The light on the right stays red. Create Frame 27 by selecting Frame 26 and clicking the Duplicate Animation Frame button. Change the artwork on Frame 27 by doing the following in the Layers palette:
Turn off the Left_Green layer
Turn on the Left_Yellow layer
Turn off the Mid_Green layer
Turn on the Mid_Yellow layer
Add Frames 28 through 30
The next three frames are copies of Frame 27. With Frame 27 selected, click the Duplicate Animation Frame button three times. You now have 30 frames.
Create Frame 31
On Frame 31, the traffic light on the left changes to red, the middle traffic light changes to red, and the traffic light on the right changes to green. Select Frame 30 and click the Duplicate Animation Frame button. Change the artwork on Frame 31 by doing the following in the Layers palette:
Turn off the Left_Yellow layer
Turn on the Left_Red layer
Turn off the Mid_Yellow layer
Turn on the Mid_Red layer
Turn off the Rt_Red layer
Turn on the Rt_Green layer
The next five frames are copies of Frame 31. With Frame 31 selected, click the Duplicate Animation Frame button five times. You should have a total of 36 frames. You're done creating frames.
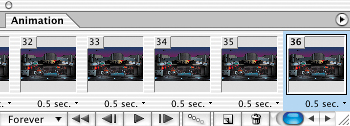
Preview in ImageReady
Preview what you've made so far by clicking the Play arrow at the bottom of the Animation palette. The animation plays in ImageReady's document window. Click the Stop button that replaces the Play arrow to pause the animation.
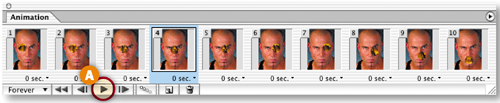
Add the Blinking Truck Lights
Click the diagonal lines at the bottom right of the Animation palette and stretch the palette out so you can see as many frames as possible A. Click on Frame 2. Then hold the Command/Ctrl key as you click on every other frame (Frames 4, 6, 8, 10, 12, 14, 16, 18, 20, 22, 24, 26, 28, 30, 32, 34, 36). In the Layers palette, click in the Visibility field of the Dark_Blinkers layer to turn the visibility of that layer off B, so that the colored lights on the back of the truck are visible on the selected frames. Preview again to see these lights blink on and off throughout the animation.

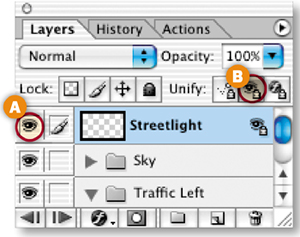
Turn on the Streetlight
Select any frame in the animation. In the Layers palette, turn on the visibility of the Streetlight layer A. Then click on the Streetlight layer to select it and click the Unify Visibility button in the Layers palette B. In the prompt that appears, click Match. This causes the Streetlight layer to become visible on every frame of the animation. The symbol you now see on the Streetlight layer indicates that the change you made to the visibility of this layer has been applied to all frames in the animation.
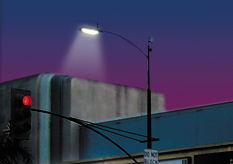
Click the Preview in Web Browser icon in the toolbox to play the animation in your default Web browser. The traffic lights will change color synchronistically and the lights on the truck blink on and off, adding a touch of realism to the scene. If your animation isn't working as expected, debug it by clicking on each frame in the Animation palette and matching layer visibility to the Frame Summary on the facing page.
Optimize and Save
Click the Optimized tab in your document window. Wait a second while the program works through all the frames to generate an optimized preview. At this point you would normally optimize each part of the scene by selecting each user slice and one of the auto slices separately and choosing optimization settings in the Optimize palette (Window>Optimize). However, we had already optimized the existing slices, and the slices you drew took their optimization settings from our underlying slices. Select the slices you drew in the scene and notice the settings in the Optimize palette. Each of them was optimized as a GIF with 64 colors, No Dither, and a Lossy setting of 17 to keep the file size down while maintaining the appearance of the image. Transparency is checked because it is a prerequisite for Redundant Pixel Removal.
Click the arrow on either of the information fields at the bottom of the document window and choose Optimized Information to see the file size of the optimized animated scene. Depending on how you drew your slices, it's about 77K---. Choose File>Save Optimized As, leave Format/Save as Type set to Images Only, and click Save. Choose File>Save to save the original with your changes.

Frame Summary. Here's a summary of layer visibility on each animation frame (in addition to the Streetlight, Sky, and Background layers which are always on).
Frame | Left_ Red Layer | Left_ Yellow Layer | Left_ Green Layer | Mid_Red Layer | Mid_ Yellow Layer | Mid_ Green Layer | Rt_ Red Layer | Rt_ Yellow Layer | Rt_ Green Layer | Dark Blinkers Layer |
|---|---|---|---|---|---|---|---|---|---|---|
1 | ON | OFF | OFF | ON | OFF | OFF | OFF | OFF | ON | ON |
2 | ON | OFF | OFF | ON | OFF | OFF | OFF | OFF | ON | OFF |
3 | ON | OFF | OFF | ON | OFF | OFF | OFF | OFF | ON | ON |
4 | ON | OFF | OFF | ON | OFF | OFF | OFF | OFF | ON | OFF |
5 | ON | OFF | OFF | ON | OFF | OFF | OFF | ON | OFF | ON |
6 | ON | OFF | OFF | ON | OFF | OFF | OFF | ON | OFF | OFF |
7 | ON | OFF | OFF | ON | OFF | OFF | OFF | ON | OFF | ON |
8 | ON | OFF | OFF | ON | OFF | OFF | OFF | ON | OFF | OFF |
9 | OFF | OFF | ON | OFF | OFF | ON | ON | OFF | OFF | ON |
10 | OFF | OFF | ON | OFF | OFF | ON | ON | OFF | OFF | OFF |
11 | OFF | OFF | ON | OFF | OFF | ON | ON | OFF | OFF | ON |
12 | OFF | OFF | ON | OFF | OFF | ON | ON | OFF | OFF | OFF |
13 | OFF | OFF | ON | OFF | OFF | ON | ON | OFF | OFF | ON |
14 | OFF | OFF | ON | OFF | OFF | ON | ON | OFF | OFF | OFF |
15 | OFF | OFF | ON | OFF | OFF | ON | ON | OFF | OFF | ON |
16 | OFF | OFF | ON | OFF | OFF | ON | ON | OFF | OFF | OFF |
17 | OFF | OFF | ON | OFF | OFF | ON | ON | OFF | OFF | ON |
18 | OFF | OFF | ON | OFF | OFF | ON | ON | OFF | OFF | OFF |
19 | OFF | OFF | ON | OFF | OFF | ON | ON | OFF | OFF | ON |
20 | OFF | OFF | ON | OFF | OFF | ON | ON | OFF | OFF | OFF |
21 | OFF | OFF | ON | OFF | OFF | ON | ON | OFF | OFF | ON |
22 | OFF | OFF | ON | OFF | OFF | ON | ON | OFF | OFF | OFF |
23 | OFF | OFF | ON | OFF | OFF | ON | ON | OFF | OFF | ON |
24 | OFF | OFF | ON | OFF | OFF | ON | ON | OFF | OFF | OFF |
25 | OFF | OFF | ON | OFF | OFF | ON | ON | OFF | OFF | ON |
26 | OFF | OFF | ON | OFF | OFF | ON | ON | OFF | OFF | OFF |
27 | OFF | ON | OFF | OFF | ON | OFF | ON | OFF | OFF | ON |
28 | OFF | ON | OFF | OFF | ON | OFF | ON | OFF | OFF | OFF |
29 | OFF | ON | OFF | OFF | ON | OFF | ON | OFF | OFF | ON |
30 | OFF | ON | OFF | OFF | ON | OFF | ON | OFF | OFF | OFF |
31 | ON | OFF | OFF | ON | OFF | OFF | OFF | OFF | ON | ON |
32 | ON | OFF | OFF | ON | OFF | OFF | OFF | OFF | ON | OFF |
33 | ON | OFF | OFF | ON | OFF | OFF | OFF | OFF | ON | ON |
34 | ON | OFF | OFF | ON | OFF | OFF | OFF | OFF | ON | OFF |
35 | ON | OFF | OFF | ON | OFF | OFF | OFF | OFF | ON | ON |
36 | ON | OFF | OFF | ON | OFF | OFF | OFF | OFF | ON | OFF |
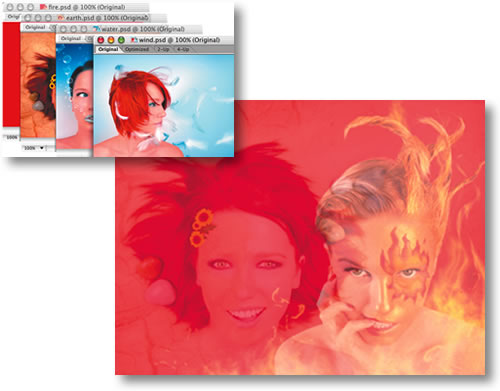
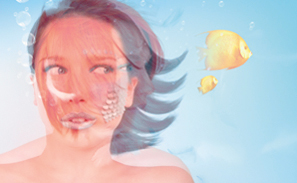
Display thumbnails of your photos on the Web in an animated slideshow with professional-looking dissolves.
Create a New File in ImageReady
In this project you'll learn how simple it is to show off a selection of your photos in an animated slide show. Try it with these photos and then substitute your own. This animation looks best with photographs that are all the same size and orientation. If you use your own photos, resize them so that they are all the same size along at least one dimension, create a new folder, and move your prepared photos into that folder.
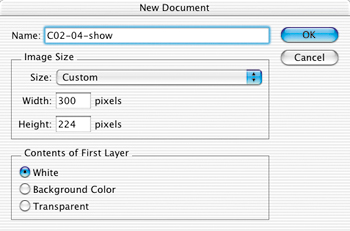
Start making a slide show by creating a new file in ImageReady. Choose File>New from the menu bar. In the New dialog box, set Width to 300 pixels and Height to 224 pixels. Leave Contents of First Layer at its default. Click OK to open a new image.
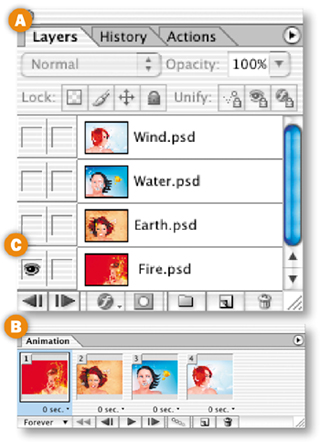
Choose File>Import>Folder as Frames from ImageReady's menu bar. Navigate to a folder of photos (for example, the Project Files>Chapter 2>C02-04-photos folder) and click Choose. ImageReady automatically does all of the following for you:
Places each item in the folder on a separate layer in the Layers palette A.
Creates a frame in the Animation palette (Window>Animation) for each layer B.
Makes the contents of a single layer visible on each frame (by turning on just one layer's Eye icon per frame) C.
This shortcut bypasses the long-winded process of dragging individual photos into the slide show file, creating animation frames one-by-one, and adjusting layer visibility manually on each frame.
Create a White Layer
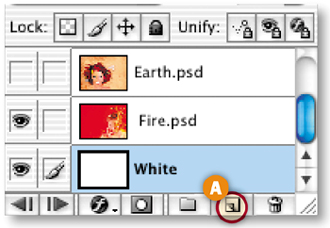
Click the Create New Layer icon at the bottom of the Layers palette A. Double-click the name of the new layer in the Layers palette and rename it White. Press D on the keyboard to set the Background Color in the toolbox to white. Press Command-Delete/Ctrl-Backspace to fill the new layer with white. Then drag the new layer to the bottom of the layer stack in the Layers palette.
Match the Layer Across Frames
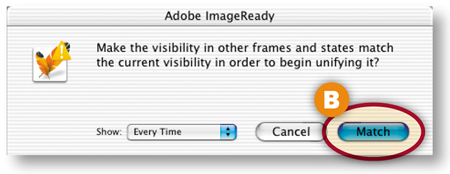
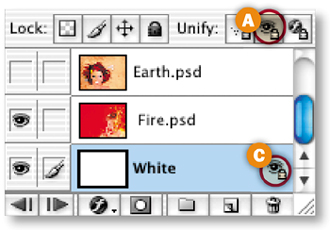
Next you'll make the White layer visible on all frames of the animation so that the semitransparent tweened frames you'll be creating shortly will all have the same solid white background. Select the White layer and click the Unify Visibility button at the top of the Layers palette A. Choose Match at the prompt B. The symbol on the White layer C indicates that it is visible on all frames.
The rest of the frames in this animation will be created automatically using a process called Tweening. Tweening takes its name from the frames it generates “in-between” the frames that you create by hand.
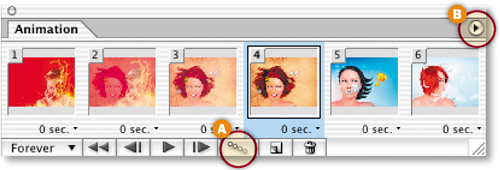
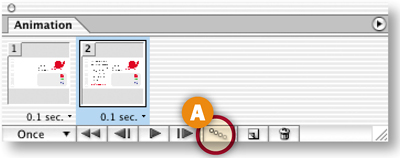
Select Frame 2 in the Animation and click the Tween button at the bottom of the Animation palette A (or click the arrow on the right side of the Animation palette B and choose Tween from the side menu).
Choose Tween Settings
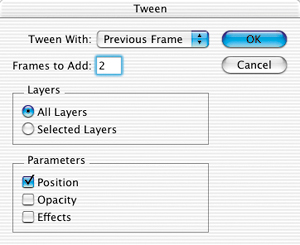
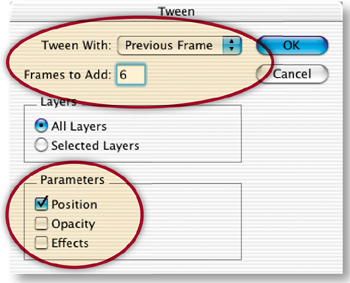
Choose the following settings in the Tween dialog box:
Make sure Tween With is set to Previous Frame to add tweened frames between the selected frame and the previous frame A.
Type the number 2 in the Frames to Add field. This tells the program to create two additional tweened frames B.
Leave Layers set to All Layers C.
Make sure that Opacity is checked, because this is the layer property that you want to change across the tweened frames D. We usually leave all three parameters checked just to be safe.
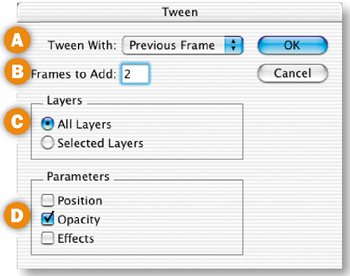
Click OK to add two semitransparent tweened frames between the earth and fire photos. This will create a dissolve between these photos that resembles the slide dissolve you'd get by using two professional slide projectors in the analog world.
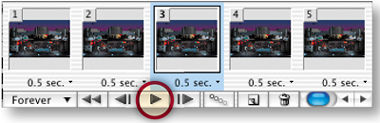
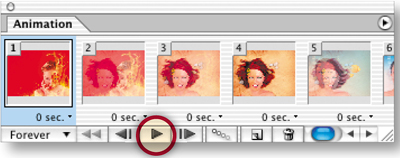
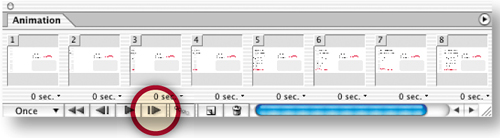
Select Frame 1 in the Animation palette. Then click the frame forward button at the bottom of the Animation palette Ato move through the frames one at a time. Notice that both the fire and earth photos are partially transparent on Frames 2 and 3, creating a dissolve effect.


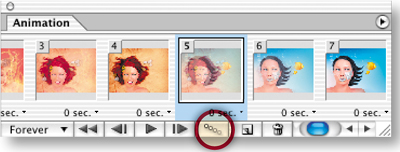
Tween Frame 5
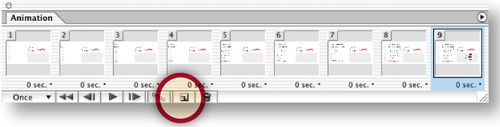
The water photo now appears on Frame 5. Select Frame 5 and click the Tween icon in the Animation palette again. Leave all the Tween settings as they were in Step 6 and click OK to add two tweened frames between the earth and water photos.

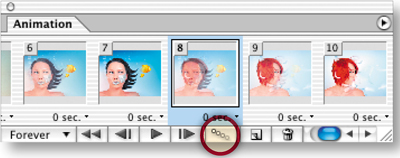
Tween Frame 8
The wind photo is now on Frame 8. Select Frame 8 and click the Tween icon again. Leave all the Tween settings as they were in the preceding step, and click OK to tween the wind photo with the water photo.
Preview the Animation
Click the Play button at the bottom of the Animation palette to preview the animation in the document window. Notice that there's a jump between the wind photo and the fire photo. That's caused by the animation looping back to to the beginning of the animation with no partially transparent fames between the wind photo on Frame 10 and the fire photo on Frame 1. You'll fix that in the next step.
Click the Stop button (the square icon) at the bottom of the Animation palette to stop the preview.
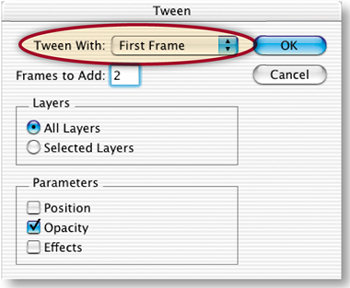
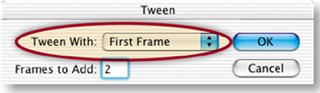
Tween the First and Last Frames
Select Frame 10-—the last frame in the Animation palette. Click the Tween button. In the Tween dialog box, change the Tween With field to First Frame. Leave the other tween settings as they were in Step 9, and click OK. There are now two partially transparent frames at the end of the animation. They create a dissolve between the wind photo in Frame 10 and the fire photo in Frame 1, smoothing the look of the animation when it loops back to the beginning to repeat itself.

Preview in a Web Browser
Click the Preview in Browser button on the toolbox to preview the finished animation in a Web browser. Notice that it plays very fast and that it repeats over and over. You'll address those two issues in the next steps.
Set the Repetitions
The looping option at the bottom of the Animation palette is set to Forever by default. This would create an animation that continuously repeats without end. You'll limit the number of repetitions of your slide show in this step. Click the looping option and choose Other from the pop-up menu. In the Set Loop Count dialog box that appears, type 2 into the Play field and click OK. Your slide show will play through twice in a viewer's Web browser.
Reduce the Speed
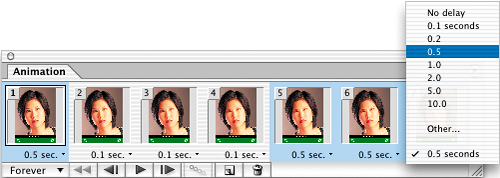
Slow this animation down so viewers have time to appreciate the photographs. Select all the frames by clicking on Frame 1, holding down the Shift key,
Now increase the timing on the four frames that display opaque photos so that the animation pauses on those frames. Click on Frame 1, hold the Command/Ctrl key and click on Frames 4, 7, and 10. Choose 2 seconds from the time delay menu beneath any one of those frames. Preview again to see the results.

Optimize the Animation
Although this file contains photos, it can't be optimized in JPEG format because JPEG doesn't support animation. Instead, you'll have to optimize the entire file as one animated GIF, choosing the maximum number of GIF colors (256), and adding dither to smooth the bands of color in the photos. In the Optimize palette, choose Format: GIF, Colors: 256, Dither Method: Diffusion, Dither Amount: 100%, Lossy: 17, and Add Metadata: Unchecked. Leave the other optimization settings at their defaults, as shown here.

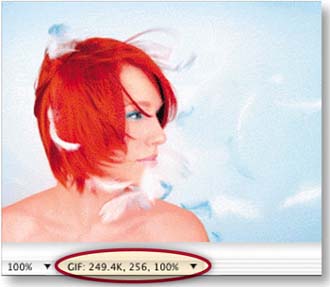
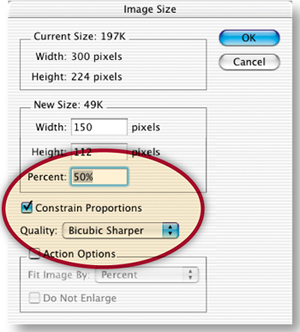
Reduce the Image Size
Click the box at the bottom of the Optimized tab of the document window and choose Optimized Information. The file size reported there is quite large for the Web. To reduce file size, you'll have to reduce the physical dimensions of the image. Choose Image>Image Size. Type 50% in the Percent field, make sure Constrain Proportions is checked, and choose Quality: Bicubic Sharper.
Save
Choose File>Save Optimized As. Leave Format/Save as Type set to Images Only, and click Save. ImageReady saves a single animated GIF file. To display this slide show on the Web add a link to the GIF in any HTML file. Choose File>Save As to save the PSD source file.
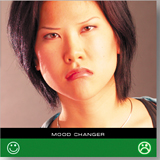
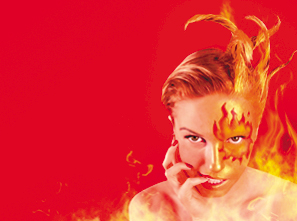
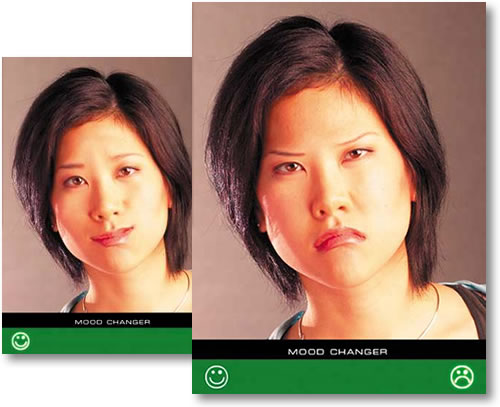
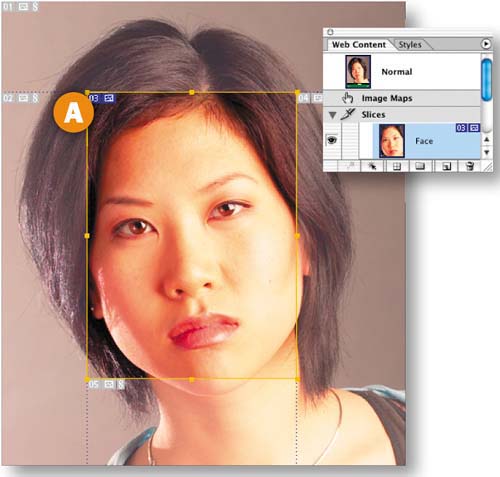
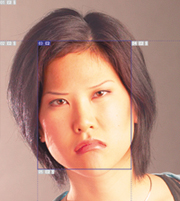
This interactive animation is an attention-getter designed to involve viewers with a site by giving them control over what they see. Rollover buttons trigger remote animations that change this woman's mood from happy to very, very mad.
Set Up Your Workspace
This is a super-project that combines remote rollovers with animations. You'll use lots of palettes at once, so start off by setting up your workspace. Go to the Window menu in the menu bar and open the Layers palette, the Web Content palette, the Animation palette, and the Optimize palette. Arrange them on your screen so you can see them all.
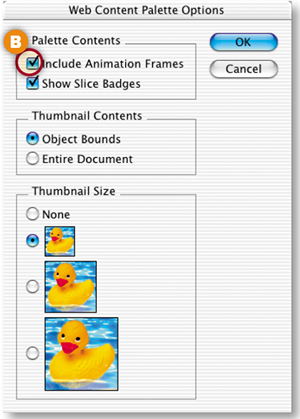
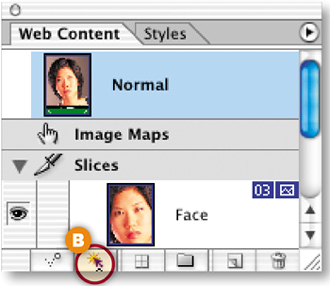
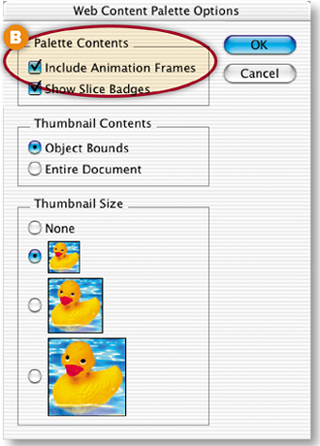
The Web Content palette (not to be confused with the similar-looking Layers palette) is your management center. Set up the Web Content palette to display animation frames, in addition to slices and rollover states. Click the side arrow on the Web Content palette A and choose Palette Options. In the Palette Options dialog box choose Include Animation Frames B and click OK.
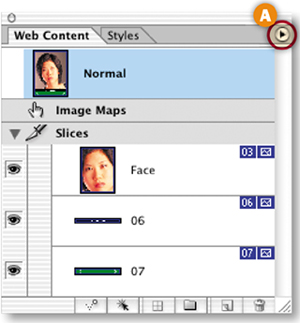
When you're making a remote rollover like this one, you'll need separate slices around the rollover buttons that trigger the animations and around the remote area where the animations will occur. We've already made and optimized the animation slice for you. Click on the Face slice in the Web Content palette to highlight that slice with a yellow border in the document window A. You'll make two separate animations in this slice, each triggered by a rollover button.
Slice the Rollover Buttons
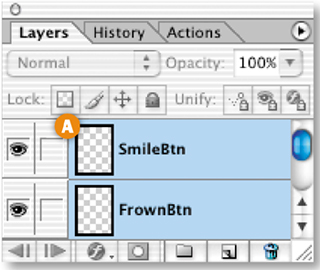
Start by slicing and adding an Over state to the smile button and the frown button. Fortunately, you can do both tasks on the two buttons simultaneously using a couple of shortcuts. First, select both the SmileBtn and FrownBtn layers in the Layers palette by clicking on one of them and holding the Shift key while clicking on the other A. Now click the Create Layer-Based Rollover icon at the bottom of the Web Content palette B. This causes ImageReady to create a separate layer-based slice around each of the two buttons.
View the Slices and Over States
You can see the two slices you just made in the image A. and they are listed in the Web Content palette. Each slice in the Web Content palette has an arrow on its left side B that opens a list of the rollover states for th2at slice. Each of the two new button slices has an Over state listed beneath it C. When you add animation frames to a rollover state, it will be listed under that rollover state. You can think of the Web Content palette as a visual outline of the interactivity features in the image.
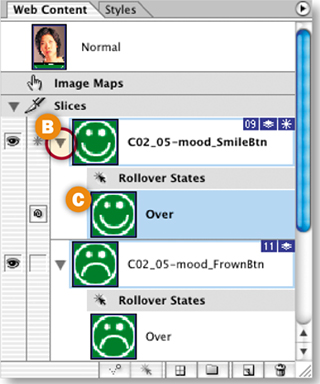
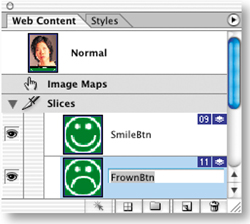
Your button slices have default names assigned automatically by the program. Give each of these two slices more meaningful names by double-clicking their default names in the Web Content palette and typing SmileBtn and FrownBtn respectively. These names will be incorporated into the names of the GIF files generated by these slices.
Add an Effect on the Over States
The Over states you just made for the two rollover buttons are copies of the Normal state of each button (the way the button will look when the page first loads in a Web browser). Now you'll change the appearance of those buttons on their Over states.
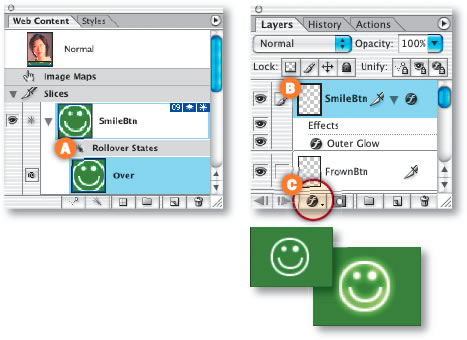
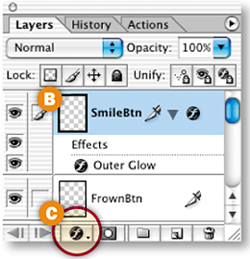
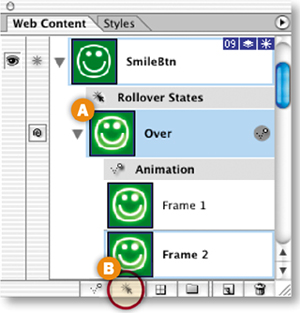
Select the Over state of the SmileBtn slice in the Web Content palette A. Then go to the Layers palette and select the SmileBtn layer B. Click the f icon at the bottom of the Layers palette C and choose Outer Glow from the pop-up menu. The Layer Style dialog box opens offering options for the Outer Glow style. Click OK to accept the default options. The smile button now has a glow on its over state.
Repeat the preceding step with the FrownBtn slice, selecting its Over state and adding an Outer Glow effect to the FrownBtn layer on that state.


Preview the Rollover Effects
Click the Slice Visibility button in the toolbox A to make the slices temporarily invisible so you have a clearer view of the image. Click the Preview button in the toolbox B. Move your cursor over the frown button in the image. It will display a glow. Move your mouse away and the glow disappears. Now mouse over the smile button, which behaves the same way.

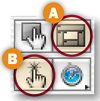
Click the Preview button again in the toolbox to exit Preview Mode. It's easy to forget to do this. You'll be reminded with a warning if you try to perform more actions.
Begin the Frown Animation
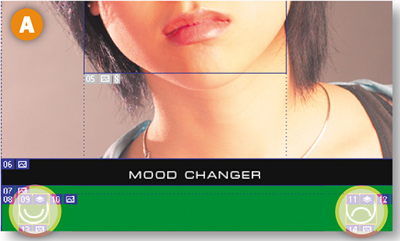
Now things get a little more complicated. You'll add another rollover effect—an animation in a remote slice—to each of the two buttons. Each button will trigger a different animation. The smile button will start an animation that gradually changes the woman's face to a smile. The frown button will start an animation that changes the woman's face to a frown. Each animation ends with a surprise, as you'll see shortly.
Start by selecting the Over state of the FrownBtn slice in the Web Content palette A. This is an important step because it establishes which state will trigger the frown animation to play.
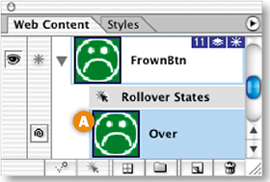
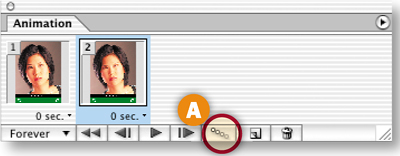
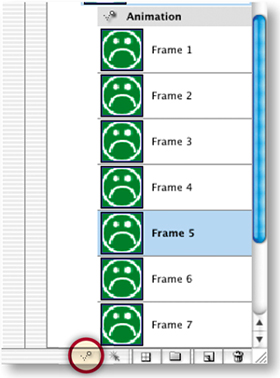
Add Frown Animation Frame 2
Now add a second frame to the Frown animation. Click the Duplicate Current Frame icon at the bottom of the Web Content palette A. This creates Frame 2 of the frown animation and displays Frame 1 and Frame 2 under the Over state of the FrownBtn slice in the Web Content palette B. (If you see no frames in the Web Content palette, go back and follow the instructions in Step 1.) Frame 2 is now just a copy of Frame 1. You'll change that in the next step.
Change Frown Animation Frame 2
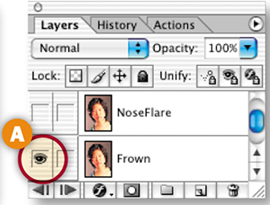
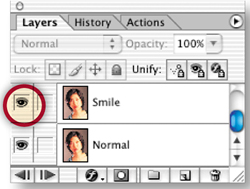
With Frame 2 selected in the Web Content palette, go to the Layers palette and click in the Visibility field of the Frown layer to turn on that layer's Eye icon A. The woman is now frowning.
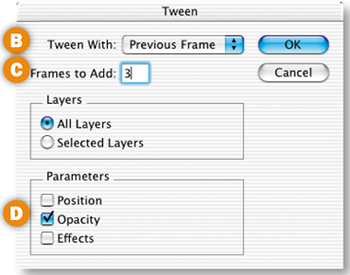
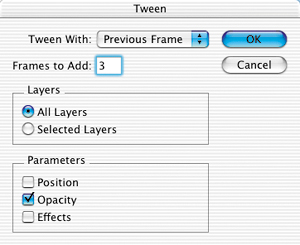
With Frame 2 selected, click the Tween button at the bottom of the Animation palette A. In the Tween dialog box, choose the following settings and then click OK:
Make sure Tween With is set to Previous Frame to add tweened frames between the selected frame and the previous frame B.
Type the number 3 in the Frames to Add field. This tells the program to create three additional tweened frames C.
Make sure that Opacity is checked, because this is the layer property that you want to change across the tweened frames D.
Click OK to automatically add three tweened frames between the normal image and the frowning image.
Preview the Tween
Click the Play button at the bottom of the Animation palette to preview the animation in the document window. The woman's face gradually changes from one expression to the other. To stop the preview, click the Stop button that replaces the Play button.
Add Frames 6 and 7
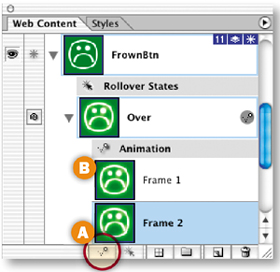
The frown image now appears on Frame 5. Select Frame 5 in the Web Content palette and click the Duplicate Current Frame icon at the bottom of the Web Content palette two times. This creates Frames 6 and 7 of the frown animation. Each is a copy of the frown image on Frame 5.
Select Frame 6 in the Web Content palette. Then go to the Layers palette and click in the Visibility field of the NoseFlare layer to turn on its Eye icon on Frame 6. This adds a little surprise at the end of the frown animation. The woman's nose flares briefly to emphasize her fighting mood. Click the Play button again to see this change.


Target the Remote Animation
The button that triggers the frown animation is located in the FrownBtn slice. The frown animation takes place in another slice—the Face slice. That's why we call this a remote animation. You have to do one more thing to make the remote animation play on the Over state of the frown button—target the Face slice from the Over state of the FrownBtn slice.
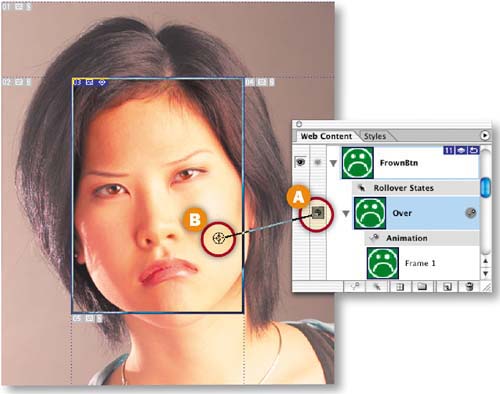
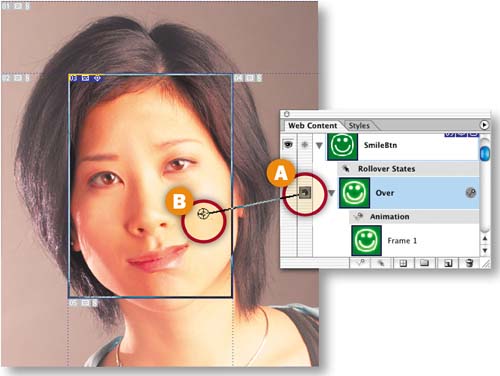
To do that, go to the Web Content palette and click on the pickwhip icon (the spiral) to the left of the Over state of the FrownBtn slice A. Drag the target line from there to the Face slice in the image B. You'll see a target symbol to the left of the Face slice in the Web Content palette.
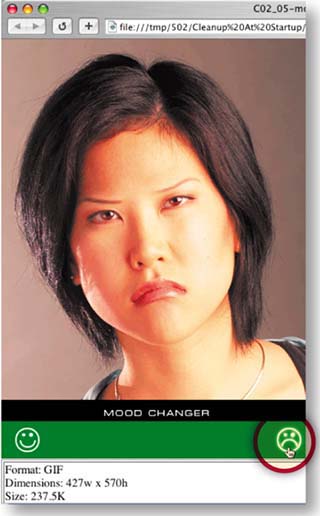
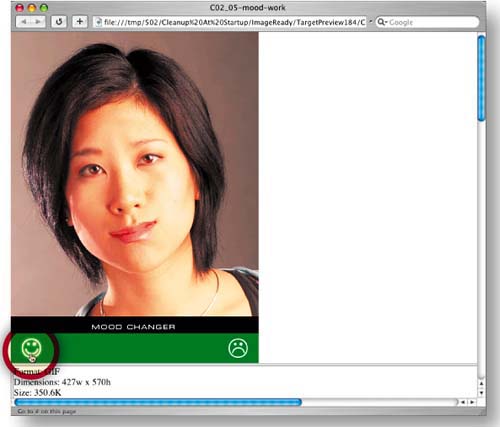
Preview in a Web Browser
Click the Preview in Browser button in the toolbox to preview the frown animation in a Web browser. The animation does not start playing automatically. Move your mouse over the frown button and you'll see the frown button glow and the frown animation play. Move your mouse away; the glow is gone and the animation stops playing. Notice that the animation plays very fast. You'll fix that in the next step.
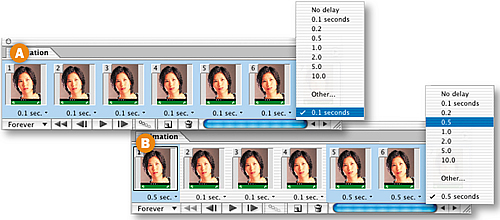
First, you'll slow the entire frown animation down. Click on Frame 1 in the Animation palette, hold the Shift key, and click Frame 7 to select all frames. Click the time delay pop-up menu under any of the frames and choose 0.1 seconds A. Leave the looping option set to its default of Forever B.
Add some pauses
Now you'll add some pauses on particular frames. In the Animation palette, click on Frame 1; then hold the Command/Ctrl key and click on Frames 5, 6, and 7 to select those four frames. Click the time delay pop-up menu under any of the selected frames and choose 0.5 seconds. Preview again in a browser to notice the change in timing. You've finished making the frown animation.
Begin the Smile Animation
The Smile animation is triggered by mousing over the smile button. It's constructed the same way as the frown animation—with a combination of layer visibility changes and tweening. We'll move more quickly through the following steps, since you already know the principles involved.
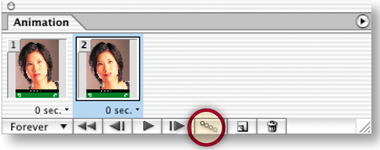
Select the Over state of the SmileBtn slice in the Web Content palette. This is the state that will trigger the animation A. Click the Create Duplicate Current Frame button at the bottom of the Web Content palette B to create Frame 2 of the smile animation. You'll see Frame 1 and Frame 2 under the Over state of the SmileBtn slice in the Web Content palette.
With Frame 2 of the smile animation selected, go to the Layers palette and click in the Visibility field of the Smile layer to turn on its Eye icon. The woman is now smiling tentatively.
Tween Frame 2
With Frame 2 still selected, click the Tween button at the bottom of the Animation palette. In the Tween dialog box, choose Tween With: Previous Frame, Frames to Add: 3, and Parameters: Opacity, and click OK to add three tweened frames to the smile animation.
Add Frames 6 and 7
With Frame 5 selected in the Web Content palette, click the Duplicate Current Frame button at the bottom of that palette twice to create Frames 6 and 7.

Change Frame 6
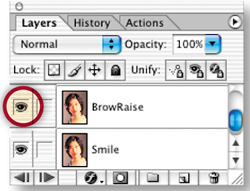
Select Frame 6 of the smile animation in the Web Content palette. In the Layers palette, click in the Visibility field of the BrowRaise layer. This makes the woman's right eyebrow raise slightly near the end of the smile animation.
Target the Remote Slice
In the Animation palette, click the pickwhip icon on the Over state of the SmileBtn slice A and drag to the Face slice in the image B. This targets the remote slice for the smile animation. It's important to target the remote slice for both of the rollover animations.
In the Animation palette, Shift-click to select all the frames. Click the time delay pop-up menu and choose 0.1 seconds A. Then Command/Ctrl-click to select only Frames 1, 5, 6, and 7, and choose 0.5 seconds from the menu B. This slows the animation down and adds a pause on the selected frames. Leave the loop option set to forever.
Good job! You've completed all of the construction. Just a few finishing touches and you're done.
Preview in a Browser
Click the Preview in Browser button in the toolbox to preview both rollover-triggered animations. In your browser window, move your mouse over the smile button. The button glows and the smile animation begins playing. Move your mouse away and both effects stop. Now mouse over the frown button to see it glow and the frown animation play.
Optimize the Button Slices
Back in ImageReady, click on the Optimized tab in the document window to see a preview of the optimized image. Click the SmileBtn slice in the Web Content palette, hold the Command/Ctrl key, and click on the FrownBtn slice. Choose the following Optimization settings for the two button slices in the Optimize palette:
Format: GIF (Although this file contains photos, it must be optimized as GIF because, as you now know, JPEG format does not support animation.)
Colors: 32
Dither: No Dither
Add Metadata: Unchecked
Leave the other optimization settings at their defaults, as shown here.
Click the box at the bottom of the Optimized tab of the document window and choose Optimized Information. Despite our best efforts to optimize this file to the smallest size at which the images look good, the total file size is still quite large for the Web. The only thing left to do to reduce file size is to make the image smaller.
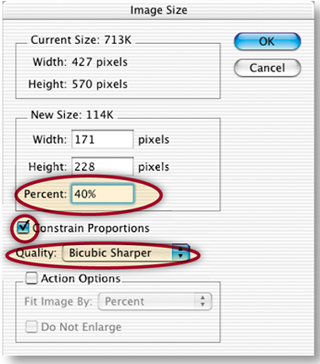
Choose Image>Image Size. Type 40% in the Percent field, make sure Constrain Proportions is checked, and choose Quality: Bicubic Sharper.
Save
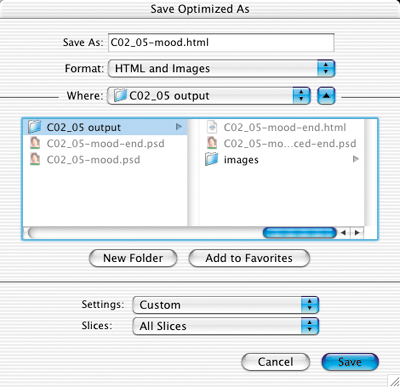
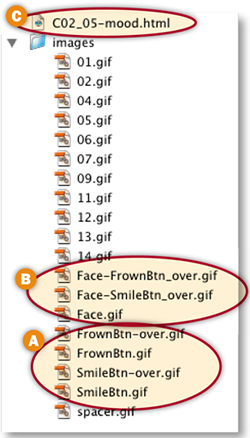
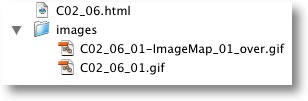
Choose File>Save Optimized As. Leave Format/Save as Type set to HTML and Images, leave Slices set to All Slices, and click Save. Each slice in the image generates at least one image file. The button slices produce two GIFs each—one for the Normal state and one for the Over state A. The Face slice produces two GIF files containing animations and a GIF for the Normal state of that slice B. ImageReady also makes an HTML file for you C that contains a table that reassembles all the individual images and that includes JavaScript to make the rollovers function. Choose File>Save to resave the PSD source file with the information you've added.
This has been a relatively complex project. You may have to read it through more than once to remember its concepts so that you can create your own rollover-triggered animations.
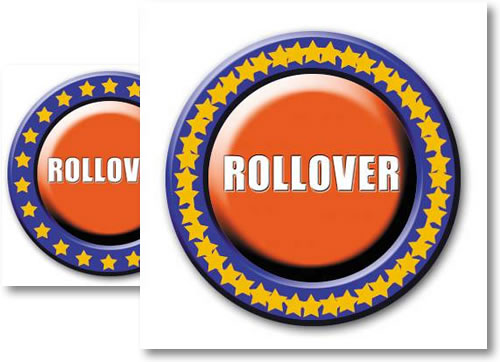
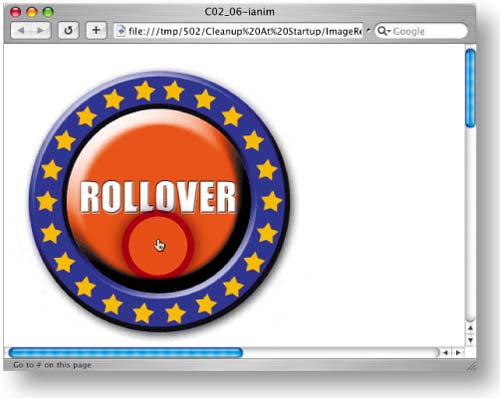
Make an eye-catching button or logo with an animated ring of stars, using a circular image map hot spot to trigger the animation. This project is done in ImageReady because Photoshop doesn't have image map creation tools.
Understand the Problem & Solution
This project, like the last one, involves a remotely triggered animation, but with a twist. This time an animation (the circular border of stars) surrounds a round trigger area (the orange button). When a viewer moves her mouse over the orange button the stars animate. If you tried to make this project by drawing a rectangular slice around the orange button, the trigger area would extend beyond the button, causing confusion about where and how to activate the animation, as you'll see in the next step. The solution is to use an image map hot spot to trigger the animation. Unlike slices, which are always rectangular, an image map hot spot can be circular, so that it just fits a circular trigger area.
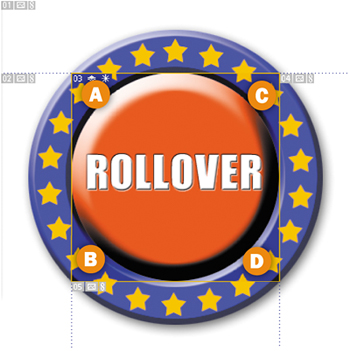
Let's see what happens if you try to define the trigger area of this animation with a slice. Select the Button layer in the Layers palette. This layer contains only the orange button and its text. Choose Layer>New Layer Based Slice from the menu bar. This creates a tight-fitting slice around the content of the Button layer. You can see that the corners of the rectangular slice extend over the ring of stars A, B, C, D. If you used this slice as the trigger region for the animation, moving a mouse over these corners would start the animation playing. Viewers wouldn't see the slice, of course, and they would probably be confused about how to activate or avoid activating the animation.
Delete the slice by selecting it in the Web Content palette and dragging it to the trash icon at the bottom of that palette.
Make a Layer-Based Hot Spot
Now that you understand what not to do, let's get started making this project the right way. First, you'll create an image map hot spot around the orange button. A hot spot is an active link region in an image map. You can draw image map hot spots manually with the Image Map drawing tools in ImageReady's toolbox. But if the content of the hot spot is on a separate layer, as it is here, you can use the automatic layer-based method instead.
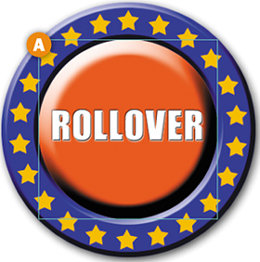
Make sure the Button layer is selected in the Layers palette. Then choose Layer>New Layer Based Image Map Area to create an image map hot spot around the contents of the Button layer. The hot spot boundaries are identified by a colored line A. By default the hot spot is rectangular. You'll fix this in the next step.
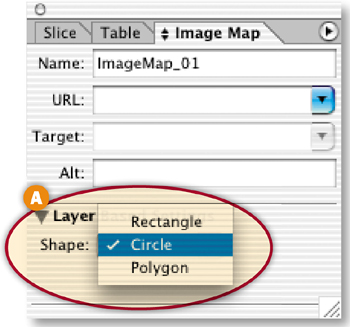
Open the Image Map palette (Window>Image Map). Click the arrow next to Layer Based Settings to display the Shape setting. Click the Shape button and choose Circle from the pop-up menu A. This changes the shape of your hot spot to a circle that exactly fits the edge of the orange button B.

Select the Hot Spot
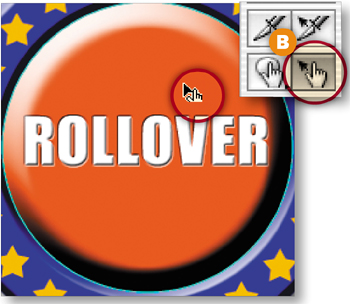
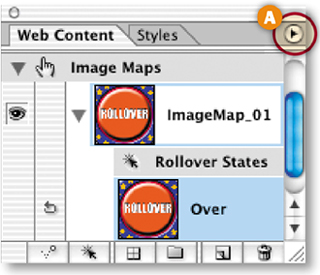
The Web Content palette lists all image map hot spots, as well as all slices and rollover states, in an image. If your hot spot is no longer selected, select it by clicking on its default name, ImageMap_01, in the Image Map area of the Web Content palette A. Or select the Image Map Select tool from the toolbox B and click inside the hot spot area in the image.
Add an Over State
In this step you'll add an Over rollover state to the image map hot spot. The Over state will occur when a viewer moves her mouse over the hot spot area defined by the image map coordinates.
CAUTION

Click the Correct Icon. Don't click the Layer Based Rollover icon at the bottom of the Web Content palette by mistake.That will create a slice with an Over state, rather than an Over state in the image map hot spot.
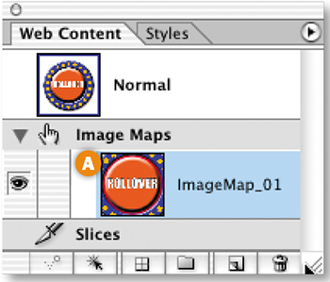
Simply click the Create Rollover State button at the bottom of the Web Content palette A to add an Over state B to the selected image map hot spot.
The Web Content palette does not display animation frames by default. But it makes sense to manage animation frames from this palette when you're creating animation triggered by an image map rollover. That allows you to see all the related elements—image map hot spots, their rollover states, and the frames of animations triggered by the rollovers—in the same palette.
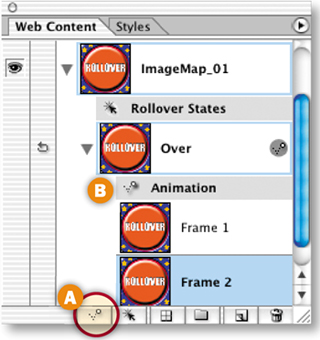
Click the arrow on the right side of the Web Content palette A and choose Palette Options from the side menu. In the Palette Options dialog box, check Include Animation Frames B and click OK. You won't see any frames in the Web Content palette until you create Frame 2 in the next step.
Create Animation Frame 2
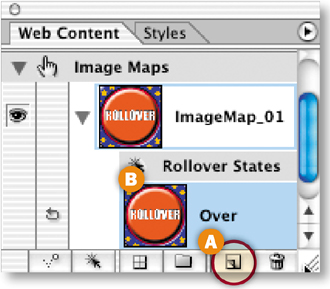
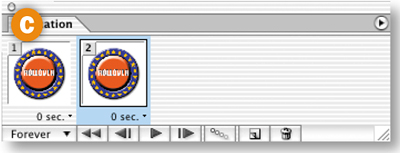
The first frame of an animation is created for you automatically. Click the Duplicate Current Frame button at the bottom of the Web Content palette A to create Frame 2 of the animation. Both frames are now displayed under your ImageMap_01 hot spot in the Web Content palette B and also in the Animation palette C.
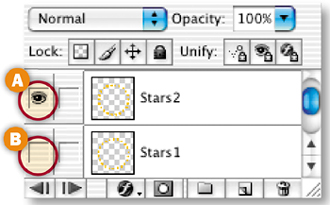
Change Animation Frame 2
At this point, Frame 2 is still a copy of Frame 1. You'll change that in this step. With Frame 2 selected in the Web Content palette, go to the Layers palette and click in the Visibility field of the Stars2 layer to add an Eye icon there A. Then click in the Visibility field of the Stars1 layer to remove its Eye icon B.
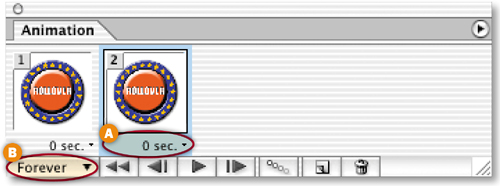
Leave the Time Delay on both frames at its default of 0 seconds A so the frames animate quickly. Leave the looping option at its default of Forever B, so that the animation continues to play over and over while the viewer's mouse is over the image map hot spot.
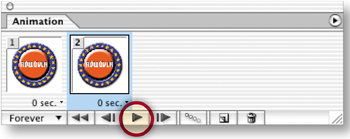
Preview the Animation
Click the Play button at the bottom of the Animation palette to preview the animation. The stars on Frame 2 are shifted slightly around the ring from those on Frame 1. So as the animation moves quickly back and forth between Frames 1 and 2, it gives the illusion that the stars are moving around the ring. Cool!

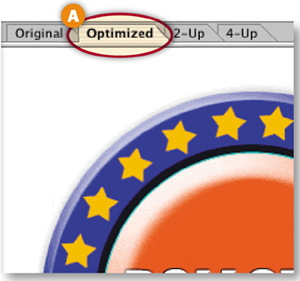
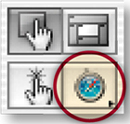
Set Up Your Optimizing Workspace
Click on the Optimized tab in the document window A where you'll see a preview of the image with the optimization settings you choose in the next step.
Open the Optimize palette (Window>Optimize), where you'll choose optimization settings that will affect the whole image. When you optimize a document as an image map the entire image takes the same optimization settings. And when you optimize an animation, all of its frames share the same optimization settings.
Click the double-pointed arrow on the Optimize palette tab B to open the sub-headings so you can see all the settings in the Optimize palette.
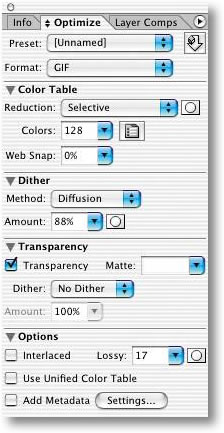
Choose the following settings in the Optimize palette:
Format: GIF (You have to optimize this image in GIF format because you will be saving it as an optimized GIF, ImageReady's default animation format.)
Colors: 128 (This image needs lots of colors because the orange button has a strong bevel and emboss effect that contains lots of graduated colors.)
Dither Method: Diffusion
Dither Amount: 88% (Adding a high percentage of dither helps smooth out potential banding in the beveled button.)
Lossy: 17 (Adding lossy compression to a GIF helps reduce file size.)
Add Metadata: Unchecked (Metadata adds to file size and is not necessary here.)
Leave the other settings at their defaults as shown here.
Preview in a Browser
Click the Preview in Browser button. The animation doesn't start until you move your mouse over the orange button. That causes the animation to play, making the stars appear to dance around the button. Move your mouse off the orange button and the animation stops.
Save
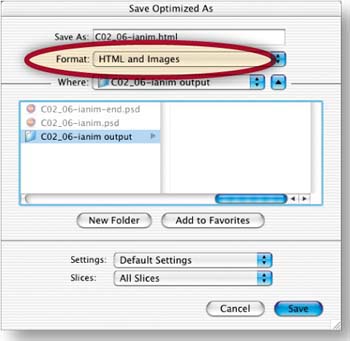
Back in ImageReady, choose File>Save Optimized As. Leave Format set to HTML and Images so that ImageReady generates an HTML file with the Java-Script that makes your rollovers function and the image map coordinates. ImageReady also saves two GIF files—including an animated GIF for the Over state and a static GIF for the normal state.
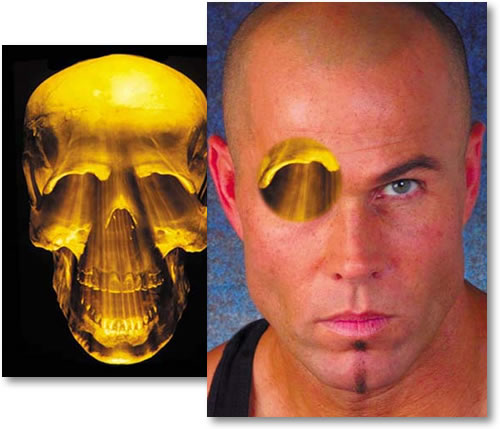
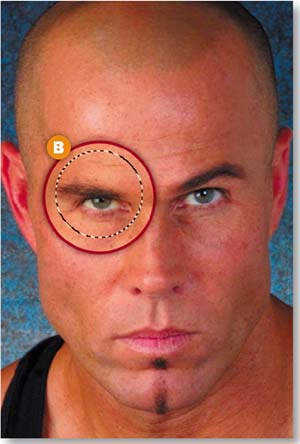
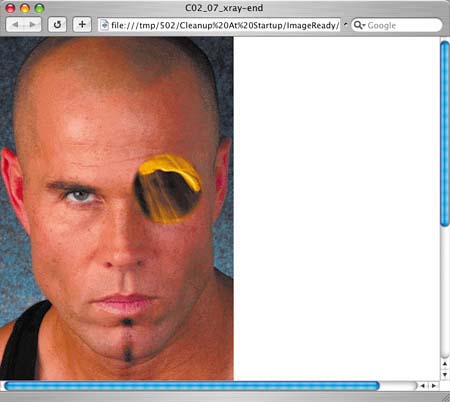
This is a science project that's hard to resist. An animated layer mask gives your viewers x-ray vision to see beneath the surface to this man's skull.
Start in Photoshop
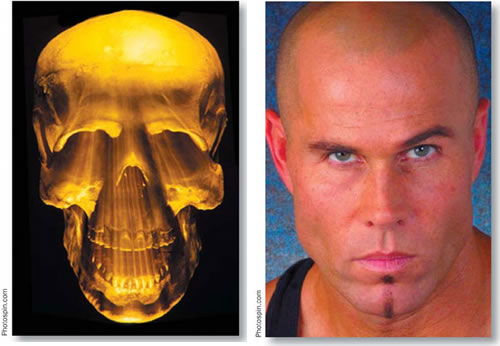
This animation looks complicated, but it's really very simple to make. We started in Photoshop with two images—a portrait that we doctored up a little, and a creepy photo of an illuminated skull. We scaled and transformed the two images slightly so the features line up. Now the file is ready for you to animate.
In the steps that follow you'll add a layer mask to the skull, cut a hole in the layer mask, and move the layer mask independently of the artwork to create an animated journey beneath the skin. Both Photoshop and ImageReady offer layer masking. We'll start working in Photoshop, then jump to ImageReady to complete this project.
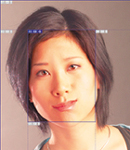
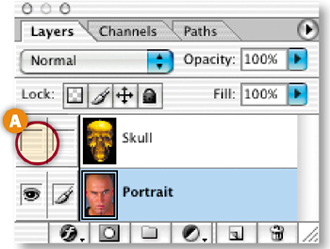
Start in Photoshop by making a circular selection that you'll use as you create a layer mask. Hide the Skull layer temporarily by clicking in the Visibility field of the Skull layer A. Select the Elliptical Marquee tool in Photoshop's toolbox, and add a slight feather by typing 1 in the Feather field in the Options bar. Drag out a selection, holding the Shift key to constrain the selection to a circle. Make the selection a little bigger than the man's right eye B.
Add a Layer Mask
Click in the Visibility field of the Skull layer again to make that layer visible A. Click on the Skull layer to select it. With the circular selection active, click the Add Layer Mask icon at the bottom of the Layers palette B.
Photoshop adds a layer mask to the Skull layer. The layer mask is filled with white inside the area you selected and with black everywhere else. The white pixels reveal the skull image. The black pixels mask it so that you can see through to the layer below.
The layer mask is represented by the grayscale thumbnail on the right side of the Skull layer.
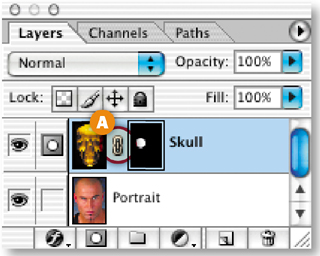
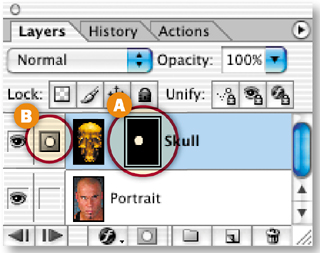
Click the link symbol between the layer mask thumbnail and the image thumbnail A. The link symbol disappears B, indicating that the layer and its layer mask are now unlinked. This makes it possible to move the layer mask independently of the skull image so that you can animate the layer mask without disturbing the image.
Jump to ImageReady
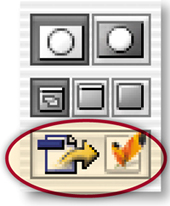
Click the Edit in ImageReady button at the bottom of the Photoshop toolbox to launch ImageReady and open this file in ImageReady with all the changes you made to it in Photoshop. You're moving to ImageReady because Photoshop doesn't have animation features.
Create Animation Frame 2
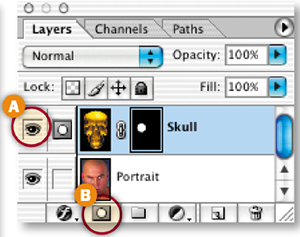
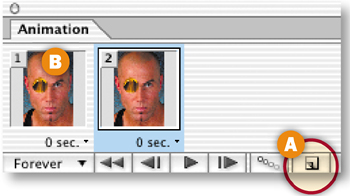
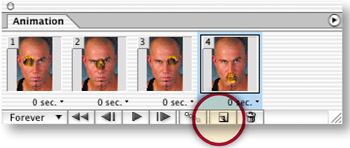
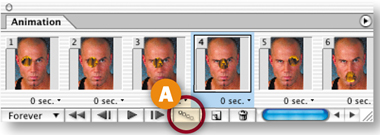
Choose Window>Animation to open the Animation palette with Frame 1 of the animation automatically displayed. Click the Duplicate Animation Frame icon at the bottom of the Animation palette A to create Frame 2 B. Frame 2 is now a copy of Frame 1. Next, you'll make a change to Frame 2 to begin constructing the animation.
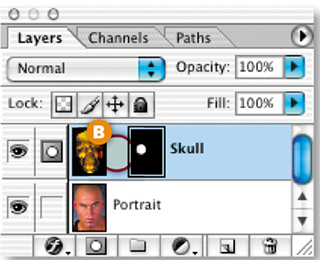
Select the Layer Mask Thumbnail
In the Layers palette, click on the Skull layer's layer mask thumbnail A so that you're working on the layer mask, rather than on the skull image. You can tell the layer mask is selected because it's surrounded by a thin border and the field just to the left of the Skull layer contains a mask symbol B (as opposed to the paintbrush symbol you'll see there when the image thumbnail is selected).
Move the Layer Mask on Frame 2
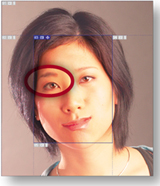
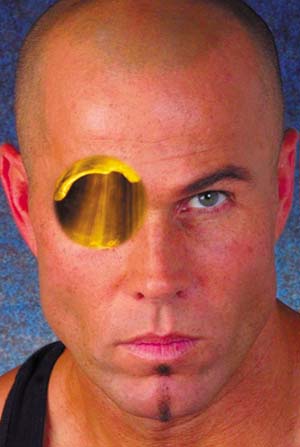
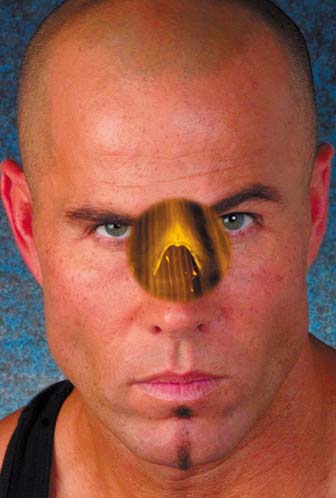
Select the Move tool in the toolbox. With Frame 2 still selected, click and drag the layer mask, so that the nose of the skull appears in the white circular area of the mask. This suggests the illusion that you're seeing through the image of the man to the nose area of his skull. You're actually just rearranging the mask, with its revealing white area and nonrevealing black area, on the Skull layer, making parts of the Skull layer visible and invisible.
Create Frame 3
With Frame 2 selected, click the Duplicate Animation Frame icon A in the Animation palette to create Frame 3 B. On Frame 3, with the layer mask still selected, use the Move tool to click and drag in the image until you see the left eye area of the skull.

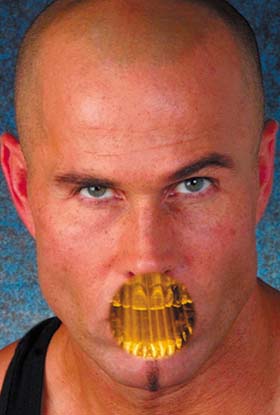
With Frame 3 selected, click the Duplicate Animation Frame icon at the bottom of the Animation palette again to create Frame 4. Check that the layer mask thumbnail is still selected on the Skull layer in the Layers palette. With the Move tool, click and drag in the image, moving the layer mask until the circle reveals the teeth in the skull.
Add Tweens
Now you'll have ImageReady create some additional intermediate frames for you, adding gradual changes between the frames you just made yourself. Select Frame 2 in the Animation palette. Click the Tween button at the bottom of the Animation palette to open the Tween dialog box. Choose the following settings there and click OK:
Tween With: Previous
Frames to Add: 2
Layers: All Layers
Parameters: Position
Repeat this step twice more, on Frame 5 and then Frame 8. The animation now has 10 frames.
Preview the Animation
Click the Play/Stop button at the bottom of the Animation palette A to watch the animation play in the document window. The circle moves around the image revealing the skull along its path. Notice that there is a small jump when the animation loops back from the last frame to the first frame. You'll fix that next.
Select Frame 10 and click the Tween button in the Animation palette again. In the Tween dialog box change Tween With to First Frame. Leave the other settings as they were and click OK.
Set the Timing
Click Frame 1 and hold the Shift key as you click on the last frame to select all frames. Click the Time Delay menu under any frame and choose 0.1 seconds. Now Command/Ctrl-click to select just frames 1, 4, 7, and 10—the frames you made yourself. Click the Time Delay menu under any of the selected frames and set it to 2.0 seconds to pause the animation on some key spots. Leave looping set to its default of forever so that the animation continually plays.

Optimize the Animation
At this point you would usually optimize the animation, but we've done that for you. We set format to GIF because this will be saved as a GIF animation. We chose a significant number of GIF colors (128) and added dither to smooth the colors and lossy compression to keep file size down.
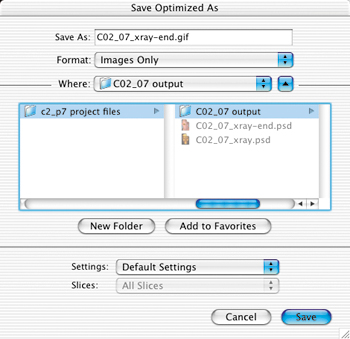
Preview and Save
Click the Preview in Browser button in the toolbox. The animation starts playing when the page loads in a browser. If you're satisfied, choose File>Save Optimized As in ImageReady. Leave Format/Save as Type set to Images Only and click Save. ImageReady saves a single GIF file containing all the frames of the animation. You can bring this file into a site-building program like GoLive to add it to an HTML page in your site. Finally, choose File>Save to resave the PSD source file to use for any changes in the future.
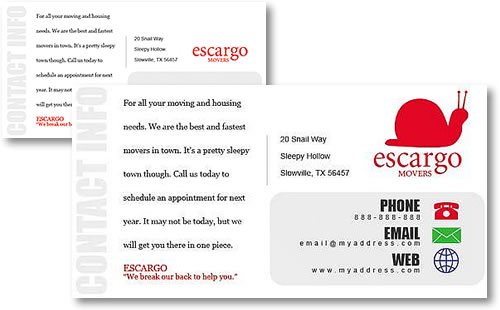
You've heard of Flash. You've heard of ImageReady. But did you know you can create and export Flash format movies right in ImageReady? You'll make this home page using vector-based text and shapes for fast Web download.
Have the Best of Both Worlds
The SWF format, popularized by Macromedia® Flash©, is reknowned for offering fast-downloading vector-based animations. The results are great, but the process of creating a movie in Flash is more complicated for many people than making an animation in ImageReady. Now you can have the best of both worlds. You can make vector artwork in Photoshop and export it in Flash (SWF) format from ImageReady.

In this project, you'll use vector-based Type and Shape tools in Photoshop to create this snappy homepage. Then you'll jump to ImageReady to animate your graphics. When you're done, you'll learn how to export the final product as an honest-to-goodness SWF movie, complete with an HTML file to display the movie on the Web.
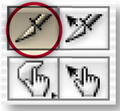
Start by adding some vector graphics to this page layout. Click on the Shape 1 layer in the Layers palette so your next layer will be located above it. Click on the Shape tool slot in your toolbox A and choose the Custom Shape tool from the flyout menu B.

Set Custom Shape Tool Options
Do all of the following in the Custom Shape tool's Options bar:
Make sure the Shape Layers icon A is selected (so you'll draw a shape rather than a path or a selection).
Click on the Link icon to set properties for a new shape layer B.
Click in the Color field C to open the Color Picker and choose red (R:204, G:0, B:0).
Click the arrow on the Shape field to open the Shape Picker D.

Select a Custom Shape
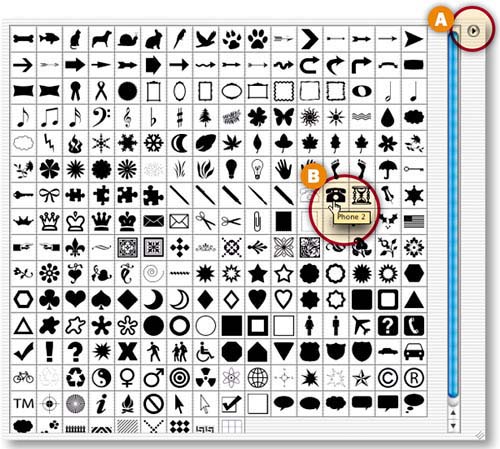
If your Shape Picker is not showing all the default shapes, like the illustration, click the arrow on the side of the Shape Picker A and choose All from the side menu. Locate the dark phone shape (Phone 2) B, and click on it. That shape will appear in the Shape field on the Options bar.
Click and drag a small phone shape to the right of the phone number in the image A.
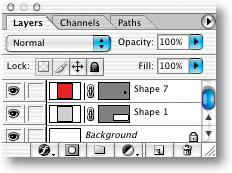
There's now a new shape layer for the phone shape in the Layers palette. It has two thumbnails, one for the red color fill and another for the vector outline that defines this shape.

Draw More Shapes
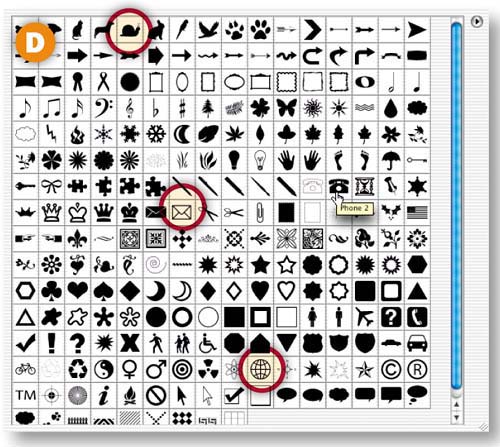
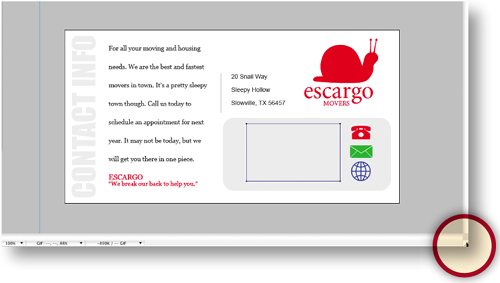
Repeat Steps 3-5 to draw a green envelope to the right of the email address A and a blue wireframe globe to the right of the Web address B.
Then finish off the logo by drawing a large red snail shape above the red logo text C. (A shape can be drawn to any size because it's vector based.)
You'll find custom shapes for all these shapes in the Shape Picker D.

Add the Address
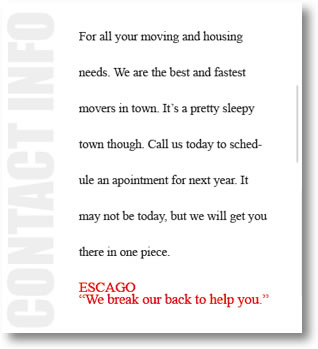
Type is another vector-based element in Photoshop and ImageReady. In this step you'll add an address to this page. Select the Horizontal Type tool in the toolbox. In the Options bar choose Arial, Regular, 14 pt, black A. Click in the image and type three lines of text, pressing Enter/Return between each line: 20 Snail Way, Sleepy Hollow, Slowville, TX 56457. Then click the big check mark on the Options bar to commit the type. Use the Move tool to drag the type into place to the right of the gray bar.


Click in the image with the Horizontal Type tool and in the Options bar choose Impact, 67 pt, and gray (R:236, G: 236, B: 236) A. Type CONTACT INFO in uppercase letters. Then choose Edit>Transform>Rotate 90° CCW. Use the Move tool to position the text along the left edge of the page.

Jump to ImageReady
Now you'll move to ImageReady to create the animation. Click the Edit in ImageReady button at the bottom of Photoshop's toolbox to open this file in ImageReady.
Begin the Animation
First you'll make a block of text fly in from off screen when the page opens in a Web browser. Click the bottom right of the document window and drag to expand the window so you can see the gray area outside the document window. Open the Animation palette (Window>Animation), which displays Frame 1 automatically.
Change Timing and Looping
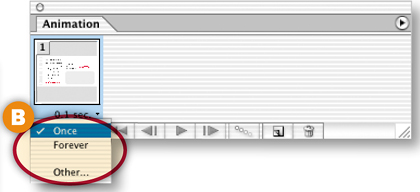
Now you'll change the timing on Frame 1. All subsequent frames will inherit this time delay. Click the Time Delay menu under Frame 1 and choose 0.1 seconds A.

You only want the animation to play once. So click the looping option and choose Once B.
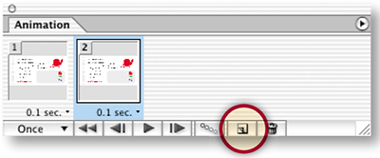
Click the Duplicate Animation Frame button at the bottom of the Layers palette to create Frame 2. Frame 2 is currently a copy of Frame 1. You'll change that in the next step.
Change Position on Frame 2
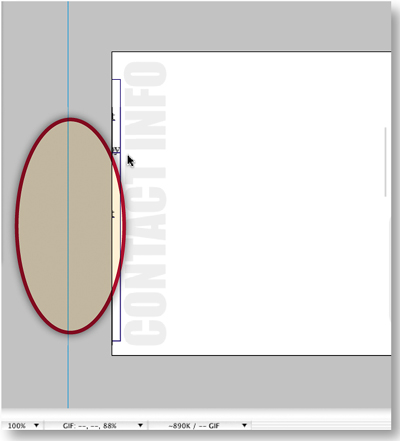
Select the Move tool in the toolbox. Select the FlyIn layer in the Layers palette. With Frame 2 selected, hold the Shift key (to move ten pixels at a time) and click the left arrow on your keyboard to move the block of text to the left until it is just outside your document window. You won't see the text at this point.
Reverse Frames 1 and 2
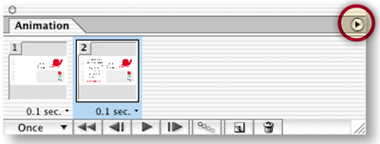
Now you'll reverse the frames so the frame with the text off-screen becomes Frame 1. Just click the arrow on the right side of the Animation palette and choose Reverse Frames.
Tween Position
Next, you'll use tweening to add six frames in-between the two existing frames. ImageReady will gradually change the position of the text block across the additional frames. Select Frame 2 and click the Tween button at the bottom of the Animation palette A. In the Tween dialog box set the following options and click OK:
Tween With: Previous Frame
Frames to Add: 6
Parameters: Position
Click the Play/Stop button in the Animation palette to watch the animation play. The text block should fly into position from off-screen.
. Add Frame 9
You now have eight frames. Click the Duplicate Animation Frame icon at the bottom of the Animation palette to add Frame 9.
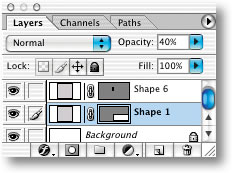
Change Opacity on Frame 9
With Frame 9 selected, go to the Layers palette and open the Contact layer set. Select the first layer in that layer set. Notice that the Opacity field at the top of the Layers palette reads 0%, which tells you that the layer is now invisible. Change Opacity to 100% A so that the layer becomes fully visible in the image.
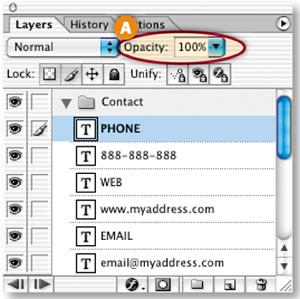
Repeat this on each of the six layers in the Contact layer set one by one. (But don't change the opacity of the entire layer set.) All of the contact information is now visible in the image B.

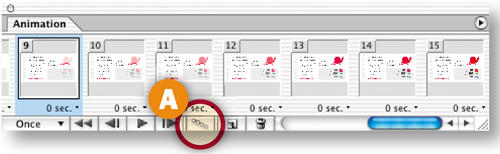
Tween Opacity on Frame 9
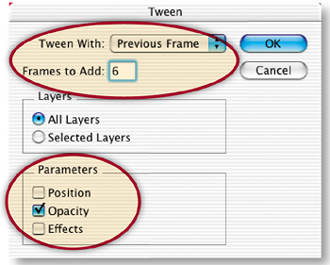
Now you'll use tweening to fade in the contact information. With Frame 9 selected, click the Tween button on the Animation palette A. In the Tween dialog box set the following options and click OK:
Tween With: Previous Frame
Frames to Add: 6
Parameters: Opacity
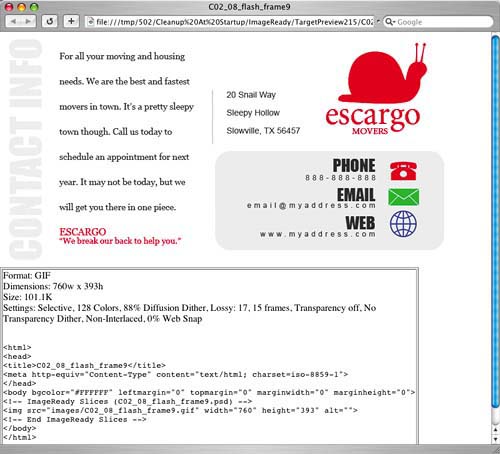
Click the Preview in Browser icon in the toolbox to watch your animation play in your default browser. The text block flies in from the left, and then the contact information fades in. The temporary HTML code in the Browser window tells you that this file is currently a GIF with a file size of about 100K. In the next steps you'll turn it into a Flash movie that will be 1/5 of this file size!
Export as SWF
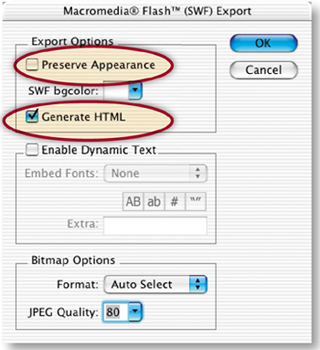
Choose File>Export>Macromedia® Flash© SWF. In the Macromedia® Flash© (SWF) Export dialog box, choose the following settings and click OK:
Make sure that Preserve Appearance is unchecked A. Leaving this setting off ensures that your graphics will remain vector-based for fast download.
Check Generate HTML B. This tells ImageReady to create an HTML file with code to display your SWF in a Web browser.
Leave the other options at their defaults, as shown here. They are not relevant because you are not including bitmap images in your SWF.
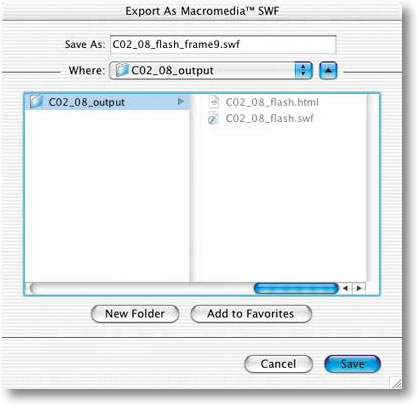
In the Export As Macromedia© SWF dialog box choose a location for your files and click Save. ImageReady makes a SWF file and an HTML file to display it. You could bring the files into a site-building program for inclusion in a full site, post them on the page as a single page, or bring the SWF into Flash for inclusion in work you're doing there.
Choose File>Save to resave the original PSD file with the graphics you added to it. The SWF is not editable so it's important to save the editable source file.
View the Flash Movie in a Browser
Open the HTML file directly from your Web browser to see the SWF play there.
Check Out the File Size
Find the SWF file on your hard drive and check its file size. It comes in at only 20K, a file size significantly lower than that of the animated GIF format. That's because SWF does a terrific job of compressing vector-based images like those you used in this page layout. If you had incorporated bitmap images the SWF file size would be larger.
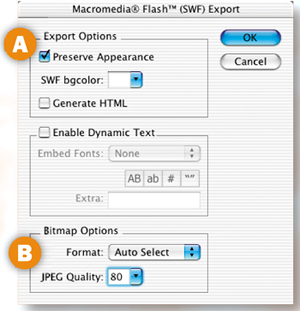
TIP
More Flash. If you include bitmap graphics, layer styles, or other effects in a file you export from ImageReady to SWF format, choose Preserve Appearance A in the Macromedia Flash© (SWF) Export dialog box to preserve the appearance of those items. You can choose the format with which bitmap items will be compressed B. By the way, if you export a file with rollovers to SWF, the rollovers won't work.
In this project you exported an entire file as one SWF. You can also export individual layers in a PSD file as separate SWFs and then import those to Flash for further work. This is a timesaver for Flash developers who create files in Photoshop or ImageReady. Choose File>Export Layers as Files, and choose Format: SWF in the Export Layers as Files dialog box C. Click the Settings button to open the Macromedia Flash (SWF) Export dialog box to finish the job.
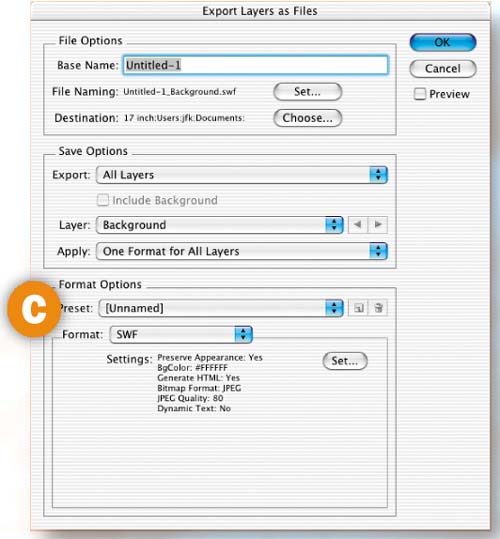
Here's a quick and easy animation that gives the illusion of a moving light source. Once you get this down you'll be able to animate any layer style to produce animations in a heartbeat.

Start with a Layer of Text
Use our file or create your own from scratch in ImageReady. Just use the Type tool to create text in a heavy font on a transparent layer. We rasterized our type layer, but this animation works fine if you leave your own type layer in its default state—as editable vector-based type.
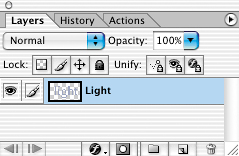
Add a Background Layer
Select the Eyedropper tool and click in the text on the Light layer. This sets the Foreground Color in the toolbox to the same color as the text. Click the Create New Layer icon at the bottom of the Layers palette. Then press Option-Delete/Alt-Backspace to fill the new Layer 1 with the Foreground Color. Drag Layer 1 beneath the Light layer in the Layers palette. Choose Layer>New>Background From Layer to make the bottom layer a non-editable Background layer. Your image now looks plain bluish/gray.

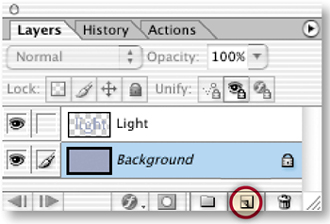
Select the Light layer in the Layers palette. Open the Styles palette (Window>Styles). Click the arrow on the side of the Styles palette A and choose HTWWeb-Styles from the side menu. Click that arrow again and choose Large Thumbnail.
Click the 09_light style to apply it to the text B. The Light layer in the Layers palette now displays a Drop Shadow and a Bevel and Emboss layer style.
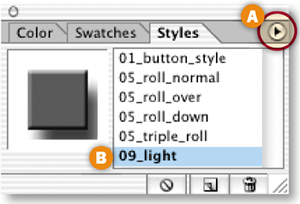
Start Building the Animation
Open the Animation palette (Window>Animation), which automatically displays Frame 1 of the animation. On Frame 1, the text displays the Drop Shadow and Bevel and Emboss layer styles you just applied. You'll make a simple change to those layer styles to create this animation.
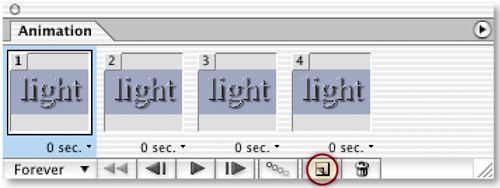
First, you'll add a few more frames to the animation. Click the Duplicate Animation Frame icon at the bottom of the Animation palette three times, so that there are a total of four frames in the Animation palette. Each of the new frames is a copy of Frame 1. You'll change that in the next steps.
Open the Layer Style Dialog Box
Click on Frame 2 in the Animation palette. Then double-click Effects under the Light layer in the Layers palette A to open the Layer Style dialog box. It opens with the Drop Shadow style checked and highlighted on the left side of the dialog box B, the Bevel and Emboss style checked but not highlighted C, and and Drop Shadow options displayed on the right side of the dialog box D. Notice the Angle setting of 143° E, which is the angle of the light source on the preceding frame—Frame 1.
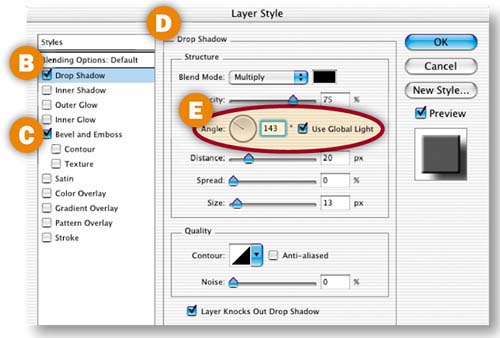
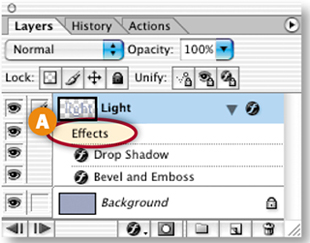
Change the Frame 2 Layer Style
With Drop Shadow highlighted (not just checked) on the left side of the Layer Style dialog box, go to the Drop Shadow settings on the right side of the dialog box and do two things:
Change the Angle setting to 78°. You can type 78 into the Angle field or spin the Angle wheel to that setting A.
Make sure there's a check mark in the Use Global Light check box B. This sets the light source angle globally so that it affects both the Drop Shadow and the Bevel and Emboss styles on the Light layer in Frame 2.
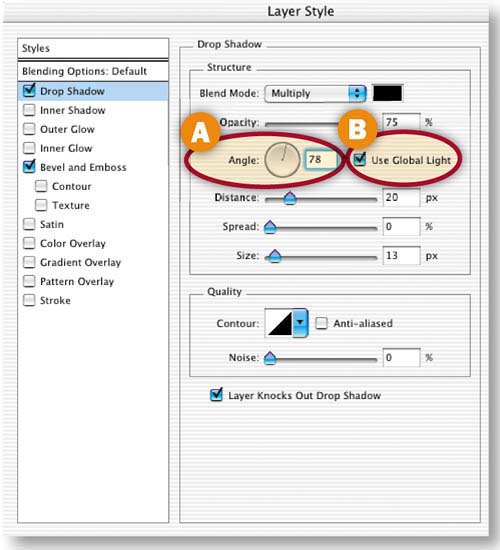
Click OK to close the Layer Style dialog box.
Change the Frame 3 Layer Style
Now you'll change the angle of the layer style on Frame 3 the same way. Select Frame 3 in the Animation palette. Double-click Effects under the Light layer in the Layers palette to open the Layer Style dialog box. In the Layer Style dialog box make sure the Drop Shadow style is highlighted.
Then change the Angle setting to 0°, and make sure Use Global Light is checked A. Click OK to close the Layer Style dialog box.

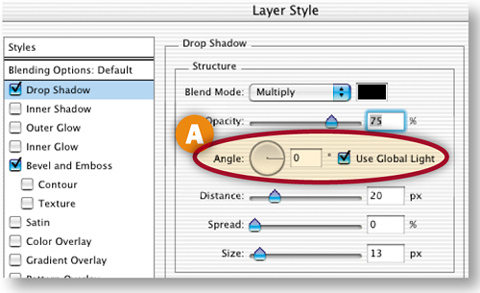
Change the Frame 4 Layer Style
Repeat the preceding Step 7 on Frame 4 A, this time changing the Angle setting to –108° B. Click OK to close the Layer Style dialog box.


You don't yet have enough frames to make the animation run smoothly. Rather than create all the frames by hand, let ImageReady do it for you with Tweening.
Select Frame 2 in the Animation palette A. Click the Tween button at the bottom of the Animation palette B. In the Tween dialog box C, set the following options and then click OK:
Tween With: Previous Frame
Frames to Add: 2
Layers: All Layers
Parameters: Effects
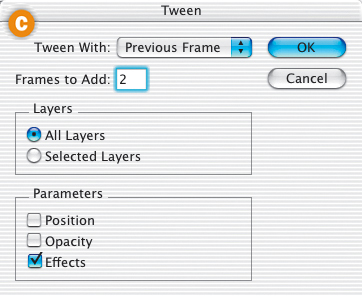
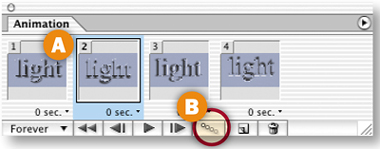

You now have a total of six frames. ImageReady added two frames, gradually changing the layer style angle across the tweened frames—current Frames 1 through 4. (The frames you made by hand are now Frames 1, 4, 5, and 6.)
Tween Two More Times
Repeat the preceding Step 10 twice more. The first time select Frame 5 and tween, adding two frames. The second time select Frame 8 and tween, adding another two frames. You now have a total of ten frames.

Tween the Last and First Frames
To make the animation run smoothly as it loops back from the last frame to the first frame, you'll do one more tween. Select the last frame—Frame 10. Click the Tween icon. This time, in the Tween dialog box choose Tween With: First Frame A. Leave the other settings as they were and click OK. ImageReady adds two frames to the end of the animation with gradual changes back to the layer style angle on Frame 1. You end up with 12 frames total. You're almost done with this project.

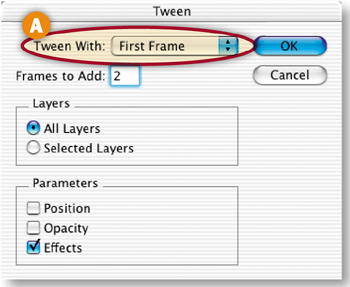
Click the arrow on the side of the Animation palette, and choose Select All Frames from the side menu. Then click the Time Delay menu beneath any frame and choose 0.1 seconds A. Leave the looping option set to Forever so that the animation plays continuously B.

Optimize the Animation
Click the Optimized tab in the document window so you can see a preview of the image with the optimization settings you choose A. Open the Optimize palette and optimize the animation with GIF settings, as shown here B. Try 128 colors (to approximate the many tones in the bevel and shadow), add some Dither (to avoid banding), and add some lossy compression (to keep file size down). Leave Transparency checked (a prerequisite for the Redundant Pixel Removal method ImageReady applies by default), and uncheck Add Metadata. These settings affect all frames of the animation, so preview on several frames. You can reduce the image width and height (Image>Image Size) if you need a file that's smaller in file size.
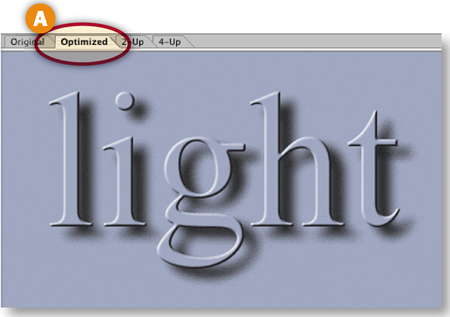
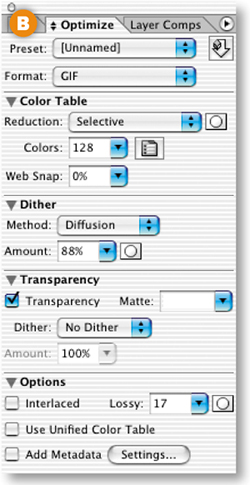
Preview and Save
Click the Preview in Browser button in the toolbox A. If you're happy with the browser preview, choose Save Optimized As to save the file as an animated GIF. In the Save Optimized As dialog box leave Format/Save as Type set to Images Only and click Save B. ImageReady produces a single GIF file with all of the frames you created. You can bring the GIF into a site-building program like GoLive to include it on a Web page.
Now that you've checked out all the animations in this chapter, try tweaking our recipes to come up with some unique variations of your own.
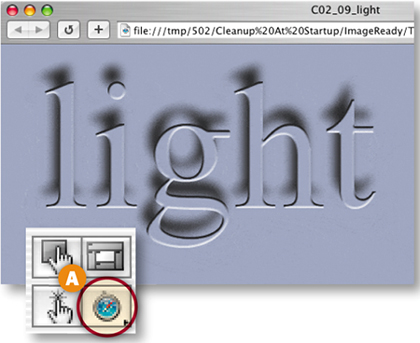
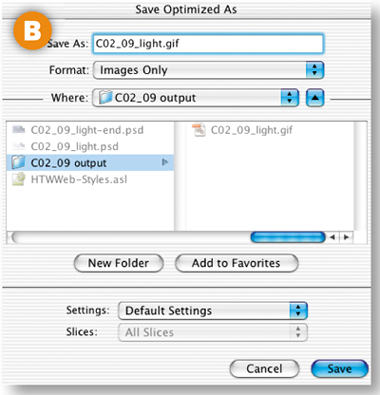
Normally any change you make to a layer in a particular frame of an animation affects that frame only. If you want a change in a layer's visibility, position or style to affect all the other frames, you'll use ImageReady's Unify or Match Layer commands. Let's see how these commands work.
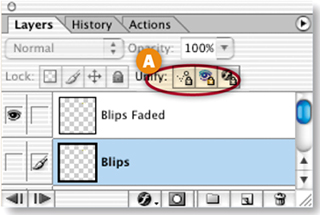
Assume that you're working on Frame 15 of an animation when you change your mind and decide that one of the layers in the image is extraneous and shouldn't be visible on any frame of the animation. You don't have to select each frame one by one, repeating the process of turning off the layer's Eye icon on every frame. Instead, select the layer in question and click the Unify Visibility button at the top of the Layers palette. Then turn off the Eye icon on that layer. Regardless of which frame is selected in the Animation palette, that change will ripple through all the frames of the animation. You can do the same thing with a layer's style or position. Select the layer, click the Unify Layer Style button or the Unify Layer Position button in the Layers palette, and then change a style or move the layer contents to affect the entire animation. Of course, if you want a layer's contents to move during an animation don't use the Unify Layer Position button on that layer.
You don't have to bother with the Unify buttons if you have Frame 1 selected when you make a change to a layer. By default, changes made on Frame 1 affect all layers of an animation. If you want to change that default behavior, click the side arrow on the Layers palette and turn off Propogate Frame 1 Changes.
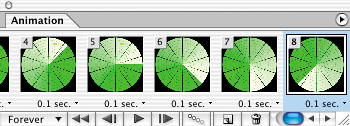
There may be times when you've already made a change to a layer's visibility, position, or style and later realize that you want that change to apply to all frames of an animation. In that case ImageReady's Unify buttons won't help you, because they are forward looking. (A Unify button only applies to changes made after the button is activated.)
To make a previous layer change ripple through the animation, select the frame on which you made the change in the Animation palette. Select the layer you changed in the Layers palette. Then choose Layer>Match from ImageReady's animation palette. The change will be applied throughout the animation.![]()